With the work that has been done in the debian-installer/netcfg merge-proposal !9 it is possible to install a standard Debian system, using the normal Debian-Installer (d-i) mini.iso images, that will come pre-installed with Netplan and all network configuration structured in /etc/netplan/.
In this write-up I d like to run you through a list of commands for experiencing the Netplan enabled installation process first-hand. For now, we ll be using a custom ISO image, while waiting for the above-mentioned merge-proposal to be landed. Furthermore, as the Debian archive is going through major transitions builds of the unstable branch of d-i don t currently work. So I implemented a small backport, producing updated netcfg and netcfg-static for Bookworm, which can be used as localudebs/ during the d-i build.
Let s start with preparing a working directory and installing the software dependencies for our virtualized Debian system:
Now let s download the custom mini.iso, linux kernel image and initrd.gz containing the Netplan enablement changes, as mentioned above.
TODO: localudebs/
Next we ll prepare a VM, by copying the EFI firmware files, preparing some persistent EFIVARs file, to boot from FS0:\EFI\debian\grubx64.efi, and create a virtual disk for our machine:
Finally, let s launch the installer using a custom preseed.cfg file, that will automatically install Netplan for us in the target system. A minimal preseed file could look like this:
For this demo, we re installing the full netplan.io package (incl. Python CLI), as the netplan-generator package was not yet split out as an independent binary in the Bookworm cycle. You can choose the preseed file from a set of different variants to test the different configurations:
We re using the custom linux kernel and initrd.gz here to be able to pass the PRESEED_URL as a parameter to the kernel s cmdline directly. Launching this VM should bring up the normal debian-installer in its netboot/gtk form:
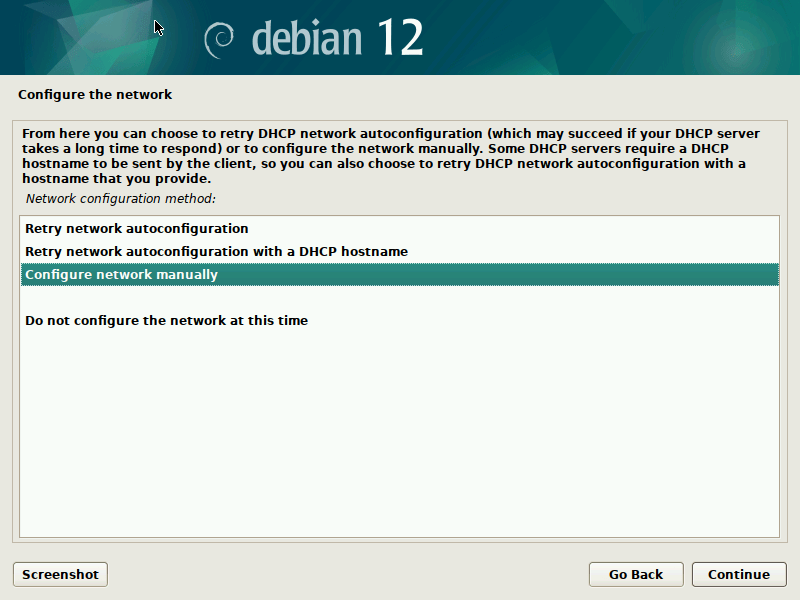
Now you can click through the normal Debian-Installer process, using mostly default settings. Optionally, you could play around with the networking settings, to see how those get translated to /etc/netplan/ in the target system.
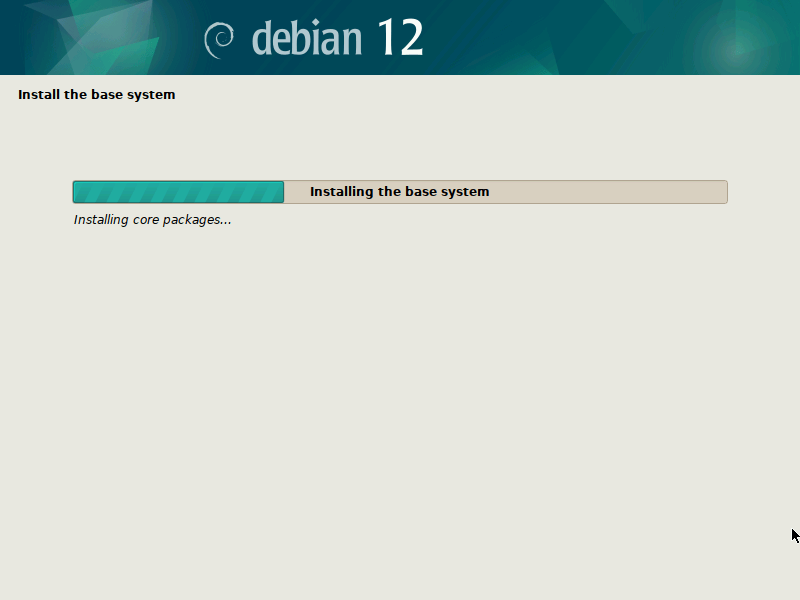
After you confirmed your partitioning changes, the base system gets installed. I suggest not to select any additional components, like desktop environments, to speed up the process.
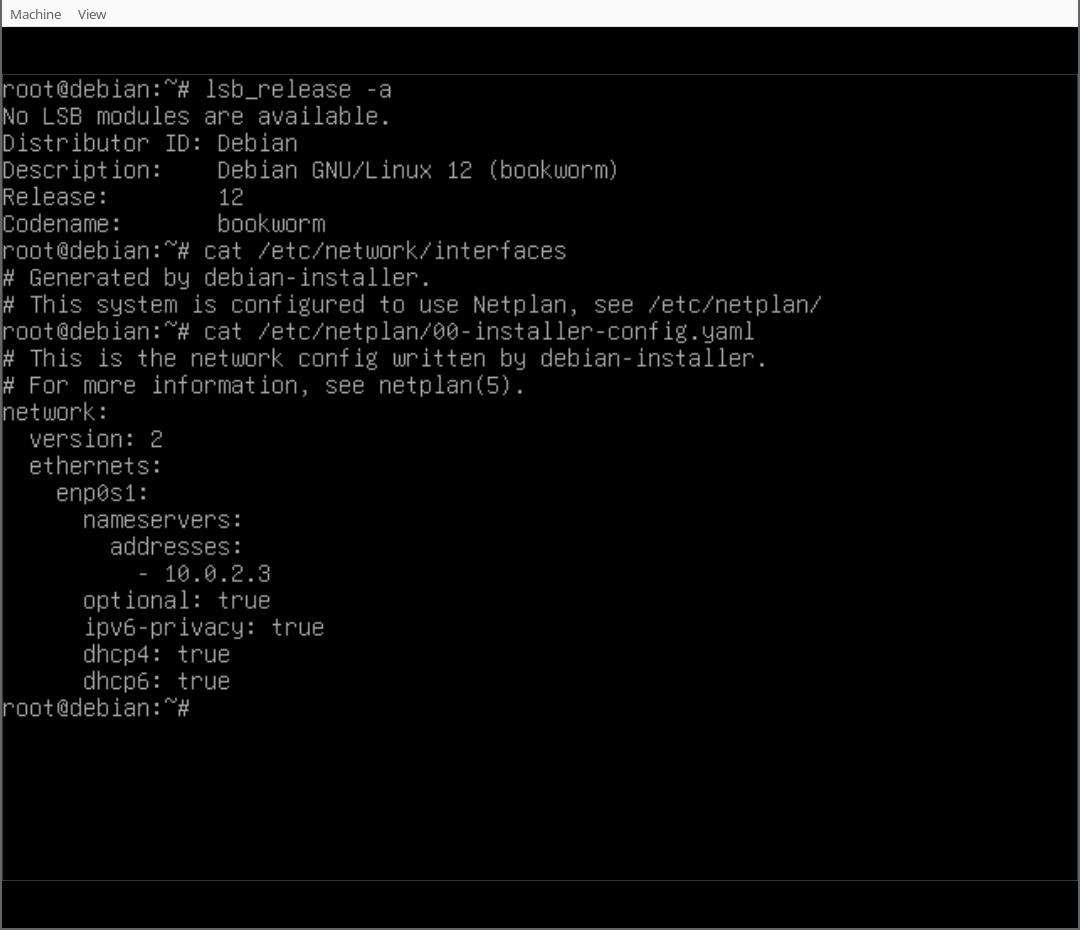
During the final step of the installation (finish-install.d/55netcfg-copy-config) d-i will detect that Netplan was installed in the target system (due to the preseed file provided) and opt to write its network configuration to /etc/netplan/ instead of /etc/network/interfaces or /etc/NetworkManager/system-connections/.
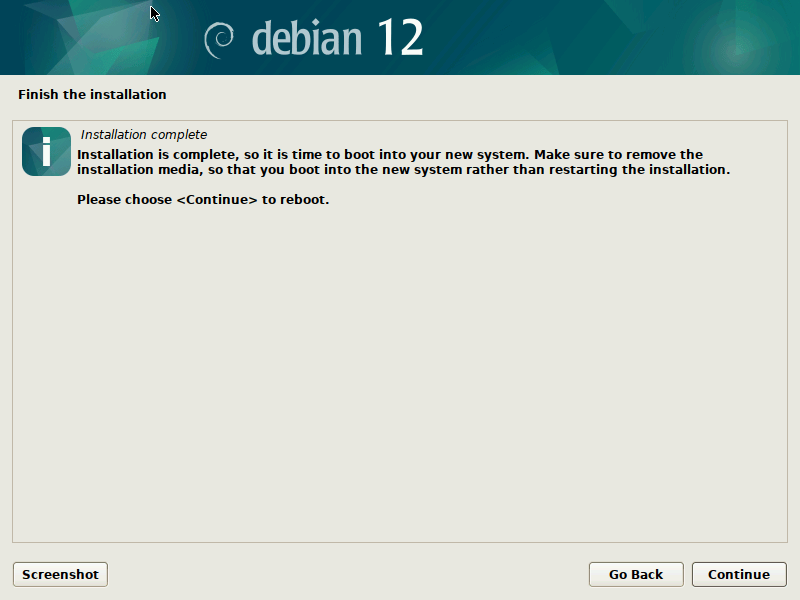
Done! After the installation finished you can reboot into your virgin Debian Bookworm system.
To do that, quit the current Qemu process, by pressing Ctrl+C and make sure to copy over the EFIVARS.fd file that was written by grub during the installation, so Qemu can find the new system. Then reboot into the new system, not using the mini.iso image any more:
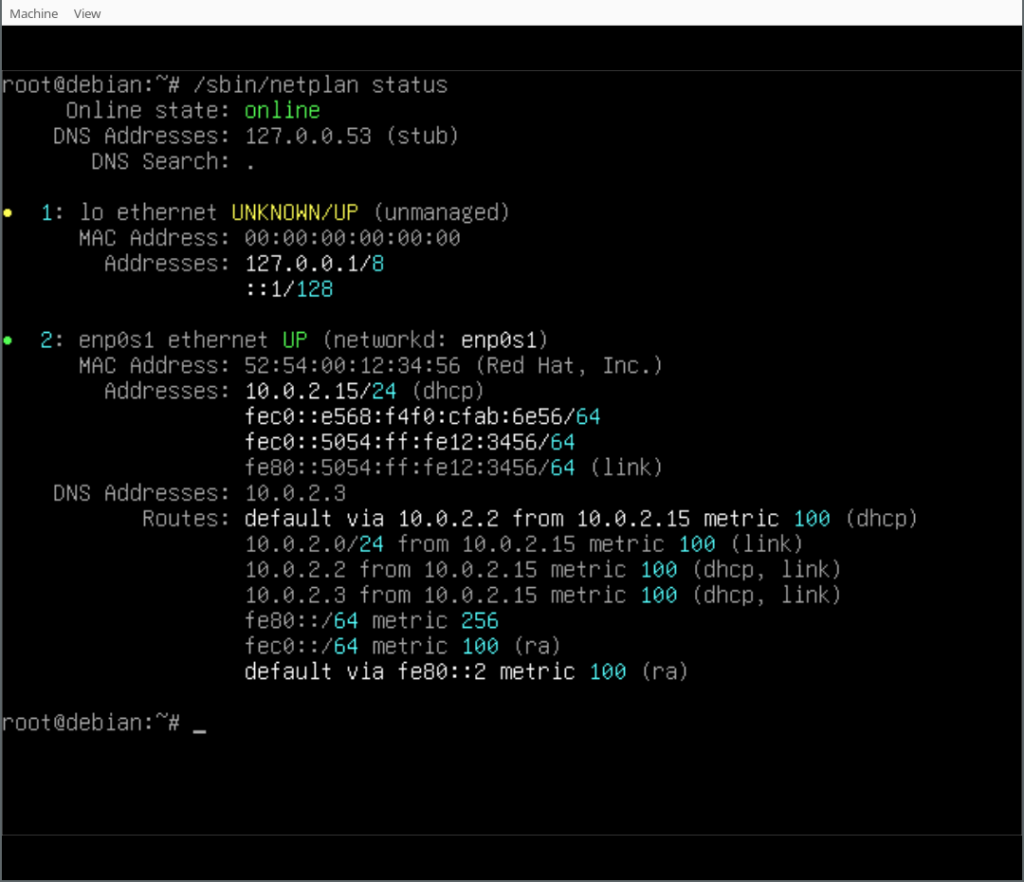
Finally, you can play around with your Netplan enabled Debian system! As you will find, /etc/network/interfaces exists but is empty, it could still be used (optionally/additionally). Netplan was configured in /etc/netplan/ according to the settings given during the d-i installation process.
In our case we also installed the Netplan CLI, so we can play around with some of its features, like netplan status:
Thank you for following along the Netplan enabled Debian installation process and happy hacking! If you want to learn more join the discussion at Salsa:installer-team/netcfg and find us at GitHub:netplan.
Last month, I had a trip to Malaysia and Thailand. I stayed for six days in each of the countries. The selection of these countries was due to both of them granting visa-free entry to Indian tourists for some time window. This post covers the Malaysia part and Thailand part will be covered in the next post. If you want to travel to any of these countries in the visa-free time period, I have written all the questions asked during immigration and at airports during this trip here which might be of help.
I mostly stayed in Kuala Lumpur and went to places around it. Although before the trip, I planned to visit Ipoh and Cameron Highlands too, but could not cover it during the trip. I found planning a trip to Malaysia a little difficult. The country is divided into two main islands - Peninsular Malaysia and Borneo. Then there are more islands - Langkawi, Penang island, Perhentian and Redang Islands. Reaching those islands seemed a little difficult to plan and I wish to visit more places in my next Malaysia trip.
My first day hostel was booked in Chinatown part of Kuala Lumpur, near Pasar Seni LRT station. As soon as I checked-in and entered my room, I met another Indian named Fletcher, and after that we accompanied each other in the trip. That day, we went to Muzium Negara and Little India. I realized that if you know the right places to buy what you want, Malaysia could be quite cheap. Malaysian currency is Malaysian Ringgit (MYR). 1 MYR is equal to 18 INR. For 2 MYR, you can get a good masala tea in Little India and it costs like 4-5 MYR for a masala dosa. The vegetarian food has good availability in Kuala Lumpur, thanks to the Tamil community. I also tried Mee Goreng, which was vegetarian, and I found it fine in terms of taste. When I checked about Mee Goreng on Wikipedia, I found out that it is unique to Indian immigrants in Malaysia (and neighboring countries) but you don t get it in India!
Mee Goreng, a dish made of noodles in Malaysia.
For the next day, Fletcher had planned a trip to Genting Highlands and pre booked everything. I also planned to join him but when we went to KL Sentral to take the bus, his bus tickets were sold out. I could take a bus at a different time, but decided to visit some other place for the day and cover Genting Highlands later. At the ticket counter, I met a family from Delhi and they wanted to go to Genting Highlands but due to not getting bus tickets for that day, they decided to buy a ticket for the next day and instead planned for Batu Caves that day. I joined them and went to Batu Caves.
After returning from Batu Caves, we went our separate ways. I went back and took rest at my hostel and later went to Petronas Towers at night. Petronas Towers is the icon of Kuala Lumpur. Having a photo there was a must. I was at Petronas Towers at around 9 PM. Around that time, Fletcher came back from Genting Highlands and we planned to meet at KL Sentral to head for dinner.
Me at Petronas Towers.
We went back to the same place as the day before where I had Mee Goreng. This time we had dosa and a masala tea. Their masala tea from the last day was tasty and that s why I was looking for them in the first place. We also met a Malaysian family having Indian ancestry dining there and had a nice conversation. Then we went to a place to eat roti canai in Pasar Seni market. Roti canai is a popular non-vegetarian dish in Malaysia but I took the vegetarian version.
Photo with Malaysians.
The next day, we went to Berjaya Time Square shopping place which sells pretty cheap items for daily use and souveniers too. However, I bought souveniers from Petaling Street, which is in Chinatown. At night, we explored Bukit Bintang, which is the heart of Kuala Lumpur and is famous for its nightlife.
After that, Fletcher went to Bangkok and I was in Malaysia for two more days. Next day, I went to Genting Highlands and took the cable car, which had awesome views. I came back to Kuala Lumpur by the night. The remaining day I just roamed around in Bukit Bintang. Then I took a flight for Bangkok on 7th Feb, which I will cover in the next post.
In Malaysia, I met so many people from different countries - apart from people from Indian subcontinent, I met Syrians, Indonesians (Malaysia seems to be a popular destination for Indonesian tourists) and Burmese people. Meeting people from other cultures is an integral part of travel for me.
My expenses for Food + Accommodation + Travel added to 10,000 INR for a week in Malaysia, while flight costs were: 13,000 INR (Delhi to Kuala Lumpur) + 10,000 INR (Kuala Lumpur to Bangkok) + 12,000 INR (Bangkok to Delhi).
For OpenStreetMap users, good news is Kuala Lumpur is fairly well-mapped on OpenStreetMap.
Tips
I bought local SIM from a shop at KL Sentral station complex which had news in their name (I forgot the exact name and there are two shops having news in their name) and it was the cheapest option I could find. The SIM was 10 MYR for 5 GB data for a week. If you want to make calls too, then you need to spend extra 5 MYR.
7-Eleven and KK Mart convenience stores are everywhere in the city and they are open all the time (24 hours a day). If you are a vegetarian, you can at least get some bread and cheese from there to eat.
A lot of people know English (and many - Indians, Pakistanis, Nepalis - know Hindi) in Kuala Lumpur, so I had no language problems most of the time.
For shopping on budget, you can go to Petaling Street, Berjaya Time Square or Bukit Bintang. In particular, there is a shop named I Love KL Gifts in Bukit Bintang which had very good prices. just near the metro/monorail stattion. Check out location of the shop on OpenStreetMap.
Roadkiller was a Soekris net5501 router I used as my main gateway
between 2010 and 2016 (for r seau and
t l phone).
It was upgraded to FreeBSD 8.4-p12 (2014-06-06) and pkgng. It was
retired in favor of octavia around 2016.
Roughly 10 years later (2024-01-24), I found it in a drawer and, to my
surprised, it booted. After wrangling with a RS-232 USB adapter,
a null modem cable, and bit rates, I even logged in:
comBIOS ver. 1.33  20070103  Copyright (C) 2000-2007 Soekris Engineering.
net5501
0512 Mbyte Memory                        CPU Geode LX 500 Mhz
Pri Mas  WDC WD800VE-00HDT0              LBA Xlt 1024-255-63  78 Gbyte
Slot   Vend Dev  ClassRev Cmd  Stat CL LT HT  Base1    Base2   Int
-------------------------------------------------------------------
0:01:2 1022 2082 10100000 0006 0220 08 00 00 A0000000 00000000 10
0:06:0 1106 3053 02000096 0117 0210 08 40 00 0000E101 A0004000 11
0:07:0 1106 3053 02000096 0117 0210 08 40 00 0000E201 A0004100 05
0:08:0 1106 3053 02000096 0117 0210 08 40 00 0000E301 A0004200 09
0:09:0 1106 3053 02000096 0117 0210 08 40 00 0000E401 A0004300 12
0:20:0 1022 2090 06010003 0009 02A0 08 40 80 00006001 00006101
0:20:2 1022 209A 01018001 0005 02A0 08 00 00 00000000 00000000
0:21:0 1022 2094 0C031002 0006 0230 08 00 80 A0005000 00000000 15
0:21:1 1022 2095 0C032002 0006 0230 08 00 00 A0006000 00000000 15
 4 Seconds to automatic boot.   Press Ctrl-P for entering Monitor.


                                                  ______
                                                    ____  __ ___  ___
            Welcome to FreeBSD!                     __   '__/ _ \/ _ \
                                                    __       __/  __/

    1. Boot FreeBSD [default]                     _     _   \___ \___
    2. Boot FreeBSD with ACPI enabled             ____   _____ _____
    3. Boot FreeBSD in Safe Mode                    _ \ / ____   __ \
    4. Boot FreeBSD in single user mode             _)   (___
    5. Boot FreeBSD with verbose logging            _ < \___ \
    6. Escape to loader prompt                      _)  ____)    __
    7. Reboot
                                                  ____/ _____/ _____/


    Select option, [Enter] for default
    or [Space] to pause timer  5

Copyright (c) 1992-2013 The FreeBSD Project.
Copyright (c) 1979, 1980, 1983, 1986, 1988, 1989, 1991, 1992, 1993, 1994
        The Regents of the University of California. All rights reserved.
FreeBSD is a registered trademark of The FreeBSD Foundation.
FreeBSD 8.4-RELEASE-p12 #5: Fri Jun  6 02:43:23 EDT 2014
    root@roadkiller.anarc.at:/usr/obj/usr/src/sys/ROADKILL i386
gcc version 4.2.2 20070831 prerelease [FreeBSD]
Timecounter "i8254" frequency 1193182 Hz quality 0
CPU: Geode(TM) Integrated Processor by AMD PCS (499.90-MHz 586-class CPU)
  Origin = "AuthenticAMD"  Id = 0x5a2  Family = 5  Model = a  Stepping = 2
  Features=0x88a93d<FPU,DE,PSE,TSC,MSR,CX8,SEP,PGE,CMOV,CLFLUSH,MMX>
  AMD Features=0xc0400000<MMX+,3DNow!+,3DNow!>
real memory  = 536870912 (512 MB)
avail memory = 506445824 (482 MB)
kbd1 at kbdmux0
K6-family MTRR support enabled (2 registers)
ACPI Error: A valid RSDP was not found (20101013/tbxfroot-309)
ACPI: Table initialisation failed: AE_NOT_FOUND
ACPI: Try disabling either ACPI or apic support.
cryptosoft0: <software crypto> on motherboard
pcib0 pcibus 0 on motherboard
pci0: <PCI bus> on pcib0
Geode LX: Soekris net5501 comBIOS ver. 1.33 20070103 Copyright (C) 2000-2007
pci0: <encrypt/decrypt, entertainment crypto> at device 1.2 (no driver attached)
vr0: <VIA VT6105M Rhine III 10/100BaseTX> port 0xe100-0xe1ff mem 0xa0004000-0xa00040ff irq 11 at device 6.0 on pci0
vr0: Quirks: 0x2
vr0: Revision: 0x96
miibus0: <MII bus> on vr0
ukphy0: <Generic IEEE 802.3u media interface> PHY 1 on miibus0
ukphy0:  none, 10baseT, 10baseT-FDX, 100baseTX, 100baseTX-FDX, auto, auto-flow
vr0: Ethernet address: 00:00:24:cc:93:44
vr0: [ITHREAD]
vr1: <VIA VT6105M Rhine III 10/100BaseTX> port 0xe200-0xe2ff mem 0xa0004100-0xa00041ff irq 5 at device 7.0 on pci0
vr1: Quirks: 0x2
vr1: Revision: 0x96
miibus1: <MII bus> on vr1
ukphy1: <Generic IEEE 802.3u media interface> PHY 1 on miibus1
ukphy1:  none, 10baseT, 10baseT-FDX, 100baseTX, 100baseTX-FDX, auto, auto-flow
vr1: Ethernet address: 00:00:24:cc:93:45
vr1: [ITHREAD]
vr2: <VIA VT6105M Rhine III 10/100BaseTX> port 0xe300-0xe3ff mem 0xa0004200-0xa00042ff irq 9 at device 8.0 on pci0
vr2: Quirks: 0x2
vr2: Revision: 0x96
miibus2: <MII bus> on vr2
ukphy2: <Generic IEEE 802.3u media interface> PHY 1 on miibus2
ukphy2:  none, 10baseT, 10baseT-FDX, 100baseTX, 100baseTX-FDX, auto, auto-flow
vr2: Ethernet address: 00:00:24:cc:93:46
vr2: [ITHREAD]
vr3: <VIA VT6105M Rhine III 10/100BaseTX> port 0xe400-0xe4ff mem 0xa0004300-0xa00043ff irq 12 at device 9.0 on pci0
vr3: Quirks: 0x2
vr3: Revision: 0x96
miibus3: <MII bus> on vr3
ukphy3: <Generic IEEE 802.3u media interface> PHY 1 on miibus3
ukphy3:  none, 10baseT, 10baseT-FDX, 100baseTX, 100baseTX-FDX, auto, auto-flow
vr3: Ethernet address: 00:00:24:cc:93:47
vr3: [ITHREAD]
isab0: <PCI-ISA bridge> at device 20.0 on pci0
isa0: <ISA bus> on isab0
atapci0: <AMD CS5536 UDMA100 controller> port 0x1f0-0x1f7,0x3f6,0x170-0x177,0x376,0xe000-0xe00f at device 20.2 on pci0
ata0: <ATA channel> at channel 0 on atapci0
ata0: [ITHREAD]
ata1: <ATA channel> at channel 1 on atapci0
ata1: [ITHREAD]
ohci0: <OHCI (generic) USB controller> mem 0xa0005000-0xa0005fff irq 15 at device 21.0 on pci0
ohci0: [ITHREAD]
usbus0 on ohci0
ehci0: <AMD CS5536 (Geode) USB 2.0 controller> mem 0xa0006000-0xa0006fff irq 15 at device 21.1 on pci0
ehci0: [ITHREAD]
usbus1: EHCI version 1.0
usbus1 on ehci0
cpu0 on motherboard
pmtimer0 on isa0
orm0: <ISA Option ROM> at iomem 0xc8000-0xd27ff pnpid ORM0000 on isa0
atkbdc0: <Keyboard controller (i8042)> at port 0x60,0x64 on isa0
atkbd0: <AT Keyboard> irq 1 on atkbdc0
kbd0 at atkbd0
atkbd0: [GIANT-LOCKED]
atkbd0: [ITHREAD]
atrtc0: <AT Real Time Clock> at port 0x70 irq 8 on isa0
ppc0: parallel port not found.
uart0: <16550 or compatible> at port 0x3f8-0x3ff irq 4 flags 0x10 on isa0
uart0: [FILTER]
uart0: console (19200,n,8,1)
uart1: <16550 or compatible> at port 0x2f8-0x2ff irq 3 on isa0
uart1: [FILTER]
Timecounter "TSC" frequency 499903982 Hz quality 800
Timecounters tick every 1.000 msec
IPsec: Initialized Security Association Processing.
usbus0: 12Mbps Full Speed USB v1.0
usbus1: 480Mbps High Speed USB v2.0
ad0: 76319MB <WDC WD800VE-00HDT0 09.07D09> at ata0-master UDMA100
ugen0.1: <AMD> at usbus0
uhub0: <AMD OHCI root HUB, class 9/0, rev 1.00/1.00, addr 1> on usbus0
ugen1.1: <AMD> at usbus1
uhub1: <AMD EHCI root HUB, class 9/0, rev 2.00/1.00, addr 1> on usbus1
GEOM: ad0s1: geometry does not match label (255h,63s != 16h,63s).
uhub0: 4 ports with 4 removable, self powered
Root mount waiting for: usbus1
Root mount waiting for: usbus1
uhub1: 4 ports with 4 removable, self powered
Trying to mount root from ufs:/dev/ad0s1a
Interestingly, I switched between eicat and teksavvy on December
11th. Which year? Who knows!
Dec 11 16:38:40 roadkiller mpd: [eicatL0] LCP: authorization successful
Dec 11 16:41:15 roadkiller mpd: [teksavvyL0] LCP: authorization successful
Never realized those good old logs had a "oh dear forgot the year"
issue (that's something like Y2K except just "Y", I guess).
That was probably 2015, because the log dates from 2017, and the last
entry is from November of the year after the above:
... so it lived for about 6 years, but still works after almost 14
years, which I find utterly amazing.
Another amazing thing is that there's tuptime installed on that
server! That is a software I thought I discovered later and then
sponsored in Debian, but turns out I was already using it then!
[root@roadkiller /var]# tuptime
System startups:        19   since   21:20:16 11/07/15
System shutdowns:       0 ok   -   18 bad
System uptime:          85.93 %   -   1 year, 11 days, 10 hours, 3 minutes and 36 seconds
System downtime:        14.07 %   -   61 days, 15 hours, 22 minutes and 45 seconds
System life:            1 year, 73 days, 1 hour, 26 minutes and 20 seconds
Largest uptime:         122 days, 9 hours, 17 minutes and 6 seconds   from   08:17:56 02/02/16
Shortest uptime:        5 minutes and 4 seconds   from   21:55:00 01/18/17
Average uptime:         19 days, 19 hours, 28 minutes and 37 seconds
Largest downtime:       57 days, 1 hour, 9 minutes and 59 seconds   from   20:45:01 11/22/16
Shortest downtime:      -1 years, 364 days, 23 hours, 58 minutes and 12 seconds   from   22:30:01 01/18/17
Average downtime:       3 days, 5 hours, 51 minutes and 43 seconds
Current uptime:         18 minutes and 23 seconds   since   22:28:13 01/18/17
Actual up/down times:
[root@roadkiller /var]# tuptime -t
No.        Startup Date                                         Uptime       Shutdown Date   End                                                  Downtime
1     21:20:16 11/07/15      1 day, 0 hours, 40 minutes and 12 seconds   22:00:28 11/08/15   BAD                                  2 minutes and 37 seconds
2     22:03:05 11/08/15      1 day, 9 hours, 41 minutes and 57 seconds   07:45:02 11/10/15   BAD                                  3 minutes and 24 seconds
3     07:48:26 11/10/15    20 days, 2 hours, 41 minutes and 34 seconds   10:30:00 11/30/15   BAD                        4 hours, 50 minutes and 21 seconds
4     15:20:21 11/30/15                      19 minutes and 40 seconds   15:40:01 11/30/15   BAD                                   6 minutes and 5 seconds
5     15:46:06 11/30/15                      53 minutes and 55 seconds   16:40:01 11/30/15   BAD                           1 hour, 1 minute and 38 seconds
6     17:41:39 11/30/15     6 days, 16 hours, 3 minutes and 22 seconds   09:45:01 12/07/15   BAD                4 days, 6 hours, 53 minutes and 11 seconds
7     16:38:12 12/11/15   50 days, 17 hours, 56 minutes and 49 seconds   10:35:01 01/31/16   BAD                                 10 minutes and 52 seconds
8     10:45:53 01/31/16     1 day, 21 hours, 28 minutes and 16 seconds   08:14:09 02/02/16   BAD                                  3 minutes and 48 seconds
9     08:17:56 02/02/16    122 days, 9 hours, 17 minutes and 6 seconds   18:35:02 06/03/16   BAD                                 10 minutes and 16 seconds
10    18:45:18 06/03/16   29 days, 17 hours, 14 minutes and 43 seconds   12:00:01 07/03/16   BAD                                 12 minutes and 34 seconds
11    12:12:35 07/03/16   31 days, 17 hours, 17 minutes and 26 seconds   05:30:01 08/04/16   BAD                                 14 minutes and 25 seconds
12    05:44:26 08/04/16     15 days, 1 hour, 55 minutes and 35 seconds   07:40:01 08/19/16   BAD                                  6 minutes and 51 seconds
13    07:46:52 08/19/16     7 days, 5 hours, 23 minutes and 10 seconds   13:10:02 08/26/16   BAD                                  3 minutes and 45 seconds
14    13:13:47 08/26/16   27 days, 21 hours, 36 minutes and 14 seconds   10:50:01 09/23/16   BAD                                  2 minutes and 14 seconds
15    10:52:15 09/23/16   60 days, 10 hours, 52 minutes and 46 seconds   20:45:01 11/22/16   BAD                 57 days, 1 hour, 9 minutes and 59 seconds
16    21:55:00 01/18/17                        5 minutes and 4 seconds   22:00:04 01/18/17   BAD                                 11 minutes and 15 seconds
17    22:11:19 01/18/17                       8 minutes and 42 seconds   22:20:01 01/18/17   BAD                                   1 minute and 20 seconds
18    22:21:21 01/18/17                       8 minutes and 40 seconds   22:30:01 01/18/17   BAD   -1 years, 364 days, 23 hours, 58 minutes and 12 seconds
19    22:28:13 01/18/17                      20 minutes and 17 seconds
The last few entries are actually the tests I'm running now, it seems
this machine thinks we're now on 2017-01-18 at ~22:00, while we're
actually 2024-01-24 at ~12:00 local:
Wed Jan 18 23:05:38 EST 2017
FreeBSD/i386 (roadkiller.anarc.at) (ttyu0)
login: root
Password:
Jan 18 23:07:10 roadkiller login: ROOT LOGIN (root) ON ttyu0
Last login: Wed Jan 18 22:29:16 on ttyu0
Copyright (c) 1992-2013 The FreeBSD Project.
Copyright (c) 1979, 1980, 1983, 1986, 1988, 1989, 1991, 1992, 1993, 1994
        The Regents of the University of California. All rights reserved.
FreeBSD 8.4-RELEASE-p12 (ROADKILL) #5: Fri Jun  6 02:43:23 EDT 2014
Reminders:
 * commit stuff in /etc
 * reload firewall (in screen!):
    pfctl -f /etc/pf.conf ; sleep 1
 * vim + syn on makes pf.conf more readable
 * monitoring the PPPoE uplink:
   tail -f /var/log/mpd.log
Current problems:
 * sometimes pf doesn't start properly on boot, if pppoe failed to come up, use
   this to resume:
     /etc/rc.d/pf start
   it will kill your shell, but fix NAT (2012-08-10)
 * babel fails to start on boot (2013-06-15):
     babeld -D -g 33123 tap0 vr3
 * DNS often fails, tried messing with unbound.conf (2014-10-05) and updating
   named.root (2016-01-28) and performance tweaks (ee63689)
 * asterisk and mpd4 are deprecated and should be uninstalled when we're sure
   their replacements (voipms + ata and mpd5) are working (2015-01-13)
 * if IPv6 fails, it's because netblocks are not being routed upstream. DHCPcd
   should do this, but doesn't start properly, use this to resume (2015-12-21):
     /usr/local/sbin/dhcpcd -6 --persistent --background --timeout 0 -C resolv.conf ng0
This machine is doomed to be replaced with the new omnia router, Indiegogo
campaign should ship in april 2016: http://igg.me/at/turris-omnia/x
(I really like the motd I left myself there. In theory, I guess this
could just start connecting to the internet again if I still had the
same PPPoE/ADSL link I had almost a decade ago; obviously, I do
not.)
Not sure how the system figured the 2017 time: the onboard clock
itself believes we're in 1980, so clearly the CMOS battery has
(understandably) failed:
> ?
comBIOS Monitor Commands
boot [drive][:partition] INT19 Boot
reboot                   cold boot
download                 download a file using XMODEM/CRC
flashupdate              update flash BIOS with downloaded file
time [HH:MM:SS]          show or set time
date [YYYY/MM/DD]        show or set date
d[b w d] [adr]           dump memory bytes/words/dwords
e[b w d] adr value [...] enter bytes/words/dwords
i[b w d] port            input from 8/16/32-bit port
o[b w d] port value      output to 8/16/32-bit port
run adr                  execute code at adr
cmosread [adr]           read CMOS RAM data
cmoswrite adr byte [...] write CMOS RAM data
cmoschecksum             update CMOS RAM Checksum
set parameter=value      set system parameter to value
show [parameter]         show one or all system parameters
?/help                   show this help
> show
ConSpeed = 19200
ConLock = Enabled
ConMute = Disabled
BIOSentry = Enabled
PCIROMS = Enabled
PXEBoot = Enabled
FLASH = Primary
BootDelay = 5
FastBoot = Disabled
BootPartition = Disabled
BootDrive = 80 81 F0 FF
ShowPCI = Enabled
Reset = Hard
CpuSpeed = Default
> time
Current Date and Time is: 1980/01/01 00:56:47
Another bit of archeology: I had documented various outages with my
ISP... back in 2003!
Fascinating.
I suspect the (IDE!) hard drive might be failing as I saw two new
files created in /var that I didn't remember seeing before:
-rw-r--r--   1 root    wheel        0 Jan 18 22:55 3@T3
-rw-r--r--   1 root    wheel        0 Jan 18 22:55 DY5
So I shutdown the machine, possibly for the last time:
Waiting (max 60 seconds) for system process  bufdaemon' to stop...done
Waiting (max 60 seconds) for system process  syncer' to stop...
Syncing disks, vnodes remaining...3 3 0 1 1 0 0 done
All buffers synced.
Uptime: 36m43s
usbus0: Controller shutdown
uhub0: at usbus0, port 1, addr 1 (disconnected)
usbus0: Controller shutdown complete
usbus1: Controller shutdown
uhub1: at usbus1, port 1, addr 1 (disconnected)
usbus1: Controller shutdown complete
The operating system has halted.
Please press any key to reboot.
I'll finally note this was the last FreeBSD server I personally
operated. I also used FreeBSD to setup the core routers at
Koumbit but those were replaced with Debian recently as
well.
Thanks Soekris, that was some sturdy hardware. Hopefully this new
Protectli router will live up to that "decade
plus" challenge.
Not sure what the fate of this device will be: I'll bring it to the
next Montreal Debian & Stuff to see if anyone's interested,
contact me if you can't show up and want this thing.
Linux kernel getting a livepatch whilst running a marathon. Generated with AI.
Livepatch service eliminates the need for unplanned maintenance windows for high and critical severity kernel vulnerabilities by patching the Linux kernel while the system runs. Originally the service launched in 2016 with just a single kernel flavour supported.Over the years, additional kernels were added: new LTS releases, ESM kernels, Public Cloud kernels, and most recently HWE kernels too.Recently livepatch support was expanded for FIPS compliant kernels, Public cloud FIPS compliant kernels, and as well IBM Z (mainframe) kernels. Bringing the total of kernel flavours support to over 60 distinct kernel flavours supported in parallel. The table of supported kernels in the documentation lists the supported kernel flavours ABIs, the duration of individual build's support window, supported architectures, and the Ubuntu release. This work was only possible thanks to the collaboration with the Ubuntu Certified Public Cloud team, engineers at IBM for IBM Z (s390x) support, Ubuntu Pro team, Livepatch server & client teams.It is a great milestone, and I personally enjoy seeing the non-intrusive popup on my Ubuntu Desktop that a kernel livepatch was applied to my running system. I do enable Ubuntu Pro on my personal laptop thanks to the free Ubuntu Pro subscription for individuals.What's next? The next frontier is supporting ARM64 kernels. The Canonical kernel team has completed the gap analysis to start supporting Livepatch Service for ARM64. Upstream Linux requires development work on the consistency model to fully support livepatch on ARM64 processors. Livepatch code changes are applied on a per-task basis, when the task is deemed safe to switch over. This safety check depends mostly on kernel stacktraces. For these checks, CONFIG_HAVE_RELIABLE_STACKTRACE needs to be available in the upstream ARM64 kernel. (see The Linux Kernel Documentation). There are preliminary patches that enable reliable stacktraces on ARM64, however these turned out to be problematic as there are lots of fix revisions that came after the initial patchset that AWS ships with 5.10. This is a call for help from any interested parties. If you have engineering resources and are interested in bringing Livepatch Service to your ARM64 platforms, please reach out to the Canonical Kernel team on the public Ubuntu Matrix, Discourse, and mailing list. If you want to chat in person, see you at FOSDEM next weekend.
After more than one a year, a new minor FAI version is available, but
it includes some interesting new features.
Here a the items from the NEWS file:
fai (6.2) unstable; urgency=low
fai-cd can now create live images
Use systemd during installation
New feature: run FAI inside a screen or tmux session
fai-diskimage: do not use compression of qemu-img which is slow
instead provide .qcow2.zst, add option -C
fai-kvm: add support for booting from USB storage
new tool mk-data-partition adds a data partition to an ISO
easy installation of packages from /pkgs/<CLASS> directories
new helper functions for creating custom list of disks
new method detect:// for FAI_CONFIG_SRC
In the past the command fai-cd was only used for creating installation
ISOs, that could be used from CD or USB stick.
Now it possible to create a live ISO. Therefore you create your live
chroot environment using 'fai dirinstall' and then convert it to a
bootable live ISO using fai-cd. See man fai-cd(8) for an example.
Years ago I had the idea to use the remaining disk space on an USB
stick after copying an ISO onto it. I've blogged about this recently:
https://blog.fai-project.org/posts/extending-iso-images/
The new FAI version includes the tool mk-data-partition for adding
a data partition to the ISO itself or to an USB stick.
FAI detects this data partition, mounts it to /media/data and can then
use various configurations from it. You may want to copy your own set
of .deb packages or your whole FAI config space to this partition. FAI
now automatically searches this partition for usable FAI configuration
data and packages. FAI will install all packages from pkgs/<CLASSNAME>
if the equivalent class is defined. Setting FAI_CONFIG_SRC=detect://
now looks into the data partition for the subdirectory 'config' and
uses this as the config space. So it's now possible to modify an
existing ISO (that is read-only) and make changes to the config space.
If there's no config directory in the data partition FAI uses the
default location on the ISO.
The tool fai-kvm, which starts virtual machines can now boot an ISO
not only as CD but also as USB stick.
Sometimes users want to adjust the list of disks before the
partitioning is startet.
Therefore FAI provides several new functions including
smallestdisk()
largestdisk()
matchdisks()
You can select individual disks by their model name or even the serial
number.
Two new FAI flags were added (tmux and screen) that make it easy to
run FAI inside a tmux or screen session.
And finally FAI uses systemd. Yeah!
This technical change was waiting since 2015 in a merge request from
Moritz 'Morty' Str be, that would enable using systemd during the
installation. Before FAI still was using old-style SYSV init
scripts and did not started systemd. I didn't tried to apply the
patch, because I was afraid that it would need much time to make it
work. But then in may 2023 Juri Grabowski just gave it a try at
MiniDebConf Hamburg, and voil it just works!
Many, many thanks to Moritz and Juri for their bravery.
The whole changelog can be found at
https://tracker.debian.org/media/packages/f/fai/changelog-6.2
New ISOs for FAI are also available including an example of a Xfce
desktop live ISO:
https://fai-project.org/fai-cd/
The FAIme service for creating customized installation ISOs will get its update
later.
The new packages are available for bookworm by adding this line to
your sources.list:
deb https://fai-project.org/download bookworm koeln
I ended 2022 with a musical retrospective and very much enjoyed writing
that blog post. As such, I have decided to do the same for 2023! From now on,
this will probably be an annual thing :)
Albums
In 2023, I added 73 new albums to my collection nearly 2 albums every three
weeks! I listed them below in the order in which I acquired them.
I purchased most of these albums when I could and borrowed the rest at
libraries. If you want to browse though, I added links to the album covers
pointing either to websites where you can buy them or to Discogs when digital
copies weren't available.
Once again this year, it seems that Punk (mostly O !) and Metal dominate my
list, mostly fueled by Angry Metal Guy and the amazing Montr al
Skinhead/Punk concert scene.
Concerts
A trend I started in 2022 was to go to as many concerts of artists I like as
possible. I'm happy to report I went to around 80% more concerts in 2023 than
in 2022! Looking back at my list, April was quite a busy month...
Here are the concerts I went to in 2023:
March 8th: Godspeed You! Black Emperor
April 11th: Alexandra Str liski
April 12th: Bikini Kill
April 21th: Brigada Flores Magon, Union Thugs
April 28th: Komintern Sect, The Outcasts, Violent Way, Ultra Razzia, Over the
Hill
May 3rd: First Fragment
May 12th: Rhapsody of Fire, Wind Rose
May 13th: Aeternam
June 2nd: Mortier, La Gachette
June 17th: Ultra Razzia, Total Nada, BLEMISH
June 30th: Avishai Cohen Trio
July 9th: Richard Galliano
August 18th: Gojira, Mastodon, Lorna Shore
September 14th: Jinjer
September 22nd: CUIR, Salvaje Punk, Hysteric Polemix, Perestroika, Ultra Razzia, Ilusion, Over the Hill, Asbestos
October 6th: Rancoeur, Street Code, Tenaz, Mortimer, Guernica, High Anxiety
Although metalfinder continues to work as intended, I'm very glad to have
discovered the Montr al underground scene has departed from Facebook/Instagram
and adopted en masseGancio, a FOSS community agenda that supports
ActivityPub. Our local instance, askapunk.net
is pretty much all I could ask for :)
That's it for 2023!
Looking at the options for blocking ads, people usually first look at browser extensions. Google's plan is to disable adblock extensions in 2024. The alternative is usually an app (on phones) or a "VPN" that does filtering for you. All these methods are quite heavyweight, and require installing software on your phone or PC. What is less known, is that you can you DNS-over-TLS or DNS-over-HTTPS for ad blocking.
What is DNS-over-TLS and DNS-over-HTTPS
Since Android 9, Google has provided a setting calledPrivate DNS. Traditional DNS is unencrypted UDP so anyone can monitor your requests and/or return false records. With private DNS, DNS-over-TLS or DNS-over-HTTPS is used to guarantee the DNS request is sent to the server you configured. Which Google hopes is of course Google's own public servers. If you do so, your ISP and hotspot providers no longer can monitor, monetize and enshittify your DNS requests - only Google can do so.
Subverting private DNS for ad blocking
This is where AdGuard DNS comes useful. By setting the AdGuard DNS server as your "private DNS" server following the instructions,you can start blocking right away. Note, on PC you can also configure the Adguard DNS server on the Browser settings (Firefox -> Enable secure DNS and Chrome -> Use Secure DNS) instead of configuring a system-wide DNS server. Blocking via DNS, of course, limits effectiveness to ads distributed from 3rd party servers.
Other uses for AdGuard DNS
If you register for Adguard DNS, you get your "own", customizable DNS server address to point to. You can, for example, create your own /etc/hosts style records that are now available to all you devices you have connected to the Adguard DNS server - whether your a are home or not. Of course, you choose to use the personal DNS server, your DNS query privacy is in the hands of AdGuard.
Going further
What else is ruining the web than Ads? Well commercial social media. An article ("Ei n in! Algoritmi hky") from the latest Finnish Magazine SKROLLI (mainos: jos luet suomeksi, Tilaa skrolli!) hit a chord for me. The algorithms of social media sites are designed not to serve you, but to addict you. For example, If you stop to watch a hateful meme image, the algorithm will record "The user spent time watching this, show more of the same!". It doesn't help block or mute - yeah that spefic hate engager will be blocked, but all the dozens similar hate pages will still be shown to you. Worse, the social media sites are being overrun by AI-generated crap. Unfortunately the addictive nature of the algorithms works. You reload in vain, hoping this time the algorithmic god will show something your friends share. How do you cure addiction? By blocking yourself out:
Epilogue
I didn't block myself out of Fediverse - yet. It's not engineered to be addictive, which is also probably why it isn't as popular as the commercial alternatives...
dkg's New OpenPGP certificate in December 2023
In December of 2023, I'm moving to a new OpenPGP certificate.
You might know my old OpenPGP certificate, which had an fingerprint of
C29F8A0C01F35E34D816AA5CE092EB3A5CA10DBA.
My new OpenPGP certificate has a fingerprint of:
D477040C70C2156A5C298549BB7E9101495E6BF7.
Both certificates have the same set of User IDs:
-----BEGIN PGP PUBLIC KEY BLOCK-----xjMEZXEJyxYJKwYBBAHaRw8BAQdA5BpbW0bpl5qCng/RiqwhQINrplDMSS5JsO/YO+5Zi7HCwAsEHxYKAH0FgmVxCcsDCwkHCRC7fpEBSV5r90cUAAAAAAAeACBzYWx0QG5vdGF0aW9ucy5zZXF1b2lhLXBncC5vcmfUAgfN9tyTSxpxhmHA1r63GiI4v6NQmrrWVLOBRJYuhQMVCggCmwECHgEWIQTUdwQMcMIValwphUm7fpEBSV5r9wAAmaEA/3MvYJMxQdLhIG4UDNMVd2bsovwdcTrReJhLYyFulBrwAQD/j/RS+AXQIVtkcO9bl6zZTAO9x6yfkOZbv0g3eNyrAs0QPGRrZ0BkZWJpYW4ub3JnPsLACwQTFgoAfQWCZXEJywMLCQcJELt+kQFJXmv3RxQAAAAAAB4AIHNhbHRAbm90YXRpb25zLnNlcXVvaWEtcGdwLm9yZ4l+Z3i19Uwjw3CfTNFCDjRsoufMoPOM7vM8HoOEdn/vAxUKCAKbAQIeARYhBNR3BAxwwhVqXCmFSbt+kQFJXmv3AAALZQEAhJsgouepQVV98BHUH6SvWvcKrb8dQEZOvHFbZQQPNWgA/A/DHkjYKnUkCg8Zc+FonqOS/35sHhNA8CwqSQFrtN4KzRc8ZGtnQGZpZnRoaG9yc2VtYW4ubmV0PsLACgQTFgoAfQWCZXEJywMLCQcJELt+kQFJXmv3RxQAAAAAAB4AIHNhbHRAbm90YXRpb25zLnNlcXVvaWEtcGdwLm9yZxLvwkgnslsAuo+IoSa9rv8+nXpbBdab2Ft7n4H9S+d/AxUKCAKbAQIeARYhBNR3BAxwwhVqXCmFSbt+kQFJXmv3AAAtFgD4wqcUfQl7nGLQOcAEHhx8V0Bg8v9ov8GsY1ei1BEFwAD/cxmxmDSO0/tA+x4pd5yIvzgfGYHSTxKS0Ww3hzjuZA7NE0RhbmllbCBLYWhuIEdpbGxtb3LCwA4EExYKAIAFgmVxCcsDCwkHCRC7fpEBSV5r90cUAAAAAAAeACBzYWx0QG5vdGF0aW9ucy5zZXF1b2lhLXBncC5vcmd7X4TgiINwnzh4jar0Pf/b5hgxFPngCFxJSmtr/f0YiQMVCggCmQECmwECHgEWIQTUdwQMcMIValwphUm7fpEBSV5r9wAAMuwBAPtMonKbhGOhOy+8miAb/knJ1cIPBjLupJbjM+NUE1WyAQD1nyGW+XwwMrprMwc320mdJH9B0jdokJZBiN7++0NoBM4zBGVxCcsWCSsGAQQB2kcPAQEHQI19uRatkPSFBXh8usgciEDwZxTnnRZYrhIgiFMybBDQwsC/BBgWCgExBYJlcQnLCRC7fpEBSV5r90cUAAAAAAAeACBzYWx0QG5vdGF0aW9ucy5zZXF1b2lhLXBncC5vcmfCopazDnq6hZUsgVyztl5wmDCmxI169YLNu+IpDzJEtQKbAr6gBBkWCgBvBYJlcQnLCRB3LRYeNc1LgUcUAAAAAAAeACBzYWx0QG5vdGF0aW9ucy5zZXF1b2lhLXBncC5vcmcQglI7G7DbL9QmaDkzcEuk3QliM4NmleIRUW7VvIBHMxYhBHS8BMQ9hghL6GcsBnctFh41zUuBAACwfwEAqDULksr8PulKRcIP6N9NI/4KoznyIcuOHi8qGk4qxMkBAIeV20SPEnWSw9MWAb0eKEcfupzr/C+8vDvsRMynCWsDFiEE1HcEDHDCFWpcKYVJu36RAUlea/cAAFD1AP0YsE3Eeig1tkWaeyrvvMf5Kl1tt2LekTNWDnB+FUG9SgD+Ka8vfPR8wuV8D3y5Y9Qq9xGO+QkEBCW0U1qNypg65QHOOARlcQnLEgorBgEEAZdVAQUBAQdAWTLEa0WmnhUmDBdWXX0ZlYAa4g1CK/fXg0NPOQSteA4DAQgHwsAABBgWCgByBYJlcQnLCRC7fpEBSV5r90cUAAAAAAAeACBzYWx0QG5vdGF0aW9ucy5zZXF1b2lhLXBncC5vcmexrMBZe0QdQ+ZJOZxFkAiwCw2I7yTSF2Ox9GVFWKmAmAKbDBYhBNR3BAxwwhVqXCmFSbt+kQFJXmv3AABcJQD/f4ltpSvLBOBEh/C2dIYadgSuqkCqq0B4WOhFRkWJZlcA/AxqLWG4o8UrrmwrmM42FhgxKtEXwCSHE00u8wR4Up8G=9Yc8-----END PGP PUBLIC KEY BLOCK-----
When I have some reasonable number of certifications, i'll update the
certificate associated with my e-mail addresses on
https://keys.openpgp.org, in DANE, and in WKD. Until then, those
lookups should continue to provide the old certificate.
A new maintenance release 0.1.11 of the RcppSimdJson
package is now on CRAN.
RcppSimdJson
wraps the fantastic and genuinely impressive simdjson library by Daniel Lemire and collaborators. Via
very clever algorithmic engineering to obtain largely branch-free code,
coupled with modern C++ and newer compiler instructions, it results in
parsing gigabytes of JSON parsed per second which is quite
mindboggling. The best-case performance is faster than CPU speed as
use of parallel SIMD instructions and careful branch avoidance can lead
to less than one cpu cycle per byte parsed; see the video of the talk by Daniel Lemire
at QCon.
This release responds to a CRAN request to address issues now
identified by -Wformat -Wformat-security. These are
frequently pretty simple changes as it was here: all it took was an call
to compileAttributes() from an updated Rcpp version which now injects
"%s" as a format string when calling
Rf_error().
The (very short) NEWS entry for this release follows.
Changes in version 0.1.11
(2023-11-28)
RcppExports.cpp has been regenerated under an update
Rcpp to address a print format
warning (Dirk in #88).
Welcome to the October 2023 report from the Reproducible Builds project. In these reports we outline the most important things that we have been up to over the past month. As a quick recap, whilst anyone may inspect the source code of free software for malicious flaws, almost all software is distributed to end users as pre-compiled binaries.
Reproducible Builds Summit 2023
Between October 31st and November 2nd, we held our seventh Reproducible Builds Summit in Hamburg, Germany!
Our summits are a unique gathering that brings together attendees from diverse projects, united by a shared vision of advancing the Reproducible Builds effort, and this instance was no different.
During this enriching event, participants had the opportunity to engage in discussions, establish connections and exchange ideas to drive progress in this vital field. A number of concrete outcomes from the summit will documented in the report for November 2023 and elsewhere.
Amazingly the agenda and all notes from all sessions are already online.
The Reproducible Builds team would like to thank our event sponsors who include Mullvad VPN, openSUSE, Debian, Software Freedom Conservancy, Allotropia and Aspiration Tech.
[ ] In March 2023, Ken gave the closing keynote [and] during the Q&A session, someone jokingly asked about the Turing award lecture, specifically can you tell us right now whether you have a backdoor into every copy of gcc and Linux still today?
Although Ken reveals (or at least claims!) that he has no such backdoor, he does admit that he has the actual code which Russ requests and subsequently dissects in great but accessible detail.
Ecosystem factors of reproducible builds
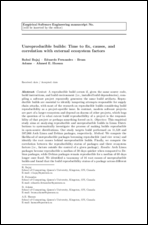
Rahul Bajaj, Eduardo Fernandes, Bram Adams and Ahmed E. Hassan from the Maintenance, Construction and Intelligence of Software (MCIS) laboratory within the School of Computing, Queen s University in Ontario, Canada have published a paper on the Time to fix, causes and correlation with external ecosystem factors of unreproducible builds.
The authors compare various response times within the Debian and Arch Linux distributions including, for example:
Arch Linux packages become reproducible a median of 30 days quicker when compared to Debian packages, while Debian packages remain reproducible for a median of 68 days longer once fixed.
NixOS installation image reproducible
On the NixOS Discourse instance, Arnout Engelen (raboof) announced that NixOS have created an independent, bit-for-bit identical rebuilding of the nixos-minimal image that is used to install NixOS. In their post, Arnout details what exactly can be reproduced, and even includes some of the history of this endeavour:
You may remember a 2021 announcement that the minimal ISO was 100% reproducible. While back then we successfully tested that all packages that were needed to build the ISO were individually reproducible, actually rebuilding the ISO still introduced differences. This was due to some remaining problems in the hydra cache and the way the ISO was created. By the time we fixed those, regressions had popped up (notably an upstream problem in Python 3.10), and it isn t until this week that we were back to having everything reproducible and being able to validate the complete chain.
New arm64 hardware from Codethink
Long-time sponsor of the project, Codethink, have generously replaced our old Moonshot-Slides , which they have generously hosted since 2016 with new KVM-based arm64 hardware. Holger Levsen integrated these new nodes to the Reproducible Builds continuous integration framework.
Distribution work
distro-info is a Debian-oriented tool that can provide information about Debian (and Ubuntu) distributions such as their codenames (eg. bookworm) and so on. This month, Benjamin Drung uploaded a new version of distro-info that added support for the SOURCE_DATE_EPOCH environment variable in order to close bug #1034422. In addition, 8 reviews of packages were added, 74 were updated and 56 were removed this month, all adding to our knowledge about identified issues.
Bernhard M. Wiedemann published another monthly report about reproducibility within openSUSE.
Software development
The Reproducible Builds project detects, dissects and attempts to fix as many currently-unreproducible packages as possible. We endeavour to send all of our patches upstream where appropriate. This month, we wrote a large number of such patches, including:
In addition, Chris Lamb fixed an issue in diffoscope, where if the equivalent of file -i returns text/plain, fallback to comparing as a text file. This was originally filed as Debian bug #1053668) by Niels Thykier. [] This was then uploaded to Debian (and elsewhere) as version 251.
Reproducibility testing framework
The Reproducible Builds project operates a comprehensive testing framework (available at tests.reproducible-builds.org) in order to check packages and other artifacts for reproducibility. In October, a number of changes were made by Holger Levsen:
Debian-related changes:
Refine the handling of package blacklisting, such as sending blacklisting notifications to the #debian-reproducible-changes IRC channel. [][][]
Install systemd-oomd on all Debian bookworm nodes (re. Debian bug #1052257). []
Detect more cases of failures to delete schroots. []
Document various bugs in bookworm which are (currently) being manually worked around. []
Node-related changes:
Integrate the new arm64 machines from Codethink. [][][][][][]
Complain less visibly about too many installed kernels. []
Misc:
Enhance the firewall handling on Jenkins nodes. [][][][]
Install the fish shell everywhere. []
In addition, Vagrant Cascadian added some packages and configuration for snapshot experiments. []
If you are interested in contributing to the Reproducible Builds project, please visit our Contribute page on our website. However, you can get in touch with us via:
If you want to test upgrades on virtual machines (running on libvit/qemu/kvm)
these are usually the most common steps:
Clone the virtual machine and test the upgrade.
Create a snapshot beforehand, do an in-place upgrade and hope everything
works. If not, revert the snapshot..
Combine both methods
Use LVM or filesystem snapshots (snapper, etc)
As with recent versions, both libvirt and qemu have full support for dirty
bitmaps (so called checkpoints). These checkpoints, once existent, will track
changes to the block level layer and can be exported via NBD protocol.
Usually one can create these checkpoints using virsh checkpoint-create[-as],
with a proper xml description.
Using the pull based model, the following is possible:
Issue an backup-begin statement and freeze the virtual machines file
systems during this process (using qemu-agent) so you get an consistent
system state.
Create an qcow2 image with backing image option that points to the created
(readonly) NBD export via unix socket as overlay.
Use the created overlay image to boot up the instance and test the system
upgrade.
Do so while the virtual machine is operating without any downtime.
The overlay image will only use the disk space for the blocks changed during
upgrade: no need to create a full clone which may waste a lot of disk space.
In order to simplify the first step, its possible to use
virtnbdbackup for creating the
required consistent checkpoint and export its data using a unix domain socket.
Update: As alternative, ive just created a small utility called
vircpt to create and export checkpoints.
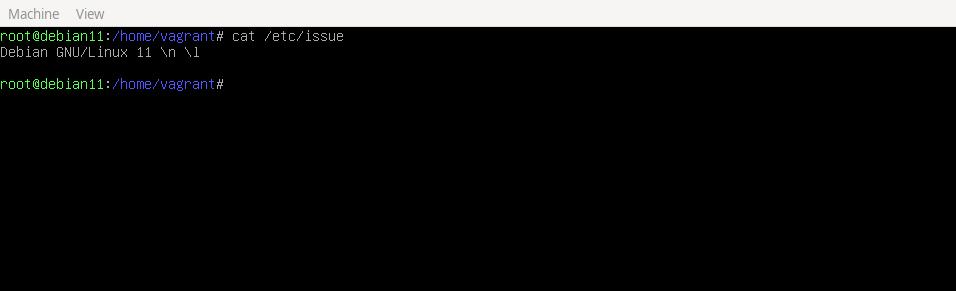
In my example im using a debian11 virtual machine with qemu guest agent
configured:
# virsh list --all
 Id Name State
 ------------------------------------------
 1 debian11_default running
Now let virtnbdbackup create an checkpoint, freeze the filesystems during
creation and tell libvirt to provide us with a usable NBD server listening on
an unix socket:
# virtnbdbackup -d debian11_default -o /tmp/foo -s
INFO lib common - printVersion [MainThread]: Version: 1.9.45 Arguments: ./virtnbdbackup -d debian11_default -o /tmp/foo -s[..]
INFO root virtnbdbackup - main [MainThread]: Local NBD Endpoint socket: [/var/tmp/virtnbdbackup.5727]
INFO root virtnbdbackup - startBackupJob [MainThread]: Starting backup job.
INFO fs fs - freeze [MainThread]: Freezed [2] filesystems.
INFO fs fs - thaw [MainThread]: Thawed [2] filesystems.
INFO root virtnbdbackup - main [MainThread]: Started backup job for debugging, exiting.
We can now use nbdinfo to display some information about the NBD export:
# nbdinfo "nbd+unix:///vda?socket=/var/tmp/virtnbdbackup.5727"
    protocol: newstyle-fixed without TLS, using structured packets
    export="vda":
    export-size: 137438953472 (128G)
    content:
        DOS/MBR boot sector uri: nbd+unix:///vda?socket=/var/tmp/virtnbdbackup.5727
And create a backing image that we can use to test an in-place upgrade:
# qemu-img create -F raw -b nbd+unix:///vda?socket=/var/tmp/virtnbdbackup.5727 -f qcow2 upgrade.qcow2
Now we have various ways for booting the image:
Create another domain config in libvirt which points to this disk image,
boot.
Extract the current qemu command line for the the running domain using
virsh domxml-to-native qemu-argv --domain debian11_default and execute it
manually after adjusting required parameters.
Trust for everything to work out in the simplest way and simply boot up the
image via:
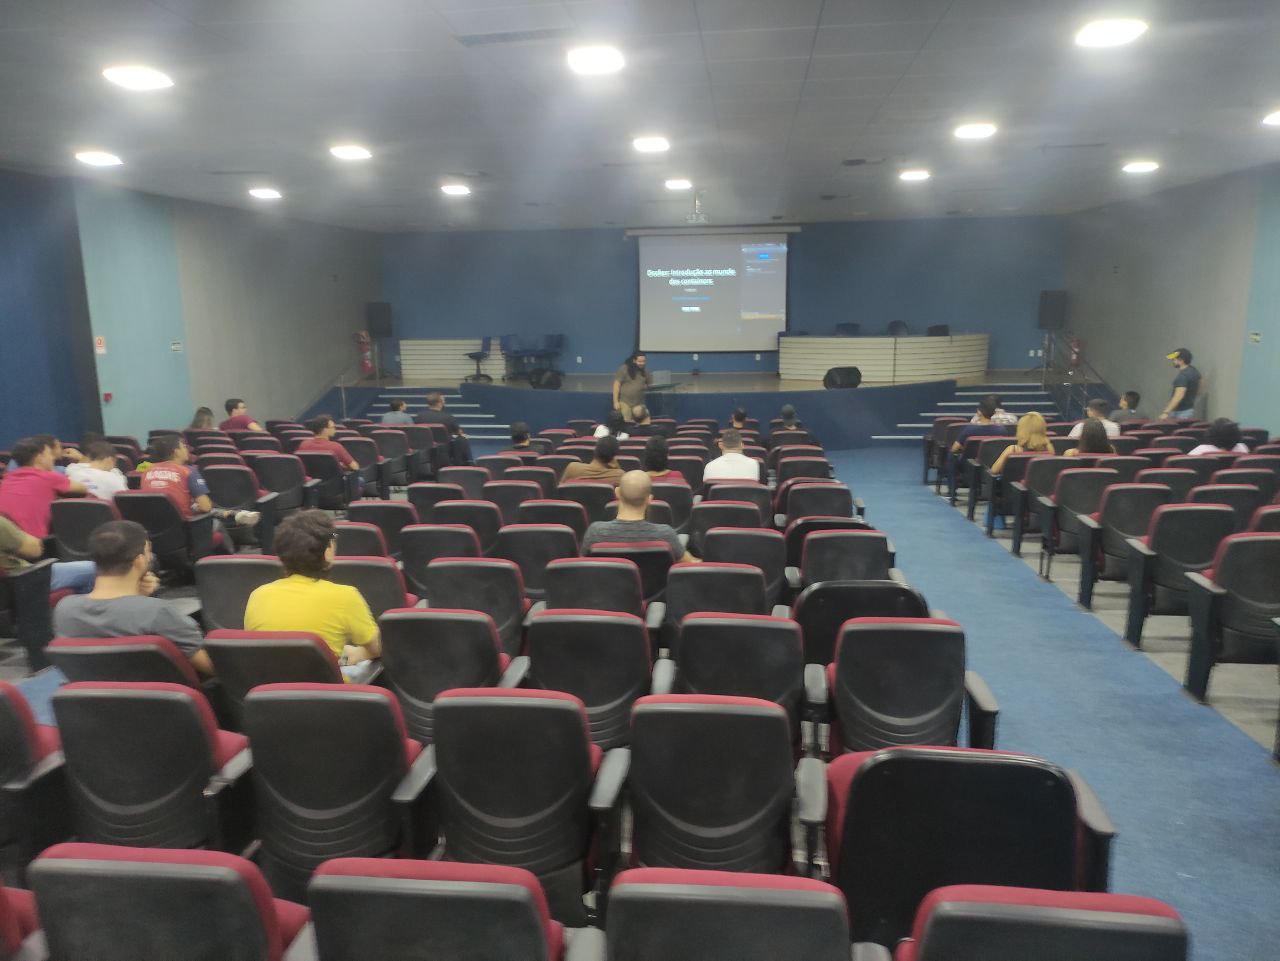
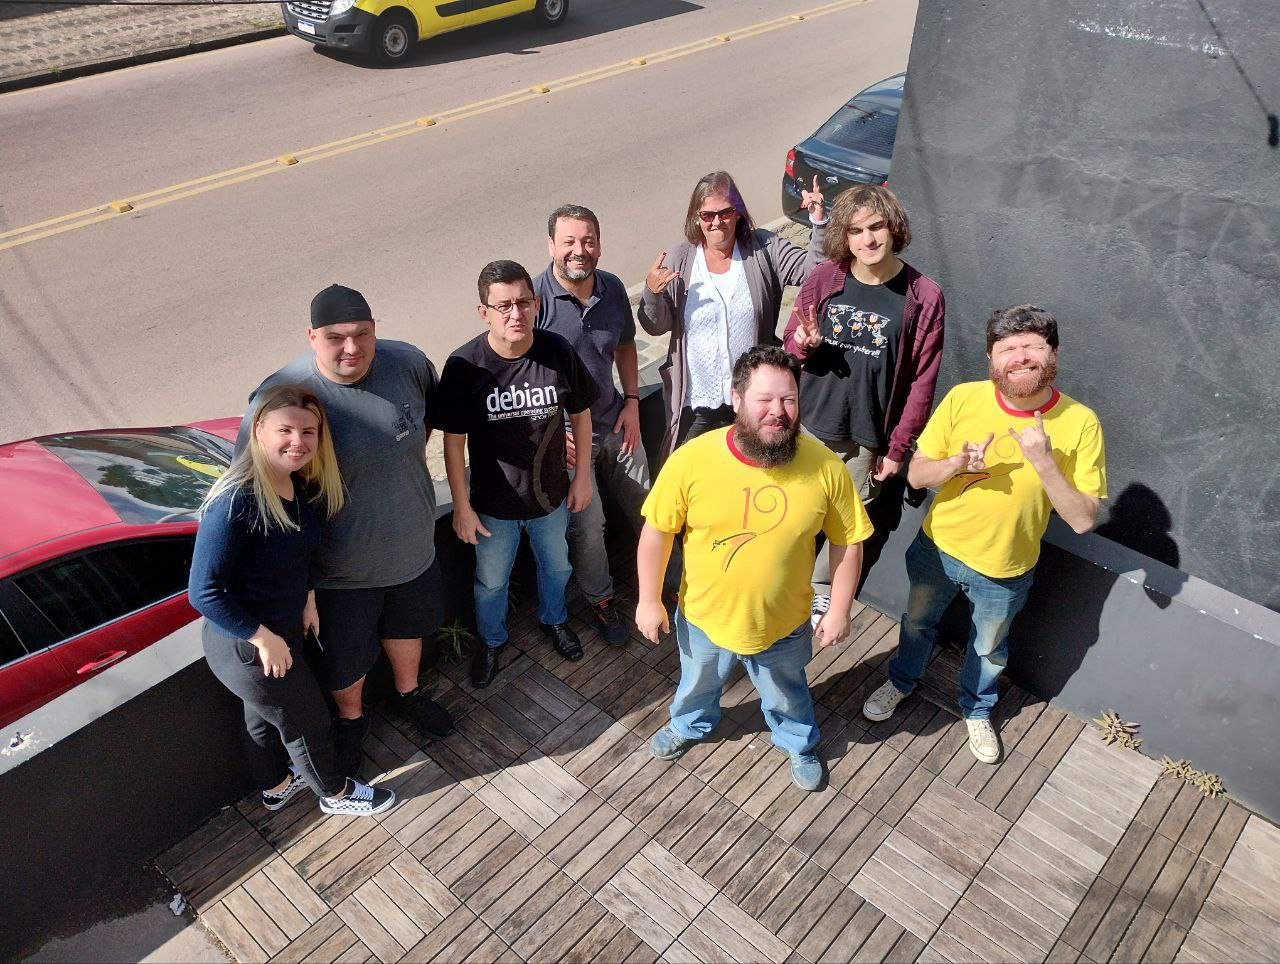
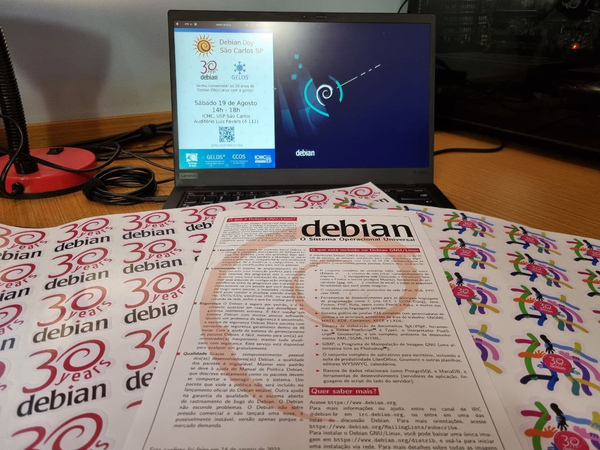
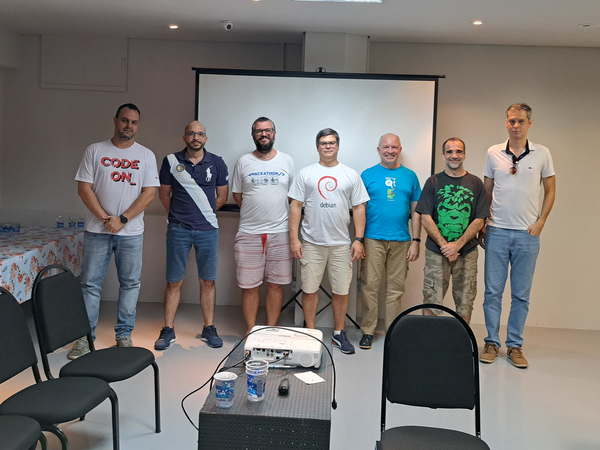
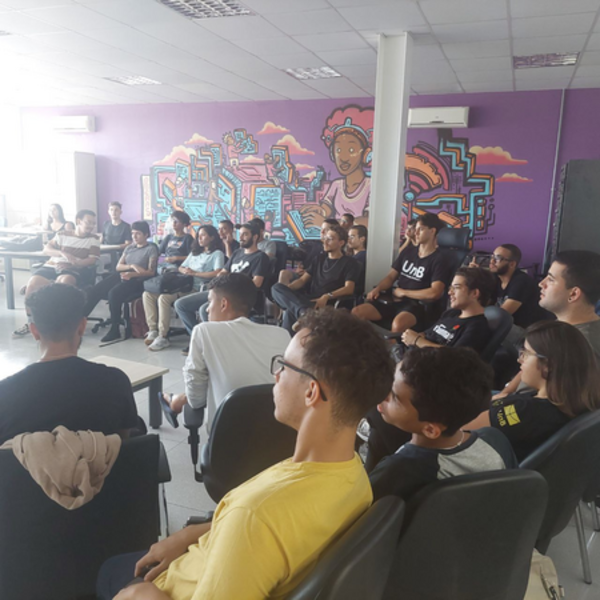
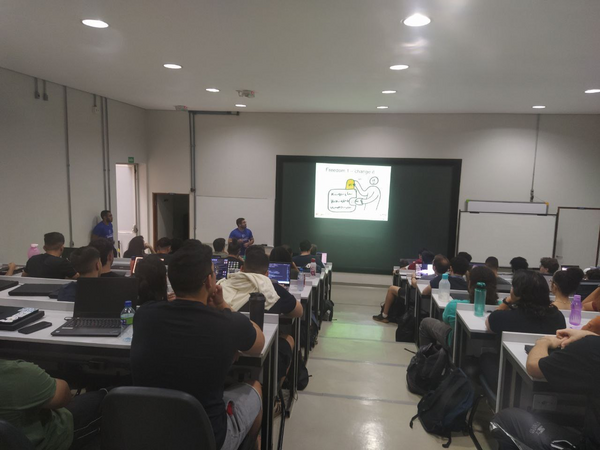
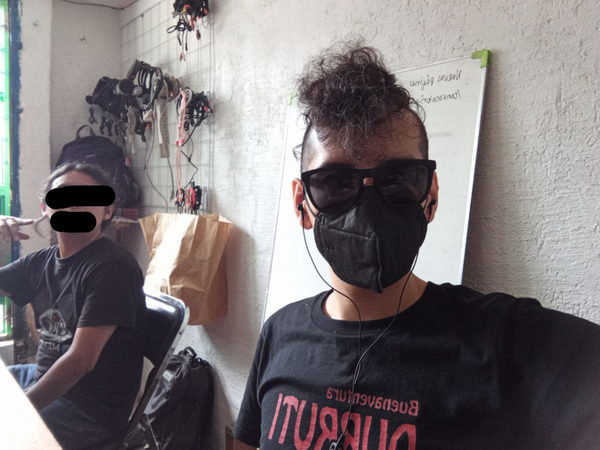
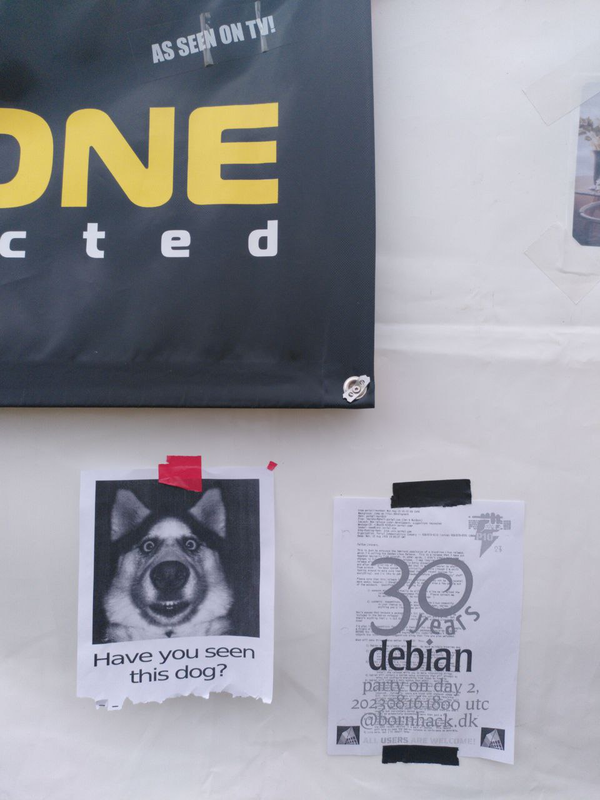
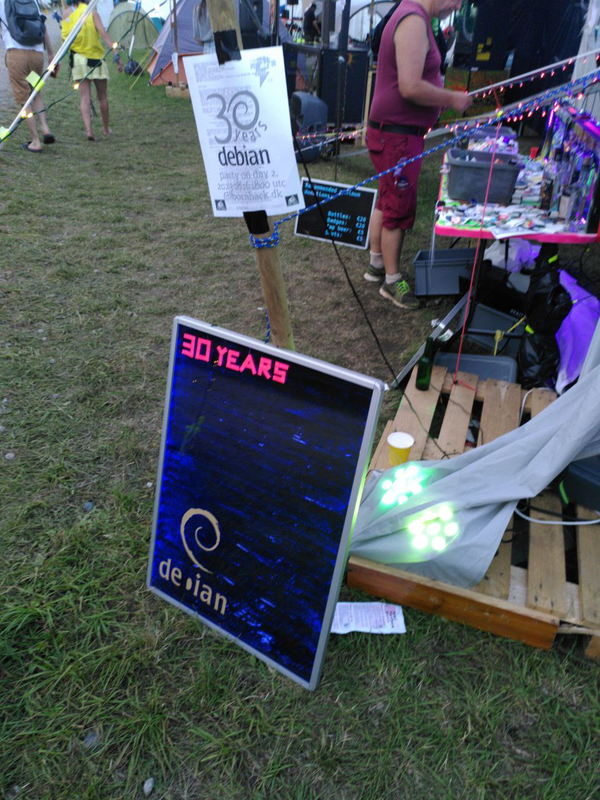
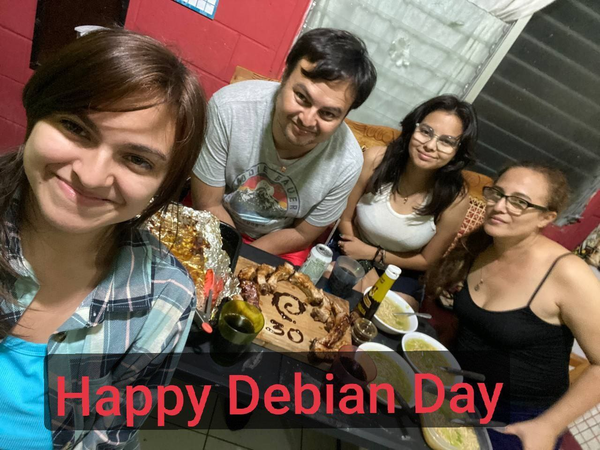
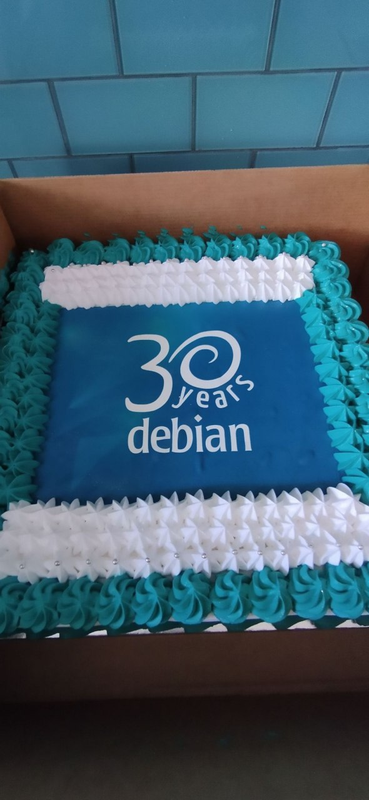
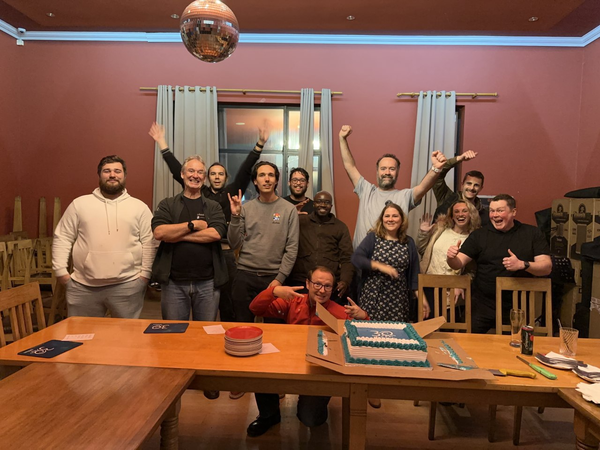
Debian Celebrates 30 years!
We celebrated our birthday this year and
we had a great time with new friends, new members welcomed to the community,
and the world.
We have collected a few comments, videos, and discussions from
around the Internet, and some images from some of the
DebianDay2023 events. We hope that
you enjoyed the day(s) as much as we did!
"Debian 30 years of collective intelligence" -Maqsuel Maqson
Brazil
Pouso Alegre, Brazil
Macei , Brazil
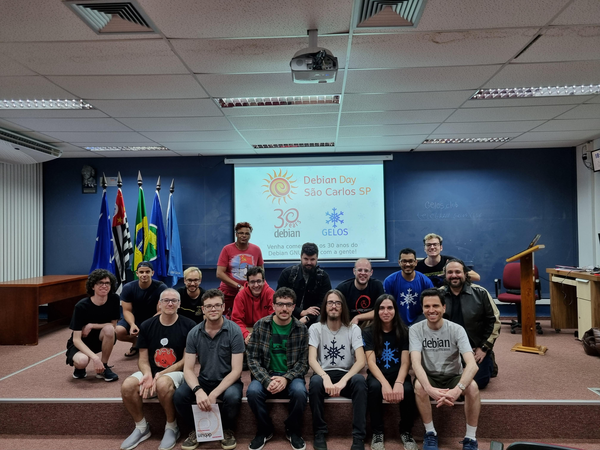
Curitiba, Brazil
The cake is there. :) Honorary Debian Developers: Buzz, Jessie, and Woody welcome guests to this amazing party.Sao Carlos, state of Sao Paulo, BrazilStickers, and Fliers, and Laptops, oh my!Belo Horizonte, BrazilBras lia, BrazilBras lia, Brazil
Mexico
30 a os!A quick SelfieWe do not encourage beverages on computing hardware, but this one is okay by us.
Germany
30 years of love
The German Delegation is also looking for this dog who footed the bill for the party, then left mysteriously.
We took the party outside
We brought the party back inside at CCCamp
Belgium
This is a short announcement to say that I have changed my main
OpenPGP key. A signed statement is available with the
cryptographic details but, in short, the reason is that I stopped
using my old YubiKey NEO that I have worn on my keyring since
2015.
I now have a YubiKey 5 which supports ED25519 which features much
shorter keys and faster decryption. It allowed me to move all my
secret subkeys on the key (including encryption keys) while retaining
reasonable performance.
I have written extensive documentation on how to do that OpenPGP key
rotation and also YubiKey OpenPGP operations.
Warning on storing encryption keys on a YubiKey
People wishing to move their private encryption keys to such a
security token should be very careful as there are special
precautions to take for disaster recovery.
I am toying with the idea of writing an article specifically about
disaster recovery for secrets and backups, dealing specifically with
cases of death or disabilities.
Autocrypt changes
One nice change is the impact on Autocrypt headers, which are
considerably shorter.
Before, the header didn't even fit on a single line in an email, it
overflowed to five lines:
Note that I have implemented my own kind of ridiculous Autocrypt
support for the NotmuchEmacs email client I use, see this
elisp code. To import keys, I pipe the message into this
script which is basically just:
sq autocrypt decode gpg --import
... thanks to Sequoia best-of-class Autocrypt support.
Note on OpenPGP usage
While some have claimed OpenPGP's death, I believe those are
overstated. Maybe it's just me, but I still use OpenPGP for my
password management, to authenticate users and messages, and it's the
interface to my YubiKey for authenticating with SSH servers.
I understand people feel that OpenPGP is possibly insecure,
counter-intuitive and full of problems, but I think most of those
problems should instead be attributed to its current flagship
implementation, GnuPG. I have tried to work with GnuPG for years, and
it keeps surprising me with evilness and oddities.
I have high hopes that the Sequoia project can bring some sanity
into this space, and I also hope that RFC4880bis can eventually
get somewhere so we have a more solid specification with more robust
crypto. It's kind of a shame that this has dragged on for so
long, but Update: there's a separate draft called
openpgp-crypto-refresh that might actually be adopted as the
"OpenPGP RFC" soon! And
it doesn't keep real work from happening in Sequoia and other
implementations. Thunderbird rewrote their OpenPGP implementation with
RNP (which was, granted, a bumpy road because it lost
compatibility with GnuPG) and Sequoia now has a certificate store
with trust management (but still no secret storage), preliminary
OpenPGP card support and even a basic GnuPG compatibility
layer. I'm also curious to try out the OpenPGP CA
capabilities.
So maybe it's just because I'm becoming an old fart that doesn't want
to change tools, but so far I haven't seen a good incentive in
switching away from OpenPGP, and haven't found a good set of tools
that completely replace it. Maybe OpenSSH's keys and CA can eventually
replace it, but I suspect they will end up rebuilding most of OpenPGP
anyway, just more slowly. If they do, let's hope they avoid the
mistakes our community has done in the past at least...
Debian s cloud-images are using systemd-networkd as their default network stack in Bookworm. A slim and feature rich networking daemon that comes included with Systemd itself. Debian s cloud-images are deploying Netplan on top of this as an easy-to-use, declarative control layer.
If you want to experiment with systemd-networkd and Netplan on Debian, this can be done easily in QEMU using the official images. To start, you need to download the relevant .qcow2 Debian cloud-image from: https://cloud.debian.org/images/cloud/bookworm/latest/
Prepare a cloud image
Next, you need to prepare some configuration files for cloud-init and Netplan, to prepare a data-source (seed.img) for your local cloud-image.
Launch the local VM
Now, everything is prepared to launch a QEMU VM with two NICs and do some experimentation! The following command will launch an ephemeral environment for you, keeping the original Debian cloud-image untouched. If you want to preserve any changes on disk, you can remove the trailing -snapshot parameter.
We set up the default debian user account through cloud-init s user-data configuration above, so you can now login to the system, using that user with the (very unsafe!) password test .
Experience Netplan and systemd-networkd
Once logged in successfully, you can execute the netplan status command to check the system s network configuration, as configured through cloud-init s netplan.yaml passthrough. So you ve already used Netplan at this point implicitly and it did all the configuration of systemd-networkd for you in the background!
debian@cloudimg:~$ sudo netplan status -a
     Online state: online
    DNS Addresses: 10.0.2.3 (compat)
       DNS Search: .
   1: lo ethernet UNKNOWN/UP (unmanaged)
      MAC Address: 00:00:00:00:00:00
        Addresses: 127.0.0.1/8
                   ::1/128
           Routes: ::1 metric 256
   2: enp0s2 ethernet DOWN (unmanaged)
      MAC Address: f0:0d:ca:fe:00:bb (Red Hat, Inc.)
   3: lan0 ethernet UP (networkd: id0)
      MAC Address: ca:fe:ca:fe:00:aa (Red Hat, Inc.)
        Addresses: 10.0.2.15/24 (dhcp)
                   fec0::c8fe:caff:fefe:aa/64
                   fe80::c8fe:caff:fefe:aa/64 (link)
    DNS Addresses: 10.0.2.3
           Routes: default via 10.0.2.2 from 10.0.2.15 metric 100 (dhcp)
                   10.0.2.0/24 from 10.0.2.15 metric 100 (link)
                   10.0.2.2 from 10.0.2.15 metric 100 (dhcp, link)
                   10.0.2.3 from 10.0.2.15 metric 100 (dhcp, link)
                   fe80::/64 metric 256
                   fec0::/64 metric 100 (ra)
                   default via fe80::2 metric 100 (ra)
As you can see from this output, the lan0 interface is configured via the id0 Netplan ID to be managed by systemd-networkd. Compare this data to the netplan.yaml file above, the networkctl output, the local Netplan configuration in /etc/netplan/ and the auto-generated systemd-networkd configuration.
Now you can go ahead and try something more advanced, like link aggregation, using the second NIC that you configured for this QEMU VM and explore all the possibilities of Netplan on Debian, by checking the Netplan YAML documentation.
Reduce the size of your c: partition to the smallest it can be and then turn off windows with the understanding that you will never boot this system on the iron ever again.
Boot into a netinst installer image (no GUI). hold alt and press left arrow a few times until you get to a prompt to press enter. Press enter.
In this example /dev/sda is your windows disk which contains the c: partition
and /dev/disk/by-id/usb0 is the USB-3 attached SATA controller that you have your SSD attached to (please find an example attached). This SSD should be equal to or larger than the windows disk for best compatability.
To find the literal path names of your detected drives you can run fdisk -l. Pay attention to the names of the partitions and the sizes of the drives to help determine which is which.
Once you have a shell in the netinst installer, you should maybe be able to run a command like the following. This will duplicate the disk located at if (in file) to the disk located at of (out file) while showing progress as the status.
If you confirm that dd is available on the netinst image and the previous command runs successfully, test that your windows partition is visible in the new disk s partition table. The start block of the windows partition on each should match, as should the partition size.
fdisk -l /dev/disk/by-id/usb0
fdisk -l /dev/sda
If the output from the first is the same as the output from the second, then you are probably safe to proceed.
Once you confirm that you have made and tested a full copy of the blocks from your windows drive saved on your usb disk, nuke your windows partition table from orbit.
dd if=/dev/zero of=/dev/sda bs=1M count=42
You can press alt-f1 to return to the Debian installer now. Follow the instructions to install Debian. Don t forget to remove all attached USB drives.
Once you install Debian, press ctrl-alt-f3 to get a root shell.
Add your user to the sudoers group:
# adduser cjac sudoers
log out
# exit
log in as your user and confirm that you have sudo
$ sudo ls
Don t forget to read the spider man advice
enter your password
you ll need to install virt-manager. I think this should help:
I personally create a volume group called /dev/vg00 for the stuff I want to run raw and instead of converting to qcow2 like all of the other users do, I instead write it to a new logical volume.
sudo lvcreate /dev/vg00 -n windows -L 42G # or however large your drive was
sudo dd if=/dev/disk/by-id/usb0 of=/dev/vg00/windows status=progress
Now that you ve got the qcow2 file created, press alt-left until you return to your GDM session.
The apt-get install command above installed virt-manager, so log in to your system if you haven t already and open up gnome-terminal by pressing the windows key or moving your mouse/gesture to the top left of your screen. Type in gnome-terminal and either press enter or click/tap on the icon.
I like to run this full screen so that I feel like I m in a space ship. If you like to feel like you re in a spaceship, too, press F11.
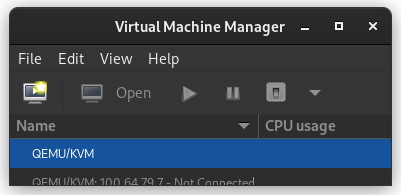
You can start virt-manager from this shell or you can press the windows key and type in virt-manager and press enter. You ll want the shell to run commands such as virsh console windows or virsh list
When virt-manager starts, right click on QEMU/KVM and select New.
In the New VM window, select Import existing disk image
When prompted for the path to the image, use the one we created with sudo qemu-img convert above.
Select the version of Windows you want.
Select memory and CPUs to allocate to the VM.
Tick the Customize configuration before install box
If you re prompted to enable the default network, do so now.
The default hardware layout should probably suffice. Get it as close to the underlying hardware as it is convenient to do. But Windows is pretty lenient these days about virtualizing licensed windows instances so long as they re not running in more than one place at a time.
Good luck! Leave comments if you have questions.
We are happy to share that the RcppSimdJson
package has been updated to release 0.1.10.
RcppSimdJson
wraps the fantastic and genuinely impressive simdjson library by Daniel Lemire and collaborators. Via
very clever algorithmic engineering to obtain largely branch-free code,
coupled with modern C++ and newer compiler instructions, it results in
parsing gigabytes of JSON parsed per second which is quite
mindboggling. The best-case performance is faster than CPU speed as
use of parallel SIMD instructions and careful branch avoidance can lead
to less than one cpu cycle per byte parsed; see the video of the talk by Daniel Lemire
at QCon.
This release updates the underlying simdjson library to
version 3.1.8 (also made today). Otherwise we only made a minor edit to
the README and adjusted one tweek for code coverage.
The (very short) NEWS entry for this release follows.
Changes in version 0.1.10
(2023-05-14)
simdjson was upgraded to version 3.1.8
(Dirk in #85).
These instructions are for qotom devices Q515P and Q1075GE. You can order one from Amazon or directly from Cherry Ni <export03@qotom.com>. Instructions are for those coming from Windows.
Prerequisites:
The details of your wireless network including wireless network ID (SSID), WPA password, gateway address and network prefix length
To find your windows network details, run the following command at the command prompt:
netsh interface ip show addresses
Here s my output:
PS C:\Users\cjcol> netsh interface ip show addresses "Wi-Fi"
Configuration for interface "Wi-Fi"
    DHCP enabled:                         Yes
    IP Address:                           172.16.79.53
    Subnet Prefix:                        172.16.79.0/24 (mask 255.255.255.0)
    Default Gateway:                      172.16.79.1
    Gateway Metric:                       0
    InterfaceMetric:                      50
Did you follow the instructions linked above in the prerequisites section? If not, take a moment to do so now.
Open Rufus and select the proxmox iso which you downloaded.
You may be warned that Rufus will be acting as dd.
Don t forget to select the USB drive that you want to write the image to. In my example, the device is creatively called NO_LABEL .
You may be warned that re-imaging the USB disk will result in the previous data on the USB disk being lost.
Once the process is complete, the application will indicate that it is complete.
You should now have a USB disk with the Proxmox installer image on it. Place the USB disk into one of the blue, USB-3.0, USB-A slots on the Qotom device so that the system can read the installer image from it at full speed. The Proxmox installer requires a keyboard, video and mouse. Please attach these to the device along with inserting the USB disk you just created.
Press the power button on the Qotom device. Press the F11 key repeatedly until you see the AMI BIOS menu. Press F11 a couple more times. You ll be presented with a boot menu. One of the options will launch the Proxmox installer. By trial and error, I found that the correct boot menu option was UEFI OS
Once you select the correct option, you will be presented with a menu that looks like this. Select the default option and install.
During the install, you will be presented with an option of the block device to install to. I think there s only a single block device in this celeron, but if there are more than one, I prefer the smaller one for the ProxMox OS. I also make a point to limit the size of the root filesystem to 16G. I think it will take up the entire volume group if you don t set a limit.
Okay, I ll do another install and select the correct filesystem.
If you read this far and want me to add some more screenshots and better instructions, leave a comment.
Way back at DebConf16Gunnar managed to arrange for a number of Next Thing Co. C.H.I.P. boards to be distributed to those who were interested. I was lucky enough to be amongst those who received one, but I have to confess after some initial experimentation it ended up sitting in its box unused.
The reasons for that were varied; partly about not being quite sure what best to do with it, partly due to a number of limitations it had, partly because NTC sadly went insolvent and there was less momentum around the hardware. I ve always meant to go back to it, poking it every now and then but never completing a project. I m finally almost there, and I figure I should write some of it up.
TL;DR: My C.H.I.P. is currently running a mainline Linux 6.3 kernel with only a few DTS patches, an upstream u-boot v2022.1 with a couple of minor patches and an unmodified Debian bullseye armhf userspace.
Storage
The main issue with the C.H.I.P. is that it uses MLC NAND, in particular mine has an 8MB H27QCG8T2E5R. That ended up unsupported in Linux, with the UBIFS folk disallowing operation on MLC devices. There s been subsequent work to enable an SLC emulation mode which makes the device more reliable at the cost of losing capacity by pairing up writes/reads in cells (AFAICT). Some of this hit for the H27UCG8T2ETR in 5.16 kernels, but I definitely did some experimentation with 5.17 without having much success. I should maybe go back and try again, but I ended up going a different route.
It turned out that BytePorter had documented how to add a microSD slot to the NTC C.H.I.P., using just a microSD to full SD card adapter. Every microSD card I buy seems to come with one of these, so I had plenty lying around to test with. I started with ensuring the kernel could see it ok (by modifying the device tree), but once that was all confirmed I went further and built a more modern u-boot that talked to the SD card, and defaulted to booting off it. That meant no more relying on the internal NAND at all!
I do see some flakiness with the SD card, which is possibly down to the dodgy way it s hooked up (I should probably do a basic PCB layout with JLCPCB instead). That s mostly been mitigated by forcing it into 1-bit mode instead of 4-bit mode (I tried lowering the frequency too, but that didn t make a difference).
The problem manifests as:
sunxi-mmc 1c11000.mmc: data error, sending stop command
and then all storage access freezing (existing logins still work, if the program you re trying to run is in cache). I can t find a conclusive software solution to this; I m pretty sure it s the hardware, but I don t understand why the recovery doesn t generally work.
Random power offs
After I had storage working I d see random hangs or power offs. It wasn t quite clear what was going on. So I started trying to work out how to find out the CPU temperature, in case it was overheating. It turns out the temperature sensor on the R8 is part of the touchscreen driver, and I d taken my usual approach of turning off all the drivers I didn t think I d need. Enabling it (CONFIG_TOUCHSCREEN_SUN4I) gave temperature readings and seemed to help somewhat with stability, though not completely.
Next I ended up looking at the AXP209 PMIC. There were various scripts still installed (I d started out with the NTC Debian install and slowly upgraded it to bullseye while stripping away the obvious pieces I didn t need) and a start-up script called enable-no-limit. This turned out to not be running (some sort of expectation of i2c-dev being loaded and another failing check), but looking at the script and the data sheet revealed the issue.
The AXP209 can cope with 3 power sources; an external DC source, a Li-battery, and finally a USB port. I was powering my board via the USB port, using a charger rated for 2A. It turns out that the AXP209 defaults to limiting USB current to 900mA, and that with wifi active and the CPU busy the C.H.I.P. can rise above that. At which point the AXP shuts everything down. Armed with that info I was able to understand what the power scripts were doing and which bit I needed - i2cset -f -y 0 0x34 0x30 0x03 to set no limit and disable the auto-power off. Additionally I also discovered that the AXP209 had a built in temperature sensor as well, so I added support for that via iio-hwmon.
WiFi
WiFi on the C.H.I.P. is provided by an RTL8723BS SDIO attached device. It s terrible (and not just here, I had an x86 based device with one where it also sucked). Thankfully there s a driver in staging in the kernel these days, but I ve still found it can fall out with my house setup, end up connecting to a further away AP which then results in lots of retries, dropped frames and CPU consumption. Nailing it to the AP on the other side of the wall from where it is helps. I haven t done any serious testing with the Bluetooth other than checking it s detected and can scan ok.
Patches
I patched u-boot v2022.01 (which shows you how long ago I was trying this out) with the following to enable boot from external SD:
u-boot C.H.I.P. external SD patch
I ve sent some patches for the kernel device tree upstream - there s an outstanding issue with the Bluetooth wake GPIO causing the serial port not to probe(!) that I need to resolve before sending a v2, but what s there works for me.
The only remaining piece is patch to enable the external SD for Linux; I don t think it s appropriate to send upstream but it s fairly basic. This limits the bus to 1 bit rather than the 4 bits it s capable of, as mentioned above.
Linux C.H.I.P. external SD DTS patch
diff
diff --git a/arch/arm/boot/dts/sun5i-r8-chip.dts b/arch/arm/boot/dts/sun5i-r8-chip.dts
index fd37bd1f3920..2b5aa4952620 100644
--- a/arch/arm/boot/dts/sun5i-r8-chip.dts
+++ b/arch/arm/boot/dts/sun5i-r8-chip.dts
@@ -163,6 +163,17 @@ &mmc0
status = "okay";
;
+&mmc2
+ pinctrl-names = "default";
+ pinctrl-0 = <&mmc2_4bit_pe_pins>;
+ vmmc-supply = <®_vcc3v3>;
+ vqmmc-supply = <®_vcc3v3>;
+ bus-width = <1>;
+ non-removable;
+ disable-wp;
+ status = "okay";
+ ;
+
&ohci0
status = "okay";
;
As for what I m doing with it, I think that ll have to be a separate post.


 Mee Goreng, a dish made of noodles in Malaysia.
 Me at Petronas Towers.
 Photo with Malaysians.

 After more than one a year, a new minor FAI version is available, but
it includes some interesting new features.
Here a the items from the NEWS file:
fai (6.2) unstable; urgency=low
After more than one a year, a new minor FAI version is available, but
it includes some interesting new features.
Here a the items from the NEWS file:
fai (6.2) unstable; urgency=low


 A new maintenance release 0.1.11 of the


 After performing the required tests within the virtual machine we can simply
kill the active NBD backup job :
After performing the required tests within the virtual machine we can simply
kill the active NBD backup job :
 Debian Celebrates 30 years!
We celebrated our
Debian Celebrates 30 years!
We celebrated our 


 Reduce the size of your c: partition to the smallest it can be and then turn off windows with the understanding that you will never boot this system on the iron ever again.
 To find the literal path names of your detected drives you can run fdisk -l. Pay attention to the names of the partitions and the sizes of the drives to help determine which is which.
Once you have a shell in the netinst installer, you should maybe be able to run a command like the following. This will duplicate the disk located at if (in file) to the disk located at of (out file) while showing progress as the status.
To find the literal path names of your detected drives you can run fdisk -l. Pay attention to the names of the partitions and the sizes of the drives to help determine which is which.
Once you have a shell in the netinst installer, you should maybe be able to run a command like the following. This will duplicate the disk located at if (in file) to the disk located at of (out file) while showing progress as the status.
 In the New VM window, select Import existing disk image
  When prompted for the path to the image, use the one we created with sudo qemu-img convert above.
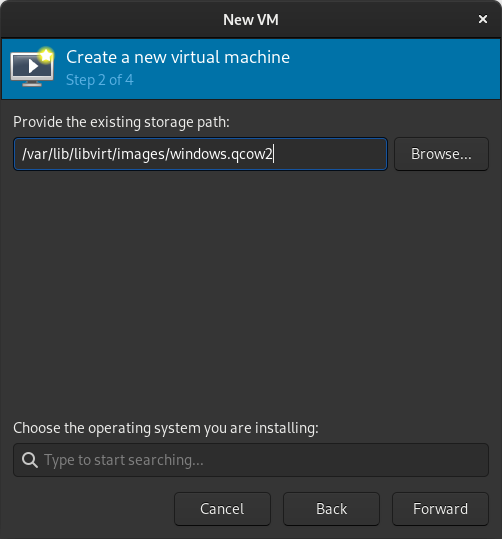 Select the version of Windows you want.
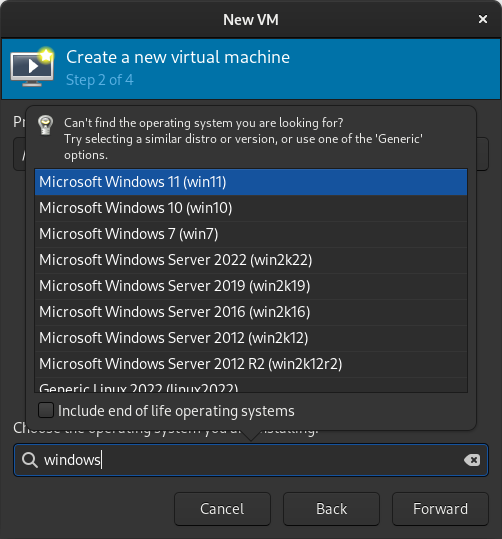 Select memory and CPUs to allocate to the VM.
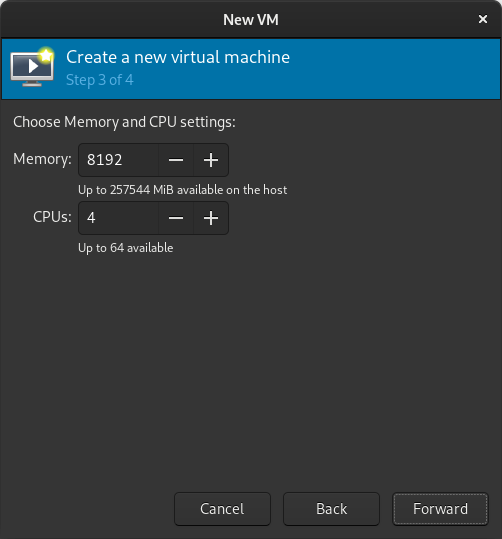 Tick the Customize configuration before install box
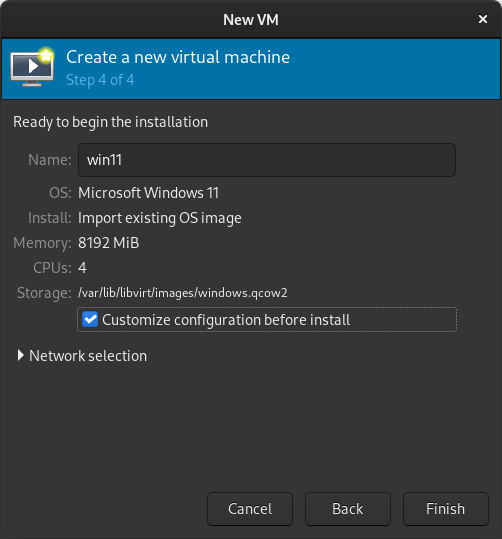 If you re prompted to enable the default network, do so now.
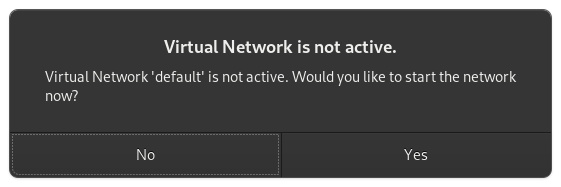 The default hardware layout should probably suffice. Get it as close to the underlying hardware as it is convenient to do. But Windows is pretty lenient these days about virtualizing licensed windows instances so long as they re not running in more than one place at a time.
 Good luck! Leave comments if you have questions.
 Did you follow the instructions linked above in the prerequisites section? If not, take a moment to do so now.
 You may be warned that Rufus will be acting as dd.
 Don t forget to select the USB drive that you want to write the image to. In my example, the device is creatively called NO_LABEL .
 You may be warned that re-imaging the USB disk will result in the previous data on the USB disk being lost.
 Once the process is complete, the application will indicate that it is complete.
 You should now have a USB disk with the Proxmox installer image on it. Place the USB disk into one of the blue, USB-3.0, USB-A slots on the Qotom device so that the system can read the installer image from it at full speed. The Proxmox installer requires a keyboard, video and mouse. Please attach these to the device along with inserting the USB disk you just created.
 Press the power button on the Qotom device. Press the F11 key repeatedly until you see the AMI BIOS menu. Press F11 a couple more times. You ll be presented with a boot menu. One of the options will launch the Proxmox installer. By trial and error, I found that the correct boot menu option was UEFI OS
 Once you select the correct option, you will be presented with a menu that looks like this. Select the default option and install.
 During the install, you will be presented with an option of the block device to install to. I think there s only a single block device in this celeron, but if there are more than one, I prefer the smaller one for the ProxMox OS. I also make a point to limit the size of the root filesystem to 16G. I think it will take up the entire volume group if you don t set a limit.
Okay, I ll do another install and select the correct filesystem.
During the install, you will be presented with an option of the block device to install to. I think there s only a single block device in this celeron, but if there are more than one, I prefer the smaller one for the ProxMox OS. I also make a point to limit the size of the root filesystem to 16G. I think it will take up the entire volume group if you don t set a limit.
Okay, I ll do another install and select the correct filesystem.
 If you read this far and want me to add some more screenshots and better instructions, leave a comment.
 Way back at
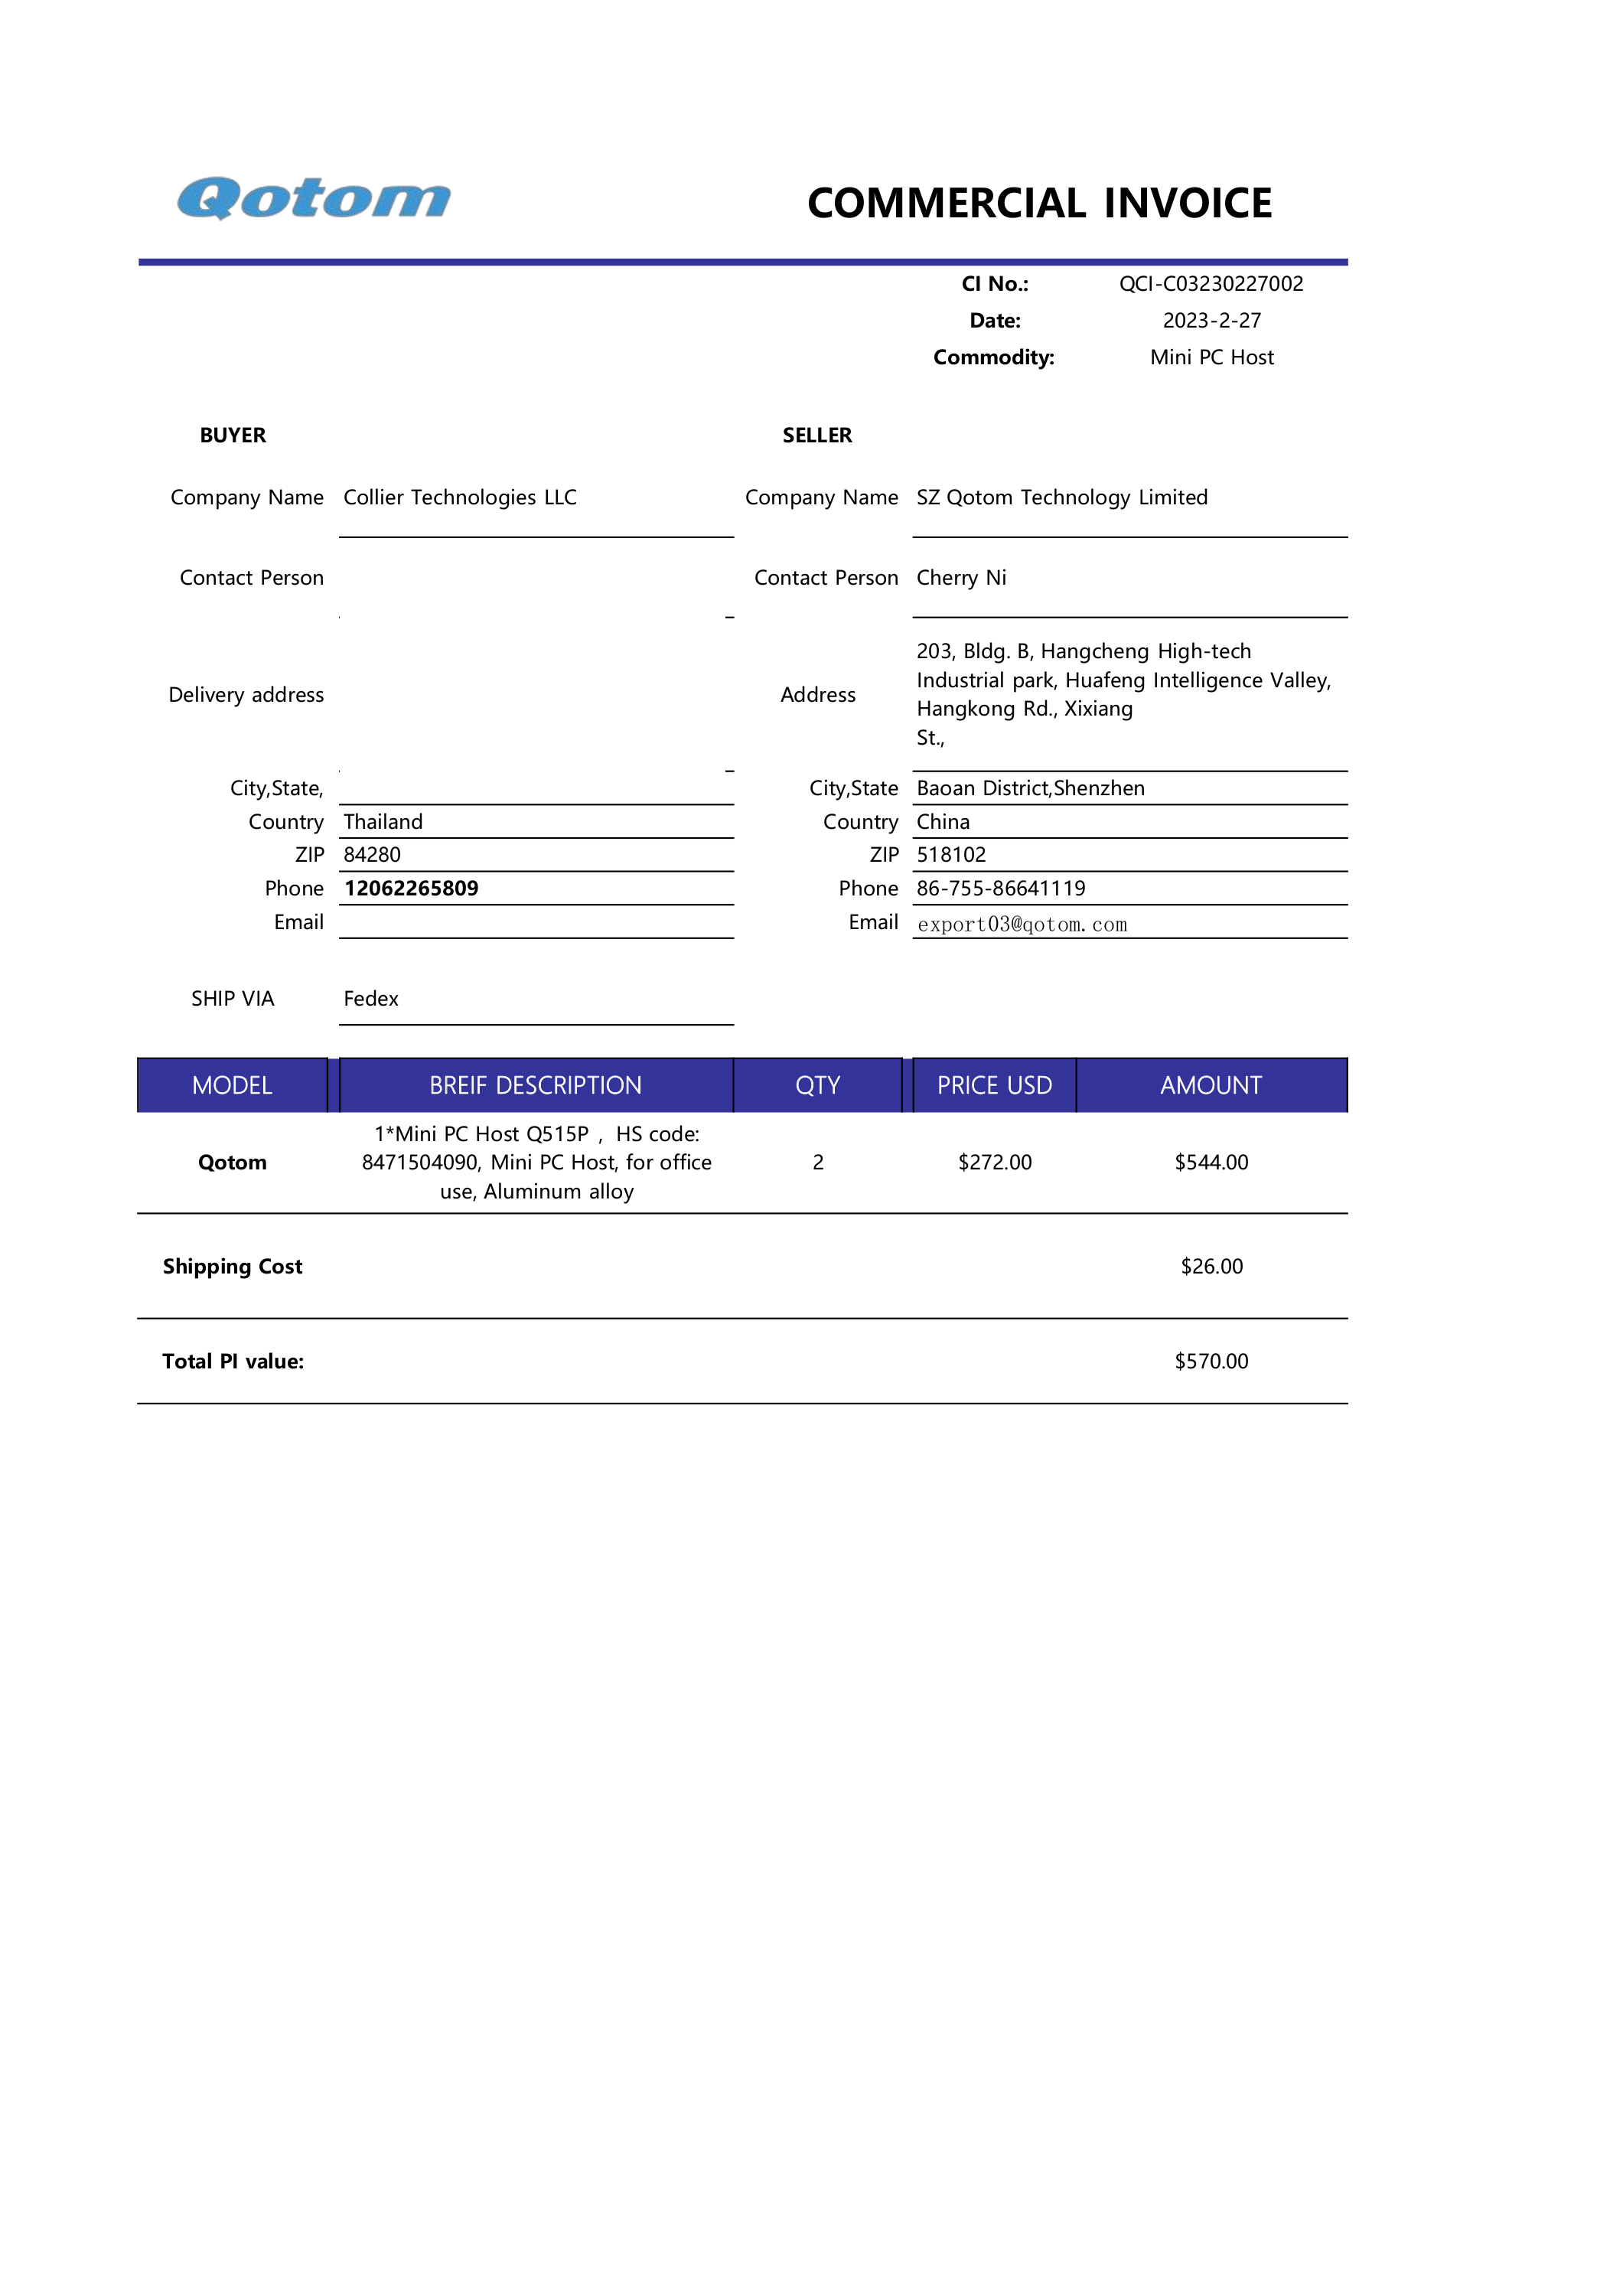
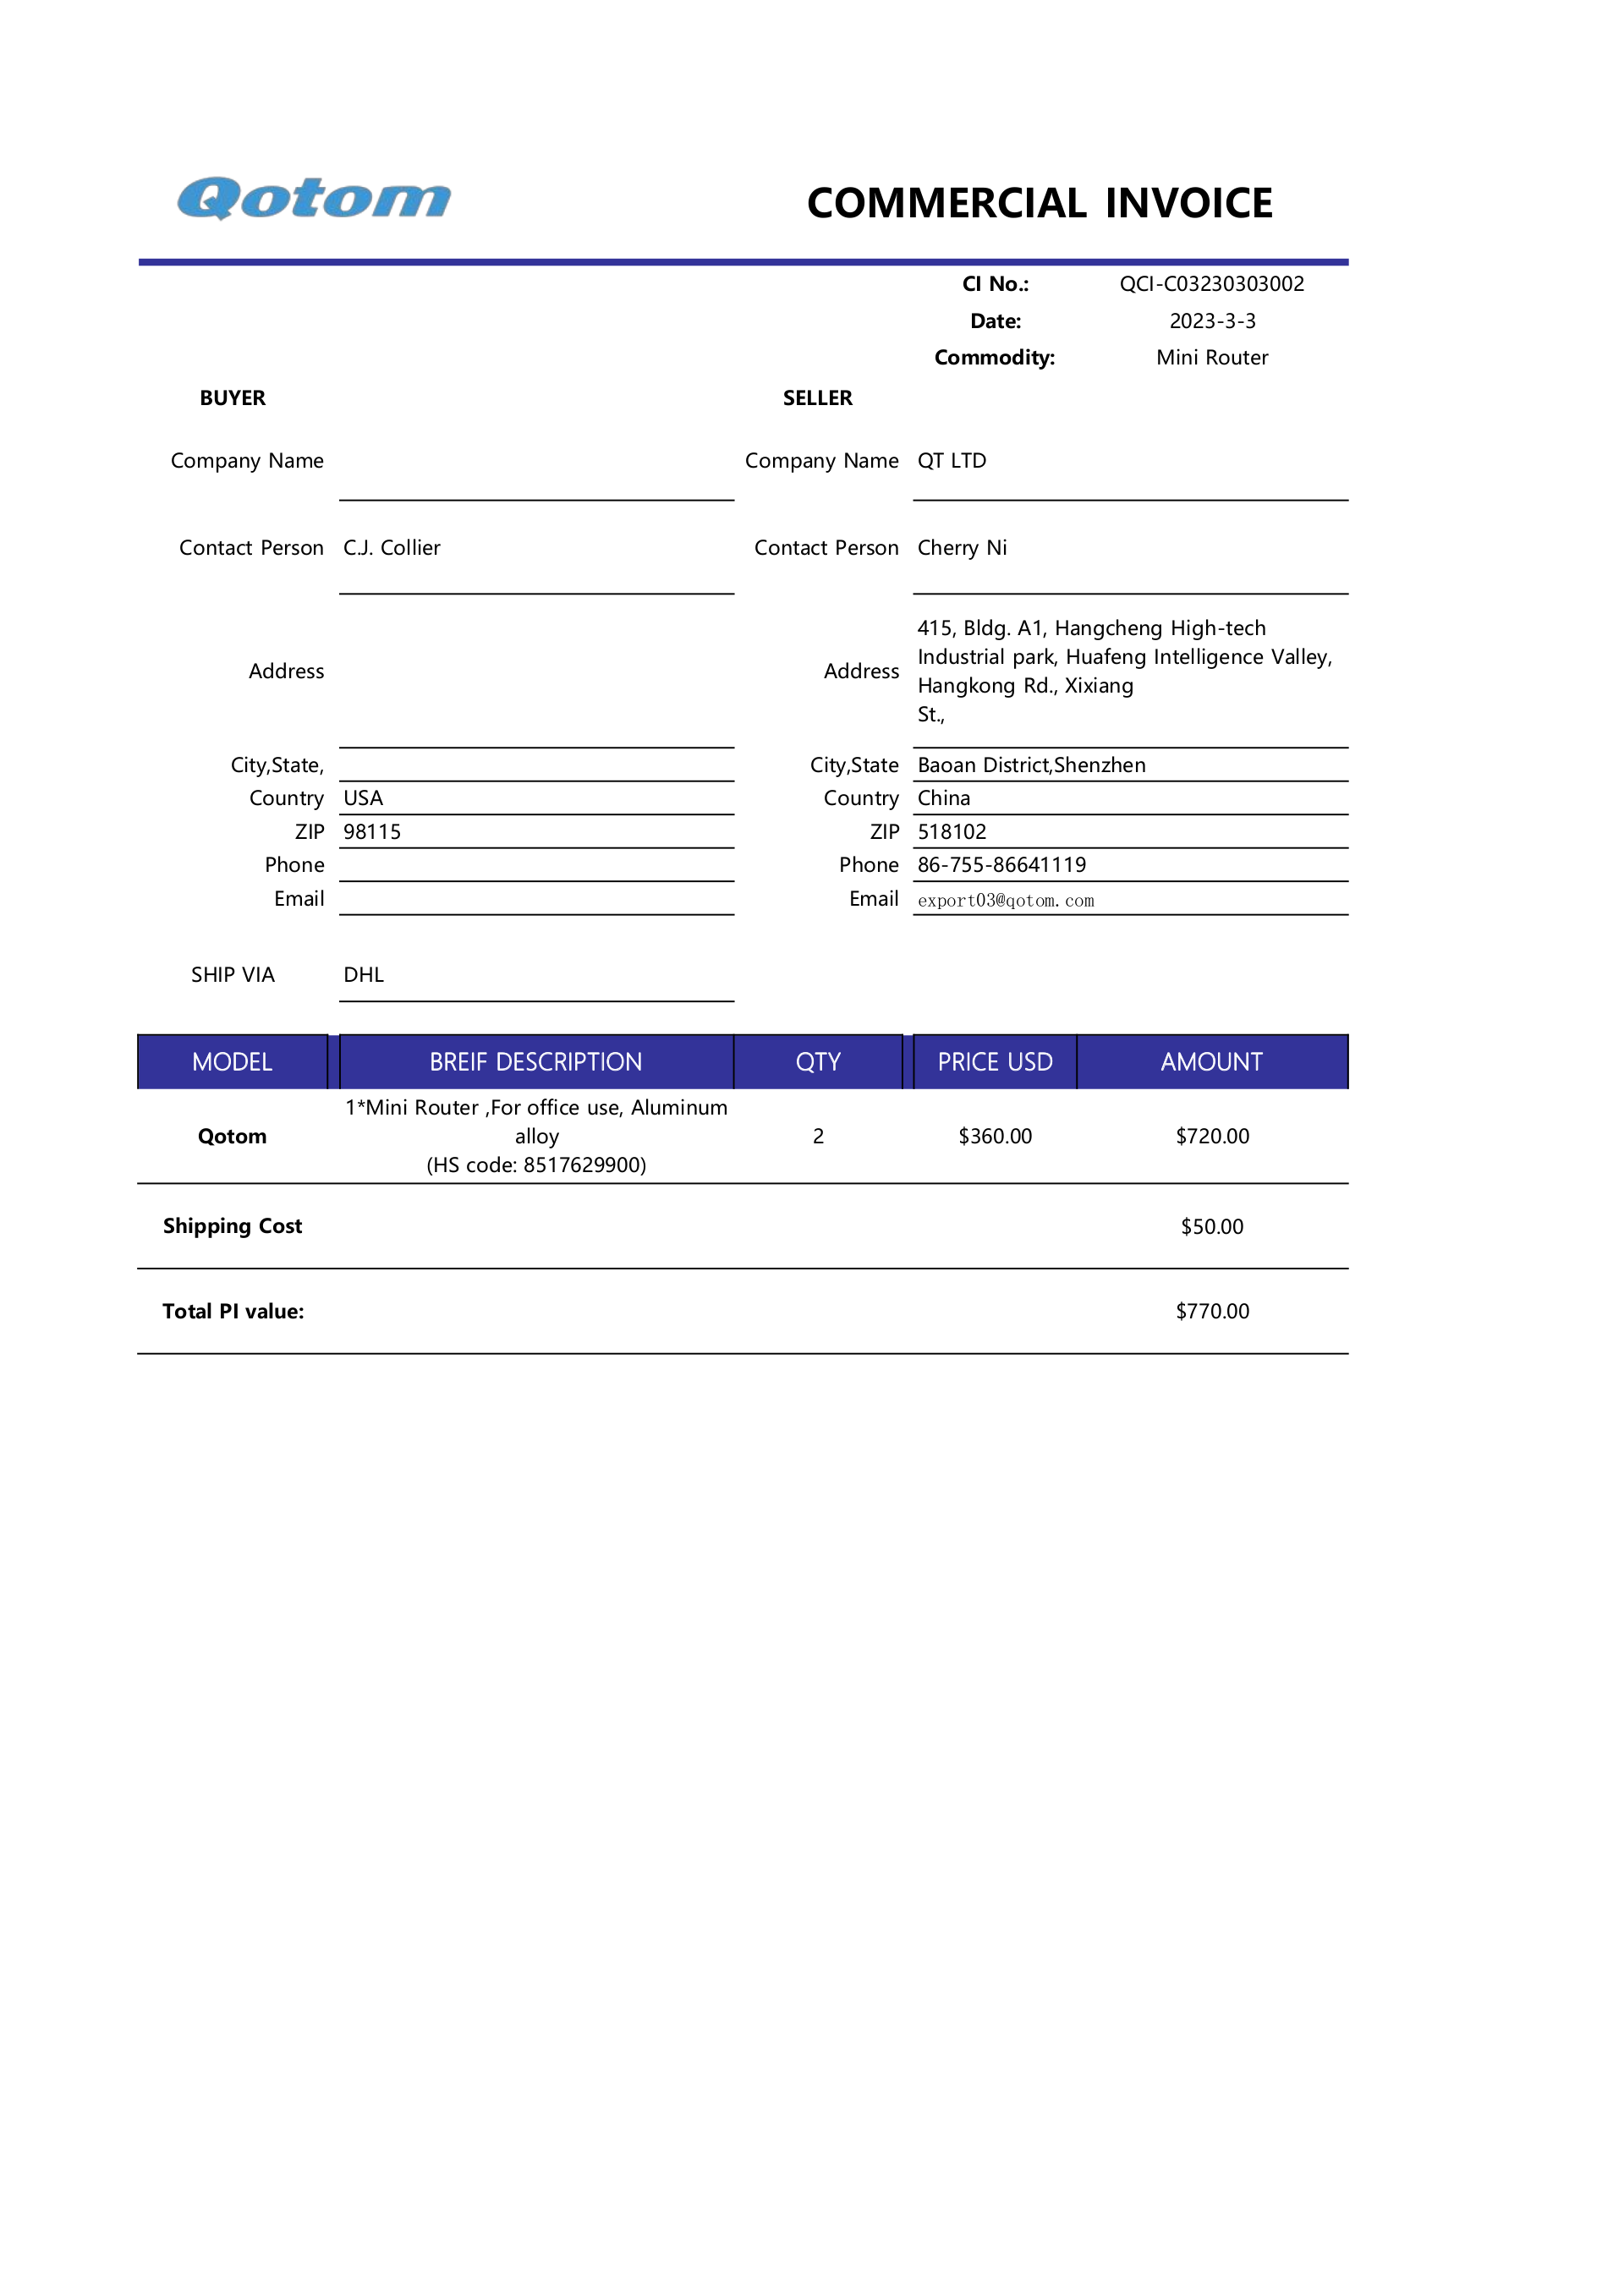