
Debian Project Bits
Volume 1, Issue 1
August 05, 2023
Welcome to the inaugural issue of Debian Project Bits!
Those remembering the Debian Weekly News (DwN) will recognize some of the sections here which served as our inspiration.
Debian Project Bits posts will allow for a faster turnaround of some project
news on a monthly basis. The
Debian Micronews
service will continue to share shorter news items, the
Debian Project News
remains as our official newsletter which may move to a biannual archive format.
News
Debian Day
The Debian Project was
officially
founded by Ian Murdock on August 16,
1993. Since then we have celebrated our Anniversary of that date each year with
events around the world. We would love it if you could join our revels
this very special year as we have the honor of turning
30!
Attend or organize a local
Debian Day
celebration. You're invited to plan your own event: from Bug Squashing parties
to Key Signing parties, Meet-Ups, or any type of social event whether large or
small. And be sure to check our
Debian reimbursement How
To if you need such
resources.
You can share your days, events, thoughts, or notes with us and the
rest of the community with the #debianday tag that will be used across most
social media platforms. See you then!
Events: Upcoming and Reports
Upcoming
Debian 30 anos
The
Debian Brasil Community is organizing the
event
Debian 30 anos to
celebrate the 30th anniversary of the Debian Project.
From August 14 to 18, between 7pm and 22pm (UTC-3) contributors will talk
online in Portuguese and we will live stream on
Debian Brasil YouTube channel.
DebConf23: Debian Developers Camp and Conference
The 2023 Debian Developers Camp (DebCamp) and Conference
(
DebConf23) will be hosted this year in
Infopark,
Kochi, India.
DebCamp is slated to run from September 3 through 9, immediately followed by
the larger DebConf, September 10 through 17.
If you are planning on attending the conference this year, now is the time to
ensure your travel documentation,
visa
information,
bursary submissions, papers and relevant equipment are prepared. For more
information contact:
debconf@debconf.
MiniDebConf Cambridge 2023
There will be a
MiniDebConf
held in Cambridge, UK, hosted by ARM for 4 days in November: 2 days for a
mini-DebCamp (Thu 23 - Fri 24), with space for dedicated development / sprint /
team meetings, then two days for a more regular MiniDebConf (Sat 25 - Sun 26)
with space for more general talks, up to 80 people.
Reports
During the last months, the Debian Community has organized some
Bug Squashing Parties:
Tilburg, Netherlands. October 2022.
St-Cergue, Switzerland. January 2023
Montreal, Canada. February 2023
In January, Debian India hosted the MiniDebConf Tamil Nadu in Viluppuram, Tamil Nadu, India (Sat 28 - Sun 26).
The following month, the MiniDebConf Portugal 2023 was held in Lisbon (12 - 16 February 2023).
These events, seen as a stunning success by some of their attendees, demonstrate the vitality of
our community.
Debian Brasil Community at Campus Party Brazil 2023
Another edition of
Campus Party Brazil
took place in the city of S o Paulo between July 25th and 30th. And one more
time the Debian Brazil Community was present. During the days in the available
space, we carry out some activities such as:
- Gifts for attendees (stickers, cups, lanyards);
- Workshop on how to contribute to the translation team;
- Workshop on packaging;
- Key signing party;
- Information about the project;
For more info and a few photos, check out the
organizers'
report.
MiniDebConf Bras lia 2023
From May 25 to 27, Bras lia hosted the
MiniDebConf Bras lia
2023. This gathering was composed of
various activities such as talks, workshops, sprints, BSPs (Bug Squashing
Party), key signings, social events, and hacking, aimed to bring the community
together and celebrate the world's largest Free Software project: Debian.
For more information please see the
full report
written by the organizers.
Debian Reunion Hamburg 2023
This year the annual
Debian Reunion Hamburg
was held from Tuesday 23 to 30 May starting with four days of
hacking followed by two days of talks, and then two more days of hacking. As
usual, people - more than forty-five attendees from Germany, Czechia, France,
Slovakia, and Switzerland - were happy to meet in person, to hack and chat
together, and much more. If you missed the live streams, the
video recordings
are available.
Translation workshops from the pt_BR team
The Brazilian translation team, debian-l10n-portuguese, had their first workshop
of 2023 in February with great results. The workshop was aimed at beginners,
working in
DDTP/DDTSS.
For more information please see the
full
report
written by the organizers.
And on June 13 another workshop took place to translate
The Debian Administrator's Handbook). The main
goal was to show beginners how to collaborate in the translation of this
important material, which has existed since 2004. The manual's translations
are hosted on
Weblate.
Releases
Stable Release
Debian 12
bookworm was released on
June 10, 2023. This new version
becomes the stable release of Debian and moves the prior Debian 11
bullseye release to
oldstable status. The Debian
community celebrated the release with 23
Release Parties all around the
world.
Bookworm's first point release
12.1
address miscellaneous bug fixes affecting 88 packages, documentation, and
installer updates was made available on
July 22,
2023.
RISC-V support
riscv64 has recently been added to the
official Debian architectures for support of 64-bit little-endian
RISC-V hardware running the Linux kernel. We expect
to have full riscv64 support in Debian 13 trixie. Updates on bootstrap,
build daemon, porterbox, and development progress were recently shared by the
team in a
Bits from the Debian riscv64 porters
post.
non-free-firmware
The Debian 12 bookworm archive now includes non-free-firmware; please be
sure to update your apt sources.list if your systems requires such components
for operation. If your previous sources.list included non-free for this
purpose it may safely be removed.
apt sources.list
The Debian archive holds several components:
- main: Contains
DFSG-compliant packages,
which do not rely on software outside this area to operate.
- contrib:
Contains packages that contain DFSG-compliant software, but have dependencies
not in main.
- non-free:
Contains software that does not comply with the DFSG.
- non-free-firmware: Firmware that is otherwise not part of the Debian system
to enable use of Debian with hardware that requires such firmware.
Example of the sources.list file
deb http://deb.debian.org/debian bookworm main
deb-src http://deb.debian.org/debian bookworm main
deb http://deb.debian.org/debian-security/ bookworm-security main
deb-src http://deb.debian.org/debian-security/ bookworm-security main
deb http://deb.debian.org/debian bookworm-updates main
deb-src http://deb.debian.org/debian bookworm-updates main
Example using the components:
deb http://deb.debian.org/debian bookworm main non-free-firmware
deb-src http://deb.debian.org/debian bookworm main non-free-firmware
deb http://deb.debian.org/debian-security/ bookworm-security main non-free-firmware
deb-src http://deb.debian.org/debian-security/ bookworm-security main non-free-firmware
deb http://deb.debian.org/debian bookworm-updates main non-free-firmware
deb-src http://deb.debian.org/debian bookworm-updates main non-free-firmware
For more information and guidelines on proper configuration of the apt
source.list file please see the
Configuring Apt Sources -
Wiki page.
Inside Debian
New Debian Members
Please welcome the following newest Debian Project Members:
- Marius Gripsgard (mariogrip)
- Mohammed Bilal (rmb)
- Emmanuel Arias (amanu)
- Robin Gustafsson (rgson)
- Lukas M rdian (slyon)
- David da Silva Polverari (polverari)
To find out more about our newest members or any Debian Developer, look
for them on the
Debian People list.
Security
Debian's Security Team releases current advisories on a daily basis.
Some recently released advisories concern these packages:
trafficserver
Several vulnerabilities were discovered in Apache Traffic Server, a
reverse and forward proxy server, which could result in information
disclosure or denial of service.
asterisk
A flaw was found in Asterisk, an Open Source Private Branch Exchange. A
buffer overflow vulnerability affects users that use PJSIP DNS resolver.
This vulnerability is related to CVE-2022-24793. The difference is that
this issue is in parsing the query record
parse_query(), while the issue
in CVE-2022-24793 is in
parse_rr(). A workaround is to disable DNS
resolution in PJSIP config (by setting
nameserver_count to zero) or use
an external resolver implementation instead.
flask
It was discovered that in some conditions the Flask web framework may
disclose a session cookie.
chromium
Multiple security issues were discovered in Chromium, which could result
in the execution of arbitrary code, denial of service or information
disclosure.
Other
Popular packages
gpgv - GNU privacy guard
signature verification tool.
99,053 installations.
gpgv is actually a stripped-down version of gpg which
is only able to check signatures. It is somewhat smaller than the fully-blown
gpg and uses a different (and simpler) way to check that the public keys used
to make the signature are valid. There are no configuration files and only a
few options are implemented.
dmsetup - Linux Kernel Device
Mapper userspace library.
77,769 installations.
The Linux Kernel Device Mapper is the LVM (Linux
Logical Volume Management) Team's implementation of a minimalistic kernel-space
driver that handles volume management, while keeping knowledge of the
underlying device layout in user-space. This makes it useful for not only LVM,
but software raid, and other drivers that create "virtual" block devices.
sensible-utils - Utilities
for sensible alternative selection. 96,001 daily users.
This package provides a number of small utilities which
are used by programs to sensibly select and spawn an appropriate browser,
editor, or pager. The specific utilities included are: sensible-browser
sensible-editor sensible-pager.
popularity-contest -
The popularity-contest package. 90,758 daily users.
The popularity-contest package sets up a cron job that
will periodically anonymously submit to the Debian developers statistics about
the most used Debian packages on the system. This information helps Debian
make decisions such as which packages should go on the first CD. It also lets
Debian improve future versions of the distribution so that the most popular
packages are the ones which are installed automatically for new users.
New and noteworthy packages in unstable
Toolkit for scalable simulation of distributed applications
SimGrid is a toolkit that provides core
functionalities for the simulation of distributed applications in heterogeneous
distributed environments. SimGrid can be used as a Grid simulator, a P2P
simulator, a Cloud simulator, a MPI simulator, or a mix of all of them. The
typical use-cases of SimGrid include heuristic evaluation, application
prototyping, and real application development and tuning. This package
contains the dynamic libraries and runtime.
LDraw mklist program
3D CAD programs and rendering programs using the LDraw
parts library of LEGO parts rely on a file called parts.lst containing a list
of all available parts. The program ldraw-mklist is used to generate this list
from a directory of LDraw parts.
Open Lighting Architecture - RDM Responder Tests
The DMX512 standard for Digital MultipleX is used for
digital communication networks commonly used to control stage lighting and
effects. The Remote Device Management protocol is an extension to DMX512,
allowing bi-directional communication between RDM-compliant devices without
disturbing other devices on the same connection. The Open Lighting
Architecture (OLA) provides a plugin framework for distributing DMX512 control
signals. The ola-rdm-tests package provides an automated way to check protocol
compliance in RDM devices.
parsec-service
Parsec is an abstraction layer that can be used to
interact with hardware-backed security facilities such as the Hardware Security
Module (HSM), the Trusted Platform Module (TPM), as well as firmware-backed and
isolated software services. The core component of Parsec is the security
service, provided by this package. The service is a background process that
runs on the host platform and provides connectivity with the secure facilities
of that host, exposing a platform-neutral API that can be consumed into
different programming languages using a client library. For a client library
implemented in Rust see the package librust-parsec-interface-dev.
Simple network calculator and lookup tool
Process and lookup network addresses from the command
line or CSV with ripalc. Output has a variety of customisable formats.
High performance, open source CPU/GPU miner and RandomX benchmark
XMRig is a high performance, open source, cross
platform RandomX, KawPow, CryptoNight, and GhostRider unified CPU/GPU miner and
RandomX benchmark.
Ping, but with a graph - Rust source code
This package contains the source for the Rust gping
crate, packaged by debcargo for use with cargo and dh-cargo.
Once upon a time in Debian:
2014-07-31 The Technical committee choose
libjpeg-turbo
as the default JPEG decoder.
2010-08-01
DebConf10 starts New York City, USA
2007-08-05
Debian Maintainers approved by vote
2009-08-05 Jeff Chimene files bug
#540000 against
live-initramfs.
Calls for help
The Publicity team calls for volunteers and help!
Your Publicity team is asking for help from you our readers, developers, and
interested parties to contribute to the Debian news effort. We implore you to
submit items that may be of interest to our community and also ask for your
assistance with translations of the news into (your!) other languages along
with the needed second or third set of eyes to assist in editing our work
before publishing. If you can share a small amount of your time to aid our
team which strives to keep all of us informed, we need you. Please reach out
to us via IRC on
#debian-publicity
on
OFTC.net, or our
public mailing list,
or via email at
press@debian.org for sensitive or
private inquiries.
 I work from home these days, and my nearest office is over 100 miles away, 3 hours door to door if I travel by train (and, to be honest, probably not a lot faster given rush hour traffic if I drive). So I m reliant on a functional internet connection in order to be able to work. I m lucky to have access to
  Those of you who haven t been in IT for far, far too long might not know that next month will be the 16th(!) anniversary of the
 They're called The Usual Suspects for a reason, but sometimes, it really is Keyser S ze

 I had reported this to Ansible a year ago (2023-02-23), but it seems this is considered expected behavior, so I am posting it here now.
TL;DR
Don't ever consume any data you got from an inventory if there is a chance somebody untrusted touched it.
Inventory plugins
I had reported this to Ansible a year ago (2023-02-23), but it seems this is considered expected behavior, so I am posting it here now.
TL;DR
Don't ever consume any data you got from an inventory if there is a chance somebody untrusted touched it.
Inventory plugins

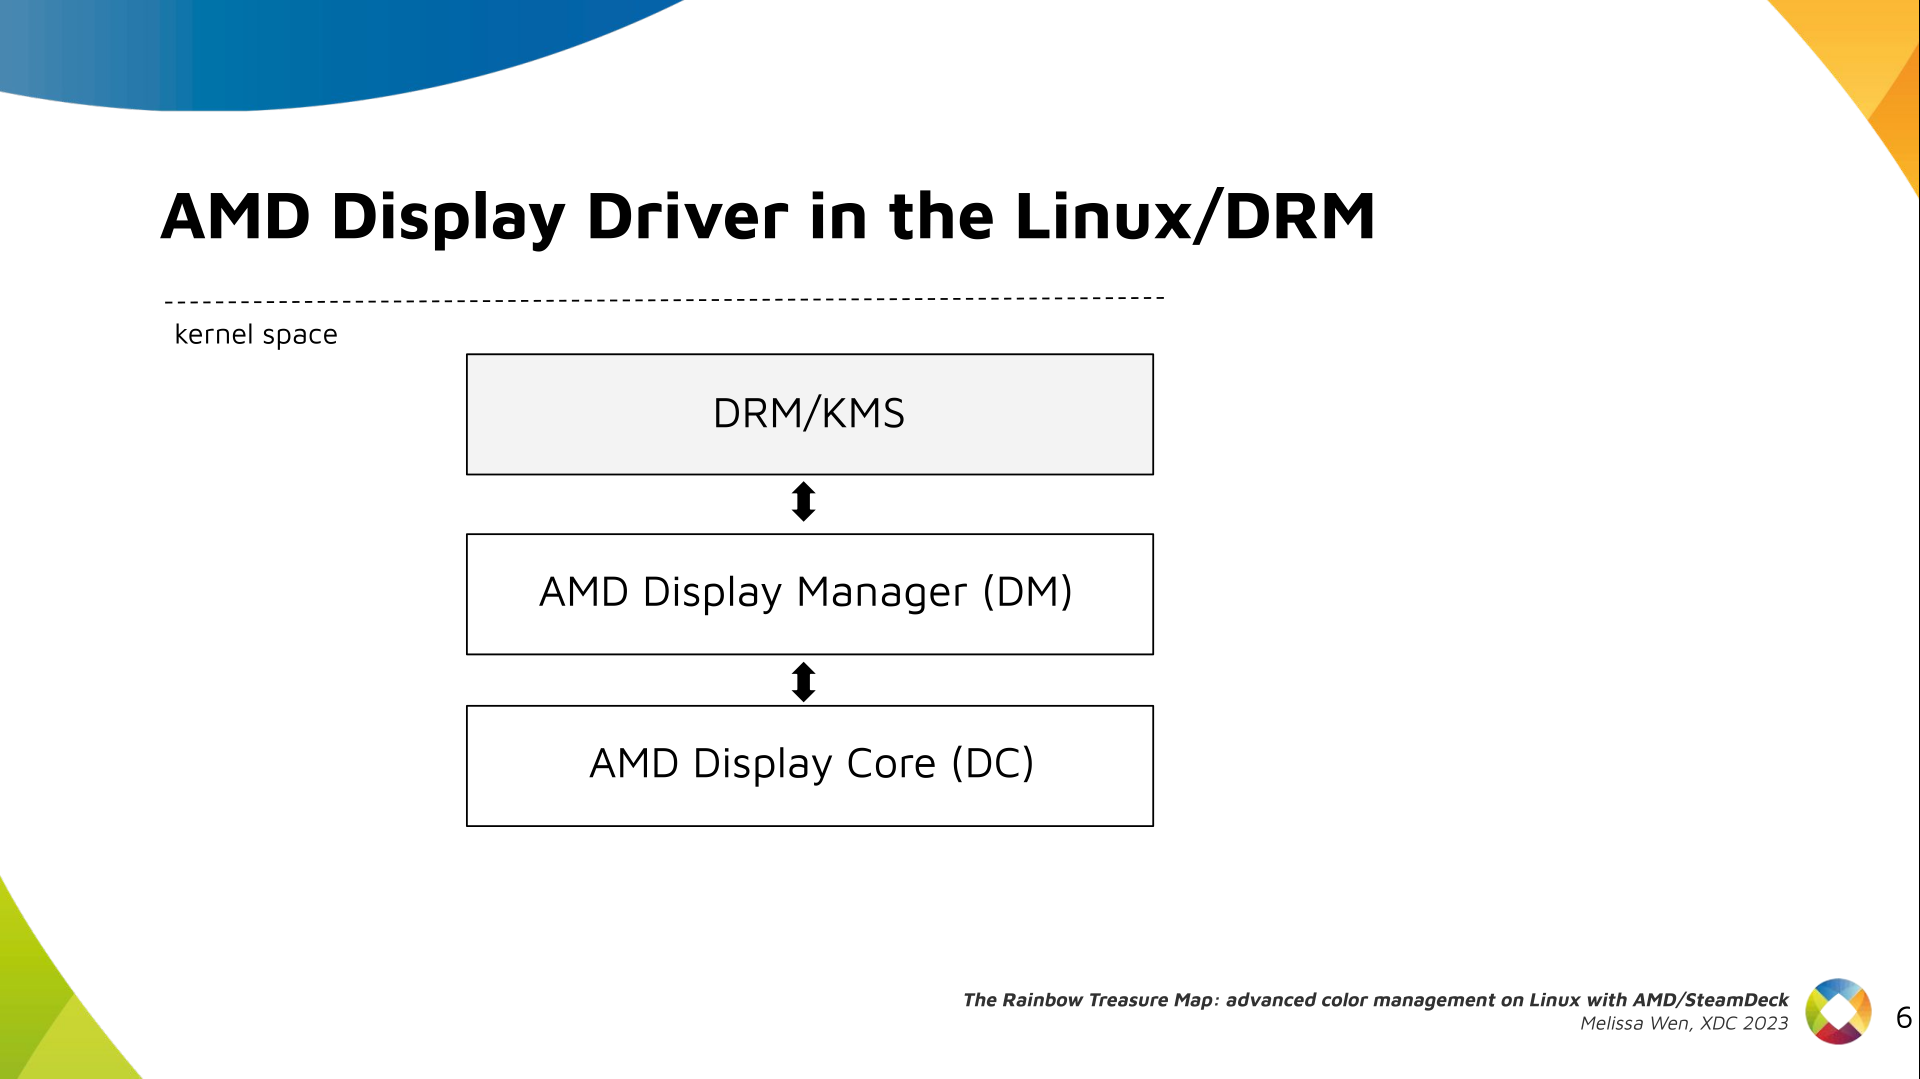
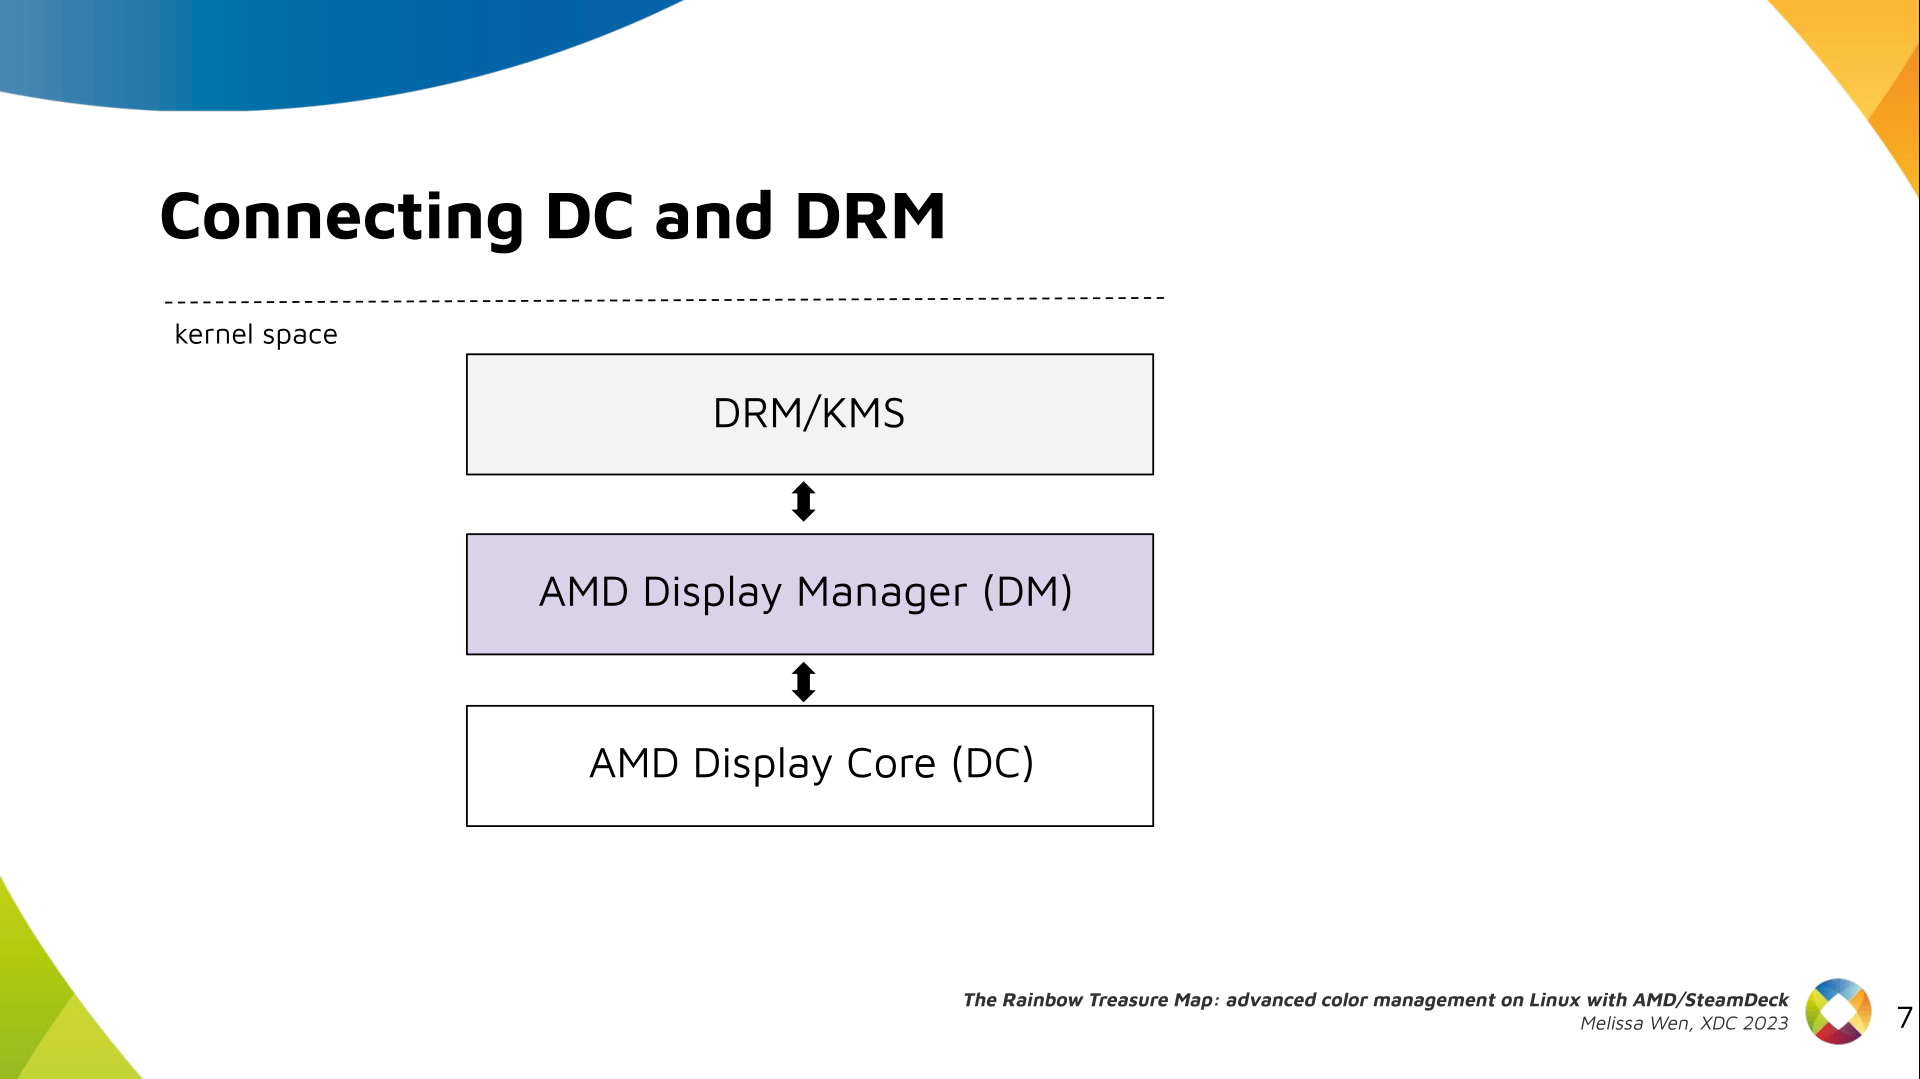
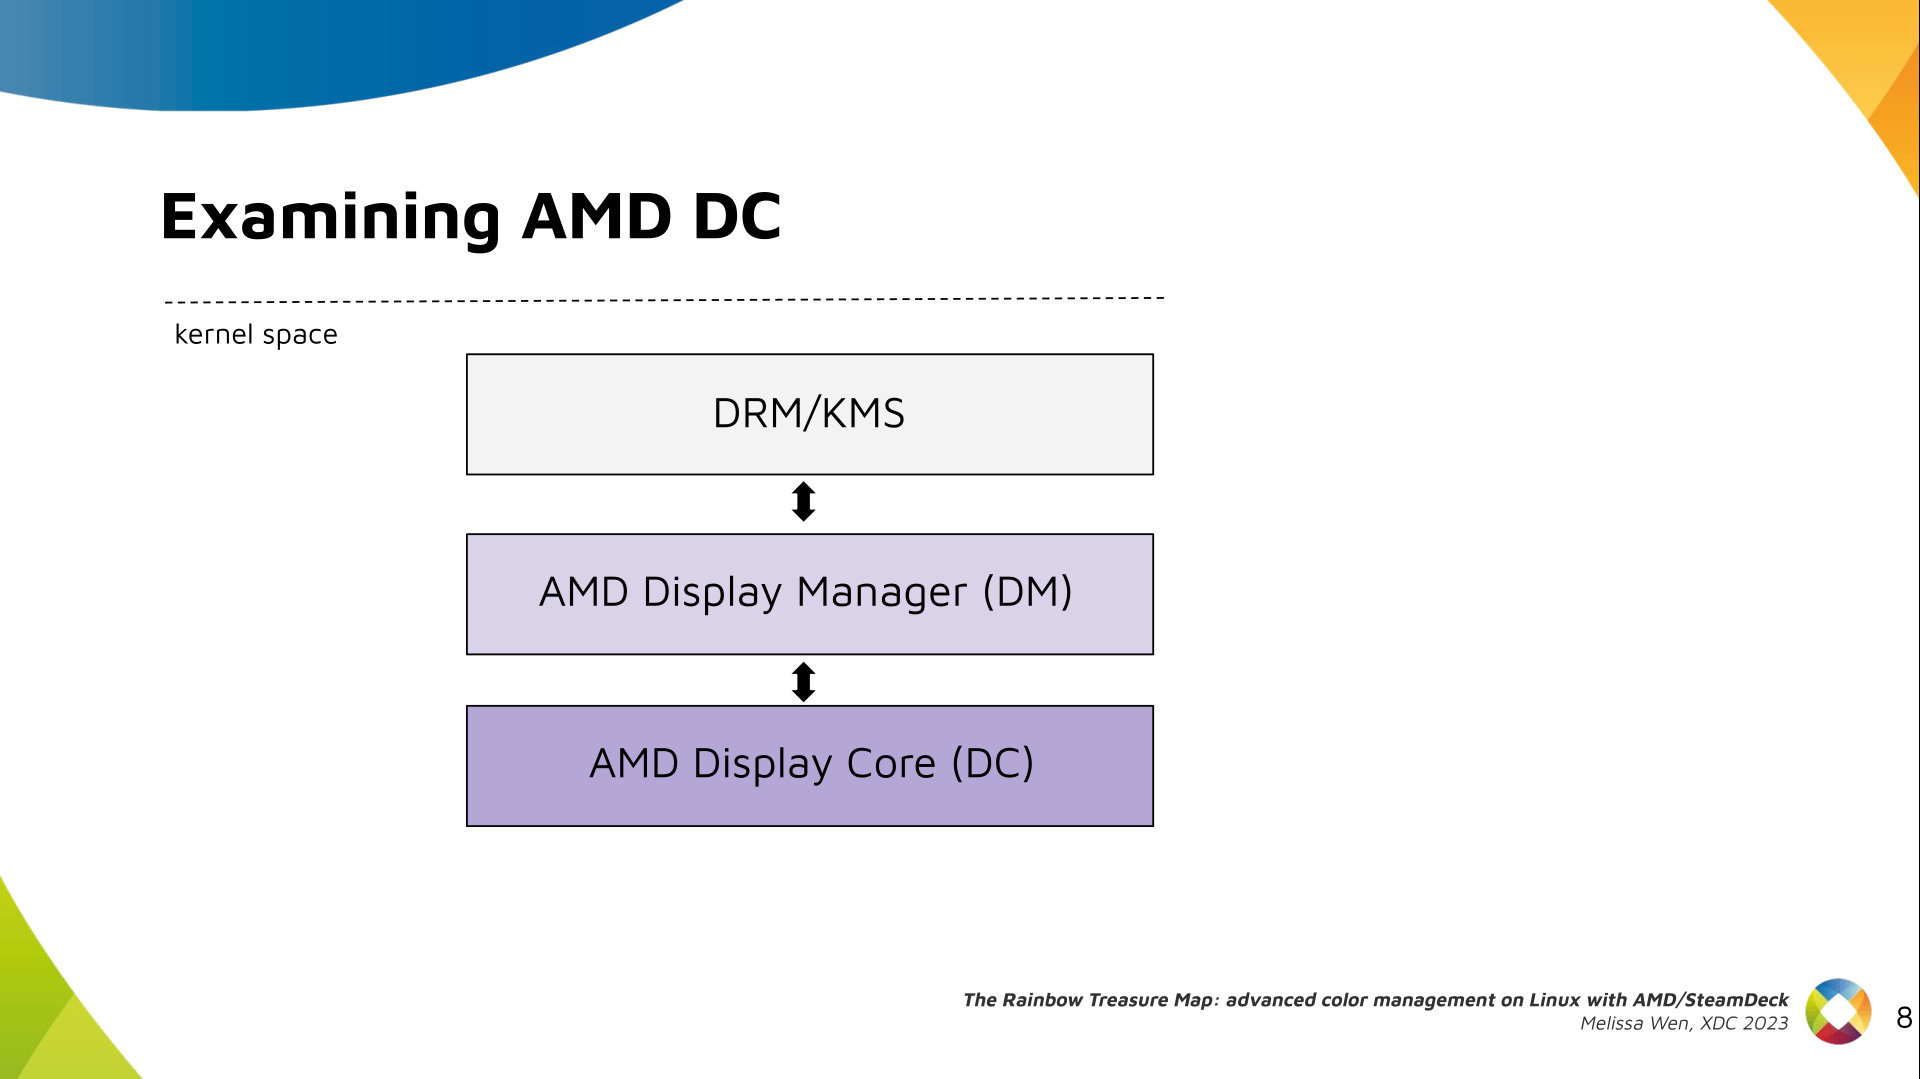
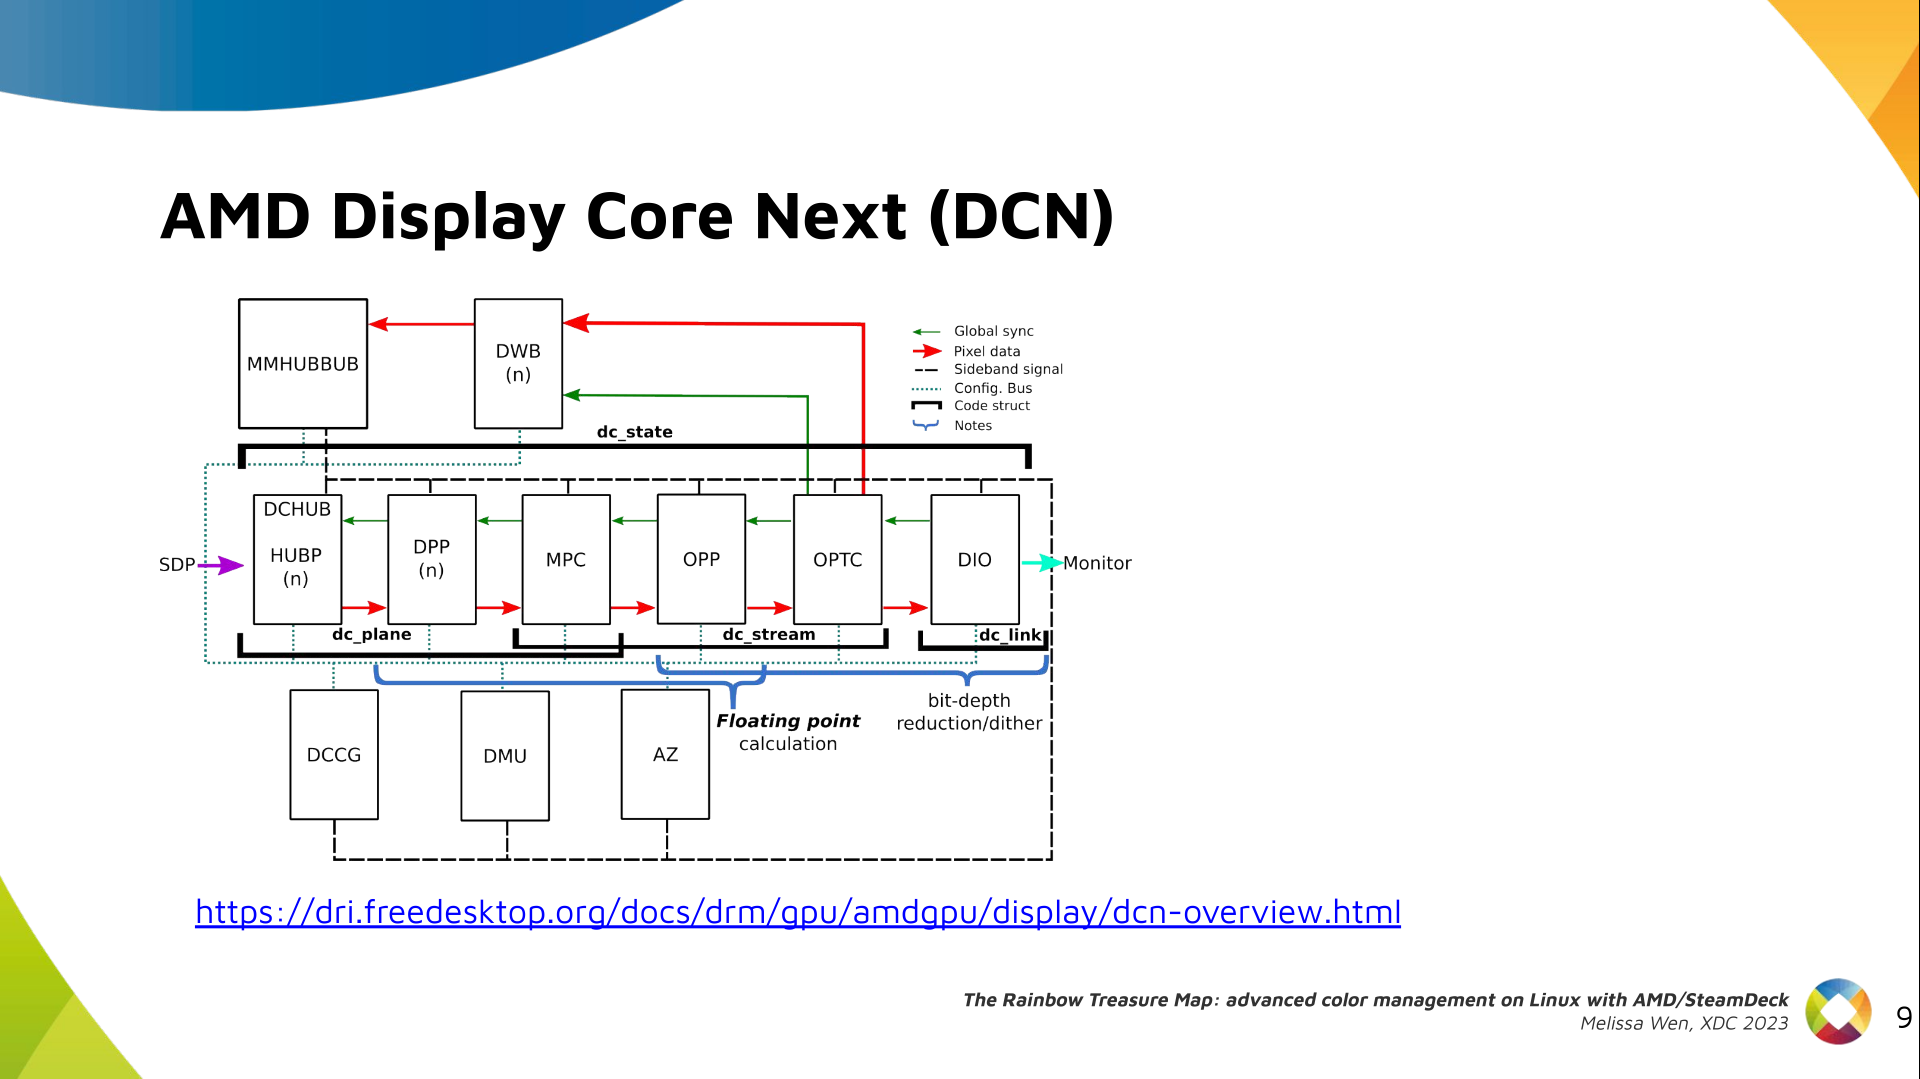
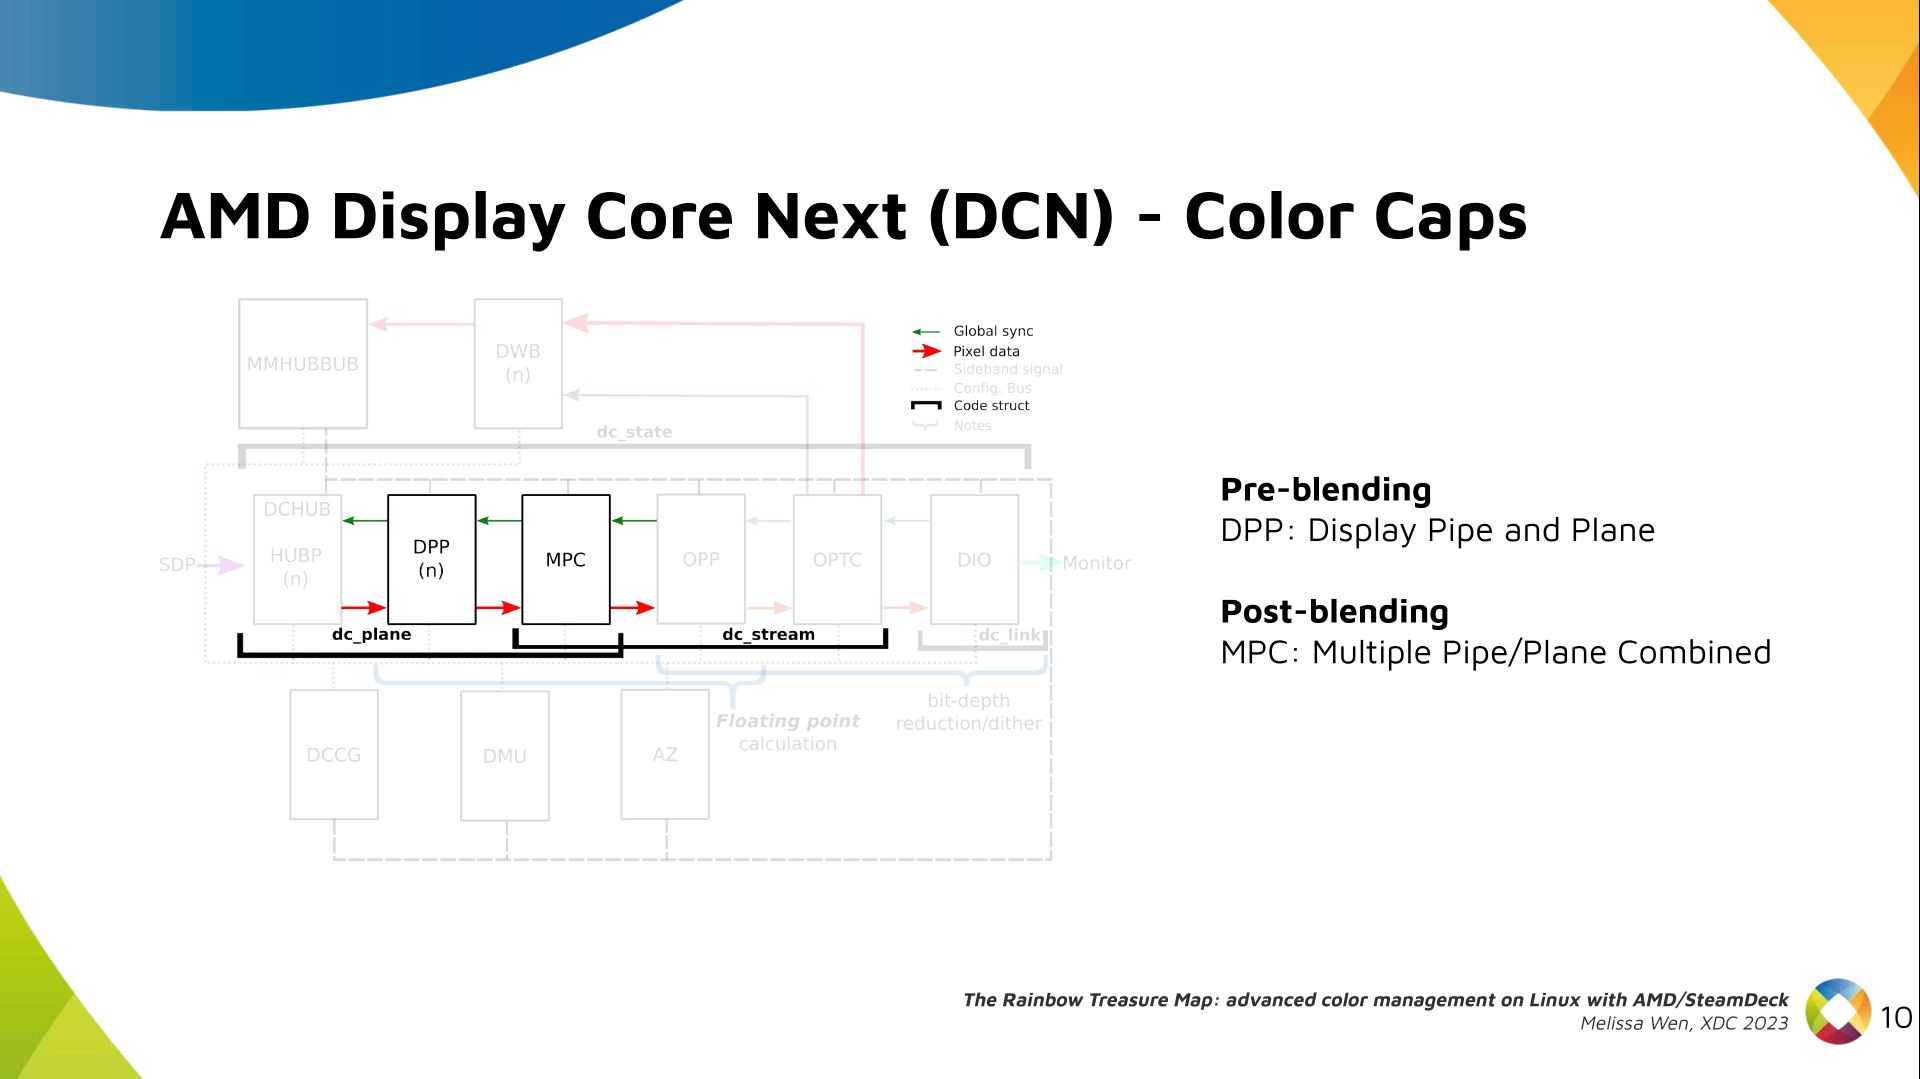
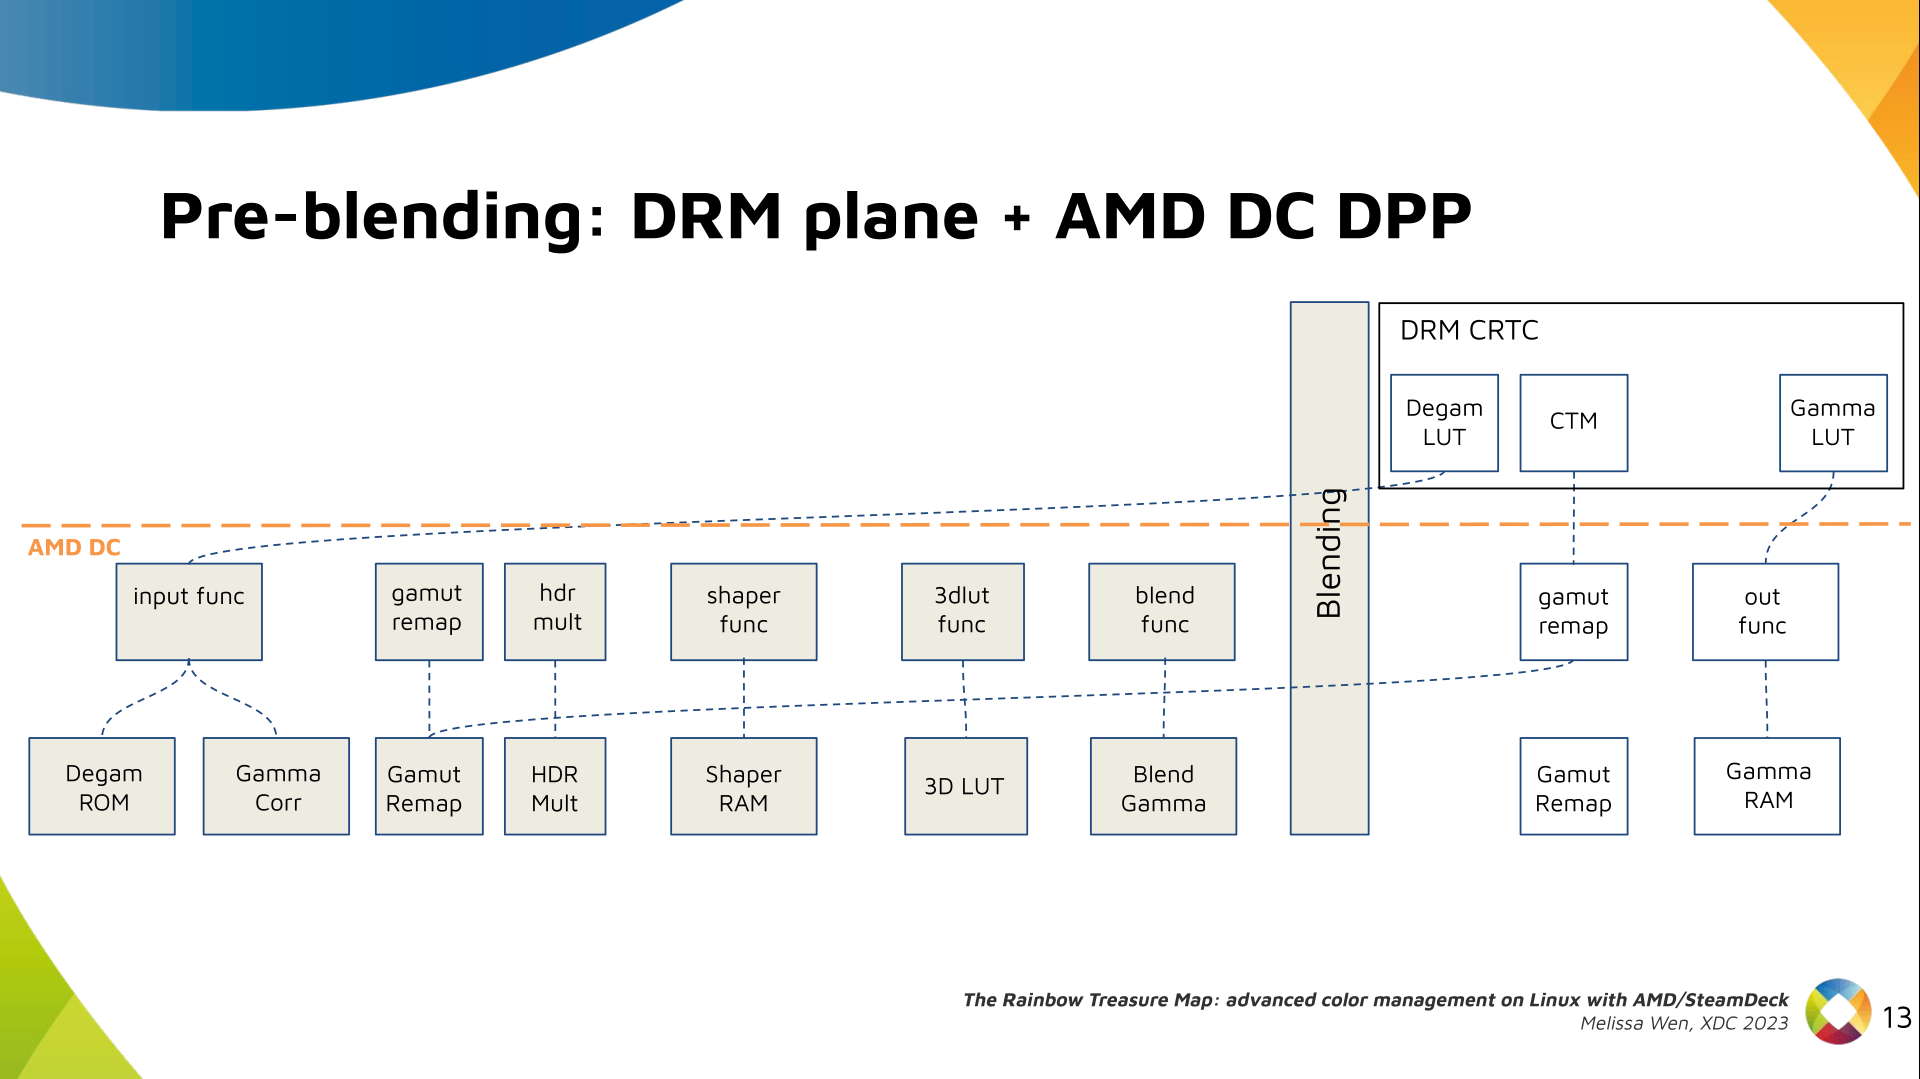

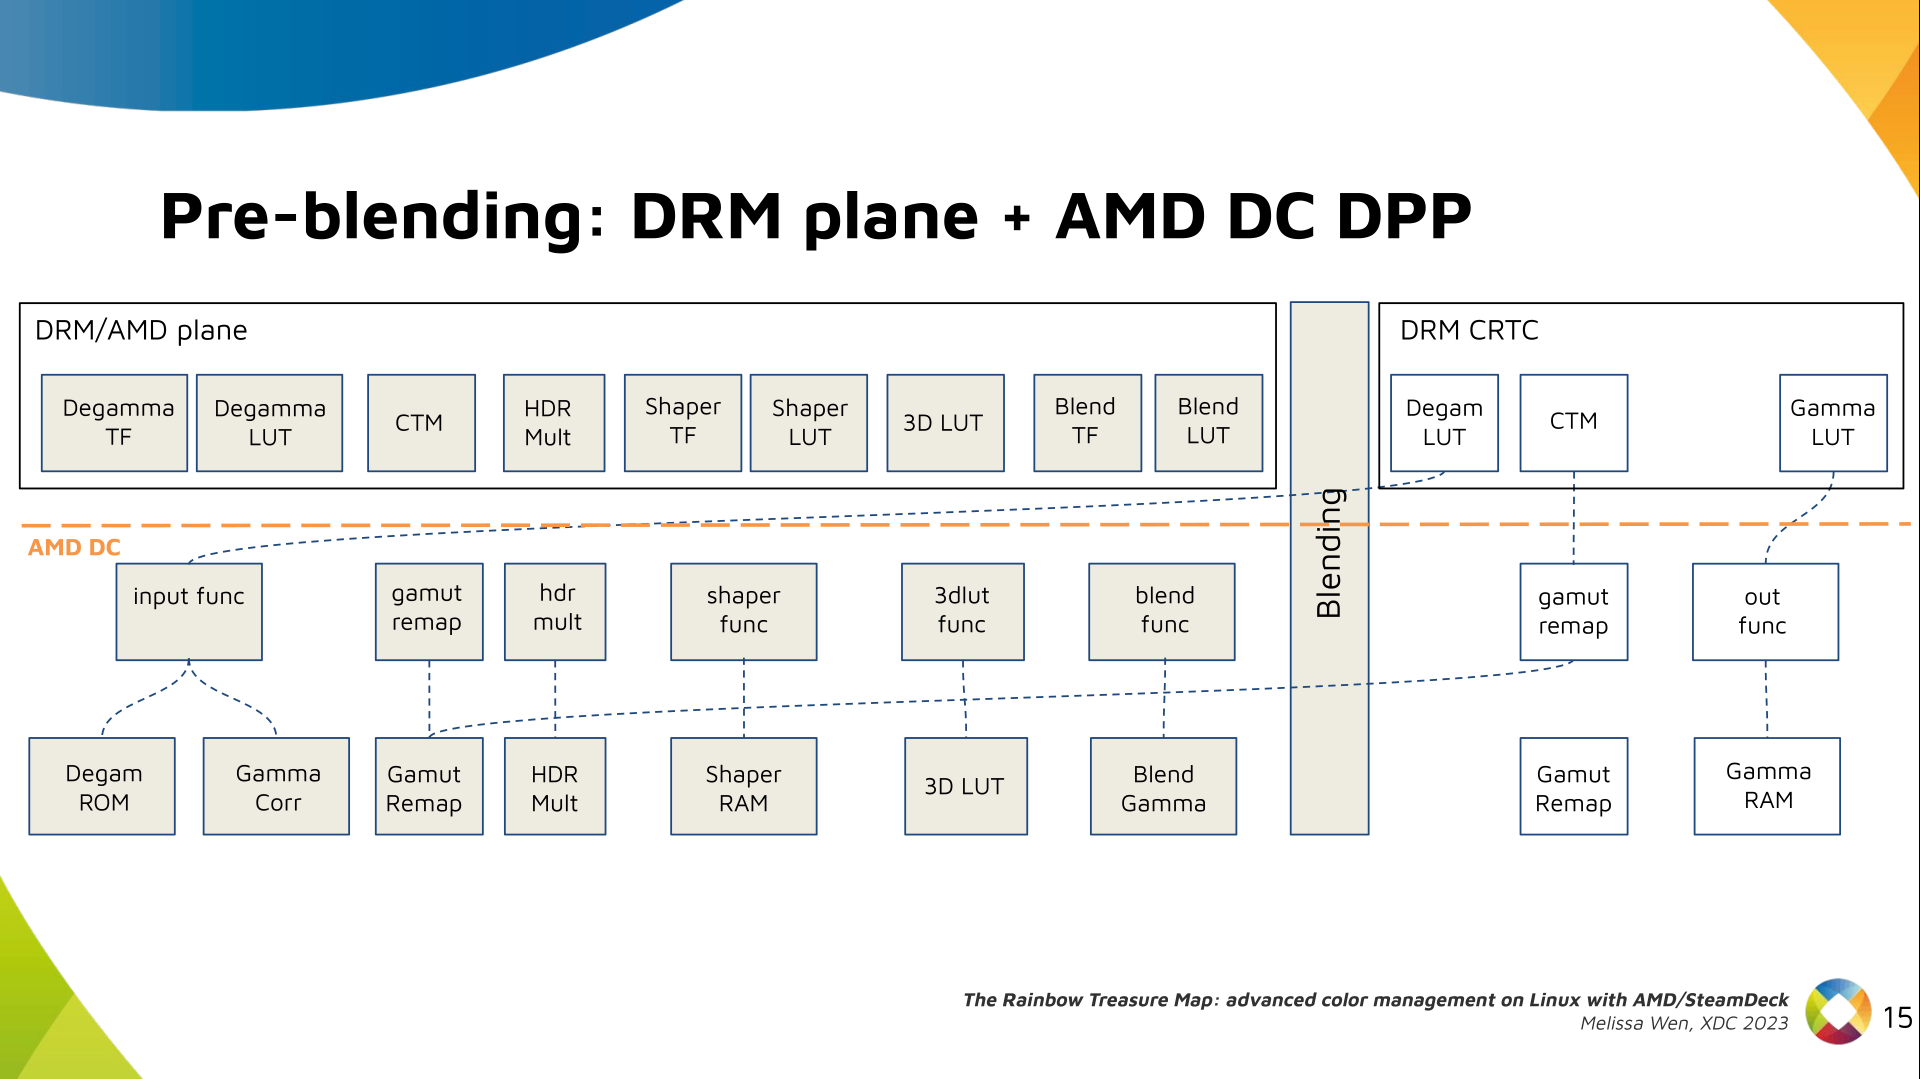


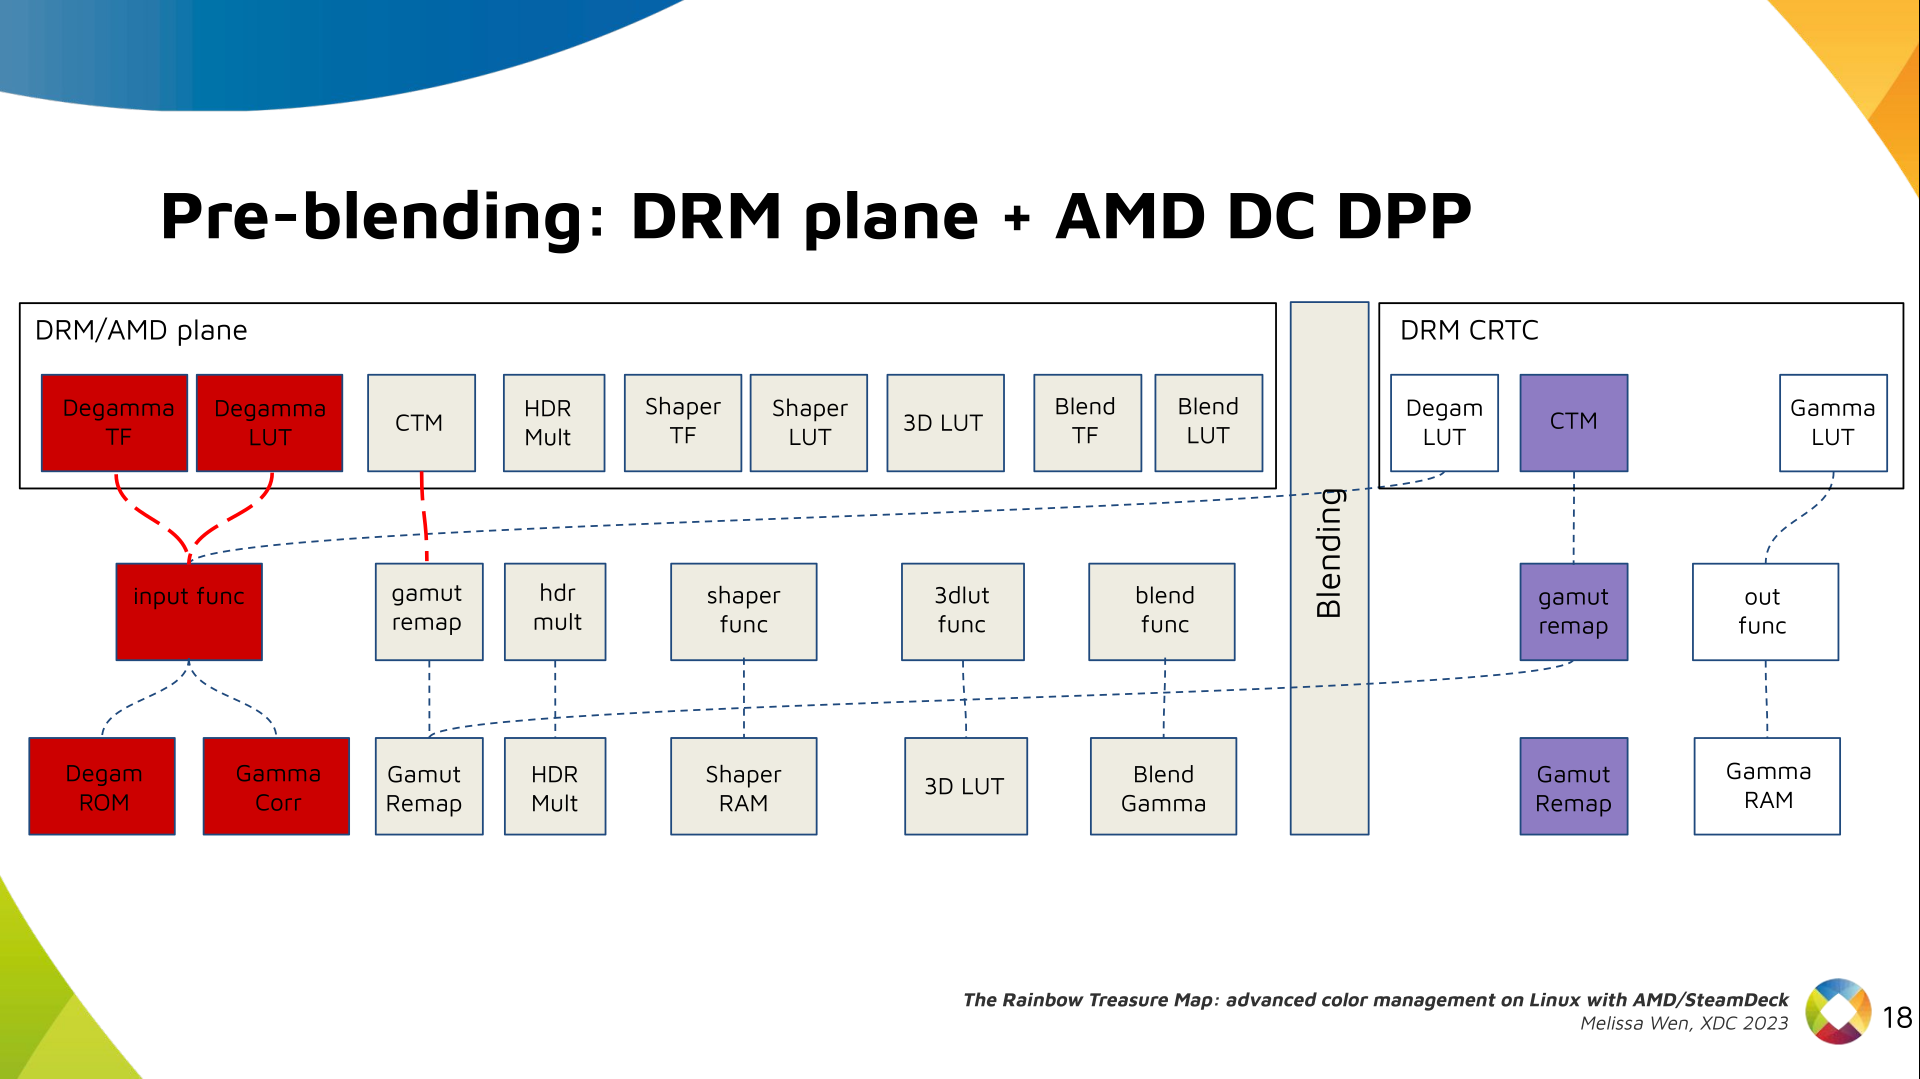
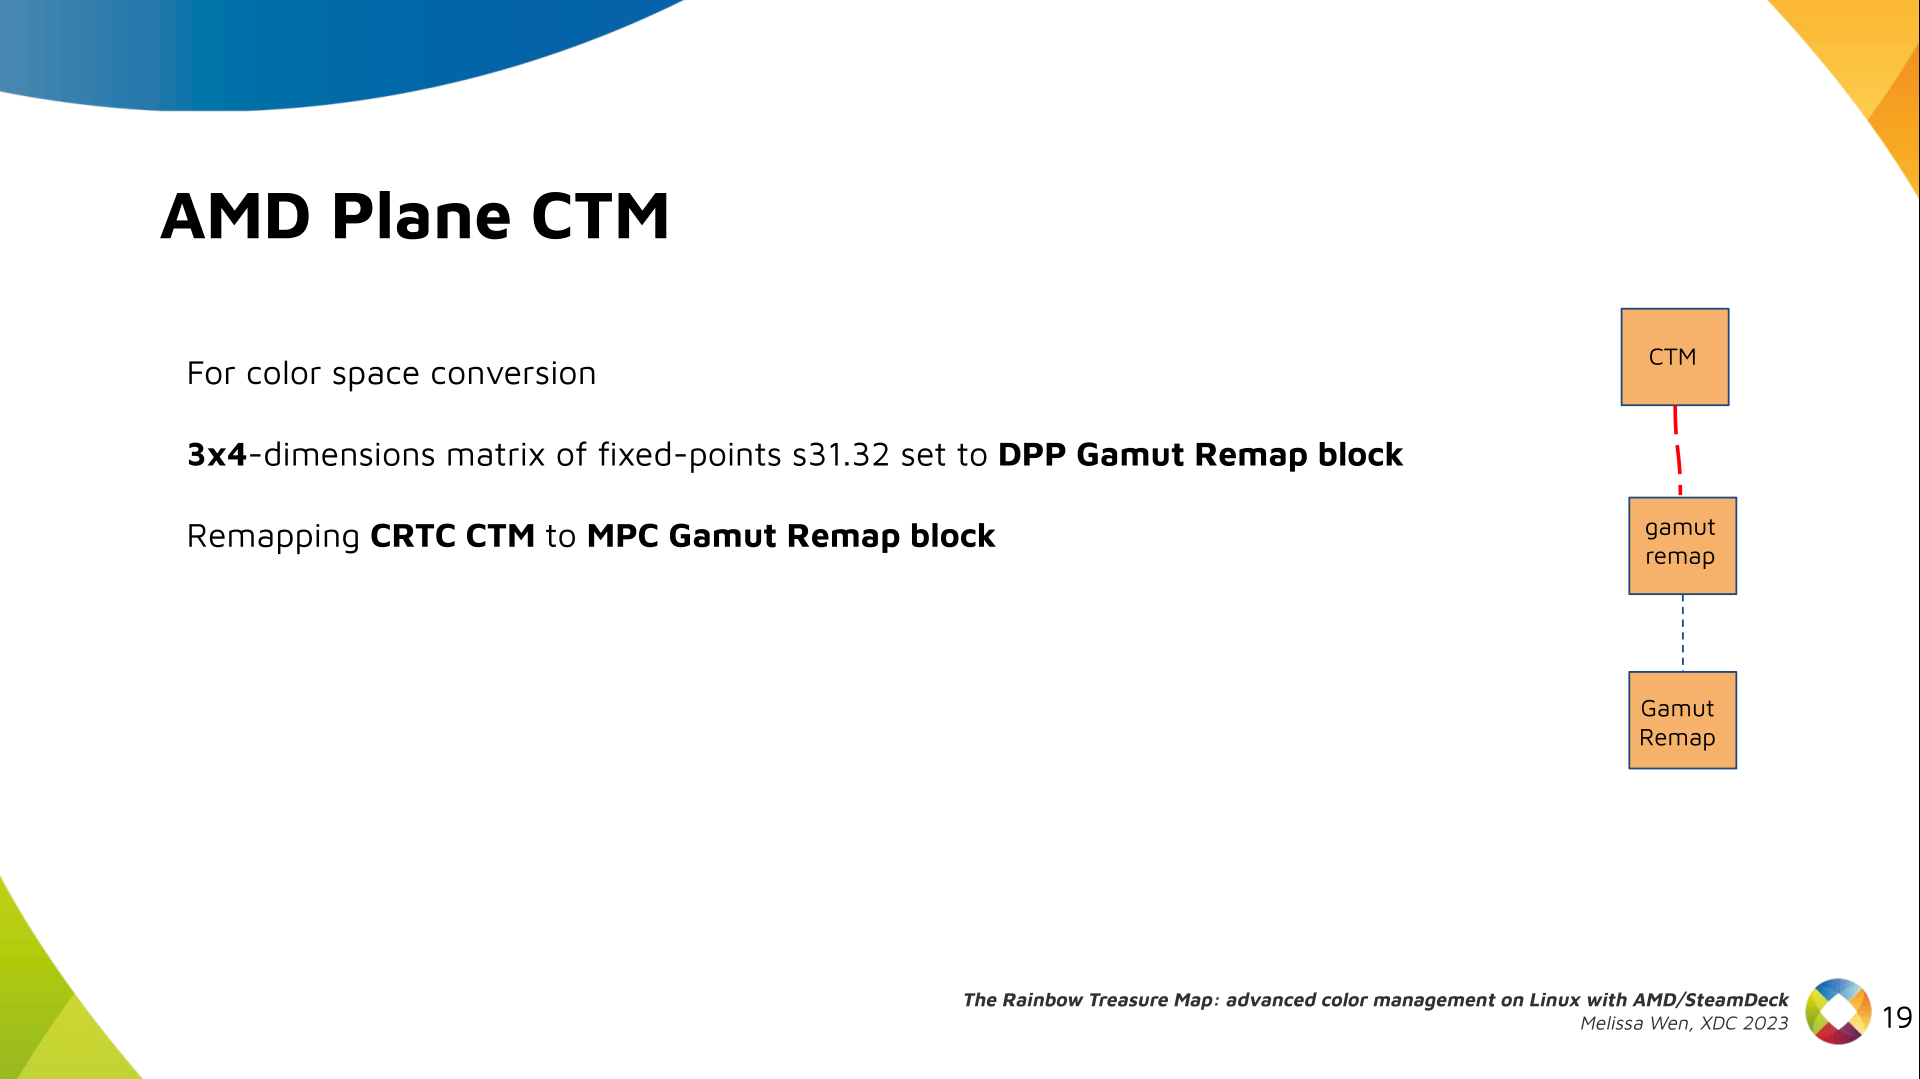
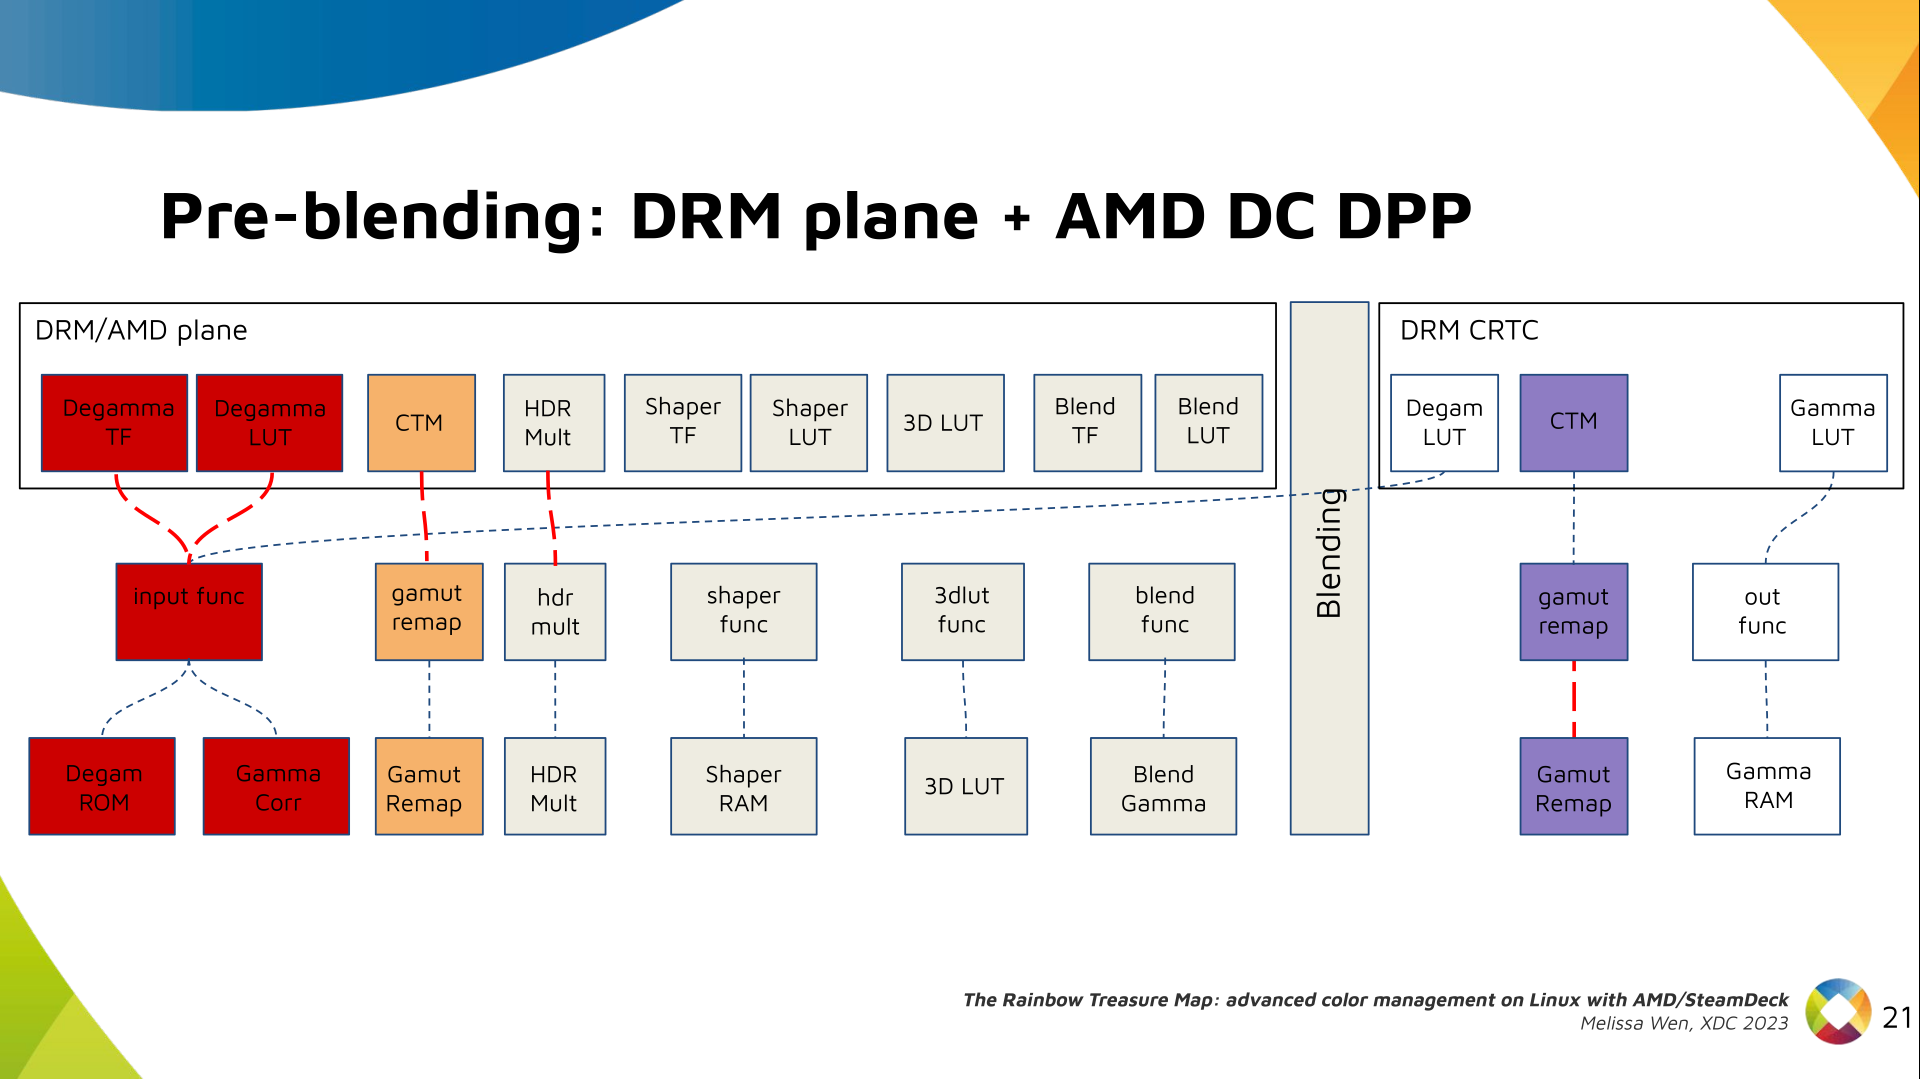

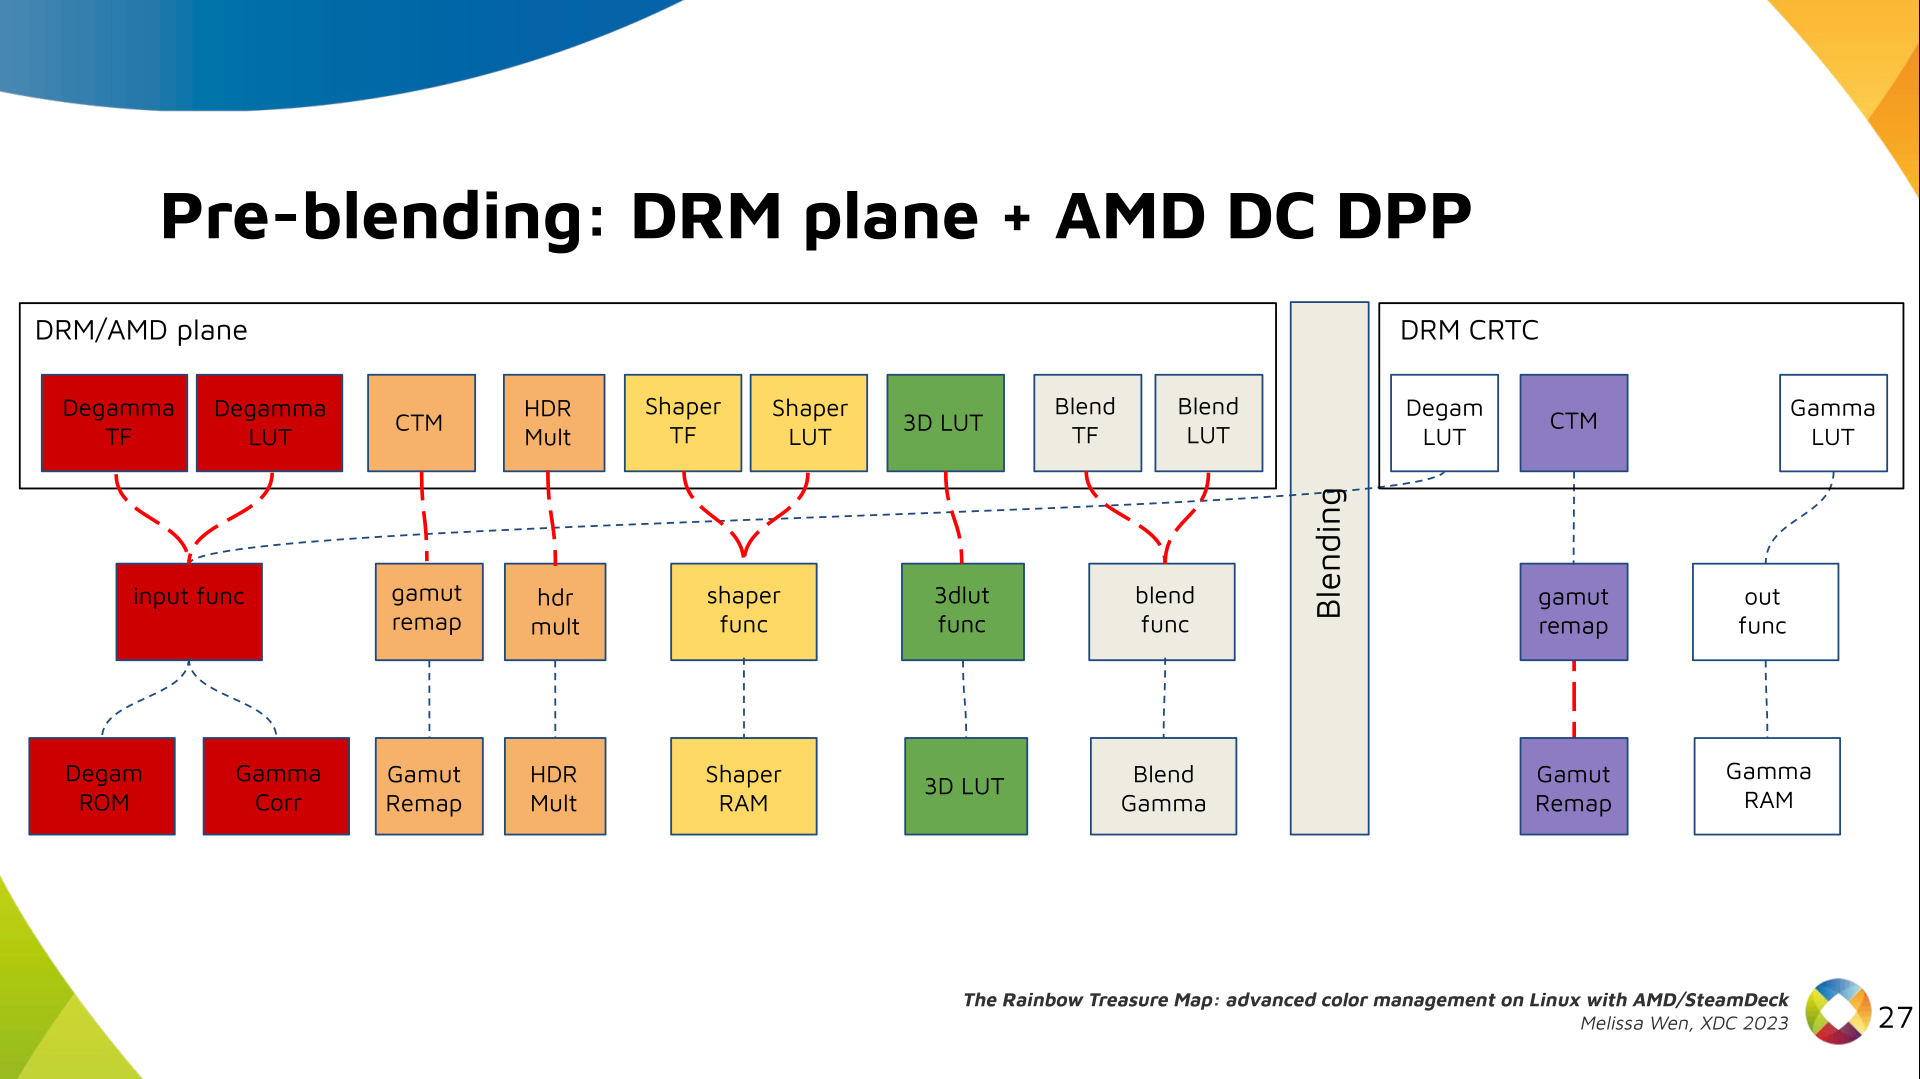
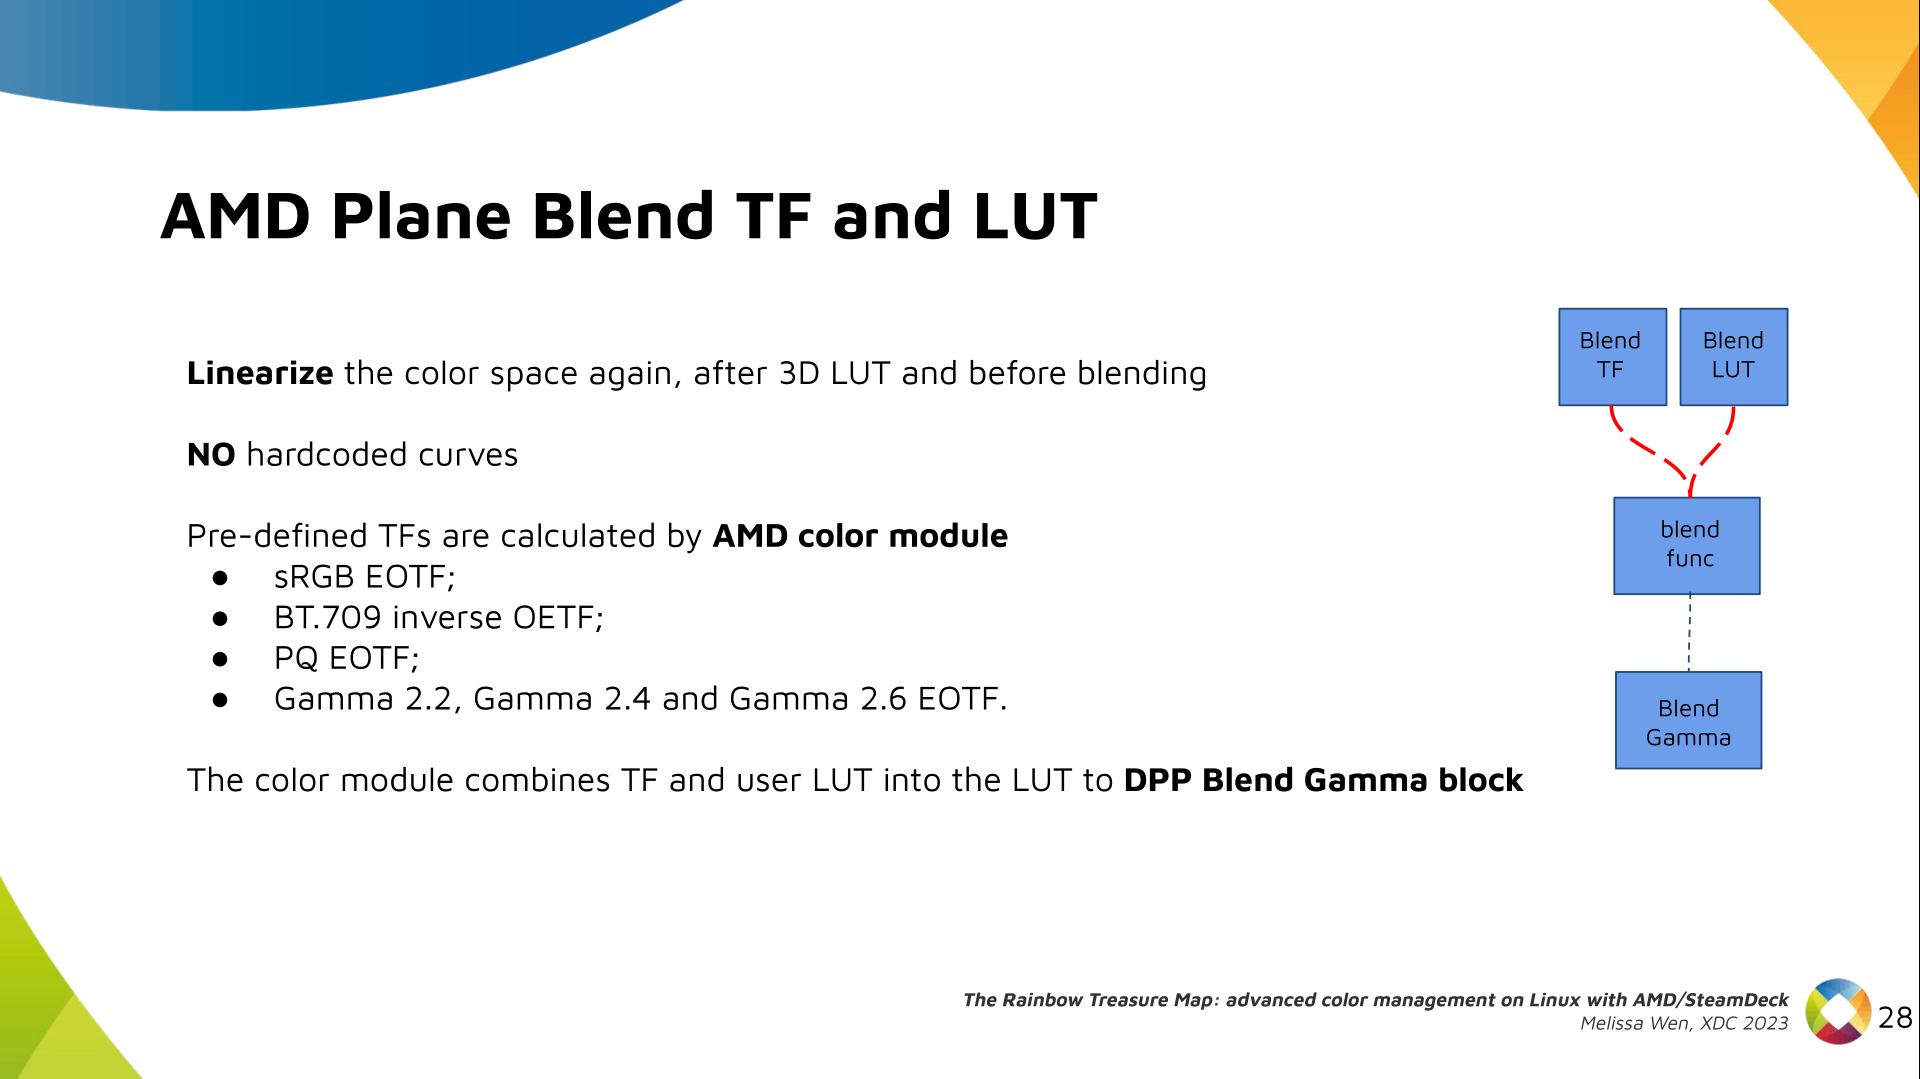

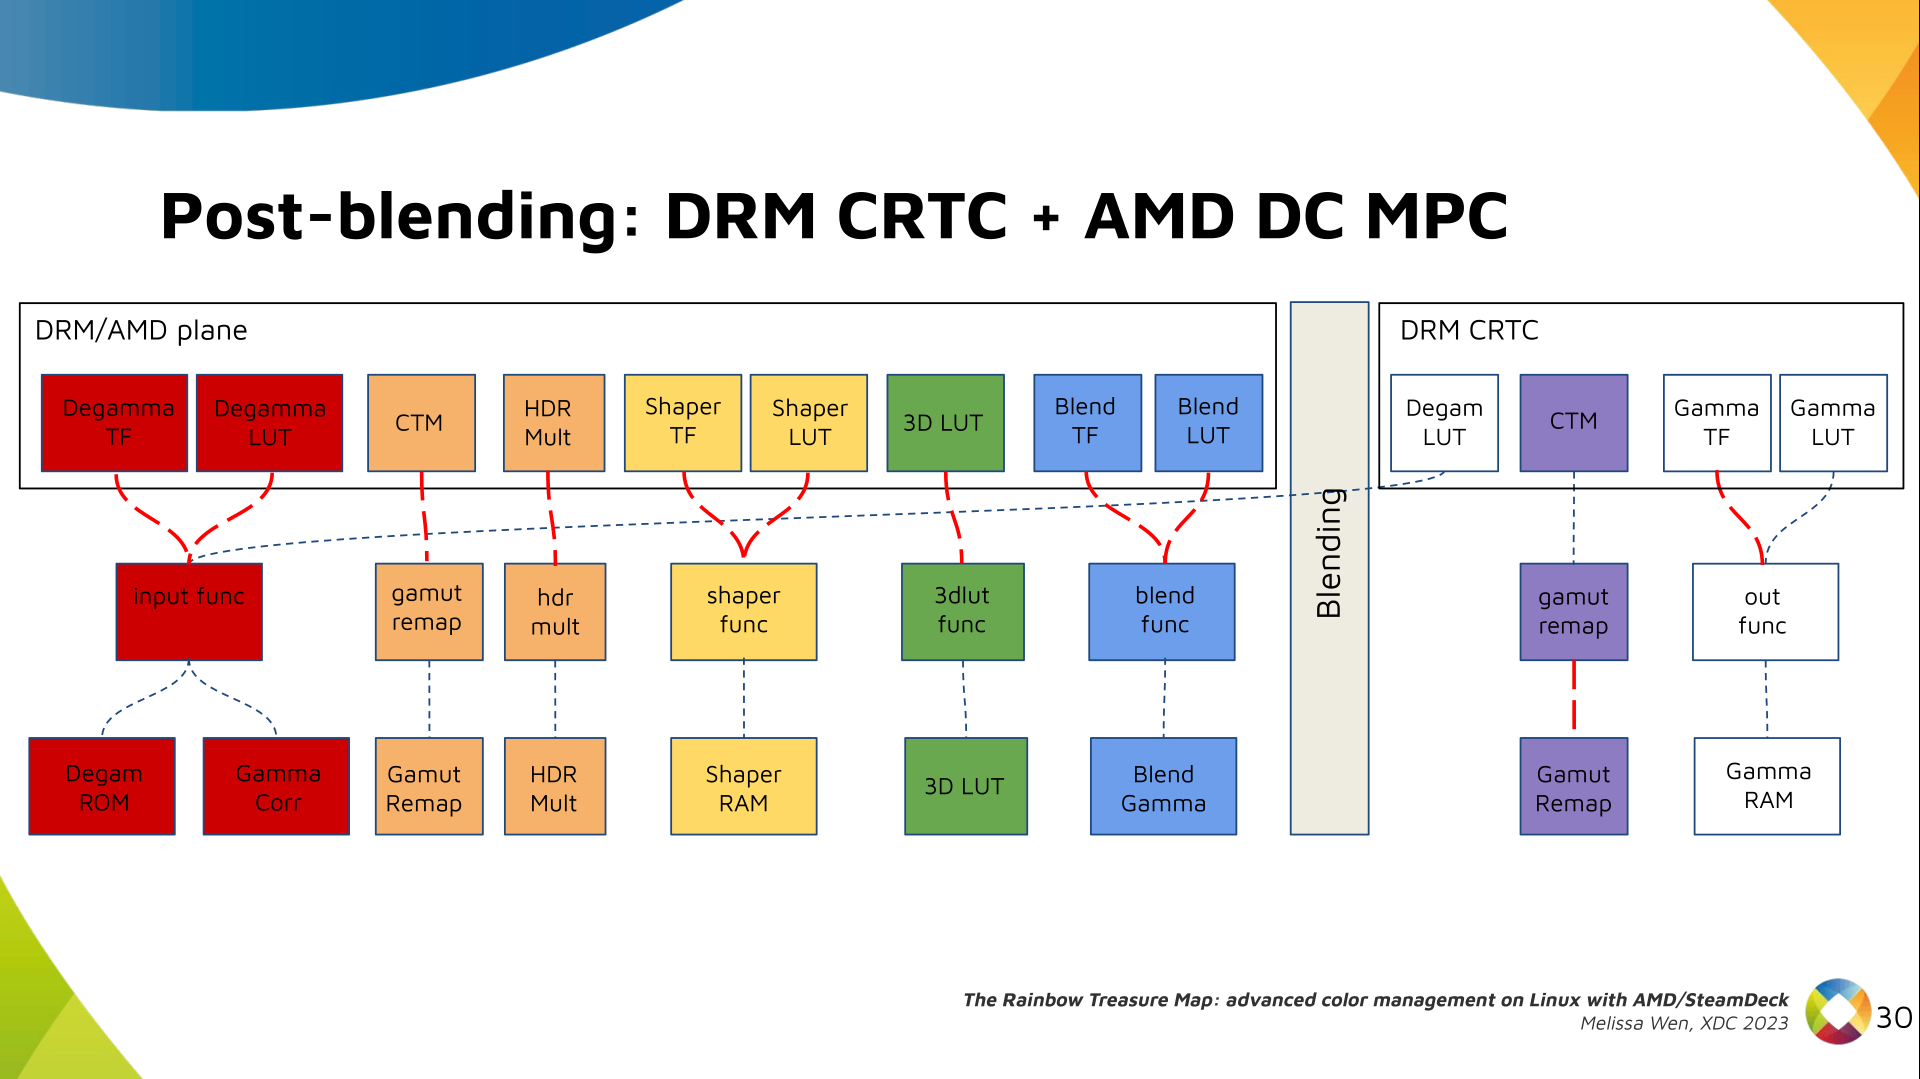
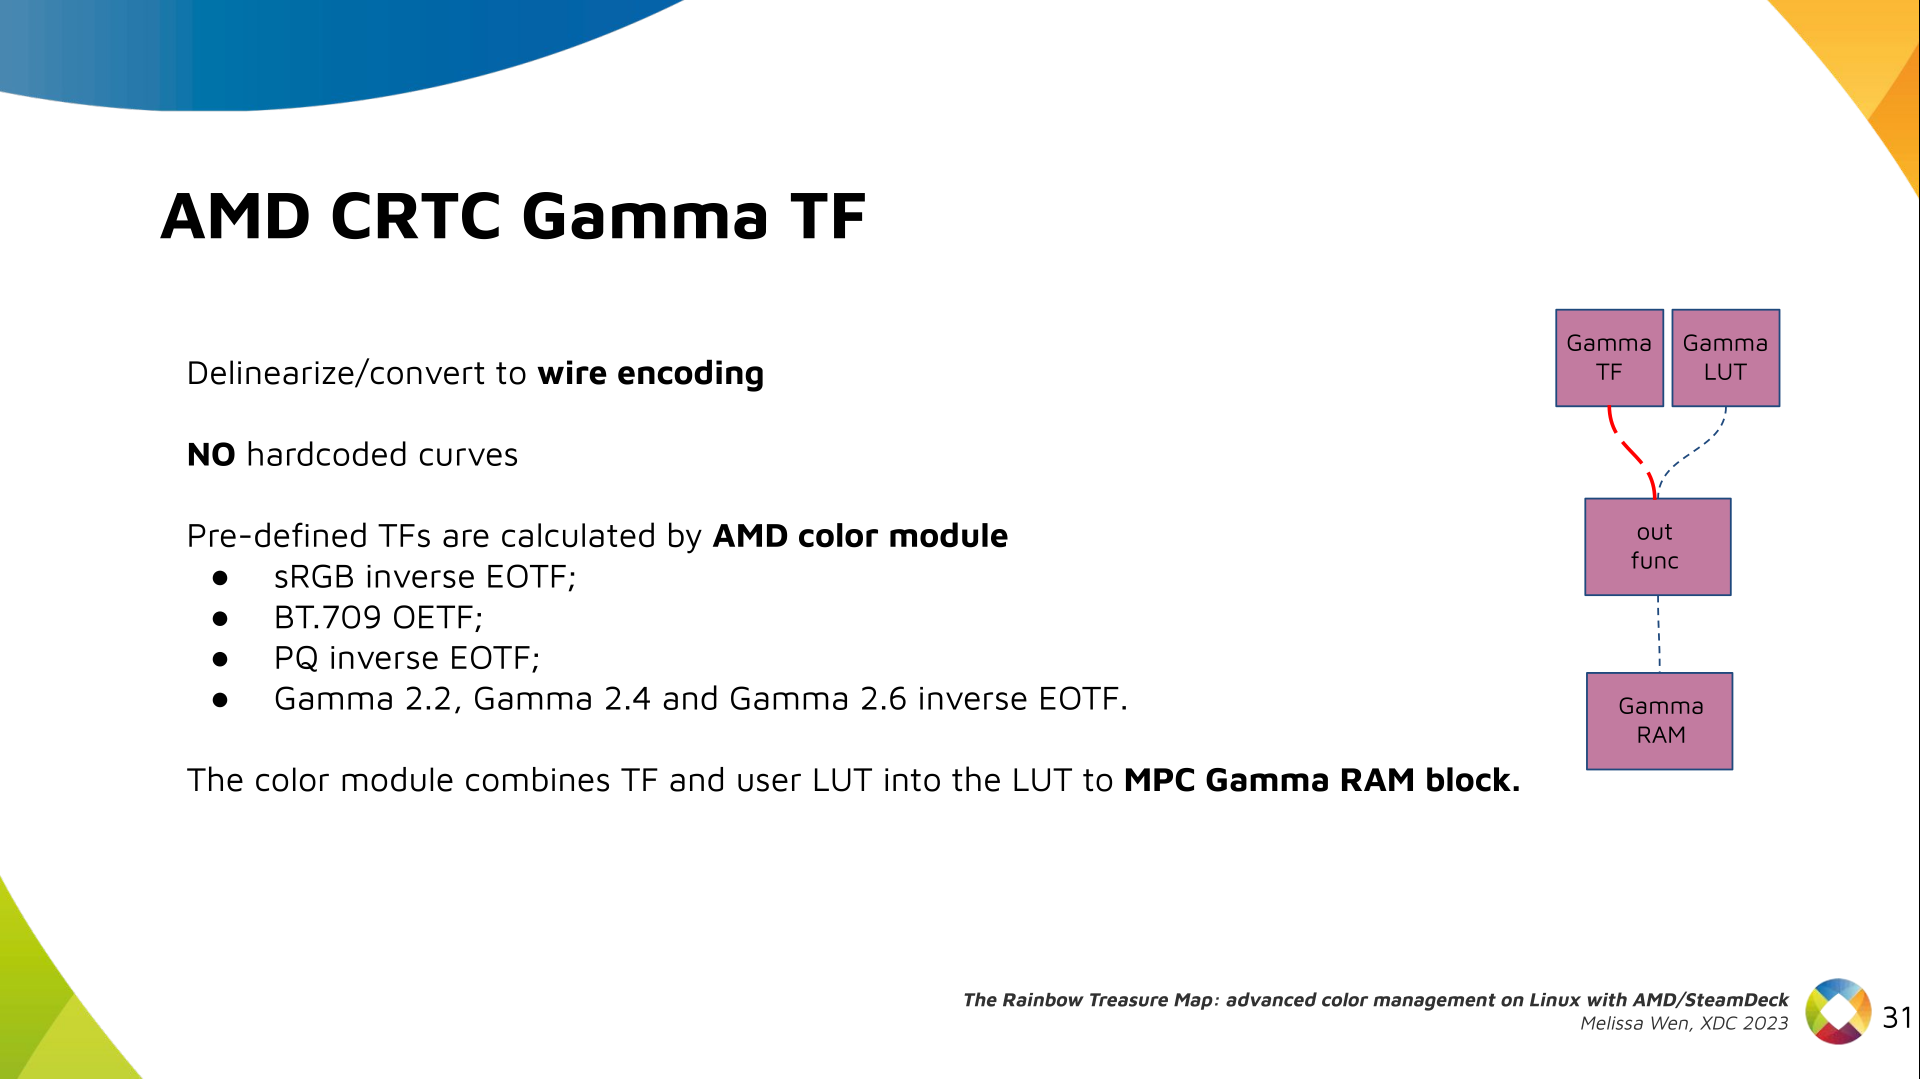
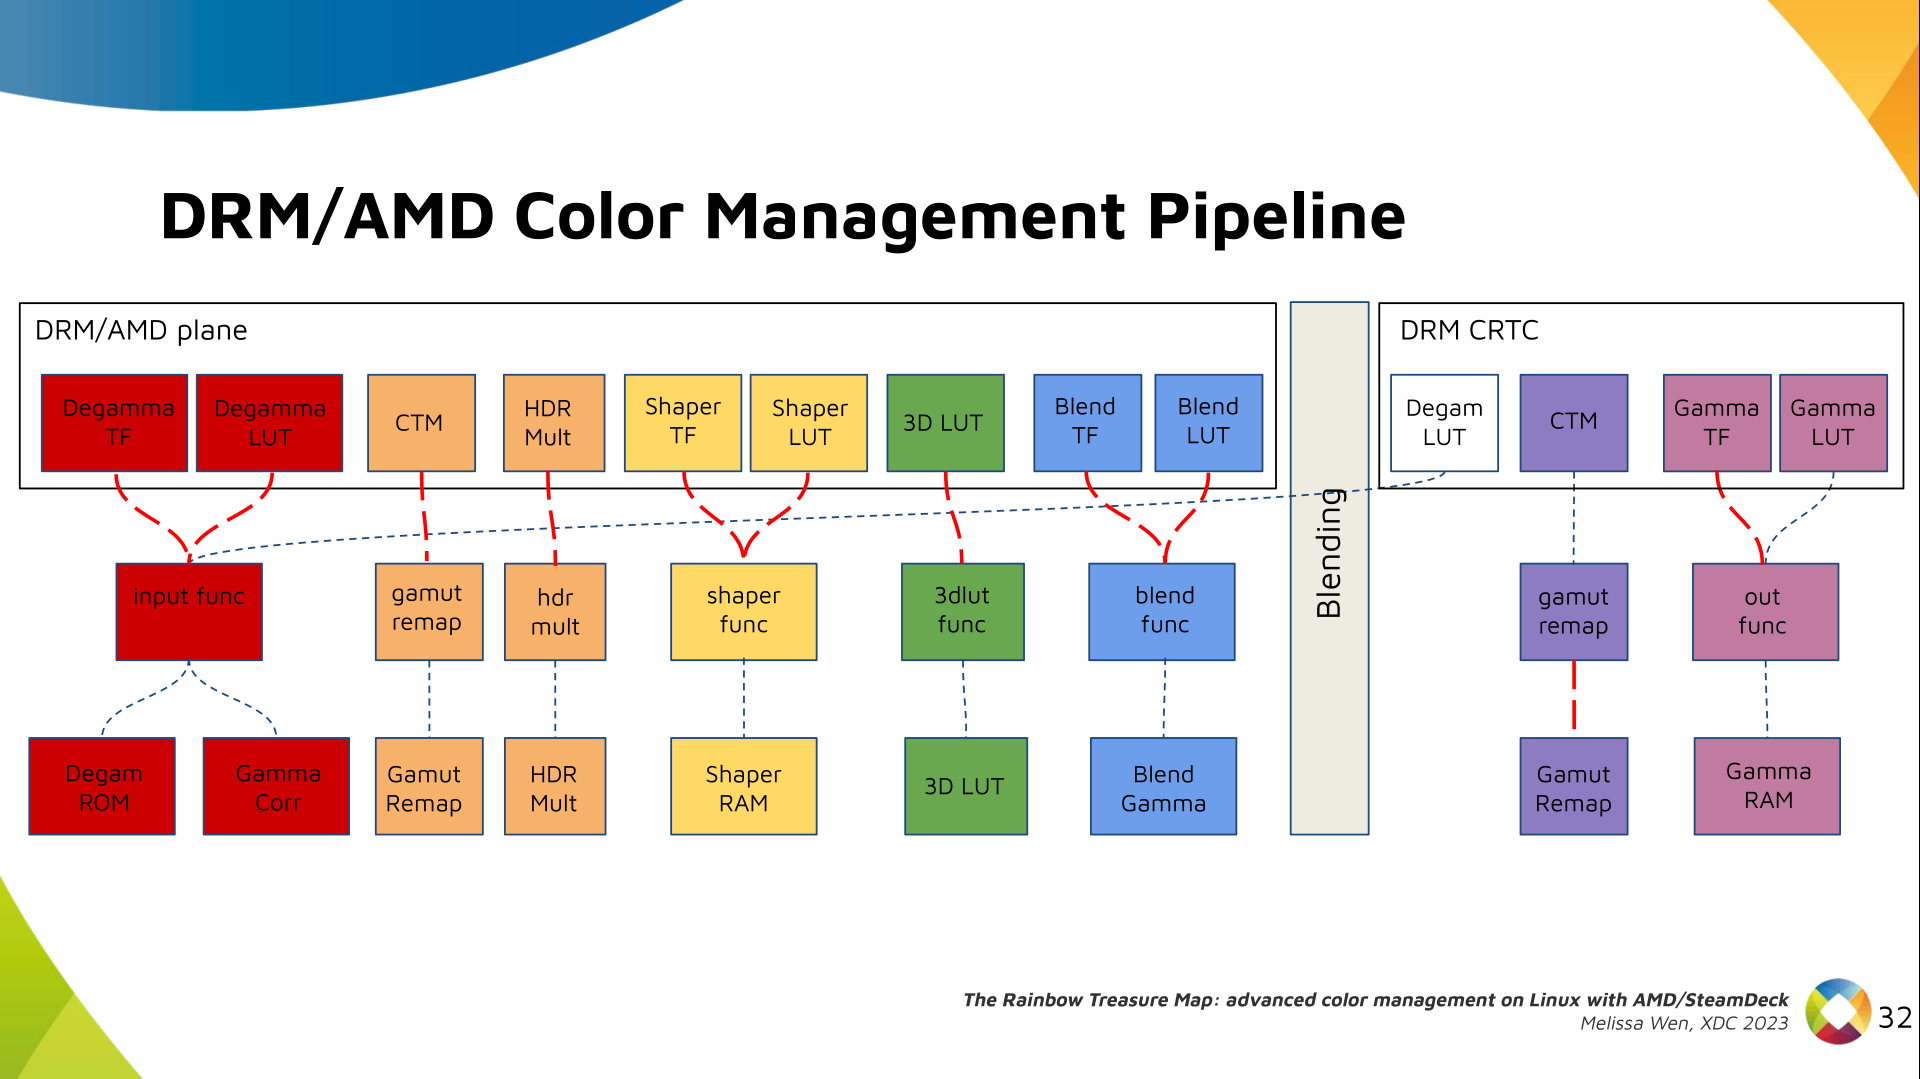
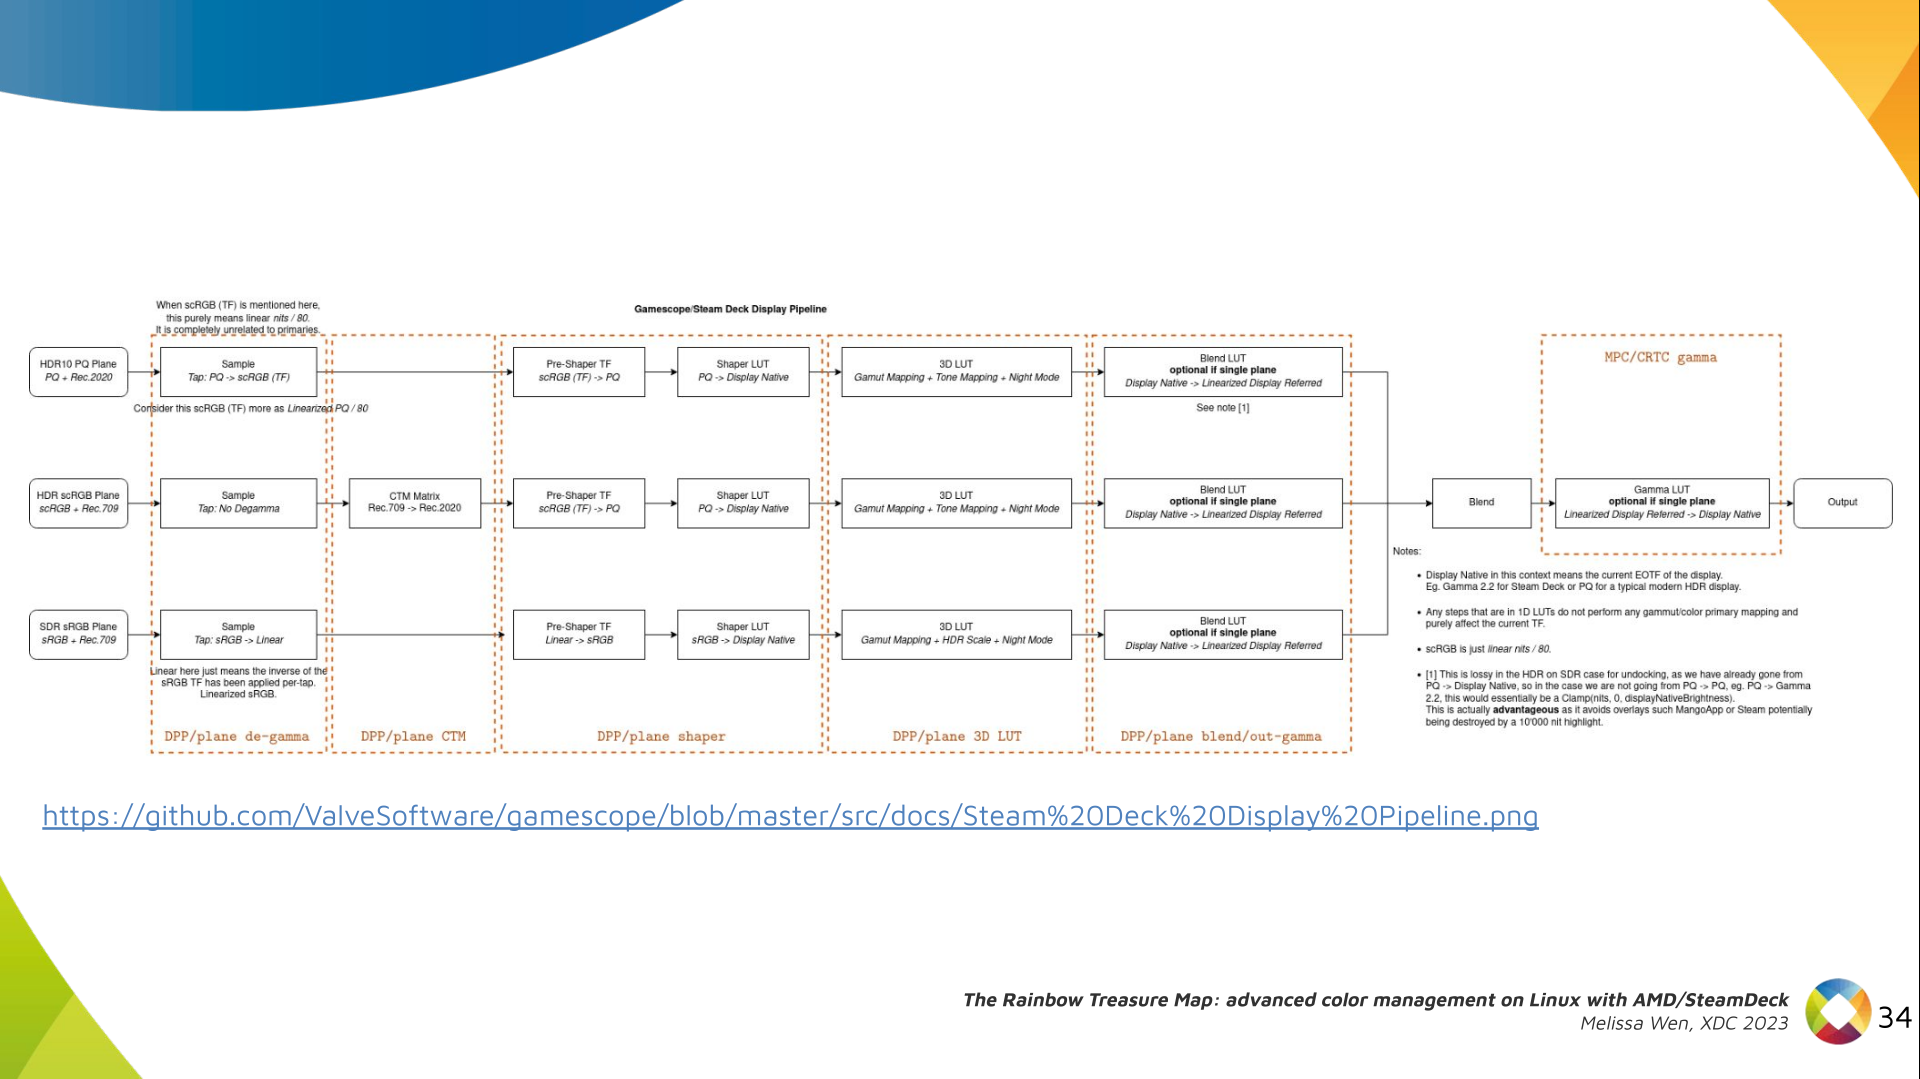


 The DRM/KMS framework provides the atomic API for color management through KMS
properties represented by
The DRM/KMS framework provides the atomic API for color management through KMS
properties represented by 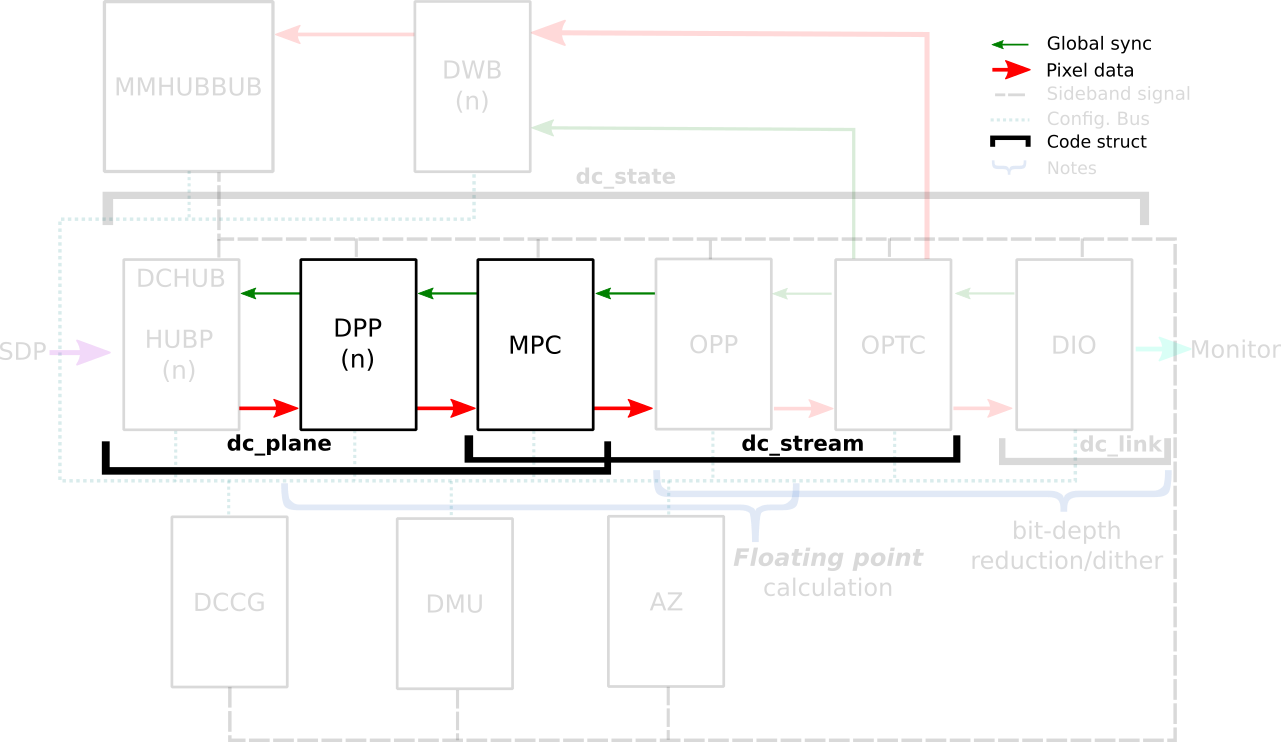


 Uhm, salsa is not resolving:
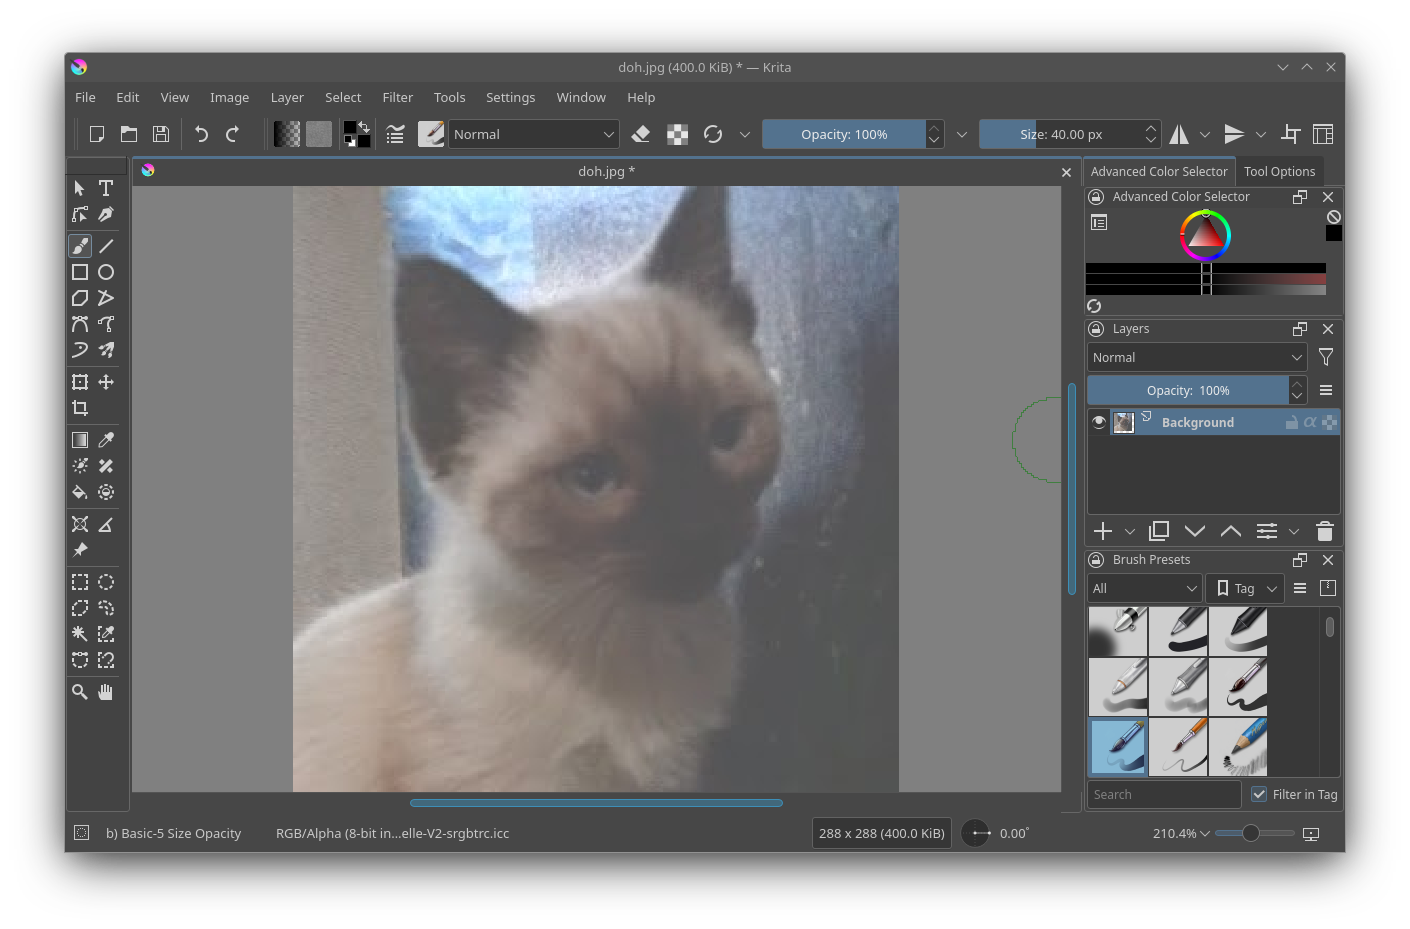 KDE Krita snap
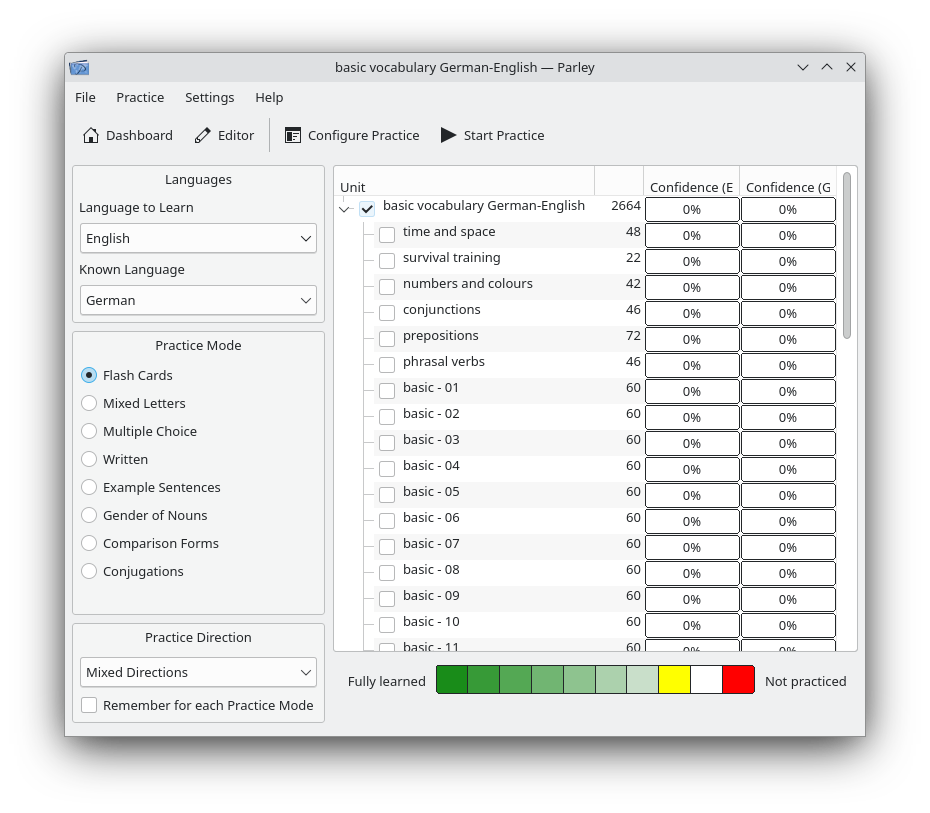 KDE Parley snap
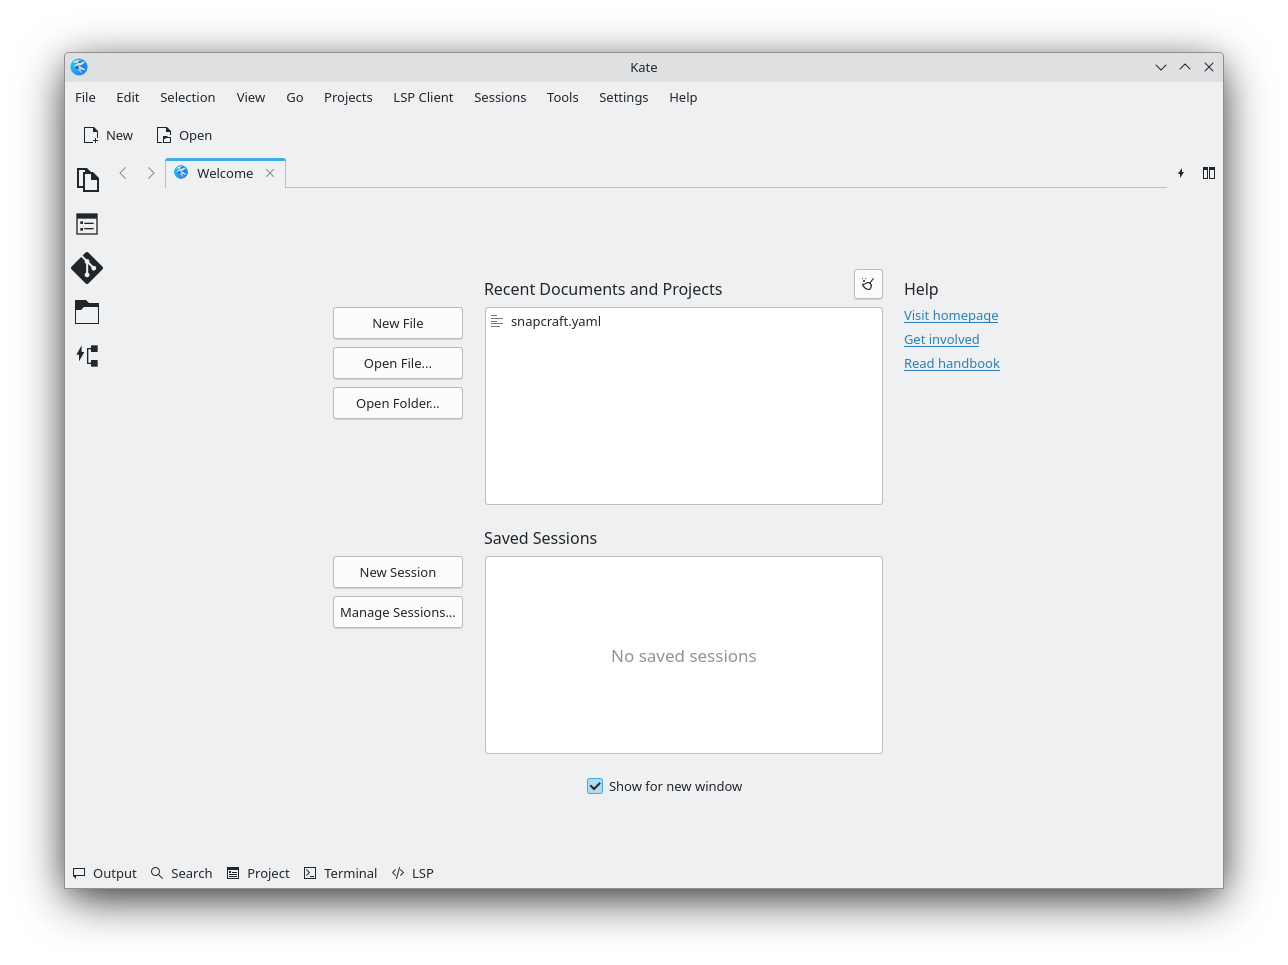 KDE Kate snap
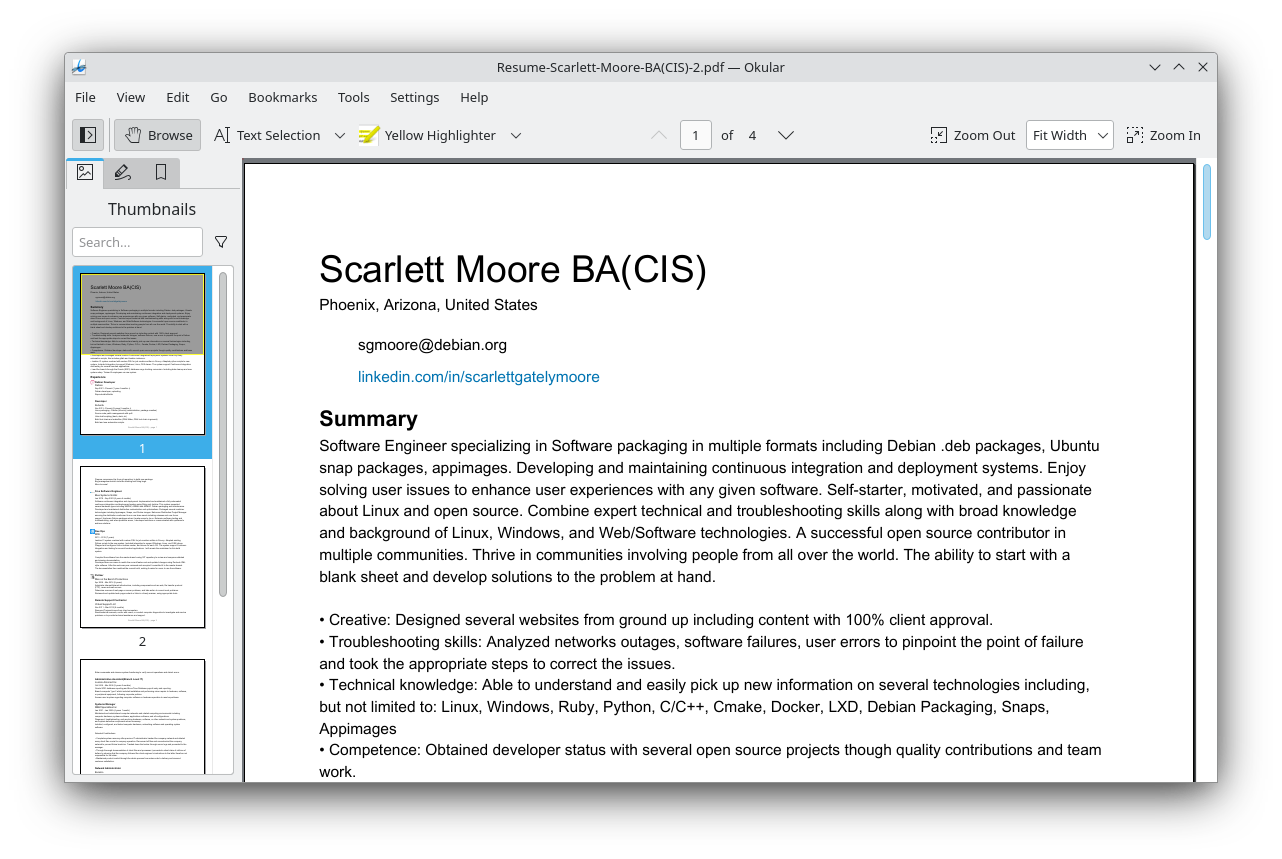 KDE Okular snap
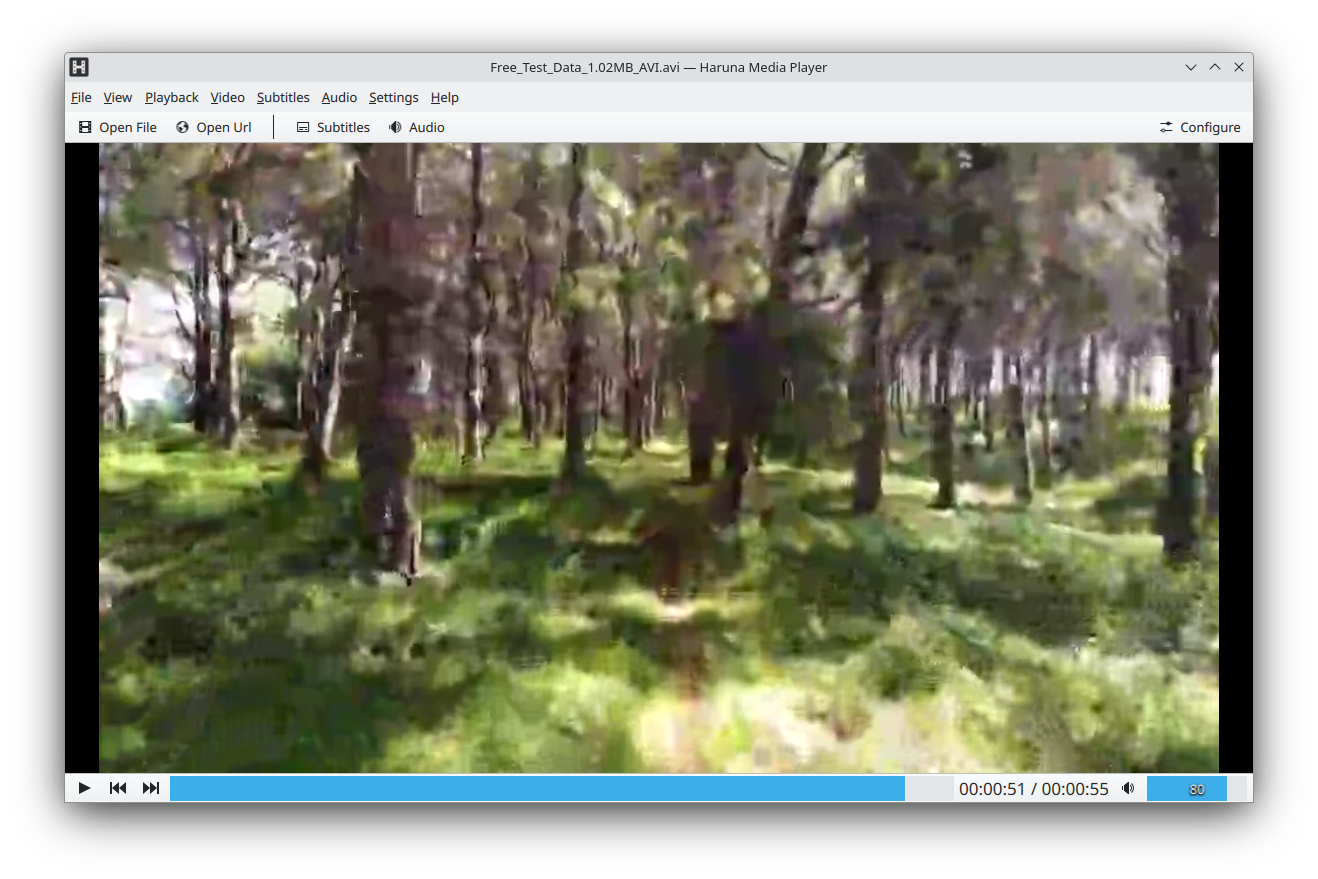 KDE Haruna snap
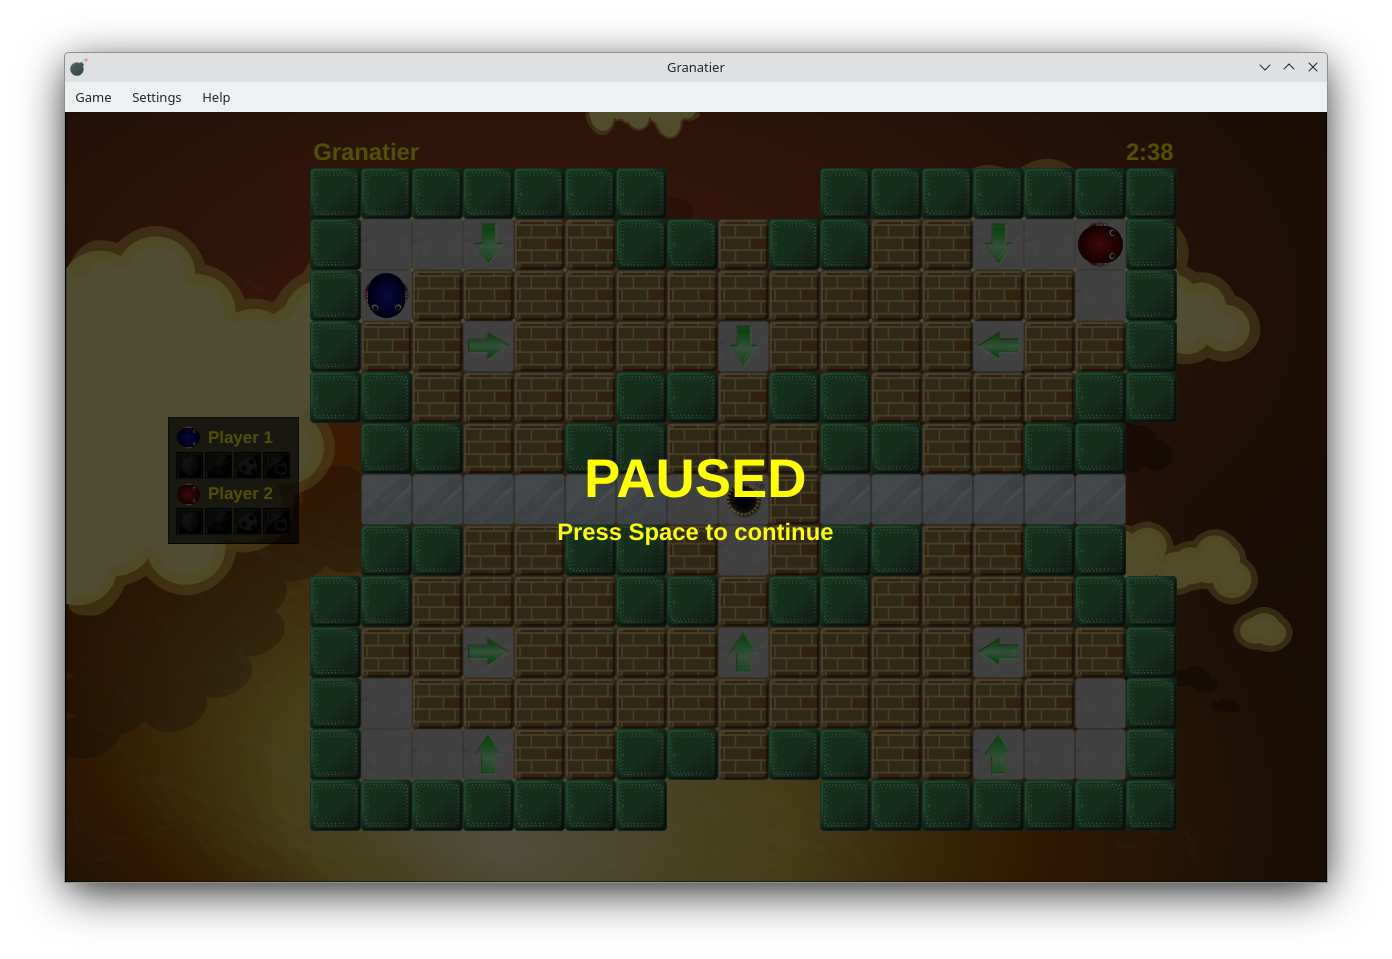 KDE Granatier snap
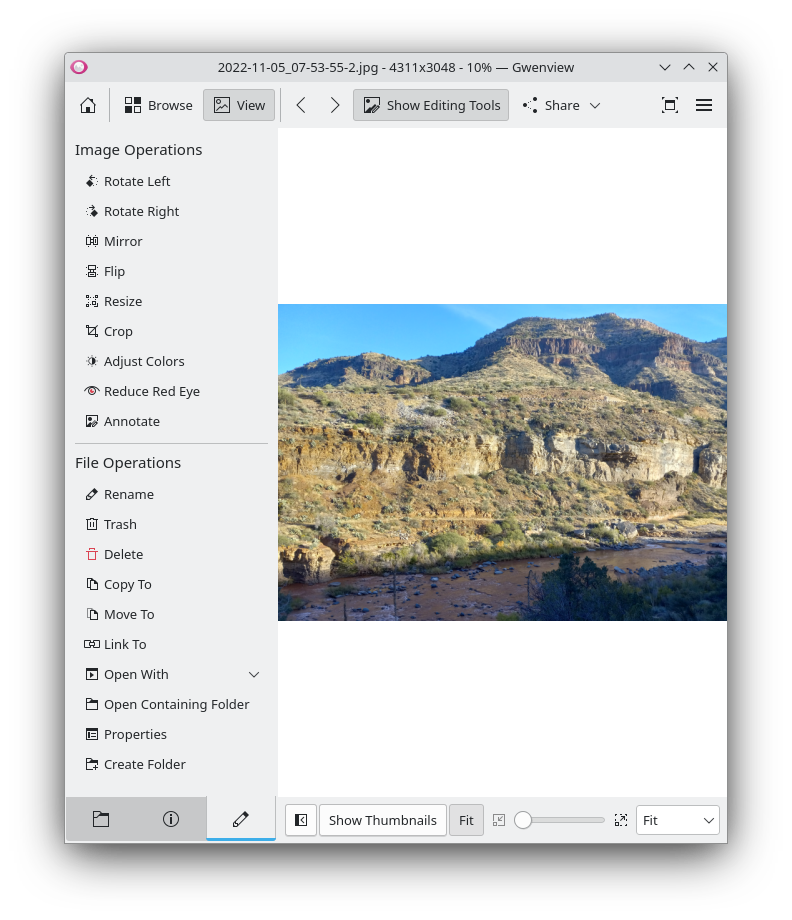 KDE Gwenview snap
 KDE Gcompris snap
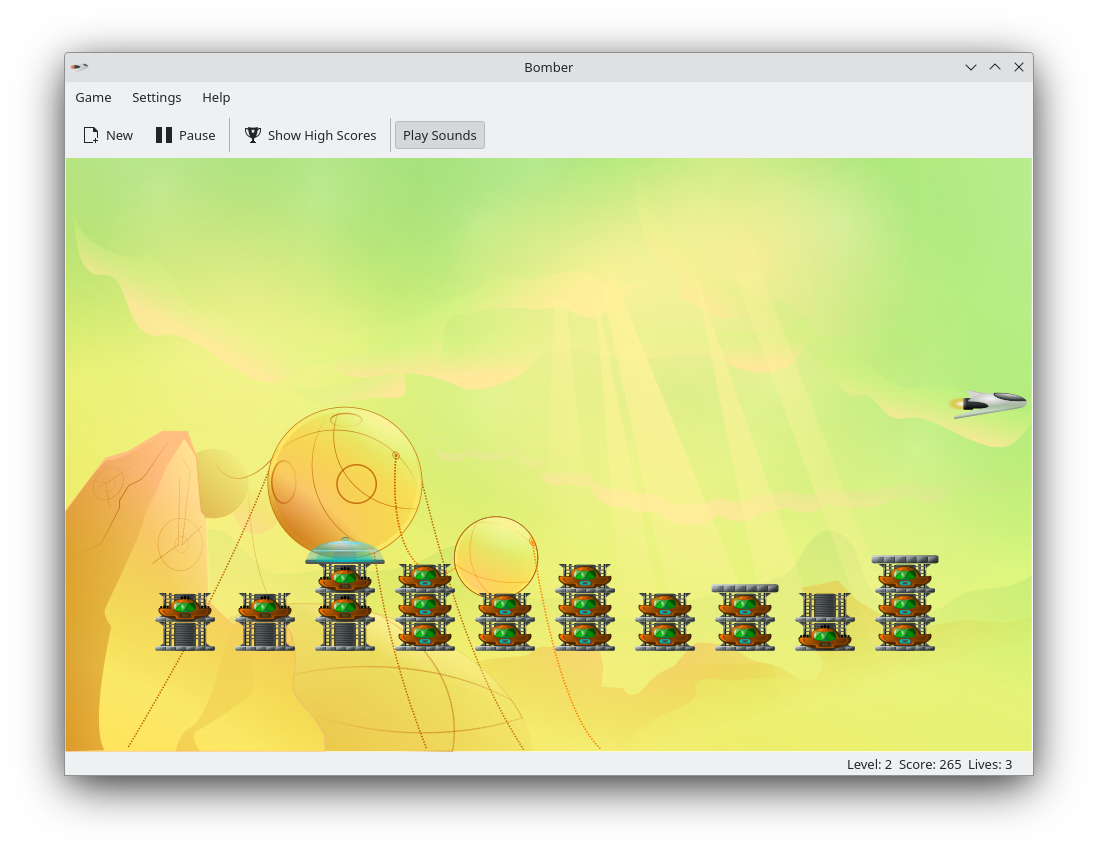 KDE Bomber snap
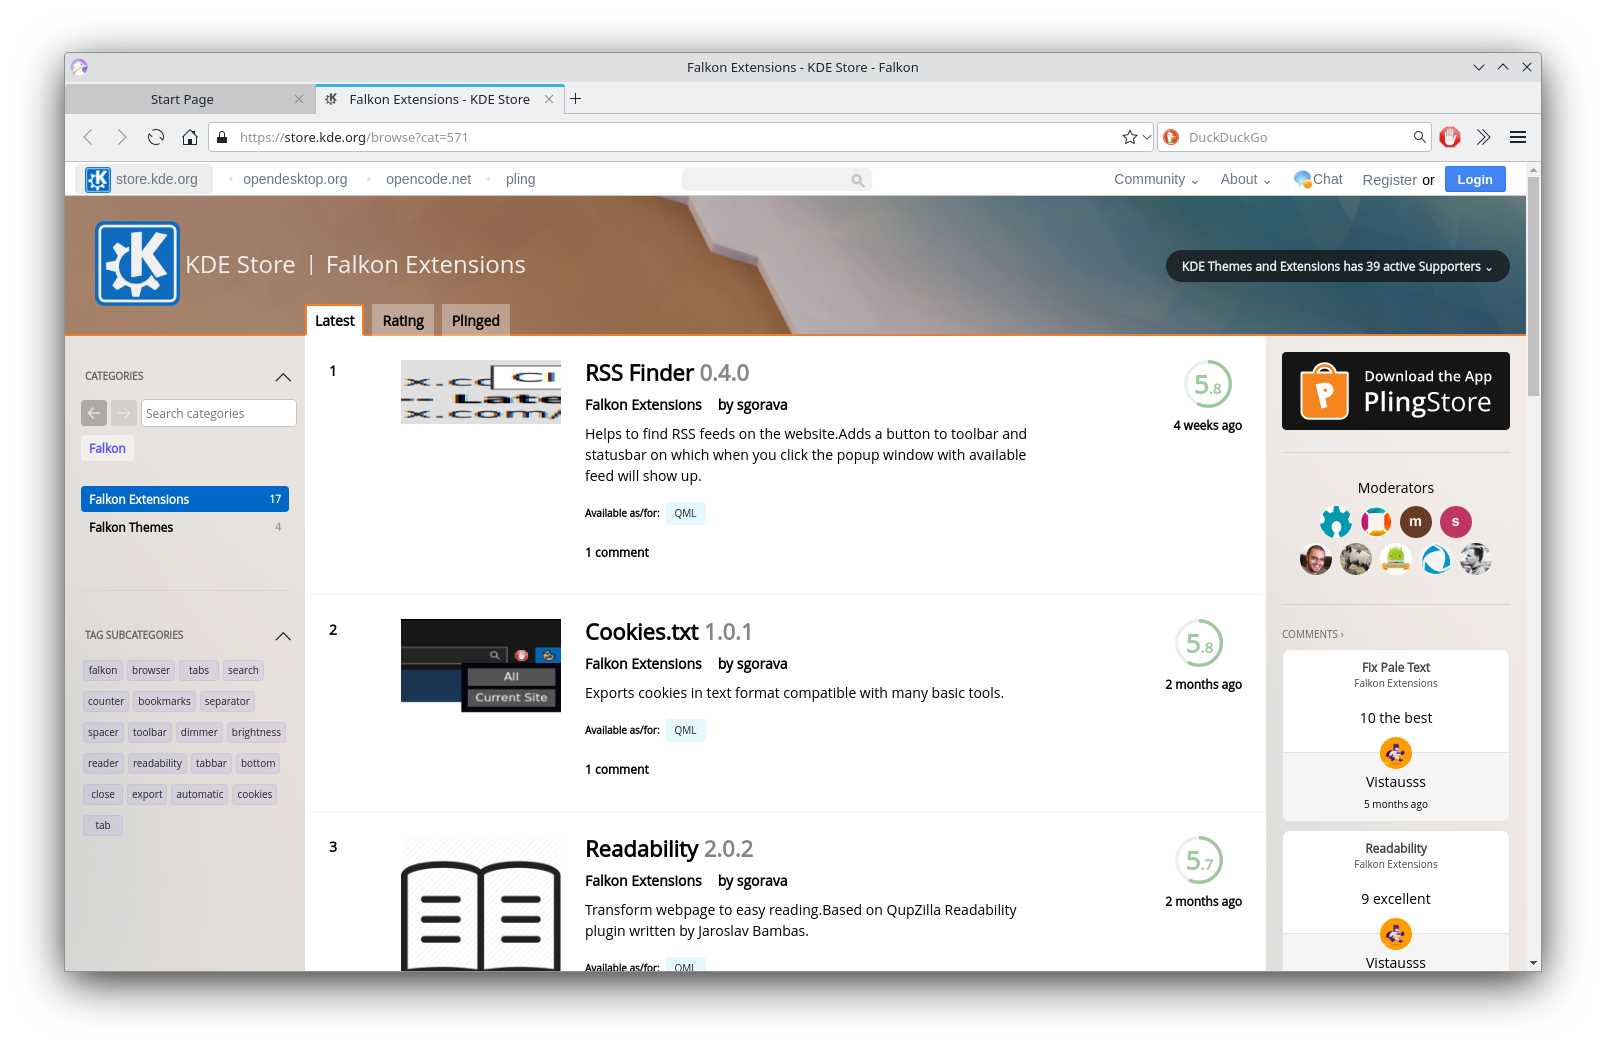 KDE Falkon snap
 KDE Ark snap
 KDE Blinken snap
 KDE Bovo Snap
 KDE Atikulate snap
 After
After 