Samuel Henrique: Hello World
 This is my very first post, just to make sure everything is working as expected.
Made with Zola and the Abridge theme.
This is my very first post, just to make sure everything is working as expected.
Made with Zola and the Abridge theme.
This is my very first post, just to make sure everything is working as expected.
Made with Zola and the Abridge theme.
This is my very first post, just to make sure everything is working as expected.
Made with Zola and the Abridge theme.

 While we couldn t go with 6 on our upcoming LTS release, I do recommend KDE neon if you want to give it a try! I want to say it again, I firmly stand by the Kubuntu Council in the decision to stay with the rock solid Plasma 5 for the 24.04 LTS release. The timing was just to close to feature freeze and the last time we went with the shiny new stuff on an LTS release, it was a nightmare ( KDE 4 anyone? ). So without further ado, my weekly wrap-up.
Kubuntu:
Continuing efforts from last week Kubuntu: Week 3 wrap up, Contest! KDE snaps, Debian uploads. , it has been another wild and crazy week getting everything in before feature freeze yesterday. We will still be uploading the upcoming Plasma 5.27.11 as it is a bug fix release and right now it is all about the finding and fixing bugs! Aside from many uploads my accomplishments this week are:
I have been working on the rather massive Apparmor bug https://bugs.launchpad.net/ubuntu/+source/apparmor/+bug/2046844 with testing the fixes from the ppa and writing profiles for the various KDE packages affected ( pretty much anything that uses webengine ) and making progress there.
My next order of business staging Frameworks 5.114 with guidance from our super awesome Rik Mills that has been doing most of the heavy lifting in Kubuntu for many years now. So thank you for that Rik
I will also start on our big transition to the Calamaras Installer! I do have experience here, so I expect it will be a smooth one.
I am so excited for the future of Kubuntu and the exciting things to come! With that said, the Kubuntu funding is community donation driven. There is enough to pay me part time for a couple contracts, but it will run out and a full-time contract would be super awesome. I am reaching out to anyone enjoying Kubuntu and want to help with the future of Kubuntu to please consider a donation! We are working on more donation options, but for now you can donate through paypal at https://kubuntu.org/donate/ Thank you!!!!!
While we couldn t go with 6 on our upcoming LTS release, I do recommend KDE neon if you want to give it a try! I want to say it again, I firmly stand by the Kubuntu Council in the decision to stay with the rock solid Plasma 5 for the 24.04 LTS release. The timing was just to close to feature freeze and the last time we went with the shiny new stuff on an LTS release, it was a nightmare ( KDE 4 anyone? ). So without further ado, my weekly wrap-up.
Kubuntu:
Continuing efforts from last week Kubuntu: Week 3 wrap up, Contest! KDE snaps, Debian uploads. , it has been another wild and crazy week getting everything in before feature freeze yesterday. We will still be uploading the upcoming Plasma 5.27.11 as it is a bug fix release and right now it is all about the finding and fixing bugs! Aside from many uploads my accomplishments this week are:
I have been working on the rather massive Apparmor bug https://bugs.launchpad.net/ubuntu/+source/apparmor/+bug/2046844 with testing the fixes from the ppa and writing profiles for the various KDE packages affected ( pretty much anything that uses webengine ) and making progress there.
My next order of business staging Frameworks 5.114 with guidance from our super awesome Rik Mills that has been doing most of the heavy lifting in Kubuntu for many years now. So thank you for that Rik
I will also start on our big transition to the Calamaras Installer! I do have experience here, so I expect it will be a smooth one.
I am so excited for the future of Kubuntu and the exciting things to come! With that said, the Kubuntu funding is community donation driven. There is enough to pay me part time for a couple contracts, but it will run out and a full-time contract would be super awesome. I am reaching out to anyone enjoying Kubuntu and want to help with the future of Kubuntu to please consider a donation! We are working on more donation options, but for now you can donate through paypal at https://kubuntu.org/donate/ Thank you!!!!!
So these "simple" files have way too many combinations of how they can be interpreted. I figured it would be helpful if debputy could highlight these difference, so I added support for those as well. Accordingly, debian/install is tagged with multiple tags including dh-executable-config and dh-glob-after-execute. Then, I added a datatable of these tags, so it would be easy for people to look up what they meant. Ok, this seems like a closed deal, right...?
- Will the debhelper use filearray, filedoublearray or none of them to read the file? This topic has about 2 bits of entropy.
- Will the config file be executed if it is marked executable assuming you are using the right compat level? If it is executable, does dh-exec allow renaming for this file? This topic adds 1 or 2 bit of entropy depending on the context.
- Will the config file be subject to glob expansions? This topic sounds like a boolean but is a complicated mess. The globs can be handled either by debhelper as it parses the file for you. In this case, the globs are applied to every token. However, this is not what dh_install does. Here the last token on each line is supposed to be a directory and therefore not subject to globs. Therefore, dh_install does the globbing itself afterwards but only on part of the tokens. So that is about 2 bits of entropy more. Actually, it gets worse...
- If the file is executed, debhelper will refuse to expand globs in the output of the command, which was a deliberate design choice by the original debhelper maintainer took when he introduced the feature in debhelper/8.9.12. Except, dh_install feature interacts with the design choice and does enable glob expansion in the tool output, because it does so manually after its filedoublearray call.
You can help yourself and others to better results by using the declarative way rather than using debian/rules, which is the bane of all introspection!
- When determining which commands are relevant, using Build-Depends: dh-sequence-foo is much more reliable than configuring it via the Turing complete configuration we call debian/rules.
- When debhelper commands use NOOP promise hints, dh_assistant can "see" the config files listed those hints, meaning the file will at least be detected. For new introspectable hint and the debputy plugin, it is probably better to wait until the dust settles a bit before adding any of those.
 This post describes how I m using
semantic-release on
gitlab-ci to manage versioning automatically
for different kinds of projects following a simple workflow (a
This post describes how I m using
semantic-release on
gitlab-ci to manage versioning automatically
for different kinds of projects following a simple workflow (a develop branch
where changes are added or merged to test new versions, a temporary
release/#.#.# to generate the release candidate versions and a main branch
where the final versions are published).
semantic-releaseIt is a Node.js application designed to manage project
versioning information on Git Repositories using a
Continuous integration
system (in this post we will use gitlab-ci)semantic-release uses semver for versioning
(release versions use the format MAJOR.MINOR.PATCH) and commit messages are
parsed to determine the next version number to publish.
If after analyzing the commits the version number has to be changed, the command
updates the files we tell it to (i.e. the package.json file for nodejs
projects and possibly a CHANGELOG.md file), creates a new commit with the
changed files, creates a tag with the new version and pushes the changes to the
repository.
When running on a CI/CD system we usually generate the artifacts related to a
release (a package, a container image, etc.) from the tag, as it includes the
right version number and usually has passed all the required tests (it is a good
idea to run the tests again in any case, as someone could create a tag manually
or we could run extra jobs when building the final assets if they fail it is
not a big issue anyway, numbers are cheap and infinite, so we can skip releases
if needed).
MAJOR version.
The commit message format used must be:
<type>(optional scope): <description>
[optional body]
[optional footer(s)]release, maintenance and
pre-release, but for now I m not using maintenance ones.
The branches I use and their types are:
main as release branch (final versions are published from there)develop as pre release branch (used to publish development and testing
versions with the format #.#.#-SNAPSHOT.#)release/#.#.# as pre release branches (they are created from develop
to publish release candidate versions with the format #.#.#-rc.# and once
they are merged with main they are deleted)main) the version number is updated as follows:
MAJOR number is incremented if a commit with a BREAKING CHANGE:
footer or an exclamation (!) after the type/scope is found in the list of
commits found since the last version change (it looks for tags on the same
branch).MINOR number is incremented if the MAJOR number is not going to be
changed and there is a commit with type feat in the commits found since
the last version change.PATCH number is incremented if neither the MAJOR nor the MINOR numbers
are going to be changed and there is a commit with type fix in the the
commits found since the last version change.develop and release/#.#.#) the version and
pre release numbers are always calculated from the last published version
available on the branch (i. e. if we published version 1.3.2 on main we need
to have the commit with that tag on the develop or release/#.#.# branch
to get right what will be the next version).
The version number is updated as follows:
MAJOR number is incremented if a commit with a BREAKING CHANGE:
footer or an exclamation (!) after the type/scope is found in the list of
commits found since the last released version.In our example it was 1.3.2 and the version is updated to 2.0.0-SNAPSHOT.1
or 2.0.0-rc.1 depending on the branch.MINOR number is incremented if the MAJOR number is not going to be
changed and there is a commit with type feat in the commits found since
the last released version.In our example the release was 1.3.2 and the version is updated to
1.4.0-SNAPSHOT.1 or 1.4.0-rc.1 depending on the branch.PATCH number is incremented if neither the MAJOR nor the MINOR numbers
are going to be changed and there is a commit with type fix in the the
commits found since the last version change.In our example the release was 1.3.2 and the version is updated to
1.3.3-SNAPSHOT.1 or 1.3.3-rc.1 depending on the branch.MAJOR, MINOR and PATCH
numbers are not going to be changed but there is a commit that would
otherwise update the version (i.e. a fix on 1.3.3-SNAPSHOT.1 will set the
version to 1.3.3-SNAPSHOT.2, a fix or feat on 1.4.0-rc.1 will set the
version to 1.4.0-rc.2 an so on).nodejs projects, it can be used
with multiple programming languages and project types.
For nodejs projects the usual place to put the configuration is the project s
package.json, but I prefer to use the .releaserc file instead.
As I use a common set of CI templates, instead of using a .releaserc on each
project I generate it on the fly on the jobs that need it, replacing values
related to the project type and the current branch on a template using the
tmpl command (lately I use a
branch of my own fork while I wait
for some feedback from upstream, as you will see on the Dockerfile).gitlab-ci job we use the image built from the
following Dockerfile:
# Semantic release image
FROM golang:alpine AS tmpl-builder
#RUN go install github.com/krakozaure/tmpl@v0.4.0
RUN go install github.com/sto/tmpl@v0.4.0-sto.2
FROM node:lts-alpine
COPY --from=tmpl-builder /go/bin/tmpl /usr/local/bin/tmpl
RUN apk update &&\
  apk upgrade &&\
  apk add curl git jq openssh-keygen yq zip &&\
  npm install --location=global\
    conventional-changelog-conventionalcommits@6.1.0\
    @qiwi/multi-semantic-release@7.0.0\
    semantic-release@21.0.7\
    @semantic-release/changelog@6.0.3\
    semantic-release-export-data@1.0.1\
    @semantic-release/git@10.0.1\
    @semantic-release/gitlab@9.5.1\
    @semantic-release/release-notes-generator@11.0.4\
    semantic-release-replace-plugin@1.2.7\
    semver@7.5.4\
  &&\
  rm -rf /var/cache/apk/*
CMD ["/bin/sh"]semantic-release is executed when new commits are added
to the develop, release/#.#.# or main branches (basically when something
is merged or pushed) and after all tests have passed (we don t want to create a
new version that does not compile or passes at least the unit tests).
The job is something like the following:
semantic_release:
  image: $SEMANTIC_RELEASE_IMAGE
  rules:
    - if: '$CI_COMMIT_BRANCH =~ /^(develop main release\/\d+.\d+.\d+)$/'
      when: always
  stage: release
  before_script:
    - echo "Loading scripts.sh"
    - . $ASSETS_DIR/scripts.sh
  script:
    - sr_gen_releaserc_json
    - git_push_setup
- semantic-releaseSEMANTIC_RELEASE_IMAGE variable contains the URI of the image built
using the Dockerfile above and the sr_gen_releaserc_json and
git_push_setup are functions defined on the $ASSETS_DIR/scripts.sh file:
sr_gen_releaserc_json function generates the .releaserc.json file
using the tmpl command.git_push_setup function configures git to allow pushing changes to the
repository with the semantic-release command, optionally signing them with a
SSH key.sr_gen_releaserc_json functionThe code for the sr_gen_releaserc_json function is the following:
sr_gen_releaserc_json()

  # Use nodejs as default project_type
  project_type="$ PROJECT_TYPE:-nodejs "
  # REGEX to match the rc_branch name
  rc_branch_regex='^release\/[0-9]\+\.[0-9]\+\.[0-9]\+$'
  # PATHS on the local ASSETS_DIR
  assets_dir="$ CI_PROJECT_DIR /$ ASSETS_DIR "
  sr_local_plugin="$ assets_dir /local-plugin.cjs"
  releaserc_tmpl="$ assets_dir /releaserc.json.tmpl"
  pipeline_runtime_values_yaml="/tmp/releaserc_values.yaml"
  pipeline_values_yaml="$ assets_dir /values_$ project_type _project.yaml"
  # Destination PATH
  releaserc_json=".releaserc.json"
  # Create an empty pipeline_values_yaml if missing
  test -f "$pipeline_values_yaml"   : >"$pipeline_values_yaml"
  # Create the pipeline_runtime_values_yaml file
  echo "branch: $ CI_COMMIT_BRANCH " >"$pipeline_runtime_values_yaml"
  echo "gitlab_url: $ CI_SERVER_URL " >"$pipeline_runtime_values_yaml"
  # Add the rc_branch name if we are on an rc_branch
  if [ "$(echo "$CI_COMMIT_BRANCH"   sed -ne "/$rc_branch_regex/ p ")" ]; then
    echo "rc_branch: $ CI_COMMIT_BRANCH " >>"$pipeline_runtime_values_yaml"
  elif [ "$(echo "$CI_MERGE_REQUEST_SOURCE_BRANCH_NAME"
      sed -ne "/$rc_branch_regex/ p ")" ]; then
    echo "rc_branch: $ CI_MERGE_REQUEST_SOURCE_BRANCH_NAME " \
      >>"$pipeline_runtime_values_yaml"
  fi
  echo "sr_local_plugin: $ sr_local_plugin " >>"$pipeline_runtime_values_yaml"
  # Create the releaserc_json file
  tmpl -f "$pipeline_runtime_values_yaml" -f "$pipeline_values_yaml" \
    "$releaserc_tmpl"   jq . >"$releaserc_json"
  # Remove the pipeline_runtime_values_yaml file
  rm -f "$pipeline_runtime_values_yaml"
  # Print the releaserc_json file
  print_file_collapsed "$releaserc_json"
  # --*-- BEG: NOTE --*--
  # Rename the package.json to ignore it when calling semantic release.
  # The idea is that the local-plugin renames it back on the first step of the
  # semantic-release process.
  # --*-- END: NOTE --*--
  if [ -f "package.json" ]; then
    echo "Renaming 'package.json' to 'package.json_disabled'"
    mv "package.json" "package.json_disabled"
  fi
gitlab except the
ASSETS_DIR and PROJECT_TYPE; in the complete pipelines the ASSETS_DIR is
defined on a common file included by all the pipelines and the project type is
defined on the .gitlab-ci.yml file of each project.
If you review the code you will see that the file processed by the tmpl
command is named releaserc.json.tmpl, its contents are shown here:
  "plugins": [
     - if .sr_local_plugin
    "  .sr_local_plugin  ",
     - end
    [
      "@semantic-release/commit-analyzer",

        "preset": "conventionalcommits",
        "releaseRules": [
            "breaking": true, "release": "major"  ,
            "revert": true, "release": "patch"  ,
            "type": "feat", "release": "minor"  ,
            "type": "fix", "release": "patch"  ,
            "type": "perf", "release": "patch"
        ]

    ],
     - if .replacements
    [
      "semantic-release-replace-plugin",
        "replacements":   .replacements   toJson
    ],
     - end
    "@semantic-release/release-notes-generator",
     - if eq .branch "main"
    [
      "@semantic-release/changelog",
        "changelogFile": "CHANGELOG.md", "changelogTitle": "# Changelog"
    ],
     - end
    [
      "@semantic-release/git",

        "assets":   if .assets   .assets   toJson   else  []  end  ,
        "message": "ci(release): v$ nextRelease.version \n\n$ nextRelease.notes "

    ],
    [
      "@semantic-release/gitlab",
        "gitlabUrl": "  .gitlab_url  ", "successComment": false
    ]
  ],
  "branches": [
      "name": "develop", "prerelease": "SNAPSHOT"  ,
     - if .rc_branch
      "name": "  .rc_branch  ", "prerelease": "rc"  ,
     - end
    "main"
  ]
releaserc_values.yaml) that includes the following keys and values:
branch: the name of the current branchgitlab_url: the URL of the gitlab server (the value is taken from the
CI_SERVER_URL variable)rc_branch: the name of the current rc branch; we only set the value if we
are processing one because semantic-release only allows one branch to match
the rc prefix and if we use a wildcard (i.e. release/*) but the users
keep more than one release/#.#.# branch open at the same time the calls to
semantic-release will fail for sure.sr_local_plugin: the path to the local plugin we use (shown later)values_$ project_type _project.yaml file that
includes settings specific to the project type, the one for nodejs is as
follows:
replacements:
  - files:
      - "package.json"
    from: "\"version\": \".*\""
    to: "\"version\": \"$ nextRelease.version \""
assets:
  - "CHANGELOG.md"
- "package.json"replacements section is used to update the version field on the relevant
files of the project (in our case the package.json file) and the assets
section includes the files that will be committed to the repository when the
release is published (looking at the template you can see that the
CHANGELOG.md is only updated for the main branch, we do it this way because
if we update the file on other branches it creates a merge nightmare and we are
only interested on it for released versions anyway).
The local plugin adds code to rename the package.json_disabled file to
package.json if present and prints the last and next versions on the logs with
a format that can be easily parsed using sed:
// Minimal plugin to:
// - rename the package.json_disabled file to package.json if present
// - log the semantic-release last & next versions
function verifyConditions(pluginConfig, context)
  var fs = require('fs');
  if (fs.existsSync('package.json_disabled'))
    fs.renameSync('package.json_disabled', 'package.json');
    context.logger.log( verifyConditions: renamed 'package.json_disabled' to 'package.json' );


function analyzeCommits(pluginConfig, context)
  if (context.lastRelease && context.lastRelease.version)
    context.logger.log( analyzeCommits: LAST_VERSION=$ context.lastRelease.version  );


function verifyRelease(pluginConfig, context)
  if (context.nextRelease && context.nextRelease.version)
    context.logger.log( verifyRelease: NEXT_VERSION=$ context.nextRelease.version  );


module.exports =
  verifyConditions,
  analyzeCommits,
  verifyRelease
git_push_setup functionThe code for the git_push_setup function is the following:
git_push_setup()

  # Update global credentials to allow git clone & push for all the group repos
  git config --global credential.helper store
  cat >"$HOME/.git-credentials" <<EOF
https://fake-user:$ GITLAB_REPOSITORY_TOKEN @gitlab.com
EOF
  # Define user name, mail and signing key for semantic-release
  user_name="$SR_USER_NAME"
  user_email="$SR_USER_EMAIL"
  ssh_signing_key="$SSH_SIGNING_KEY"
  # Export git user variables
  export GIT_AUTHOR_NAME="$user_name"
  export GIT_AUTHOR_EMAIL="$user_email"
  export GIT_COMMITTER_NAME="$user_name"
  export GIT_COMMITTER_EMAIL="$user_email"
  # Sign commits with ssh if there is a SSH_SIGNING_KEY variable
  if [ "$ssh_signing_key" ]; then
    echo "Configuring GIT to sign commits with SSH"
    ssh_keyfile="/tmp/.ssh-id"
    : >"$ssh_keyfile"
    chmod 0400 "$ssh_keyfile"
    echo "$ssh_signing_key"   tr -d '\r' >"$ssh_keyfile"
    git config gpg.format ssh
    git config user.signingkey "$ssh_keyfile"
    git config commit.gpgsign true
  fi
GITLAB_REPOSITORY_TOKEN variable (set on the
CI/CD variables section of the project or group we want) contains a token with
read_repository and write_repository permissions on all the projects we are
going to use this function.
The SR_USER_NAME and SR_USER_EMAIL variables can be defined on a common file
or the CI/CD variables section of the project or group we want to work with and
the script assumes that the optional SSH_SIGNING_KEY is exported as a CI/CD
default value of type variable (that is why the keyfile is created on the fly)
and git is configured to use it if the variable is not empty.
GITLAB_REPOSITORY_TOKEN and SSH_SIGNING_KEY
contain secrets, so probably is a good idea to make them protected (if you do
that you have to make the develop, main and release/* branches protected
too).semantic-release user has to be able to push to all the projects on those
protected branches, it is a good idea to create a dedicated user and add it as a
MAINTAINER for the projects we want (the MAINTAINERS need to be able to push
to the branches), or, if you are using a Gitlab with a Premium license you can
use the
api
to allow the semantic-release user to push to the protected branches without
allowing it for any other user.semantic-release commandOnce we have the .releaserc file and the git configuration ready we run the
semantic-release command.
If the branch we are working with has one or more commits that will increment
the version, the tool does the following (note that the steps are described are
the ones executed if we use the configuration we have generated):
version field on the package.json file).CHANGELOG.md file adding the release notes if we are going to
publish the file (when we are on the main branch).assets key have
changed and uses the commit message we have defined, replacing the variables
for their current values.gitlab plugin after tagging it also creates a release
on the project with the tag name and the release notes.git workflows and merges between branchesIt is very important to remember that semantic-release looks at the commits of
a given branch when calculating the next version to publish, that has two
important implications:
semantic-release needs to calculate
the next version and even if we use the right prefix for the squashed commit
(fix, feat, ) we miss all the messages that would otherwise go to the
CHANGELOG.md file.main branch changes into the develop one after each release
tag is created; in my pipelines the fist job that processes a release tag
creates a branch from the tag and an MR to merge it to develop.
The important thing about that MR is that is must not be squashed, if we do that
the tag commit will probably be lost, so we need to be careful.
To merge the changes directly we can run the following code:
# Set the SR_TAG variable to the tag you want to process
SR_TAG="v1.3.2"
# Fetch all the changes
git fetch --all --prune
# Switch to the main branch
git switch main
# Pull all the changes
git pull
# Switch to the development branch
git switch develop
# Pull all the changes
git pull
# Create followup branch from tag
git switch -c "followup/$SR_TAG" "$SR_TAG"
# Change files manually & commit the changed files
git commit -a --untracked-files=no -m "ci(followup): $SR_TAG to develop"
# Switch to the development branch
git switch develop
# Merge the followup branch into the development one using the --no-ff option
git merge --no-ff "followup/$SR_TAG"
# Remove the followup branch
git branch -d "followup/$SR_TAG"
# Push the changes
git pushdevelop we can create a MR pushing the followup
branch after committing the changes, but we have to make sure that we don t
squash the commits when merging or it will not work as we want.
 This post describes how to define and use rule templates with semantic names using
 extends or !reference tags, how
to define manual jobs using the same templates and how to use gitlab-ci
inputs as macros to give names to regular expressions used by rules.
rules.yml file stored on a common repository used from different projects as I mentioned on
my previous post, but they can be defined anywhere, the important thing is that the
files that need them include their definition somehow.
The first version of my rules.yml file was as follows:
.rules_common:
  # Common rules; we include them from others instead of forcing a workflow
  rules:
    # Disable branch pipelines while there is an open merge request from it
    - if: >-
        $CI_COMMIT_BRANCH &&
        $CI_OPEN_MERGE_REQUESTS &&
        $CI_PIPELINE_SOURCE != "merge_request_event"
      when: never
.rules_default:
  # Default rules, we need to add the when: on_success to make things work
  rules:
    - !reference [.rules_common, rules]
- when: on_success.rules_common defines a rule section to disable jobs as we can do on a workflow definition;
in our case common rules only have if rules that apply to all jobs and are used to disable them. The example includes
one that avoids creating duplicated jobs when we push to a branch that is the source of an open MR as explained
here.
To use the rules in a job we have two options, use the extends keyword (we do that when we want to use the rule as is)
or declare a rules section and add a !reference to the template we want to use as described
here (we do that when we want to add
additional rules to disable a job before evaluating the template conditions).
As an example, with the following definitions both jobs use the same rules:
job_1:
  extends:
    - .rules_default
  [...]
job_2:
  rules:
    - !reference [.rules_default, rules]
[...]when: manual and defines if we
want it to be optional or not (allow_failure: true makes the job optional, if we don t add that to the rule the job is
blocking) or add the when: manual and the allow_failure value to the job (if we work at the job level the default
value for allow_failure is false for when: manual, so it is optional by default, we have to add an explicit
allow_failure = true it to make it blocking).
The following example shows how we define blocking or optional manual jobs using rules with when conditions:
.rules_default_manual_blocking:
  # Default rules for optional manual jobs
  rules:
    - !reference [.rules_common, rules]
    - when: manual
      # allow_failure: false is implicit
.rules_default_manual_optional:
  # Default rules for optional manual jobs
  rules:
    - !reference [.rules_common, rules]
    - when: manual
      allow_failure: true
manual_blocking_job:
  extends:
    - .rules_default_manual_blocking
  [...]
manual_optional_job:
  extends:
    - .rules_default_manual_optional
[...]manual_blocking_job:
extends:
- .rules_default
when: manual
allow_failure: false
[...]
manual_optional_job:
extends:
- .rules_default
when: manual
# allow_failure: true is implicit
[...]rules.yml file smaller and I see that the
job is manual in its definition without problem.allow_failure, changes, exists, needs or variablesUnluckily for us, for now there is no way to avoid creating additional templates as we did on the when: manual case
when a rule is similar to an existing one but adds changes,
exists,
needs or
variables to it.
So, for now, if a rule needs to add any of those fields we have to copy the original rule and add the keyword section.
Some notes, though:
allow_failure if we want to change its value for a given condition, in other cases we can set
the value at the job level.changes to the rule it is important to make sure that they are going to be evaluated as explained
here.needs value to a rule for a specific condition and it matches it replaces the job needs section;
when using templates I would use two different job names with different conditions instead of adding a needs on a
single job.main branch and use
short-lived branches to test and complete changes before pushing things to main.
Using this approach we can define an initial set of rule templates with semantic names:
.rules_mr_to_main:
  rules:
    - !reference [.rules_common, rules]
    - if: $CI_MERGE_REQUEST_TARGET_BRANCH_NAME == 'main'
.rules_mr_or_push_to_main:
  rules:
    - !reference [.rules_common, rules]
    - if: $CI_MERGE_REQUEST_TARGET_BRANCH_NAME == 'main'
    - if: >-
        $CI_COMMIT_BRANCH == 'main'
        &&
        $CI_PIPELINE_SOURCE != 'merge_request_event'
.rules_push_to_main:
  rules:
    - !reference [.rules_common, rules]
    - if: >-
        $CI_COMMIT_BRANCH == 'main'
        &&
        $CI_PIPELINE_SOURCE != 'merge_request_event'
.rules_push_to_branch:
  rules:
    - !reference [.rules_common, rules]
    - if: >-
        $CI_COMMIT_BRANCH != 'main'
        &&
        $CI_PIPELINE_SOURCE != 'merge_request_event'
.rules_push_to_branch_or_mr_to_main:
  rules:
    - !reference [.rules_push_to_branch, rules]
    - if: >-
         $CI_MERGE_REQUEST_SOURCE_BRANCH_NAME != 'main'
         &&
         $CI_MERGE_REQUEST_TARGET_BRANCH_NAME == 'main'
.rules_release_tag:
  rules:
    - !reference [.rules_common, rules]
    - if: $CI_COMMIT_TAG =~ /^([0-9a-zA-Z_.-]+-)?v\d+.\d+.\d+$/
.rules_non_release_tag:
  rules:
    - !reference [.rules_common, rules]
- if: $CI_COMMIT_TAG !~ /^([0-9a-zA-Z_.-]+-)?v\d+.\d+.\d+$/inputs as macrosOn the previous rules we have used a regular expression to identify the release tag format and assumed that the
general branches are the ones with a name different than main; if we want to force a format for those branch names
we can replace the condition != 'main' by a regex comparison (=~ if we look for matches, !~ if we want to define
valid branch names removing the invalid ones).
When testing the new gitlab-ci inputs my colleague Jorge noticed that
if you keep their default value they basically work as macros.
The variables declared as inputs can t hold YAML values, the truth is that their value is always a string that is
replaced by the value assigned to them when including the file (if given) or by their default value, if defined.
If you don t assign a value to an input variable when including the file that declares it its occurrences are replaced
by its default value, making them work basically as macros; this is useful for us when working with strings that can t
managed as variables, like the regular expressions used inside if conditions.
With those two ideas we can add the following prefix to the rules.yaml defining inputs for both regular expressions
and replace the rules that can use them by the ones shown here:
spec:
  inputs:
    # Regular expression for branches; the prefix matches the type of changes
    # we plan to work on inside the branch (we use conventional commit types as
    # the branch prefix)
    branch_regex:
      default: '/^(build ci chore docs feat fix perf refactor style test)\/.+$/'
    # Regular expression for tags
    release_tag_regex:
      default: '/^([0-9a-zA-Z_.-]+-)?v\d+.\d+.\d+$/'
---
[...]
.rules_push_to_changes_branch:
  rules:
    - !reference [.rules_common, rules]
    - if: >-
        $CI_COMMIT_BRANCH =~ $[[ inputs.branch_regex ]]
        &&
        $CI_PIPELINE_SOURCE != 'merge_request_event'
.rules_push_to_branch_or_mr_to_main:
  rules:
    - !reference [.rules_push_to_branch, rules]
    - if: >-
         $CI_MERGE_REQUEST_SOURCE_BRANCH_NAME =~ $[[ inputs.branch_regex ]]
         &&
         $CI_MERGE_REQUEST_TARGET_BRANCH_NAME == 'main'
.rules_release_tag:
  rules:
    - !reference [.rules_common, rules]
    - if: $CI_COMMIT_TAG =~ $[[ inputs.release_tag_regex ]]
.rules_non_release_tag:
  rules:
    - !reference [.rules_common, rules]
- if: $CI_COMMIT_TAG !~ $[[ inputs.release_tag_regex ]]!reference tags to fine tune rules when we need to add conditions to disable them
simply adding conditions with when: never before referencing the template.
As an example, in some projects I m using different job definitions depending on the DEPLOY_ENVIRONMENT value to make
the job manual or automatic; as we just said we can define different jobs referencing the same rule adding a condition
to check if the environment is the one we are interested in:
deploy_job_auto:
  rules:
    # Only deploy automatically if the environment is 'dev' by skipping this job
    # for other values of the DEPLOY_ENVIRONMENT variable
    - if: $DEPLOY_ENVIRONMENT != "dev"
      when: never
    - !reference [.rules_release_tag, rules]
  [...]
deploy_job_manually:
  rules:
    # Disable this job if the environment is 'dev'
    - if: $DEPLOY_ENVIRONMENT == "dev"
      when: never
    - !reference [.rules_release_tag, rules]
  when: manual
  # Change this to  false  to make the deployment job blocking
  allow_failure: true
[...].rules_common template; we add
conditions to disable the job before evaluating the real rules.
The difference in that case is that we reference them at the beginning because we want those negative conditions on all
jobs and that is also why we have a .rules_default condition with an when: on_success for the jobs that only need to
respect the default workflow (we need the last condition to make sure that they are executed if the negative rules don t
match). This post describes how to handle files that are used as assets by jobs and pipelines defined on a common gitlab-ci
repository when we include those definitions from a different project.
.giltlab-ci.yml file includes files from a different
repository its contents are expanded and the resulting code is the same as the one generated when the included files
are local to the repository.
In fact, even when the remote files include other files everything works right, as they are also expanded (see the
description of how included files are merged
for a complete explanation), allowing us to organise the common repository as we want.
As an example, suppose that we have the following script on the assets/ folder of the common repository:
dumb.sh
#!/bin/sh
echo "The script arguments are: '$@'"job:
script:
- $CI_PROJECT_DIR/assets/dumb.sh ARG1 ARG2The script arguments are: 'ARG1 ARG2'/scripts-23-19051/step_script: eval: line 138: d./assets/dumb.sh: not foundYAML files, but if a script wants to use other files from the
common repository as an asset (configuration file, shell script, template, etc.), the execution fails if the files are
not available on the project that includes the remote job definition.base64 or something similar, making maintenance harder.
As an example, imagine that we want to use the dumb.sh script presented on the previous section and we want to call it
from the same PATH of the main project (on the examples we are using the same folder, in practice we can create a hidden
folder inside the project directory or use a PATH like /tmp/assets-$CI_JOB_ID to leave things outside the project
folder and make sure that there will be no collisions if two jobs are executed on the same place (i.e. when using a ssh
runner).
To create the file we will use hidden jobs to write our script
template and reference tags to add it to the
scripts when we want to use them.
Here we have a snippet that creates the file with cat:
.file_scripts:
  create_dumb_sh:
    -
      # Create dumb.sh script
      mkdir -p "$ CI_PROJECT_DIR /assets"
      cat >"$ CI_PROJECT_DIR /assets/dumb.sh" <<EOF
      #!/bin/sh
      echo "The script arguments are: '\$@'"
      EOF
chmod +x "$ CI_PROJECT_DIR /assets/dumb.sh"base64 we replace the previous snippet by this:
.file_scripts:
  create_dumb_sh:
    -
      # Create dumb.sh script
      mkdir -p "$ CI_PROJECT_DIR /assets"
      base64 -d >"$ CI_PROJECT_DIR /assets/dumb.sh" <<EOF
      IyEvYmluL3NoCmVjaG8gIlRoZSBzY3JpcHQgYXJndW1lbnRzIGFyZTogJyRAJyIK
      EOF
chmod +x "$ CI_PROJECT_DIR /assets/dumb.sh"base64 version of the file using 6 spaces (all lines of the base64 output have to be
indented) and to make changes we have to decode and re-code the file manually, making it harder to maintain.
With either version we just need to add a !reference before using the script, if we add the call on the first lines of
the before_script we can use the downloaded file in the before_script, script or after_script sections of the
job without problems:
job:
  before_script:
    - !reference [.file_scripts, create_dumb_sh]
  script:
    - $ CI_PROJECT_DIR /assets/dumb.sh ARG1 ARG2
The script arguments are: 'ARG1 ARG2'assets) and prepare a YAML file that declares some variables (i.e. the URL of the templates project and the PATH where
we want to download the files) and defines a script fragment to download the complete folder.
Once we have the YAML file we just need to include it and add a reference to the script fragment at the beginning of the
before_script of the jobs that use files from the assets directory and they will be available when needed.
The following file is an example of the YAML file we just mentioned:
variables:
  CI_TMPL_API_V4_URL: "$ CI_API_V4_URL /projects/common%2Fci-templates"
  CI_TMPL_ARCHIVE_URL: "$ CI_TMPL_API_V4_URL /repository/archive"
  CI_TMPL_ASSETS_DIR: "/tmp/assets-$ CI_JOB_ID "
.scripts_common:
  bootstrap_ci_templates:
    -
      # Downloading assets
      echo "Downloading assets"
      mkdir -p "$CI_TMPL_ASSETS_DIR"
      wget -q -O - --header="PRIVATE-TOKEN: $CI_TMPL_READ_TOKEN" \
        "$CI_TMPL_ARCHIVE_URL?path=assets&sha=$ CI_TMPL_REF:-main "
tar --strip-components 2 -C "$ASSETS_DIR" -xzf -CI_TMPL_API_V4_URL: URL of the common project, in our case we are using the project ci-templates inside the
common group (note that the slash between the group and the project is escaped, that is needed to reference the
project by name, if we don t like that approach we can replace the url encoded path by the project id, i.e. we could
use a value like $ CI_API_V4_URL /projects/31)CI_TMPL_ARCHIVE_URL: Base URL to use the gitlab API to download files from a repository, we will add the arguments
path and sha to select which sub path to download and from which commit, branch or tag (we will explain later why
we use the CI_TMPL_REF, for now just keep in mind that if it is not defined we will download the version of the
files available on the main branch when the job is executed).CI_TMPL_ASSETS_DIR: Destination of the downloaded files.CI_TMPL_READ_TOKEN: token that includes the read_api scope for the common project, we need it because the
tokens created by the CI/CD pipelines of other projects can t be used to access the api of the common one.We define the variable on the gitlab CI/CD variables section to be able to change it if needed (i.e. if it expires)CI_TMPL_REF: branch or tag of the common repo from which to get the files (we need that to make sure we are using
the right version of the files, i.e. when testing we will use a branch and on production pipelines we can use fixed
tags to make sure that the assets don t change between executions unless we change the reference).We will set the value on the .gitlab-ci.yml file of the remote projects and will use the same reference when including
the files to make sure that everything is coherent.pipeline.yml
include:
  - /bootstrap.yaml
stages:
  - test
dumb_job:
  stage: test
  before_script:
    - !reference [.bootstrap_ci_templates, create_dumb_sh]
  script:
- $ CI_TMPL_ASSETS_DIR /dumb.sh ARG1 ARG2gitlab-ci.yml
include:
  - project: 'common/ci-templates'
    ref: &ciTmplRef 'main'
    file: '/pipeline.yml'
variables:
CI_TMPL_REF: *ciTmplRefCI_TMPL_REF variable (as far as I know we have to pass the ref value explicitly to know which reference was used
when including the file, the anchor allows us to make sure that the value is always the same in both places).
The reference we use is quite important for the reproducibility of the jobs, if we don t use fixed tags or commit
hashes as references each time a job that downloads the files is executed we can get different versions of them.
For that reason is not a bad idea to create tags on our common repo and use them as reference on the projects or
branches that we want to behave as if their CI/CD configuration was local (if we point to a fixed version of the common
repo the way everything is going to work is almost the same as having the pipelines directly in our repo).
But while developing pipelines using branches as references is a really useful option; it allows us to re-run the jobs
that we want to test and they will download the latest versions of the asset files on the branch, speeding up the
testing process.
However keep in mind that the trick only works with the asset files, if we change a job or a pipeline on the YAML
files restarting the job is not enough to test the new version as the restart uses the same job created with the current
pipeline.
To try the updated jobs we have to create a new pipeline using a new action against the repository or executing the
pipeline manually. This post describes how to deploy cilium (and
hubble) using docker on a Linux system with
k3d or kind to test it as
CNI and
Service Mesh.
I wrote some scripts to do a local installation and evaluate cilium to use it
at work (in fact we are using cilium on an EKS
cluster now), but I thought it would be a good idea to share my original
scripts in this blog just in case they are useful to somebody, at least for
playing a little with the technology.
cilium
I m providing some links for the reader interested on reading about it:
cilium as CNI, metallb for BGP (I tested the
cilium options, but I wasn t able to configure them right) and nginx as the
ingress controller (again, I tried to use cilium but something didn t work
either).
To be able to use the previous components some default options have been
disabled on k3d and kind and, in the case of k3d, a lot of k3s options
(traefik, servicelb, kubeproxy, network-policy, ) have also been
disabled to avoid conflicts.
To use the scripts we need to install cilium, docker, helm, hubble,
k3d, kind, kubectl and tmpl in our system.
After cloning the repository, the sbin/tools.sh
script can be used to do that on a linux-amd64 system:
$ git clone https://gitea.mixinet.net/blogops/cilium-docker.git
$ cd cilium-docker
$ ./sbin/tools.sh appsk3d (for kind replace
k3d by kind) we can use the
sbin/cilium-install.sh script as
follows:
$ # Deploy first k3d cluster with cilium & cluster-mesh
$ ./sbin/cilium-install.sh k3d 1 full
[...]
$ # Deploy second k3d cluster with cilium & cluster-mesh
$ ./sbin/cilium-install.sh k3d 2 full
[...]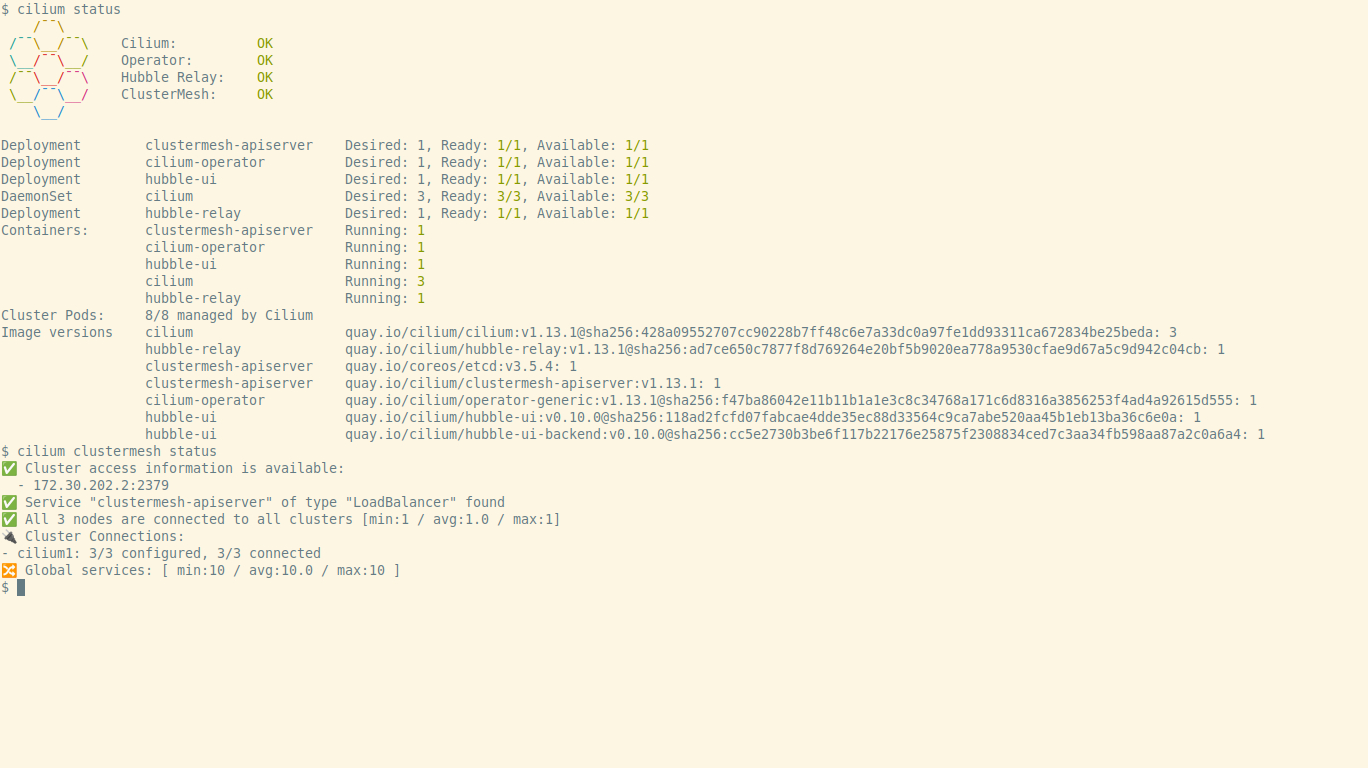
$ # The 2nd cluster-mesh installation connects the clusterscilium status after the installation we should get an
output similar to the one seen on the following screenshot:
tmpl/k3d-config.yaml: configuration to
deploy the k3d cluster.tmpl/kind-config.yaml: configuration to
deploy the kind cluster.tmpl/metallb-crds.yaml and
tmpl/ippols.yaml: configurations for the
metallb deployment.tmpl/cilium.yaml: values to deploy the
cilium using the helm chart.sbin/cilium-remove.sh script.
cilium deployment needs to mount the
bpffs on /sys/fs/bpf and cgroupv2 on /run/cilium/cgroupv2; that is
done automatically on kind, but fails on k3d because the image does not
include bash (see this issue).To fix it we mount a script on all the k3d containers that is executed each
time they are started (the script is mounted as /bin/k3d-entrypoint-cilium.sh
because the /bin/k3d-entrypoint.sh script executes the scripts that follow
the pattern /bin/k3d-entrypoint-*.sh before launching the k3s daemon).
The source code of the script is available
here.k3d we have found issues
with open files, looks like they are related to inotify (see
this
page on the kind documentation); adding the following to the
/etc/sysctl.conf file fixed the issue:# fix inotify issues with docker & k3d
fs.inotify.max_user_watches = 524288
fs.inotify.max_user_instances = 512cilium
as the cluster ingress yet (it did not work, so it is no longer enabled)
and we are also ignoring the gateway-api for now.cilium cli to do all the installations, but I
noticed that following that route the current version does not work right with
hubble (it messes up the TLS support, there are some notes about the
problems on this cilium
issue), so we are deploying with helm right now.The problem with the helm approach is that there is no official documentation
on how to install the cluster mesh with it (there is a request for
documentation here), so we are
using the cilium cli for now and it looks that it does not break the hubble
configuration.cilium we have used some scripts & additional config files that are
available on the test sub directory of the repository:
cilium-connectivity.sh: a script
that runs the cilium connectivity test for one cluster or in multi cluster
mode (for mesh testing).If we export the variable HUBBLE_PF=true the script executes the command
cilium hubble port-forward before launching the tests.http-sw.sh: Simple tests for cilium policies
from the cilium demo;
the script deploys the Star Wars demo application and allows us to add the
L3/L4 policy or the L3/L4/L7 policy, test the connectivity and view the
policies.ingress-basic.sh: This test is for
checking the ingress controller, it is prepared to work against cilium and
nginx, but as explained before the use of cilium as an ingress controller
is not working as expected, so the idea is to call it with nginx always as
the first argument for now.mesh-test.sh: Tool to deploy a global
service on two clusters, change the service affinity to local or remote,
enable or disable if the service is shared and test how the tools respond.cilium-connectivity.sh executes the standard cilium tests:
$ ./test/cilium-connectivity.sh k3d 12
   Monitor aggregation detected, will skip some flow validation
steps
  [k3d-cilium1] Creating namespace cilium-test for connectivity
check...
  [k3d-cilium2] Creating namespace cilium-test for connectivity
check...
[...]
  All 33 tests (248 actions) successful, 2 tests skipped,
0 scenarios skipped.http-sw.sh script:
kubectx k3d-cilium2 # (just in case)
# Create test namespace and services
./test/http-sw.sh create
# Test without policies (exaust-port fails by design)
./test/http-sw.sh test
# Create and view L3/L4 CiliumNetworkPolicy
./test/http-sw.sh policy-l34
# Test policy (no access from xwing, exaust-port fails)
./test/http-sw.sh test
# Create and view L7 CiliumNetworkPolicy
./test/http-sw.sh policy-l7
# Test policy (no access from xwing, exaust-port returns 403)
./test/http-sw.sh test
# Delete http-sw test
./test/http-sw.sh deletemesh-test.sh script:
# Create services on both clusters and test
./test/mesh-test.sh k3d create
./test/mesh-test.sh k3d test
# Disable service sharing from cluster 1 and test
./test/mesh-test.sh k3d svc-shared-false
./test/mesh-test.sh k3d test
# Restore sharing, set local affinity and test
./test/mesh-test.sh k3d svc-shared-default
./test/mesh-test.sh k3d svc-affinity-local
./test/mesh-test.sh k3d test
# Delete deployment from cluster 1 and test
./test/mesh-test.sh k3d delete-deployment
./test/mesh-test.sh k3d test
# Delete test
./test/mesh-test.sh k3d delete Kweather Snap
That is just awesome, nothing to see here, go look at the BPF documents if you have cgroup v2. With cgroup v1 if you wanted to know what devices were permitted, you just wouldCgroup v2 device controller has no interface files and is implemented on top of cgroup BPF.https://www.kernel.org/doc/Documentation/admin-guide/cgroup-v2.rst
cat /sys/fs/cgroup/XX/devices.allow and you were done!
The kernel documentation is not very helpful, sure its something in BPF and has something to do with the cgroup BPF specifically, but what does that mean?
There doesn t seem to be an easy corresponding method to get the same information. So to see what restrictions a docker container has, we will have to:
docker ps command, you get the short id. To get the long id you can either use the --no-trunc flag or just guess from the short ID. I usually do the second.
$ docker ps
CONTAINER ID   IMAGE            COMMAND       CREATED          STATUS          PORTS     NAMES
a3c53d8aaec2   debian:minicom   "/bin/bash"   19 minutes ago   Up 19 minutes             inspiring_shannon
/sys/fs/cgroup/system.slice/docker-a3c53d8aaec23c256124f03d208732484714219c8b5f90dc1c3b4ab00f0b7779.scope/ Notice that the last directory has docker- then the short ID.
If you re not sure of the exact path. The /sys/fs/cgroup is the cgroup v2 mount point which can be found with mount -t cgroup2 and then rest is the actual cgroup name. If you know the process running in the container then the cgroup column in ps will show you.
$ ps -o pid,comm,cgroup 140064
    PID COMMAND         CGROUP
140064 bash 0::/system.slice/docker-a3c53d8aaec23c256124f03d208732484714219c8b5f90dc1c3b4ab00f0b7779.scope$ sudo bpftool cgroup list /sys/fs/cgroup/system.slice/docker-a3c53d8aaec23c256124f03d208732484714219c8b5f90dc1c3b4ab00f0b7779.scope/
ID AttachType AttachFlags Name
90 cgroup_device multisudo bpftool prog dump xlated id 90 > myebpf.txt0: (61) r2 = *(u32 *)(r1 +0) 1: (54) w2 &= 65535 2: (61) r3 = *(u32 *)(r1 +0) 3: (74) w3 >>= 16 4: (61) r4 = *(u32 *)(r1 +4) 5: (61) r5 = *(u32 *)(r1 +8)What we find is that once we get past the first few lines filtering the given value that the comparison lines have:
63: (55) if r2 != 0x2 goto pc+4 64: (55) if r4 != 0x64 goto pc+3 65: (55) if r5 != 0x2a goto pc+2 66: (b4) w0 = 1 67: (95) exitThis is a container using the option
--device-cgroup-rule='c 100:42 rwm'. It is checking if r2 (device type) is 2 (char) and r4 (major device number) is 0x64 or 100 and r5 (minor device number) is 0x2a or 42. If any of those are not true, move to the next section, otherwise return with 1 (permit). We have all access modes permitted so it doesn t check for it.
The previous example has all permissions for our device with id 100:42, what about if we only want write access with the option --device-cgroup-rule='c 100:42 r'. The resulting eBPF is:
63: (55) if r2 != 0x2 goto pc+7 64: (bc) w1 = w3 65: (54) w1 &= 2 66: (5d) if r1 != r3 goto pc+4 67: (55) if r4 != 0x64 goto pc+3 68: (55) if r5 != 0x2a goto pc+2 69: (b4) w0 = 1 70: (95) exitThe code is almost the same but we are checking that w3 only has the second bit set, which is for reading, effectively checking for X==X&2. It s a cautious approach meaning no access still passes but multiple bits set will fail.
--device flag. This flag actually does two things. The first is to great the device file in the containers /dev directory, effectively doing a mknod command. The second thing is to adjust the eBPF program. If the device file we specified actually did have a major number of 100 and a minor of 42, the eBPF would look exactly like the above snippets.
--privileged flag do? This lets the container have full access to all the devices (if the user running the process is allowed). Like the --device flag, it makes the device files as well, but what does the filtering look like? We still have a cgroup but the eBPF program is greatly simplified, here it is in full:
0: (61) r2 = *(u32 *)(r1 +0) 1: (54) w2 &= 65535 2: (61) r3 = *(u32 *)(r1 +0) 3: (74) w3 >>= 16 4: (61) r4 = *(u32 *)(r1 +4) 5: (61) r5 = *(u32 *)(r1 +8) 6: (b4) w0 = 1 7: (95) exitThere is the usual setup lines and then, return 1. Everyone is a winner for all devices and access types!
 KDE Elisia snap
 KDE Krita snap
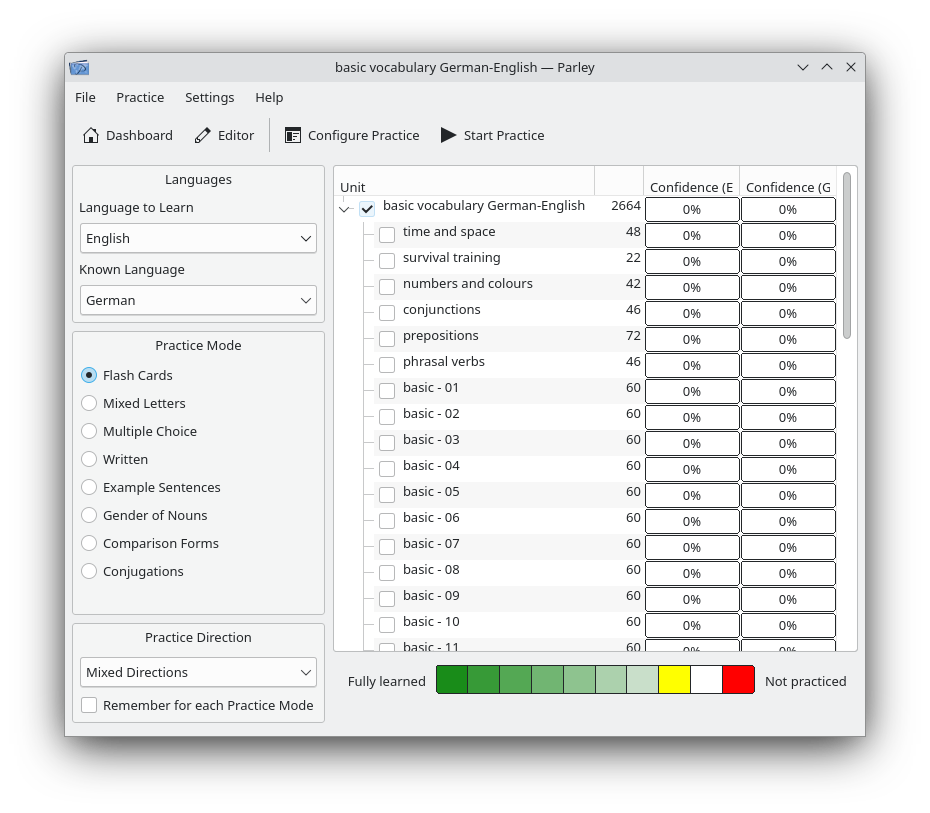 KDE Parley snap
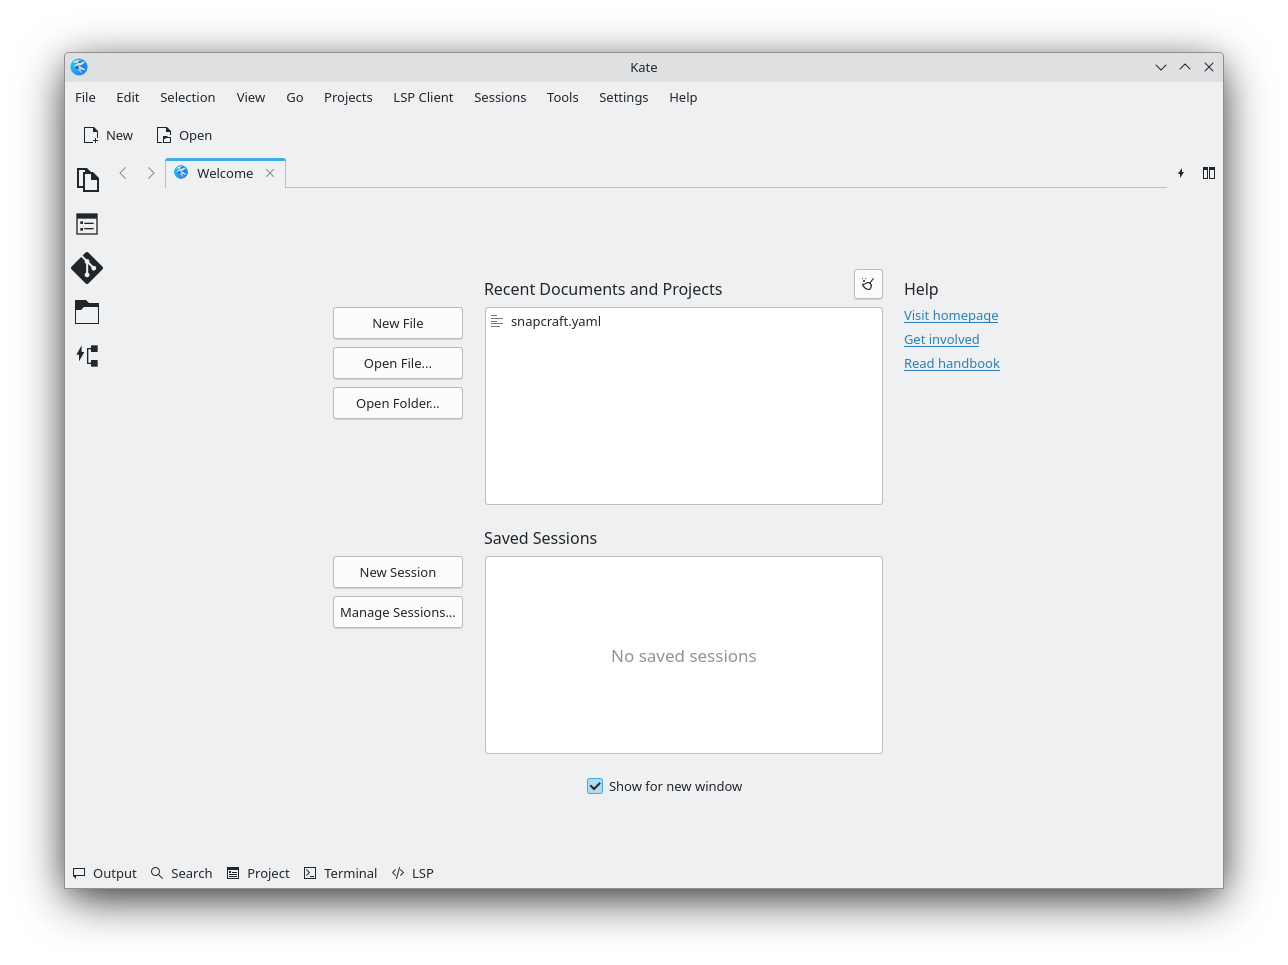 KDE Kate snap
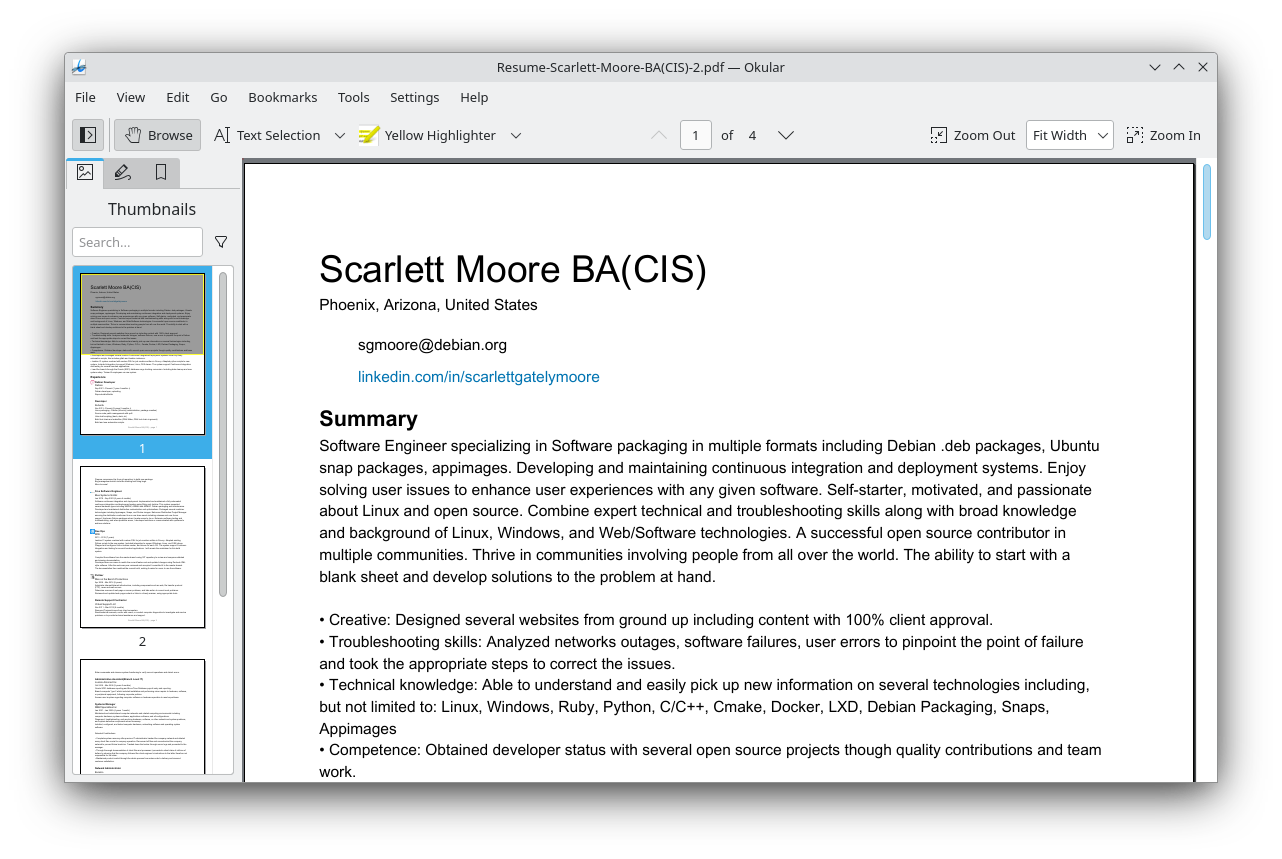 KDE Okular snap
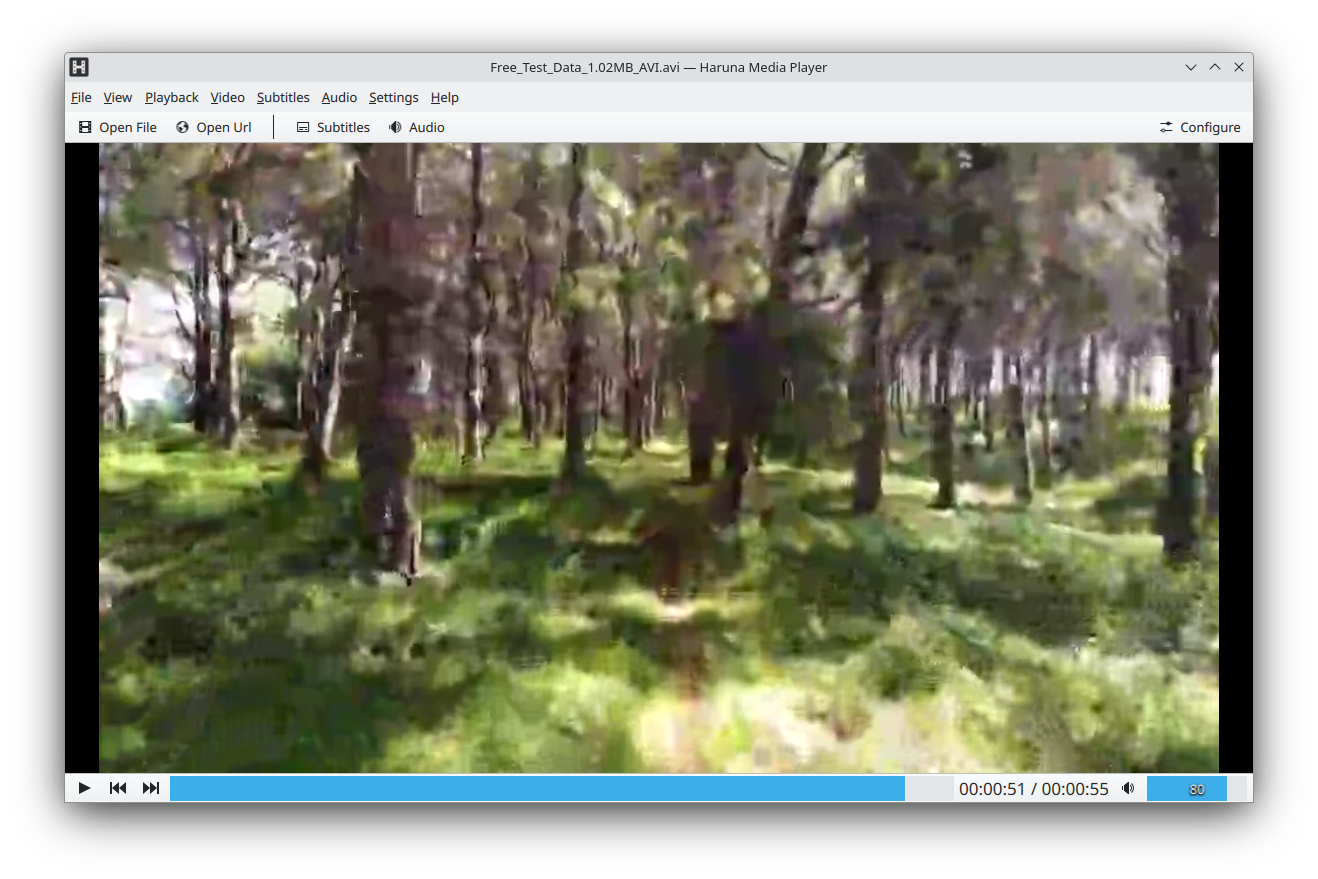 KDE Haruna snap
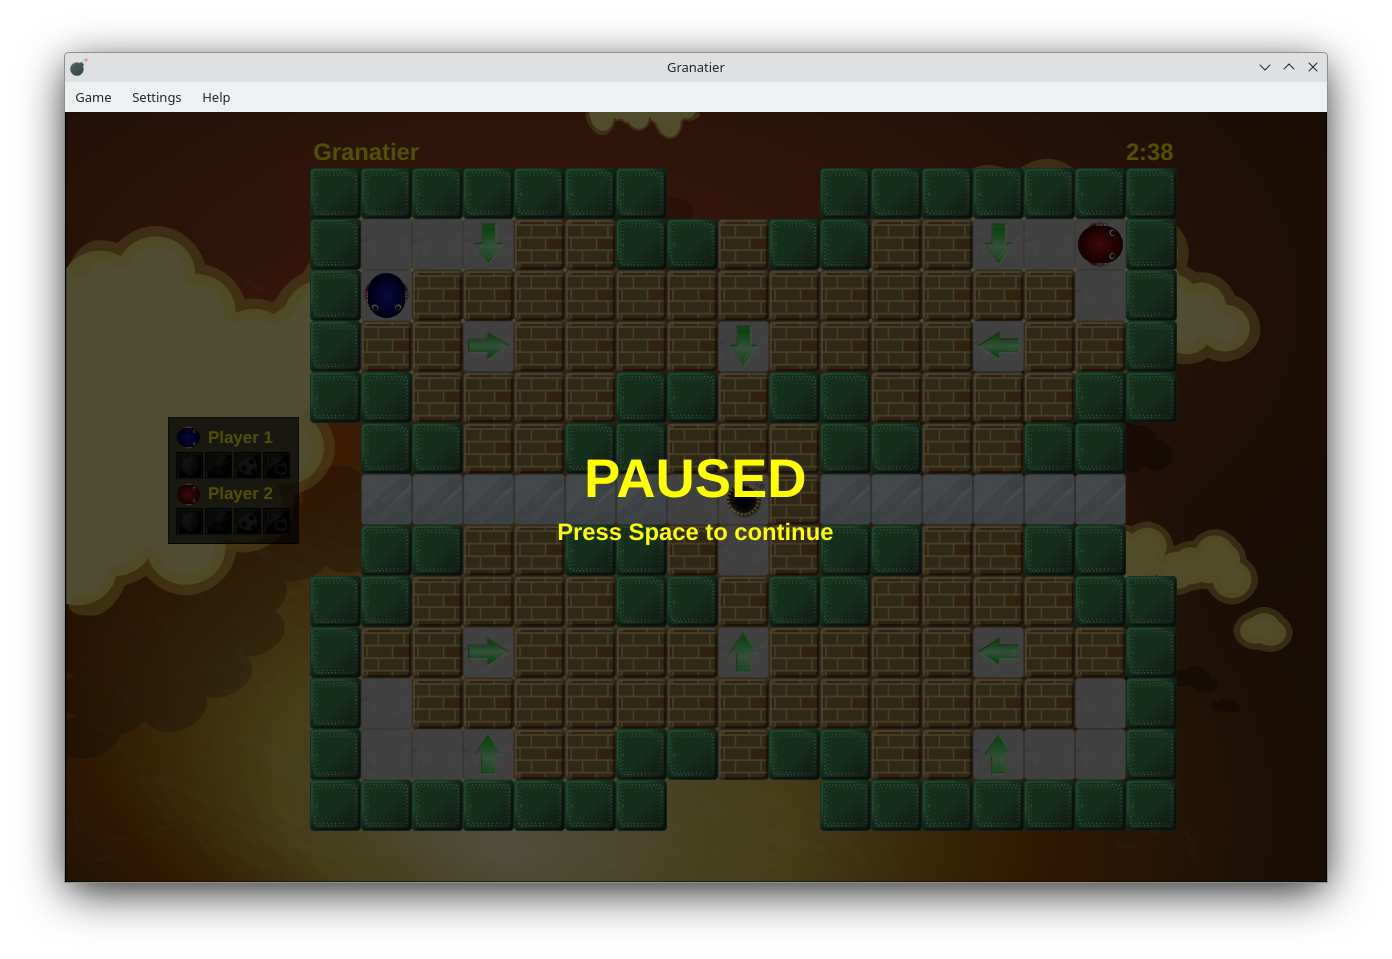 KDE Granatier snap
 KDE Gwenview snap
 KDE Gcompris snap
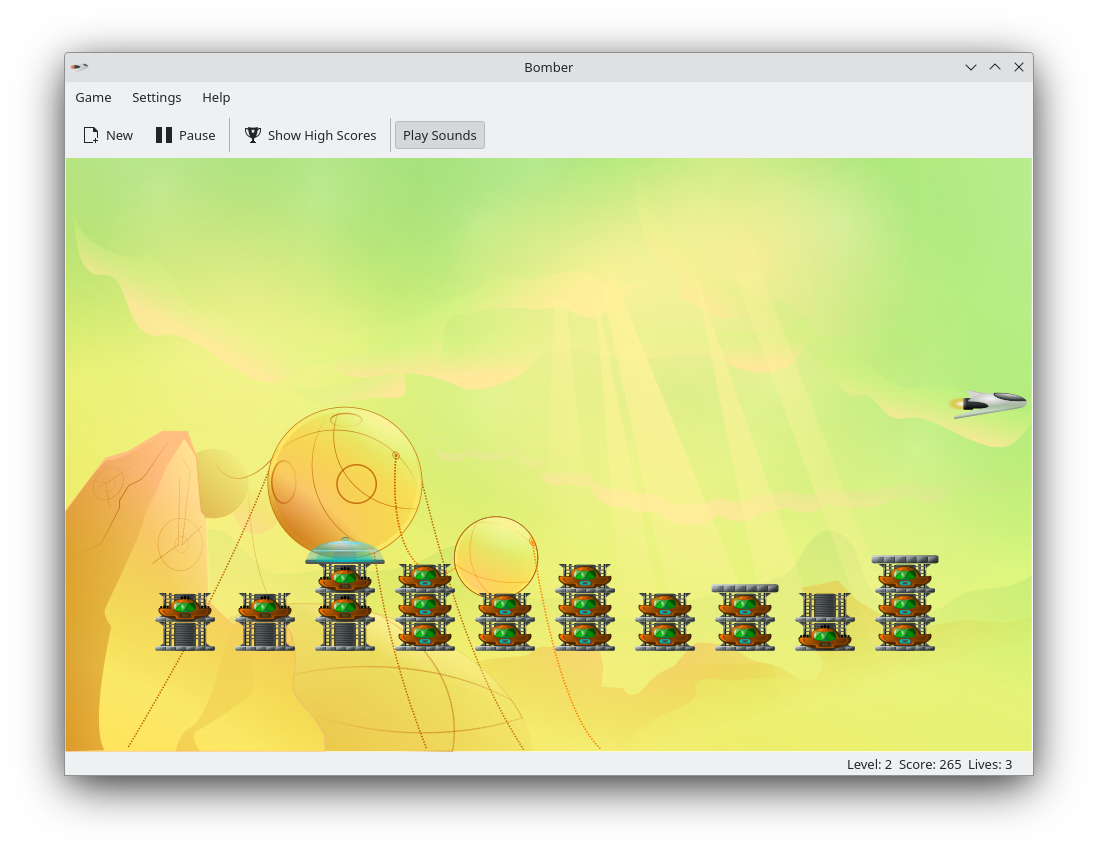 KDE Bomber snap
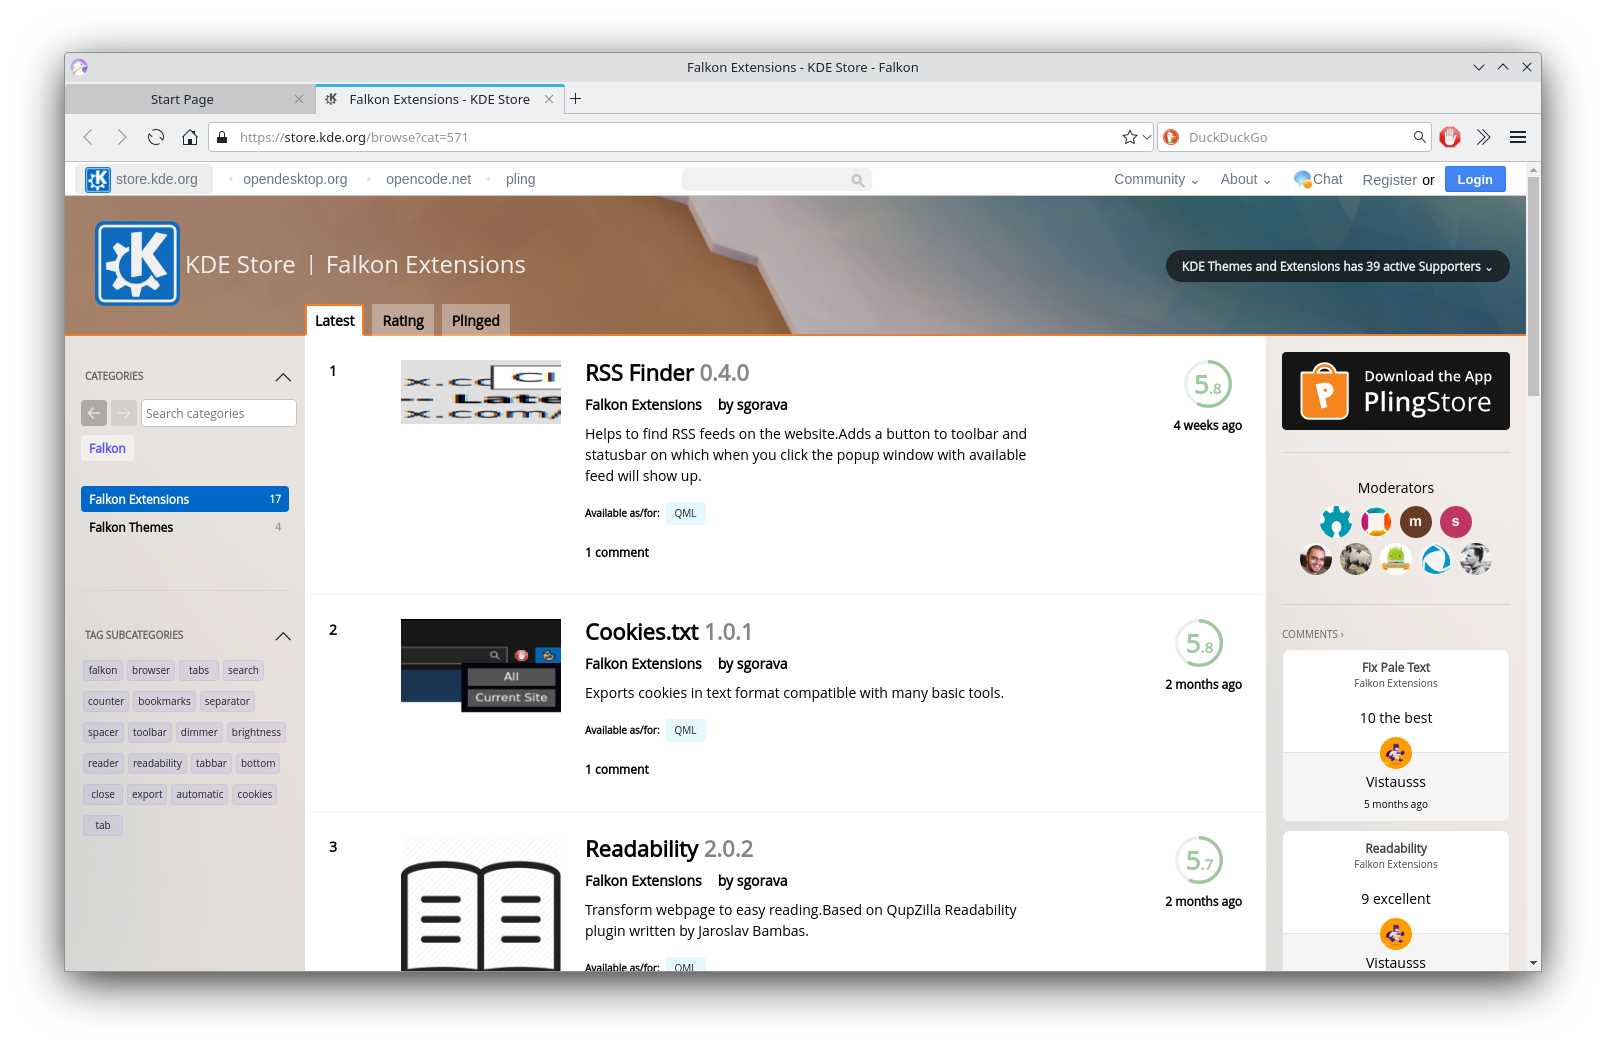 KDE Falkon snap
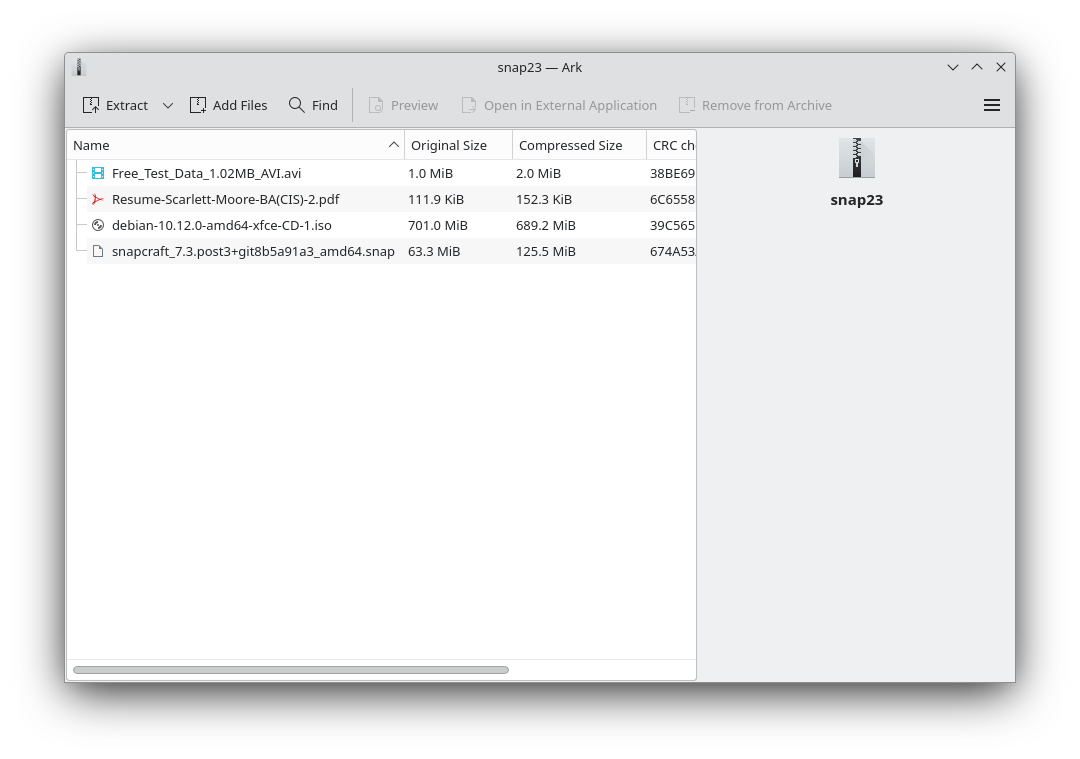 KDE Ark snap
 KDE Blinken snap
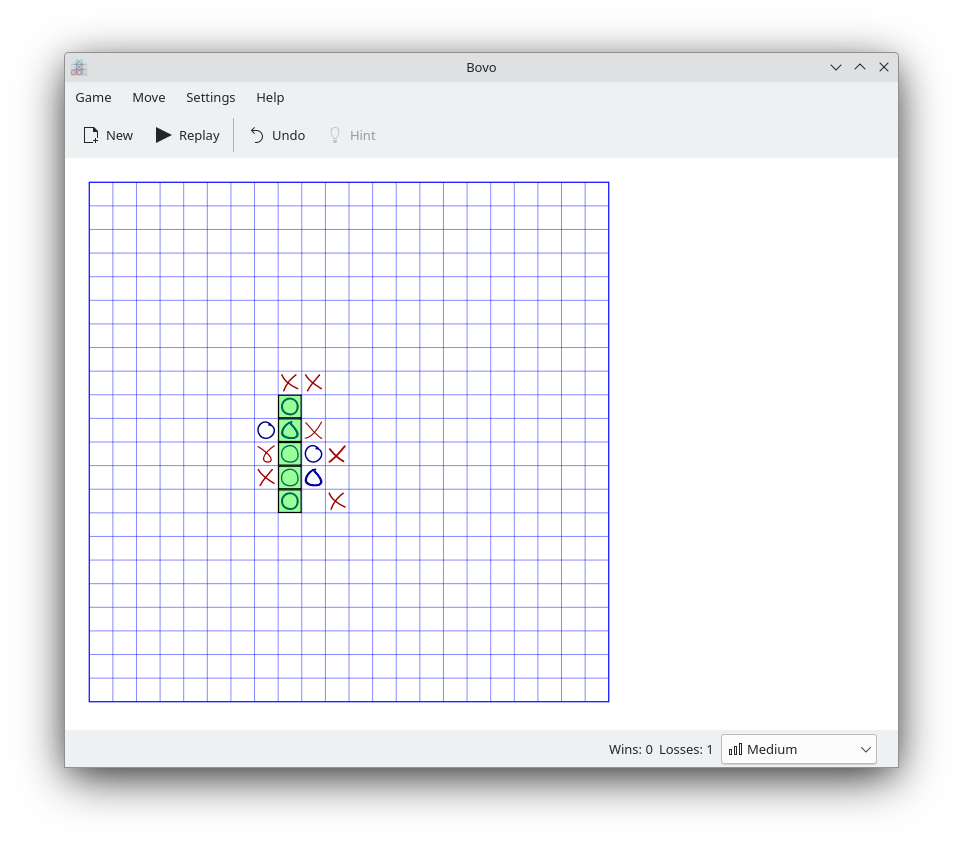 KDE Bovo Snap
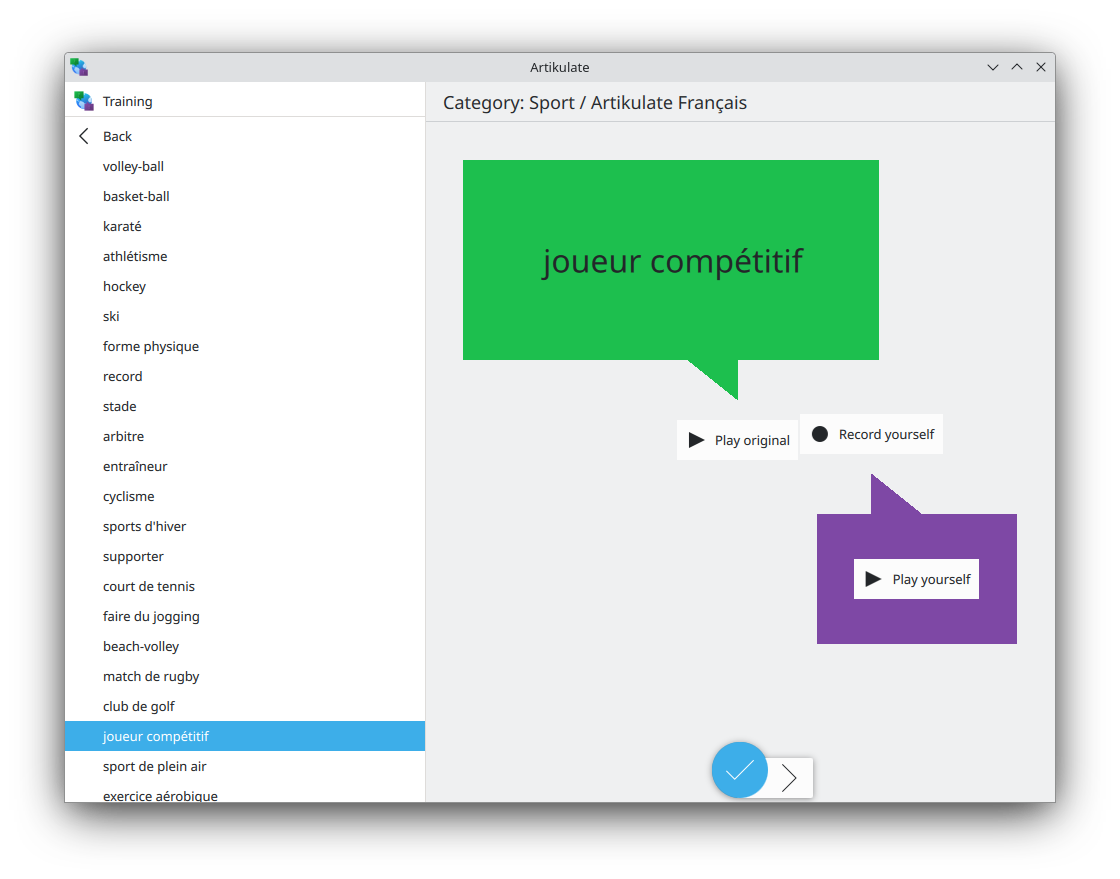 KDE Atikulate snap
 I would suggest that this blog post would be slightly unpleasant and I do wish that there was a way, a standardized way just like movies where you can put General, 14+, 16+, Adult and whatnot. so people could share without getting into trouble. I would suggest to consider this blog as for somewhat mature and perhaps disturbing.
 Also shocking are the number of heart attacks that young people are getting. Dunno the reason for either. Just saw this yesterday, The first thing to my mind was, at least she wasn t chopped. It was only latter I realized that the younger sister may have wanted to educate herself or have some other drreams, but because of some evil customs had to give hand in marriage. No outrage here for anything, not even child marriage :(. How have we become so insensitive. And it s mostly Hindus killing Hindus but still no outrage. We have been killing Muslims and Christians so that I guess is just par for the course :(. I wish I could say there is a solution but there seems to be not Even Child abuse cases have been going up but sad to say even they are being normalised. It s only when a US agency or somebody who feels shocked, then we feel shocked otherwise we have become numb
. Now while it s almost a year since then and probably all has been fixed but there haven t been any instructions that I could find that tellls me if there is any new way or just the old way works. In any case, I do think bookworm release probably would have all the fixes needed. IIRC, we just entered soft freeze just couple of weeks back.
I have to admit something though, I have never used secure-boot as it has been designed, partially because I always run testing, irrespective of whatever device I use. And AFAIK the whole idea of Secure Boot is to have few updates unlike Testing which is kinda a rolling release thing. While Secure Boot wants same bits, all underlying bits, in Testing it s hard to ensure that as the idea is to test new releases of software and see what works and what breaks till we send it to final release (something like Bookworm ). FWIW, currently bookworm and Testing is one and the same till Bookworm releases, and then Testing would have its own updates from the next hour/day after.
Also shocking are the number of heart attacks that young people are getting. Dunno the reason for either. Just saw this yesterday, The first thing to my mind was, at least she wasn t chopped. It was only latter I realized that the younger sister may have wanted to educate herself or have some other drreams, but because of some evil customs had to give hand in marriage. No outrage here for anything, not even child marriage :(. How have we become so insensitive. And it s mostly Hindus killing Hindus but still no outrage. We have been killing Muslims and Christians so that I guess is just par for the course :(. I wish I could say there is a solution but there seems to be not Even Child abuse cases have been going up but sad to say even they are being normalised. It s only when a US agency or somebody who feels shocked, then we feel shocked otherwise we have become numb
. Now while it s almost a year since then and probably all has been fixed but there haven t been any instructions that I could find that tellls me if there is any new way or just the old way works. In any case, I do think bookworm release probably would have all the fixes needed. IIRC, we just entered soft freeze just couple of weeks back.
I have to admit something though, I have never used secure-boot as it has been designed, partially because I always run testing, irrespective of whatever device I use. And AFAIK the whole idea of Secure Boot is to have few updates unlike Testing which is kinda a rolling release thing. While Secure Boot wants same bits, all underlying bits, in Testing it s hard to ensure that as the idea is to test new releases of software and see what works and what breaks till we send it to final release (something like Bookworm ). FWIW, currently bookworm and Testing is one and the same till Bookworm releases, and then Testing would have its own updates from the next hour/day after.
 Sunset, Witch Wells Arizona
 Witch Wells, AZ Snow
BEGIN:VEVENT
DTSTART;TZID=Australia/Sydney:20230206T000000
DTEND;TZID=Australia/Sydney:20230206T000000
SUMMARY:School Term starts
END:VEVENT<?php
$site = $_GET['s'];
if ($site == 'site1')
$REMOTE_URL='https://site1.example.net/ical_feed';
elseif ($site == 'site2')
$REMOTE_URL='https://site2.example.net/ical_feed';
else
http_response_code(400);
die();
$fp = fopen($REMOTE_URL, "r");
if (!$fp)
die("fopen");
header('Content-Type: text/calendar');
while (( $line = fgets($fp, 1024)) !== false)
$line = preg_replace(
'/^(DTSTART DTEND);[^:]+:([0-9] 8 )T000[01]00/',
'$ 1 ;VALUE=DATE:$ 2 ',
$line);
echo $line;
?>
It s pretty quick and nasty but gets the job done. So what is it doing?
s and match it to either site1 or site2 to obtain the URL. If you only had one site to fix you could just set the REMOTE_URL variable.fopen() and nasty error handling.while loop to read the contents of the remote site line by line.preg_replace is a Perl regular expression replacement. The PCRE is:
BEGIN:VEVENT
DTSTART;VALUE=DATE:20230206
DTEND;VALUE=DATE:20230206
SUMMARY:School Term starts
END:VEVENT I am old enough to remember when BPF meant the traditional Berkeley Packet Filter, and was confined to filtering network packets. It s grown into much, much, more as eBPF and getting familiar with it so that I can add it to the suite of tips and tricks I can call upon has been on my to-do list for a while. To this end I was lucky enough to attend a live walk through of bpftrace last year. bpftrace is a high level tool that allows the easy creation and execution of eBPF tracers under Linux.
Recently I ve been working on updating the RetroArch packages in Debian and as I was doing so I realised there was a need to update the quite outdated retroarch-assets package, which contains various icons and images used for the user interface. I wanted to try and re-generate as many of the artefacts as I could, to ensure the proper source was available. However it wasn t always clear which files were actually needed and which were either source or legacy. So I wanted to trace file opens by retroarch and see when it was failing to find files. Traditionally this is something I d have used
I am old enough to remember when BPF meant the traditional Berkeley Packet Filter, and was confined to filtering network packets. It s grown into much, much, more as eBPF and getting familiar with it so that I can add it to the suite of tips and tricks I can call upon has been on my to-do list for a while. To this end I was lucky enough to attend a live walk through of bpftrace last year. bpftrace is a high level tool that allows the easy creation and execution of eBPF tracers under Linux.
Recently I ve been working on updating the RetroArch packages in Debian and as I was doing so I realised there was a need to update the quite outdated retroarch-assets package, which contains various icons and images used for the user interface. I wanted to try and re-generate as many of the artefacts as I could, to ensure the proper source was available. However it wasn t always clear which files were actually needed and which were either source or legacy. So I wanted to trace file opens by retroarch and see when it was failing to find files. Traditionally this is something I d have used strace for, but it seemed like a great opportunity to try out bpftrace.
It turns out bpftrace ships with an example, opensnoop.bt which provided details of hooking the open syscall entry + exit and providing details of all files opened on the system. I only wanted to track opens by the retroarch binary that failed, so I made a couple of modifications:
#!/usr/bin/env bpftrace
/*
 * retro-failed-open-snoop - snoop failed opens by RetroArch
 *
 * Based on:
 * opensnoop	Trace open() syscalls.
 *		For Linux, uses bpftrace and eBPF.
 *
 * Copyright 2018 Netflix, Inc.
 * Licensed under the Apache License, Version 2.0 (the "License")
 *
 * 08-Sep-2018	Brendan Gregg	Created this.
 */
BEGIN

	printf("Tracing open syscalls... Hit Ctrl-C to end.\n");
	printf("%-6s %-16s %3s %s\n", "PID", "COMM", "ERR", "PATH");

tracepoint:syscalls:sys_enter_open,
tracepoint:syscalls:sys_enter_openat

	@filename[tid] = args->filename;

tracepoint:syscalls:sys_exit_open,
tracepoint:syscalls:sys_exit_openat
/@filename[tid]/

	$ret = args->ret;
	$errno = $ret > 0 ? 0 : - $ret;
	if (($ret <= 0) && (strncmp("retroarch", comm, 9) == 0) )
		printf("%-6d %-16s %3d %s\n", pid, comm, $errno,
		    str(@filename[tid]));

	delete(@filename[tid]);

END

	clear(@filename);
apt install bpftrace) and then I ran bpftrace -o retro.log retro-failed-open-snoop.bt as root and fired up retroarch as a normal user.
Attaching 6 probes...
Tracing open syscalls... Hit Ctrl-C to end.
PID    COMM             ERR PATH
3394   retroarch          2 /usr/lib/x86_64-linux-gnu/pulseaudio/glibc-hwcaps/x86-64-v2/lib
3394   retroarch          2 /usr/lib/x86_64-linux-gnu/pulseaudio/tls/x86_64/x86_64/libpulse
3394   retroarch          2 /usr/lib/x86_64-linux-gnu/pulseaudio/tls/x86_64/libpulsecommon-
3394   retroarch          2 /usr/lib/x86_64-linux-gnu/pulseaudio/tls/x86_64/libpulsecommon-
3394   retroarch          2 /usr/lib/x86_64-linux-gnu/pulseaudio/tls/libpulsecommon-16.1.so
3394   retroarch          2 /usr/lib/x86_64-linux-gnu/pulseaudio/x86_64/x86_64/libpulsecomm
3394   retroarch          2 /usr/lib/x86_64-linux-gnu/pulseaudio/x86_64/libpulsecommon-16.1
3394   retroarch          2 /usr/lib/x86_64-linux-gnu/pulseaudio/x86_64/libpulsecommon-16.1
3394   retroarch          2 /etc/gcrypt/hwf.deny
3394   retroarch          2 /lib/x86_64-linux-gnu/glibc-hwcaps/x86-64-v2/libgamemode.so.0
3394   retroarch          2 /lib/x86_64-linux-gnu/tls/x86_64/x86_64/libgamemode.so.0
3394   retroarch          2 /lib/x86_64-linux-gnu/tls/x86_64/libgamemode.so.0
3394   retroarch          2 /lib/x86_64-linux-gnu/tls/x86_64/libgamemode.so.0
3394   retroarch          2 /lib/x86_64-linux-gnu/tls/libgamemode.so.0
3394   retroarch          2 /lib/x86_64-linux-gnu/x86_64/x86_64/libgamemode.so.0
3394   retroarch          2 /lib/x86_64-linux-gnu/x86_64/libgamemode.so.0
3394   retroarch          2 /lib/x86_64-linux-gnu/x86_64/libgamemode.so.0
3394   retroarch          2 /lib/x86_64-linux-gnu/libgamemode.so.0
3394   retroarch          2 /usr/lib/x86_64-linux-gnu/glibc-hwcaps/x86-64-v2/libgamemode.so
3394   retroarch          2 /usr/lib/x86_64-linux-gnu/tls/x86_64/x86_64/libgamemode.so.0
3394   retroarch          2 /usr/lib/x86_64-linux-gnu/tls/x86_64/libgamemode.so.0
3394   retroarch          2 /usr/lib/x86_64-linux-gnu/tls/x86_64/libgamemode.so.0
3394   retroarch          2 /usr/lib/x86_64-linux-gnu/tls/libgamemode.so.0
3394   retroarch          2 /usr/lib/x86_64-linux-gnu/x86_64/x86_64/libgamemode.so.0
3394   retroarch          2 /usr/lib/x86_64-linux-gnu/x86_64/libgamemode.so.0
3394   retroarch          2 /usr/lib/x86_64-linux-gnu/x86_64/libgamemode.so.0
3394   retroarch          2 /usr/lib/x86_64-linux-gnu/libgamemode.so.0
3394   retroarch          2 /lib/glibc-hwcaps/x86-64-v2/libgamemode.so.0
3394   retroarch          2 /lib/tls/x86_64/x86_64/libgamemode.so.0
3394   retroarch          2 /lib/tls/x86_64/libgamemode.so.0
3394   retroarch          2 /lib/tls/x86_64/libgamemode.so.0
3394   retroarch          2 /lib/tls/libgamemode.so.0
3394   retroarch          2 /lib/x86_64/x86_64/libgamemode.so.0
3394   retroarch          2 /lib/x86_64/libgamemode.so.0
3394   retroarch          2 /lib/x86_64/libgamemode.so.0
3394   retroarch          2 /lib/libgamemode.so.0
3394   retroarch          2 /usr/lib/glibc-hwcaps/x86-64-v2/libgamemode.so.0
3394   retroarch          2 /usr/lib/tls/x86_64/x86_64/libgamemode.so.0
3394   retroarch          2 /usr/lib/tls/x86_64/libgamemode.so.0
3394   retroarch          2 /usr/lib/tls/x86_64/libgamemode.so.0
3394   retroarch          2 /usr/lib/tls/libgamemode.so.0
3394   retroarch          2 /usr/lib/x86_64/x86_64/libgamemode.so.0
3394   retroarch          2 /usr/lib/x86_64/libgamemode.so.0
3394   retroarch          2 /usr/lib/x86_64/libgamemode.so.0
3394   retroarch          2 /usr/lib/libgamemode.so.0
3394   retroarch          2 /lib/x86_64-linux-gnu/libgamemode.so
3394   retroarch          2 /usr/lib/x86_64-linux-gnu/libgamemode.so
3394   retroarch          2 /lib/libgamemode.so
3394   retroarch          2 /usr/lib/libgamemode.so
3394   retroarch          2 /lib/x86_64-linux-gnu/libdecor-0.so
3394   retroarch          2 /usr/lib/x86_64-linux-gnu/libdecor-0.so
3394   retroarch          2 /lib/libdecor-0.so
3394   retroarch          2 /usr/lib/libdecor-0.so
3394   retroarch          2 /etc/drirc
3394   retroarch          2 /home/noodles/.drirc
3394   retroarch          2 /etc/drirc
3394   retroarch          2 /home/noodles/.drirc
3394   retroarch          2 /usr/lib/x86_64-linux-gnu/dri/tls/iris_dri.so
3394   retroarch          2 /lib/x86_64-linux-gnu/../lib/glibc-hwcaps/x86-64-v2/libedit.so.
3394   retroarch          2 /lib/x86_64-linux-gnu/../lib/tls/x86_64/x86_64/libedit.so.2
3394   retroarch          2 /lib/x86_64-linux-gnu/../lib/tls/x86_64/libedit.so.2
3394   retroarch          2 /lib/x86_64-linux-gnu/../lib/tls/x86_64/libedit.so.2
3394   retroarch          2 /lib/x86_64-linux-gnu/../lib/tls/libedit.so.2
3394   retroarch          2 /lib/x86_64-linux-gnu/../lib/x86_64/x86_64/libedit.so.2
3394   retroarch          2 /lib/x86_64-linux-gnu/../lib/x86_64/libedit.so.2
3394   retroarch          2 /lib/x86_64-linux-gnu/../lib/x86_64/libedit.so.2
3394   retroarch          2 /lib/x86_64-linux-gnu/../lib/libedit.so.2
3394   retroarch          2 /etc/drirc
3394   retroarch          2 /home/noodles/.drirc
3394   retroarch          2 /etc/drirc
3394   retroarch          2 /home/noodles/.drirc
3394   retroarch          2 /etc/drirc
3394   retroarch          2 /home/noodles/.drirc
3394   retroarch          2 /home/noodles/.Xdefaults-udon
3394   retroarch          2 /home/noodles/.icons/default/cursors/00000000000000000000000000
3394   retroarch          2 /home/noodles/.icons/default/index.theme
3394   retroarch          2 /usr/share/icons/default/cursors/000000000000000000000000000000
3394   retroarch          2 /usr/share/pixmaps/default/cursors/0000000000000000000000000000
3394   retroarch          2 /home/noodles/.icons/Adwaita/cursors/00000000000000000000000000
3394   retroarch          2 /home/noodles/.icons/Adwaita/index.theme
3394   retroarch          2 /usr/share/icons/Adwaita/cursors/000000000000000000000000000000
3394   retroarch          2 /usr/share/pixmaps/Adwaita/cursors/0000000000000000000000000000
3394   retroarch          2 /home/noodles/.icons/hicolor/cursors/00000000000000000000000000
3394   retroarch          2 /home/noodles/.icons/hicolor/index.theme
3394   retroarch          2 /usr/share/icons/hicolor/cursors/000000000000000000000000000000
3394   retroarch          2 /usr/share/pixmaps/hicolor/cursors/0000000000000000000000000000
3394   retroarch          2 /usr/share/pixmaps/hicolor/index.theme
3394   retroarch          2 /home/noodles/.XCompose
3394   retroarch          2 /home/noodles/.icons/default/cursors/00000000000000000000000000
3394   retroarch          2 /home/noodles/.icons/default/index.theme
3394   retroarch          2 /usr/share/icons/default/cursors/000000000000000000000000000000
3394   retroarch          2 /usr/share/pixmaps/default/cursors/0000000000000000000000000000
3394   retroarch          2 /home/noodles/.icons/Adwaita/cursors/00000000000000000000000000
3394   retroarch          2 /home/noodles/.icons/Adwaita/index.theme
3394   retroarch          2 /usr/share/icons/Adwaita/cursors/000000000000000000000000000000
3394   retroarch          2 /usr/share/pixmaps/Adwaita/cursors/0000000000000000000000000000
3394   retroarch          2 /home/noodles/.icons/hicolor/cursors/00000000000000000000000000
3394   retroarch          2 /home/noodles/.icons/hicolor/index.theme
3394   retroarch          2 /usr/share/icons/hicolor/cursors/000000000000000000000000000000
3394   retroarch          2 /usr/share/pixmaps/hicolor/cursors/0000000000000000000000000000
3394   retroarch          2 /usr/share/pixmaps/hicolor/index.theme
3394   retroarch          2 /usr/share/libretro/assets/xmb/monochrome/png/disc.png
3394   retroarch          2 /usr/share/libretro/assets/xmb/monochrome/sounds
3394   retroarch          2 /usr/share/libretro/assets/sounds
3394   retroarch          2 /sys/class/power_supply/ACAD
3394   retroarch          2 /sys/class/power_supply/ACAD
3394   retroarch          2 /usr/share/libretro/assets/xmb/monochrome/png/disc.png
3394   retroarch          2 /usr/share/libretro/assets/ozone/sounds
3394   retroarch          2 /usr/share/libretro/assets/sounds
disc.png from XMB Monochrome (which fails to have SVG source). I also discovered the runtime optional loading of GameMode. This is available in Debian so it was a simple matter to add libgamemode0 to the binary package Recommends.
So, a very basic example of using bpftrace, but a remarkably useful intro to it from my point of view!
Next.