Search Results: "mk"

18 April 2024

Thomas Koch: Minimal overhead VMs with Nix and MicroVM

Posted on March 17, 2024
Joachim Breitner wrote about a Convenient sandboxed development environment and thus reminded me to blog about MicroVM. I ve toyed around with it a little but not yet seriously used it as I m currently not coding. MicroVM is a nix based project to configure and run minimal VMs. It can mount and thus reuse the hosts nix store inside the VM and thus has a very small disk footprint. I use MicroVM on a debian system using the nix package manager. The MicroVM author uses the project to host production services. Otherwise I consider it also a nice way to learn about NixOS after having started with the nix package manager and before making the big step to NixOS as my main system. The guests root filesystem is a tmpdir, so one must explicitly define folders that should be mounted from the host and thus be persistent across VM reboots. I defined the VM as a nix flake since this is how I started from the MicroVM projects example:
 
  description = "Haskell dev MicroVM";
  inputs.impermanence.url = "github:nix-community/impermanence";
  inputs.microvm.url = "github:astro/microvm.nix";
  inputs.microvm.inputs.nixpkgs.follows = "nixpkgs";
  outputs =   self, impermanence, microvm, nixpkgs  :
    let
      persistencePath = "/persistent";
      system = "x86_64-linux";
      user = "thk";
      vmname = "haskell";
      nixosConfiguration = nixpkgs.lib.nixosSystem  
          inherit system;
          modules = [
            microvm.nixosModules.microvm
            impermanence.nixosModules.impermanence
            ( pkgs, ...  :  
            environment.persistence.$ persistencePath  =  
                hideMounts = true;
                users.$ user  =  
                  directories = [
                    "git" ".stack"
                  ];
                 ;
               ;
              environment.sessionVariables =  
                TERM = "screen-256color";
               ;
              environment.systemPackages = with pkgs; [
                ghc
                git
                (haskell-language-server.override   supportedGhcVersions = [ "94" ];  )
                htop
                stack
                tmux
                tree
                vcsh
                zsh
              ];
              fileSystems.$ persistencePath .neededForBoot = nixpkgs.lib.mkForce true;
              microvm =  
                forwardPorts = [
                    from = "host"; host.port = 2222; guest.port = 22;  
                    from = "guest"; host.port = 5432; guest.port = 5432;   # postgresql
                ];
                hypervisor = "qemu";
                interfaces = [
                    type = "user"; id = "usernet"; mac = "00:00:00:00:00:02";  
                ];
                mem = 4096;
                shares = [  
                  # use "virtiofs" for MicroVMs that are started by systemd
                  proto = "9p";
                  tag = "ro-store";
                  # a host's /nix/store will be picked up so that no
                  # squashfs/erofs will be built for it.
                  source = "/nix/store";
                  mountPoint = "/nix/.ro-store";
                   
                  proto = "virtiofs";
                  tag = "persistent";
                  source = "~/.local/share/microvm/vms/$ vmname /persistent";
                  mountPoint = persistencePath;
                  socket = "/run/user/1000/microvm-$ vmname -persistent";
                 
                ];
                socket = "/run/user/1000/microvm-control.socket";
                vcpu = 3;
                volumes = [];
                writableStoreOverlay = "/nix/.rwstore";
               ;
              networking.hostName = vmname;
              nix.enable = true;
              nix.nixPath = ["nixpkgs=$ builtins.storePath <nixpkgs> "];
              nix.settings =  
                extra-experimental-features = ["nix-command" "flakes"];
                trusted-users = [user];
               ;
              security.sudo =  
                enable = true;
                wheelNeedsPassword = false;
               ;
              services.getty.autologinUser = user;
              services.openssh =  
                enable = true;
               ;
              system.stateVersion = "24.11";
              systemd.services.loadnixdb =  
                description = "import hosts nix database";
                path = [pkgs.nix];
                wantedBy = ["multi-user.target"];
                requires = ["nix-daemon.service"];
                script = "cat $ persistencePath /nix-store-db-dump nix-store --load-db";
               ;
              time.timeZone = nixpkgs.lib.mkDefault "Europe/Berlin";
              users.users.$ user  =  
                extraGroups = [ "wheel" "video" ];
                group = "user";
                isNormalUser = true;
                openssh.authorizedKeys.keys = [
                  "ssh-rsa REDACTED"
                ];
                password = "";
               ;
              users.users.root.password = "";
              users.groups.user =  ;
             )
          ];
         ;
    in  
      packages.$ system .default = nixosConfiguration.config.microvm.declaredRunner;
     ;
 
I start the microVM with a templated systemd user service:
[Unit]
Description=MicroVM for Haskell development
Requires=microvm-virtiofsd-persistent@.service
After=microvm-virtiofsd-persistent@.service
AssertFileNotEmpty=%h/.local/share/microvm/vms/%i/flake/flake.nix
[Service]
Type=forking
ExecStartPre=/usr/bin/sh -c "[ /nix/var/nix/db/db.sqlite -ot %h/.local/share/microvm/nix-store-db-dump ]   nix-store --dump-db >%h/.local/share/microvm/nix-store-db-dump"
ExecStartPre=ln -f -t %h/.local/share/microvm/vms/%i/persistent/ %h/.local/share/microvm/nix-store-db-dump
ExecStartPre=-%h/.local/state/nix/profile/bin/tmux new -s microvm -d
ExecStart=%h/.local/state/nix/profile/bin/tmux new-window -t microvm: -n "%i" "exec %h/.local/state/nix/profile/bin/nix run --impure %h/.local/share/microvm/vms/%i/flake"
The above service definition creates a dump of the hosts nix store db so that it can be imported in the guest. This is necessary so that the guest can actually use what is available in /nix/store. There is an effort for an overlayed nix store that would be preferable to this hack. Finally the microvm is started inside a tmux session named microvm . This way I can use the VM with SSH or through the console and also access the qemu console. And for completeness the virtiofsd service:
[Unit]
Description=serve host persistent folder for dev VM
AssertPathIsDirectory=%h/.local/share/microvm/vms/%i/persistent
[Service]
ExecStart=%h/.local/state/nix/profile/bin/virtiofsd \
 --socket-path=$ XDG_RUNTIME_DIR /microvm-%i-persistent \
 --shared-dir=%h/.local/share/microvm/vms/%i/persistent \
 --gid-map :995:%G:1: \
 --uid-map :1000:%U:1:

13 April 2024

Simon Josefsson: Reproducible and minimal source-only tarballs

With the release of Libntlm version 1.8 the release tarball can be reproduced on several distributions. We also publish a signed minimal source-only tarball, produced by git-archive which is the same format used by Savannah, Codeberg, GitLab, GitHub and others. Reproducibility of both tarballs are tested continuously for regressions on GitLab through a CI/CD pipeline. If that wasn t enough to excite you, the Debian packages of Libntlm are now built from the reproducible minimal source-only tarball. The resulting binaries are hopefully reproducible on several architectures. What does that even mean? Why should you care? How you can do the same for your project? What are the open issues? Read on, dear reader This article describes my practical experiments with reproducible release artifacts, following up on my earlier thoughts that lead to discussion on Fosstodon and a patch by Janneke Nieuwenhuizen to make Guix tarballs reproducible that inspired me to some practical work. Let s look at how a maintainer release some software, and how a user can reproduce the released artifacts from the source code. Libntlm provides a shared library written in C and uses GNU Make, GNU Autoconf, GNU Automake, GNU Libtool and gnulib for build management, but these ideas should apply to most project and build system. The following illustrate the steps a maintainer would take to prepare a release:
git clone https://gitlab.com/gsasl/libntlm.git
cd libntlm
git checkout v1.8
./bootstrap
./configure
make distcheck
gpg -b libntlm-1.8.tar.gz
The generated files libntlm-1.8.tar.gz and libntlm-1.8.tar.gz.sig are published, and users download and use them. This is how the GNU project have been doing releases since the late 1980 s. That is a testament to how successful this pattern has been! These tarballs contain source code and some generated files, typically shell scripts generated by autoconf, makefile templates generated by automake, documentation in formats like Info, HTML, or PDF. Rarely do they contain binary object code, but historically that happened. The XZUtils incident illustrate that tarballs with files that are not included in the git archive offer an opportunity to disguise malicious backdoors. I blogged earlier how to mitigate this risk by using signed minimal source-only tarballs. The risk of hiding malware is not the only motivation to publish signed minimal source-only tarballs. With pre-generated content in tarballs, there is a risk that GNU/Linux distributions such as Trisquel, Guix, Debian/Ubuntu or Fedora ship generated files coming from the tarball into the binary *.deb or *.rpm package file. Typically the person packaging the upstream project never realized that some installed artifacts was not re-built through a typical autoconf -fi && ./configure && make install sequence, and never wrote the code to rebuild everything. This can also happen if the build rules are written but are buggy, shipping the old artifact. When a security problem is found, this can lead to time-consuming situations, as it may be that patching the relevant source code and rebuilding the package is not sufficient: the vulnerable generated object from the tarball would be shipped into the binary package instead of a rebuilt artifact. For architecture-specific binaries this rarely happens, since object code is usually not included in tarballs although for 10+ years I shipped the binary Java JAR file in the GNU Libidn release tarball, until I stopped shipping it. For interpreted languages and especially for generated content such as HTML, PDF, shell scripts this happens more than you would like. Publishing minimal source-only tarballs enable easier auditing of a project s code, to avoid the need to read through all generated files looking for malicious content. I have taken care to generate the source-only minimal tarball using git-archive. This is the same format that GitLab, GitHub etc offer for the automated download links on git tags. The minimal source-only tarballs can thus serve as a way to audit GitLab and GitHub download material! Consider if/when hosting sites like GitLab or GitHub has a security incident that cause generated tarballs to include a backdoor that is not present in the git repository. If people rely on the tag download artifact without verifying the maintainer PGP signature using GnuPG, this can lead to similar backdoor scenarios that we had for XZUtils but originated with the hosting provider instead of the release manager. This is even more concerning, since this attack can be mounted for some selected IP address that you want to target and not on everyone, thereby making it harder to discover. With all that discussion and rationale out of the way, let s return to the release process. I have added another step here:
make srcdist
gpg -b libntlm-1.8-src.tar.gz
Now the release is ready. I publish these four files in the Libntlm s Savannah Download area, but they can be uploaded to a GitLab/GitHub release area as well. These are the SHA256 checksums I got after building the tarballs on my Trisquel 11 aramo laptop:
91de864224913b9493c7a6cec2890e6eded3610d34c3d983132823de348ec2ca  libntlm-1.8-src.tar.gz
ce6569a47a21173ba69c990965f73eb82d9a093eb871f935ab64ee13df47fda1  libntlm-1.8.tar.gz
So how can you reproduce my artifacts? Here is how to reproduce them in a Ubuntu 22.04 container:
podman run -it --rm ubuntu:22.04
apt-get update
apt-get install -y --no-install-recommends autoconf automake libtool make git ca-certificates
git clone https://gitlab.com/gsasl/libntlm.git
cd libntlm
git checkout v1.8
./bootstrap
./configure
make dist srcdist
sha256sum libntlm-*.tar.gz
You should see the exact same SHA256 checksum values. Hooray! This works because Trisquel 11 and Ubuntu 22.04 uses the same version of git, autoconf, automake, and libtool. These tools do not guarantee the same output content for all versions, similar to how GNU GCC does not generate the same binary output for all versions. So there is still some delicate version pairing needed. Ideally, the artifacts should be possible to reproduce from the release artifacts themselves, and not only directly from git. It is possible to reproduce the full tarball in a AlmaLinux 8 container replace almalinux:8 with rockylinux:8 if you prefer RockyLinux:
podman run -it --rm almalinux:8
dnf update -y
dnf install -y make wget gcc
wget https://download.savannah.nongnu.org/releases/libntlm/libntlm-1.8.tar.gz
tar xfa libntlm-1.8.tar.gz
cd libntlm-1.8
./configure
make dist
sha256sum libntlm-1.8.tar.gz
The source-only minimal tarball can be regenerated on Debian 11:
podman run -it --rm debian:11
apt-get update
apt-get install -y --no-install-recommends make git ca-certificates
git clone https://gitlab.com/gsasl/libntlm.git
cd libntlm
git checkout v1.8
make -f cfg.mk srcdist
sha256sum libntlm-1.8-src.tar.gz 
As the Magnus Opus or chef-d uvre, let s recreate the full tarball directly from the minimal source-only tarball on Trisquel 11 replace docker.io/kpengboy/trisquel:11.0 with ubuntu:22.04 if you prefer.
podman run -it --rm docker.io/kpengboy/trisquel:11.0
apt-get update
apt-get install -y --no-install-recommends autoconf automake libtool make wget git ca-certificates
wget https://download.savannah.nongnu.org/releases/libntlm/libntlm-1.8-src.tar.gz
tar xfa libntlm-1.8-src.tar.gz
cd libntlm-v1.8
./bootstrap
./configure
make dist
sha256sum libntlm-1.8.tar.gz
Yay! You should now have great confidence in that the release artifacts correspond to what s in version control and also to what the maintainer intended to release. Your remaining job is to audit the source code for vulnerabilities, including the source code of the dependencies used in the build. You no longer have to worry about auditing the release artifacts. I find it somewhat amusing that the build infrastructure for Libntlm is now in a significantly better place than the code itself. Libntlm is written in old C style with plenty of string manipulation and uses broken cryptographic algorithms such as MD4 and single-DES. Remember folks: solving supply chain security issues has no bearing on what kind of code you eventually run. A clean gun can still shoot you in the foot. Side note on naming: GitLab exports tarballs with pathnames libntlm-v1.8/ (i.e.., PROJECT-TAG/) and I ve adopted the same pathnames, which means my libntlm-1.8-src.tar.gz tarballs are bit-by-bit identical to GitLab s exports and you can verify this with tools like diffoscope. GitLab name the tarball libntlm-v1.8.tar.gz (i.e., PROJECT-TAG.ARCHIVE) which I find too similar to the libntlm-1.8.tar.gz that we also publish. GitHub uses the same git archive style, but unfortunately they have logic that removes the v in the pathname so you will get a tarball with pathname libntlm-1.8/ instead of libntlm-v1.8/ that GitLab and I use. The content of the tarball is bit-by-bit identical, but the pathname and archive differs. Codeberg (running Forgejo) uses another approach: the tarball is called libntlm-v1.8.tar.gz (after the tag) just like GitLab, but the pathname inside the archive is libntlm/, otherwise the produced archive is bit-by-bit identical including timestamps. Savannah s CGIT interface uses archive name libntlm-1.8.tar.gz with pathname libntlm-1.8/, but otherwise file content is identical. Savannah s GitWeb interface provides snapshot links that are named after the git commit (e.g., libntlm-a812c2ca.tar.gz with libntlm-a812c2ca/) and I cannot find any tag-based download links at all. Overall, we are so close to get SHA256 checksum to match, but fail on pathname within the archive. I ve chosen to be compatible with GitLab regarding the content of tarballs but not on archive naming. From a simplicity point of view, it would be nice if everyone used PROJECT-TAG.ARCHIVE for the archive filename and PROJECT-TAG/ for the pathname within the archive. This aspect will probably need more discussion. Side note on git archive output: It seems different versions of git archive produce different results for the same repository. The version of git in Debian 11, Trisquel 11 and Ubuntu 22.04 behave the same. The version of git in Debian 12, AlmaLinux/RockyLinux 8/9, Alpine, ArchLinux, macOS homebrew, and upcoming Ubuntu 24.04 behave in another way. Hopefully this will not change that often, but this would invalidate reproducibility of these tarballs in the future, forcing you to use an old git release to reproduce the source-only tarball. Alas, GitLab and most other sites appears to be using modern git so the download tarballs from them would not match my tarballs even though the content would. Side note on ChangeLog: ChangeLog files were traditionally manually curated files with version history for a package. In recent years, several projects moved to dynamically generate them from git history (using tools like git2cl or gitlog-to-changelog). This has consequences for reproducibility of tarballs: you need to have the entire git history available! The gitlog-to-changelog tool also output different outputs depending on the time zone of the person using it, which arguable is a simple bug that can be fixed. However this entire approach is incompatible with rebuilding the full tarball from the minimal source-only tarball. It seems Libntlm s ChangeLog file died on the surgery table here. So how would a distribution build these minimal source-only tarballs? I happen to help on the libntlm package in Debian. It has historically used the generated tarballs as the source code to build from. This means that code coming from gnulib is vendored in the tarball. When a security problem is discovered in gnulib code, the security team needs to patch all packages that include that vendored code and rebuild them, instead of merely patching the gnulib package and rebuild all packages that rely on that particular code. To change this, the Debian libntlm package needs to Build-Depends on Debian s gnulib package. But there was one problem: similar to most projects that use gnulib, Libntlm depend on a particular git commit of gnulib, and Debian only ship one commit. There is no coordination about which commit to use. I have adopted gnulib in Debian, and add a git bundle to the *_all.deb binary package so that projects that rely on gnulib can pick whatever commit they need. This allow an no-network GNULIB_URL and GNULIB_REVISION approach when running Libntlm s ./bootstrap with the Debian gnulib package installed. Otherwise libntlm would pick up whatever latest version of gnulib that Debian happened to have in the gnulib package, which is not what the Libntlm maintainer intended to be used, and can lead to all sorts of version mismatches (and consequently security problems) over time. Libntlm in Debian is developed and tested on Salsa and there is continuous integration testing of it as well, thanks to the Salsa CI team. Side note on git bundles: unfortunately there appears to be no reproducible way to export a git repository into one or more files. So one unfortunate consequence of all this work is that the gnulib *.orig.tar.gz tarball in Debian is not reproducible any more. I have tried to get Git bundles to be reproducible but I never got it to work see my notes in gnulib s debian/README.source on this aspect. Of course, source tarball reproducibility has nothing to do with binary reproducibility of gnulib in Debian itself, fortunately. One open question is how to deal with the increased build dependencies that is triggered by this approach. Some people are surprised by this but I don t see how to get around it: if you depend on source code for tools in another package to build your package, it is a bad idea to hide that dependency. We ve done it for a long time through vendored code in non-minimal tarballs. Libntlm isn t the most critical project from a bootstrapping perspective, so adding git and gnulib as Build-Depends to it will probably be fine. However, consider if this pattern was used for other packages that uses gnulib such as coreutils, gzip, tar, bison etc (all are using gnulib) then they would all Build-Depends on git and gnulib. Cross-building those packages for a new architecture will therefor require git on that architecture first, which gets circular quick. The dependency on gnulib is real so I don t see that going away, and gnulib is a Architecture:all package. However, the dependency on git is merely a consequence of how the Debian gnulib package chose to make all gnulib git commits available to projects: through a git bundle. There are other ways to do this that doesn t require the git tool to extract the necessary files, but none that I found practical ideas welcome! Finally some brief notes on how this was implemented. Enabling bootstrappable source-only minimal tarballs via gnulib s ./bootstrap is achieved by using the GNULIB_REVISION mechanism, locking down the gnulib commit used. I have always disliked git submodules because they add extra steps and has complicated interaction with CI/CD. The reason why I gave up git submodules now is because the particular commit to use is not recorded in the git archive output when git submodules is used. So the particular gnulib commit has to be mentioned explicitly in some source code that goes into the git archive tarball. Colin Watson added the GNULIB_REVISION approach to ./bootstrap back in 2018, and now it no longer made sense to continue to use a gnulib git submodule. One alternative is to use ./bootstrap with --gnulib-srcdir or --gnulib-refdir if there is some practical problem with the GNULIB_URL towards a git bundle the GNULIB_REVISION in bootstrap.conf. The srcdist make rule is simple:
git archive --prefix=libntlm-v1.8/ -o libntlm-v1.8.tar.gz HEAD
Making the make dist generated tarball reproducible can be more complicated, however for Libntlm it was sufficient to make sure the modification times of all files were set deterministically to the timestamp of the last commit in the git repository. Interestingly there seems to be a couple of different ways to accomplish this, Guix doesn t support minimal source-only tarballs but rely on a .tarball-timestamp file inside the tarball. Paul Eggert explained what TZDB is using some time ago. The approach I m using now is fairly similar to the one I suggested over a year ago. If there are problems because all files in the tarball now use the same modification time, there is a solution by Bruno Haible that could be implemented. Side note on git tags: Some people may wonder why not verify a signed git tag instead of verifying a signed tarball of the git archive. Currently most git repositories uses SHA-1 for git commit identities, but SHA-1 is not a secure hash function. While current SHA-1 attacks can be detected and mitigated, there are fundamental doubts that a git SHA-1 commit identity uniquely refers to the same content that was intended. Verifying a git tag will never offer the same assurance, since a git tag can be moved or re-signed at any time. Verifying a git commit is better but then we need to trust SHA-1. Migrating git to SHA-256 would resolve this aspect, but most hosting sites such as GitLab and GitHub does not support this yet. There are other advantages to using signed tarballs instead of signed git commits or git tags as well, e.g., tar.gz can be a deterministically reproducible persistent stable offline storage format but .git sub-directory trees or git bundles do not offer this property. Doing continous testing of all this is critical to make sure things don t regress. Libntlm s pipeline definition now produce the generated libntlm-*.tar.gz tarballs and a checksum as a build artifact. Then I added the 000-reproducability job which compares the checksums and fails on mismatches. You can read its delicate output in the job for the v1.8 release. Right now we insists that builds on Trisquel 11 match Ubuntu 22.04, that PureOS 10 builds match Debian 11 builds, that AlmaLinux 8 builds match RockyLinux 8 builds, and AlmaLinux 9 builds match RockyLinux 9 builds. As you can see in pipeline job output, not all platforms lead to the same tarballs, but hopefully this state can be improved over time. There is also partial reproducibility, where the full tarball is reproducible across two distributions but not the minimal tarball, or vice versa. If this way of working plays out well, I hope to implement it in other projects too. What do you think? Happy Hacking!

13 March 2024

Freexian Collaborators: Debian Contributions: Upcoming Improvements to Salsa CI, /usr-move, packaging simplemonitor, and more! (by Utkarsh Gupta)

Contributing to Debian is part of Freexian s mission. This article covers the latest achievements of Freexian and their collaborators. All of this is made possible by organizations subscribing to our Long Term Support contracts and consulting services.

/usr-move, by Helmut Grohne Much of the work was spent on handling interaction with time time64 transition and sending patches for mitigating fallout. The set of packages relevant to debootstrap is mostly converted and the patches for glibc and base-files have been refined due to feedback from the upload to Ubuntu noble. Beyond this, he sent patches for all remaining packages that cannot move their files with dh-sequence-movetousr and packages using dpkg-divert in ways that dumat would not recognize.

Upcoming improvements to Salsa CI, by Santiago Ruano Rinc n Last month, Santiago Ruano Rinc n started the work on integrating sbuild into the Salsa CI pipeline. Initially, Santiago used sbuild with the unshare chroot mode. However, after discussion with josch, jochensp and helmut (thanks to them!), it turns out that the unshare mode is not the most suitable for the pipeline, since the level of isolation it provides is not needed, and some test suites would fail (eg: krb5). Additionally, one of the requirements of the build job is the use of ccache, since it is needed by some C/C++ large projects to reduce the compilation time. In the preliminary work with unshare last month, it was not possible to make ccache to work. Finally, Santiago changed the chroot mode, and now has a couple of POC (cf: 1 and 2) that rely on the schroot and sudo, respectively. And the good news is that ccache is successfully used by sbuild with schroot! 
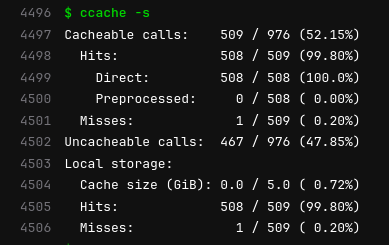
The image here comes from an example of building grep. At the end of the build, ccache -s shows the statistics of the cache that it used, and so a little more than half of the calls of that job were cacheable. The most important pieces are in place to finish the integration of sbuild into the pipeline. Other than that, Santiago also reviewed the very useful merge request !346, made by IOhannes zm lnig to autodetect the release from debian/changelog. As agreed with IOhannes, Santiago is preparing a merge request to include the release autodetection use case in the very own Salsa CI s CI.

Packaging simplemonitor, by Carles Pina i Estany Carles started using simplemonitor in 2017, opened a WNPP bug in 2022 and started packaging simplemonitor dependencies in October 2023. After packaging five direct and indirect dependencies, Carles finally uploaded simplemonitor to unstable in February. During the packaging of simplemonitor, Carles reported a few issues to upstream. Some of these were to make the simplemonitor package build and run tests reproducibly. A reproducibility issue was reprotest overriding the timezone, which broke simplemonitor s tests. There have been discussions on resolving this upstream in simplemonitor and in reprotest, too. Carles also started upgrading or improving some of simplemonitor s dependencies.

Miscellaneous contributions
  • Stefano Rivera spent some time doing admin on debian.social infrastructure. Including dealing with a spike of abuse on the Jitsi server.
  • Stefano started to prepare a new release of dh-python, including cleaning out a lot of old Python 2.x related code. Thanks to Niels Thykier (outside Freexian) for spear-heading this work.
  • DebConf 24 planning is beginning. Stefano discussed venues and finances with the local team and remotely supported a site-visit by Nattie (outside Freexian).
  • Also in the DebConf 24 context, Santiago took part in discussions and preparations related to the Content Team.
  • A JIT bug was reported against pypy3 in Debian Bookworm. Stefano bisected the upstream history to find the patch (it was already resolved upstream) and released an update to pypy3 in bookworm.
  • Enrico participated in /usr-merge discussions with Helmut.
  • Colin Watson backported a python-channels-redis fix to bookworm, rediscovered while working on debusine.
  • Colin dug into a cluster of celery build failures and tracked the hardest bit down to a Python 3.12 regression, now fixed in unstable. celery should be back in testing once the 64-bit time_t migration is out of the way.
  • Thorsten Alteholz uploaded a new upstream version of cpdb-libs. Unfortunately upstream changed the naming of their release tags, so updating the watch file was a bit demanding. Anyway this version 2.0 is a huge step towards introduction of the new Common Print Dialog Backends.
  • Helmut send patches for 48 cross build failures.
  • Helmut changed debvm to use mkfs.ext4 instead of genext2fs.
  • Helmut sent a debci MR for improving collector robustness.
  • In preparation for DebConf 25, Santiago worked on the Brest Bid.

10 March 2024

Vasudev Kamath: Cloning a laptop over NVME TCP

Recently, I got a new laptop and had to set it up so I could start using it. But I wasn't really in the mood to go through the same old steps which I had explained in this post earlier. I was complaining about this to my colleague, and there came the suggestion of why not copy the entire disk to the new laptop. Though it sounded like an interesting idea to me, I had my doubts, so here is what I told him in return.
  1. I don't have the tools to open my old laptop and connect the new disk over USB to my new laptop.
  2. I use full disk encryption, and my old laptop has a 512GB disk, whereas the new laptop has a 1TB NVME, and I'm not so familiar with resizing LUKS.
He promptly suggested both could be done. For step 1, just expose the disk using NVME over TCP and connect it over the network and do a full disk copy, and the rest is pretty simple to achieve. In short, he suggested the following:
  1. Export the disk using nvmet-tcp from the old laptop.
  2. Do a disk copy to the new laptop.
  3. Resize the partition to use the full 1TB.
  4. Resize LUKS.
  5. Finally, resize the BTRFS root disk.
Exporting Disk over NVME TCP The easiest way suggested by my colleague to do this is using systemd-storagetm.service. This service can be invoked by simply booting into storage-target-mode.target by specifying rd.systemd.unit=storage-target-mode.target. But he suggested not to use this as I need to tweak the dracut initrd image to involve network services as well as configuring WiFi from this mode is a painful thing to do. So alternatively, I simply booted both my laptops with GRML rescue CD. And the following step was done to export the NVME disk on my current laptop using the nvmet-tcp module of Linux:
modprobe nvmet-tcp
cd /sys/kernel/config/nvmet
mkdir ports/0
cd ports/0
echo "ipv4" > addr_adrfam
echo 0.0.0.0 > addr_traaddr
echo 4420 > addr_trsvcid
echo tcp > addr_trtype
cd /sys/kernel/config/nvmet/subsystems
mkdir testnqn
echo 1 >testnqn/allow_any_host
mkdir testnqn/namespaces/1
cd testnqn
# replace the device name with the disk you want to export
echo "/dev/nvme0n1" > namespaces/1/device_path
echo 1 > namespaces/1/enable
ln -s "../../subsystems/testnqn" /sys/kernel/config/nvmet/ports/0/subsystems/testnqn
These steps ensure that the device is now exported using NVME over TCP. The next step is to detect this on the new laptop and connect the device:
nvme discover -t tcp -a <ip> -s 4420
nvme connectl-all -t tcp -a <> -s 4420
Finally, nvme list shows the device which is connected to the new laptop, and we can proceed with the next step, which is to do the disk copy.
Copying the Disk I simply used the dd command to copy the root disk to my new laptop. Since the new laptop didn't have an Ethernet port, I had to rely only on WiFi, and it took about 7 and a half hours to copy the entire 512GB to the new laptop. The speed at which I was copying was about 18-20MB/s. The other option would have been to create an initial partition and file system and do an rsync of the root disk or use BTRFS itself for file system transfer.
dd if=/dev/nvme2n1 of=/dev/nvme0n1 status=progress bs=40M
Resizing Partition and LUKS Container The final part was very easy. When I launched parted, it detected that the partition table does not match the disk size and asked if it can fix it, and I said yes. Next, I had to install cloud-guest-utils to get growpart to fix the second partition, and the following command extended the partition to the full 1TB:
growpart /dev/nvem0n1 p2
Next, I used cryptsetup-resize to increase the LUKS container size.
cryptsetup luksOpen /dev/nvme0n1p2 ENC
cryptsetup resize ENC
Finally, I rebooted into the disk, and everything worked fine. After logging into the system, I resized the BTRFS file system. BTRFS requires the system to be mounted for resize, so I could not attempt it in live boot.
btfs fielsystem resize max /
Conclussion The only benefit of this entire process is that I have a new laptop, but I still feel like I'm using my existing laptop. Typically, setting up a new laptop takes about a week or two to completely get adjusted, but in this case, that entire time is saved. An added benefit is that I learned how to export disks using NVME over TCP, thanks to my colleague. This new knowledge adds to the value of the experience.

25 February 2024

Jacob Adams: AAC and Debian

Currently, in a default installation of Debian with the GNOME desktop, Bluetooth headphones that require the AAC codec1 cannot be used. As the Debian wiki outlines, using the AAC codec over Bluetooth, while technically supported by PipeWire, is explicitly disabled in Debian at this time. This is because the fdk-aac library needed to enable this support is currently in the non-free component of the repository, meaning that PipeWire, which is in the main component, cannot depend on it.

How to Fix it Yourself If what you, like me, need is simply for Bluetooth Audio to work with AAC in Debian s default desktop environment2, then you ll need to rebuild the pipewire package to include the AAC codec. While the current version in Debian main has been built with AAC deliberately disabled, it is trivial to enable if you can install a version of the fdk-aac library. I preface this with the usual caveats when it comes to patent and licensing controversies. I am not a lawyer, building this package and/or using it could get you into legal trouble. These instructions have only been tested on an up-to-date copy of Debian 12.
  1. Install pipewire s build dependencies
    sudo apt install build-essential devscripts
    sudo apt build-dep pipewire
    
  2. Install libfdk-aac-dev
    sudo apt install libfdk-aac-dev
    
    If the above doesn t work you ll likely need to enable non-free and try again
    sudo sed -i 's/main/main non-free/g' /etc/apt/sources.list
    sudo apt update
    
    Alternatively, if you wish to ensure you are maximally license-compliant and patent un-infringing3, you can instead build fdk-aac-free which includes only those components of AAC that are known to be patent-free3. This is what should eventually end up in Debian to resolve this problem (see below).
    sudo apt install git-buildpackage
    mkdir fdk-aac-source
    cd fdk-aac-source
    git clone https://salsa.debian.org/multimedia-team/fdk-aac
    cd fdk-aac
    gbp buildpackage
    sudo dpkg -i ../libfdk-aac2_*deb ../libfdk-aac-dev_*deb
    
  3. Get the pipewire source code
    mkdir pipewire-source
    cd pipewire-source
    apt source pipewire
    
    This will create a bunch of files within the pipewire-source directory, but you ll only need the pipewire-<version> folder, this contains all the files you ll need to build the package, with all the debian-specific patches already applied. Note that you don t want to run the apt source command as root, as it will then create files that your regular user cannot edit.
  4. Fix the dependencies and build options To fix up the build scripts to use the fdk-aac library, you need to save the following as pipewire-source/aac.patch
    --- debian/control.orig
    +++ debian/control
    @@ -40,8 +40,8 @@
                 modemmanager-dev,
                 pkg-config,
                 python3-docutils,
    -               systemd [linux-any]
    -Build-Conflicts: libfdk-aac-dev
    +               systemd [linux-any],
    +               libfdk-aac-dev
     Standards-Version: 4.6.2
     Vcs-Browser: https://salsa.debian.org/utopia-team/pipewire
     Vcs-Git: https://salsa.debian.org/utopia-team/pipewire.git
    --- debian/rules.orig
    +++ debian/rules
    @@ -37,7 +37,7 @@
     		-Dauto_features=enabled \
     		-Davahi=enabled \
     		-Dbluez5-backend-native-mm=enabled \
    -		-Dbluez5-codec-aac=disabled \
    +		-Dbluez5-codec-aac=enabled \
     		-Dbluez5-codec-aptx=enabled \
     		-Dbluez5-codec-lc3=enabled \
     		-Dbluez5-codec-lc3plus=disabled \
    
    Then you ll need to run patch from within the pipewire-<version> folder created by apt source:
    patch -p0 < ../aac.patch
    
  5. Build pipewire
    cd pipewire-*
    debuild
    
    Note that you will likely see an error from debsign at the end of this process, this is harmless, you simply don t have a GPG key set up to sign your newly-built package4. Packages don t need to be signed to be installed, and debsign uses a somewhat non-standard signing process that dpkg does not check anyway.
  1. Install libspa-0.2-bluetooth
    sudo dpkg -i libspa-0.2-bluetooth_*.deb
    
  2. Restart PipeWire and/or Reboot
    sudo reboot
    
    Theoretically there s a set of services to restart here that would get pipewire to pick up the new library, probably just pipewire itself. But it s just as easy to restart and ensure everything is using the correct library.

Why This is a slightly unusual situation, as the fdk-aac library is licensed under what even the GNU project acknowledges is a free software license. However, this license explicitly informs the user that they need to acquire a patent license to use this software5:
3. NO PATENT LICENSE NO EXPRESS OR IMPLIED LICENSES TO ANY PATENT CLAIMS, including without limitation the patents of Fraunhofer, ARE GRANTED BY THIS SOFTWARE LICENSE. Fraunhofer provides no warranty of patent non-infringement with respect to this software. You may use this FDK AAC Codec software or modifications thereto only for purposes that are authorized by appropriate patent licenses.
To quote the GNU project:
Because of this, and because the license author is a known patent aggressor, we encourage you to be careful about using or redistributing software under this license: you should first consider whether the licensor might aim to lure you into patent infringement.
AAC is covered by a number of patents, which expire at some point in the 2030s6. As such the current version of the library is potentially legally dubious to ship with any other software, as it could be considered patent-infringing3.

Fedora s solution Since 2017, Fedora has included a modified version of the library as fdk-aac-free, see the announcement and the bugzilla bug requesting review. This version of the library includes only the AAC LC profile, which is believed to be entirely patent-free3. Based on this, there is an open bug report in Debian requesting that the fdk-aac package be moved to the main component and that the pipwire package be updated to build against it.

The Debian NEW queue To resolve these bugs, a version of fdk-aac-free has been uploaded to Debian by Jeremy Bicha. However, to make it into Debian proper, it must first pass through the ftpmaster s NEW queue. The current version of fdk-aac-free has been in the NEW queue since July 2023. Based on conversations in some of the bugs above, it s been there since at least 20227. I hope this helps anyone stuck with AAC to get their hardware working for them while we wait for the package to eventually make it through the NEW queue. Discuss on Hacker News
  1. Such as, for example, any Apple AirPods, which only support AAC AFAICT.
  2. Which, as of Debian 12 is GNOME 3 under Wayland with PipeWire.
  3. I m not a lawyer, I don t know what kinds of infringement might or might not be possible here, do your own research, etc. 2 3 4
  4. And if you DO have a key setup with debsign you almost certainly don t need these instructions.
  5. This was originally phrased as explicitly does not grant any patent rights. It was pointed out on Hacker News that this is not exactly what it says, as it also includes a specific note that you ll need to acquire your own patent license. I ve now quoted the relevant section of the license for clarity.
  6. Wikipedia claims the base patents expire in 2031, with the extensions expiring in 2038, but its source for these claims is some guy s spreadsheet in a forum. The same discussion also brings up Wikipedia s claim and casts some doubt on it, so I m not entirely sure what s correct here, but I didn t feel like doing a patent deep-dive today. If someone can provide a clear answer that would be much appreciated.
  7. According to Jeremy B cha: https://bugs.debian.org/cgi-bin/bugreport.cgi?bug=1021370#17

10 February 2024

Andrew Cater: Debian point releases - updated media for Bullseye (11.9) and Bookworm (12.5) - 2024-02-10

It's been a LONG day: two point releases in a day takes of the order of twelve or thirteen hours of fairly solid work on behalf of those doing the releases and testing.Thanks firstly to the main Debian release team for all the initial work.Thanks to Isy, RattusRattus, Sledge and egw in Cottenham, smcv and Helen closer to the centre of Cambridge, cacin and others who have dropped in and out of IRC and helped testing.

I've been at home but active on IRC - missing the team (and the food) and drinking far too much coffee/eating too many biscuits.

We've found relatively few bugs that we haven't previously noted: it's been a good day. Back again, at some point a couple of months from now to do this all over again.With luck, I can embed a picture of the Cottenham folk below: it's fun to know _exactly_ where people are because you've been there yourself.


25 January 2024

Dimitri John Ledkov: Ubuntu Livepatch service now supports over 60 different kernels

Linux kernel getting a livepatch whilst running a marathon. Generated with AI.
Livepatch service eliminates the need for unplanned maintenance windows for high and critical severity kernel vulnerabilities by patching the Linux kernel while the system runs. Originally the service launched in 2016 with just a single kernel flavour supported.Over the years, additional kernels were added: new LTS releases, ESM kernels, Public Cloud kernels, and most recently HWE kernels too.Recently livepatch support was expanded for FIPS compliant kernels, Public cloud FIPS compliant kernels, and as well IBM Z (mainframe) kernels. Bringing the total of kernel flavours support to over 60 distinct kernel flavours supported in parallel. The table of supported kernels in the documentation lists the supported kernel flavours ABIs, the duration of individual build's support window, supported architectures, and the Ubuntu release. This work was only possible thanks to the collaboration with the Ubuntu Certified Public Cloud team, engineers at IBM for IBM Z (s390x) support, Ubuntu Pro team, Livepatch server & client teams.It is a great milestone, and I personally enjoy seeing the non-intrusive popup on my Ubuntu Desktop that a kernel livepatch was applied to my running system. I do enable Ubuntu Pro on my personal laptop thanks to the free Ubuntu Pro subscription for individuals.What's next? The next frontier is supporting ARM64 kernels. The Canonical kernel team has completed the gap analysis to start supporting Livepatch Service for ARM64. Upstream Linux requires development work on the consistency model to fully support livepatch on ARM64 processors. Livepatch code changes are applied on a per-task basis, when the task is deemed safe to switch over. This safety check depends mostly on kernel stacktraces. For these checks, CONFIG_HAVE_RELIABLE_STACKTRACE needs to be available in the upstream ARM64 kernel. (see The Linux Kernel Documentation). There are preliminary patches that enable reliable stacktraces on ARM64, however these turned out to be problematic as there are lots of fix revisions that came after the initial patchset that AWS ships with 5.10. This is a call for help from any interested parties. If you have engineering resources and are interested in bringing Livepatch Service to your ARM64 platforms, please reach out to the Canonical Kernel team on the public Ubuntu Matrix, Discourse, and mailing list. If you want to chat in person, see you at FOSDEM next weekend.

24 January 2024

Thomas Lange: FAI 6.2 released

After more than one a year, a new minor FAI version is available, but it includes some interesting new features. Here a the items from the NEWS file: fai (6.2) unstable; urgency=low In the past the command fai-cd was only used for creating installation ISOs, that could be used from CD or USB stick. Now it possible to create a live ISO. Therefore you create your live chroot environment using 'fai dirinstall' and then convert it to a bootable live ISO using fai-cd. See man fai-cd(8) for an example. Years ago I had the idea to use the remaining disk space on an USB stick after copying an ISO onto it. I've blogged about this recently: https://blog.fai-project.org/posts/extending-iso-images/ The new FAI version includes the tool mk-data-partition for adding a data partition to the ISO itself or to an USB stick. FAI detects this data partition, mounts it to /media/data and can then use various configurations from it. You may want to copy your own set of .deb packages or your whole FAI config space to this partition. FAI now automatically searches this partition for usable FAI configuration data and packages. FAI will install all packages from pkgs/<CLASSNAME> if the equivalent class is defined. Setting FAI_CONFIG_SRC=detect:// now looks into the data partition for the subdirectory 'config' and uses this as the config space. So it's now possible to modify an existing ISO (that is read-only) and make changes to the config space. If there's no config directory in the data partition FAI uses the default location on the ISO. The tool fai-kvm, which starts virtual machines can now boot an ISO not only as CD but also as USB stick. Sometimes users want to adjust the list of disks before the partitioning is startet. Therefore FAI provides several new functions including You can select individual disks by their model name or even the serial number. Two new FAI flags were added (tmux and screen) that make it easy to run FAI inside a tmux or screen session. And finally FAI uses systemd. Yeah! This technical change was waiting since 2015 in a merge request from Moritz 'Morty' Str be, that would enable using systemd during the installation. Before FAI still was using old-style SYSV init scripts and did not started systemd. I didn't tried to apply the patch, because I was afraid that it would need much time to make it work. But then in may 2023 Juri Grabowski just gave it a try at MiniDebConf Hamburg, and voil it just works! Many, many thanks to Moritz and Juri for their bravery. The whole changelog can be found at https://tracker.debian.org/media/packages/f/fai/changelog-6.2 New ISOs for FAI are also available including an example of a Xfce desktop live ISO: https://fai-project.org/fai-cd/ The FAIme service for creating customized installation ISOs will get its update later. The new packages are available for bookworm by adding this line to your sources.list: deb https://fai-project.org/download bookworm koeln

5 January 2024

Valhalla's Things: Random Sashiko + Crazy Quilt Pocket

Posted on January 5, 2024
Tags: madeof:atoms
A 18th century pocket in black jeans with a random pattern of pink running stitches forming squares and other shapes. The unfinished edges of the pieces of jeans can be seen, running more or less diagonally. 
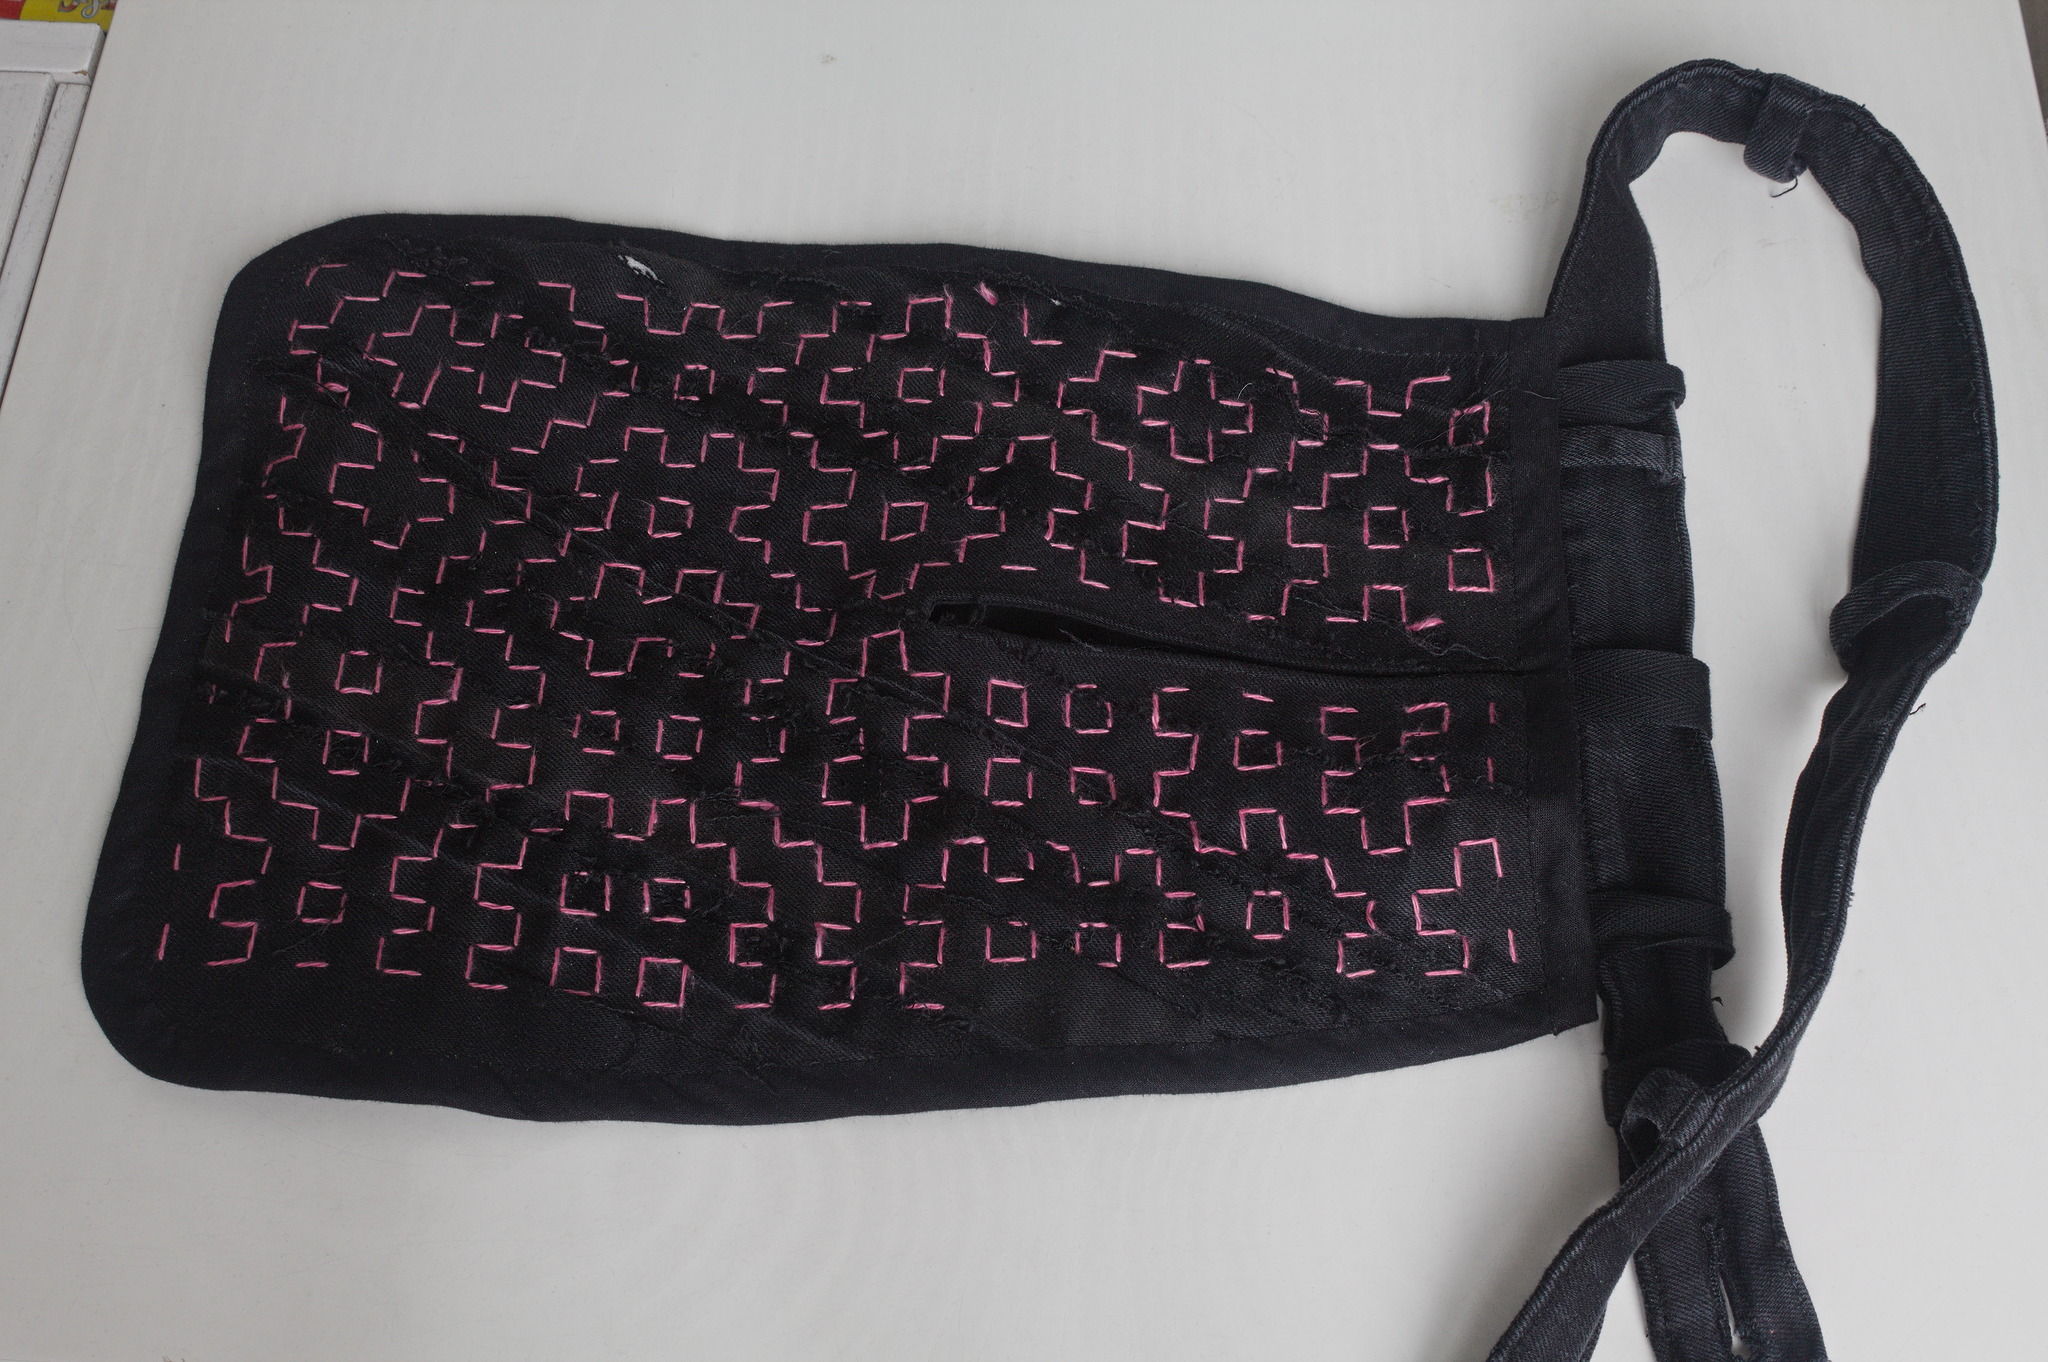
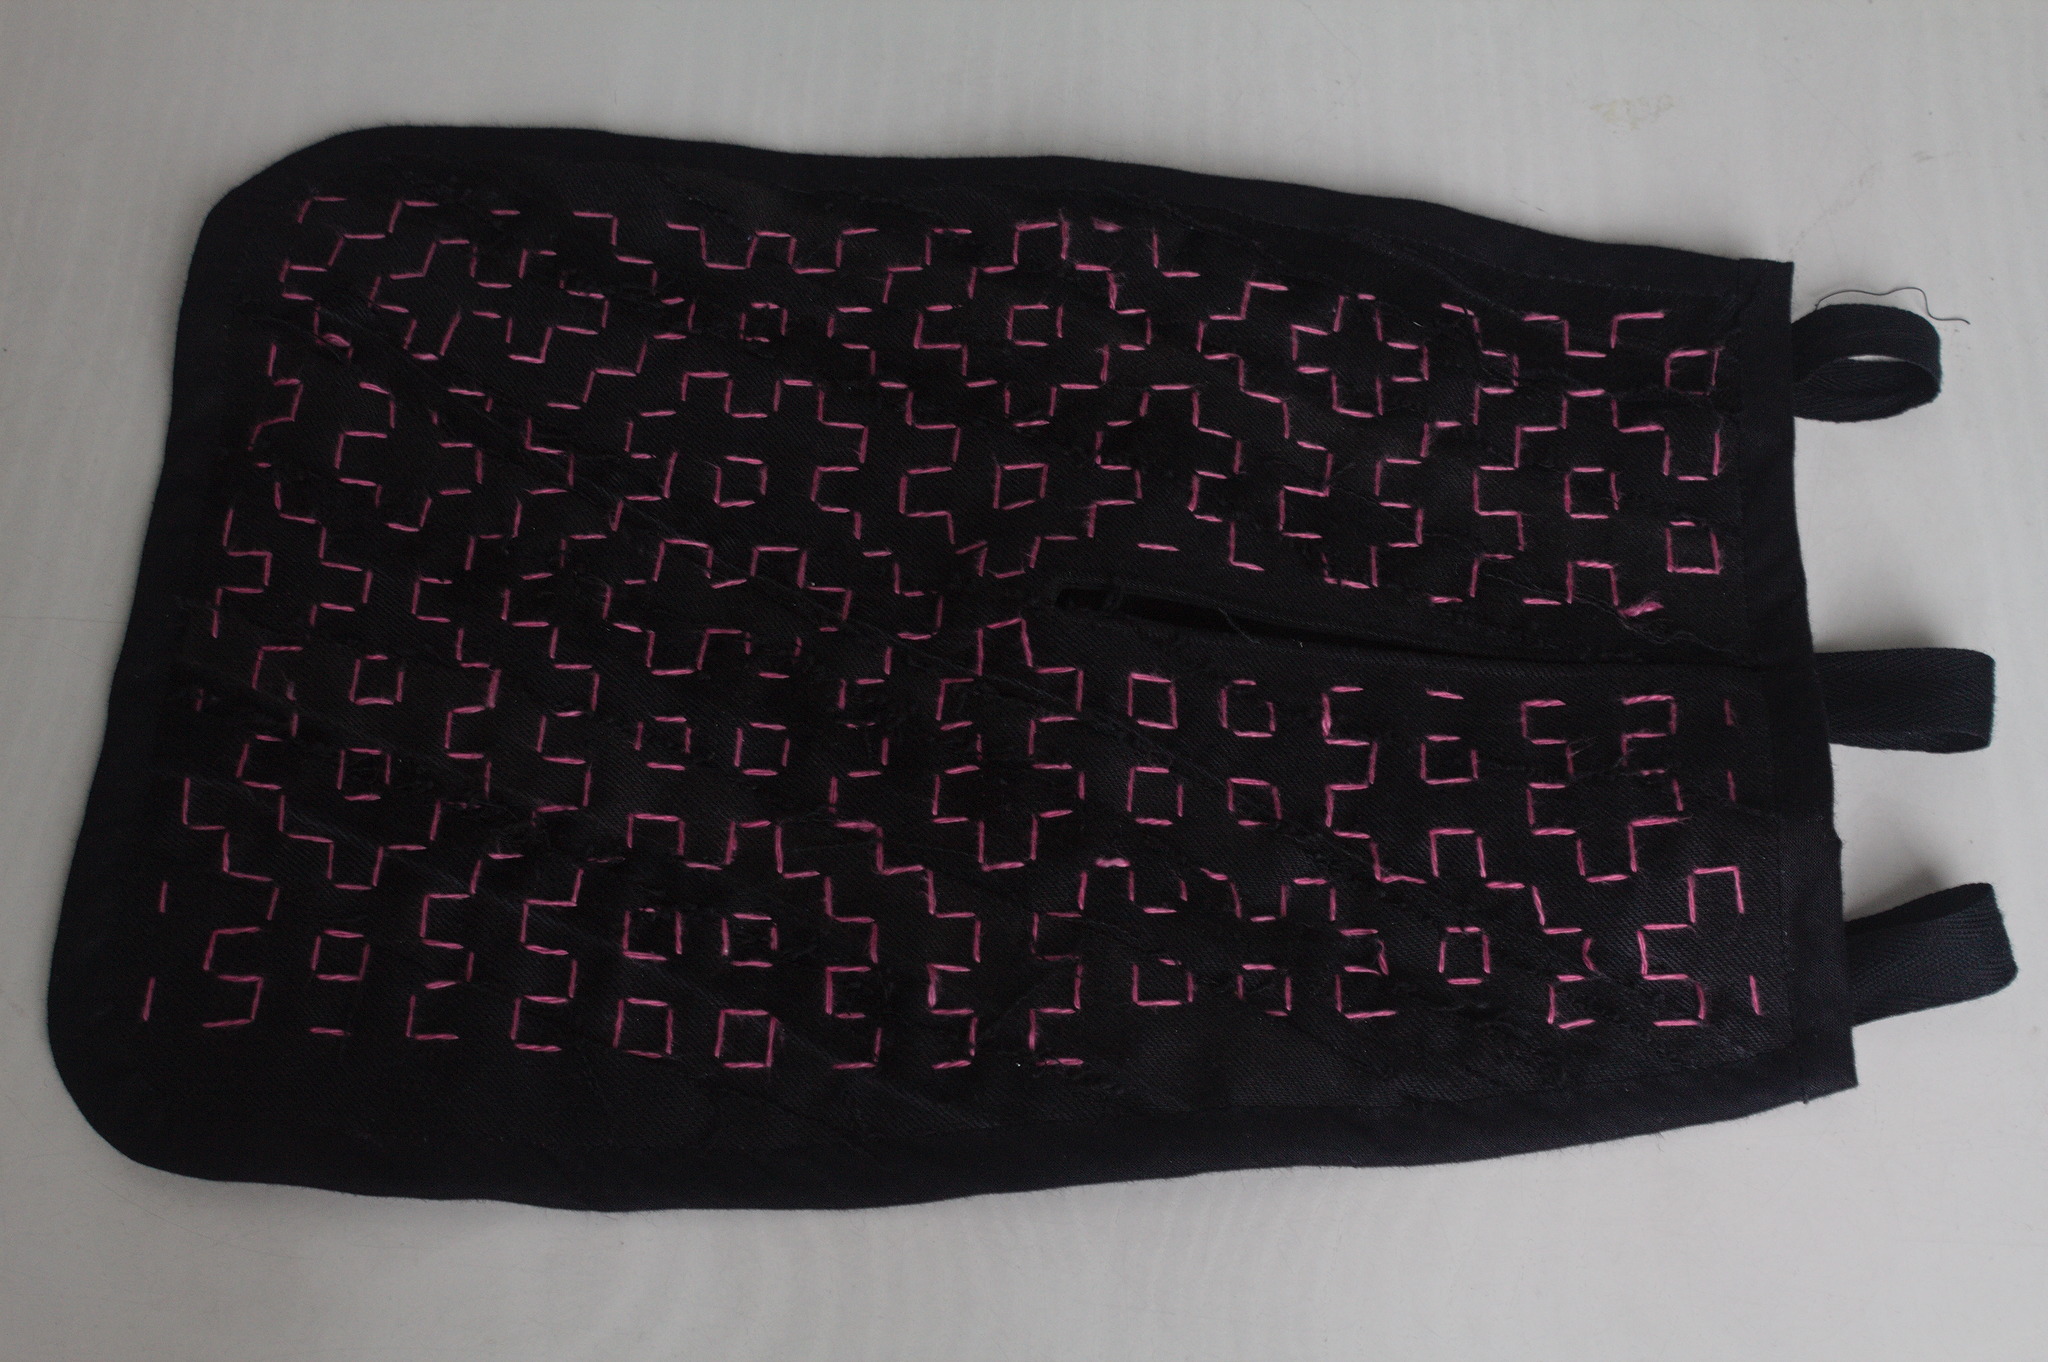
Lately I ve seen people on the internet talking about victorian crazy quilting. Years ago I had watched a
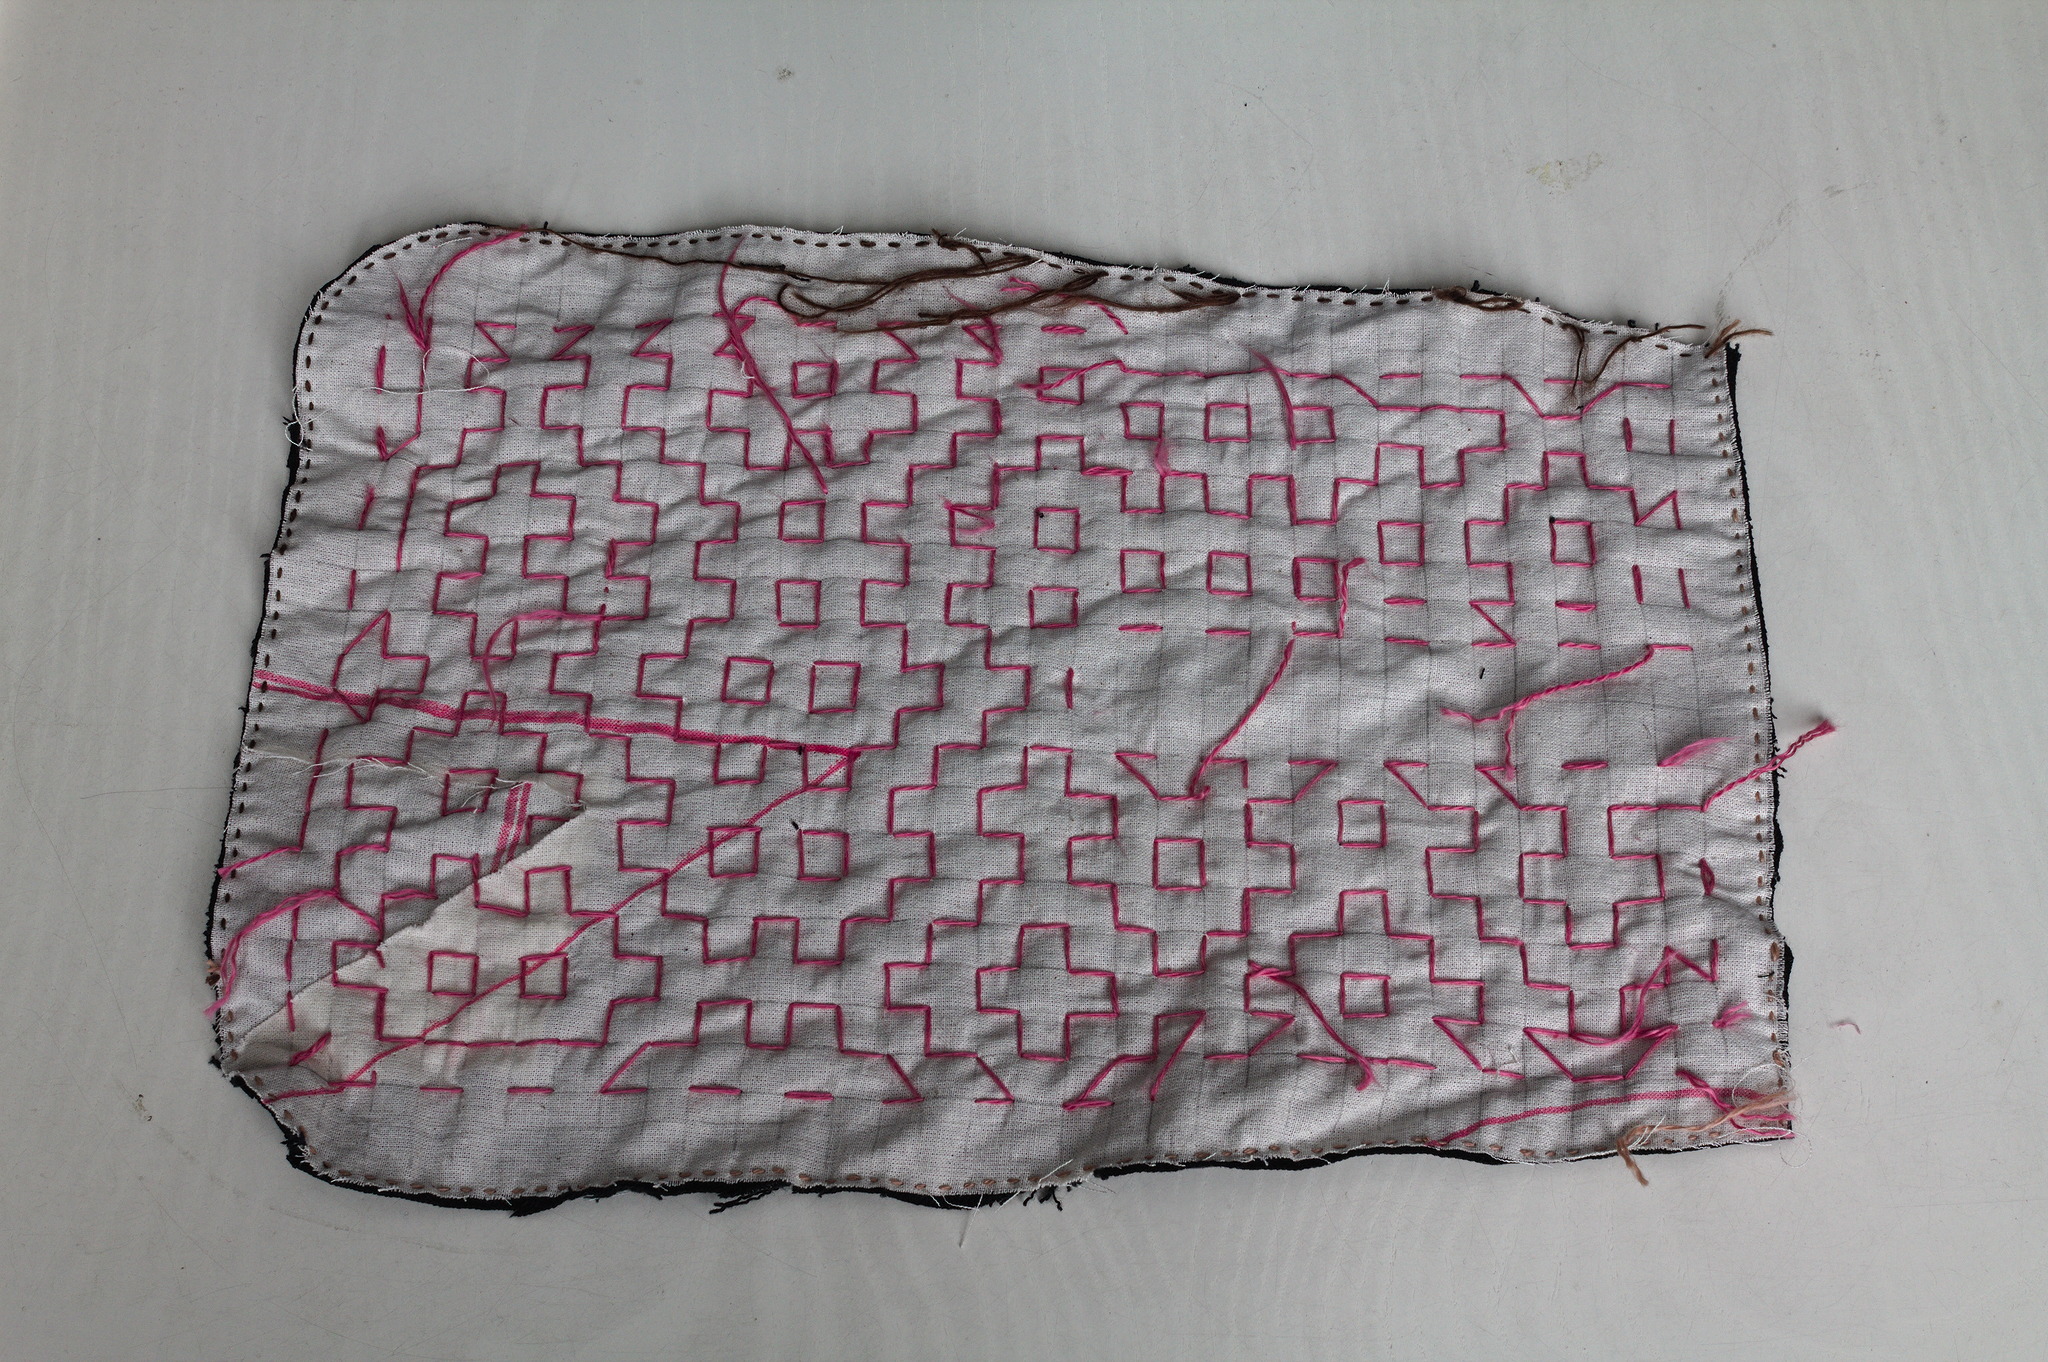
 Numberphile video about Hitomezashi Stitch Patterns based on numbers, words or randomness. Few weeks ago I had cut some fabric piece out of an old pair of jeans and I had a lot of scraps that were too small to do anything useful on their own. It easy to see where this can go, right? The wrong side of a pocket piece, showing a light coloured fabric with a grid drawn in pencil, a line of small stitches all around the edges and a mess of thread ends left hanging. I cut a pocket shape out of old garment mockups (this required some piecing), drew a square grid, arranged scraps of jeans to cover the other side, kept everything together with a lot of pins, carefully avoided basting anything, and started covering everything in sashiko / hitomezashi stitches, starting each line with a stitch on the front or the back of the work based on the result of:
import random
random.choice(["front", "back"])
The wrong side of the other pocket piece, with just three lines of stitching and a piece of paper to mark the pattern. There are bits of jeans peeking out of the sides. 
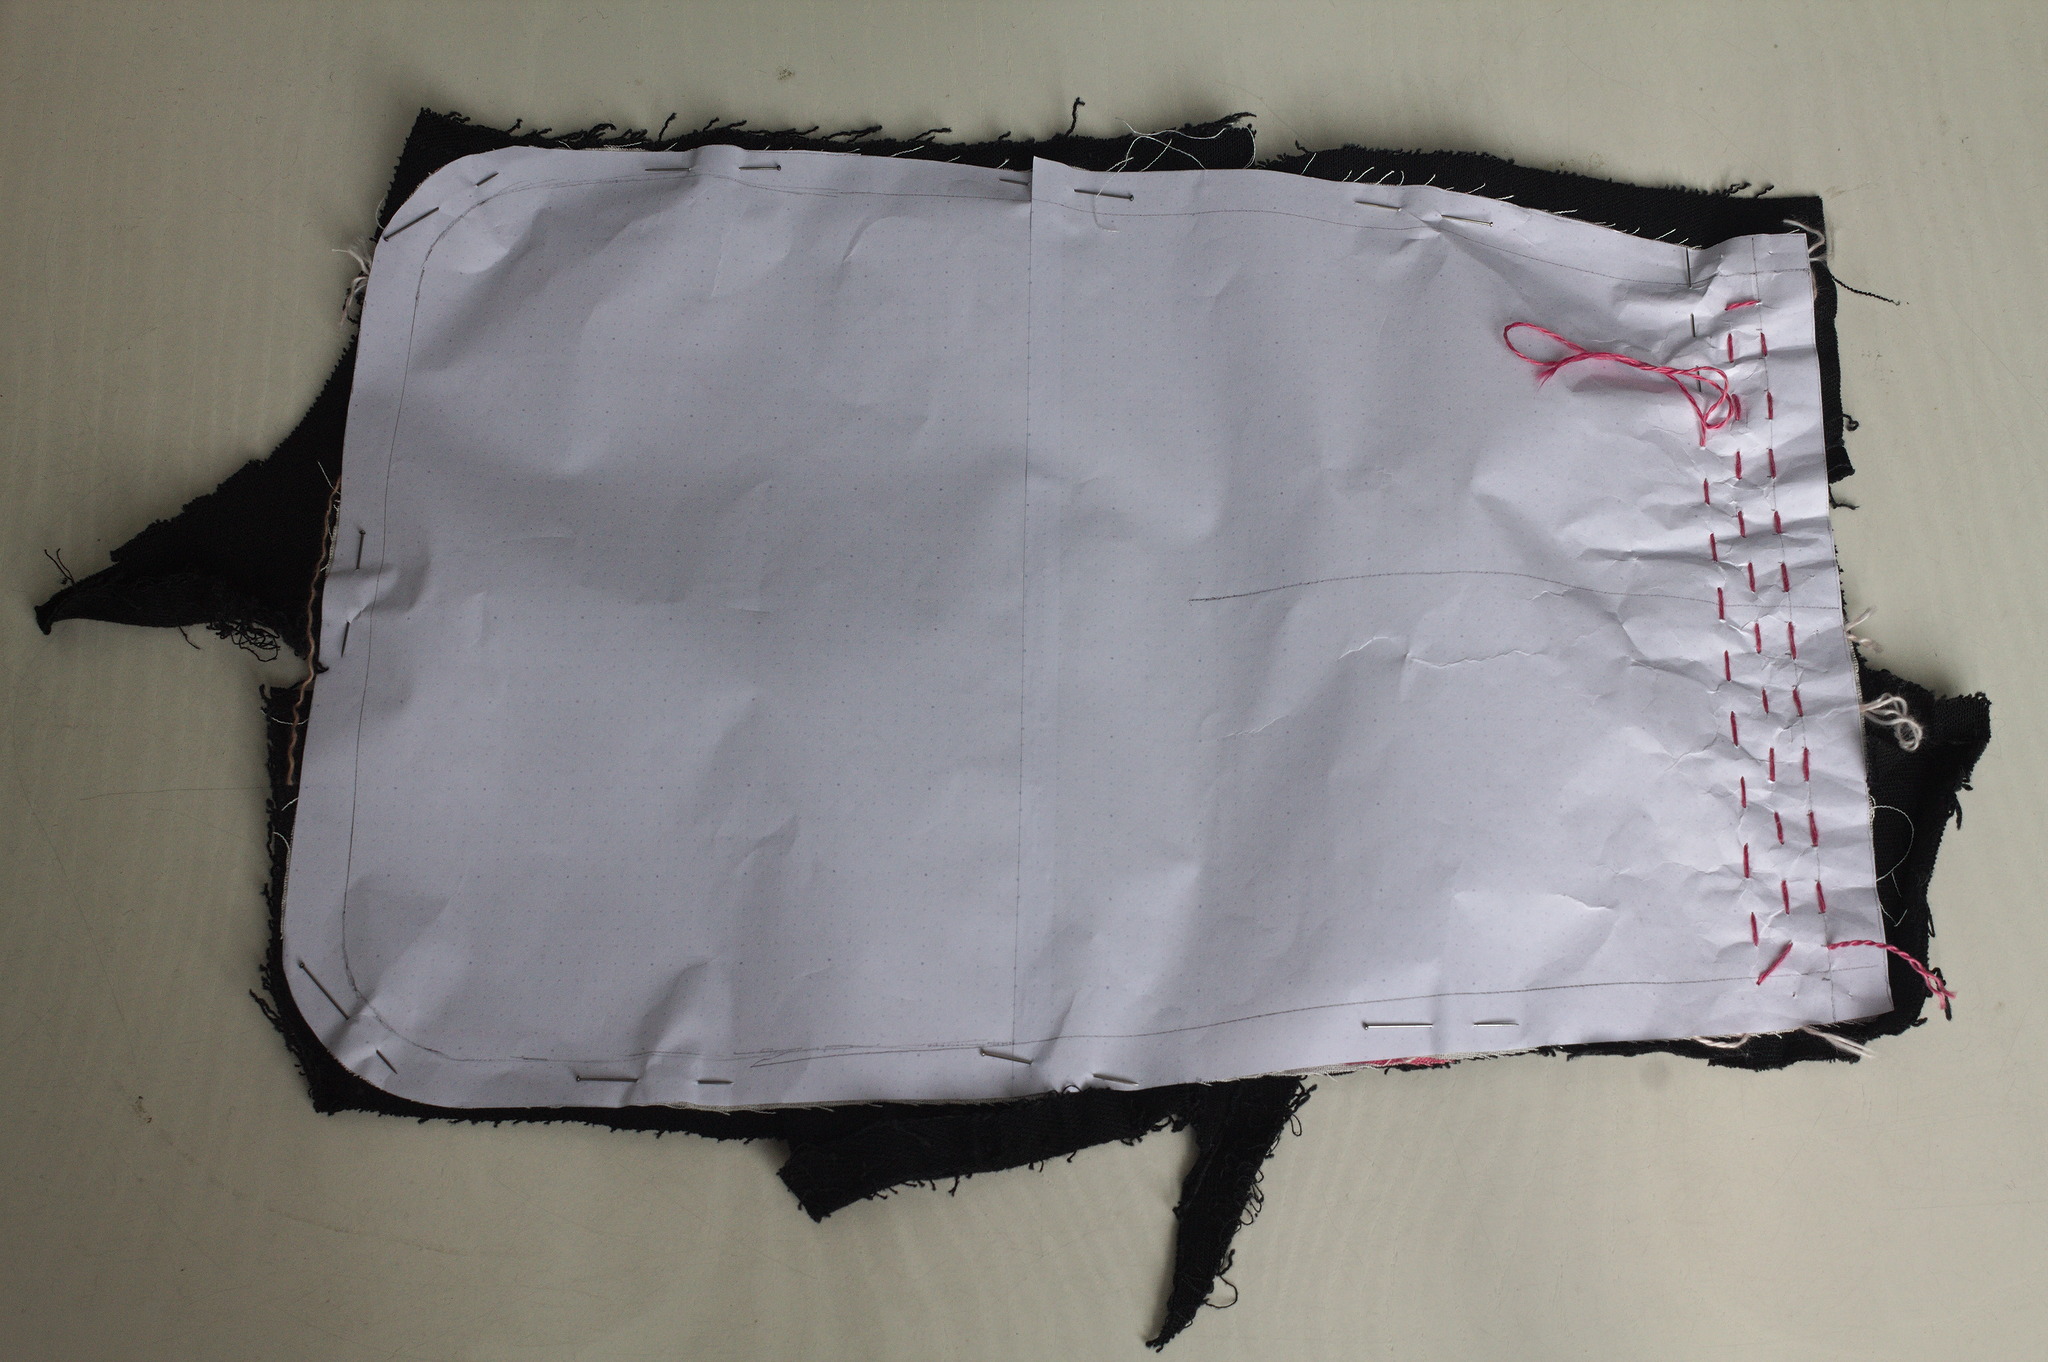
For the second piece I tried to use a piece of paper with the square grid instead of drawing it on the fabric: it worked, mostly, I would not do it again as removing the paper was more of a hassle than drawing the lines in the first place. I suspected it, but had to try it anyway. The front of the pocket seen from the wrong side, with a machine seam around the lit, whose end has been cut in a triangle so that it can be turned. 
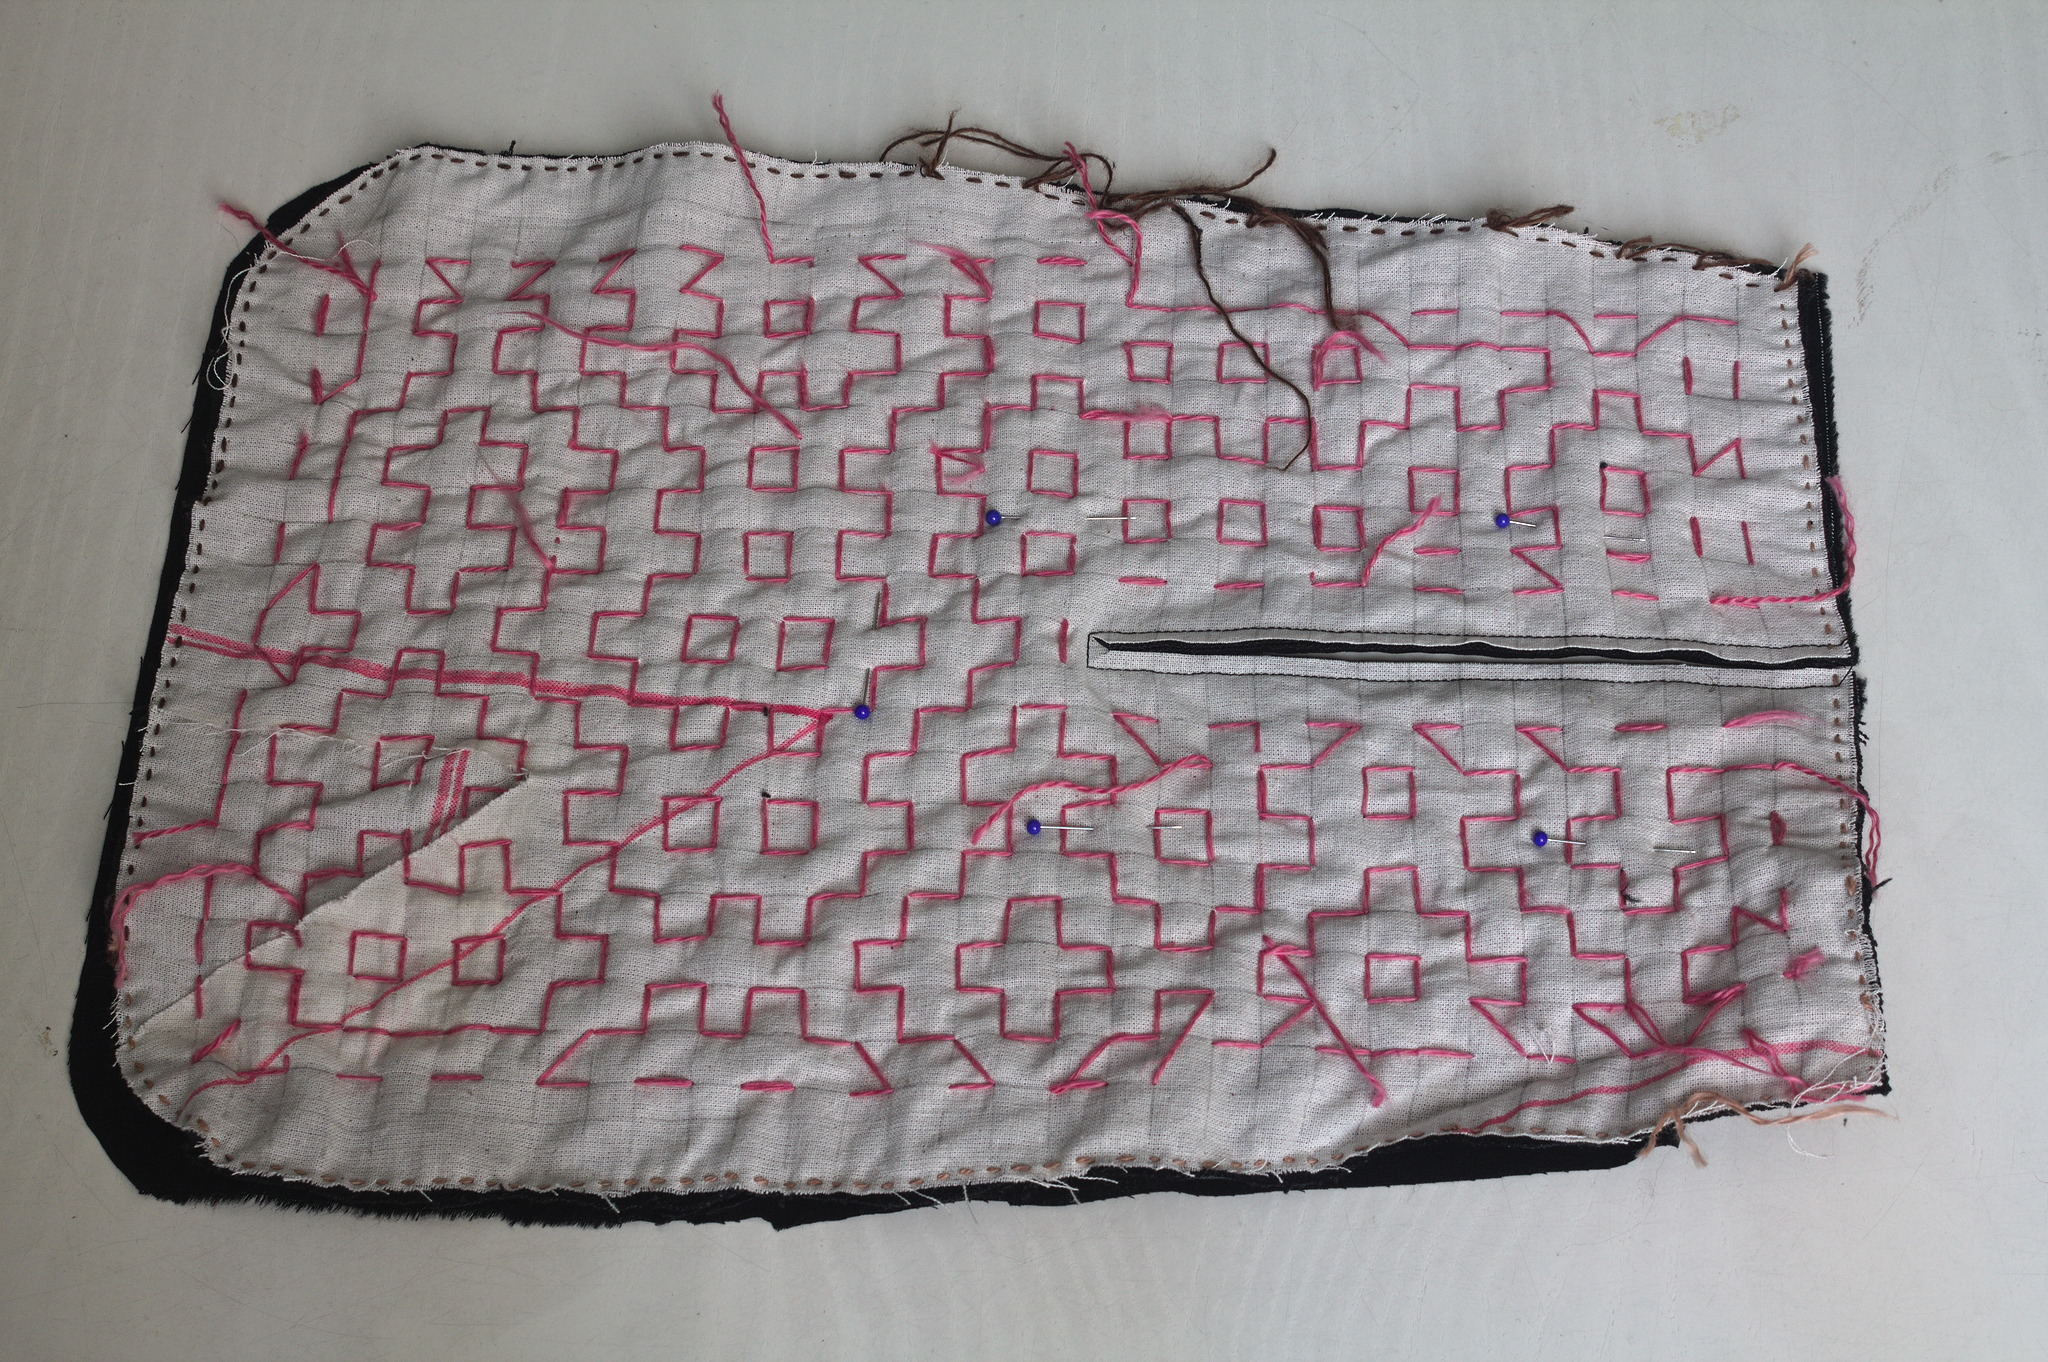
Then I added a lining from some plain black cotton from the stash; for the slit I put the lining on the front right sides together, sewn at 2 mm from the marked slit, cut it, turned the lining to the back side, pressed and then topstitched as close as possible to the slit from the front. The finished pocket attached to a belt made from the waistband of a pair of jeans (with button, buttonhole and belt loops still attached) whose raw edges (left when unpicking away the jeans) have been sewn shut by hand. I bound everything with bias tape, adding herringbone tape loops at the top to hang it from a belt (such as one made from the waistband of one of the donor pair of jeans) and that was it. The back of the pocket, showing another random pattern in two different shades of pink for the vertical and horizontal lines of stitching. 
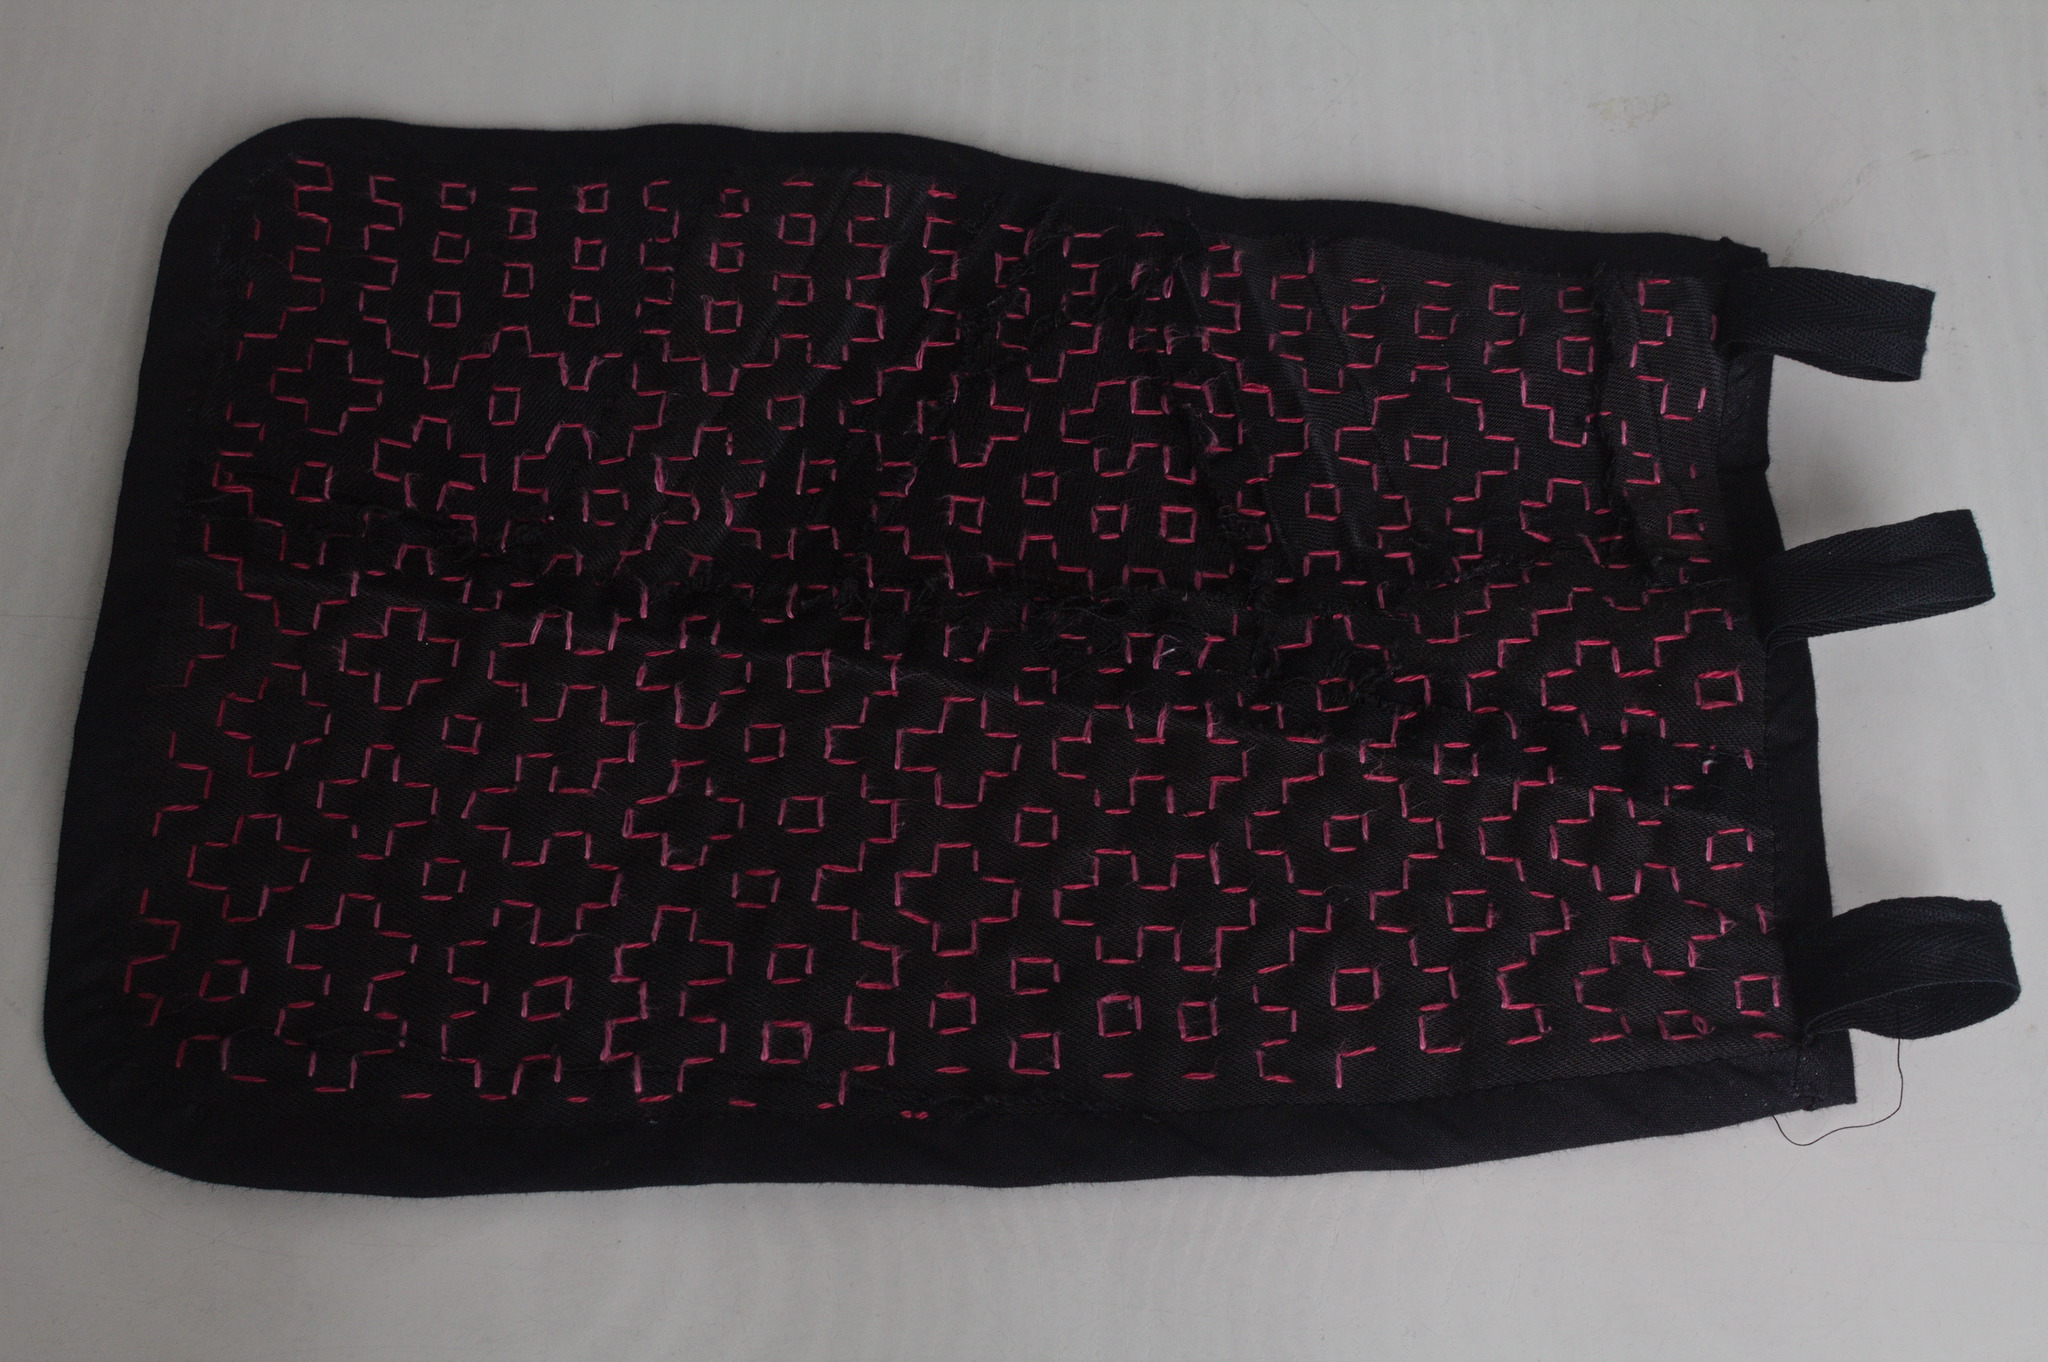
I like the way the result feels; maybe it s a bit too stiff for a pocket, but I can see it work very well for a bigger bag, and maybe even a jacket or some other outer garment.

4 January 2024

Michael Ablassmeier: Migrating a system to Hetzner cloud using REAR and kexec

I needed to migrate an existing system to an Hetzner cloud VPS. While it is possible to attach KVM consoles and custom ISO images to dedicated servers, i didn t find any way to do so with regular cloud instances. For system migrations i usually use REAR, which has never failed me. (and also has saved my ass during recovery multiple times). It s an awesome utility! It s possible to do this using the Hetzner recovery console too, but using REAR is very convenient here, because it handles things like re-creating the partition layout and network settings automatically! The steps are:

Example To create a rescue image on the source system:
apt install rear
echo OUTPUT=ISO > /etc/rear/local.conf
rear mkrescue -v
[..]
Wrote ISO image: /var/lib/rear/output/rear-debian12.iso (185M)
My source system had a 128 GB disk, so i registered an instance on Hetzner cloud with greater disk size to make things easier: image Now copy the ISO image to the newly created instance and extract its data:
 apt install kexec-tools
 scp rear-debian12.iso root@49.13.193.226:/tmp/
 modprobe loop
 mount -o loop rear-debian12.iso /mnt/
 cp /mnt/isolinux/kernel /tmp/
 cp /mnt/isolinux/initrd.cgz /tmp/
Install kexec if not installed already:
 apt install kexec-tools
Note down the current gateway configuration, this is required later on to make the REAR recovery console reachable via SSH:
root@testme:~# ip route
default via 172.31.1.1 dev eth0
172.31.1.1 dev eth0 scope link
Reboot the running VPS instance into the REAR recovery image using somewhat the same kernel cmdline:
root@testme:~# cat /proc/cmdline
BOOT_IMAGE=/boot/vmlinuz-6.1.0-13-amd64 root=UUID=5174a81e-5897-47ca-8fe4-9cd19dc678c4 ro consoleblank=0 systemd.show_status=true console=tty1 console=ttyS0
kexec --initrd /tmp/initrd.cgz --command-line="consoleblank=0 systemd.show_status=true console=tty1 console=ttyS0" /tmp/kernel
Connection to 49.13.193.226 closed by remote host.
Connection to 49.13.193.226 closed
Now watch the system on the Console booting into the REAR system: image 
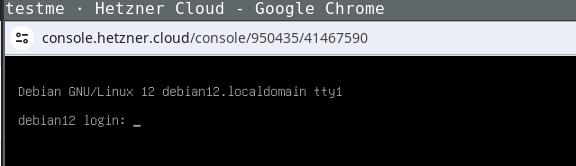
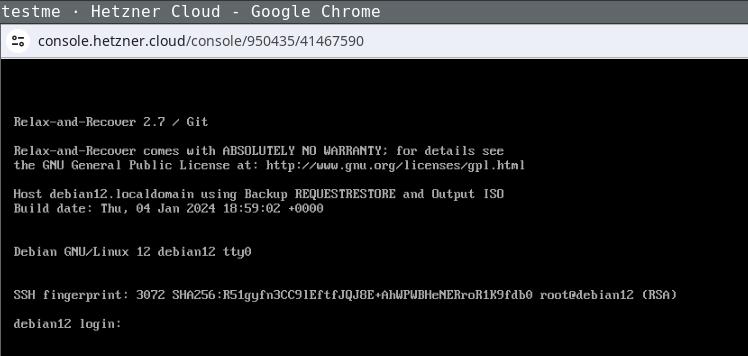
Login the recovery console (root without password) and fix its default route to make it reachable:
ip addr
[..]
2: enp1s0
..
$ ip route add 172.31.1.1 dev enp1s0
$ ip route add default via 172.31.1.1
ping 49.13.193.226
64 bytes from 49.13.193.226: icmp_seq=83 ttl=52 time=27.7 ms
The network configuration might differ, the source system in this example used DHCP, as the target does. If REAR detects changed static network configuration it guides you through the setup pretty nicely. Login via SSH (REAR will store your ssh public keys in the image) and start the recovery process, follow the steps as suggested by REAR:
ssh -l root 49.13.193.226
Welcome to Relax-and-Recover. Run "rear recover" to restore your system !
RESCUE debian12:~ # rear recover
Relax-and-Recover 2.7 / Git
Running rear recover (PID 673 date 2024-01-04 19:20:22)
Using log file: /var/log/rear/rear-debian12.log
Running workflow recover within the ReaR rescue/recovery system
Will do driver migration (recreating initramfs/initrd)
Comparing disks
Device vda does not exist (manual configuration needed)
Switching to manual disk layout configuration (GiB sizes rounded down to integer)
/dev/vda had size 137438953472 (128 GiB) but it does no longer exist
/dev/sda was not used on the original system and has now 163842097152 (152 GiB)
Original disk /dev/vda does not exist (with same size) in the target system
Using /dev/sda (the only available of the disks) for recreating /dev/vda
Current disk mapping table (source => target):
  /dev/vda => /dev/sda
Confirm or edit the disk mapping
1) Confirm disk mapping and continue 'rear recover'
[..]
User confirmed recreated disk layout
[..]
This step re-recreates your original disk layout and mounts it to /mnt/local/ (this example uses a pretty lame layout, but usually REAR will handle things like lvm/btrfs just nicely):
mount
/dev/sda3 on /mnt/local type ext4 (rw,relatime,errors=remount-ro)
/dev/sda1 on /mnt/local/boot type ext4 (rw,relatime)
Now clone your source systems data to /mnt/local/ with whatever utility you like to use and exit the recovery step. After confirming everything went well, REAR will setup the bootloader (and all other config details like fstab entries and adjusted network configuration) for you as required:
rear> exit
Did you restore the backup to /mnt/local ? Are you ready to continue recovery ? yes
User confirmed restored files
Updated initramfs with new drivers for this system.
Skip installing GRUB Legacy boot loader because GRUB 2 is installed (grub-probe or grub2-probe exist).
Installing GRUB2 boot loader...
Determining where to install GRUB2 (no GRUB2_INSTALL_DEVICES specified)
Found possible boot disk /dev/sda - installing GRUB2 there
Finished 'recover'. The target system is mounted at '/mnt/local'.
Exiting rear recover (PID 7103) and its descendant processes ...
Running exit tasks
Now reboot the recovery console and watch it boot into your target systems configuration: image Being able to use this procedure for complete disaster recovery within Hetzner cloud VPS (using off-site backups) gives me a better feeling, too.

3 January 2024

John Goerzen: Live Migrating from Raspberry Pi OS bullseye to Debian bookworm

I ve been getting annoyed with Raspberry Pi OS (Raspbian) for years now. It s a fork of Debian, but manages to omit some of the most useful things. So I ve decided to migrate all of my Pis to run pure Debian. These are my reasons:
  1. Raspberry Pi OS has, for years now, specified that there is no upgrade path. That is, to get to a newer major release, it s a reinstall. While I have sometimes worked around this, for a device that is frequently installed in hard-to-reach locations, this is even more important than usual. It s common for me to upgrade machines for a decade or more across Debian releases and there s no reason that it should be so much more difficult with Raspbian.
  2. As I noted in Consider Security First, the security situation for Raspberry Pi OS isn t as good as it is with Debian.
  3. Raspbian lags behind Debian often times by 6 months or more for major releases, and days or weeks for bug fixes and security patches.
  4. Raspbian has no direct backports support, though Raspberry Pi 3 and above can use Debian s backports (per my instructions as Installing Debian Backports on Raspberry Pi)
  5. Raspbian uses a custom kernel without initramfs support
It turns out it is actually possible to do an in-place migration from Raspberry Pi OS bullseye to Debian bookworm. Here I will describe how. Even if you don t have a Raspberry Pi, this might still be instructive on how Raspbian and Debian packages work.

WARNINGS Before continuing, back up your system. This process isn t for the neophyte and it is entirely possible to mess up your boot device to the point that you have to do a fresh install to get your Pi to boot. This isn t a supported process at all.

Architecture Confusion Debian has three ARM-based architectures:
  • armel, for the lowest-end 32-bit ARM devices without hardware floating point support
  • armhf, for the higher-end 32-bit ARM devices with hardware float (hence hf )
  • arm64, for 64-bit ARM devices (which all have hardware float)
Although the Raspberry Pi 0 and 1 do support hardware float, they lack support for other CPU features that Debian s armhf architecture assumes. Therefore, the Raspberry Pi 0 and 1 could only run Debian s armel architecture. Raspberry Pi 3 and above are capable of running 64-bit, and can run both armhf and arm64. Prior to the release of the Raspberry Pi 5 / Raspbian bookworm, Raspbian only shipped the armhf architecture. Well, it was an architecture they called armhf, but it was different from Debian s armhf in that everything was recompiled to work with the more limited set of features on the earlier Raspberry Pi boards. It was really somewhere between Debian s armel and armhf archs. You could run Debian armel on those, but it would run more slowly, due to doing floating point calculations without hardware support. Debian s raspi FAQ goes into this a bit. What I am going to describe here is going from Raspbian armhf to Debian armhf with a 64-bit kernel. Therefore, it will only work with Raspberry Pi 3 and above. It may theoretically be possible to take a Raspberry Pi 2 to Debian armhf with a 32-bit kernel, but I haven t tried this and it may be more difficult. I have seen conflicting information on whether armhf really works on a Pi 2. (If you do try it on a Pi 2, ignore everything about arm64 and 64-bit kernels below, and just go with the linux-image-armmp-lpae kernel per the ARMMP page) There is another wrinkle: Debian doesn t support running 32-bit ARM kernels on 64-bit ARM CPUs, though it does support running a 32-bit userland on them. So we will wind up with a system with kernel packages from arm64 and everything else from armhf. This is a perfectly valid configuration as the arm64 like x86_64 is multiarch (that is, the CPU can natively execute both the 32-bit and 64-bit instructions). (It is theoretically possible to crossgrade a system from 32-bit to 64-bit userland, but that felt like a rather heavy lift for dubious benefit on a Pi; nevertheless, if you want to make this process even more complicated, refer to the CrossGrading page.)

Prerequisites and Limitations In addition to the need for a Raspberry Pi 3 or above in order for this to work, there are a few other things to mention. If you are using the GPIO features of the Pi, I don t know if those work with Debian. I think Raspberry Pi OS modified the desktop environment more than other components. All of my Pis are headless, so I don t know if this process will work if you use a desktop environment. I am assuming you are booting from a MicroSD card as is typical in the Raspberry Pi world. The Pi s firmware looks for a FAT partition (MBR type 0x0c) and looks within it for boot information. Depending on how long ago you first installed an OS on your Pi, your /boot may be too small for Debian. Use df -h /boot to see how big it is. I recommend 200MB at minimum. If your /boot is smaller than that, stop now (or use some other system to shrink your root filesystem and rearrange your partitions; I ve done this, but it s outside the scope of this article.) You need to have stable power. Once you begin this process, your pi will mostly be left in a non-bootable state until you finish. (You did make a backup, right?)

Basic idea The basic idea here is that since bookworm has almost entirely newer packages then bullseye, we can just switch over to it and let the Debian packages replace the Raspbian ones as they are upgraded. Well, it s not quite that easy, but that s the main idea.

Preparation First, make a backup. Even an image of your MicroSD card might be nice. OK, I think I ve said that enough now. It would be a good idea to have a HDMI cable (with the appropriate size of connector for your particular Pi board) and a HDMI display handy so you can troubleshoot any bootup issues with a console.

Preparation: access The Raspberry Pi OS by default sets up a user named pi that can use sudo to gain root without a password. I think this is an insecure practice, but assuming you haven t changed it, you will need to ensure it still works once you move to Debian. Raspberry Pi OS had a patch in their sudo package to enable it, and that will be removed when Debian s sudo package is installed. So, put this in /etc/sudoers.d/010_picompat:
pi ALL=(ALL) NOPASSWD: ALL
Also, there may be no password set for the root account. It would be a good idea to set one; it makes it easier to log in at the console. Use the passwd command as root to do so.

Preparation: bluetooth Debian doesn t correctly identify the Bluetooth hardware address. You can save it off to a file by running hcitool dev > /root/bluetooth-from-raspbian.txt. I don t use Bluetooth, but this should let you develop a script to bring it up properly.

Preparation: Debian archive keyring You will next need to install Debian s archive keyring so that apt can authenticate packages from Debian. Go to the bookworm download page for debian-archive-keyring and copy the URL for one of the files, then download it on the pi. For instance:
wget http://http.us.debian.org/debian/pool/main/d/debian-archive-keyring/debian-archive-keyring_2023.3+deb12u1_all.deb
Use sha256sum to verify the checksum of the downloaded file, comparing it to the package page on the Debian site. Now, you ll install it with:
dpkg -i debian-archive-keyring_2023.3+deb12u1_all.deb

Package first steps From here on, we are making modifications to the system that can leave it in a non-bootable state. Examine /etc/apt/sources.list and all the files in /etc/apt/sources.list.d. Most likely you will want to delete or comment out all lines in all files there. Replace them with something like:
deb http://deb.debian.org/debian/ bookworm main non-free-firmware contrib non-free
deb http://security.debian.org/debian-security bookworm-security main non-free-firmware contrib non-free
deb https://deb.debian.org/debian bookworm-backports main non-free-firmware contrib non-free
(you might leave off contrib and non-free depending on your needs) Now, we re going to tell it that we ll support arm64 packages:
dpkg --add-architecture arm64
And finally, download the bookworm package lists:
apt-get update
If there are any errors from that command, fix them and don t proceed until you have a clean run of apt-get update.

Moving /boot to /boot/firmware The boot FAT partition I mentioned above is mounted at /boot by Raspberry Pi OS, but Debian s scripts assume it will be at /boot/firmware. We need to fix this. First:
umount /boot
mkdir /boot/firmware
Now, edit fstab and change the reference to /boot to be to /boot/firmware. Now:
mount -v /boot/firmware
cd /boot/firmware
mv -vi * ..
This mounts the filesystem at the new location, and moves all its contents back to where apt believes it should be. Debian s packages will populate /boot/firmware later.

Installing the first packages Now we start by installing the first of the needed packages. Eventually we will wind up with roughly the same set Debian uses.
apt-get install linux-image-arm64
apt-get install firmware-brcm80211=20230210-5
apt-get install raspi-firmware
If you get errors relating to firmware-brcm80211 from any commands, run that install firmware-brcm80211 command and then proceed. There are a few packages that Raspbian marked as newer than the version in bookworm (whether or not they really are), and that s one of them.

Configuring the bootloader We need to configure a few things in /etc/default/raspi-firmware before proceeding. Edit that file. First, uncomment (or add) a line like this:
KERNEL_ARCH="arm64"
Next, in /boot/cmdline.txt you can find your old Raspbian boot command line. It will say something like:
root=PARTUUID=...
Save off the bit starting with PARTUUID. Back in /etc/default/raspi-firmware, set a line like this:
ROOTPART=PARTUUID=abcdef00
(substituting your real value for abcdef00). This is necessary because the microSD card device name often changes from /dev/mmcblk0 to /dev/mmcblk1 when switching to Debian s kernel. raspi-firmware will encode the current device name in /boot/firmware/cmdline.txt by default, which will be wrong once you boot into Debian s kernel. The PARTUUID approach lets it work regardless of the device name.

Purging the Raspbian kernel Run:
dpkg --purge raspberrypi-kernel

Upgrading the system At this point, we are going to run the procedure beginning at section 4.4.3 of the Debian release notes. Generally, you will do:
apt-get -u upgrade
apt full-upgrade
Fix any errors at each step before proceeding to the next. Now, to remove some cruft, run:
apt-get --purge autoremove
Inspect the list to make sure nothing important isn t going to be removed.

Removing Raspbian cruft You can list some of the cruft with:
apt list '~o'
And remove it with:
apt purge '~o'
I also don t run Bluetooth, and it seemed to sometimes hang on boot becuase I didn t bother to fix it, so I did:
apt-get --purge remove bluez

Installing some packages This makes sure some basic Debian infrastructure is available:
apt-get install wpasupplicant parted dosfstools wireless-tools iw alsa-tools
apt-get --purge autoremove

Installing firmware Now run:
apt-get install firmware-linux

Resolving firmware package version issues If it gives an error about the installed version of a package, you may need to force it to the bookworm version. For me, this often happened with firmware-atheros, firmware-libertas, and firmware-realtek. Here s how to resolve it, with firmware-realtek as an example:
  1. Go to https://packages.debian.org/PACKAGENAME for instance, https://packages.debian.org/firmware-realtek. Note the version number in bookworm in this case, 20230210-5.
  2. Now, you will force the installation of that package at that version:
    apt-get install firmware-realtek=20230210-5
    
  3. Repeat with every conflicting package until done.
  4. Rerun apt-get install firmware-linux and make sure it runs cleanly.
Also, in the end you should be able to:
apt-get install firmware-atheros firmware-libertas firmware-realtek firmware-linux

Dealing with other Raspbian packages The Debian release notes discuss removing non-Debian packages. There will still be a few of those. Run:
apt list '?narrow(?installed, ?not(?origin(Debian)))'
Deal with them; mostly you will need to force the installation of a bookworm version using the procedure in the section Resolving firmware package version issues above (even if it s not for a firmware package). For non-firmware packages, you might possibly want to add --mark-auto to your apt-get install command line to allow the package to be autoremoved later if the things depending on it go away. If you aren t going to use Bluetooth, I recommend apt-get --purge remove bluez as well. Sometimes it can hang at boot if you don t fix it up as described above.

Set up networking We ll be switching to the Debian method of networking, so we ll create some files in /etc/network/interfaces.d. First, eth0 should look like this:
allow-hotplug eth0
iface eth0 inet dhcp
iface eth0 inet6 auto
And wlan0 should look like this:
allow-hotplug wlan0
iface wlan0 inet dhcp
    wpa-conf /etc/wpa_supplicant/wpa_supplicant.conf
Raspbian is inconsistent about using eth0/wlan0 or renamed interface. Run ifconfig or ip addr. If you see a long-named interface such as enx<something> or wlp<something>, copy the eth0 file to the one named after the enx interface, or the wlan0 file to the one named after the wlp interface, and edit the internal references to eth0/wlan0 in this new file to name the long interface name. If using wifi, verify that your SSIDs and passwords are in /etc/wpa_supplicant/wpa_supplicant.conf. It should have lines like:
network= 
   ssid="NetworkName"
   psk="passwordHere"
 
(This is where Raspberry Pi OS put them).

Deal with DHCP Raspberry Pi OS used dhcpcd, whereas bookworm normally uses isc-dhcp-client. Verify the system is in the correct state:
apt-get install isc-dhcp-client
apt-get --purge remove dhcpcd dhcpcd-base dhcpcd5 dhcpcd-dbus

Set up LEDs To set up the LEDs to trigger on MicroSD activity as they did with Raspbian, follow the Debian instructions. Run apt-get install sysfsutils. Then put this in a file at /etc/sysfs.d/local-raspi-leds.conf:
class/leds/ACT/brightness = 1
class/leds/ACT/trigger = mmc1

Prepare for boot To make sure all the /boot/firmware files are updated, run update-initramfs -u. Verify that root in /boot/firmware/cmdline.txt references the PARTUUID as appropriate. Verify that /boot/firmware/config.txt contains the lines arm_64bit=1 and upstream_kernel=1. If not, go back to the section on modifying /etc/default/raspi-firmware and fix it up.

The moment arrives Cross your fingers and try rebooting into your Debian system:
reboot
For some reason, I found that the first boot into Debian seems to hang for 30-60 seconds during bootstrap. I m not sure why; don t panic if that happens. It may be necessary to power cycle the Pi for this boot.

Troubleshooting If things don t work out, hook up the Pi to a HDMI display and see what s up. If I anticipated a particular problem, I would have documented it here (a lot of the things I documented here are because I ran into them!) So I can t give specific advice other than to watch boot messages on the console. If you don t even get kernel messages going, then there is some problem with your partition table or /boot/firmware FAT partition. Otherwise, you ve at least got the kernel going and can troubleshoot like usual from there.

Jacob Adams: Fixing My Shell

For an embarassingly long time, my shell has unnecessarily tried to initialize a console font in every kind of interactive terminal. This leaves the following error message in my terminal:
Couldn't get a file descriptor referring to the console.
It even shows up twice when running tmux! Clearly I ve done something horrible to my configuration, and now I ve got to clean it up.

How does Shell Initialization Work? The precise files a shell reads at start-up is somewhat complex, and defined by this excellent chart 1: Shell Startup Flowchart For the purposes of what I m trying to fix, there are two paths that matter.
  • Interactive login shell startup
  • Interactive non-login shell startup
As you can see from the above, trying to distinguish these two paths in bash is an absolute mess. zsh, in contrast, is much cleaner and allows for a clear distinction between these two cases, with login shell configuration files as a superset of configuration files used by non-login shells.

How did we get here? I keep my configuration files in a config repository. Some time ago I got quite frustrated at this whole shell initialization thing, and just linked everything together in one profile file:
.mkshrc -> config/profile
.profile -> config/profile
This appears to have created this mess.

Move to ZSH I ve wanted to move to zsh for a while, and took this opportunity to do so. So my new configuration files are .zprofile and .zshrc instead of .mkshrc and .profile (though I m going to retain those symlinks to allow my old configurations to continue working). mksh is a nice simple shell, but using zsh here allows for more consistency between my home and $WORK environments, and will allow a lot more powerful extensions.

Updating my Prompt ZSH prompts use a totally different configuration via variable expansion. However, it also uses the PROMPT variable, so I set that to the needed values for zsh. There s an excellent ZSH prompt generator at https://zsh-prompt-generator.site that I used to get these variables, though I m sure they re in the zsh documentation somewhere as well. I wanted a simple prompt with user (%n), host (%m), and path (%d). I also wanted a % at the end to distinguish this from other shells.
PROMPT="%n@%m%d%% "

Fixing mksh prompts This worked but surprisingly mksh also looks at PROMPT, leaving my mksh prompt as the literal prompt string without expansion. Fixing this requires setting up a proper shrc and linking it to .mkshrc and .zshrc. I chose to move my existing aliases script to this file, as it also broke in non-login shells when moved to profile. Within this new shrc file we can check what shell we re running via $0:
if [ "$0" = "/bin/zsh" ]   [ "$0" = "zsh" ]   [ "$0" = "-zsh" ]
I chose to add plain zsh here in case I run it manually for whatever reason. I also added -zsh to support tmux as that s what it presents as $0. This also means you ll need to be careful to quote $0 or you ll get fun shell errors. There s probably a better way to do this, but I couldn t find something that was compatible with POSIX shell, which is what most of this has to be written in to be compatible with mksh and zsh2. We can then setup different prompts for each:
if [ "$0" = "/bin/zsh" ]   [ "$0" = "zsh" ]   [ "$0" = "-zsh" ]
then
	PROMPT="%n@%m%d%% "
else
	# Borrowed from
	# http://www.unixmantra.com/2013/05/setting-custom-prompt-in-ksh.html
	PS1='$(id -un)@$(hostname -s)$PWD$ '
fi

Setting Console Font in a Better Way I ve been setting console font via setfont in my .profile for a while. I m not sure where I picked this up, but it s not the right way. I even tried to only run this in a console with -t but that only checks that output is a terminal, not specifically a console.
if [ -t 1 ]
then
	setfont /usr/share/consolefonts/Lat15-Terminus20x10.psf.gz
fi
This also only runs once the console is logged into, instead of initializing it on boot. The correct way to set this up, on Debian-based systems, is reconfiguring console-setup like so:
dpkg-reconfigure console-setup
From there you get a menu of encoding, character set, font, and then font size to configure for your consoles.

VIM mode To enable VIM mode for ZSH, you simply need to set:
bindkeys -v
This allows you to edit your shell commands with basic VIM keybinds.

Getting back Ctrl + Left Arrow and Ctrl + Right Arrow Moving around one word at a time with Ctrl and the arrow keys is broken by vim mode unfortunately, so we ll need to re-enable it:
bindkey "^[[1;5C" forward-word
bindkey "^[[1;5D" backward-word

Why did it show up twice for tmux? Because tmux creates a login shell. Adding:
echo PROFILE
to profile and:
echo SHRC
to shrc confirms this with:
PROFILE
SHRC
SHRC
For now, profile sources shrc so that running twice is expected. But after this exploration and diagram, it s clear we don t need that for zsh. Removing this will break remote bash shells (see above diagram), but I can live without those on my development laptop. Removing that line results in the expected output for a new terminal:
SHRC
And the full output for a new tmux session or console:
PROFILE
SHRC
So finally we re back to a normal state! This post is a bit unfocused but I hope it helps someone else repair or enhance their shell environment. If you liked this4, or know of any other ways to manage this I could use, let me know at fixmyshell@tookmund.com.
  1. This chart comes from the excellent Shell Startup Scripts article by Peter Ward. I ve generated the SVG from the graphviz source linked in the article.
  2. Technically it has be compatible with Korn shell, but a quick google seems to suggest that that s actually a subset of POSIX shell.
  3. I use oh-my-zsh at $WORK but for now I m going to simplify my personal configuration. If I end up using a lot of plugins I ll reconsider this.
  4. Or if you ve found any typos or other issues that I should fix.

31 December 2023

Chris Lamb: Favourites of 2023

This post should have marked the beginning of my yearly roundups of the favourite books and movies I read and watched in 2023. However, due to coming down with a nasty bout of flu recently and other sundry commitments, I wasn't able to undertake writing the necessary four or five blog posts In lieu of this, however, I will simply present my (unordered and unadorned) highlights for now. Do get in touch if this (or any of my previous posts) have spurred you into picking something up yourself

Books

Peter Watts: Blindsight (2006) Reymer Banham: Los Angeles: The Architecture of Four Ecologies (2006) Joanne McNeil: Lurking: How a Person Became a User (2020) J. L. Carr: A Month in the Country (1980) Hilary Mantel: A Memoir of My Former Self: A Life in Writing (2023) Adam Higginbotham: Midnight in Chernobyl (2019) Tony Judt: Postwar: A History of Europe Since 1945 (2005) Tony Judt: Reappraisals: Reflections on the Forgotten Twentieth Century (2008) Peter Apps: Show Me the Bodies: How We Let Grenfell Happen (2021) Joan Didion: Slouching Towards Bethlehem (1968)Erik Larson: The Devil in the White City (2003)

Films Recent releases

Unenjoyable experiences included Alejandro G mez Monteverde's Sound of Freedom (2023), Alex Garland's Men (2022) and Steven Spielberg's The Fabelmans (2022).
Older releases (Films released before 2022, and not including rewatches from previous years.) Distinctly unenjoyable watches included Ocean's Eleven (1960), El Topo (1970), L olo (1992), Hotel Mumbai (2018), Bulworth (1998) and and The Big Red One (1980).

30 December 2023

Riku Voipio: Adguard DNS, or how to reduce ads without apps/extensions

Looking at the options for blocking ads, people usually first look at browser extensions. Google's plan is to disable adblock extensions in 2024. The alternative is usually an app (on phones) or a "VPN" that does filtering for you. All these methods are quite heavyweight, and require installing software on your phone or PC. What is less known, is that you can you DNS-over-TLS or DNS-over-HTTPS for ad blocking.
What is DNS-over-TLS and DNS-over-HTTPS
Since Android 9, Google has provided a setting calledPrivate DNS. Traditional DNS is unencrypted UDP so anyone can monitor your requests and/or return false records. With private DNS, DNS-over-TLS or DNS-over-HTTPS is used to guarantee the DNS request is sent to the server you configured. Which Google hopes is of course Google's own public servers. If you do so, your ISP and hotspot providers no longer can monitor, monetize and enshittify your DNS requests - only Google can do so.
Subverting private DNS for ad blocking
This is where AdGuard DNS comes useful. By setting the AdGuard DNS server as your "private DNS" server following the instructions,you can start blocking right away. Note, on PC you can also configure the Adguard DNS server on the Browser settings (Firefox -> Enable secure DNS and Chrome -> Use Secure DNS) instead of configuring a system-wide DNS server. Blocking via DNS, of course, limits effectiveness to ads distributed from 3rd party servers.
Other uses for AdGuard DNS
If you register for Adguard DNS, you get your "own", customizable DNS server address to point to. You can, for example, create your own /etc/hosts style records that are now available to all you devices you have connected to the Adguard DNS server - whether your a are home or not. Of course, you choose to use the personal DNS server, your DNS query privacy is in the hands of AdGuard.
Going further
What else is ruining the web than Ads? Well commercial social media. An article ("Ei n in! Algoritmi hky") from the latest Finnish Magazine SKROLLI (mainos: jos luet suomeksi, Tilaa skrolli!) hit a chord for me. The algorithms of social media sites are designed not to serve you, but to addict you. For example, If you stop to watch a hateful meme image, the algorithm will record "The user spent time watching this, show more of the same!". It doesn't help block or mute - yeah that spefic hate engager will be blocked, but all the dozens similar hate pages will still be shown to you. Worse, the social media sites are being overrun by AI-generated crap. Unfortunately the addictive nature of the algorithms works. You reload in vain, hoping this time the algorithmic god will show something your friends share. How do you cure addiction? By blocking yourself out:
Epilogue
I didn't block myself out of Fediverse - yet. It's not engineered to be addictive, which is also probably why it isn't as popular as the commercial alternatives...

16 December 2023

Thomas Lange: Adding a writeable data partition to an ISO image

Some years ago a customer needed a live ISO containing a customized FAI environment (not for installing but for extended hardware stress tests), but on an USB stick with the possibility to store the logs of the tests on the USB stick. But an ISO file system (iso9660) remains read-only, even when put onto an USB stick. I had the idea to add another partition onto the USB stick after the ISO was written to it (using cp or dd). You can use fdisk with an ISO file, add a new partition, loop mount the ISO and format this partition. That's all. This worked perfect for my customer. I forgot this idea for a while but a few weeks ago I remembered it. What could be possible when my FAI (Fully Automatic Installation) image would also provide such a partition? Which things could be provided on this partition? Could I provide a FAI ISO and my users would be able to easily put their own .deb package onto it without remastering the ISO or building an ISO on their own? Now here's the shell script, that extends an ISO or an USB stick with an ext4 or exFAT partition and set the file system label to MY-DATA. https://github.com/faiproject/fai/blob/master/bin/mk-data-partition Examples how to use mk-data-partition
Add a data partition of size 1G to the Debian installer ISO using an ext4 partition
# mk-data-partition -s 1G debian-12.2.0-amd64-netinst.iso
Create the data partition using an exFAT file system on USB named /dev/sdb.
First copy (or dd) the ISO onto the USB stick. Then add the data partition
to the USB stick.
# cp faicd64-large_6.0.3.iso /dev/sdb
# mk-data-partition -F /dev/sdb
Create the data partition and copy directories A and B to it
# mk-data-partition -c debian-12.2.0-amd64-netinst.iso A B
The next FAI version will use this in different parts of an installation. A blog post about this will follow. A new idea for our Debian installer ISO Here are my ideas how the Debian installer could use such a partition if it automatically detects and mounts it (by it's file system label): The advantage of this approach is that there's no need for the user to remaster the official Debian installer ISO, which is not easy for end users. We only have to extend the installer to use files from this data partition in some portions of the installation. Additional udebs, packages or firmware could automatically be used by the installer. Companies could easily create an OEM installer of Debian. What do you think about this idea? Please send feedback to lange@debian.org

9 December 2023

Simon Josefsson: Classic McEliece goes to IETF and OpenSSH

My earlier work on Streamlined NTRU Prime has been progressing along. The IETF document on sntrup761 in SSH has passed several process points. GnuPG s libgcrypt has added support for sntrup761. The libssh support for sntrup761 is working, but the merge request is stuck mostly due to lack of time to debug why the regression test suite sporadically errors out in non-sntrup761 related parts with the patch. The foundation for lattice-based post-quantum algorithms has some uncertainty around it, and I have felt that there is more to the post-quantum story than adding sntrup761 to implementations. Classic McEliece has been mentioned to me a couple of times, and I took some time to learn it and did a cut n paste job of the proposed ISO standard and published draft-josefsson-mceliece in the IETF to make the algorithm easily available to the IETF community. A high-quality implementation of Classic McEliece has been published as libmceliece and I ve been supporting the work of Jan Moj to package libmceliece for Debian, alas it has been stuck in the ftp-master NEW queue for manual review for over two months. The pre-dependencies librandombytes and libcpucycles are available in Debian already. All that text writing and packaging work set the scene to write some code. When I added support for sntrup761 in libssh, I became familiar with the OpenSSH code base, so it was natural to return to OpenSSH to experiment with a new SSH KEX for Classic McEliece. DJB suggested to pick mceliece6688128 and combine it with the existing X25519+sntrup761 or with plain X25519. While a three-algorithm hybrid between X25519, sntrup761 and mceliece6688128 would be a simple drop-in for those that don t want to lose the benefits offered by sntrup761, I decided to start the journey on a pure combination of X25519 with mceliece6688128. The key combiner in sntrup761x25519 is a simple SHA512 call and the only good I can say about that is that it is simple to describe and implement, and doesn t raise too many questions since it is already deployed. After procrastinating coding for months, once I sat down to work it only took a couple of hours until I had a successful Classic McEliece SSH connection. I suppose my brain had sorted everything in background before I started. To reproduce it, please try the following in a Debian testing environment (I use podman to get a clean environment).
# podman run -it --rm debian:testing-slim
apt update
apt dist-upgrade -y
apt install -y wget python3 librandombytes-dev libcpucycles-dev gcc make git autoconf libz-dev libssl-dev
cd ~
wget -q -O- https://lib.mceliece.org/libmceliece-20230612.tar.gz   tar xfz -
cd libmceliece-20230612/
./configure
make install
ldconfig
cd ..
git clone https://gitlab.com/jas/openssh-portable
cd openssh-portable
git checkout jas/mceliece
autoreconf
./configure # verify 'libmceliece support: yes'
make # CC="cc -DDEBUG_KEX=1 -DDEBUG_KEXDH=1 -DDEBUG_KEXECDH=1"
You should now have a working SSH client and server that supports Classic McEliece! Verify support by running ./ssh -Q kex and it should mention mceliece6688128x25519-sha512@openssh.com. To have it print plenty of debug outputs, you may remove the # character on the final line, but don t use such a build in production. You can test it as follows:
./ssh-keygen -A # writes to /usr/local/etc/ssh_host_...
# setup public-key based login by running the following:
./ssh-keygen -t rsa -f ~/.ssh/id_rsa -P ""
cat ~/.ssh/id_rsa.pub > ~/.ssh/authorized_keys
adduser --system sshd
mkdir /var/empty
while true; do $PWD/sshd -p 2222 -f /dev/null; done &
./ssh -v -p 2222 localhost -oKexAlgorithms=mceliece6688128x25519-sha512@openssh.com date
On the client you should see output like this:
OpenSSH_9.5p1, OpenSSL 3.0.11 19 Sep 2023
...
debug1: SSH2_MSG_KEXINIT sent
debug1: SSH2_MSG_KEXINIT received
debug1: kex: algorithm: mceliece6688128x25519-sha512@openssh.com
debug1: kex: host key algorithm: ssh-ed25519
debug1: kex: server->client cipher: chacha20-poly1305@openssh.com MAC: <implicit> compression: none
debug1: kex: client->server cipher: chacha20-poly1305@openssh.com MAC: <implicit> compression: none
debug1: expecting SSH2_MSG_KEX_ECDH_REPLY
debug1: SSH2_MSG_KEX_ECDH_REPLY received
debug1: Server host key: ssh-ed25519 SHA256:YognhWY7+399J+/V8eAQWmM3UFDLT0dkmoj3pIJ0zXs
...
debug1: Host '[localhost]:2222' is known and matches the ED25519 host key.
debug1: Found key in /root/.ssh/known_hosts:1
debug1: rekey out after 134217728 blocks
debug1: SSH2_MSG_NEWKEYS sent
debug1: expecting SSH2_MSG_NEWKEYS
debug1: SSH2_MSG_NEWKEYS received
debug1: rekey in after 134217728 blocks
...
debug1: Sending command: date
debug1: pledge: fork
debug1: permanently_set_uid: 0/0
Environment:
  USER=root
  LOGNAME=root
  HOME=/root
  PATH=/usr/bin:/bin:/usr/sbin:/sbin:/usr/local/bin
  MAIL=/var/mail/root
  SHELL=/bin/bash
  SSH_CLIENT=::1 46894 2222
  SSH_CONNECTION=::1 46894 ::1 2222
debug1: client_input_channel_req: channel 0 rtype exit-status reply 0
debug1: client_input_channel_req: channel 0 rtype eow@openssh.com reply 0
Sat Dec  9 22:22:40 UTC 2023
debug1: channel 0: free: client-session, nchannels 1
Transferred: sent 1048044, received 3500 bytes, in 0.0 seconds
Bytes per second: sent 23388935.4, received 78108.6
debug1: Exit status 0
Notice the kex: algorithm: mceliece6688128x25519-sha512@openssh.com output. How about network bandwidth usage? Below is a comparison of a complete SSH client connection such as the one above that log in and print date and logs out. Plain X25519 is around 7kb, X25519 with sntrup761 is around 9kb, and mceliece6688128 with X25519 is around 1MB. Yes, Classic McEliece has large keys, but for many environments, 1MB of data for the session establishment will barely be noticeable.
./ssh -v -p 2222 localhost -oKexAlgorithms=curve25519-sha256 date 2>&1   grep ^Transferred
Transferred: sent 3028, received 3612 bytes, in 0.0 seconds
./ssh -v -p 2222 localhost -oKexAlgorithms=sntrup761x25519-sha512@openssh.com date 2>&1   grep ^Transferred
Transferred: sent 4212, received 4596 bytes, in 0.0 seconds
./ssh -v -p 2222 localhost -oKexAlgorithms=mceliece6688128x25519-sha512@openssh.com date 2>&1   grep ^Transferred
Transferred: sent 1048044, received 3764 bytes, in 0.0 seconds
So how about session establishment time?
date; i=0; while test $i -le 100; do ./ssh -v -p 2222 localhost -oKexAlgorithms=curve25519-sha256 date > /dev/null 2>&1; i= expr $i + 1 ; done; date
Sat Dec  9 22:39:19 UTC 2023
Sat Dec  9 22:39:25 UTC 2023
# 6 seconds
date; i=0; while test $i -le 100; do ./ssh -v -p 2222 localhost -oKexAlgorithms=sntrup761x25519-sha512@openssh.com date > /dev/null 2>&1; i= expr $i + 1 ; done; date
Sat Dec  9 22:39:29 UTC 2023
Sat Dec  9 22:39:38 UTC 2023
# 9 seconds
date; i=0; while test $i -le 100; do ./ssh -v -p 2222 localhost -oKexAlgorithms=mceliece6688128x25519-sha512@openssh.com date > /dev/null 2>&1; i= expr $i + 1 ; done; date
Sat Dec  9 22:39:55 UTC 2023
Sat Dec  9 22:40:07 UTC 2023
# 12 seconds
I never noticed adding sntrup761, so I m pretty sure I wouldn t notice this increase either. This is all running on my laptop that runs Trisquel so take it with a grain of salt but at least the magnitude is clear. Future work items include: Happy post-quantum SSH ing! Update: Changing the mceliece6688128_keypair call to mceliece6688128f_keypair (i.e., using the fully compatible f-variant) results in McEliece being just as fast as sntrup761 on my machine. Update 2023-12-26: An initial IETF document draft-josefsson-ssh-mceliece-00 published.

7 December 2023

Daniel Kahn Gillmor: New OpenPGP certificate for dkg, December 2023

dkg's New OpenPGP certificate in December 2023 In December of 2023, I'm moving to a new OpenPGP certificate. You might know my old OpenPGP certificate, which had an fingerprint of C29F8A0C01F35E34D816AA5CE092EB3A5CA10DBA. My new OpenPGP certificate has a fingerprint of: D477040C70C2156A5C298549BB7E9101495E6BF7. Both certificates have the same set of User IDs:
  • Daniel Kahn Gillmor
  • <dkg@debian.org>
  • <dkg@fifthhorseman.net>
You can find a version of this transition statement signed by both the old and new certificates at: https://dkg.fifthhorseman.net/2023-dkg-openpgp-transition.txt The new OpenPGP certificate is:
-----BEGIN PGP PUBLIC KEY BLOCK-----
xjMEZXEJyxYJKwYBBAHaRw8BAQdA5BpbW0bpl5qCng/RiqwhQINrplDMSS5JsO/Y
O+5Zi7HCwAsEHxYKAH0FgmVxCcsDCwkHCRC7fpEBSV5r90cUAAAAAAAeACBzYWx0
QG5vdGF0aW9ucy5zZXF1b2lhLXBncC5vcmfUAgfN9tyTSxpxhmHA1r63GiI4v6NQ
mrrWVLOBRJYuhQMVCggCmwECHgEWIQTUdwQMcMIValwphUm7fpEBSV5r9wAAmaEA
/3MvYJMxQdLhIG4UDNMVd2bsovwdcTrReJhLYyFulBrwAQD/j/RS+AXQIVtkcO9b
l6zZTAO9x6yfkOZbv0g3eNyrAs0QPGRrZ0BkZWJpYW4ub3JnPsLACwQTFgoAfQWC
ZXEJywMLCQcJELt+kQFJXmv3RxQAAAAAAB4AIHNhbHRAbm90YXRpb25zLnNlcXVv
aWEtcGdwLm9yZ4l+Z3i19Uwjw3CfTNFCDjRsoufMoPOM7vM8HoOEdn/vAxUKCAKb
AQIeARYhBNR3BAxwwhVqXCmFSbt+kQFJXmv3AAALZQEAhJsgouepQVV98BHUH6Sv
WvcKrb8dQEZOvHFbZQQPNWgA/A/DHkjYKnUkCg8Zc+FonqOS/35sHhNA8CwqSQFr
tN4KzRc8ZGtnQGZpZnRoaG9yc2VtYW4ubmV0PsLACgQTFgoAfQWCZXEJywMLCQcJ
ELt+kQFJXmv3RxQAAAAAAB4AIHNhbHRAbm90YXRpb25zLnNlcXVvaWEtcGdwLm9y
ZxLvwkgnslsAuo+IoSa9rv8+nXpbBdab2Ft7n4H9S+d/AxUKCAKbAQIeARYhBNR3
BAxwwhVqXCmFSbt+kQFJXmv3AAAtFgD4wqcUfQl7nGLQOcAEHhx8V0Bg8v9ov8Gs
Y1ei1BEFwAD/cxmxmDSO0/tA+x4pd5yIvzgfGYHSTxKS0Ww3hzjuZA7NE0Rhbmll
bCBLYWhuIEdpbGxtb3LCwA4EExYKAIAFgmVxCcsDCwkHCRC7fpEBSV5r90cUAAAA
AAAeACBzYWx0QG5vdGF0aW9ucy5zZXF1b2lhLXBncC5vcmd7X4TgiINwnzh4jar0
Pf/b5hgxFPngCFxJSmtr/f0YiQMVCggCmQECmwECHgEWIQTUdwQMcMIValwphUm7
fpEBSV5r9wAAMuwBAPtMonKbhGOhOy+8miAb/knJ1cIPBjLupJbjM+NUE1WyAQD1
nyGW+XwwMrprMwc320mdJH9B0jdokJZBiN7++0NoBM4zBGVxCcsWCSsGAQQB2kcP
AQEHQI19uRatkPSFBXh8usgciEDwZxTnnRZYrhIgiFMybBDQwsC/BBgWCgExBYJl
cQnLCRC7fpEBSV5r90cUAAAAAAAeACBzYWx0QG5vdGF0aW9ucy5zZXF1b2lhLXBn
cC5vcmfCopazDnq6hZUsgVyztl5wmDCmxI169YLNu+IpDzJEtQKbAr6gBBkWCgBv
BYJlcQnLCRB3LRYeNc1LgUcUAAAAAAAeACBzYWx0QG5vdGF0aW9ucy5zZXF1b2lh
LXBncC5vcmcQglI7G7DbL9QmaDkzcEuk3QliM4NmleIRUW7VvIBHMxYhBHS8BMQ9
hghL6GcsBnctFh41zUuBAACwfwEAqDULksr8PulKRcIP6N9NI/4KoznyIcuOHi8q
Gk4qxMkBAIeV20SPEnWSw9MWAb0eKEcfupzr/C+8vDvsRMynCWsDFiEE1HcEDHDC
FWpcKYVJu36RAUlea/cAAFD1AP0YsE3Eeig1tkWaeyrvvMf5Kl1tt2LekTNWDnB+
FUG9SgD+Ka8vfPR8wuV8D3y5Y9Qq9xGO+QkEBCW0U1qNypg65QHOOARlcQnLEgor
BgEEAZdVAQUBAQdAWTLEa0WmnhUmDBdWXX0ZlYAa4g1CK/fXg0NPOQSteA4DAQgH
wsAABBgWCgByBYJlcQnLCRC7fpEBSV5r90cUAAAAAAAeACBzYWx0QG5vdGF0aW9u
cy5zZXF1b2lhLXBncC5vcmexrMBZe0QdQ+ZJOZxFkAiwCw2I7yTSF2Ox9GVFWKmA
mAKbDBYhBNR3BAxwwhVqXCmFSbt+kQFJXmv3AABcJQD/f4ltpSvLBOBEh/C2dIYa
dgSuqkCqq0B4WOhFRkWJZlcA/AxqLWG4o8UrrmwrmM42FhgxKtEXwCSHE00u8wR4
Up8G
=9Yc8
-----END PGP PUBLIC KEY BLOCK-----
When I have some reasonable number of certifications, i'll update the certificate associated with my e-mail addresses on https://keys.openpgp.org, in DANE, and in WKD. Until then, those lookups should continue to provide the old certificate.

6 December 2023

Reproducible Builds: Reproducible Builds in November 2023

Welcome to the November 2023 report from the Reproducible Builds project! In these reports we outline the most important things that we have been up to over the past month. As a rather rapid recap, whilst anyone may inspect the source code of free software for malicious flaws, almost all software is distributed to end users as pre-compiled binaries (more).

Reproducible Builds Summit 2023 Between October 31st and November 2nd, we held our seventh Reproducible Builds Summit in Hamburg, Germany! Amazingly, the agenda and all notes from all sessions are all online many thanks to everyone who wrote notes from the sessions. As a followup on one idea, started at the summit, Alexander Couzens and Holger Levsen started work on a cache (or tailored front-end) for the snapshot.debian.org service. The general idea is that, when rebuilding Debian, you do not actually need the whole ~140TB of data from snapshot.debian.org; rather, only a very small subset of the packages are ever used for for building. It turns out, for amd64, arm64, armhf, i386, ppc64el, riscv64 and s390 for Debian trixie, unstable and experimental, this is only around 500GB ie. less than 1%. Although the new service not yet ready for usage, it has already provided a promising outlook in this regard. More information is available on https://rebuilder-snapshot.debian.net and we hope that this service becomes usable in the coming weeks. The adjacent picture shows a sticky note authored by Jan-Benedict Glaw at the summit in Hamburg, confirming Holger Levsen s theory that rebuilding all Debian packages needs a very small subset of packages, the text states that 69,200 packages (in Debian sid) list 24,850 packages in their .buildinfo files, in 8,0200 variations. This little piece of paper was the beginning of rebuilder-snapshot and is a direct outcome of the summit! The Reproducible Builds team would like to thank our event sponsors who include Mullvad VPN, openSUSE, Debian, Software Freedom Conservancy, Allotropia and Aspiration Tech.

Beyond Trusting FOSS presentation at SeaGL On November 4th, Vagrant Cascadian presented Beyond Trusting FOSS at SeaGL in Seattle, WA in the United States. Founded in 2013, SeaGL is a free, grassroots technical summit dedicated to spreading awareness and knowledge about free source software, hardware and culture. The summary of Vagrant s talk mentions that it will:
[ ] introduce the concepts of Reproducible Builds, including best practices for developing and releasing software, the tools available to help diagnose issues, and touch on progress towards solving decades-old deeply pervasive fundamental security issues Learn how to verify and demonstrate trust, rather than simply hoping everything is OK!
Germane to the contents of the talk, the slides for Vagrant s talk can be built reproducibly, resulting in a PDF with a SHA1 of cfde2f8a0b7e6ec9b85377eeac0661d728b70f34 when built on Debian bookworm and c21fab273232c550ce822c4b0d9988e6c49aa2c3 on Debian sid at the time of writing.

Human Factors in Software Supply Chain Security Marcel Fourn , Dominik Wermke, Sascha Fahl and Yasemin Acar have published an article in a Special Issue of the IEEE s Security & Privacy magazine. Entitled A Viewpoint on Human Factors in Software Supply Chain Security: A Research Agenda, the paper justifies the need for reproducible builds to reach developers and end-users specifically, and furthermore points out some under-researched topics that we have seen mentioned in interviews. An author pre-print of the article is available in PDF form.

Community updates On our mailing list this month:

openSUSE updates Bernhard M. Wiedemann has created a wiki page outlining an proposal to create a general-purpose Linux distribution which consists of 100% bit-reproducible packages albeit minus the embedded signature within RPM files. It would be based on openSUSE Tumbleweed or, if available, its Slowroll-variant. In addition, Bernhard posted another monthly update for his work elsewhere in openSUSE.

Ubuntu Launchpad now supports .buildinfo files Back in 2017, Steve Langasek filed a bug against Ubuntu s Launchpad code hosting platform to report that .changes files (artifacts of building Ubuntu and Debian packages) reference .buildinfo files that aren t actually exposed by Launchpad itself. This was causing issues when attempting to process .changes files with tools such as Lintian. However, it was noticed last month that, in early August of this year, Simon Quigley had resolved this issue, and .buildinfo files are now available from the Launchpad system.

PHP reproducibility updates There have been two updates from the PHP programming language this month. Firstly, the widely-deployed PHPUnit framework for the PHP programming language have recently released version 10.5.0, which introduces the inclusion of a composer.lock file, ensuring total reproducibility of the shipped binary file. Further details and the discussion that went into their particular implementation can be found on the associated GitHub pull request. In addition, the presentation Leveraging Nix in the PHP ecosystem has been given in late October at the PHP International Conference in Munich by Pol Dellaiera. While the video replay is not yet available, the (reproducible) presentation slides and speaker notes are available.

diffoscope changes diffoscope is our in-depth and content-aware diff utility that can locate and diagnose reproducibility issues. This month, Chris Lamb made a number of changes, including:
  • Improving DOS/MBR extraction by adding support for 7z. [ ]
  • Adding a missing RequiredToolNotFound import. [ ]
  • As a UI/UX improvement, try and avoid printing an extended traceback if diffoscope runs out of memory. [ ]
  • Mark diffoscope as stable on PyPI.org. [ ]
  • Uploading version 252 to Debian unstable. [ ]

Website updates A huge number of notes were added to our website that were taken at our recent Reproducible Builds Summit held between October 31st and November 2nd in Hamburg, Germany. In particular, a big thanks to Arnout Engelen, Bernhard M. Wiedemann, Daan De Meyer, Evangelos Ribeiro Tzaras, Holger Levsen and Orhun Parmaks z. In addition to this, a number of other changes were made, including:

Upstream patches The Reproducible Builds project detects, dissects and attempts to fix as many currently-unreproducible packages as possible. We endeavour to send all of our patches upstream where appropriate. This month, we wrote a large number of such patches, including:

Reproducibility testing framework The Reproducible Builds project operates a comprehensive testing framework (available at tests.reproducible-builds.org) in order to check packages and other artifacts for reproducibility. In October, a number of changes were made by Holger Levsen:
  • Debian-related changes:
    • Track packages marked as Priority: important in a new package set. [ ][ ]
    • Stop scheduling packages that fail to build from source in bookworm [ ] and bullseye. [ ].
    • Add old releases dashboard link in web navigation. [ ]
    • Permit re-run of the pool_buildinfos script to be re-run for a specific year. [ ]
    • Grant jbglaw access to the osuosl4 node [ ][ ] along with lynxis [ ].
    • Increase RAM on the amd64 Ionos builders from 48 GiB to 64 GiB; thanks IONOS! [ ]
    • Move buster to archived suites. [ ][ ]
    • Reduce the number of arm64 architecture workers from 24 to 16 in order to improve stability [ ], reduce the workers for amd64 from 32 to 28 and, for i386, reduce from 12 down to 8 [ ].
    • Show the entire build history of each Debian package. [ ]
    • Stop scheduling already tested package/version combinations in Debian bookworm. [ ]
  • Snapshot service for rebuilders
    • Add an HTTP-based API endpoint. [ ][ ]
    • Add a Gunicorn instance to serve the HTTP API. [ ]
    • Add an NGINX config [ ][ ][ ][ ]
  • System-health:
    • Detect failures due to HTTP 503 Service Unavailable errors. [ ]
    • Detect failures to update package sets. [ ]
    • Detect unmet dependencies. (This usually occurs with builds of Debian live-build.) [ ]
  • Misc-related changes:
    • do install systemd-ommd on jenkins. [ ]
    • fix harmless typo in squid.conf for codethink04. [ ]
    • fixup: reproducible Debian: add gunicorn service to serve /api for rebuilder-snapshot.d.o. [ ]
    • Increase codethink04 s Squid cache_dir size setting to 16 GiB. [ ]
    • Don t install systemd-oomd as it unfortunately kills sshd [ ]
    • Use debootstrap from backports when commisioning nodes. [ ]
    • Add the live_build_debian_stretch_gnome, debsums-tests_buster and debsums-tests_buster jobs to the zombie list. [ ][ ]
    • Run jekyll build with the --watch argument when building the Reproducible Builds website. [ ]
    • Misc node maintenance. [ ][ ][ ]
Other changes were made as well, however, including Mattia Rizzolo fixing rc.local s Bash syntax so it can actually run [ ], commenting away some file cleanup code that is (potentially) deleting too much [ ] and fixing the html_brekages page for Debian package builds [ ]. Finally, diagnosed and submitted a patch to add a AddEncoding gzip .gz line to the tests.reproducible-builds.org Apache configuration so that Gzip files aren t re-compressed as Gzip which some clients can t deal with (as well as being a waste of time). [ ]

If you are interested in contributing to the Reproducible Builds project, please visit our Contribute page on our website. However, you can get in touch with us via:

3 December 2023

Ben Hutchings: FOSS activity in August 2023

27 November 2023

Andrew Cater: 20231123 - UEFI install on a Raspberry Pi 4 - step by step instructions to a modified d-i

Motivation
Andy (RattusRattus) and I have been formalising instructions for using Pete Batard's version of Tianocore (and therefore UEFI booting) for the Raspberry Pi 4 together with a Debian arm64 netinst to make a modified Debian installer on a USB stick which "just works" for a Raspberry Pi 4.
Thanks also to Steve McIntyre for initial notes that got this working for us and also to Emmanuele Rocca for putting up some useful instructions for copying.

Recipe

Plug in a USB stick - use dmesg or your favourite method to see how it is identified.

Make a couple of mount points under /mnt - /mnt/data and /mnt/cdrom


1. Grab a USB stick, Partition using MBR. Make a single VFAT
partition, type 0xEF (i.e. EFI System Partition)

For a USB stick (identified as sdX) below:
$ sudo parted --script /dev/sdX mklabel msdos $ sudo parted --script /dev/sdX mkpart primary fat32 0% 100% $ sudo mkfs.vfat /dev/sdX1 $ sudo mount /dev/sdX1 /mnt/data/

Download an arm64 netinst.iso

https://cdimage.debian.org/debian-cd/current/arm64/iso-cd/debian-12.2.0-arm64-netinst.iso

2. Copy the complete contents of partition *1* from a Debian arm64
installer image into the filesystem (partition 1 is the installer
stuff itself) on the USB stick, in /

$ sudo kpartx -v -a debian-12.2.0-arm64-netinst.iso # Mount the first partition on the ISO and copy its contents to the stick $ sudo mount /dev/mapper/loop0p1 /mnt/cdrom/ $ sudo rsync -av /mnt/cdrom/ /mnt/data/ $ sudo umount /mnt/cdrom

3. Copy the complete contents of partition *2* from that Debian arm64
installer image into that filesystem (partition 2 is the ESP) on
the USB stick, in /

# Same story with the second partition on the ISO

$ sudo mount /dev/mapper/loop0p2 /mnt/cdrom/

$ sudo rsync -av /mnt/cdrom/ /mnt/data/ $ sudo umount /mnt/cdrom

$ sudo kpartx -d debian-testing-amd64-netinst.iso $ sudo umount /mnt/data


4. Grab the rpi edk2 build from https://github.com/pftf/RPi4/releases
(I used 1.35) and extract it. I copied the files there into *2*
places for now on the USB stick:

/ (so the Pi will boot using it)
/rpi4 (so we can find the files again later)

5. Add the preseed.cfg file (attached) into *both* of the two initrd
files on the USB stick

- /install.a64/initrd.gz and
- /install.a64/gtk/initrd.gz

cpio is an awful tool to use :-(. In each case:

$ cp /path/to/initrd.gz .
$ gunzip initrd.gz
$ echo preseed.cfg cpio -H newc -o -A -F initrd

$ gzip -9v initrd

$ cp initrd.gz /path/to/initrd.gz

If you look at the preseed file, it will do a few things:

- Use an early_command to unmount /media (to work around Debian bug
#1051964)

- Register a late_command call for /cdrom/finish-rpi (the next
file - see below) to run at the end of the installation.

- Force grub installation also to the EFI removable media path,
needed as the rpi doesn't store EFI boot variables.

- Stop the installer asking for firmware from removable media (as
the rpi4 will ask for broadcom bluetooth fw that we can't
ship. Can be ignored safely.)

6. Copy the finish-rpi script (attached) into / on the USB stick. It
will be run at the end of the installation, triggered via the
preseed. It does a couple of things:

- Copy the edk2 firmware files into the ESP on the system that's
just been installer

- Remove shim-signed from the installed systems, as there's a bug
that causes it to fail on rpi4. I need to dig into this to see
what the issue is.

That's it! Run the installer as normal, all should Just Work (TM).

BlueTooth didn't quite work : raspberrypi-firmware didn't install until adding a symlink for boot/efi to /boot/firmware

20231127 - This may not be necessary because raspberrypi-firmware path has been fixed

Preseed.cfg
# The preseed file itself causes a problem - the installer medium is
# left mounted on /medis so things break in cdrom-detect. Let's see if
# we can fix that!
d-i preseed/early_command string umount /media true

# Run our command to do rpi setup before reboot
d-i preseed/late_command string /cdrom/finish-rpi

# Force grub installation to the RM path
grub-efi-arm64 grub2/force_efi_extra_removable boolean true

# Don't prompt for missing firmware from removable media,
# e.g. broadcom bluetooth on the rpi.
d-i hw-detect/load_firmware boolean false

Finish.rpi
!/bin/sh

set -x

grep -q -a RPI4 /sys/firmware/acpi/tables/CSRT
if [ $? -ne 0 ]; then
echo "Not running on a Pi 4, exit!"
exit 0
fi

# Copy the rpi4 firmware binaries onto the installed system.
# Assumes the installer media is mounted on /cdrom.
cp -vr /cdrom/rpi4/. /target/boot/efi/.

# shim-signed doesn't seem happy on rpi4, so remove it
mount --bind /sys /target/sys
mount --bind /proc /target/proc
mount --bind /dev /target/dev

in-target apt-get remove --purge --autoremove -y shim-signed


Next.