Search Results: "manuel"

5 April 2024

Emanuele Rocca: PGP keys on Yubikey, with a side of Mutt

Here are my notes about copying PGP keys to external hardware devices such as Yubikeys. Let me begin by saying that the gpg tools are pretty bad at this.
MAKE A COUPLE OF BACKUPS OF ~/.gnupg/ TO DIFFERENT ENCRYPTED USB STICKS BEFORE YOU START. GPG WILL MESS UP YOUR KEYS. SERIOUSLY.
For example, would you believe me if I said that saving changes results in the removal of your private key? Well check this out.
Now that you have multiple safe, offline backups of your keys, here are my notes.
apt install yubikey-manager scdaemon
Plug the Yubikey in, see if it s recognized properly:
ykman list
gpg --card-status
Change the default PIN (123456) and Admin PIN (12345678):
gpg --card-edit
gpg/card> admin
gpg/card> passwd
Look at the openpgp information and change the maximum number of retries, if you like. I have seen this failing a couple of times, unplugging the Yubikey and putting it back in worked.
ykman openpgp info
ykman openpgp access set-retries 7 7 7
Copy your keys. MAKE A BACKUP OF ~/.gnupg/ BEFORE YOU DO THIS.
gpg --edit-key $KEY_ID
gpg> keytocard # follow the prompts to copy the first key
Now choose the next key and copy that one too. Repeat till all subkeys are copied.
gpg> key 1
gpg> keytocard
Typing gpg --card-status you should be able to see all your keys on the Yubikey now.

Using the key on another machine
How do you use your PGP keys on the Yubikey on other systems?
Go to another system, if it does have a ~/.gnupg directory already move it somewhere else.
apt install scdaemon
Import your public key:
gpg -k
gpg --keyserver pgp.mit.edu --recv-keys $KEY_ID
Check the fingerprint and if it is indeed your key say you trust it:
gpg --edit-key $KEY_ID
> trust
> 5
> y
> save
Now try gpg --card-status and gpg --list-secret-keys, you should be able to see your keys. Try signing something, it should work.
gpg --output /tmp/x.out --sign /etc/motd
gpg --verify /tmp/x.out

Using the Yubikey with Mutt
If you re using mutt with IMAP, there is a very simple trick to safely store your password on disk. Create an encrypted file with your IMAP password:
echo SUPERSECRET   gpg --encrypt > ~/.mutt_password.gpg
Add the following to ~/.muttrc:
set imap_pass= gpg --decrypt ~/.mutt_password.gpg 
With the above, mutt now prompts you to insert the Yubikey and type your PIN in order to connect to the IMAP server.

26 March 2024

Emmanuel Kasper: Adding a private / custom Certificate Authority to the firefox trust store

Today at $WORK I needed to add the private company Certificate Authority (CA) to Firefox, and I found the steps were unnecessarily complex. Time to blog about that, and I also made a Debian wiki article of that post, so that future generations can update the information, when Firefox 742 is released on Debian 17. The cacert certificate authority is not included in Debian and Firefox, and is thus a good example of adding a private CA. Note that this does not mean I specifically endorse that CA.
  • Test that SSL connections to a site signed by the private CA is failing
$ gnutls-cli wiki.cacert.org:443
...
- Status: The certificate is NOT trusted. The certificate issuer is unknown. 
*** PKI verification of server certificate failed...
*** Fatal error: Error in the certificate.
  • Download the private CA
$ wget http://www.cacert.org/certs/root_X0F.crt
  • test that a connection works with the private CA
$ gnutls-cli --x509cafile root_X0F.crt wiki.cacert.org:443
...
- Status: The certificate is trusted. 
- Description: (TLS1.2-X.509)-(ECDHE-SECP256R1)-(RSA-SHA256)-(AES-256-GCM)
- Session ID: 37:56:7A:89:EA:5F:13:E8:67:E4:07:94:4B:52:23:63:1E:54:31:69:5D:70:17:3C:D0:A4:80:B0:3A:E5:22:B3
- Options: safe renegotiation,
- Handshake was completed
...
  • add the private CA to the Debian trust store located in /etc/ssl/certs/ca-certificates.crt
$ sudo cp root_X0F.crt /usr/local/share/ca-certificates/cacert-org-root-ca.crt
$ sudo update-ca-certificates --verbose
...
Adding debian:cacert-org-root-ca.pem
...
  • verify that we can connect without passing the private CA on the command line
$ gnutls-cli wiki.cacert.org:443
... 
 - Status: The certificate is trusted.
  • At that point most applications are able to connect to systems with a certificate signed by the private CA (curl, Gnome builtin Browser ). However Firefox is using its own trust store and will still display a security error if connecting to https://wiki.cacert.org. To make Firefox trust the Debian trust store, we need to add a so called security device, in fact an extra library wrapping the Debian trust store. The library will wrap the Debian trust store in the PKCS#11 industry format that Firefox supports.
  • install the pkcs#11 wrapping library and command line tools
$ sudo apt install p11-kit p11-kit-modules
  • verify that the private CA is accessible via PKCS#11
$ trust list   grep --context 2 'CA Cert'
pkcs11:id=%16%B5%32%1B%D4%C7%F3%E0%E6%8E%F3%BD%D2%B0%3A%EE%B2%39%18%D1;type=cert
    type: certificate
    label: CA Cert Signing Authority
    trust: anchor
    category: authority
  • now we need to add a new security device in Firefox pointing to the pkcs11 trust store. The pkcs11 trust store is located in /usr/lib/x86_64-linux-gnu/pkcs11/p11-kit-trust.so
$ dpkg --listfiles p11-kit-modules   grep trust
/usr/lib/x86_64-linux-gnu/pkcs11/p11-kit-trust.so
  • in Firefox (tested in version 115 esr), go to Settings -> Privacy & Security -> Security -> Security Devices.
    Then click Load , in the popup window use My local trust as a module name, and /usr/lib/x86_64-linux-gnu/pkcs11/p11-kit-trust.so as a module filename. After adding the module, you should see it in the list of Security Devices, having /etc/ssl/certs/ca-certificates.crt as a description.
  • now restart Firefox and you should be able to browse https://wiki.cacert.org without security errors

18 March 2024

Gunnar Wolf: After miniDebConf Santa Fe

Last week we held our promised miniDebConf in Santa Fe City, Santa Fe province, Argentina just across the river from Paran , where I have spent almost six beautiful months I will never forget. Around 500 Kilometers North from Buenos Aires, Santa Fe and Paran are separated by the beautiful and majestic Paran river, which flows from Brazil, marks the Eastern border of Paraguay, and continues within Argentina as the heart of the litoral region of the country, until it merges with the Uruguay river (you guessed right the river marking the Eastern border of Argentina, first with Brazil and then with Uruguay), and they become the R o de la Plata. This was a short miniDebConf: we were lent the APUL union s building for the weekend (thank you very much!); during Saturday, we had a cycle of talks, and on sunday we had more of a hacklab logic, having some unstructured time to work each on their own projects, and to talk and have a good time together. We were five Debian people attending: santiago debacle eamanu dererk gwolf @debian.org. My main contact to kickstart organization was Mart n Bayo. Mart n was for many years the leader of the Technical Degree on Free Software at Universidad Nacional del Litoral, where I was also a teacher for several years. Together with Leo Mart nez, also a teacher at the tecnicatura, they contacted us with Guillermo and Gabriela, from the APUL non-teaching-staff union of said university. We had the following set of talks (for which there is a promise to get electronic record, as APUL was kind enough to record them! of course, I will push them to our usual conference video archiving service as soon as I get them)
Hour Title (Spanish) Title (English) Presented by
10:00-10:25 Introducci n al Software Libre Introduction to Free Software Mart n Bayo
10:30-10:55 Debian y su comunidad Debian and its community Emanuel Arias
11:00-11:25 Por qu sigo contribuyendo a Debian despu s de 20 a os? Why am I still contributing to Debian after 20 years? Santiago Ruano
11:30-11:55 Mi identidad y el proyecto Debian: Qu es el llavero OpenPGP y por qu ? My identity and the Debian project: What is the OpenPGP keyring and why? Gunnar Wolf
12:00-13:00 Explorando las masculinidades en el contexto del Software Libre Exploring masculinities in the context of Free Software Gora Ortiz Fuentes - Jos Francisco Ferro
13:00-14:30 Lunch
14:30-14:55 Debian para el d a a d a Debian for our every day Leonardo Mart nez
15:00-15:25 Debian en las Raspberry Pi Debian in the Raspberry Pi Gunnar Wolf
15:30-15:55 Device Trees Device Trees Lisandro Dami n Nicanor Perez Meyer (videoconferencia)
16:00-16:25 Python en Debian Python in Debian Emmanuel Arias
16:30-16:55 Debian y XMPP en la medici n de viento para la energ a e lica Debian and XMPP for wind measuring for eolic energy Martin Borgert
As it always happens DebConf, miniDebConf and other Debian-related activities are always fun, always productive, always a great opportunity to meet again our decades-long friends. Lets see what comes next!

12 February 2024

Emanuele Rocca: Enabling Kernel Settings in Debian

This time it s about enabling new kernel config options in the official Debian kernel packages. A few dependencies are needed to run the various scripts used by the Debian kernel folks, as well as to build the kernel itself:
apt install git gpg python3-debian python3-dacite
apt build-dep linux
With that in place, fetch the linux and kernel-team repos:
git clone --depth 1 https://salsa.debian.org/kernel-team/linux
git clone --depth 1 https://salsa.debian.org/kernel-team/kernel-team
So far you ve only got the Debian-specific bits. Fetch the actual kernel sources now. In the likely case that you re building a stable kernel, run the following from within the linux directory:
debian/bin/genorig.py https://git.kernel.org/pub/scm/linux/kernel/git/stable/linux-stable.git
Use the torvalds repo if you re building an RC version instead:
debian/bin/genorig.py https://git.kernel.org/pub/scm/linux/kernel/git/torvalds/linux.git
Now generate the upstream tarball as well as debian/control. The first command will take a bit, and the second command will fail: but that s success just as the output says.
debian/rules orig
debian/rules debian/control
Now generate patched sources with:
debian/rules source
Time to edit the Kconfig and enable/disable whatever setting you wanted to change. Take a look around the files under debian/config/ to see where your changes should go. If it s a setting shared among multiple architectures that may be debian/config/config. For x86-specific things, the file is debian/config/amd64/config. On aarch64 debian/config/arm64/config. If in doubt, you could try asking #debian-kernel on IRC.
It may look like you need to figure out where exactly in the file the setting should be placed. That is not the case. There s a helpful script fixing things up for you:
../kernel-team/utils/kconfigeditor2/process.py .
The above will fail if you forgot to run debian/rules source. The debian/build/source_rt/Kconfig file is needed by the script:
Traceback (most recent call last):
  File "/tmp/linux/../kernel-team/utils/kconfigeditor2/process.py", line 19, in __init__
    menu = fs_menu[featureset or 'none']
           ~~~~~~~^^^^^^^^^^^^^^^^^^^^^^
KeyError: 'rt'
During handling of the above exception, another exception occurred:
[...]
FileNotFoundError: [Errno 2] No such file or directory: './debian/build/source_rt/Kconfig'
If that happens, run:
debian/rules source
Now process.py should work fine and fix your config file.
Excellent, now the config is updated and we re ready to build the kernel. Off we go:
export MAKEFLAGS=-j$(nproc)
export DEB_BUILD_PROFILES='pkg.linux.nokerneldbg pkg.linux.nokerneldbginfo pkg.linux.notools nodoc'
dpkg-buildpackage -b -nc -uc

11 February 2024

Freexian Collaborators: Debian Contributions: Upcoming Improvements to Salsa CI, /usr-move, and more! (by Utkarsh Gupta)

Contributing to Debian is part of Freexian s mission. This article covers the latest achievements of Freexian and their collaborators. All of this is made possible by organizations subscribing to our Long Term Support contracts and consulting services.

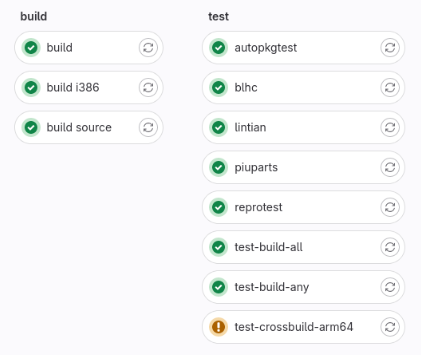
Upcoming Improvements to Salsa CI, by Santiago Ruano Rinc n Santiago started picking up the work made by Outreachy Intern, Enock Kashada (a big thanks to him!), to solve some long-standing issues in Salsa CI. Currently, the first job in a Salsa CI pipeline is the extract-source job, used to produce a debianize source tree of the project. This job was introduced to make it possible to build the projects on different architectures, on the subsequent build jobs. However, that extract-source approach is sub-optimal: not only it increases the execution time of the pipeline by some minutes, but also projects whose source tree is too large are not able to use the pipeline. The debianize source tree is passed as an artifact to the build jobs, and for those large projects, the size of their source tree exceeds the Salsa s limits. This is specific issue is documented as issue #195, and the proposed solution is to get rid of the extract-source job, relying on sbuild in the very build job (see issue #296). Switching to sbuild would also help to improve the build source job, solving issues such as #187 and #298. The current work-in-progress is very preliminary, but it has already been possible to run the build (amd64), build-i386 and build-source job using sbuild with the unshare mode. The image on the right shows a pipeline that builds grep. All the test jobs use the artifacts of the new build job. There is a lot of remaining work, mainly making the integration with ccache work. This change could break some things, it will also be important to test how the new pipeline works with complex projects. Also, thanks to Emmanuel Arias, we are proposing a Google Summer of Code 2024 project to improve Salsa CI. As part of the ongoing work in preparation for the GSoC 2024 project, Santiago has proposed a merge request to make more efficient how contributors can test their changes on the Salsa CI pipeline.

/usr-move, by Helmut Grohne In January, we sent most of the moving patches for the set of packages involved with debootstrap. Notably missing is glibc, which turns out harder than anticipated via dumat, because it has Conflicts between different architectures, which dumat does not analyze. Patches for diversion mitigations have been updated in a way to not exhibit any loss anymore. The main change here is that packages which are being diverted now support the diverting packages in transitioning their diversions. We also supported a few packages with non-trivial changes such as netplan.io. dumat has been enhanced to better support derivatives such as Ubuntu.

Miscellaneous contributions
  • Python 3.12 migration trundles on. Stefano Rivera helped port several new packages to support 3.12.
  • Stefano updated the Sphinx configuration of DebConf Video Team s documentation, which was broken by Sphinx 7.
  • Stefano published the videos from the Cambridge MiniDebConf to YouTube and PeerTube.
  • DebConf 24 planning has begun, and Stefano & Utkarsh have started work on this.
  • Utkarsh re-sponsored the upload of golang-github-prometheus-community-pgbouncer-exporter for Lena.
  • Colin Watson added Incus support to autopkgtest.
  • Colin discovered Perl::Critic and used it to tidy up some poor practices in several of his packages, including debconf.
  • Colin did some overdue debconf maintenance, mainly around tidying up error message handling in several places (1, 2, 3).
  • Colin figured out how to update the mirror size documentation in debmirror, last updated in 2010. It should now be much easier to keep it up to date regularly.
  • Colin issued a man-db buster update to clean up some irritations due to strict sandboxing.
  • Thorsten Alteholz adopted two more packages, magicfilter and ifhp, for the debian-printing team. Those packages are the last ones of the latest round of adoptions to preserve the old printing protocol within Debian. If you know of other packages that should be retained, please don t hesitate to contact Thorsten.
  • Enrico participated in /usr-merge discussions with Helmut.
  • Helmut sent patches for 16 cross build failures.
  • Helmut supported Matthias Klose (not affiliated with Freexian) with adding -for-host support to gcc-defaults.
  • Helmut uploaded dput-ng enabling dcut migrate and merging two MRs of Ben Hutchings.
  • Santiago took part in the discussions relating to the EU Cyber Resilience Act (CRA) and the Debian public statement that was published last year. He participated in a meeting with Members of the European Parliament (MEPs), Marcel Kolaja and Karen Melchior, and their teams to clarify some points about the impact of the CRA and Debian and downstream projects, and the improvements in the last version of the proposed regulation.

27 November 2023

Andrew Cater: 20231123 - UEFI install on a Raspberry Pi 4 - step by step instructions to a modified d-i

Motivation
Andy (RattusRattus) and I have been formalising instructions for using Pete Batard's version of Tianocore (and therefore UEFI booting) for the Raspberry Pi 4 together with a Debian arm64 netinst to make a modified Debian installer on a USB stick which "just works" for a Raspberry Pi 4.
Thanks also to Steve McIntyre for initial notes that got this working for us and also to Emmanuele Rocca for putting up some useful instructions for copying.

Recipe

Plug in a USB stick - use dmesg or your favourite method to see how it is identified.

Make a couple of mount points under /mnt - /mnt/data and /mnt/cdrom


1. Grab a USB stick, Partition using MBR. Make a single VFAT
partition, type 0xEF (i.e. EFI System Partition)

For a USB stick (identified as sdX) below:
$ sudo parted --script /dev/sdX mklabel msdos $ sudo parted --script /dev/sdX mkpart primary fat32 0% 100% $ sudo mkfs.vfat /dev/sdX1 $ sudo mount /dev/sdX1 /mnt/data/

Download an arm64 netinst.iso

https://cdimage.debian.org/debian-cd/current/arm64/iso-cd/debian-12.2.0-arm64-netinst.iso

2. Copy the complete contents of partition *1* from a Debian arm64
installer image into the filesystem (partition 1 is the installer
stuff itself) on the USB stick, in /

$ sudo kpartx -v -a debian-12.2.0-arm64-netinst.iso # Mount the first partition on the ISO and copy its contents to the stick $ sudo mount /dev/mapper/loop0p1 /mnt/cdrom/ $ sudo rsync -av /mnt/cdrom/ /mnt/data/ $ sudo umount /mnt/cdrom

3. Copy the complete contents of partition *2* from that Debian arm64
installer image into that filesystem (partition 2 is the ESP) on
the USB stick, in /

# Same story with the second partition on the ISO

$ sudo mount /dev/mapper/loop0p2 /mnt/cdrom/

$ sudo rsync -av /mnt/cdrom/ /mnt/data/ $ sudo umount /mnt/cdrom

$ sudo kpartx -d debian-testing-amd64-netinst.iso $ sudo umount /mnt/data


4. Grab the rpi edk2 build from https://github.com/pftf/RPi4/releases
(I used 1.35) and extract it. I copied the files there into *2*
places for now on the USB stick:

/ (so the Pi will boot using it)
/rpi4 (so we can find the files again later)

5. Add the preseed.cfg file (attached) into *both* of the two initrd
files on the USB stick

- /install.a64/initrd.gz and
- /install.a64/gtk/initrd.gz

cpio is an awful tool to use :-(. In each case:

$ cp /path/to/initrd.gz .
$ gunzip initrd.gz
$ echo preseed.cfg cpio -H newc -o -A -F initrd

$ gzip -9v initrd

$ cp initrd.gz /path/to/initrd.gz

If you look at the preseed file, it will do a few things:

- Use an early_command to unmount /media (to work around Debian bug
#1051964)

- Register a late_command call for /cdrom/finish-rpi (the next
file - see below) to run at the end of the installation.

- Force grub installation also to the EFI removable media path,
needed as the rpi doesn't store EFI boot variables.

- Stop the installer asking for firmware from removable media (as
the rpi4 will ask for broadcom bluetooth fw that we can't
ship. Can be ignored safely.)

6. Copy the finish-rpi script (attached) into / on the USB stick. It
will be run at the end of the installation, triggered via the
preseed. It does a couple of things:

- Copy the edk2 firmware files into the ESP on the system that's
just been installer

- Remove shim-signed from the installed systems, as there's a bug
that causes it to fail on rpi4. I need to dig into this to see
what the issue is.

That's it! Run the installer as normal, all should Just Work (TM).

BlueTooth didn't quite work : raspberrypi-firmware didn't install until adding a symlink for boot/efi to /boot/firmware

20231127 - This may not be necessary because raspberrypi-firmware path has been fixed

Preseed.cfg
# The preseed file itself causes a problem - the installer medium is
# left mounted on /medis so things break in cdrom-detect. Let's see if
# we can fix that!
d-i preseed/early_command string umount /media true

# Run our command to do rpi setup before reboot
d-i preseed/late_command string /cdrom/finish-rpi

# Force grub installation to the RM path
grub-efi-arm64 grub2/force_efi_extra_removable boolean true

# Don't prompt for missing firmware from removable media,
# e.g. broadcom bluetooth on the rpi.
d-i hw-detect/load_firmware boolean false

Finish.rpi
!/bin/sh

set -x

grep -q -a RPI4 /sys/firmware/acpi/tables/CSRT
if [ $? -ne 0 ]; then
echo "Not running on a Pi 4, exit!"
exit 0
fi

# Copy the rpi4 firmware binaries onto the installed system.
# Assumes the installer media is mounted on /cdrom.
cp -vr /cdrom/rpi4/. /target/boot/efi/.

# shim-signed doesn't seem happy on rpi4, so remove it
mount --bind /sys /target/sys
mount --bind /proc /target/proc
mount --bind /dev /target/dev

in-target apt-get remove --purge --autoremove -y shim-signed


25 November 2023

Andrew Cater: Laptop with ARM, mobile phone BoF - MiniDebConf Cambridge day 1

So following Emanuele's talk on a Lenovo X13s, we're now at the Debian on Mobile BoF (Birds of a feather) discussion session from Arnaud Ferraris
Discussion and questions on how best to support many variants of mobile phones: the short answer seems to be "it's still *hard* - too many devices around to add individual tweaks for every phone and manufacturer.One thing that may not have been audible in the video soundtrack - lots of laughter in the room prompted as someone's device said, audibly "You are not allowed to do that without unlocking your device"Upstream and downstream packages for hardware enablement are also hard: basic support is sometimes easy but that might even include non-support for charging, for example.Much discussion around the numbers of kernels and kernel image proliferation there could be. Debian tends to prefer *one* way of doing things with kernels.Abstracting hardware is the hardest thing but leads to huge kernels - there's no easy trade-off. Simple/feasible in multiple end user devices/supportable - pick one

12 November 2023

Lisandro Dami n Nicanor P rez Meyer: Mini DebConf 2023 in Montevideo, Uruguay

15 years, "la ni a bonita", if you ask many of my fellow argentinians, is the amount of time I haven't been present in any Debian-related face to face activity. It was already time to fix that. Thanks to Santiago Ruano Rinc n and Gunnar Wolf that proded me to come I finally attended the Mini DebConf Uruguay in Montevideo. Me in Montevideo, Uruguay I took the opportunity to do my first trip by ferry, which is currently one of the best options to get from Buenos Aires to Montevideo, in my case through Colonia. Living ~700km at the south west of Buenos Aires city the trip was long, it included a 10 hours bus, a ferry and yet another bus... but of course, it was worth it. In Buenos Aires' port I met Emmanuel eamanu Arias, a fellow Argentinian Debian Developer from La Rioja, so I had the pleasure to travel with him. To be honest Gunnar already did a wonderful blog post with many pictures, I should have taken more. I had the opportunity to talk about device trees, and even look at Gunnar's machine one in order to find why a Display Port port was not working on a kernel but did in another. At the same time I also had time to start packaging qt6-grpc. Sadly I was there just one entire day, as I arrived on Thursday afternoon and had to leave on Saturday after lunch, but we did have a lot of quality Debian time. I'll repeat here what Gunnar already wrote:
We had a long, important conversation about an important discussion that we are about to present on debian-vote@lists.debian.org.
Stay tuned on that, I think this is something we should all get involved. All in all I already miss hacking with people on the same room. Meetings for us mean a lot of distance to be traveled (well, I live far away of almost everything), but I really should try to this more often. Certainly more than just once every 15 years :-)

11 November 2023

Gunnar Wolf: There once was a miniDebConf in Uruguay...

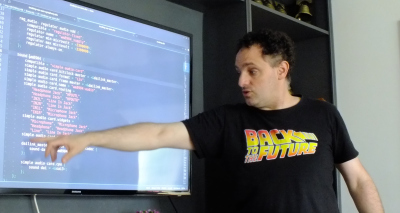
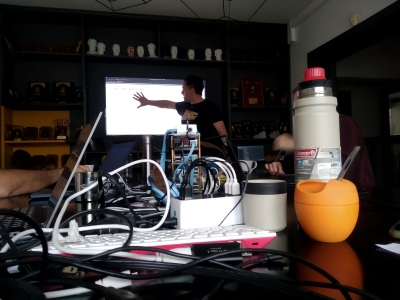
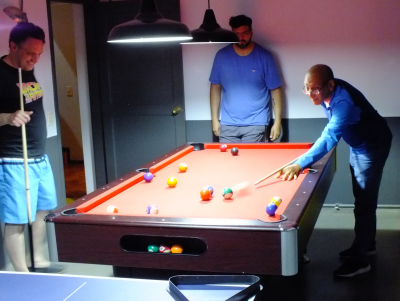
Meeting Debian people for having a good time together, for some good hacking, for learning, for teaching Is always fun and welcome. It brings energy, life and joy. And this year, due to the six-months-long relocation my family and me decided to have to Argentina, I was unable to attend the real deal, DebConf23 at India. And while I know DebConf is an experience like no other, this year I took part in two miniDebConfs. One I have already shared in this same blog: I was in MiniDebConf Tamil Nadu in India, followed by some days of pre-DebConf preparation and scouting in Kochi proper, where I got to interact with the absolutely great and loving team that prepared DebConf. The other one is still ongoing (but close to finishing). Some months ago, I talked with Santiago Ruano, jokin as we were Spanish-speaking DDs announcing to the debian-private mailing list we d be relocating to around R o de la Plata. And things worked out normally: He has been for several months in Uruguay already, so he decided to rent a house for some days, and invite Debian people to do what we do best. I left Paran Tuesday night (and missed my online class at UNAM! Well, you cannot have everything, right?). I arrived early on Wednesday, and around noon came to the house of the keysigning (well, the place is properly called Casa Key , it s a publicity agency that is also rented as a guesthouse in a very nice area of Montevideo, close to Nuevo Pocitos beach). In case you don t know it, Montevideo is on the Northern (or Eastern) shore of R o de la Plata, the widest river in the world (up to 300Km wide, with current and non-salty water). But most important for some Debian contributors: You can even come here by boat! That first evening, we received Ilu, who was in Uruguay by chance for other issues (and we were very happy about it!) and a young and enthusiastic Uruguayan, Felipe, interested in getting involved in Debian. We spent the evening talking about life, the universe and everything Which was a bit tiring, as I had to interface between Spanish and English, talking with two friends that didn t share a common language On Thursday morning, I went out for an early walk at the beach. And lets say, if only just for the narrative, that I found a lost penguin emerging from R o de la Plata! For those that don t know (who d be most of you, as he has not been seen at Debian events for 15 years), that s Lisandro Dami n Nicanor P rez Meyer (or just lisandro), long-time maintainer of the Qt ecosystem, and one of our embedded world extraordinaires. So, after we got him dry and fed him fresh river fishes, he gave us a great impromptu talk about understanding and finding our way around the Device Tree Source files for development boards and similar machines, mostly in the ARM world. From Argentina, we also had Emanuel (eamanu) crossing all the way from La Rioja. I spent most of our first workday getting my laptop in shape to be useful as the driver for my online class on Thursday (which is no small feat people that know the particularities of my much loved ARM-based laptop will understand), and running a set of tests again on my Raspberry Pi labortory, which I had not updated in several months. I am happy to say we are also finally also building Raspberry images for Trixie (Debian 13, Testing)! Sadly, I managed to burn my USB-to-serial-console (UART) adaptor, and could neither test those, nor the oldstable ones we are still building (and will probably soon be dropped, if not for anything else, to save disk space). We enjoyed a lot of socialization time. An important highlight of the conference for me was that we reconnected with a long-lost DD, Eduardo Tr pani, and got him interested in getting involved in the project again! This second day, another local Uruguayan, Mauricio, joined us together with his girlfriend, Alicia, and Felipe came again to hang out with us. Sadly, we didn t get photographic evidence of them (nor the permission to post it). The nice house Santiago got for us was very well equipped for a miniDebConf. There were a couple of rounds of pool played by those that enjoyed it (I was very happy just to stand around, take some photos and enjoy the atmosphere and the conversation). Today (Saturday) is the last full-house day of miniDebConf; tomorrow we will be leaving the house by noon. It was also a very productive day! We had a long, important conversation about an important discussion that we are about to present on debian-vote@lists.debian.org. It has been a great couple of days! Sadly, it s coming to an end But this at least gives me the opportunity (and moral obligation!) to write a long blog post. And to thank Santiago for organizing this, and Debian, for sponsoring our trip, stay, foods and healthy enjoyment!

6 October 2023

Emanuele Rocca: Custom Debian Installer and Kernel on a USB stick

There are many valid reasons to create a custom Debian Installer image. You may need to pass some special arguments to the kernel, use a different GRUB version, automate the installation by means of preseeding, use a custom kernel, or modify the installer itself.
If you have a EFI system, which is probably the case in 2023, there is no need to learn complex procedures in order to create a custom Debian Installer stick.
The source of many frustrations is that the ISO format for CDs/DVDs is read-only, but you can just create a VFAT filesystem on a USB stick, copy all ISO contents onto the stick itself, and modify things at will.

Create a writable USB stick
First create a FAT32 filesystem on the removable device and mount it. The device is sdX in the example.
$ sudo parted --script /dev/sdX mklabel msdos
$ sudo parted --script /dev/sdX mkpart primary fat32 0% 100%
$ sudo mkfs.vfat /dev/sdX1
$ sudo mount /dev/sdX1 /mnt/data/
Then copy to the USB stick the installer ISO you would like to modify, debian-testing-amd64-netinst.iso here.
$ sudo kpartx -v -a debian-testing-amd64-netinst.iso
# Mount the first partition on the ISO and copy its contents to the stick
$ sudo mount /dev/mapper/loop0p1 /mnt/cdrom/
$ sudo rsync -av /mnt/cdrom/ /mnt/data/
$ sudo umount /mnt/cdrom
# Same story with the second partition on the ISO
$ sudo mount /dev/mapper/loop0p2 /mnt/cdrom/
$ sudo rsync -av /mnt/cdrom/ /mnt/data/
$ sudo umount /mnt/cdrom
$ sudo kpartx -d debian-testing-amd64-netinst.iso
$ sudo umount /mnt/data
Now try booting from the USB stick just to verify that everything went well and we can start customizing the image.

Boot loader, preseeding, installer hacks
The easiest things we can change now are the shim, GRUB, and GRUB s configuration. The USB stick contains the shim under /EFI/boot/bootx64.efi, while GRUB is at /EFI/boot/grubx64.efi. This means that if you want to test a different shim / GRUB version, you just replace the relevant files. That s it. Take for example /usr/lib/grub/x86_64-efi/monolithic/grubx64.efi from the package grub-efi-amd64-bin, or the signed version from grub-efi-amd64-signed and copy them under /EFI/boot/grubx64.efi. Or perhaps you want to try out systemd-boot? Then take /usr/lib/systemd/boot/efi/systemd-bootx64.efi from the package systemd-boot-efi, copy it to /EFI/boot/bootx64.efi and you re good to go. Figuring out the right systemd-boot configuration needed to start the Installer is left as an exercise.
By editing /boot/grub/grub.cfg you can pass arbitrary arguments to the kernel and the Installer itself. See the official Installation Guide for a comprehensive list of boot parameters.
One very commong thing to do is automating the installation using a preseed file. Add the following to the kernel command line: preseed/file=/cdrom/preseed.cfg and create a /preseed.cfg file on the USB stick. As a little example:
d-i time/zone select Europe/Rome
d-i passwd/root-password this-is-the-root-password
d-i passwd/root-password-again this-is-the-root-password
d-i passwd/user-fullname string Emanuele Rocca
d-i passwd/username string ema
d-i passwd/user-password password lol-haha-uh
d-i passwd/user-password-again password lol-haha-uh
d-i apt-setup/no_mirror boolean true
d-i popularity-contest/participate boolean true
tasksel tasksel/first multiselect standard
See Steve McIntyre s awesome page with the full list of available settings and their description: https://preseed.einval.com/debian-preseed/.
Two noteworthy settings are early_command and late_command. They can be used to execute arbitrary commands and provide thus extreme flexibility! You can go as far as replacing parts of the installer with a sed command, or maybe wgetting an entirely different file. This is a fairly easy way to test minor Installer patches. As an example, I ve once used this to test a patch to grub-installer:
d-i partman/early_command string wget https://people.debian.org/~ema/grub-installer-1035085-1 -O /usr/bin/grub-installer
Finally, the initrd contains all early stages of the installer. It s easy to unpack it, modify whatever component you like, and repack it. Say you want to change a given udev rule:
$ mkdir /tmp/new-initrd
$ cd /tmp/new-initrd
$ zstdcat /mnt/data/install.a64/initrd.gz   sudo cpio -id
$ vi lib/udev/rules.d/60-block.rules
$ find .   cpio -o -H newc   zstd --stdout > /mnt/data/install.a64/initrd.gz

Custom udebs
From a basic architectural standpoint the Debian Installer can be seen as an initrd that loads a series of special Debian packages called udebs. In the previous section we have seen how to (ab)use early_command to replace one of the scripts used by the Installer, namely grub-installer. It turns out that such script is installed by a udeb, so let s do things right and build a new Installer ISO with our custom grub udeb.
Fetch the code for the grub-installer udeb, make your changes and build it with a classic dpkg-buildpackage -rfakeroot.
Then get the Installer code and install all dependencies:
$ git clone https://salsa.debian.org/installer-team/debian-installer/
$ cd debian-installer/
$ sudo apt build-dep .
Now add the grub-installer udeb to the localudebs directory and create a new netboot image:
$ cp /path/to/grub-installer_1.198_arm64.udeb build/localudebs/
$ cd build
$ fakeroot make clean_netboot build_netboot
Give it some time, soon enough you ll have a brand new ISO to test under dest/netboot/mini.iso.

Custom kernel
Perhaps there s a kernel configuration option you need to enable, or maybe you need a more recent kernel version than what is available in sid.
The Debian Linux Kernel Handbook has all the details for how to do things properly, but here s a quick example.
Get the Debian kernel packaging from salsa and generate the upstream tarball:
$ git clone https://salsa.debian.org/kernel-team/linux/
$ ./debian/bin/genorig.py https://git.kernel.org/pub/scm/linux/kernel/git/stable/linux-stable.git
For RC kernels use the repo from Linus instead of linux-stable.
Now do your thing, for instance change a config setting by editing debian/config/amd64/config. Don t worry about where you put it in the file, there s a tool from https://salsa.debian.org/kernel-team/kernel-team to fix that:
$ /path/to/kernel-team/utils/kconfigeditor2/process.py .
Now build your kernel:
$ export MAKEFLAGS=-j$(nproc)
$ export DEB_BUILD_PROFILES='pkg.linux.nokerneldbg pkg.linux.nokerneldbginfo pkg.linux.notools nodoc'
$ debian/rules orig
$ debian/rules debian/control
$ dpkg-buildpackage -b -nc -uc
After some time, if everything went well, you should get a bunch of .deb files as well as a .changes file, linux_6.6~rc3-1~exp1_arm64.changes here. To generate the udebs used by the Installer you need to first get a linux-signed .dsc file, and then build it with sbuild in this example:
$ /path/to/kernel-team/scripts/debian-test-sign linux_6.6~rc3-1~exp1_arm64.changes
$ sbuild --dist=unstable --extra-package=$PWD linux-signed-arm64_6.6~rc3+1~exp1.dsc
Excellent, now you should have a ton of .udebs. To build a custom installer image with this kernel, copy them all under debian-installer/build/localudebs/ and then run fakeroot make clean_netboot build_netboot as described in the previous section. In case you are trying to use a different kernel version from what is currently in sid, you will have to install the linux-image package on the system building the ISO, and change LINUX_KERNEL_ABI in build/config/common. The linux-image dependency in debian/control probably needs to be tweaked as well.
That s it, the new Installer ISO should boot with your custom kernel!
There is going to be another minor obstacle though, as anna will complain that your new kernel cannot be found in the archive. Copy the kernel udebs you have built onto a vfat formatted USB stick, switch to a terminal, and install them all with udpkg:
~ # udpkg -i *.udeb
Now the installation should proceed smoothly.

27 September 2023

Bits from Debian: New Debian Developers and Maintainers (July and August 2023)

The following contributors got their Debian Developer accounts in the last two months: The following contributors were added as Debian Maintainers in the last two months: Congratulations!

5 August 2023

Bits from Debian: Debian Project Bits Volume 1, Issue 1


Debian Project Bits Volume 1, Issue 1 August 05, 2023 Welcome to the inaugural issue of Debian Project Bits! Those remembering the Debian Weekly News (DwN) will recognize some of the sections here which served as our inspiration. Debian Project Bits posts will allow for a faster turnaround of some project news on a monthly basis. The Debian Micronews service will continue to share shorter news items, the Debian Project News remains as our official newsletter which may move to a biannual archive format. News Debian Day The Debian Project was officially founded by Ian Murdock on August 16, 1993. Since then we have celebrated our Anniversary of that date each year with events around the world. We would love it if you could join our revels this very special year as we have the honor of turning 30! Attend or organize a local Debian Day celebration. You're invited to plan your own event: from Bug Squashing parties to Key Signing parties, Meet-Ups, or any type of social event whether large or small. And be sure to check our Debian reimbursement How To if you need such resources. You can share your days, events, thoughts, or notes with us and the rest of the community with the #debianday tag that will be used across most social media platforms. See you then! Events: Upcoming and Reports Upcoming Debian 30 anos The Debian Brasil Community is organizing the event Debian 30 anos to celebrate the 30th anniversary of the Debian Project. From August 14 to 18, between 7pm and 22pm (UTC-3) contributors will talk online in Portuguese and we will live stream on Debian Brasil YouTube channel. DebConf23: Debian Developers Camp and Conference The 2023 Debian Developers Camp (DebCamp) and Conference (DebConf23) will be hosted this year in Infopark, Kochi, India. DebCamp is slated to run from September 3 through 9, immediately followed by the larger DebConf, September 10 through 17. If you are planning on attending the conference this year, now is the time to ensure your travel documentation, visa information, bursary submissions, papers and relevant equipment are prepared. For more information contact: debconf@debconf. MiniDebConf Cambridge 2023 There will be a MiniDebConf held in Cambridge, UK, hosted by ARM for 4 days in November: 2 days for a mini-DebCamp (Thu 23 - Fri 24), with space for dedicated development / sprint / team meetings, then two days for a more regular MiniDebConf (Sat 25 - Sun 26) with space for more general talks, up to 80 people. Reports During the last months, the Debian Community has organized some Bug Squashing Parties:
Tilburg, Netherlands. October 2022. St-Cergue, Switzerland. January 2023 Montreal, Canada. February 2023 In January, Debian India hosted the MiniDebConf Tamil Nadu in Viluppuram, Tamil Nadu, India (Sat 28 - Sun 26). The following month, the MiniDebConf Portugal 2023 was held in Lisbon (12 - 16 February 2023). These events, seen as a stunning success by some of their attendees, demonstrate the vitality of our community.
Debian Brasil Community at Campus Party Brazil 2023 Another edition of Campus Party Brazil took place in the city of S o Paulo between July 25th and 30th. And one more time the Debian Brazil Community was present. During the days in the available space, we carry out some activities such as: For more info and a few photos, check out the organizers' report. MiniDebConf Bras lia 2023 From May 25 to 27, Bras lia hosted the MiniDebConf Bras lia 2023. This gathering was composed of various activities such as talks, workshops, sprints, BSPs (Bug Squashing Party), key signings, social events, and hacking, aimed to bring the community together and celebrate the world's largest Free Software project: Debian. For more information please see the full report written by the organizers. Debian Reunion Hamburg 2023 This year the annual Debian Reunion Hamburg was held from Tuesday 23 to 30 May starting with four days of hacking followed by two days of talks, and then two more days of hacking. As usual, people - more than forty-five attendees from Germany, Czechia, France, Slovakia, and Switzerland - were happy to meet in person, to hack and chat together, and much more. If you missed the live streams, the video recordings are available. Translation workshops from the pt_BR team The Brazilian translation team, debian-l10n-portuguese, had their first workshop of 2023 in February with great results. The workshop was aimed at beginners, working in DDTP/DDTSS. For more information please see the full report written by the organizers. And on June 13 another workshop took place to translate The Debian Administrator's Handbook). The main goal was to show beginners how to collaborate in the translation of this important material, which has existed since 2004. The manual's translations are hosted on Weblate. Releases Stable Release Debian 12 bookworm was released on June 10, 2023. This new version becomes the stable release of Debian and moves the prior Debian 11 bullseye release to oldstable status. The Debian community celebrated the release with 23 Release Parties all around the world. Bookworm's first point release 12.1 address miscellaneous bug fixes affecting 88 packages, documentation, and installer updates was made available on July 22, 2023. RISC-V support riscv64 has recently been added to the official Debian architectures for support of 64-bit little-endian RISC-V hardware running the Linux kernel. We expect to have full riscv64 support in Debian 13 trixie. Updates on bootstrap, build daemon, porterbox, and development progress were recently shared by the team in a Bits from the Debian riscv64 porters post. non-free-firmware The Debian 12 bookworm archive now includes non-free-firmware; please be sure to update your apt sources.list if your systems requires such components for operation. If your previous sources.list included non-free for this purpose it may safely be removed. apt sources.list The Debian archive holds several components: Example of the sources.list file
deb http://deb.debian.org/debian bookworm main
deb-src http://deb.debian.org/debian bookworm main
deb http://deb.debian.org/debian-security/ bookworm-security main
deb-src http://deb.debian.org/debian-security/ bookworm-security main
deb http://deb.debian.org/debian bookworm-updates main
deb-src http://deb.debian.org/debian bookworm-updates main
Example using the components:
deb http://deb.debian.org/debian bookworm main non-free-firmware
deb-src http://deb.debian.org/debian bookworm main non-free-firmware
deb http://deb.debian.org/debian-security/ bookworm-security main non-free-firmware
deb-src http://deb.debian.org/debian-security/ bookworm-security main non-free-firmware
deb http://deb.debian.org/debian bookworm-updates main non-free-firmware
deb-src http://deb.debian.org/debian bookworm-updates main non-free-firmware
For more information and guidelines on proper configuration of the apt source.list file please see the Configuring Apt Sources - Wiki page. Inside Debian New Debian Members Please welcome the following newest Debian Project Members: To find out more about our newest members or any Debian Developer, look for them on the Debian People list. Security Debian's Security Team releases current advisories on a daily basis. Some recently released advisories concern these packages: trafficserver Several vulnerabilities were discovered in Apache Traffic Server, a reverse and forward proxy server, which could result in information disclosure or denial of service. asterisk A flaw was found in Asterisk, an Open Source Private Branch Exchange. A buffer overflow vulnerability affects users that use PJSIP DNS resolver. This vulnerability is related to CVE-2022-24793. The difference is that this issue is in parsing the query record parse_query(), while the issue in CVE-2022-24793 is in parse_rr(). A workaround is to disable DNS resolution in PJSIP config (by setting nameserver_count to zero) or use an external resolver implementation instead. flask It was discovered that in some conditions the Flask web framework may disclose a session cookie. chromium Multiple security issues were discovered in Chromium, which could result in the execution of arbitrary code, denial of service or information disclosure. Other Popular packages gpgv - GNU privacy guard signature verification tool. 99,053 installations. gpgv is actually a stripped-down version of gpg which is only able to check signatures. It is somewhat smaller than the fully-blown gpg and uses a different (and simpler) way to check that the public keys used to make the signature are valid. There are no configuration files and only a few options are implemented. dmsetup - Linux Kernel Device Mapper userspace library. 77,769 installations. The Linux Kernel Device Mapper is the LVM (Linux Logical Volume Management) Team's implementation of a minimalistic kernel-space driver that handles volume management, while keeping knowledge of the underlying device layout in user-space. This makes it useful for not only LVM, but software raid, and other drivers that create "virtual" block devices. sensible-utils - Utilities for sensible alternative selection. 96,001 daily users. This package provides a number of small utilities which are used by programs to sensibly select and spawn an appropriate browser, editor, or pager. The specific utilities included are: sensible-browser sensible-editor sensible-pager. popularity-contest - The popularity-contest package. 90,758 daily users. The popularity-contest package sets up a cron job that will periodically anonymously submit to the Debian developers statistics about the most used Debian packages on the system. This information helps Debian make decisions such as which packages should go on the first CD. It also lets Debian improve future versions of the distribution so that the most popular packages are the ones which are installed automatically for new users. New and noteworthy packages in unstable Toolkit for scalable simulation of distributed applications SimGrid is a toolkit that provides core functionalities for the simulation of distributed applications in heterogeneous distributed environments. SimGrid can be used as a Grid simulator, a P2P simulator, a Cloud simulator, a MPI simulator, or a mix of all of them. The typical use-cases of SimGrid include heuristic evaluation, application prototyping, and real application development and tuning. This package contains the dynamic libraries and runtime. LDraw mklist program 3D CAD programs and rendering programs using the LDraw parts library of LEGO parts rely on a file called parts.lst containing a list of all available parts. The program ldraw-mklist is used to generate this list from a directory of LDraw parts. Open Lighting Architecture - RDM Responder Tests The DMX512 standard for Digital MultipleX is used for digital communication networks commonly used to control stage lighting and effects. The Remote Device Management protocol is an extension to DMX512, allowing bi-directional communication between RDM-compliant devices without disturbing other devices on the same connection. The Open Lighting Architecture (OLA) provides a plugin framework for distributing DMX512 control signals. The ola-rdm-tests package provides an automated way to check protocol compliance in RDM devices. parsec-service Parsec is an abstraction layer that can be used to interact with hardware-backed security facilities such as the Hardware Security Module (HSM), the Trusted Platform Module (TPM), as well as firmware-backed and isolated software services. The core component of Parsec is the security service, provided by this package. The service is a background process that runs on the host platform and provides connectivity with the secure facilities of that host, exposing a platform-neutral API that can be consumed into different programming languages using a client library. For a client library implemented in Rust see the package librust-parsec-interface-dev. Simple network calculator and lookup tool Process and lookup network addresses from the command line or CSV with ripalc. Output has a variety of customisable formats. High performance, open source CPU/GPU miner and RandomX benchmark XMRig is a high performance, open source, cross platform RandomX, KawPow, CryptoNight, and GhostRider unified CPU/GPU miner and RandomX benchmark. Ping, but with a graph - Rust source code This package contains the source for the Rust gping crate, packaged by debcargo for use with cargo and dh-cargo. Once upon a time in Debian: 2014-07-31 The Technical committee choose libjpeg-turbo as the default JPEG decoder. 2010-08-01 DebConf10 starts New York City, USA 2007-08-05 Debian Maintainers approved by vote 2009-08-05 Jeff Chimene files bug #540000 against live-initramfs. Calls for help The Publicity team calls for volunteers and help! Your Publicity team is asking for help from you our readers, developers, and interested parties to contribute to the Debian news effort. We implore you to submit items that may be of interest to our community and also ask for your assistance with translations of the news into (your!) other languages along with the needed second or third set of eyes to assist in editing our work before publishing. If you can share a small amount of your time to aid our team which strives to keep all of us informed, we need you. Please reach out to us via IRC on #debian-publicity on OFTC.net, or our public mailing list, or via email at press@debian.org for sensitive or private inquiries.

13 July 2023

Emmanuel Kasper: Debian 11 to Debian 12 (Bookworm) Upgrade Report

Laptop + Workstation My workstation was initially installed with Debian 8 back in the day, so I might have carried a lot of configuration cruft.
Indeed. I followed the recommended upgrades documentation (apt upgrade --without-new-pkgs followed by apt full-upgrade). And when executing apt full-upgrade I had the following error:
Preparing to unpack .../71-python3-numpy_1%3a1.24.2-1_amd64.deb ...
Unpacking python3-numpy (1:1.24.2-1) over (1:1.19.5-1) ...
dpkg: error processing archive /tmp/apt-dpkg-install-ibI85v/71-python3-numpy_1%3a1.24.2-1_amd64.deb (--unpack):
 trying to overwrite '/usr/bin/f2py', which is also in package python-numpy 1:1.16.5-5
Deleting the python-numpy package and resuming the upgrade with apt --fix-broken install followed by apt full-upgrade allowed the upgrade to complete successfully. This was already metioned in a Debian bug report and would have been avoided if I had purged the locally obsolete packages after upgrading to Debian 11. On laptop and workstation, after the upgrade, for unclear reasons, the gnome3 user extensions were disabled. I reenabled the extensions manually with
gsettings set org.gnome.shell disable-user-extensions false
Finally podman, had a major upgrade from 3 to 4, and a backward-incompatible configuration change. If a custom configuration file was in place in /etc/containers/storage.conf to override the default storage options, you need now to add the following stanza
[storage]
runroot="/run/containers/storage"
graphRoot="/var/lib/containers/storage"
in that file.
Otherwise you ll get the error Failed to obtain podman configuration: runroot must be set when running any podman command. This was discussed upstream. Cloud server (VM) Everything worked flawlessly, nothing to report. Conclusion Again a great Debian release, very happy that I could update three systems with ten thousands of packages with so little fuss. For my small home server running RHEL 8 (with the no cost sub) I will do a reinstall on newer hardware.

4 May 2023

Emanuele Rocca: UEFI Secure Boot on the Raspberry Pi

UPDATE: this post unexpectedly ended up on Hacker News and I received a lot of comments. The two most important points being made are (1) that Secure Boot on the RPi as described here is not actually truly secure. An attacker who successfully gained root could just mount the firmware partition and either add their own keys to the EFI variable store or replace the firmware altogether with a malicious one. (2) The TianCore firmware cannot be used instead of the proprietary blob as I mentioned. What truly happens is that the proprietary blob is loaded onto the VideoCore cores, then TianoCore is loaded onto the ARM cores. Thanks for the corrections.

A port of the free software TianoCore UEFI firmware can be used instead of the proprietary boot blob to boot the Raspberry Pi. This allows to install Debian on the RPi with the standard Debian Installer, and it also makes it possible to use UEFI Secure Boot. Note that Secure Boot had been broken on arm64 for a while, but it s now working in Bookworm!.

Debian Installer UEFI boot
To begin, you ll need to download the appropriate firmware files for the RPi3 or RPi4. I ve got a Raspberry Pi 3 Model B+ myself, so the rest of this document will assume an RPi3 is being installed.
Plug the SD card you are going to use as the RPi storage device into another system. Say it shows up as /dev/sdf. Then:
# Create an msdos partition table
$ sudo parted --script /dev/sdf mklabel msdos
# Create, format, and label a 10M fat32 partition
$ sudo parted --script /dev/sdf mkpart primary fat32 0% 10M
$ sudo mkfs.vfat /dev/sdf1
$ sudo fatlabel /dev/sdf1 RPI-FW
# Get the UEFI firmware onto the SD card
$ sudo mount /dev/sdf1 /mnt/data/
$ sudo unzip Downloads/RPi3_UEFI_Firmware_v1.38.zip -d /mnt/data/
$ sudo umount /mnt/data
At this point, the SD card can be used to boot the RPi, and you ll get a UEFI firmware.
Download the Bookworm RC 2 release of the installer, copy it to a USB stick as described in the Installation Guide, and boot your RPi from the stick. If for some reason booting from the stick does not happen automatically, enter the firmware interface with ESC and choose the USB stick from Boot Manager.
Proceed with the installation as normal, paying attention not to modify the firmware partition labeled RPI-FW. I initially thought it would be nice to reuse the firmware partition as ESP partition as well. However, setting the esp flag on makes the RPi unbootable. Either configuring the partition as ESP in debian-installer, or manually with sudo parted --script /dev/sda set 1 esp on, breaks boot. In case you accidentally do that, set it back to off and the edk2 firmware will boot again.
What I suggest doing in terms of partitioning is: (1) leave the 10M partition created above for the firmware alone, and (2) create another 512M or so ESP partition for EFI boot.
The installation should go smoothly till the end, but rebooting won t work. Doh. This is because of an important gotcha: the Raspberry Pi port of the TianoCore firmware we are using does not support setting UEFI variables persistently from a "High Level Operating System (HLOS)", which is the debian-installer in our case. Persistently is the keyword there: variables can be set and modified regularly with efibootmgr or otherwise, but crucially the modifications do not survive reboot. However, changes made from the firmware interface itself are persistent. So enter the firmware with ESC right after booting the RPi, select Boot Maintenance Manager Boot Options Add Boot Option Your SD card Your ESP partition EFI debian shimaa64.efi. Choose a creative name for your boot entry (eg: "debian"), save and exit the firmware interface. Bookworm should be booting fine at this point!

Enabling Secure Boot
Although the TianoCore firmware does support Secure Boot, there are no keys enrolled by default. To add the required keys, copy PK-0001.der, DB-0001.der, DB-0002.der, KEK-0001.der, and KEK-0002.der to a FAT32 formatted USB stick.
Here s a summary of the Subject field for each of the above:
PK-0001.der.pem
        Subject: O = Debian, CN = Debian UEFI Secure Boot (PK/KEK key), emailAddress = debian-devel@lists.debian.org
DB-0001.der.pem
        Subject: C = US, ST = Washington, L = Redmond, O = Microsoft Corporation, CN = Microsoft Windows Production PCA 2011
DB-0002.der.pem
        Subject: C = US, ST = Washington, L = Redmond, O = Microsoft Corporation, CN = Microsoft Corporation UEFI CA 2011
KEK-0001.der.pem
        Subject: O = Debian, CN = Debian UEFI Secure Boot (PK/KEK key), emailAddress = debian-devel@lists.debian.org
KEK-0002.der.pem
        Subject: C = US, ST = Washington, L = Redmond, O = Microsoft Corporation, CN = Microsoft Corporation KEK CA 2011
Plug the stick into the RPi, boot and enter the firmware interface with ESC. Select Device Manager Secure Boot Configuration Secure Boot Mode choose Custom Mode Custom Secure Boot Options PK Options Enroll PK choose PK-0001.der. Do the same for DB Options, this time choose DB-0001.der and DB-0002.der. As you may have guessed by now, the same must be done for KEK Options, but adding KEK-0001.der and KEK-0002.der. Save, exit, reboot. If everything went well, your RPi now has booted with Secure Boot enabled.
See https://wiki.debian.org/SecureBoot for the details on how to check whether Secure Boot has been enabled correctly and much more.

26 March 2023

Emanuele Rocca: EFI and Secure Boot Notes

To create a bootable EFI drive to use with QEMU, first make a disk image and create a vfat filesystem on it.
$ dd if=/dev/zero of=boot.img bs=1M count=512
$ sudo mkfs.vfat boot.img
By default, EFI firmwares boot a specific file under /efi/boot/. The name of such file depends on the architecture: for example, on 64 bit x86 systems it is bootx64.efi, while on ARM it is bootaa64.efi.
Copy /usr/lib/grub/x86_64-efi/monolithic/grubx64.efi from package grub-efi-amd64-bin to /efi/boot/bootx64.efi on the boot image, and that should be enough to start GRUB.
# mount boot.img /mnt/
# mkdir -p /mnt/efi/boot/
# cp /usr/lib/grub/x86_64-efi/monolithic/grubx64.efi /mnt/efi/boot/bootx64.efi
# umount /mnt/
Now get the x86 firmware from package ovmf and start qemu:
$ cp /usr/share/OVMF/OVMF_CODE.fd /tmp/code.fd
$ qemu-system-x86_64 -drive file=/tmp/code.fd,format=raw,if=pflash -cdrom boot.img
GRUB looks fine, but it would be good to have a kernel to boot. Let s add one to boot.img.
# mount boot.img /mnt
# cp vmlinuz-6.1.0-7-amd64 /mnt/vmlinuz
# umount /mnt/
Boot with qemu again, but this time pass -m 1G. The default amount of memory is not enough to boot.
$ qemu-system-x86_64 -drive file=/tmp/code.fd,format=raw,if=pflash -cdrom boot.img -m 1G
At the grub prompt, type the following to boot:
grub> linux /vmlinuz
grub> boot
The kernel will start and reach the point of trying to mount the root fs. This is great but it would now be useful to have some sort of shell access in order to look around. Let s add an initrd!
# mount boot.img /mnt
# cp initrd.img-6.1.0-7-amd64 /mnt/initrd
# umount /mnt/
There s the option of starting qemu in console, let s try that out. Start qemu with -nographic, and append console=ttyS0 to the kernel command line arguments.
$ qemu-system-x86_64 -drive file=/tmp/code.fd,format=raw,if=pflash -cdrom boot.img -m 1G -nographic
grub> linux /vmlinuz console=ttyS0
grub> initrd /initrd
grub> boot
If all went well we are now in the initramfs shell. We can now run commands! At this point we can see that the system has Secure boot disabled:
(initramfs) dmesg   grep secureboot
[    0.000000] secureboot: Secure boot disabled
In order to boot with Secure boot, we need:
  • a signed shim, grub, and kernel
  • the right EFI variables for Secure boot
The package shim-signed provides a shim signed with Microsoft s key, while grub-efi-amd64-signed has GRUB signed with Debian s key.
The signatures can be shown with sbverify --list:
$ sbverify --list /usr/lib/shim/shimx64.efi.signed
warning: data remaining[823184 vs 948768]: gaps between PE/COFF sections?
signature 1
image signature issuers:
 - /C=US/ST=Washington/L=Redmond/O=Microsoft Corporation/CN=Microsoft Corporation UEFI CA 2011
image signature certificates:
 - subject: /C=US/ST=Washington/L=Redmond/O=Microsoft Corporation/CN=Microsoft Windows UEFI Driver Publisher
   issuer:  /C=US/ST=Washington/L=Redmond/O=Microsoft Corporation/CN=Microsoft Corporation UEFI CA 2011
 - subject: /C=US/ST=Washington/L=Redmond/O=Microsoft Corporation/CN=Microsoft Corporation UEFI CA 2011
   issuer:  /C=US/ST=Washington/L=Redmond/O=Microsoft Corporation/CN=Microsoft Corporation Third Party Marketplace Root
Similarly for GRUB and the kernel:
$ sbverify --list /usr/lib/grub/x86_64-efi-signed/grubx64.efi.signed
signature 1
image signature issuers:
 - /CN=Debian Secure Boot CA
image signature certificates:
 - subject: /CN=Debian Secure Boot Signer 2022 - grub2
   issuer:  /CN=Debian Secure Boot CA
$ sbverify --list /mnt/vmlinuz
signature 1
image signature issuers:
 - /CN=Debian Secure Boot CA
image signature certificates:
 - subject: /CN=Debian Secure Boot Signer 2022 - linux
   issuer:  /CN=Debian Secure Boot CA
Let s use the signed shim and grub in the boot image:
# mount boot.img /mnt
# cp /usr/lib/shim/shimx64.efi.signed /mnt/efi/boot/bootx64.efi
# cp /usr/lib/grub/x86_64-efi-signed/grubx64.efi.signed /mnt/efi/boot/grubx64.efi
# umount /mnt
And start QEMU with the appropriate EFI variables for Secure boot:
$ cp /usr/share/OVMF/OVMF_VARS.ms.fd /tmp/vars.fd
$ qemu-system-x86_64 -drive file=/tmp/code.fd,format=raw,if=pflash -drive file=/tmp/vars.fd,format=raw,if=pflash -cdrom boot.img -m 1G -nographic
We can double-check in the firmware settings if Secure boot is indeed enabled. At the GRUB prompt, type fwsetup:
grub> fwsetup
Check under "Device Manager" "Secure Boot Configuration" that "Attempt Secure Boot" is selected, then boot from GRUB as before. If all went well, the kernel should confirm that we have booted with Secure boot:
(initramfs) dmesg   grep secureboot
[    0.000000] secureboot: Secure boot enabled

15 March 2023

Emanuele Rocca: Disposable Debian VMs with debvm

Some notes on using debvm, an amazing piece of software I ve started using only recently.
Create a new virtual machine:
$ debvm-create
You now have a virtual machine with Debian Sid of your host native architecture (probably amd64). The image file is called rootfs.ext4. You ve got 1G of disk space in the VM.
You can now just run the VM! You will be automatically logged is as root.
$ debvm-run
Experiment in the VM, run all the sort of tests you have in mind. For example, one thing I commonly do is verifying that things work in a clean environment, as opposed to "on my machine".
If anything goes wrong, or if you just want to repeat the test: shutdown the guest, remove rootfs.ext4, and start again with debvm-create.
Now, especially if you intend creating and recreating VMs multiple times, it helps to use a local apt mirror as a cache to avoid fetching all the required packages from the internet over and over again. Install apt-cacher-ng on your host machine and point debvm-create at it:
$ debvm-create -- http://10.0.3.1:3142/debian
The additional options after -- are passed to mmdebstrap. In this case we re specifying http://10.0.3.1:3142/debian as the URL of our local apt mirror. It is going to be used both for image creation and as the only entry in /etc/apt/sources.list on the guest. This is the reason for using 10.0.3.1, the IP address of the lxcbr0 interface used by qemu, instead of 127.0.0.1: to make sure that the guest VM has access to it too.
For a slightly more advanced example, we now want to:
  • run a arm64 VM
  • have more disk space availably, say 2G
  • install additional packages (curl and locales)
  • allow SSH as root with the given public keys, in this example the authorized_keys installed on the host
  • start the VM in the background with no console output
$ debvm-create -a arm64 -o sid-arm64.ext4 -z 2G -k ~/.ssh/authorized_keys -- http://10.0.3.1:3142/debian --include curl,locales
Start the VM:
$ debvm-run -i sid-arm64.ext4 -s 2222 -g -- -display none &
SSH into the guest:
$ ssh -o NoHostAuthenticationForLocalhost=yes -p 2222 root@127.0.0.1
Enjoy!

13 March 2023

Antoine Beaupr : Framework 12th gen laptop review

The Framework is a 13.5" laptop body with swappable parts, which makes it somewhat future-proof and certainly easily repairable, scoring an "exceedingly rare" 10/10 score from ifixit.com. There are two generations of the laptop's main board (both compatible with the same body): the Intel 11th and 12th gen chipsets. I have received my Framework, 12th generation "DIY", device in late September 2022 and will update this page as I go along in the process of ordering, burning-in, setting up and using the device over the years. Overall, the Framework is a good laptop. I like the keyboard, the touch pad, the expansion cards. Clearly there's been some good work done on industrial design, and it's the most repairable laptop I've had in years. Time will tell, but it looks sturdy enough to survive me many years as well. This is also one of the most powerful devices I ever lay my hands on. I have managed, remotely, more powerful servers, but this is the fastest computer I have ever owned, and it fits in this tiny case. It is an amazing machine. On the downside, there's a bit of proprietary firmware required (WiFi, Bluetooth, some graphics) and the Framework ships with a proprietary BIOS, with currently no Coreboot support. Expect to need the latest kernel, firmware, and hacking around a bunch of things to get resolution and keybindings working right. Like others, I have first found significant power management issues, but many issues can actually be solved with some configuration. Some of the expansion ports (HDMI, DP, MicroSD, and SSD) use power when idle, so don't expect week-long suspend, or "full day" battery while those are plugged in. Finally, the expansion ports are nice, but there's only four of them. If you plan to have a two-monitor setup, you're likely going to need a dock. Read on for the detailed review. For context, I'm moving from the Purism Librem 13v4 because it basically exploded on me. I had, in the meantime, reverted back to an old ThinkPad X220, so I sometimes compare the Framework with that venerable laptop as well. This blog post has been maturing for months now. It started in September 2022 and I declared it completed in March 2023. It's the longest single article on this entire website, currently clocking at about 13,000 words. It will take an average reader a full hour to go through this thing, so I don't expect anyone to actually do that. This introduction should be good enough for most people, read the first section if you intend to actually buy a Framework. Jump around the table of contents as you see fit for after you did buy the laptop, as it might include some crucial hints on how to make it work best for you, especially on (Debian) Linux.

Advice for buyers Those are things I wish I would have known before buying:
  1. consider buying 4 USB-C expansion cards, or at least a mix of 4 USB-A or USB-C cards, as they use less power than other cards and you do want to fill those expansion slots otherwise they snag around and feel insecure
  2. you will likely need a dock or at least a USB hub if you want a two-monitor setup, otherwise you'll run out of ports
  3. you have to do some serious tuning to get proper (10h+ idle, 10 days suspend) power savings
  4. in particular, beware that the HDMI, DisplayPort and particularly the SSD and MicroSD cards take a significant amount power, even when sleeping, up to 2-6W for the latter two
  5. beware that the MicroSD card is what it says: Micro, normal SD cards won't fit, and while there might be full sized one eventually, it's currently only at the prototyping stage
  6. the Framework monitor has an unusual aspect ratio (3:2): I like it (and it matches classic and digital photography aspect ratio), but it might surprise you

Current status I have the framework! It's setup with a fresh new Debian bookworm installation. I've ran through a large number of tests and burn in. I have decided to use the Framework as my daily driver, and had to buy a USB-C dock to get my two monitors connected, which was own adventure. Update: Framework just (2023-03-23) just announced a whole bunch of new stuff: The recording is available in this video and it's not your typical keynote. It starts ~25 minutes late, audio is crap, lightning and camera are crap, clapping seems to be from whatever staff they managed to get together in a room, decor is bizarre, colors are shit. It's amazing.

Specifications Those are the specifications of the 12th gen, in general terms. Your build will of course vary according to your needs.
  • CPU: i5-1240P, i7-1260P, or i7-1280P (Up to 4.4-4.8 GHz, 4+8 cores), Iris Xe graphics
  • Storage: 250-4000GB NVMe (or bring your own)
  • Memory: 8-64GB DDR4-3200 (or bring your own)
  • WiFi 6e (AX210, vPro optional, or bring your own)
  • 296.63mm X 228.98mm X 15.85mm, 1.3Kg
  • 13.5" display, 3:2 ratio, 2256px X 1504px, 100% sRGB, >400 nit
  • 4 x USB-C user-selectable expansion ports, including
    • USB-C
    • USB-A
    • HDMI
    • DP
    • Ethernet
    • MicroSD
    • 250-1000GB SSD
  • 3.5mm combo headphone jack
  • Kill switches for microphone and camera
  • Battery: 55Wh
  • Camera: 1080p 60fps
  • Biometrics: Fingerprint Reader
  • Backlit keyboard
  • Power Adapter: 60W USB-C (or bring your own)
  • ships with a screwdriver/spludger
  • 1 year warranty
  • base price: 1000$CAD, but doesn't give you much, typical builds around 1500-2000$CAD

Actual build This is the actual build I ordered. Amounts in CAD. (1CAD = ~0.75EUR/USD.)

Base configuration
  • CPU: Intel Core i5-1240P (AKA Alder Lake P 8 4.4GHz P-threads, 8 3.2GHz E-threads, 16 total, 28-64W), 1079$
  • Memory: 16GB (1 x 16GB) DDR4-3200, 104$

Customization
  • Keyboard: US English, included

Expansion Cards
  • 2 USB-C $24
  • 3 USB-A $36
  • 2 HDMI $50
  • 1 DP $50
  • 1 MicroSD $25
  • 1 Storage 1TB $199
  • Sub-total: 384$

Accessories
  • Power Adapter - US/Canada $64.00

Total
  • Before tax: 1606$
  • After tax and duties: 1847$
  • Free shipping

Quick evaluation This is basically the TL;DR: here, just focusing on broad pros/cons of the laptop.

Pros

Cons
  • the 11th gen is out of stock, except for the higher-end CPUs, which are much less affordable (700$+)
  • the 12th gen has compatibility issues with Debian, followup in the DebianOn page, but basically: brightness hotkeys, power management, wifi, the webcam is okay even though the chipset is the infamous alder lake because it does not have the fancy camera; most issues currently seem solvable, and upstream is working with mainline to get their shit working
  • 12th gen might have issues with thunderbolt docks
  • they used to have some difficulty keeping up with the orders: first two batches shipped, third batch sold out, fourth batch should have shipped (?) in October 2021. they generally seem to keep up with shipping. update (august 2022): they rolled out a second line of laptops (12th gen), first batch shipped, second batch shipped late, September 2022 batch was generally on time, see this spreadsheet for a crowdsourced effort to track those supply chain issues seem to be under control as of early 2023. I got the Ethernet expansion card shipped within a week.
  • compared to my previous laptop (Purism Librem 13v4), it feels strangely bulkier and heavier; it's actually lighter than the purism (1.3kg vs 1.4kg) and thinner (15.85mm vs 18mm) but the design of the Purism laptop (tapered edges) makes it feel thinner
  • no space for a 2.5" drive
  • rather bright LED around power button, but can be dimmed in the BIOS (not low enough to my taste) I got used to it
  • fan quiet when idle, but can be noisy when running, for example if you max a CPU for a while
  • battery described as "mediocre" by Ars Technica (above), confirmed poor in my tests (see below)
  • no RJ-45 port, and attempts at designing ones are failing because the modular plugs are too thin to fit (according to Linux After Dark), so unlikely to have one in the future Update: they cracked that nut and ship an 2.5 gbps Ethernet expansion card with a realtek chipset, without any firmware blob (!)
  • a bit pricey for the performance, especially when compared to the competition (e.g. Dell XPS, Apple M1)
  • 12th gen Intel has glitchy graphics, seems like Intel hasn't fully landed proper Linux support for that chipset yet

Initial hardware setup A breeze.

Accessing the board The internals are accessed through five TorX screws, but there's a nice screwdriver/spudger that works well enough. The screws actually hold in place so you can't even lose them. The first setup is a bit counter-intuitive coming from the Librem laptop, as I expected the back cover to lift and give me access to the internals. But instead the screws is release the keyboard and touch pad assembly, so you actually need to flip the laptop back upright and lift the assembly off (!) to get access to the internals. Kind of scary. I also actually unplugged a connector in lifting the assembly because I lifted it towards the monitor, while you actually need to lift it to the right. Thankfully, the connector didn't break, it just snapped off and I could plug it back in, no harm done. Once there, everything is well indicated, with QR codes all over the place supposedly leading to online instructions.

Bad QR codes Unfortunately, the QR codes I tested (in the expansion card slot, the memory slot and CPU slots) did not actually work so I wonder how useful those actually are. After all, they need to point to something and that means a URL, a running website that will answer those requests forever. I bet those will break sooner than later and in fact, as far as I can tell, they just don't work at all. I prefer the approach taken by the MNT reform here which designed (with the 100 rabbits folks) an actual paper handbook (PDF). The first QR code that's immediately visible from the back of the laptop, in an expansion cord slot, is a 404. It seems to be some serial number URL, but I can't actually tell because, well, the page is a 404. I was expecting that bar code to lead me to an introduction page, something like "how to setup your Framework laptop". Support actually confirmed that it should point a quickstart guide. But in a bizarre twist, they somehow sent me the URL with the plus (+) signs escaped, like this:
https://guides.frame.work/Guide/Framework\+Laptop\+DIY\+Edition\+Quick\+Start\+Guide/57
... which Firefox immediately transforms in:
https://guides.frame.work/Guide/Framework/+Laptop/+DIY/+Edition/+Quick/+Start/+Guide/57
I'm puzzled as to why they would send the URL that way, the proper URL is of course:
https://guides.frame.work/Guide/Framework+Laptop+DIY+Edition+Quick+Start+Guide/57
(They have also "let the team know about this for feedback and help resolve the problem with the link" which is a support code word for "ha-ha! nope! not my problem right now!" Trust me, I know, my own code word is "can you please make a ticket?")

Seating disks and memory The "DIY" kit doesn't actually have that much of a setup. If you bought RAM, it's shipped outside the laptop in a little plastic case, so you just seat it in as usual. Then you insert your NVMe drive, and, if that's your fancy, you also install your own mPCI WiFi card. If you ordered one (which was my case), it's pre-installed. Closing the laptop is also kind of amazing, because the keyboard assembly snaps into place with magnets. I have actually used the laptop with the keyboard unscrewed as I was putting the drives in and out, and it actually works fine (and will probably void your warranty, so don't do that). (But you can.) (But don't, really.)

Hardware review

Keyboard and touch pad The keyboard feels nice, for a laptop. I'm used to mechanical keyboard and I'm rather violent with those poor things. Yet the key travel is nice and it's clickety enough that I don't feel too disoriented. At first, I felt the keyboard as being more laggy than my normal workstation setup, but it turned out this was a graphics driver issues. After enabling a composition manager, everything feels snappy. The touch pad feels good. The double-finger scroll works well enough, and I don't have to wonder too much where the middle button is, it just works. Taps don't work, out of the box: that needs to be enabled in Xorg, with something like this:
cat > /etc/X11/xorg.conf.d/40-libinput.conf <<EOF
Section "InputClass"
      Identifier "libinput touch pad catchall"
      MatchIsTouchpad "on"
      MatchDevicePath "/dev/input/event*"
      Driver "libinput"
      Option "Tapping" "on"
      Option "TappingButtonMap" "lmr"
EndSection
EOF
But be aware that once you enable that tapping, you'll need to deal with palm detection... So I have not actually enabled this in the end.

Power button The power button is a little dangerous. It's quite easy to hit, as it's right next to one expansion card where you are likely to plug in a cable power. And because the expansion cards are kind of hard to remove, you might squeeze the laptop (and the power key) when trying to remove the expansion card next to the power button. So obviously, don't do that. But that's not very helpful. An alternative is to make the power button do something else. With systemd-managed systems, it's actually quite easy. Add a HandlePowerKey stanza to (say) /etc/systemd/logind.conf.d/power-suspends.conf:
[Login]
HandlePowerKey=suspend
HandlePowerKeyLongPress=poweroff
You might have to create the directory first:
mkdir /etc/systemd/logind.conf.d/
Then restart logind:
systemctl restart systemd-logind
And the power button will suspend! Long-press to power off doesn't actually work as the laptop immediately suspends... Note that there's probably half a dozen other ways of doing this, see this, this, or that.

Special keybindings There is a series of "hidden" (as in: not labeled on the key) keybindings related to the fn keybinding that I actually find quite useful.
Key Equivalent Effect Command
p Pause lock screen xset s activate
b Break ? ?
k ScrLk switch keyboard layout N/A
It looks like those are defined in the microcontroller so it would be possible to add some. For example, the SysRq key is almost bound to fn s in there. Note that most other shortcuts like this are clearly documented (volume, brightness, etc). One key that's less obvious is F12 that only has the Framework logo on it. That actually calls the keysym XF86AudioMedia which, interestingly, does absolutely nothing here. By default, on Windows, it opens your browser to the Framework website and, on Linux, your "default media player". The keyboard backlight can be cycled with fn-space. The dimmer version is dim enough, and the keybinding is easy to find in the dark. A skinny elephant would be performed with alt PrtScr (above F11) KEY, so for example alt fn F11 b should do a hard reset. This comment suggests you need to hold the fn only if "function lock" is on, but that's actually the opposite of my experience. Out of the box, some of the fn keys don't work. Mute, volume up/down, brightness, monitor changes, and the airplane mode key all do basically nothing. They don't send proper keysyms to Xorg at all. This is a known problem and it's related to the fact that the laptop has light sensors to adjust the brightness automatically. Somehow some of those keys (e.g. the brightness controls) are supposed to show up as a different input device, but don't seem to work correctly. It seems like the solution is for the Framework team to write a driver specifically for this, but so far no progress since July 2022. In the meantime, the fancy functionality can be supposedly disabled with:
echo 'blacklist hid_sensor_hub'   sudo tee /etc/modprobe.d/framework-als-blacklist.conf
... and a reboot. This solution is also documented in the upstream guide. Note that there's another solution flying around that fixes this by changing permissions on the input device but I haven't tested that or seen confirmation it works.

Kill switches The Framework has two "kill switches": one for the camera and the other for the microphone. The camera one actually disconnects the USB device when turned off, and the mic one seems to cut the circuit. It doesn't show up as muted, it just stops feeding the sound. Both kill switches are around the main camera, on top of the monitor, and quite discreet. Then turn "red" when enabled (i.e. "red" means "turned off").

Monitor The monitor looks pretty good to my untrained eyes. I have yet to do photography work on it, but some photos I looked at look sharp and the colors are bright and lively. The blacks are dark and the screen is bright. I have yet to use it in full sunlight. The dimmed light is very dim, which I like.

Screen backlight I bind brightness keys to xbacklight in i3, but out of the box I get this error:
sep 29 22:09:14 angela i3[5661]: No outputs have backlight property
It just requires this blob in /etc/X11/xorg.conf.d/backlight.conf:
Section "Device"
    Identifier  "Card0"
    Driver      "intel"
    Option      "Backlight"  "intel_backlight"
EndSection
This way I can control the actual backlight power with the brightness keys, and they do significantly reduce power usage.

Multiple monitor support I have been able to hook up my two old monitors to the HDMI and DisplayPort expansion cards on the laptop. The lid closes without suspending the machine, and everything works great. I actually run out of ports, even with a 4-port USB-A hub, which gives me a total of 7 ports:
  1. power (USB-C)
  2. monitor 1 (DisplayPort)
  3. monitor 2 (HDMI)
  4. USB-A hub, which adds:
  5. keyboard (USB-A)
  6. mouse (USB-A)
  7. Yubikey
  8. external sound card
Now the latter, I might be able to get rid of if I switch to a combo-jack headset, which I do have (and still need to test). But still, this is a problem. I'll probably need a powered USB-C dock and better monitors, possibly with some Thunderbolt chaining, to save yet more ports. But that means more money into this setup, argh. And figuring out my monitor situation is the kind of thing I'm not that big of a fan of. And neither is shopping for USB-C (or is it Thunderbolt?) hubs. My normal autorandr setup doesn't work: I have tried saving a profile and it doesn't get autodetected, so I also first need to do:
autorandr -l framework-external-dual-lg-acer
The magic:
autorandr -l horizontal
... also works well. The worst problem with those monitors right now is that they have a radically smaller resolution than the main screen on the laptop, which means I need to reset the font scaling to normal every time I switch back and forth between those monitors and the laptop, which means I actually need to do this:
autorandr -l horizontal &&
eho Xft.dpi: 96   xrdb -merge &&
systemctl restart terminal xcolortaillog background-image emacs &&
i3-msg restart
Kind of disruptive.

Expansion ports I ordered a total of 10 expansion ports. I did manage to initialize the 1TB drive as an encrypted storage, mostly to keep photos as this is something that takes a massive amount of space (500GB and counting) and that I (unfortunately) don't work on very often (but still carry around). The expansion ports are fancy and nice, but not actually that convenient. They're a bit hard to take out: you really need to crimp your fingernails on there and pull hard to take them out. There's a little button next to them to release, I think, but at first it feels a little scary to pull those pucks out of there. You get used to it though, and it's one of those things you can do without looking eventually. There's only four expansion ports. Once you have two monitors, the drive, and power plugged in, bam, you're out of ports; there's nowhere to plug my Yubikey. So if this is going to be my daily driver, with a dual monitor setup, I will need a dock, which means more crap firmware and uncertainty, which isn't great. There are actually plans to make a dual-USB card, but that is blocked on designing an actual board for this. I can't wait to see more expansion ports produced. There's a ethernet expansion card which quickly went out of stock basically the day it was announced, but was eventually restocked. I would like to see a proper SD-card reader. There's a MicroSD card reader, but that obviously doesn't work for normal SD cards, which would be more broadly compatible anyways (because you can have a MicroSD to SD card adapter, but I have never heard of the reverse). Someone actually found a SD card reader that fits and then someone else managed to cram it in a 3D printed case, which is kind of amazing. Still, I really like that idea that I can carry all those little adapters in a pouch when I travel and can basically do anything I want. It does mean I need to shuffle through them to find the right one which is a little annoying. I have an elastic band to keep them lined up so that all the ports show the same side, to make it easier to find the right one. But that quickly gets undone and instead I have a pouch full of expansion cards. Another awesome thing with the expansion cards is that they don't just work on the laptop: anything that takes USB-C can take those cards, which means you can use it to connect an SD card to your phone, for backups, for example. Heck, you could even connect an external display to your phone that way, assuming that's supported by your phone of course (and it probably isn't). The expansion ports do take up some power, even when idle. See the power management section below, and particularly the power usage tests for details.

USB-C charging One thing that is really a game changer for me is USB-C charging. It's hard to overstate how convenient this is. I often have a USB-C cable lying around to charge my phone, and I can just grab that thing and pop it in my laptop. And while it will obviously not charge as fast as the provided charger, it will stop draining the battery at least. (As I wrote this, I had the laptop plugged in the Samsung charger that came with a phone, and it was telling me it would take 6 hours to charge the remaining 15%. With the provided charger, that flew down to 15 minutes. Similarly, I can power the laptop from the power grommet on my desk, reducing clutter as I have that single wire out there instead of the bulky power adapter.) I also really like the idea that I can charge my laptop with a power bank or, heck, with my phone, if push comes to shove. (And vice-versa!) This is awesome. And it works from any of the expansion ports, of course. There's a little led next to the expansion ports as well, which indicate the charge status:
  • red/amber: charging
  • white: charged
  • off: unplugged
I couldn't find documentation about this, but the forum answered. This is something of a recurring theme with the Framework. While it has a good knowledge base and repair/setup guides (and the forum is awesome) but it doesn't have a good "owner manual" that shows you the different parts of the laptop and what they do. Again, something the MNT reform did well. Another thing that people are asking about is an external sleep indicator: because the power LED is on the main keyboard assembly, you don't actually see whether the device is active or not when the lid is closed. Finally, I wondered what happens when you plug in multiple power sources and it turns out the charge controller is actually pretty smart: it will pick the best power source and use it. The only downside is it can't use multiple power sources, but that seems like a bit much to ask.

Multimedia and other devices Those things also work:
  • webcam: splendid, best webcam I've ever had (but my standards are really low)
  • onboard mic: works well, good gain (maybe a bit much)
  • onboard speakers: sound okay, a little metal-ish, loud enough to be annoying, see this thread for benchmarks, apparently pretty good speakers
  • combo jack: works, with slight hiss, see below
There's also a light sensor, but it conflicts with the keyboard brightness controls (see above). There's also an accelerometer, but it's off by default and will be removed from future builds.

Combo jack mic tests The Framework laptop ships with a combo jack on the left side, which allows you to plug in a CTIA (source) headset. In human terms, it's a device that has both a stereo output and a mono input, typically a headset or ear buds with a microphone somewhere. It works, which is better than the Purism (which only had audio out), but is on par for the course for that kind of onboard hardware. Because of electrical interference, such sound cards very often get lots of noise from the board. With a Jabra Evolve 40, the built-in USB sound card generates basically zero noise on silence (invisible down to -60dB in Audacity) while plugging it in directly generates a solid -30dB hiss. There is a noise-reduction system in that sound card, but the difference is still quite striking. On a comparable setup (curie, a 2017 Intel NUC), there is also a his with the Jabra headset, but it's quieter, more in the order of -40/-50 dB, a noticeable difference. Interestingly, testing with my Mee Audio Pro M6 earbuds leads to a little more hiss on curie, more on the -35/-40 dB range, close to the Framework. Also note that another sound card, the Antlion USB adapter that comes with the ModMic 4, also gives me pretty close to silence on a quiet recording, picking up less than -50dB of background noise. It's actually probably picking up the fans in the office, which do make audible noises. In other words, the hiss of the sound card built in the Framework laptop is so loud that it makes more noise than the quiet fans in the office. Or, another way to put it is that two USB sound cards (the Jabra and the Antlion) are able to pick up ambient noise in my office but not the Framework laptop. See also my audio page.

Performance tests

Compiling Linux 5.19.11 On a single core, compiling the Debian version of the Linux kernel takes around 100 minutes:
5411.85user 673.33system 1:37:46elapsed 103%CPU (0avgtext+0avgdata 831700maxresident)k
10594704inputs+87448000outputs (9131major+410636783minor)pagefaults 0swaps
This was using 16 watts of power, with full screen brightness. With all 16 cores (make -j16), it takes less than 25 minutes:
19251.06user 2467.47system 24:13.07elapsed 1494%CPU (0avgtext+0avgdata 831676maxresident)k
8321856inputs+87427848outputs (30792major+409145263minor)pagefaults 0swaps
I had to plug the normal power supply after a few minutes because battery would actually run out using my desk's power grommet (34 watts). During compilation, fans were spinning really hard, quite noisy, but not painfully so. The laptop was sucking 55 watts of power, steadily:
  Time    User  Nice   Sys  Idle    IO  Run Ctxt/s  IRQ/s Fork Exec Exit  Watts
-------- ----- ----- ----- ----- ----- ---- ------ ------ ---- ---- ---- ------
 Average  87.9   0.0  10.7   1.4   0.1 17.8 6583.6 5054.3 233.0 223.9 233.1  55.96
 GeoMean  87.9   0.0  10.6   1.2   0.0 17.6 6427.8 5048.1 227.6 218.7 227.7  55.96
  StdDev   1.4   0.0   1.2   0.6   0.2  3.0 1436.8  255.5 50.0 47.5 49.7   0.20
-------- ----- ----- ----- ----- ----- ---- ------ ------ ---- ---- ---- ------
 Minimum  85.0   0.0   7.8   0.5   0.0 13.0 3594.0 4638.0 117.0 111.0 120.0  55.52
 Maximum  90.8   0.0  12.9   3.5   0.8 38.0 10174.0 5901.0 374.0 362.0 375.0  56.41
-------- ----- ----- ----- ----- ----- ---- ------ ------ ---- ---- ---- ------
Summary:
CPU:  55.96 Watts on average with standard deviation 0.20
Note: power read from RAPL domains: package-0, uncore, package-0, core, psys.
These readings do not cover all the hardware in this device.

memtest86+ I ran Memtest86+ v6.00b3. It shows something like this:
Memtest86+ v6.00b3        12th Gen Intel(R) Core(TM) i5-1240P
CLK/Temp: 2112MHz    78/78 C   Pass  2% #
L1 Cache:   48KB    414 GB/s   Test 46% ##################
L2 Cache: 1.25MB    118 GB/s   Test #3 [Moving inversions, 1s & 0s] 
L3 Cache:   12MB     43 GB/s   Testing: 16GB - 18GB [1GB of 15.7GB]
Memory  :  15.7GB  14.9 GB/s   Pattern: 
--------------------------------------------------------------------------------
CPU: 4P+8E-Cores (16T)    SMP: 8T (PAR))    Time:  0:27:23  Status: Pass     \
RAM: 1600MHz (DDR4-3200) CAS 22-22-22-51    Pass:  1        Errors: 0
--------------------------------------------------------------------------------
Memory SPD Information
----------------------
 - Slot 2: 16GB DDR-4-3200 - Crucial CT16G4SFRA32A.C16FP (2022-W23)
                          Framework FRANMACP04
 <ESC> Exit  <F1> Configuration  <Space> Scroll Lock            6.00.unknown.x64
So about 30 minutes for a full 16GB memory test.

Software setup Once I had everything in the hardware setup, I figured, voil , I'm done, I'm just going to boot this beautiful machine and I can get back to work. I don't understand why I am so na ve some times. It's mind boggling. Obviously, it didn't happen that way at all, and I spent the best of the three following days tinkering with the laptop.

Secure boot and EFI First, I couldn't boot off of the NVMe drive I transferred from the previous laptop (the Purism) and the BIOS was not very helpful: it was just complaining about not finding any boot device, without dropping me in the real BIOS. At first, I thought it was a problem with my NVMe drive, because it's not listed in the compatible SSD drives from upstream. But I figured out how to enter BIOS (press F2 manically, of course), which showed the NVMe drive was actually detected. It just didn't boot, because it was an old (2010!!) Debian install without EFI. So from there, I disabled secure boot, and booted a grml image to try to recover. And by "boot" I mean, I managed to get to the grml boot loader which promptly failed to load its own root file system somehow. I still have to investigate exactly what happened there, but it failed some time after the initrd load with:
Unable to find medium containing a live file system
This, it turns out, was fixed in Debian lately, so a daily GRML build will not have this problems. The upcoming 2022 release (likely 2022.10 or 2022.11) will also get the fix. I did manage to boot the development version of the Debian installer which was a surprisingly good experience: it mounted the encrypted drives and did everything pretty smoothly. It even offered me to reinstall the boot loader, but that ultimately (and correctly, as it turns out) failed because I didn't have a /boot/efi partition. At this point, I realized there was no easy way out of this, and I just proceeded to completely reinstall Debian. I had a spare NVMe drive lying around (backups FTW!) so I just swapped that in, rebooted in the Debian installer, and did a clean install. I wanted to switch to bookworm anyways, so I guess that's done too.

Storage limitations Another thing that happened during setup is that I tried to copy over the internal 2.5" SSD drive from the Purism to the Framework 1TB expansion card. There's no 2.5" slot in the new laptop, so that's pretty much the only option for storage expansion. I was tired and did something wrong. I ended up wiping the partition table on the original 2.5" drive. Oops. It might be recoverable, but just restoring the partition table didn't work either, so I'm not sure how I recover the data there. Normally, everything on my laptops and workstations is designed to be disposable, so that wasn't that big of a problem. I did manage to recover most of the data thanks to git-annex reinit, but that was a little hairy.

Bootstrapping Puppet Once I had some networking, I had to install all the packages I needed. The time I spent setting up my workstations with Puppet has finally paid off. What I actually did was to restore two critical directories:
/etc/ssh
/var/lib/puppet
So that I would keep the previous machine's identity. That way I could contact the Puppet server and install whatever was missing. I used my Puppet optimization trick to do a batch install and then I had a good base setup, although not exactly as it was before. 1700 packages were installed manually on angela before the reinstall, and not in Puppet. I did not inspect each one individually, but I did go through /etc and copied over more SSH keys, for backups and SMTP over SSH.

LVFS support It looks like there's support for the (de-facto) standard LVFS firmware update system. At least I was able to update the UEFI firmware with a simple:
apt install fwupd-amd64-signed
fwupdmgr refresh
fwupdmgr get-updates
fwupdmgr update
Nice. The 12th gen BIOS updates, currently (January 2023) beta, can be deployed through LVFS with:
fwupdmgr enable-remote lvfs-testing
echo 'DisableCapsuleUpdateOnDisk=true' >> /etc/fwupd/uefi_capsule.conf 
fwupdmgr update
Those instructions come from the beta forum post. I performed the BIOS update on 2023-01-16T16:00-0500.

Resolution tweaks The Framework laptop resolution (2256px X 1504px) is big enough to give you a pretty small font size, so welcome to the marvelous world of "scaling". The Debian wiki page has a few tricks for this.

Console This will make the console and grub fonts more readable:
cat >> /etc/default/console-setup <<EOF
FONTFACE="Terminus"
FONTSIZE=32x16
EOF
echo GRUB_GFXMODE=1024x768 >> /etc/default/grub
update-grub

Xorg Adding this to your .Xresources will make everything look much bigger:
! 1.5*96
Xft.dpi: 144
Apparently, some of this can also help:
! These might also be useful depending on your monitor and personal preference:
Xft.autohint: 0
Xft.lcdfilter:  lcddefault
Xft.hintstyle:  hintfull
Xft.hinting: 1
Xft.antialias: 1
Xft.rgba: rgb
It my experience it also makes things look a little fuzzier, which is frustrating because you have this awesome monitor but everything looks out of focus. Just bumping Xft.dpi by a 1.5 factor looks good to me. The Debian Wiki has a page on HiDPI, but it's not as good as the Arch Wiki, where the above blurb comes from. I am not using the latter because I suspect it's causing some of the "fuzziness". TODO: find the equivalent of this GNOME hack in i3? (gsettings set org.gnome.mutter experimental-features "['scale-monitor-framebuffer']"), taken from this Framework guide

Issues

BIOS configuration The Framework BIOS has some minor issues. One issue I personally encountered is that I had disabled Quick boot and Quiet boot in the BIOS to diagnose the above boot issues. This, in turn, triggers a bug where the BIOS boot manager (F12) would just hang completely. It would also fail to boot from an external USB drive. The current fix (as of BIOS 3.03) is to re-enable both Quick boot and Quiet boot. Presumably this is something that will get fixed in a future BIOS update. Note that the following keybindings are active in the BIOS POST check:
Key Meaning
F2 Enter BIOS setup menu
F12 Enter BIOS boot manager
Delete Enter BIOS setup menu

WiFi compatibility issues I couldn't make WiFi work at first. Obviously, the default Debian installer doesn't ship with proprietary firmware (although that might change soon) so the WiFi card didn't work out of the box. But even after copying the firmware through a USB stick, I couldn't quite manage to find the right combination of ip/iw/wpa-supplicant (yes, after repeatedly copying a bunch more packages over to get those bootstrapped). (Next time I should probably try something like this post.) Thankfully, I had a little USB-C dongle with a RJ-45 jack lying around. That also required a firmware blob, but it was a single package to copy over, and with that loaded, I had network. Eventually, I did managed to make WiFi work; the problem was more on the side of "I forgot how to configure a WPA network by hand from the commandline" than anything else. NetworkManager worked fine and got WiFi working correctly. Note that this is with Debian bookworm, which has the 5.19 Linux kernel, and with the firmware-nonfree (firmware-iwlwifi, specifically) package.

Battery life I was having between about 7 hours of battery on the Purism Librem 13v4, and that's after a year or two of battery life. Now, I still have about 7 hours of battery life, which is nicer than my old ThinkPad X220 (20 minutes!) but really, it's not that good for a new generation laptop. The 12th generation Intel chipset probably improved things compared to the previous one Framework laptop, but I don't have a 11th gen Framework to compare with). (Note that those are estimates from my status bar, not wall clock measurements. They should still be comparable between the Purism and Framework, that said.) The battery life doesn't seem up to, say, Dell XPS 13, ThinkPad X1, and of course not the Apple M1, where I would expect 10+ hours of battery life out of the box. That said, I do get those kind estimates when the machine is fully charged and idle. In fact, when everything is quiet and nothing is plugged in, I get dozens of hours of battery life estimated (I've seen 25h!). So power usage fluctuates quite a bit depending on usage, which I guess is expected. Concretely, so far, light web browsing, reading emails and writing notes in Emacs (e.g. this file) takes about 8W of power:
Time    User  Nice   Sys  Idle    IO  Run Ctxt/s  IRQ/s Fork Exec Exit  Watts
-------- ----- ----- ----- ----- ----- ---- ------ ------ ---- ---- ---- ------
 Average   1.7   0.0   0.5  97.6   0.2  1.2 4684.9 1985.2 126.6 39.1 128.0   7.57
 GeoMean   1.4   0.0   0.4  97.6   0.1  1.2 4416.6 1734.5 111.6 27.9 113.3   7.54
  StdDev   1.0   0.2   0.2   1.2   0.0  0.5 1584.7 1058.3 82.1 44.0 80.2   0.71
-------- ----- ----- ----- ----- ----- ---- ------ ------ ---- ---- ---- ------
 Minimum   0.2   0.0   0.2  94.9   0.1  1.0 2242.0  698.2 82.0 17.0 82.0   6.36
 Maximum   4.1   1.1   1.0  99.4   0.2  3.0 8687.4 4445.1 463.0 249.0 449.0   9.10
-------- ----- ----- ----- ----- ----- ---- ------ ------ ---- ---- ---- ------
Summary:
System:   7.57 Watts on average with standard deviation 0.71
Expansion cards matter a lot in the battery life (see below for a thorough discussion), my normal setup is 2xUSB-C and 1xUSB-A (yes, with an empty slot, and yes, to save power). Interestingly, playing a video in a (720p) window in a window takes up more power (10.5W) than in full screen (9.5W) but I blame that on my desktop setup (i3 + compton)... Not sure if mpv hits the VA-API, maybe not in windowed mode. Similar results with 1080p, interestingly, except the window struggles to keep up altogether. Full screen playback takes a relatively comfortable 9.5W, which means a solid 5h+ of playback, which is fine by me. Fooling around the web, small edits, youtube-dl, and I'm at around 80% battery after about an hour, with an estimated 5h left, which is a little disappointing. I had a 7h remaining estimate before I started goofing around Discourse, so I suspect the website is a pretty big battery drain, actually. I see about 10-12 W, while I was probably at half that (6-8W) just playing music with mpv in the background... In other words, it looks like editing posts in Discourse with Firefox takes a solid 4-6W of power. Amazing and gross. (When writing about abusive power usage generates more power usage, is that an heisenbug? Or schr dinbug?)

Power management Compared to the Purism Librem 13v4, the ongoing power usage seems to be slightly better. An anecdotal metric is that the Purism would take 800mA idle, while the more powerful Framework manages a little over 500mA as I'm typing this, fluctuating between 450 and 600mA. That is without any active expansion card, except the storage. Those numbers come from the output of tlp-stat -b and, unfortunately, the "ampere" unit makes it quite hard to compare those, because voltage is not necessarily the same between the two platforms.
  • TODO: review Arch Linux's tips on power saving
  • TODO: i915 driver has a lot of parameters, including some about power saving, see, again, the arch wiki, and particularly enable_fbc=1
TL:DR; power management on the laptop is an issue, but there's various tweaks you can make to improve it. Try:
  • powertop --auto-tune
  • apt install tlp && systemctl enable tlp
  • nvme.noacpi=1 mem_sleep_default=deep on the kernel command line may help with standby power usage
  • keep only USB-C expansion cards plugged in, all others suck power even when idle
  • consider upgrading the BIOS to latest beta (3.06 at the time of writing), unverified power savings
  • latest Linux kernels (6.2) promise power savings as well (unverified)
Update: also try to follow the official optimization guide. It was made for Ubuntu but will probably also work for your distribution of choice with a few tweaks. They recommend using tlpui but it's not packaged in Debian. There is, however, a Flatpak release. In my case, it resulted in the following diff to tlp.conf: tlp.patch.

Background on CPU architecture There were power problems in the 11th gen Framework laptop, according to this report from Linux After Dark, so the issues with power management on the Framework are not new. The 12th generation Intel CPU (AKA "Alder Lake") is a big-little architecture with "power-saving" and "performance" cores. There used to be performance problems introduced by the scheduler in Linux 5.16 but those were eventually fixed in 5.18, which uses Intel's hardware as an "intelligent, low-latency hardware-assisted scheduler". According to Phoronix, the 5.19 release improved the power saving, at the cost of some penalty cost. There were also patch series to make the scheduler configurable, but it doesn't look those have been merged as of 5.19. There was also a session about this at the 2022 Linux Plumbers, but they stopped short of talking more about the specific problems Linux is facing in Alder lake:
Specifically, the kernel's energy-aware scheduling heuristics don't work well on those CPUs. A number of features present there complicate the energy picture; these include SMT, Intel's "turbo boost" mode, and the CPU's internal power-management mechanisms. For many workloads, running on an ostensibly more power-hungry Pcore can be more efficient than using an Ecore. Time for discussion of the problem was lacking, though, and the session came to a close.
All this to say that the 12gen Intel line shipped with this Framework series should have better power management thanks to its power-saving cores. And Linux has had the scheduler changes to make use of this (but maybe is still having trouble). In any case, this might not be the source of power management problems on my laptop, quite the opposite. Also note that the firmware updates for various chipsets are supposed to improve things eventually. On the other hand, The Verge simply declared the whole P-series a mistake...

Attempts at improving power usage I did try to follow some of the tips in this forum post. The tricks powertop --auto-tune and tlp's PCIE_ASPM_ON_BAT=powersupersave basically did nothing: I was stuck at 10W power usage in powertop (600+mA in tlp-stat). Apparently, I should be able to reach the C8 CPU power state (or even C9, C10) in powertop, but I seem to be stock at C7. (Although I'm not sure how to read that tab in powertop: in the Core(HW) column there's only C3/C6/C7 states, and most cores are 85% in C7 or maybe C6. But the next column over does show many CPUs in C10 states... As it turns out, the graphics card actually takes up a good chunk of power unless proper power management is enabled (see below). After tweaking this, I did manage to get down to around 7W power usage in powertop. Expansion cards actually do take up power, and so does the screen, obviously. The fully-lit screen takes a solid 2-3W of power compared to the fully dimmed screen. When removing all expansion cards and making the laptop idle, I can spin it down to 4 watts power usage at the moment, and an amazing 2 watts when the screen turned off.

Caveats Abusive (10W+) power usage that I initially found could be a problem with my desktop configuration: I have this silly status bar that updates every second and probably causes redraws... The CPU certainly doesn't seem to spin down below 1GHz. Also note that this is with an actual desktop running with everything: it could very well be that some things (I'm looking at you Signal Desktop) take up unreasonable amount of power on their own (hello, 1W/electron, sheesh). Syncthing and containerd (Docker!) also seem to take a good 500mW just sitting there. Beyond my desktop configuration, this could, of course, be a Debian-specific problem; your favorite distribution might be better at power management.

Idle power usage tests Some expansion cards waste energy, even when unused. Here is a summary of the findings from the powerstat page. I also include other devices tested in this page for completeness:
Device Minimum Average Max Stdev Note
Screen, 100% 2.4W 2.6W 2.8W N/A
Screen, 1% 30mW 140mW 250mW N/A
Backlight 1 290mW ? ? ? fairly small, all things considered
Backlight 2 890mW 1.2W 3W? 460mW? geometric progression
Backlight 3 1.69W 1.5W 1.8W? 390mW? significant power use
Radios 100mW 250mW N/A N/A
USB-C N/A N/A N/A N/A negligible power drain
USB-A 10mW 10mW ? 10mW almost negligible
DisplayPort 300mW 390mW 600mW N/A not passive
HDMI 380mW 440mW 1W? 20mW not passive
1TB SSD 1.65W 1.79W 2W 12mW significant, probably higher when busy
MicroSD 1.6W 3W 6W 1.93W highest power usage, possibly even higher when busy
Ethernet 1.69W 1.64W 1.76W N/A comparable to the SSD card
So it looks like all expansion cards but the USB-C ones are active, i.e. they draw power with idle. The USB-A cards are the least concern, sucking out 10mW, pretty much within the margin of error. But both the DisplayPort and HDMI do take a few hundred miliwatts. It looks like USB-A connectors have this fundamental flaw that they necessarily draw some powers because they lack the power negotiation features of USB-C. At least according to this post:
It seems the USB A must have power going to it all the time, that the old USB 2 and 3 protocols, the USB C only provides power when there is a connection. Old versus new.
Apparently, this is a problem specific to the USB-C to USB-A adapter that ships with the Framework. Some people have actually changed their orders to all USB-C because of this problem, but I'm not sure the problem is as serious as claimed in the forums. I couldn't reproduce the "one watt" power drains suggested elsewhere, at least not repeatedly. (A previous version of this post did show such a power drain, but it was in a less controlled test environment than the series of more rigorous tests above.) The worst offenders are the storage cards: the SSD drive takes at least one watt of power and the MicroSD card seems to want to take all the way up to 6 watts of power, both just sitting there doing nothing. This confirms claims of 1.4W for the SSD (but not 5W) power usage found elsewhere. The former post has instructions on how to disable the card in software. The MicroSD card has been reported as using 2 watts, but I've seen it as high as 6 watts, which is pretty damning. The Framework team has a beta update for the DisplayPort adapter but currently only for Windows (LVFS technically possible, "under investigation"). A USB-A firmware update is also under investigation. It is therefore likely at least some of those power management issues will eventually be fixed. Note that the upcoming Ethernet card has a reported 2-8W power usage, depending on traffic. I did my own power usage tests in powerstat-wayland and they seem lower than 2W. The upcoming 6.2 Linux kernel might also improve battery usage when idle, see this Phoronix article for details, likely in early 2023.

Idle power usage tests under Wayland Update: I redid those tests under Wayland, see powerstat-wayland for details. The TL;DR: is that power consumption is either smaller or similar.

Idle power usage tests, 3.06 beta BIOS I redid the idle tests after the 3.06 beta BIOS update and ended up with this results:
Device Minimum Average Max Stdev Note
Baseline 1.96W 2.01W 2.11W 30mW 1 USB-C, screen off, backlight off, no radios
2 USB-C 1.95W 2.16W 3.69W 430mW USB-C confirmed as mostly passive...
3 USB-C 1.95W 2.16W 3.69W 430mW ... although with extra stdev
1TB SSD 3.72W 3.85W 4.62W 200mW unchanged from before upgrade
1 USB-A 1.97W 2.18W 4.02W 530mW unchanged
2 USB-A 1.97W 2.00W 2.08W 30mW unchanged
3 USB-A 1.94W 1.99W 2.03W 20mW unchanged
MicroSD w/o card 3.54W 3.58W 3.71W 40mW significant improvement! 2-3W power saving!
MicroSD w/ card 3.53W 3.72W 5.23W 370mW new measurement! increased deviation
DisplayPort 2.28W 2.31W 2.37W 20mW unchanged
1 HDMI 2.43W 2.69W 4.53W 460mW unchanged
2 HDMI 2.53W 2.59W 2.67W 30mW unchanged
External USB 3.85W 3.89W 3.94W 30mW new result
Ethernet 3.60W 3.70W 4.91W 230mW unchanged
Note that the table summary is different than the previous table: here we show the absolute numbers while the previous table was doing a confusing attempt at showing relative (to the baseline) numbers. Conclusion: the 3.06 BIOS update did not significantly change idle power usage stats except for the MicroSD card which has significantly improved. The new "external USB" test is also interesting: it shows how the provided 1TB SSD card performs (admirably) compared to existing devices. The other new result is the MicroSD card with a card which, interestingly, uses less power than the 1TB SSD drive.

Standby battery usage I wrote some quick hack to evaluate how much power is used during sleep. Apparently, this is one of the areas that should have improved since the first Framework model, let's find out. My baseline for comparison is the Purism laptop, which, in 10 minutes, went from this:
sep 28 11:19:45 angela systemd-sleep[209379]: /sys/class/power_supply/BAT/charge_now                      =   6045 [mAh]
... to this:
sep 28 11:29:47 angela systemd-sleep[209725]: /sys/class/power_supply/BAT/charge_now                      =   6037 [mAh]
That's 8mAh per 10 minutes (and 2 seconds), or 48mA, or, with this battery, about 127 hours or roughly 5 days of standby. Not bad! In comparison, here is my really old x220, before:
sep 29 22:13:54 emma systemd-sleep[176315]: /sys/class/power_supply/BAT0/energy_now                     =   5070 [mWh]
... after:
sep 29 22:23:54 emma systemd-sleep[176486]: /sys/class/power_supply/BAT0/energy_now                     =   4980 [mWh]
... which is 90 mwH in 10 minutes, or a whopping 540mA, which was possibly okay when this battery was new (62000 mAh, so about 100 hours, or about 5 days), but this battery is almost dead and has only 5210 mAh when full, so only 10 hours standby. And here is the Framework performing a similar test, before:
sep 29 22:27:04 angela systemd-sleep[4515]: /sys/class/power_supply/BAT1/charge_full                    =   3518 [mAh]
sep 29 22:27:04 angela systemd-sleep[4515]: /sys/class/power_supply/BAT1/charge_now                     =   2861 [mAh]
... after:
sep 29 22:37:08 angela systemd-sleep[4743]: /sys/class/power_supply/BAT1/charge_now                     =   2812 [mAh]
... which is 49mAh in a little over 10 minutes (and 4 seconds), or 292mA, much more than the Purism, but half of the X220. At this rate, the battery would last on standby only 12 hours!! That is pretty bad. Note that this was done with the following expansion cards:
  • 2 USB-C
  • 1 1TB SSD drive
  • 1 USB-A with a hub connected to it, with keyboard and LAN
Preliminary tests without the hub (over one minute) show that it doesn't significantly affect this power consumption (300mA). This guide also suggests booting with nvme.noacpi=1 but this still gives me about 5mAh/min (or 300mA). Adding mem_sleep_default=deep to the kernel command line does make a difference. Before:
sep 29 23:03:11 angela systemd-sleep[3699]: /sys/class/power_supply/BAT1/charge_now                     =   2544 [mAh]
... after:
sep 29 23:04:25 angela systemd-sleep[4039]: /sys/class/power_supply/BAT1/charge_now                     =   2542 [mAh]
... which is 2mAh in 74 seconds, which is 97mA, brings us to a more reasonable 36 hours, or a day and a half. It's still above the x220 power usage, and more than an order of magnitude more than the Purism laptop. It's also far from the 0.4% promised by upstream, which would be 14mA for the 3500mAh battery. It should also be noted that this "deep" sleep mode is a little more disruptive than regular sleep. As you can see by the timing, it took more than 10 seconds for the laptop to resume, which feels a little alarming as your banging the keyboard to bring it back to life. You can confirm the current sleep mode with:
# cat /sys/power/mem_sleep
s2idle [deep]
In the above, deep is selected. You can change it on the fly with:
printf s2idle > /sys/power/mem_sleep
Here's another test:
sep 30 22:25:50 angela systemd-sleep[32207]: /sys/class/power_supply/BAT1/charge_now                     =   1619 [mAh]
sep 30 22:31:30 angela systemd-sleep[32516]: /sys/class/power_supply/BAT1/charge_now                     =   1613 [mAh]
... better! 6 mAh in about 6 minutes, works out to 63.5mA, so more than two days standby. A longer test:
oct 01 09:22:56 angela systemd-sleep[62978]: /sys/class/power_supply/BAT1/charge_now                     =   3327 [mAh]
oct 01 12:47:35 angela systemd-sleep[63219]: /sys/class/power_supply/BAT1/charge_now                     =   3147 [mAh]
That's 180mAh in about 3.5h, 52mA! Now at 66h, or almost 3 days. I wasn't sure why I was seeing such fluctuations in those tests, but as it turns out, expansion card power tests show that they do significantly affect power usage, especially the SSD drive, which can take up to two full watts of power even when idle. I didn't control for expansion cards in the above tests running them with whatever card I had plugged in without paying attention so it's likely the cause of the high power usage and fluctuations. It might be possible to work around this problem by disabling USB devices before suspend. TODO. See also this post. In the meantime, I have been able to get much better suspend performance by unplugging all modules. Then I get this result:
oct 04 11:15:38 angela systemd-sleep[257571]: /sys/class/power_supply/BAT1/charge_now                     =   3203 [mAh]
oct 04 15:09:32 angela systemd-sleep[257866]: /sys/class/power_supply/BAT1/charge_now                     =   3145 [mAh]
Which is 14.8mA! Almost exactly the number promised by Framework! With a full battery, that means a 10 days suspend time. This is actually pretty good, and far beyond what I was expecting when starting down this journey. So, once the expansion cards are unplugged, suspend power usage is actually quite reasonable. More detailed standby tests are available in the standby-tests page, with a summary below. There is also some hope that the Chromebook edition specifically designed with a specification of 14 days standby time could bring some firmware improvements back down to the normal line. Some of those issues were reported upstream in April 2022, but there doesn't seem to have been any progress there since. TODO: one final solution here is suspend-then-hibernate, which Windows uses for this TODO: consider implementing the S0ix sleep states , see also troubleshooting TODO: consider https://github.com/intel/pm-graph

Standby expansion cards test results This table is a summary of the more extensive standby-tests I have performed:
Device Wattage Amperage Days Note
baseline 0.25W 16mA 9 sleep=deep nvme.noacpi=1
s2idle 0.29W 18.9mA ~7 sleep=s2idle nvme.noacpi=1
normal nvme 0.31W 20mA ~7 sleep=s2idle without nvme.noacpi=1
1 USB-C 0.23W 15mA ~10
2 USB-C 0.23W 14.9mA same as above
1 USB-A 0.75W 48.7mA 3 +500mW (!!) for the first USB-A card!
2 USB-A 1.11W 72mA 2 +360mW
3 USB-A 1.48W 96mA <2 +370mW
1TB SSD 0.49W 32mA <5 +260mW
MicroSD 0.52W 34mA ~4 +290mW
DisplayPort 0.85W 55mA <3 +620mW (!!)
1 HDMI 0.58W 38mA ~4 +250mW
2 HDMI 0.65W 42mA <4 +70mW (?)
Conclusions:
  • USB-C cards take no extra power on suspend, possibly less than empty slots, more testing required
  • USB-A cards take a lot more power on suspend (300-500mW) than on regular idle (~10mW, almost negligible)
  • 1TB SSD and MicroSD cards seem to take a reasonable amount of power (260-290mW), compared to their runtime equivalents (1-6W!)
  • DisplayPort takes a surprising lot of power (620mW), almost double its average runtime usage (390mW)
  • HDMI cards take, surprisingly, less power (250mW) in standby than the DP card (620mW)
  • and oddly, a second card adds less power usage (70mW?!) than the first, maybe a circuit is used by both?
A discussion of those results is in this forum post.

Standby expansion cards test results, 3.06 beta BIOS Framework recently (2022-11-07) announced that they will publish a firmware upgrade to address some of the USB-C issues, including power management. This could positively affect the above result, improving both standby and runtime power usage. The update came out in December 2022 and I redid my analysis with the following results:
Device Wattage Amperage Days Note
baseline 0.25W 16mA 9 no cards, same as before upgrade
1 USB-C 0.25W 16mA 9 same as before
2 USB-C 0.25W 16mA 9 same
1 USB-A 0.80W 62mA 3 +550mW!! worse than before
2 USB-A 1.12W 73mA <2 +320mW, on top of the above, bad!
Ethernet 0.62W 40mA 3-4 new result, decent
1TB SSD 0.52W 34mA 4 a bit worse than before (+2mA)
MicroSD 0.51W 22mA 4 same
DisplayPort 0.52W 34mA 4+ upgrade improved by 300mW
1 HDMI ? 38mA ? same
2 HDMI ? 45mA ? a bit worse than before (+3mA)
Normal 1.08W 70mA ~2 Ethernet, 2 USB-C, USB-A
Full results in standby-tests-306. The big takeaway for me is that the update did not improve power usage on the USB-A ports which is a big problem for my use case. There is a notable improvement on the DisplayPort power consumption which brings it more in line with the HDMI connector, but it still doesn't properly turn off on suspend either. Even worse, the USB-A ports now sometimes fails to resume after suspend, which is pretty annoying. This is a known problem that will hopefully get fixed in the final release.

Battery wear protection The BIOS has an option to limit charge to 80% to mitigate battery wear. There's a way to control the embedded controller from runtime with fw-ectool, partly documented here. The command would be:
sudo ectool fwchargelimit 80
I looked at building this myself but failed to run it. I opened a RFP in Debian so that we can ship this in Debian, and also documented my work there. Note that there is now a counter that tracks charge/discharge cycles. It's visible in tlp-stat -b, which is a nice improvement:
root@angela:/home/anarcat# tlp-stat -b
--- TLP 1.5.0 --------------------------------------------
+++ Battery Care
Plugin: generic
Supported features: none available
+++ Battery Status: BAT1
/sys/class/power_supply/BAT1/manufacturer                   = NVT
/sys/class/power_supply/BAT1/model_name                     = Framewo
/sys/class/power_supply/BAT1/cycle_count                    =      3
/sys/class/power_supply/BAT1/charge_full_design             =   3572 [mAh]
/sys/class/power_supply/BAT1/charge_full                    =   3541 [mAh]
/sys/class/power_supply/BAT1/charge_now                     =   1625 [mAh]
/sys/class/power_supply/BAT1/current_now                    =    178 [mA]
/sys/class/power_supply/BAT1/status                         = Discharging
/sys/class/power_supply/BAT1/charge_control_start_threshold = (not available)
/sys/class/power_supply/BAT1/charge_control_end_threshold   = (not available)
Charge                                                      =   45.9 [%]
Capacity                                                    =   99.1 [%]
One thing that is still missing is the charge threshold data (the (not available) above). There's been some work to make that accessible in August, stay tuned? This would also make it possible implement hysteresis support.

Ethernet expansion card The Framework ethernet expansion card is a fancy little doodle: "2.5Gbit/s and 10/100/1000Mbit/s Ethernet", the "clear housing lets you peek at the RTL8156 controller that powers it". Which is another way to say "we didn't completely finish prod on this one, so it kind of looks like we 3D-printed this in the shop".... The card is a little bulky, but I guess that's inevitable considering the RJ-45 form factor when compared to the thin Framework laptop. I have had a serious issue when trying it at first: the link LEDs just wouldn't come up. I made a full bug report in the forum and with upstream support, but eventually figured it out on my own. It's (of course) a power saving issue: if you reboot the machine, the links come up when the laptop is running the BIOS POST check and even when the Linux kernel boots. I first thought that the problem is likely related to the powertop service which I run at boot time to tweak some power saving settings. It seems like this:
echo 'on' > '/sys/bus/usb/devices/4-2/power/control'
... is a good workaround to bring the card back online. You can even return to power saving mode and the card will still work:
echo 'auto' > '/sys/bus/usb/devices/4-2/power/control'
Further research by Matt_Hartley from the Framework Team found this issue in the tlp tracker that shows how the USB_AUTOSUSPEND setting enables the power saving even if the driver doesn't support it, which, in retrospect, just sounds like a bad idea. To quote that issue:
By default, USB power saving is active in the kernel, but not force-enabled for incompatible drivers. That is, devices that support suspension will suspend, drivers that do not, will not.
So the fix is actually to uninstall tlp or disable that setting by adding this to /etc/tlp.conf:
USB_AUTOSUSPEND=0
... but that disables auto-suspend on all USB devices, which may hurt other power usage performance. I have found that a a combination of:
USB_AUTOSUSPEND=1
USB_DENYLIST="0bda:8156"
and this on the kernel commandline:
usbcore.quirks=0bda:8156:k
... actually does work correctly. I now have this in my /etc/default/grub.d/framework-tweaks.cfg file:
# net.ifnames=0: normal interface names ffs (e.g. eth0, wlan0, not wlp166
s0)
# nvme.noacpi=1: reduce SSD disk power usage (not working)
# mem_sleep_default=deep: reduce power usage during sleep (not working)
# usbcore.quirk is a workaround for the ethernet card suspend bug: https:
//guides.frame.work/Guide/Fedora+37+Installation+on+the+Framework+Laptop/
108?lang=en
GRUB_CMDLINE_LINUX="net.ifnames=0 nvme.noacpi=1 mem_sleep_default=deep usbcore.quirks=0bda:8156:k"
# fix the resolution in grub for fonts to not be tiny
GRUB_GFXMODE=1024x768
Other than that, I haven't been able to max out the card because I don't have other 2.5Gbit/s equipment at home, which is strangely satisfying. But running against my Turris Omnia router, I could pretty much max a gigabit fairly easily:
[ ID] Interval           Transfer     Bitrate         Retr
[  5]   0.00-10.00  sec  1.09 GBytes   937 Mbits/sec  238             sender
[  5]   0.00-10.00  sec  1.09 GBytes   934 Mbits/sec                  receiver
The card doesn't require any proprietary firmware blobs which is surprising. Other than the power saving issues, it just works. In my power tests (see powerstat-wayland), the Ethernet card seems to use about 1.6W of power idle, without link, in the above "quirky" configuration where the card is functional but without autosuspend.

Proprietary firmware blobs The framework does need proprietary firmware to operate. Specifically:
  • the WiFi network card shipped with the DIY kit is a AX210 card that requires a 5.19 kernel or later, and the firmware-iwlwifi non-free firmware package
  • the Bluetooth adapter also loads the firmware-iwlwifi package (untested)
  • the graphics work out of the box without firmware, but certain power management features come only with special proprietary firmware, normally shipped in the firmware-misc-nonfree but currently missing from the package
Note that, at the time of writing, the latest i915 firmware from linux-firmware has a serious bug where loading all the accessible firmware results in noticeable I estimate 200-500ms lag between the keyboard (not the mouse!) and the display. Symptoms also include tearing and shearing of windows, it's pretty nasty. One workaround is to delete the two affected firmware files:
cd /lib/firmware && rm adlp_guc_70.1.1.bin adlp_guc_69.0.3.bin
update-initramfs -u
You will get the following warning during build, which is good as it means the problematic firmware is disabled:
W: Possible missing firmware /lib/firmware/i915/adlp_guc_69.0.3.bin for module i915
W: Possible missing firmware /lib/firmware/i915/adlp_guc_70.1.1.bin for module i915
But then it also means that critical firmware isn't loaded, which means, among other things, a higher battery drain. I was able to move from 8.5-10W down to the 7W range after making the firmware work properly. This is also after turning the backlight all the way down, as that takes a solid 2-3W in full blast. The proper fix is to use some compositing manager. I ended up using compton with the following systemd unit:
[Unit]
Description=start compositing manager
PartOf=graphical-session.target
ConditionHost=angela
[Service]
Type=exec
ExecStart=compton --show-all-xerrors --backend glx --vsync opengl-swc
Restart=on-failure
[Install]
RequiredBy=graphical-session.target
compton is orphaned however, so you might be tempted to use picom instead, but in my experience the latter uses much more power (1-2W extra, similar experience). I also tried compiz but it would just crash with:
anarcat@angela:~$ compiz --replace
compiz (core) - Warn: No XI2 extension
compiz (core) - Error: Another composite manager is already running on screen: 0
compiz (core) - Fatal: No manageable screens found on display :0
When running from the base session, I would get this instead:
compiz (core) - Warn: No XI2 extension
compiz (core) - Error: Couldn't load plugin 'ccp'
Thanks to EmanueleRocca for figuring all that out. See also this discussion about power management on the Framework forum. Note that Wayland environments do not require any special configuration here and actually work better, see my Wayland migration notes for details.
Also note that the iwlwifi firmware also looks incomplete. Even with the package installed, I get those errors in dmesg:
[   19.534429] Intel(R) Wireless WiFi driver for Linux
[   19.534691] iwlwifi 0000:a6:00.0: enabling device (0000 -> 0002)
[   19.541867] iwlwifi 0000:a6:00.0: firmware: failed to load iwlwifi-ty-a0-gf-a0-72.ucode (-2)
[   19.541881] iwlwifi 0000:a6:00.0: firmware: failed to load iwlwifi-ty-a0-gf-a0-72.ucode (-2)
[   19.541882] iwlwifi 0000:a6:00.0: Direct firmware load for iwlwifi-ty-a0-gf-a0-72.ucode failed with error -2
[   19.541890] iwlwifi 0000:a6:00.0: firmware: failed to load iwlwifi-ty-a0-gf-a0-71.ucode (-2)
[   19.541895] iwlwifi 0000:a6:00.0: firmware: failed to load iwlwifi-ty-a0-gf-a0-71.ucode (-2)
[   19.541896] iwlwifi 0000:a6:00.0: Direct firmware load for iwlwifi-ty-a0-gf-a0-71.ucode failed with error -2
[   19.541903] iwlwifi 0000:a6:00.0: firmware: failed to load iwlwifi-ty-a0-gf-a0-70.ucode (-2)
[   19.541907] iwlwifi 0000:a6:00.0: firmware: failed to load iwlwifi-ty-a0-gf-a0-70.ucode (-2)
[   19.541908] iwlwifi 0000:a6:00.0: Direct firmware load for iwlwifi-ty-a0-gf-a0-70.ucode failed with error -2
[   19.541913] iwlwifi 0000:a6:00.0: firmware: failed to load iwlwifi-ty-a0-gf-a0-69.ucode (-2)
[   19.541916] iwlwifi 0000:a6:00.0: firmware: failed to load iwlwifi-ty-a0-gf-a0-69.ucode (-2)
[   19.541917] iwlwifi 0000:a6:00.0: Direct firmware load for iwlwifi-ty-a0-gf-a0-69.ucode failed with error -2
[   19.541922] iwlwifi 0000:a6:00.0: firmware: failed to load iwlwifi-ty-a0-gf-a0-68.ucode (-2)
[   19.541926] iwlwifi 0000:a6:00.0: firmware: failed to load iwlwifi-ty-a0-gf-a0-68.ucode (-2)
[   19.541927] iwlwifi 0000:a6:00.0: Direct firmware load for iwlwifi-ty-a0-gf-a0-68.ucode failed with error -2
[   19.541933] iwlwifi 0000:a6:00.0: firmware: failed to load iwlwifi-ty-a0-gf-a0-67.ucode (-2)
[   19.541937] iwlwifi 0000:a6:00.0: firmware: failed to load iwlwifi-ty-a0-gf-a0-67.ucode (-2)
[   19.541937] iwlwifi 0000:a6:00.0: Direct firmware load for iwlwifi-ty-a0-gf-a0-67.ucode failed with error -2
[   19.544244] iwlwifi 0000:a6:00.0: firmware: direct-loading firmware iwlwifi-ty-a0-gf-a0-66.ucode
[   19.544257] iwlwifi 0000:a6:00.0: api flags index 2 larger than supported by driver
[   19.544270] iwlwifi 0000:a6:00.0: TLV_FW_FSEQ_VERSION: FSEQ Version: 0.63.2.1
[   19.544523] iwlwifi 0000:a6:00.0: firmware: failed to load iwl-debug-yoyo.bin (-2)
[   19.544528] iwlwifi 0000:a6:00.0: firmware: failed to load iwl-debug-yoyo.bin (-2)
[   19.544530] iwlwifi 0000:a6:00.0: loaded firmware version 66.55c64978.0 ty-a0-gf-a0-66.ucode op_mode iwlmvm
Some of those are available in the latest upstream firmware package (iwlwifi-ty-a0-gf-a0-71.ucode, -68, and -67), but not all (e.g. iwlwifi-ty-a0-gf-a0-72.ucode is missing) . It's unclear what those do or don't, as the WiFi seems to work well without them. I still copied them in from the latest linux-firmware package in the hope they would help with power management, but I did not notice a change after loading them. There are also multiple knobs on the iwlwifi and iwlmvm drivers. The latter has a power_schmeme setting which defaults to 2 (balanced), setting it to 3 (low power) could improve battery usage as well, in theory. The iwlwifi driver also has power_save (defaults to disabled) and power_level (1-5, defaults to 1) settings. See also the output of modinfo iwlwifi and modinfo iwlmvm for other driver options.

Graphics acceleration After loading the latest upstream firmware and setting up a compositing manager (compton, above), I tested the classic glxgears. Running in a window gives me odd results, as the gears basically grind to a halt:
Running synchronized to the vertical refresh.  The framerate should be
approximately the same as the monitor refresh rate.
137 frames in 5.1 seconds = 26.984 FPS
27 frames in 5.4 seconds =  5.022 FPS
Ouch. 5FPS! But interestingly, once the window is in full screen, it does hit the monitor refresh rate:
300 frames in 5.0 seconds = 60.000 FPS
I'm not really a gamer and I'm not normally using any of that fancy graphics acceleration stuff (except maybe my browser does?). I installed intel-gpu-tools for the intel_gpu_top command to confirm the GPU was engaged when doing those simulations. A nice find. Other useful diagnostic tools include glxgears and glxinfo (in mesa-utils) and (vainfo in vainfo). Following to this post, I also made sure to have those settings in my about:config in Firefox, or, in user.js:
user_pref("media.ffmpeg.vaapi.enabled", true);
Note that the guide suggests many other settings to tweak, but those might actually be overkill, see this comment and its parents. I did try forcing hardware acceleration by setting gfx.webrender.all to true, but everything became choppy and weird. The guide also mentions installing the intel-media-driver package, but I could not find that in Debian. The Arch wiki has, as usual, an excellent reference on hardware acceleration in Firefox.

Chromium / Signal desktop bugs It looks like both Chromium and Signal Desktop misbehave with my compositor setup (compton + i3). The fix is to add a persistent flag to Chromium. In Arch, it's conveniently in ~/.config/chromium-flags.conf but that doesn't actually work in Debian. I had to put the flag in /etc/chromium.d/disable-compositing, like this:
export CHROMIUM_FLAGS="$CHROMIUM_FLAGS --disable-gpu-compositing"
It's possible another one of the hundreds of flags might fix this issue better, but I don't really have time to go through this entire, incomplete, and unofficial list (!?!). Signal Desktop is a similar problem, and doesn't reuse those flags (because of course it doesn't). Instead I had to rewrite the wrapper script in /usr/local/bin/signal-desktop to use this instead:
exec /usr/bin/flatpak run --branch=stable --arch=x86_64 org.signal.Signal --disable-gpu-compositing "$@"
This was mostly done in this Puppet commit. I haven't figured out the root of this problem. I did try using picom and xcompmgr; they both suffer from the same issue. Another Debian testing user on Wayland told me they haven't seen this problem, so hopefully this can be fixed by switching to wayland.

Graphics card hangs I believe I might have this bug which results in a total graphical hang for 15-30 seconds. It's fairly rare so it's not too disruptive, but when it does happen, it's pretty alarming. The comments on that bug report are encouraging though: it seems this is a bug in either mesa or the Intel graphics driver, which means many people have this problem so it's likely to be fixed. There's actually a merge request on mesa already (2022-12-29). It could also be that bug because the error message I get is actually:
Jan 20 12:49:10 angela kernel: Asynchronous wait on fence 0000:00:02.0:sway[104431]:cb0ae timed out (hint:intel_atomic_commit_ready [i915]) 
Jan 20 12:49:15 angela kernel: i915 0000:00:02.0: [drm] GPU HANG: ecode 12:0:00000000 
Jan 20 12:49:15 angela kernel: i915 0000:00:02.0: [drm] Resetting chip for stopped heartbeat on rcs0 
Jan 20 12:49:15 angela kernel: i915 0000:00:02.0: [drm] GuC firmware i915/adlp_guc_70.1.1.bin version 70.1 
Jan 20 12:49:15 angela kernel: i915 0000:00:02.0: [drm] HuC firmware i915/tgl_huc_7.9.3.bin version 7.9 
Jan 20 12:49:15 angela kernel: i915 0000:00:02.0: [drm] HuC authenticated 
Jan 20 12:49:15 angela kernel: i915 0000:00:02.0: [drm] GuC submission enabled 
Jan 20 12:49:15 angela kernel: i915 0000:00:02.0: [drm] GuC SLPC enabled
It's a solid 30 seconds graphical hang. Maybe the keyboard and everything else keeps working. The latter bug report is quite long, with many comments, but this one from January 2023 seems to say that Sway 1.8 fixed the problem. There's also an earlier patch to add an extra kernel parameter that supposedly fixes that too. There's all sorts of other workarounds in there, for example this:
echo "options i915 enable_dc=1 enable_guc_loading=1 enable_guc_submission=1 edp_vswing=0 enable_guc=2 enable_fbc=1 enable_psr=1 disable_power_well=0"   sudo tee /etc/modprobe.d/i915.conf
from this comment... So that one is unsolved, as far as the upstream drivers are concerned, but maybe could be fixed through Sway.

Weird USB hangs / graphical glitches I have had weird connectivity glitches better described in this post, but basically: my USB keyboard and mice (connected over a USB hub) drop keys, lag a lot or hang, and I get visual glitches. The fix was to tighten the screws around the CPU on the motherboard (!), which is, thankfully, a rather simple repair.

USB docks are hell Note that the monitors are hooked up to angela through a USB-C / Thunderbolt dock from Cable Matters, with the lovely name of 201053-SIL. It has issues, see this blog post for an in-depth discussion.

Shipping details I ordered the Framework in August 2022 and received it about a month later, which is sooner than expected because the August batch was late. People (including me) expected this to have an impact on the September batch, but it seems Framework have been able to fix the delivery problems and keep up with the demand. As of early 2023, their website announces that laptops ship "within 5 days". I have myself ordered a few expansion cards in November 2022, and they shipped on the same day, arriving 3-4 days later.

The supply pipeline There are basically 6 steps in the Framework shipping pipeline, each (except the last) accompanied with an email notification:
  1. pre-order
  2. preparing batch
  3. preparing order
  4. payment complete
  5. shipping
  6. (received)
This comes from the crowdsourced spreadsheet, which should be updated when the status changes here. I was part of the "third batch" of the 12th generation laptop, which was supposed to ship in September. It ended up arriving on my door step on September 27th, about 33 days after ordering. It seems current orders are not processed in "batches", but in real time, see this blog post for details on shipping.

Shipping trivia I don't know about the others, but my laptop shipped through no less than four different airplane flights. Here are the hops it took: I can't quite figure out how to calculate exactly how much mileage that is, but it's huge. The ride through Alaska is surprising enough but the bounce back through Winnipeg is especially weird. I guess the route happens that way because of Fedex shipping hubs. There was a related oddity when I had my Purism laptop shipped: it left from the west coast and seemed to enter on an endless, two week long road trip across the continental US.

Other resources

28 January 2023

Emmanuel Kasper: Table of correspondence between AWS / Azure / Red Hat OpenShift Container Platform / upstream projects

If you know the Amazon Web Services or Azure portfolio, and you are interested in OpenShift or the OKD OpenShift community distribution, this is a table of corresponding technologies. OpenShift is Red Hat s Kubernetes distribution: it is basically the upstream Kubernetes delivered with monitoring, logging, CI/CD, underlying OS, tested upgrade paths not found with a manual kubernetes.io kubeadm install. After passing the two corresponding certifications, my opinion on cloud operators is that it is very much a step back in the direction of proprietary software. You can rebuild their cloud stack with opensource components, but it is also a lot of integration work, similar to using the Linux from scratch distribution instead of something like Debian. A good middle point are the OpenShift and OKD Kubernetes distributions, who integrate the most common cloud components, but allow an installation on your own hardware or cloud provider of your choice.
AWS Azure OpenShift *OpenShift upstream project&
Cloud Trail Kubernetes API Server audit log Kubernetes
Cloud Watch Azure Monitor, Azure Log Analytics OpenShift Monitoring Prometheus, Kubernetes Metrics
AWS Artifact Compliance Operator OpenSCAP
AWS Trusted Advisor Azure Advisor Insights
AWS Marketplace Red Hat Market place Operator Hub
AWS Identity and Access Management (IAM) Azure Active Directory, Azure AD DS Red Hat SSO Keycloack
AWS Elastisc Beanstalk Azure App Services OpenShift Source2Image (S2I) Source2Image (S2I)
AWS S3 Azure Blob Storage** ODF Rados Gateway Rook RGW
AWS Elastic Block Storage Azure Disk Storage ODF Rados Block Device Rook RBD
AWS Elastic File System Azure Files ODF Ceph FS Rook CephFS
AWS ELB Classic Azure Load Balancer MetalLB Operator MetalLB
AWS ELB Application Load Balancer Azure Application Gateway OpenShift Router HAProxy
Amazon Simple Notification Service OpenShift Streams for Apache Kafka Apache Kafka
Amazon Guard Duty Microsoft Defender for Cloud API Server audit log review, ACS Runtime detection Stackrox
Amazon Inspector Microsoft Defender for Cloud Quay.io container scanner, ACS Vulnerability Assessment Clair, Stackrox
AWS Lambda Azure Serverless Openshift Serverless* Knative
AWS Key Management System Azure Key Vault could be done with Hashicorp Vault Vault
AWS WAF NGINX Ingress Controller Operator with ModSecurity NGINX ModSecurity
Amazon Elasticache Redis Enterprise Operator Redis, memcached as alternative
AWS Relational Database Service Azure SQL Crunchy Data Operator PostgreSQL
Azure Arc OpenShift ACM Open Cluster Management
AWS Scaling Group Azure Scale Set OpenShift Autoscaler OKD Autoscaler
* OpenShift Serverless requires the application to be packaged as a container, something AWS Lambda does not require. ** Azure Blob Storage covers the object storage use case of S3, but is itself not S3 compatible

2 January 2023

Emmanuel Kasper: Ensuring someone is listening before telling a joke

  • Alice (speaking to Bob): Bob, I have a good joke to tell, can I call you at 12:00 ?
  • Bob (turns head towards Alice): OK, fine for me, but can we make it at 13:00 ?
  • Alice (nodding): Works for me.
  • At 13:00, Alice starts telling a joke.
Did you recognize the three way TCP handshake ? Protagonists:
  • Alice: Client
  • Bob: Server
Dialog:
  • I have a good joke to tell: TCP segment with SYN flag
  • 12:00: initial sequence number
  • OK: TCP segment with SYN and ACK flag
  • 13:00: acknowledgment number (initial sequence number + 1)
  • Works for me: TCP segment with ACK flag, acknowledgment of the server acknowledgment
More details on this in https://www.linuxjournal.com/article/6447 and remember tcpdump uses a dot( . ) to indicate segments with the ACK flag.

8 December 2022

Louis-Philippe V ronneau: Debian Python Team 2022 Sprint Report

This is the report for the Debian Python Team remote sprint that took place on December 2-3-4 2022. Many thanks to those who participated, namely: Here is a list of issues we worked on: pybuild autodep8 feature About a year ago, Antonio Terceiro contributed code to pybuild to make it possible to automatically run the upstream test suite as autopkgtests. This feature has now been merged and uploaded to unstable. Although you can find out more about it in the pybuild-autopkgtest manpage, an email providing more details should be sent to the debian-python mailing list relatively soon. Fixing packages that run tests via python3 setup.py test Last August, Stefano Rivera poked the team about the deprecation of the python3 setup.py test command to run tests in pybuild. Although this feature has been deprecated upstream for 6 years now, many packages in the archive still use it to run the upstream test suite during build. Around 29 of the 67 packages that are team-maintained by the Debian Python Team were fixed during the sprint. Ideally, all of them would be before the feature is removed from pybuild. if a package you maintain still runs this command, please consider fixing it! Fixing packages that use nose nose, provided by the python3-nose package, is an obsolete testing framework for Python and has been unmaintained since 2015. During the sprint, people worked on fixing some of the many bugs filled against packages still running tests via nose, but there are still around 240 packages affected by this issue in the archive. Again, if a package you maintain still runs this command, please consider fixing it! Removal of the remaining Python2 packages With the upload of dh-python 5.20221202, Stefano Rivera officially removed support for dh_python2 and dh_pypy, thus closing the "Python2 removal in sid/bullseye" bug. It seems some work still needs to be done for complete Python2 removal from Sid, but I expect this will be done in time for the Bookworm release. Working on Lintian tags for the Team During the sprint, I managed to work on some Lintian issues that we had targeted, namely: I also worked on a few other Lintian tags, but they were unrelated to the Debian Python Team itself. I'm also happy to report many of the tags I wrote for the team in the past few months were merged by the awesome Russ Allbery and should land in unstable as soon as a new release is made. I'm particularly looking forward the new "uses-python-distutils" tag that should help us flag packages that still use the deprecated distutils library. Patching distro-tracker (tracker.debian.org) to show pending team MRs It's often hard to have a good overview of pending merge requests when working with team-maintained packages, as by default, Salsa doesn't notify anyone when a MR is opened. Although our workflow typically does not involve creating merge requests, some people still do and they end up sitting there, unnoticed. During the sprint, Kurt Kremitzki worked on solving this issue by having distro-tracker show the pending MRs on our team's tracker page. Sadly, it seems little progress was made, as the removal of python3-django-jsonfield from the archive and breaking changes in python3-selenium has broken the test suite. Migrate packages building with the flit plugin to the generic pyproject one pybuild has been supporting building with PEP-517 style pyproject.toml files via a generic plugin (pybuild-plugin-pyproject) for a while now. As this plugin supersedes the old flit plugin, we've been thinking of deprecating it in time for the Bookworm release. To make this possible, most of the packages in the archive that still used this plugin were migrated to the generic one and I opened bugs on the last handful of packages that were not team-maintained. Other work Many other things were done during the sprint, such as: Thanks Thanks again to everyone who joined the sprint, and three big cheers for all the folks who donate to Debian and made it possible for us to have a food budget for the event.

Next.