Search Results: "justin"

19 April 2024

Louis-Philippe V ronneau: Montreal's Debian & Stuff - March 2024

Time really flies when you are really busy you have fun! Our Montr al Debian User Group met on Sunday March 31st and I only just found the time to write our report :) This time around, 9 of us we met at EfficiOS's offices1 to chat, hang out and work on Debian and other stuff! Here is what we did: pollo: tvaz: tassia: viashimo: lavamind: justin: Pictures Here are pictures of the event. Well, one picture (thanks Tassia!) of the event itself and another one of the crisp Italian lager I drank at the bar after the event :) People at the event working around a long table A glass of beer illuminated by sunlight

  1. Maintainers, amongst other things, of the great LTTng.

12 April 2024

Freexian Collaborators: Debian Contributions: SSO Authentication for jitsi.debian.social, /usr-move updates, and more! (by Utkarsh Gupta)

Contributing to Debian is part of Freexian s mission. This article covers the latest achievements of Freexian and their collaborators. All of this is made possible by organizations subscribing to our Long Term Support contracts and consulting services. P.S. We ve completed over a year of writing these blogs. If you have any suggestions on how to make them better or what you d like us to cover, or any other opinions/reviews you might have, et al, please let us know by dropping an email to us. We d be happy to hear your thoughts. :)

SSO Authentication for jitsi.debian.social, by Stefano Rivera Debian.social s jitsi instance has been getting some abuse by (non-Debian) people sharing sexually explicit content on the service. After playing whack-a-mole with this for a month, and shutting the instance off for another month, we opened it up again and the abuse immediately re-started. Stefano sat down and wrote an SSO Implementation that hooks into Jitsi s existing JWT SSO support. This requires everyone using jitsi.debian.social to have a Salsa account. With only a little bit of effort, we could change this in future, to only require an account to open a room, and allow guests to join the call.

/usr-move, by Helmut Grohne The biggest task this month was sending mitigation patches for all of the /usr-move issues arising from package renames due to the 2038 transition. As a result, we can now say that every affected package in unstable can either be converted with dh-sequence-movetousr or has an open bug report. The package set relevant to debootstrap except for the set that has to be uploaded concurrently has been moved to /usr and is awaiting migration. The move of coreutils happened to affect piuparts which hard codes the location of /bin/sync and received multiple updates as a result.

Miscellaneous contributions
  • Stefano Rivera uploaded a stable release update to python3.11 for bookworm, fixing a use-after-free crash.
  • Stefano uploaded a new version of python-html2text, and updated python3-defaults to build with it.
  • In support of Python 3.12, Stefano dropped distutils as a Build-Dependency from a few packages, and uploaded a complex set of patches to python-mitogen.
  • Stefano landed some merge requests to clean up dead code in dh-python, removed the flit plugin, and uploaded it.
  • Stefano uploaded new upstream versions of twisted, hatchling, python-flexmock, python-authlib, python mitogen, python-pipx, and xonsh.
  • Stefano requested removal of a few packages supporting the Opsis HDMI2USB hardware that DebConf Video team used to use for HDMI capture, as they are not being maintained upstream. They started to FTBFS, with recent sdcc changes.
  • DebConf 24 is getting ready to open registration, Stefano spent some time fixing bugs in the website, caused by infrastructure updates.
  • Stefano reviewed all the DebConf 23 travel reimbursements, filing requests for more information from SPI where our records mismatched.
  • Stefano spun up a Wafer website for the Berlin 2024 mini DebConf.
  • Roberto C. S nchez worked on facilitating the transfer of upstream maintenance responsibility for the dormant Shorewall project to a new team led by the current maintainer of the Shorewall packages in Debian.
  • Colin Watson fixed build failures in celery-haystack-ng, db1-compat, jsonpickle, libsdl-perl, kali, knews, openssh-ssh1, python-json-log-formatter, python-typing-extensions, trn4, vigor, and wcwidth. Some of these were related to the 64-bit time_t transition, since that involved enabling -Werror=implicit-function-declaration.
  • Colin fixed an off-by-one error in neovim, which was already causing a build failure in Ubuntu and would eventually have caused a build failure in Debian with stricter toolchain settings.
  • Colin added an sshd@.service template to openssh to help newer systemd versions make containers and VMs SSH-accessible over AF_VSOCK sockets.
  • Following the xz-utils backdoor, Colin spent some time testing and discussing OpenSSH upstream s proposed inline systemd notification patch, since the current implementation via libsystemd was part of the attack vector used by that backdoor.
  • Utkarsh reviewed and sponsored some Go packages for Lena Voytek and Rajudev.
  • Utkarsh also helped Mitchell Dzurick with the adoption of pyparted package.
  • Helmut sent 10 patches for cross build failures.
  • Helmut partially fixed architecture cross bootstrap tooling to deal with changes in linux-libc-dev and the recent gcc-for-host changes and also fixed a 64bit-time_t FTBFS in libtextwrap.
  • Thorsten Alteholz uploaded several packages from debian-printing: cjet, lprng, rlpr and epson-inkjet-printer-escpr were affected by the newly enabled compiler switch -Werror=implicit-function-declaration. Besides fixing these serious bugs, Thorsten also worked on other bugs and could fix one or the other.
  • Carles updated simplemonitor and python-ring-doorbell packages with new upstream versions.
  • Santiago is still working on the Salsa CI MRs to adapt the build jobs so they can rely on sbuild. Current work includes adapting the images used by the build job, implementing the basic sbuild support the related jobs, and adjusting the support for experimental and *-backports releases..
    Additionally, Santiago reviewed some MR such as Make timeout action explicit in the logs and the subsequent Implement conditional timeout verbosity, and the batch of MRs included in https://salsa.debian.org/salsa-ci-team/pipeline/-/merge_requests/482.
  • Santiago also reviewed applications for the improving Salsa CI in Debian GSoC 2024 project. We received applications from four very talented candidates. The selection process is currently ongoing. A huge thanks to all of them!
  • As part of the DebConf 24 organization, Santiago has taken part in the Content team discussions.

22 January 2024

Paul Tagliamonte: Writing a simulator to check phased array beamforming

Interested in future updates? Follow me on mastodon at @paul@soylent.green. Posts about hz.tools will be tagged #hztools.

If you're on the Fediverse, I'd very much appreciate boosts on my toot!
While working on hz.tools, I started to move my beamforming code from 2-D (meaning, beamforming to some specific angle on the X-Y plane for waves on the X-Y plane) to 3-D. I ll have more to say about that once I get around to publishing the code as soon as I m sure it s not completely wrong, but in the meantime I decided to write a simple simulator to visually check the beamformer against the textbooks. The results were pretty rad, so I figured I d throw together a post since it s interesting all on its own outside of beamforming as a general topic. I figured I d write this in Rust, since I ve been using Rust as my primary language over at zoo, and it s a good chance to learn the language better.
This post has some large GIFs

It make take a little bit to load depending on your internet connection. Sorry about that, I'm not clever enough to do better without doing tons of complex engineering work. They may be choppy while they load or something. I tried to compress an ensmall them, so if they're loaded but fuzzy, click on them to load a slightly larger version.
This post won t cover the basics of how phased arrays work or the specifics of calculating the phase offsets for each antenna, but I ll dig into how I wrote a simple simulator and how I wound up checking my phase offsets to generate the renders below.

Assumptions I didn t want to build a general purpose RF simulator, anything particularly generic, or something that would solve for any more than the things right in front of me. To do this as simply (and quickly all this code took about a day to write, including the beamforming math) I had to reduce the amount of work in front of me. Given that I was concerend with visualizing what the antenna pattern would look like in 3-D given some antenna geometry, operating frequency and configured beam, I made the following assumptions: All anetnnas are perfectly isotropic they receive a signal that is exactly the same strength no matter what direction the signal originates from. There s a single point-source isotropic emitter in the far-field (I modeled this as being 1 million meters away 1000 kilometers) of the antenna system. There is no noise, multipath, loss or distortion in the signal as it travels through space. Antennas will never interfere with each other.

2-D Polar Plots The last time I wrote something like this, I generated 2-D GIFs which show a radiation pattern, not unlike the polar plots you d see on a microphone. These are handy because it lets you visualize what the directionality of the antenna looks like, as well as in what direction emissions are captured, and in what directions emissions are nulled out. You can see these plots on spec sheets for antennas in both 2-D and 3-D form. Now, let s port the 2-D approach to 3-D and see how well it works out.

Writing the 3-D simulator As an EM wave travels through free space, the place at which you sample the wave controls that phase you observe at each time-step. This means, assuming perfectly synchronized clocks, a transmitter and receiver exactly one RF wavelength apart will observe a signal in-phase, but a transmitter and receiver a half wavelength apart will observe a signal 180 degrees out of phase. This means that if we take the distance between our point-source and antenna element, divide it by the wavelength, we can use the fractional part of the resulting number to determine the phase observed. If we multiply that number (in the range of 0 to just under 1) by tau, we can generate a complex number by taking the cos and sin of the multiplied phase (in the range of 0 to tau), assuming the transmitter is emitting a carrier wave at a static amplitude and all clocks are in perfect sync.
 let observed_phases: Vec<Complex> = antennas
.iter()
.map( antenna   
let distance = (antenna - tx).magnitude();
let distance = distance - (distance as i64 as f64);
((distance / wavelength) * TAU)
 )
.map( phase  Complex(phase.cos(), phase.sin()))
.collect();
At this point, given some synthetic transmission point and each antenna, we know what the expected complex sample would be at each antenna. At this point, we can adjust the phase of each antenna according to the beamforming phase offset configuration, and add up every sample in order to determine what the entire system would collectively produce a sample as.
 let beamformed_phases: Vec<Complex> = ...;
let magnitude = beamformed_phases
.iter()
.zip(observed_phases.iter())
.map( (beamformed, observed)  observed * beamformed)
.reduce( acc, el  acc + el)
.unwrap()
.abs();
Armed with this information, it s straight forward to generate some number of (Azimuth, Elevation) points to sample, generate a transmission point far away in that direction, resolve what the resulting Complex sample would be, take its magnitude, and use that to create an (x, y, z) point at (azimuth, elevation, magnitude). The color attached two that point is based on its distance from (0, 0, 0). I opted to use the Life Aquatic table for this one. After this process is complete, I have a point cloud of ((x, y, z), (r, g, b)) points. I wrote a small program using kiss3d to render point cloud using tons of small spheres, and write out the frames to a set of PNGs, which get compiled into a GIF. Now for the fun part, let s take a look at some radiation patterns!

1x4 Phased Array The first configuration is a phased array where all the elements are in perfect alignment on the y and z axis, and separated by some offset in the x axis. This configuration can sweep 180 degrees (not the full 360), but can t be steared in elevation at all. Let s take a look at what this looks like for a well constructed 1x4 phased array: 
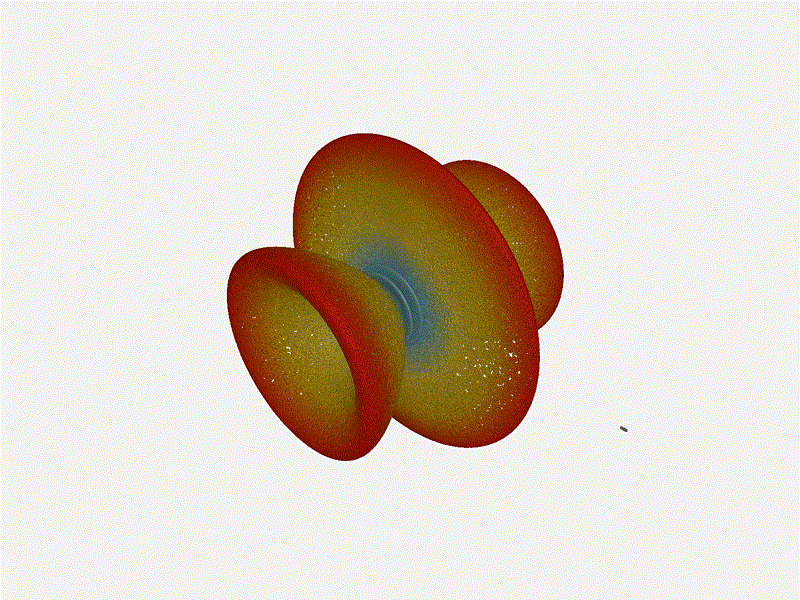
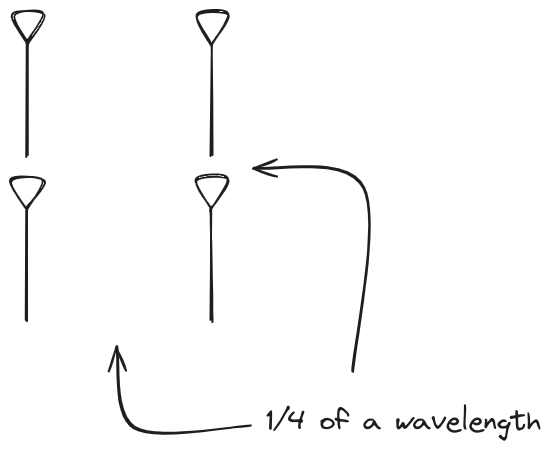
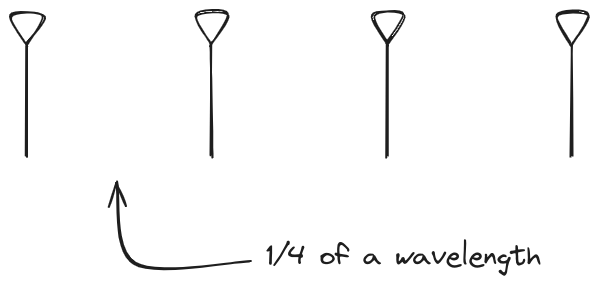
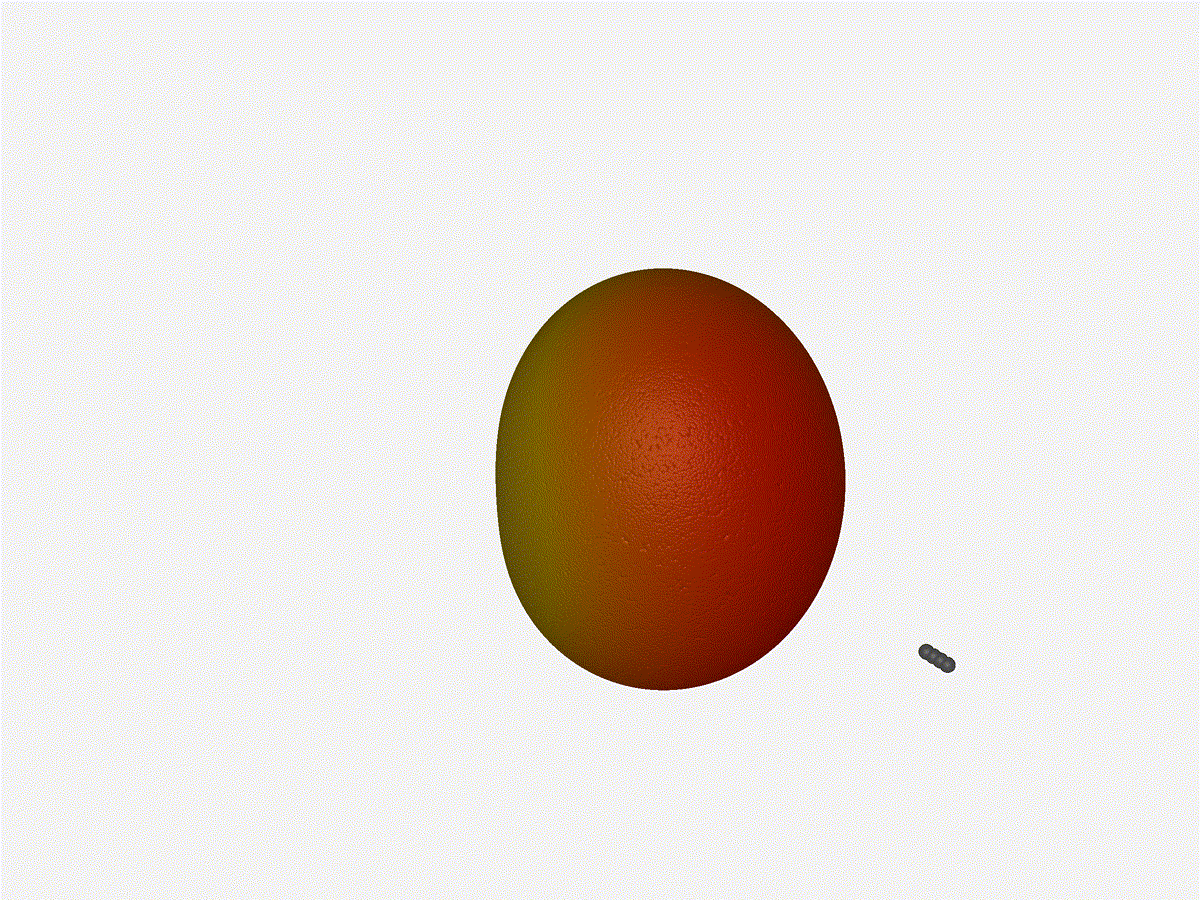
And now let s take a look at the renders as we play with the configuration of this array and make sure things look right. Our initial quarter-wavelength spacing is very effective and has some outstanding performance characteristics. Let s check to see that everything looks right as a first test. Nice. Looks perfect. When pointing forward at (0, 0), we d expect to see a torus, which we do. As we sweep between 0 and 360, astute observers will notice the pattern is mirrored along the axis of the antennas, when the beam is facing forward to 0 degrees, it ll also receive at 180 degrees just as strong. There s a small sidelobe that forms when it s configured along the array, but it also becomes the most directional, and the sidelobes remain fairly small.

Long compared to the wavelength (1 ) Let s try again, but rather than spacing each antenna of a wavelength apart, let s see about spacing each antenna 1 of a wavelength apart instead. The main lobe is a lot more narrow (not a bad thing!), but some significant sidelobes have formed (not ideal). This can cause a lot of confusion when doing things that require a lot of directional resolution unless they re compensated for.

Going from ( to 5 ) The last model begs the question - what do things look like when you separate the antennas from each other but without moving the beam? Let s simulate moving our antennas but not adjusting the configured beam or operating frequency. Very cool. As the spacing becomes longer in relation to the operating frequency, we can see the sidelobes start to form out of the end of the antenna system.

2x2 Phased Array The second configuration I want to try is a phased array where the elements are in perfect alignment on the z axis, and separated by a fixed offset in either the x or y axis by their neighbor, forming a square when viewed along the x/y axis. Let s take a look at what this looks like for a well constructed 2x2 phased array: 
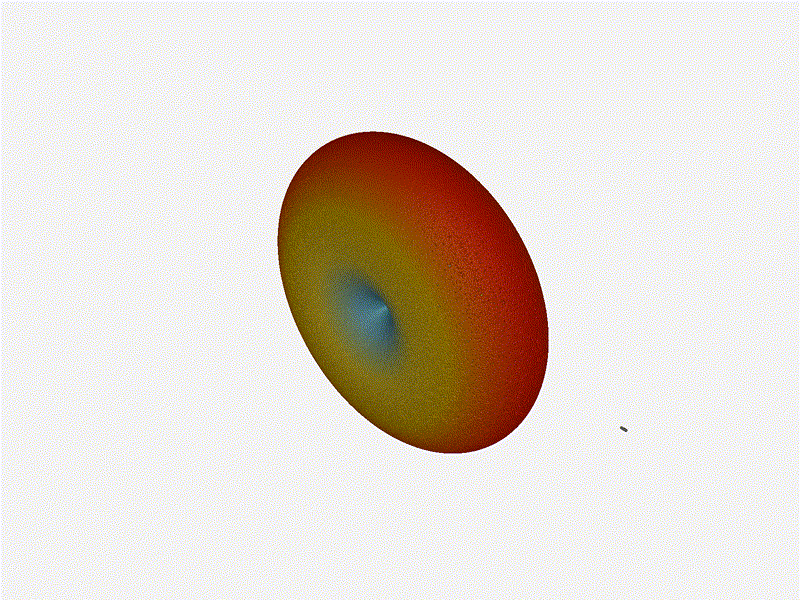
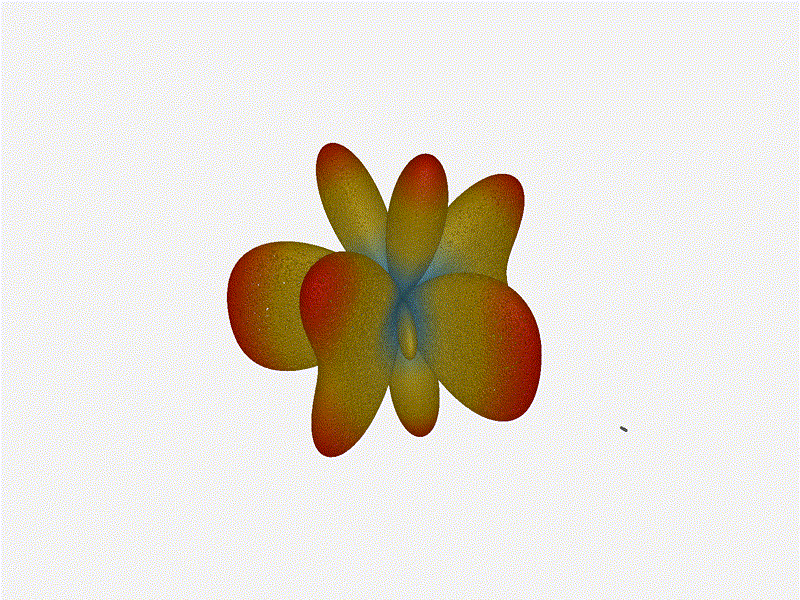
Let s do the same as above and take a look at the renders as we play with the configuration of this array and see what things look like. This configuration should suppress the sidelobes and give us good performance, and even give us some amount of control in elevation while we re at it. Sweet. Heck yeah. The array is quite directional in the configured direction, and can even sweep a little bit in elevation, a definite improvement from the 1x4 above.

Long compared to the wavelength (1 ) Let s do the same thing as the 1x4 and take a look at what happens when the distance between elements is long compared to the frequency of operation say, 1 of a wavelength apart? What happens to the sidelobes given this spacing when the frequency of operation is much different than the physical geometry? Mesmerising. This is my favorate render. The sidelobes are very fun to watch come in and out of existence. It looks absolutely other-worldly.

Going from ( to 5 ) Finally, for completeness' sake, what do things look like when you separate the antennas from each other just as we did with the 1x4? Let s simulate moving our antennas but not adjusting the configured beam or operating frequency. Very very cool. The sidelobes wind up turning the very blobby cardioid into an electromagnetic dog toy. I think we ve proven to ourselves that using a phased array much outside its designed frequency of operation seems like a real bad idea.

Future Work Now that I have a system to test things out, I m a bit more confident that my beamforming code is close to right! I d love to push that code over the line and blog about it, since it s a really interesting topic on its own. Once I m sure the code involved isn t full of lies, I ll put it up on the hztools org, and post about it here and on mastodon.

13 December 2023

Melissa Wen: 15 Tips for Debugging Issues in the AMD Display Kernel Driver

A self-help guide for examining and debugging the AMD display driver within the Linux kernel/DRM subsystem. It s based on my experience as an external developer working on the driver, and are shared with the goal of helping others navigate the driver code. Acknowledgments: These tips were gathered thanks to the countless help received from AMD developers during the driver development process. The list below was obtained by examining open source code, reviewing public documentation, playing with tools, asking in public forums and also with the help of my former GSoC mentor, Rodrigo Siqueira.

Pre-Debugging Steps: Before diving into an issue, it s crucial to perform two essential steps: 1) Check the latest changes: Ensure you re working with the latest AMD driver modifications located in the amd-staging-drm-next branch maintained by Alex Deucher. You may also find bug fixes for newer kernel versions on branches that have the name pattern drm-fixes-<date>. 2) Examine the issue tracker: Confirm that your issue isn t already documented and addressed in the AMD display driver issue tracker. If you find a similar issue, you can team up with others and speed up the debugging process.

Understanding the issue: Do you really need to change this? Where should you start looking for changes? 3) Is the issue in the AMD kernel driver or in the userspace?: Identifying the source of the issue is essential regardless of the GPU vendor. Sometimes this can be challenging so here are some helpful tips:
  • Record the screen: Capture the screen using a recording app while experiencing the issue. If the bug appears in the capture, it s likely a userspace issue, not the kernel display driver.
  • Analyze the dmesg log: Look for error messages related to the display driver in the dmesg log. If the error message appears before the message [drm] Display Core v... , it s not likely a display driver issue. If this message doesn t appear in your log, the display driver wasn t fully loaded and you will see a notification that something went wrong here.
4) AMD Display Manager vs. AMD Display Core: The AMD display driver consists of two components:
  • Display Manager (DM): This component interacts directly with the Linux DRM infrastructure. Occasionally, issues can arise from misinterpretations of DRM properties or features. If the issue doesn t occur on other platforms with the same AMD hardware - for example, only happens on Linux but not on Windows - it s more likely related to the AMD DM code.
  • Display Core (DC): This is the platform-agnostic part responsible for setting and programming hardware features. Modifications to the DC usually require validation on other platforms, like Windows, to avoid regressions.
5) Identify the DC HW family: Each AMD GPU has variations in its hardware architecture. Features and helpers differ between families, so determining the relevant code for your specific hardware is crucial.
  • Find GPU product information in Linux/AMD GPU documentation
  • Check the dmesg log for the Display Core version (since this commit in Linux kernel 6.3v). For example:
    • [drm] Display Core v3.2.241 initialized on DCN 2.1
    • [drm] Display Core v3.2.237 initialized on DCN 3.0.1

Investigating the relevant driver code: Keep from letting unrelated driver code to affect your investigation. 6) Narrow the code inspection down to one DC HW family: the relevant code resides in a directory named after the DC number. For example, the DCN 3.0.1 driver code is located at drivers/gpu/drm/amd/display/dc/dcn301. We all know that the AMD s shared code is huge and you can use these boundaries to rule out codes unrelated to your issue. 7) Newer families may inherit code from older ones: you can find dcn301 using code from dcn30, dcn20, dcn10 files. It s crucial to verify which hooks and helpers your driver utilizes to investigate the right portion. You can leverage ftrace for supplemental validation. To give an example, it was useful when I was updating DCN3 color mapping to correctly use their new post-blending color capabilities, such as: Additionally, you can use two different HW families to compare behaviours. If you see the issue in one but not in the other, you can compare the code and understand what has changed and if the implementation from a previous family doesn t fit well the new HW resources or design. You can also count on the help of the community on the Linux AMD issue tracker to validate your code on other hardware and/or systems. This approach helped me debug a 2-year-old issue where the cursor gamma adjustment was incorrect in DCN3 hardware, but working correctly for DCN2 family. I solved the issue in two steps, thanks for community feedback and validation: 8) Check the hardware capability screening in the driver: You can currently find a list of display hardware capabilities in the drivers/gpu/drm/amd/display/dc/dcn*/dcn*_resource.c file. More precisely in the dcn*_resource_construct() function. Using DCN301 for illustration, here is the list of its hardware caps:
	/*************************************************
	 *  Resource + asic cap harcoding                *
	 *************************************************/
	pool->base.underlay_pipe_index = NO_UNDERLAY_PIPE;
	pool->base.pipe_count = pool->base.res_cap->num_timing_generator;
	pool->base.mpcc_count = pool->base.res_cap->num_timing_generator;
	dc->caps.max_downscale_ratio = 600;
	dc->caps.i2c_speed_in_khz = 100;
	dc->caps.i2c_speed_in_khz_hdcp = 5; /*1.4 w/a enabled by default*/
	dc->caps.max_cursor_size = 256;
	dc->caps.min_horizontal_blanking_period = 80;
	dc->caps.dmdata_alloc_size = 2048;
	dc->caps.max_slave_planes = 2;
	dc->caps.max_slave_yuv_planes = 2;
	dc->caps.max_slave_rgb_planes = 2;
	dc->caps.is_apu = true;
	dc->caps.post_blend_color_processing = true;
	dc->caps.force_dp_tps4_for_cp2520 = true;
	dc->caps.extended_aux_timeout_support = true;
	dc->caps.dmcub_support = true;
	/* Color pipeline capabilities */
	dc->caps.color.dpp.dcn_arch = 1;
	dc->caps.color.dpp.input_lut_shared = 0;
	dc->caps.color.dpp.icsc = 1;
	dc->caps.color.dpp.dgam_ram = 0; // must use gamma_corr
	dc->caps.color.dpp.dgam_rom_caps.srgb = 1;
	dc->caps.color.dpp.dgam_rom_caps.bt2020 = 1;
	dc->caps.color.dpp.dgam_rom_caps.gamma2_2 = 1;
	dc->caps.color.dpp.dgam_rom_caps.pq = 1;
	dc->caps.color.dpp.dgam_rom_caps.hlg = 1;
	dc->caps.color.dpp.post_csc = 1;
	dc->caps.color.dpp.gamma_corr = 1;
	dc->caps.color.dpp.dgam_rom_for_yuv = 0;
	dc->caps.color.dpp.hw_3d_lut = 1;
	dc->caps.color.dpp.ogam_ram = 1;
	// no OGAM ROM on DCN301
	dc->caps.color.dpp.ogam_rom_caps.srgb = 0;
	dc->caps.color.dpp.ogam_rom_caps.bt2020 = 0;
	dc->caps.color.dpp.ogam_rom_caps.gamma2_2 = 0;
	dc->caps.color.dpp.ogam_rom_caps.pq = 0;
	dc->caps.color.dpp.ogam_rom_caps.hlg = 0;
	dc->caps.color.dpp.ocsc = 0;
	dc->caps.color.mpc.gamut_remap = 1;
	dc->caps.color.mpc.num_3dluts = pool->base.res_cap->num_mpc_3dlut; //2
	dc->caps.color.mpc.ogam_ram = 1;
	dc->caps.color.mpc.ogam_rom_caps.srgb = 0;
	dc->caps.color.mpc.ogam_rom_caps.bt2020 = 0;
	dc->caps.color.mpc.ogam_rom_caps.gamma2_2 = 0;
	dc->caps.color.mpc.ogam_rom_caps.pq = 0;
	dc->caps.color.mpc.ogam_rom_caps.hlg = 0;
	dc->caps.color.mpc.ocsc = 1;
	dc->caps.dp_hdmi21_pcon_support = true;
	/* read VBIOS LTTPR caps */
	if (ctx->dc_bios->funcs->get_lttpr_caps)  
		enum bp_result bp_query_result;
		uint8_t is_vbios_lttpr_enable = 0;
		bp_query_result = ctx->dc_bios->funcs->get_lttpr_caps(ctx->dc_bios, &is_vbios_lttpr_enable);
		dc->caps.vbios_lttpr_enable = (bp_query_result == BP_RESULT_OK) && !!is_vbios_lttpr_enable;
	 
	if (ctx->dc_bios->funcs->get_lttpr_interop)  
		enum bp_result bp_query_result;
		uint8_t is_vbios_interop_enabled = 0;
		bp_query_result = ctx->dc_bios->funcs->get_lttpr_interop(ctx->dc_bios, &is_vbios_interop_enabled);
		dc->caps.vbios_lttpr_aware = (bp_query_result == BP_RESULT_OK) && !!is_vbios_interop_enabled;
	 
Keep in mind that the documentation of color capabilities are available at the Linux kernel Documentation.

Understanding the development history: What has brought us to the current state? 9) Pinpoint relevant commits: Use git log and git blame to identify commits targeting the code section you re interested in. 10) Track regressions: If you re examining the amd-staging-drm-next branch, check for regressions between DC release versions. These are defined by DC_VER in the drivers/gpu/drm/amd/display/dc/dc.h file. Alternatively, find a commit with this format drm/amd/display: 3.2.221 that determines a display release. It s useful for bisecting. This information helps you understand how outdated your branch is and identify potential regressions. You can consider each DC_VER takes around one week to be bumped. Finally, check testing log of each release in the report provided on the amd-gfx mailing list, such as this one Tested-by: Daniel Wheeler:

Reducing the inspection area: Focus on what really matters. 11) Identify involved HW blocks: This helps isolate the issue. You can find more information about DCN HW blocks in the DCN Overview documentation. In summary:
  • Plane issues are closer to HUBP and DPP.
  • Blending/Stream issues are closer to MPC, OPP and OPTC. They are related to DRM CRTC subjects.
This information was useful when debugging a hardware rotation issue where the cursor plane got clipped off in the middle of the screen. Finally, the issue was addressed by two patches: 12) Issues around bandwidth (glitches) and clocks: May be affected by calculations done in these HW blocks and HW specific values. The recalculation equations are found in the DML folder. DML stands for Display Mode Library. It s in charge of all required configuration parameters supported by the hardware for multiple scenarios. See more in the AMD DC Overview kernel docs. It s a math library that optimally configures hardware to find the best balance between power efficiency and performance in a given scenario. Finding some clk variables that affect device behavior may be a sign of it. It s hard for a external developer to debug this part, since it involves information from HW specs and firmware programming that we don t have access. The best option is to provide all relevant debugging information you have and ask AMD developers to check the values from your suspicions.
  • Do a trick: If you suspect the power setup is degrading performance, try setting the amount of power supplied to the GPU to the maximum and see if it affects the system behavior with this command: sudo bash -c "echo high > /sys/class/drm/card0/device/power_dpm_force_performance_level"
I learned it when debugging glitches with hardware cursor rotation on Steam Deck. My first attempt was changing the clock calculation. In the end, Rodrigo Siqueira proposed the right solution targeting bandwidth in two steps:

Checking implicit programming and hardware limitations: Bring implicit programming to the level of consciousness and recognize hardware limitations. 13) Implicit update types: Check if the selected type for atomic update may affect your issue. The update type depends on the mode settings, since programming some modes demands more time for hardware processing. More details in the source code:
/* Surface update type is used by dc_update_surfaces_and_stream
 * The update type is determined at the very beginning of the function based
 * on parameters passed in and decides how much programming (or updating) is
 * going to be done during the call.
 *
 * UPDATE_TYPE_FAST is used for really fast updates that do not require much
 * logical calculations or hardware register programming. This update MUST be
 * ISR safe on windows. Currently fast update will only be used to flip surface
 * address.
 *
 * UPDATE_TYPE_MED is used for slower updates which require significant hw
 * re-programming however do not affect bandwidth consumption or clock
 * requirements. At present, this is the level at which front end updates
 * that do not require us to run bw_calcs happen. These are in/out transfer func
 * updates, viewport offset changes, recout size changes and pixel
depth changes.
 * This update can be done at ISR, but we want to minimize how often
this happens.
 *
 * UPDATE_TYPE_FULL is slow. Really slow. This requires us to recalculate our
 * bandwidth and clocks, possibly rearrange some pipes and reprogram
anything front
 * end related. Any time viewport dimensions, recout dimensions,
scaling ratios or
 * gamma need to be adjusted or pipe needs to be turned on (or
disconnected) we do
 * a full update. This cannot be done at ISR level and should be a rare event.
 * Unless someone is stress testing mpo enter/exit, playing with
colour or adjusting
 * underscan we don't expect to see this call at all.
 */
enum surface_update_type  
UPDATE_TYPE_FAST, /* super fast, safe to execute in isr */
UPDATE_TYPE_MED,  /* ISR safe, most of programming needed, no bw/clk change*/
UPDATE_TYPE_FULL, /* may need to shuffle resources */
 ;

Using tools: Observe the current state, validate your findings, continue improvements. 14) Use AMD tools to check hardware state and driver programming: help on understanding your driver settings and checking the behavior when changing those settings.
  • DC Visual confirmation: Check multiple planes and pipe split policy.
  • DTN logs: Check display hardware state, including rotation, size, format, underflow, blocks in use, color block values, etc.
  • UMR: Check ASIC info, register values, KMS state - links and elements (framebuffers, planes, CRTCs, connectors). Source: UMR project documentation
15) Use generic DRM/KMS tools:
  • IGT test tools: Use generic KMS tests or develop your own to isolate the issue in the kernel space. Compare results across different GPU vendors to understand their implementations and find potential solutions. Here AMD also has specific IGT tests for its GPUs that is expect to work without failures on any AMD GPU. You can check results of HW-specific tests using different display hardware families or you can compare expected differences between the generic workflow and AMD workflow.
  • drm_info: This tool summarizes the current state of a display driver (capabilities, properties and formats) per element of the DRM/KMS workflow. Output can be helpful when reporting bugs.

Don t give up! Debugging issues in the AMD display driver can be challenging, but by following these tips and leveraging available resources, you can significantly improve your chances of success. Worth mentioning: This blog post builds upon my talk, I m not an AMD expert, but presented at the 2022 XDC. It shares guidelines that helped me debug AMD display issues as an external developer of the driver. Open Source Display Driver: The Linux kernel/AMD display driver is open source, allowing you to actively contribute by addressing issues listed in the official tracker. Tackling existing issues or resolving your own can be a rewarding learning experience and a valuable contribution to the community. Additionally, the tracker serves as a valuable resource for finding similar bugs, troubleshooting tips, and suggestions from AMD developers. Finally, it s a platform for seeking help when needed. Remember, contributing to the open source community through issue resolution and collaboration is mutually beneficial for everyone involved.

12 December 2023

Raju Devidas: Nextcloud AIO install with docker-compose and nginx reverse proxy

Nextcloud AIO install with docker-compose and nginx reverse proxy
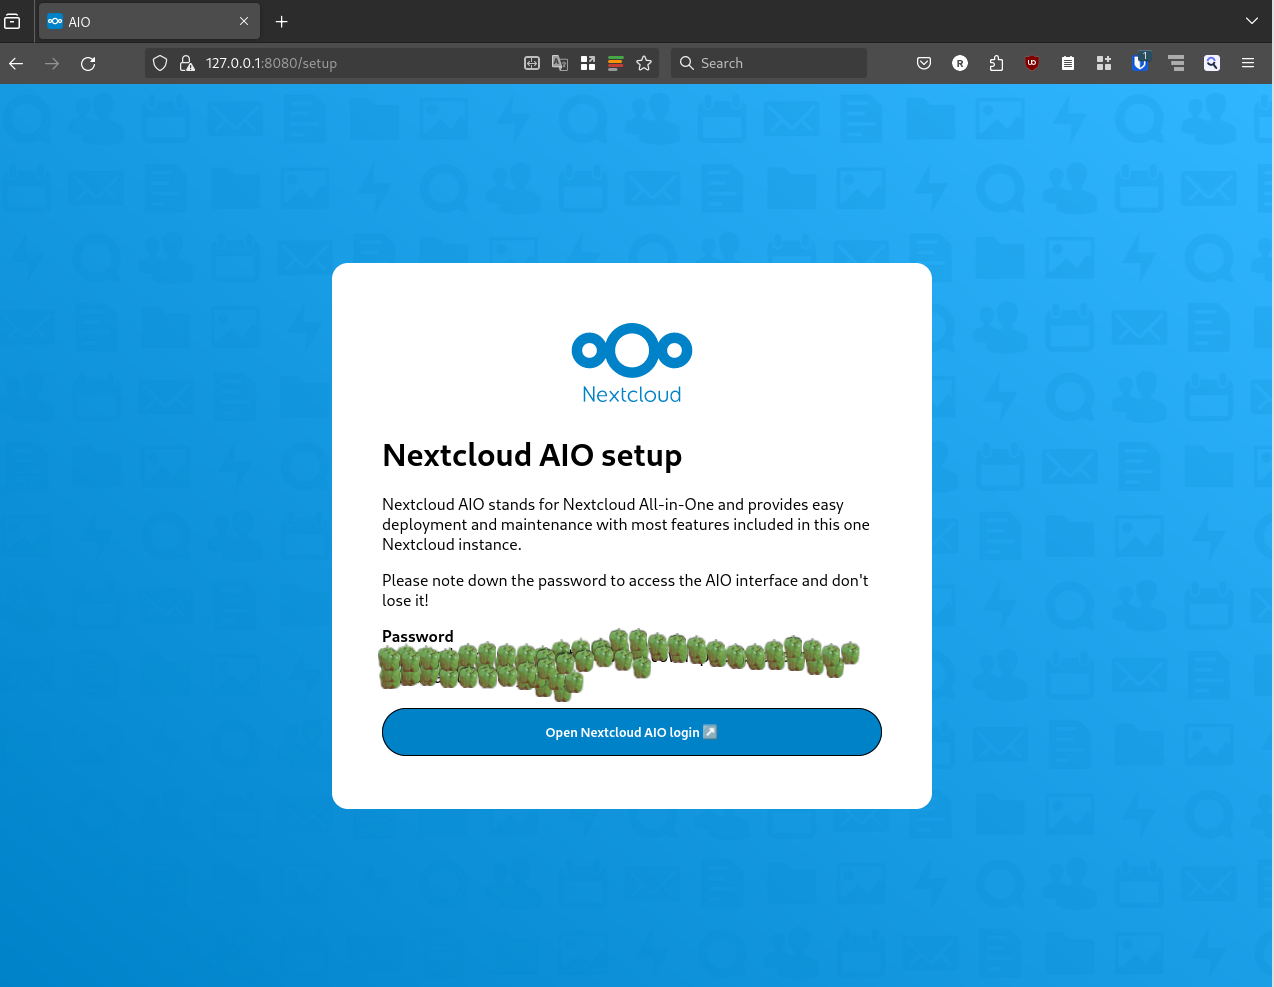
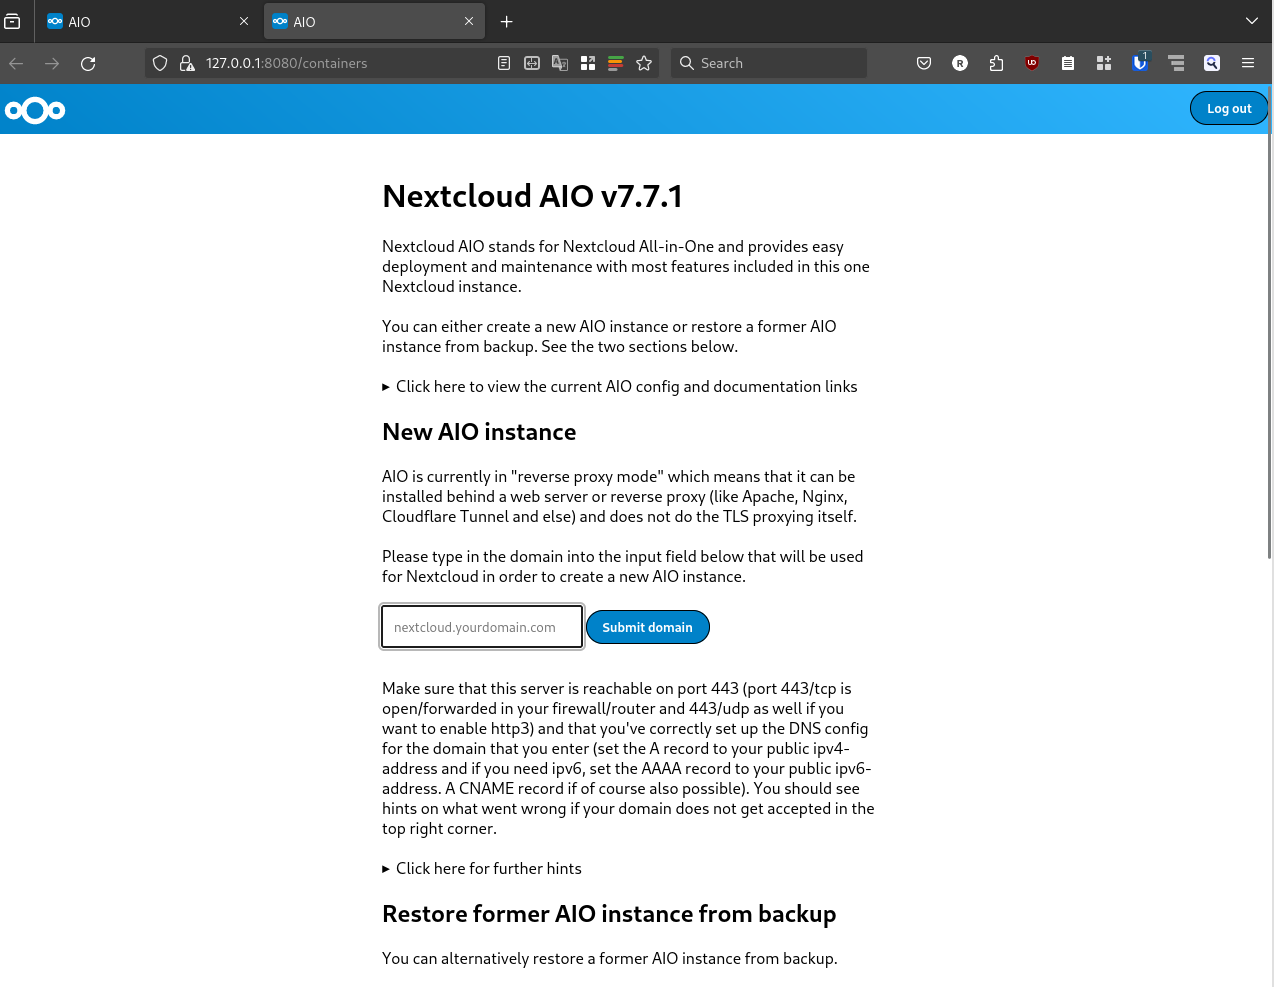
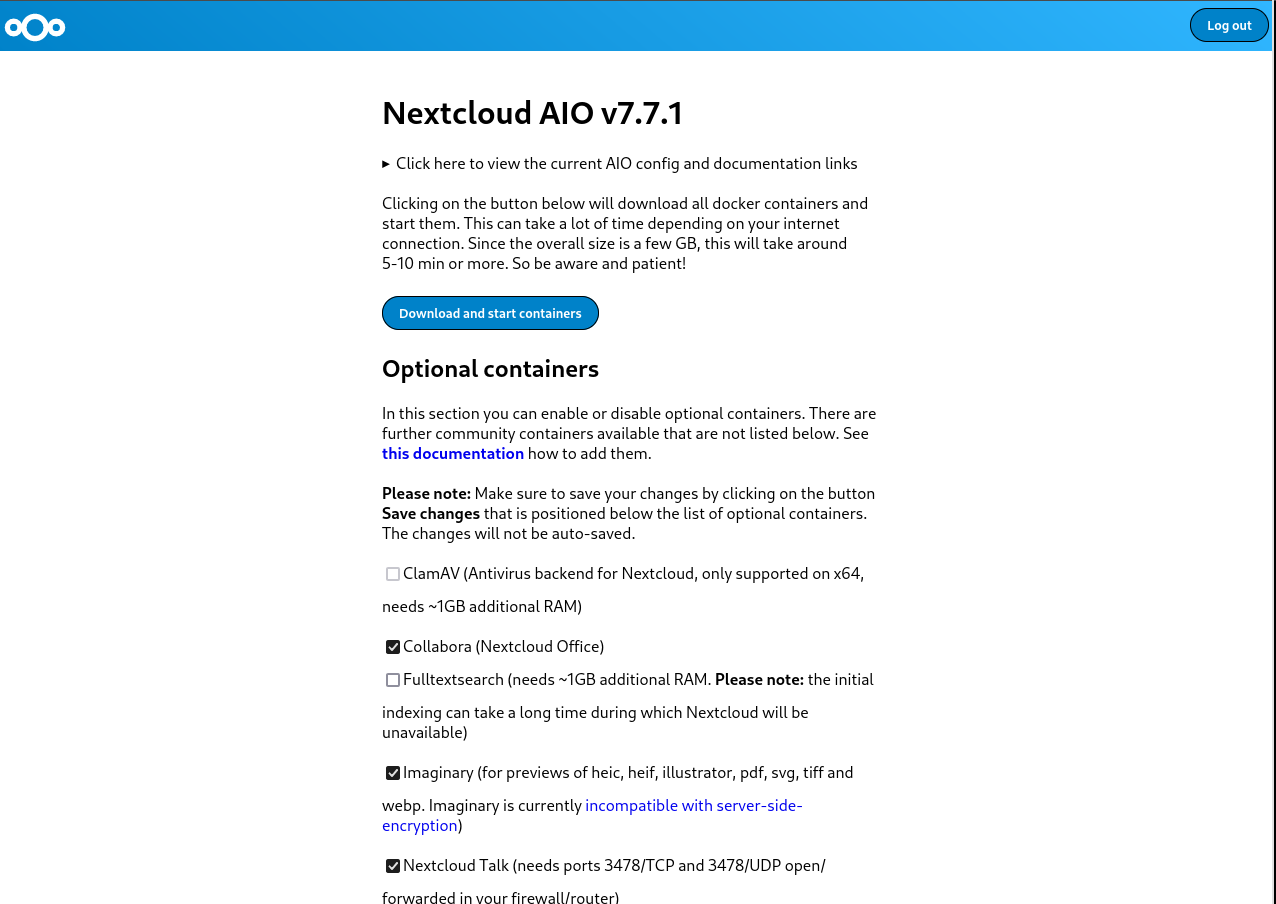
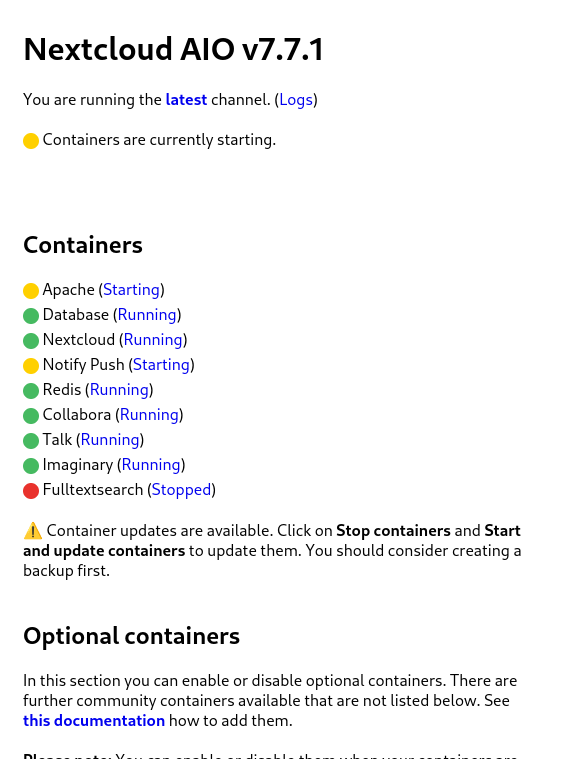
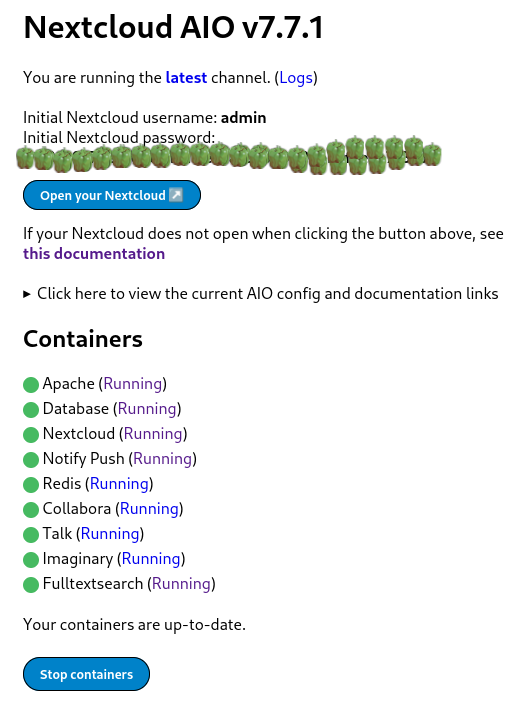
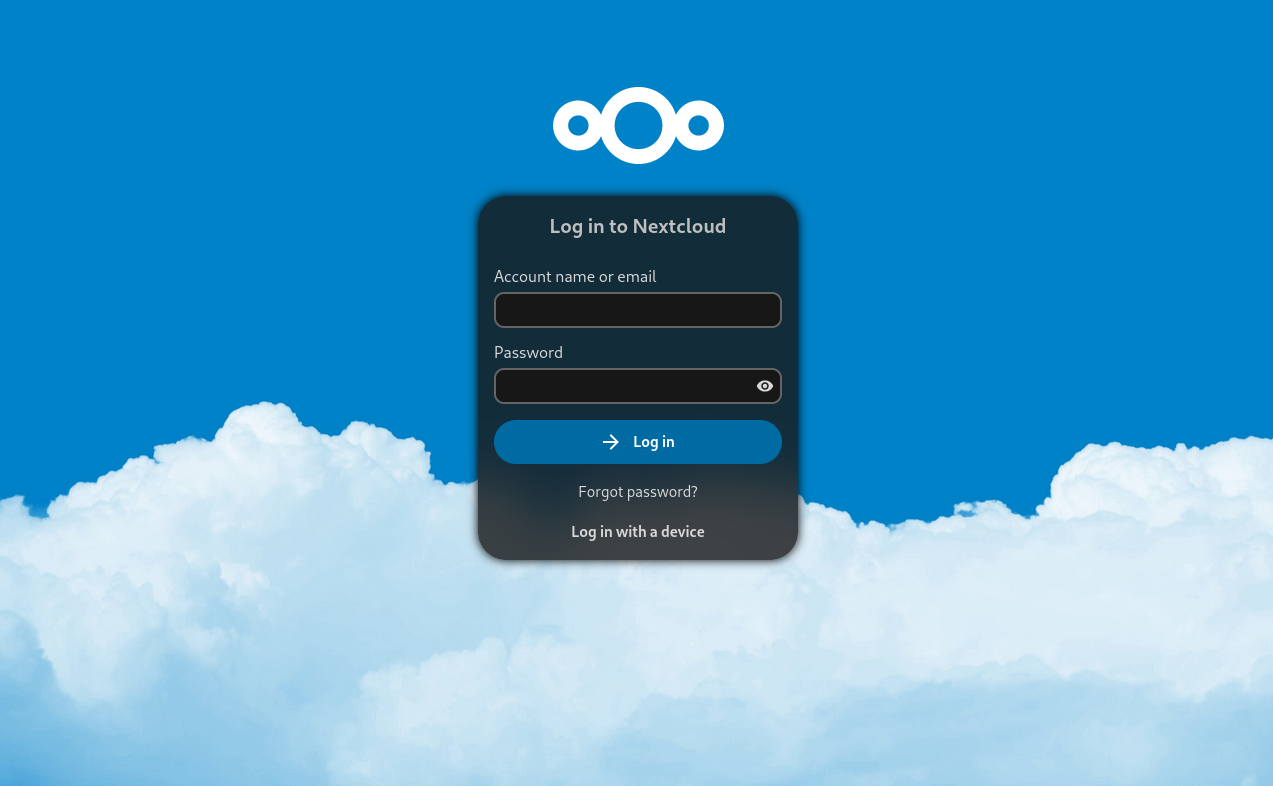
Nextcloud is a popular self-hosted solution for file sync and share as well as cloud apps such as document editing, chat and talk, calendar, photo gallery etc. This guide will walk you through setting up Nextcloud AIO using Docker Compose. This blog post would not be possible without immense help from Sahil Dhiman a.k.a. sahilisterThere are various ways in which the installation could be done, in our setup here are the pre-requisites.

Step 1 : The docker-compose file for nextcloud AIOThe original compose.yml file is present in nextcloud AIO&aposs git repo here . By taking a reference of that file, we have own compose.yml here.
services:
  nextcloud-aio-mastercontainer:
    image: nextcloud/all-in-one:latest
    init: true
    restart: always
    container_name: nextcloud-aio-mastercontainer # This line is not allowed to be changed as otherwise AIO will not work correctly
    volumes:
      - nextcloud_aio_mastercontainer:/mnt/docker-aio-config # This line is not allowed to be changed as otherwise the built-in backup solution will not work
      - /var/run/docker.sock:/var/run/docker.sock:ro # May be changed on macOS, Windows or docker rootless. See the applicable documentation. If adjusting, don&apost forget to also set &aposWATCHTOWER_DOCKER_SOCKET_PATH&apos!
    ports:
      - 8080:8080
    environment: # Is needed when using any of the options below
      # - AIO_DISABLE_BACKUP_SECTION=false # Setting this to true allows to hide the backup section in the AIO interface. See https://github.com/nextcloud/all-in-one#how-to-disable-the-backup-section
      - APACHE_PORT=32323 # Is needed when running behind a web server or reverse proxy (like Apache, Nginx, Cloudflare Tunnel and else). See https://github.com/nextcloud/all-in-one/blob/main/reverse-proxy.md
      - APACHE_IP_BINDING=127.0.0.1 # Should be set when running behind a web server or reverse proxy (like Apache, Nginx, Cloudflare Tunnel and else) that is running on the same host. See https://github.com/nextcloud/all-in-one/blob/main/reverse-proxy.md
      # - BORG_RETENTION_POLICY=--keep-within=7d --keep-weekly=4 --keep-monthly=6 # Allows to adjust borgs retention policy. See https://github.com/nextcloud/all-in-one#how-to-adjust-borgs-retention-policy
      # - COLLABORA_SECCOMP_DISABLED=false # Setting this to true allows to disable Collabora&aposs Seccomp feature. See https://github.com/nextcloud/all-in-one#how-to-disable-collaboras-seccomp-feature
      - NEXTCLOUD_DATADIR=/opt/docker/cloud.raju.dev/nextcloud # Allows to set the host directory for Nextcloud&aposs datadir.   Warning: do not set or adjust this value after the initial Nextcloud installation is done! See https://github.com/nextcloud/all-in-one#how-to-change-the-default-location-of-nextclouds-datadir
      # - NEXTCLOUD_MOUNT=/mnt/ # Allows the Nextcloud container to access the chosen directory on the host. See https://github.com/nextcloud/all-in-one#how-to-allow-the-nextcloud-container-to-access-directories-on-the-host
      # - NEXTCLOUD_UPLOAD_LIMIT=10G # Can be adjusted if you need more. See https://github.com/nextcloud/all-in-one#how-to-adjust-the-upload-limit-for-nextcloud
      # - NEXTCLOUD_MAX_TIME=3600 # Can be adjusted if you need more. See https://github.com/nextcloud/all-in-one#how-to-adjust-the-max-execution-time-for-nextcloud
      # - NEXTCLOUD_MEMORY_LIMIT=512M # Can be adjusted if you need more. See https://github.com/nextcloud/all-in-one#how-to-adjust-the-php-memory-limit-for-nextcloud
      # - NEXTCLOUD_TRUSTED_CACERTS_DIR=/path/to/my/cacerts # CA certificates in this directory will be trusted by the OS of the nexcloud container (Useful e.g. for LDAPS) See See https://github.com/nextcloud/all-in-one#how-to-trust-user-defined-certification-authorities-ca
      # - NEXTCLOUD_STARTUP_APPS=deck twofactor_totp tasks calendar contacts notes # Allows to modify the Nextcloud apps that are installed on starting AIO the first time. See https://github.com/nextcloud/all-in-one#how-to-change-the-nextcloud-apps-that-are-installed-on-the-first-startup
      # - NEXTCLOUD_ADDITIONAL_APKS=imagemagick # This allows to add additional packages to the Nextcloud container permanently. Default is imagemagick but can be overwritten by modifying this value. See https://github.com/nextcloud/all-in-one#how-to-add-os-packages-permanently-to-the-nextcloud-container
      # - NEXTCLOUD_ADDITIONAL_PHP_EXTENSIONS=imagick # This allows to add additional php extensions to the Nextcloud container permanently. Default is imagick but can be overwritten by modifying this value. See https://github.com/nextcloud/all-in-one#how-to-add-php-extensions-permanently-to-the-nextcloud-container
      # - NEXTCLOUD_ENABLE_DRI_DEVICE=true # This allows to enable the /dev/dri device in the Nextcloud container.   Warning: this only works if the &apos/dev/dri&apos device is present on the host! If it should not exist on your host, don&apost set this to true as otherwise the Nextcloud container will fail to start! See https://github.com/nextcloud/all-in-one#how-to-enable-hardware-transcoding-for-nextcloud
      # - NEXTCLOUD_KEEP_DISABLED_APPS=false # Setting this to true will keep Nextcloud apps that are disabled in the AIO interface and not uninstall them if they should be installed. See https://github.com/nextcloud/all-in-one#how-to-keep-disabled-apps
      # - TALK_PORT=3478 # This allows to adjust the port that the talk container is using. See https://github.com/nextcloud/all-in-one#how-to-adjust-the-talk-port
      # - WATCHTOWER_DOCKER_SOCKET_PATH=/var/run/docker.sock # Needs to be specified if the docker socket on the host is not located in the default &apos/var/run/docker.sock&apos. Otherwise mastercontainer updates will fail. For macos it needs to be &apos/var/run/docker.sock&apos
    # networks: # Is needed when you want to create the nextcloud-aio network with ipv6-support using this file, see the network config at the bottom of the file
      # - nextcloud-aio # Is needed when you want to create the nextcloud-aio network with ipv6-support using this file, see the network config at the bottom of the file
      # - SKIP_DOMAIN_VALIDATION=true
    # # Uncomment the following line when using SELinux
    # security_opt: ["label:disable"]
volumes: # If you want to store the data on a different drive, see https://github.com/nextcloud/all-in-one#how-to-store-the-filesinstallation-on-a-separate-drive
  nextcloud_aio_mastercontainer:
    name: nextcloud_aio_mastercontainer # This line is not allowed to be changed as otherwise the built-in backup solution will not work
I have not removed many of the commented options in the compose file, for a possibility of me using them in the future.If you want a smaller cleaner compose with the extra options, you can refer to
services:
  nextcloud-aio-mastercontainer:
    image: nextcloud/all-in-one:latest
    init: true
    restart: always
    container_name: nextcloud-aio-mastercontainer
    volumes:
      - nextcloud_aio_mastercontainer:/mnt/docker-aio-config
      - /var/run/docker.sock:/var/run/docker.sock:ro
    ports:
      - 8080:8080
    environment:
      - APACHE_PORT=32323
      - APACHE_IP_BINDING=127.0.0.1
      - NEXTCLOUD_DATADIR=/opt/docker/nextcloud
volumes:
  nextcloud_aio_mastercontainer:
    name: nextcloud_aio_mastercontainer
I am using a separate directory to store nextcloud data. As per nextcloud documentation you should be using a separate partition if you want to use this feature, however I did not have that option on my server, so I used a separate directory instead. Also we use a custom port on which nextcloud listens for operations, we have set it up as 32323 above, but you can use any in the permissible port range. The 8080 port is used the setup the AIO management interface. Both 8080 and the APACHE_PORT do not need to be open on the host machine, as we will be using reverse proxy setup with nginx to direct requests. once you have your preferred compose.yml file, you can start the containers using
$ docker-compose -f compose.yml up -d 
Creating network "clouddev_default" with the default driver
Creating volume "nextcloud_aio_mastercontainer" with default driver
Creating nextcloud-aio-mastercontainer ... done
once your container&aposs are running, we can do the nginx setup.

Step 2: Configuring nginx reverse proxy for our domain on host. A reference nginx configuration for nextcloud AIO is given in the nextcloud git repository here . You can modify the configuration file according to your needs and setup. Here is configuration that we are using

map $http_upgrade $connection_upgrade  
    default upgrade;
    &apos&apos close;
 
server  
    listen 80;
    #listen [::]:80;            # comment to disable IPv6
    if ($scheme = "http")  
        return 301 https://$host$request_uri;
     
    listen 443 ssl http2;      # for nginx versions below v1.25.1
    #listen [::]:443 ssl http2; # for nginx versions below v1.25.1 - comment to disable IPv6
    # listen 443 ssl;      # for nginx v1.25.1+
    # listen [::]:443 ssl; # for nginx v1.25.1+ - keep comment to disable IPv6
    # http2 on;                                 # uncomment to enable HTTP/2        - supported on nginx v1.25.1+
    # http3 on;                                 # uncomment to enable HTTP/3 / QUIC - supported on nginx v1.25.0+
    # quic_retry on;                            # uncomment to enable HTTP/3 / QUIC - supported on nginx v1.25.0+
    # add_header Alt-Svc &aposh3=":443"; ma=86400&apos; # uncomment to enable HTTP/3 / QUIC - supported on nginx v1.25.0+
    # listen 443 quic reuseport;       # uncomment to enable HTTP/3 / QUIC - supported on nginx v1.25.0+ - please remove "reuseport" if there is already another quic listener on port 443 with enabled reuseport
    # listen [::]:443 quic reuseport;  # uncomment to enable HTTP/3 / QUIC - supported on nginx v1.25.0+ - please remove "reuseport" if there is already another quic listener on port 443 with enabled reuseport - keep comment to disable IPv6
    server_name cloud.example.com;
    location /  
        proxy_pass http://127.0.0.1:32323$request_uri;
        proxy_set_header X-Forwarded-For $proxy_add_x_forwarded_for;
        proxy_set_header X-Forwarded-Port $server_port;
        proxy_set_header X-Forwarded-Scheme $scheme;
        proxy_set_header X-Forwarded-Proto $scheme;
        proxy_set_header X-Real-IP $remote_addr;
        proxy_set_header Accept-Encoding "";
        proxy_set_header Host $host;
    
        client_body_buffer_size 512k;
        proxy_read_timeout 86400s;
        client_max_body_size 0;
        # Websocket
        proxy_http_version 1.1;
        proxy_set_header Upgrade $http_upgrade;
        proxy_set_header Connection $connection_upgrade;
     
    ssl_certificate /etc/letsencrypt/live/cloud.example.com/fullchain.pem; # managed by Certbot
    ssl_certificate_key /etc/letsencrypt/live/cloud.example.com/privkey.pem; # managed by Certbot
    ssl_session_timeout 1d;
    ssl_session_cache shared:MozSSL:10m; # about 40000 sessions
    ssl_session_tickets off;
    ssl_protocols TLSv1.2 TLSv1.3;
    ssl_ciphers ECDHE-ECDSA-AES128-GCM-SHA256:ECDHE-RSA-AES128-GCM-SHA256:ECDHE-ECDSA-AES256-GCM-SHA384:ECDHE-RSA-AES256-GCM-SHA384:ECDHE-ECDSA-CHACHA20-POLY1305:ECDHE-RSA-CHACHA20-POLY1305:DHE-RSA-AES128-GCM-SHA256:DHE-RSA-AES256-GCM-SHA384:DHE-RSA-CHACHA20-POLY1305;
    ssl_prefer_server_ciphers on;
    # Optional settings:
    # OCSP stapling
    # ssl_stapling on;
    # ssl_stapling_verify on;
    # ssl_trusted_certificate /etc/letsencrypt/live/<your-nc-domain>/chain.pem;
    # replace with the IP address of your resolver
    # resolver 127.0.0.1; # needed for oscp stapling: e.g. use 94.140.15.15 for adguard / 1.1.1.1 for cloudflared or 8.8.8.8 for google - you can use the same nameserver as listed in your /etc/resolv.conf file
 
Please note that you need to have valid SSL certificates for your domain for this configuration to work. Steps on getting valid SSL certificates for your domain are beyond the scope of this article. You can give a web search on getting SSL certificates with letsencrypt and you will get several resources on that, or may write a blog post on it separately in the future.once your configuration for nginx is done, you can test the nginx configuration using
$ sudo nginx -t 
nginx: the configuration file /etc/nginx/nginx.conf syntax is ok
nginx: configuration file /etc/nginx/nginx.conf test is successful
and then reload nginx with
$ sudo nginx -s reload

Step 3: Setup of Nextcloud AIO from the browser.To setup nextcloud AIO, we need to access it using the web browser on URL of our domain.tld:8080, however we do not want to open the 8080 port publicly to do this, so to complete the setup, here is a neat hack from sahilister
ssh -L 8080:127.0.0.1:8080 username:<server-ip>
you can bind the 8080 port of your server to the 8080 of your localhost using Unix socket forwarding over SSH.The port forwarding only last for the duration of your SSH session, if the SSH session breaks, your port forwarding will to. So, once you have the port forwarded, you can open the nextcloud AIO instance in your web browser at 127.0.0.1:8080
Nextcloud AIO install with docker-compose and nginx reverse proxy
you will get this error because you are trying to access a page on localhost over HTTPS. You can click on advanced and then continue to proceed to the next page. Your data is encrypted over SSH for this session as we are binding the port over SSH. Depending on your choice of browser, the above page might look different.once you have proceeded, the nextcloud AIO interface will open and will look something like this.
Nextcloud AIO install with docker-compose and nginx reverse proxynextcloud AIO initial screen with capsicums as password
It will show an auto generated passphrase, you need to save this passphrase and make sure to not loose it. For the purposes of security, I have masked the passwords with capsicums. once you have noted down your password, you can proceed to the Nextcloud AIO login, enter your password and then login. After login you will be greeted with a screen like this.
Nextcloud AIO install with docker-compose and nginx reverse proxy
now you can put the domain that you want to use in the Submit domain field. Once the domain check is done, you will proceed to the next step and see another screen like this
Nextcloud AIO install with docker-compose and nginx reverse proxy
here you can select any optional containers for the features that you might want. IMPORTANT: Please make sure to also change the time zone at the bottom of the page according to the time zone you wish to operate in.
Nextcloud AIO install with docker-compose and nginx reverse proxy
The timezone setup is also important because the data base will get initialized according to the set time zone. This could result in wrong initialization of database and you ending up in a startup loop for nextcloud. I faced this issue and could only resolve it after getting help from sahilister . Once you are done changing the timezone, and selecting any additional features you want, you can click on Download and start the containersIt will take some time for this process to finish, take a break and look at the farthest object in your room and take a sip of water. Once you are done, and the process has finished you will see a page similar to the following one.
Nextcloud AIO install with docker-compose and nginx reverse proxy
wait patiently for everything to turn green.
Nextcloud AIO install with docker-compose and nginx reverse proxy
once all the containers have started properly, you can open the nextcloud login interface on your configured domain, the initial login details are auto generated as you can see from the above screenshot. Again you will see a password that you need to note down or save to enter the nextcloud interface. Capsicums will not work as passwords. I have masked the auto generated passwords using capsicums.Now you can click on Open your Nextcloud button or go to your configured domain to access the login screen.
Nextcloud AIO install with docker-compose and nginx reverse proxy
You can use the login details from the previous step to login to the administrator account of your Nextcloud instance. There you have it, your very own cloud!

Additional Notes:

How to properly reset Nextcloud setup?While following the above steps, or while following steps from some other tutorial, you may have made a mistake, and want to start everything again from scratch. The instructions for it are present in the Nextcloud documentation here . Here is the TLDR for a docker-compose setup. These steps will delete all data, do not use these steps on an existing nextcloud setup unless you know what you are doing.
  • Stop your master container.
docker-compose -f compose.yml down -v
The above command will also remove the volume associated with the master container
  • Stop all the child containers that has been started by the master container.
docker stop nextcloud-aio-apache nextcloud-aio-notify-push nextcloud-aio-nextcloud nextcloud-aio-imaginary nextcloud-aio-fulltextsearch nextcloud-aio-redis nextcloud-aio-database nextcloud-aio-talk nextcloud-aio-collabora
  • Remove all the child containers that has been started by the master container
docker rm nextcloud-aio-apache nextcloud-aio-notify-push nextcloud-aio-nextcloud nextcloud-aio-imaginary nextcloud-aio-fulltextsearch nextcloud-aio-redis nextcloud-aio-database nextcloud-aio-talk nextcloud-aio-collabora
  • If you also wish to remove all images associated with nextcloud you can do it with
docker rmi $(docker images --filter "reference=nextcloud/*" -q)
  • remove all volumes associated with child containers
docker volume rm <volume-name>
  • remove the network associated with nextcloud
docker network rm nextcloud-aio

Additional references.
  1. Nextcloud Github
  2. Nextcloud reverse proxy documentation
  3. Nextcloud Administration Guide
  4. Nextcloud User Manual
  5. Nextcloud Developer&aposs manual

11 December 2023

Jonathan Dowland: Tex Shura

So yeah, I bought the Shura.
Tex Shura keyboard, ISO-UK layout
It's been about a year since I got the Tex Shinobi keyboard. I ended up taking to the office and using it there. The MX Silent Red switches are a good fit for a shared space, and I have a bit more desk space so the extra large footprint is not a problem. Back at home, I have a reasonably large desk, but I've got a Synth jammed at the back-centre, leaving a slightly tight budget for keyboard depth. The Shura is nice and compact and fits in perfectly. So what should I say about it? Build quality is excellent. I went with MX Reds (non-silent this time) which feel a lot better to me than the silent variant. I do worry about waking the kids up if I type after they've gone to bed, but it hasn't actually been a problem (and the switches activate quite early in travel so you can "tip-toe" type silently, and slowly). I like these keyboards (and I've otherwise avoided the Mech keyboard money pit) because they have the integrated trackpoint, which I rely on. Just as with the Shinobi, the Trackpoint is of an excellent quality, pretty much indistinguishable from that on the official Lenovo trackpoint keyboards. Since the Shura is a a "60%" or "65%" or "70%" or something, thus forgoing the Function keys and such, I rely on "layers": switching the function of all the regular keys whilst "Fn" is pressed. You can reprogram the Tex keyboards using a profile output by their web-based configurator which I've used to mildly customize the layout: swapped left-hand "Win" with "Fn" (FN1), mapped FN1 to the right-hand "Win". That's it so far, the defaults are otherwise sufficient for me. I've also used the DIP switches to enable mouse wheel emulation with the trackpoint (in common with the Lenovos). In September, Justin from TeX left an intriguing comment on my last blog post:
Thanks for your promotion !! We will try to design a new keyboard ( a little ergo keyboard ) should be release end of this year !!

15 October 2023

Michael Ablassmeier: Testing system updates using libvirts checkpoint feature

If you want to test upgrades on virtual machines (running on libvit/qemu/kvm) these are usually the most common steps: As with recent versions, both libvirt and qemu have full support for dirty bitmaps (so called checkpoints). These checkpoints, once existent, will track changes to the block level layer and can be exported via NBD protocol. Usually one can create these checkpoints using virsh checkpoint-create[-as], with a proper xml description. Using the pull based model, the following is possible: The overlay image will only use the disk space for the blocks changed during upgrade: no need to create a full clone which may waste a lot of disk space. In order to simplify the first step, its possible to use virtnbdbackup for creating the required consistent checkpoint and export its data using a unix domain socket. Update: As alternative, ive just created a small utility called vircpt to create and export checkpoints. In my example im using a debian11 virtual machine with qemu guest agent configured:
# virsh list --all
 Id Name State 
 ------------------------------------------ 
 1 debian11_default running
Now let virtnbdbackup create an checkpoint, freeze the filesystems during creation and tell libvirt to provide us with a usable NBD server listening on an unix socket:
# virtnbdbackup -d debian11_default -o /tmp/foo -s
INFO lib common - printVersion [MainThread]: Version: 1.9.45 Arguments: ./virtnbdbackup -d debian11_default -o /tmp/foo -s
[..] 
INFO root virtnbdbackup - main [MainThread]: Local NBD Endpoint socket: [/var/tmp/virtnbdbackup.5727] 
INFO root virtnbdbackup - startBackupJob [MainThread]: Starting backup job.
INFO fs fs - freeze [MainThread]: Freezed [2] filesystems. 
INFO fs fs - thaw [MainThread]: Thawed [2] filesystems. 
INFO root virtnbdbackup - main [MainThread]: Started backup job for debugging, exiting.
We can now use nbdinfo to display some information about the NBD export:
# nbdinfo "nbd+unix:///vda?socket=/var/tmp/virtnbdbackup.5727" 
    protocol: newstyle-fixed without TLS, using structured packets 
    export="vda": 
    export-size: 137438953472 (128G) 
    content: 
        DOS/MBR boot sector uri: nbd+unix:///vda?socket=/var/tmp/virtnbdbackup.5727
And create a backing image that we can use to test an in-place upgrade:
# qemu-img create -F raw -b nbd+unix:///vda?socket=/var/tmp/virtnbdbackup.5727 -f qcow2 upgrade.qcow2
Now we have various ways for booting the image:
# qemu-system-x86_64 -hda upgrade.qcow2 -m 2500 --enable-kvm
image After performing the required tests within the virtual machine we can simply kill the active NBD backup job :
# virtnbdbackup -d debian11_default -o /tmp/foo -k
INFO lib common - printVersion [MainThread]: Version: 1.9.45 Arguments: ./virtnbdbackup -d debian11_default -o /tmp/foo -k 
[..]
INFO root virtnbdbackup - main [MainThread]: Stopping backup job
And remove the created qcow image:
# rm -f upgrade.qcow2

25 September 2023

Michael Prokop: Postfix failing with no shared cipher

I m one of the few folks left who run and maintain mail servers. Recently I had major troubles receiving mails from the mail servers used by a bank, and when asking my favourite search engine, I m clearly not the only one who ran into such an issue. Actually, I should have checked off the issue and not become a customer at that bank, but the tech nerd in me couldn t resist getting to the bottom of the problem. Since I got it working and this might be useful for others, here we are. :) I was trying to get an online banking account set up, but the corresponding account creation mail didn t arrive me, at all. Looking at my mail server logs, my postfix mail server didn t accept the mail due to:
postfix/smtpd[3319640]: warning: TLS library problem: error:1417A0C1:SSL routines:tls_post_process_client_hello:no shared cipher:../ssl/statem/statem_srvr.c:2283:
postfix/smtpd[3319640]: lost connection after STARTTLS from mx01.arz.at[193.110.182.61]
Huh, what s going on here?! Let s increase the TLS loglevel (setting smtpd_tls_loglevel = 2) and retry. But how can I retry receiving yet another mail? Luckily, on the registration website of the bank there was a URL available, that let me request a one-time password. This triggered another mail, so I did that and managed to grab this in the logs:
postfix/smtpd[3320018]: initializing the server-side TLS engine
postfix/tlsmgr[3320020]: open smtpd TLS cache btree:/var/lib/postfix/smtpd_scache
postfix/tlsmgr[3320020]: tlsmgr_cache_run_event: start TLS smtpd session cache cleanup
postfix/smtpd[3320018]: connect from mx01.arz.at[193.110.182.61]
postfix/smtpd[3320018]: setting up TLS connection from mx01.arz.at[193.110.182.61]
postfix/smtpd[3320018]: mx01.arz.at[193.110.182.61]: TLS cipher list "aNULL:-aNULL:HIGH:MEDIUM:+RC4:@STRENGTH"
postfix/smtpd[3320018]: SSL_accept:before SSL initialization
postfix/smtpd[3320018]: SSL3 alert write:fatal:handshake failure
postfix/smtpd[3320018]: SSL_accept:error in error
postfix/smtpd[3320018]: SSL_accept error from mx01.arz.at[193.110.182.61]: -1
postfix/smtpd[3320018]: warning: TLS library problem: error:1417A0C1:SSL routines:tls_post_process_client_hello:no shared cipher:../ssl/statem/statem_srvr.c:2283:
postfix/smtpd[3320018]: lost connection after STARTTLS from mx01.arz.at[193.110.182.61]
postfix/smtpd[3320018]: disconnect from mx01.arz.at[193.110.182.61] ehlo=1 starttls=0/1 commands=1/2
postfix/smtpd[3320018]: connect from mx01.arz.at[193.110.182.61]
postfix/smtpd[3320018]: disconnect from mx01.arz.at[193.110.182.61] ehlo=1 quit=1 commands=2
Ok, so this TLS cipher list aNULL:-aNULL:HIGH:MEDIUM:+RC4:@STRENGTH looked like the tls_medium_cipherlist setting in postfix, but which ciphers might we expect? Let s see what their SMTP server would speak to us:
% testssl --cipher-per-proto -t=smtp mx01.arz.at:25
[...]
Hexcode  Cipher Suite Name (OpenSSL)       KeyExch.   Encryption  Bits     Cipher Suite Name (IANA/RFC)
-----------------------------------------------------------------------------------------------------------------------------
SSLv2
SSLv3
TLS 1
TLS 1.1
TLS 1.2
 xc030   ECDHE-RSA-AES256-GCM-SHA384       ECDH 256   AESGCM      256      TLS_ECDHE_RSA_WITH_AES_256_GCM_SHA384
 xc028   ECDHE-RSA-AES256-SHA384           ECDH 256   AES         256      TLS_ECDHE_RSA_WITH_AES_256_CBC_SHA384
 xc014   ECDHE-RSA-AES256-SHA              ECDH 256   AES         256      TLS_ECDHE_RSA_WITH_AES_256_CBC_SHA
 x9d     AES256-GCM-SHA384                 RSA        AESGCM      256      TLS_RSA_WITH_AES_256_GCM_SHA384
 x3d     AES256-SHA256                     RSA        AES         256      TLS_RSA_WITH_AES_256_CBC_SHA256
 x35     AES256-SHA                        RSA        AES         256      TLS_RSA_WITH_AES_256_CBC_SHA
 xc02f   ECDHE-RSA-AES128-GCM-SHA256       ECDH 256   AESGCM      128      TLS_ECDHE_RSA_WITH_AES_128_GCM_SHA256
 xc027   ECDHE-RSA-AES128-SHA256           ECDH 256   AES         128      TLS_ECDHE_RSA_WITH_AES_128_CBC_SHA256
 xc013   ECDHE-RSA-AES128-SHA              ECDH 256   AES         128      TLS_ECDHE_RSA_WITH_AES_128_CBC_SHA
 x9c     AES128-GCM-SHA256                 RSA        AESGCM      128      TLS_RSA_WITH_AES_128_GCM_SHA256
 x3c     AES128-SHA256                     RSA        AES         128      TLS_RSA_WITH_AES_128_CBC_SHA256
 x2f     AES128-SHA                        RSA        AES         128      TLS_RSA_WITH_AES_128_CBC_SHA
TLS 1.3
Looks like a very small subset of ciphers, and they don t seem to be talking TLS v1.3 at all? Not great. :( A nice web service to verify the situation from another point of view is checktls, which also confirmed this:
[000.705] 	<-- 	220 2.0.0 Ready to start TLS
[000.705] 		STARTTLS command works on this server
[001.260] 		Connection converted to SSL
		SSLVersion in use: TLSv1_2
		Cipher in use: ECDHE-RSA-AES256-GCM-SHA384
		Perfect Forward Secrecy: yes
		Session Algorithm in use: Curve P-256 DHE(256 bits)
		Certificate #1 of 3 (sent by MX):
		Cert VALIDATED: ok
		Cert Hostname VERIFIED (mx01.arz.at = *.arz.at   DNS:*.arz.at   DNS:arz.at)
[...]
[001.517] 		TLS successfully started on this server
I got distracted by some other work, and when coming back to this problem, the one-time password procedure no longer worked, as the password reset URL was no longer valid. :( I managed to find the underlying URL, and with some web developer tools tinkering I could still use the website to let me trigger sending further one-time password mails, phew. Let s continue, so my mail server was running Debian/bullseye with postfix v3.5.18-0+deb11u1 and openssl v1.1.1n-0+deb11u5, let s see what it offers:
% testssl --cipher-per-proto -t=smtp mail.example.com:25
[...]
Hexcode  Cipher Suite Name (OpenSSL)       KeyExch.   Encryption  Bits     Cipher Suite Name (IANA/RFC)
-----------------------------------------------------------------------------------------------------------------------------
SSLv2
SSLv3
TLS 1
 xc00a   ECDHE-ECDSA-AES256-SHA            ECDH 253   AES         256      TLS_ECDHE_ECDSA_WITH_AES_256_CBC_SHA
 xc019   AECDH-AES256-SHA                  ECDH 253   AES         256      TLS_ECDH_anon_WITH_AES_256_CBC_SHA
 x3a     ADH-AES256-SHA                    DH 2048    AES         256      TLS_DH_anon_WITH_AES_256_CBC_SHA
 x89     ADH-CAMELLIA256-SHA               DH 2048    Camellia    256      TLS_DH_anon_WITH_CAMELLIA_256_CBC_SHA
 xc009   ECDHE-ECDSA-AES128-SHA            ECDH 253   AES         128      TLS_ECDHE_ECDSA_WITH_AES_128_CBC_SHA
 xc018   AECDH-AES128-SHA                  ECDH 253   AES         128      TLS_ECDH_anon_WITH_AES_128_CBC_SHA
 x34     ADH-AES128-SHA                    DH 2048    AES         128      TLS_DH_anon_WITH_AES_128_CBC_SHA
 x9b     ADH-SEED-SHA                      DH 2048    SEED        128      TLS_DH_anon_WITH_SEED_CBC_SHA
 x46     ADH-CAMELLIA128-SHA               DH 2048    Camellia    128      TLS_DH_anon_WITH_CAMELLIA_128_CBC_SHA
TLS 1.1
 xc00a   ECDHE-ECDSA-AES256-SHA            ECDH 253   AES         256      TLS_ECDHE_ECDSA_WITH_AES_256_CBC_SHA
 xc019   AECDH-AES256-SHA                  ECDH 253   AES         256      TLS_ECDH_anon_WITH_AES_256_CBC_SHA
 x3a     ADH-AES256-SHA                    DH 2048    AES         256      TLS_DH_anon_WITH_AES_256_CBC_SHA
 x89     ADH-CAMELLIA256-SHA               DH 2048    Camellia    256      TLS_DH_anon_WITH_CAMELLIA_256_CBC_SHA
 xc009   ECDHE-ECDSA-AES128-SHA            ECDH 253   AES         128      TLS_ECDHE_ECDSA_WITH_AES_128_CBC_SHA
 xc018   AECDH-AES128-SHA                  ECDH 253   AES         128      TLS_ECDH_anon_WITH_AES_128_CBC_SHA
 x34     ADH-AES128-SHA                    DH 2048    AES         128      TLS_DH_anon_WITH_AES_128_CBC_SHA
 x9b     ADH-SEED-SHA                      DH 2048    SEED        128      TLS_DH_anon_WITH_SEED_CBC_SHA
 x46     ADH-CAMELLIA128-SHA               DH 2048    Camellia    128      TLS_DH_anon_WITH_CAMELLIA_128_CBC_SHA
TLS 1.2
 xc02c   ECDHE-ECDSA-AES256-GCM-SHA384     ECDH 253   AESGCM      256      TLS_ECDHE_ECDSA_WITH_AES_256_GCM_SHA384
 xc024   ECDHE-ECDSA-AES256-SHA384         ECDH 253   AES         256      TLS_ECDHE_ECDSA_WITH_AES_256_CBC_SHA384
 xc00a   ECDHE-ECDSA-AES256-SHA            ECDH 253   AES         256      TLS_ECDHE_ECDSA_WITH_AES_256_CBC_SHA
 xcca9   ECDHE-ECDSA-CHACHA20-POLY1305     ECDH 253   ChaCha20    256      TLS_ECDHE_ECDSA_WITH_CHACHA20_POLY1305_SHA256
 xc0af   ECDHE-ECDSA-AES256-CCM8           ECDH 253   AESCCM8     256      TLS_ECDHE_ECDSA_WITH_AES_256_CCM_8
 xc0ad   ECDHE-ECDSA-AES256-CCM            ECDH 253   AESCCM      256      TLS_ECDHE_ECDSA_WITH_AES_256_CCM
 xc073   ECDHE-ECDSA-CAMELLIA256-SHA384    ECDH 253   Camellia    256      TLS_ECDHE_ECDSA_WITH_CAMELLIA_256_CBC_SHA384
 xc019   AECDH-AES256-SHA                  ECDH 253   AES         256      TLS_ECDH_anon_WITH_AES_256_CBC_SHA
 xa7     ADH-AES256-GCM-SHA384             DH 2048    AESGCM      256      TLS_DH_anon_WITH_AES_256_GCM_SHA384
 x6d     ADH-AES256-SHA256                 DH 2048    AES         256      TLS_DH_anon_WITH_AES_256_CBC_SHA256
 x3a     ADH-AES256-SHA                    DH 2048    AES         256      TLS_DH_anon_WITH_AES_256_CBC_SHA
 xc5     ADH-CAMELLIA256-SHA256            DH 2048    Camellia    256      TLS_DH_anon_WITH_CAMELLIA_256_CBC_SHA256
 x89     ADH-CAMELLIA256-SHA               DH 2048    Camellia    256      TLS_DH_anon_WITH_CAMELLIA_256_CBC_SHA
 xc05d   ECDHE-ECDSA-ARIA256-GCM-SHA384    ECDH 253   ARIAGCM     256      TLS_ECDHE_ECDSA_WITH_ARIA_256_GCM_SHA384
 xc02b   ECDHE-ECDSA-AES128-GCM-SHA256     ECDH 253   AESGCM      128      TLS_ECDHE_ECDSA_WITH_AES_128_GCM_SHA256
 xc023   ECDHE-ECDSA-AES128-SHA256         ECDH 253   AES         128      TLS_ECDHE_ECDSA_WITH_AES_128_CBC_SHA256
 xc009   ECDHE-ECDSA-AES128-SHA            ECDH 253   AES         128      TLS_ECDHE_ECDSA_WITH_AES_128_CBC_SHA
 xc0ae   ECDHE-ECDSA-AES128-CCM8           ECDH 253   AESCCM8     128      TLS_ECDHE_ECDSA_WITH_AES_128_CCM_8
 xc0ac   ECDHE-ECDSA-AES128-CCM            ECDH 253   AESCCM      128      TLS_ECDHE_ECDSA_WITH_AES_128_CCM
 xc072   ECDHE-ECDSA-CAMELLIA128-SHA256    ECDH 253   Camellia    128      TLS_ECDHE_ECDSA_WITH_CAMELLIA_128_CBC_SHA256
 xc018   AECDH-AES128-SHA                  ECDH 253   AES         128      TLS_ECDH_anon_WITH_AES_128_CBC_SHA
 xa6     ADH-AES128-GCM-SHA256             DH 2048    AESGCM      128      TLS_DH_anon_WITH_AES_128_GCM_SHA256
 x6c     ADH-AES128-SHA256                 DH 2048    AES         128      TLS_DH_anon_WITH_AES_128_CBC_SHA256
 x34     ADH-AES128-SHA                    DH 2048    AES         128      TLS_DH_anon_WITH_AES_128_CBC_SHA
 xbf     ADH-CAMELLIA128-SHA256            DH 2048    Camellia    128      TLS_DH_anon_WITH_CAMELLIA_128_CBC_SHA256
 x9b     ADH-SEED-SHA                      DH 2048    SEED        128      TLS_DH_anon_WITH_SEED_CBC_SHA
 x46     ADH-CAMELLIA128-SHA               DH 2048    Camellia    128      TLS_DH_anon_WITH_CAMELLIA_128_CBC_SHA
 xc05c   ECDHE-ECDSA-ARIA128-GCM-SHA256    ECDH 253   ARIAGCM     128      TLS_ECDHE_ECDSA_WITH_ARIA_128_GCM_SHA256
TLS 1.3
 x1302   TLS_AES_256_GCM_SHA384            ECDH 253   AESGCM      256      TLS_AES_256_GCM_SHA384
 x1303   TLS_CHACHA20_POLY1305_SHA256      ECDH 253   ChaCha20    256      TLS_CHACHA20_POLY1305_SHA256
 x1301   TLS_AES_128_GCM_SHA256            ECDH 253   AESGCM      128      TLS_AES_128_GCM_SHA256
Not so bad, but sadly no overlap with any of the ciphers that mx01.arz.at offers. What about disabling STARTTLS for the mx01.arz.at (+ mx02.arz.at being another one used by the relevant domain) mail servers when talking to mine? Let s try that:
% sudo postconf -nf smtpd_discard_ehlo_keyword_address_maps
smtpd_discard_ehlo_keyword_address_maps =
    hash:/etc/postfix/smtpd_discard_ehlo_keywords
% cat /etc/postfix/smtpd_discard_ehlo_keywords
# *disable* starttls for mx01.arz.at / mx02.arz.at:
193.110.182.61 starttls
193.110.182.62 starttls
But the remote mail server doesn t seem to send mails without TLS:
postfix/smtpd[4151799]: connect from mx01.arz.at[193.110.182.61]
postfix/smtpd[4151799]: discarding EHLO keywords: STARTTLS
postfix/smtpd[4151799]: disconnect from mx01.arz.at[193.110.182.61] ehlo=1 quit=1 commands=2
Let s verify this further, but without fiddling with the main mail server too much. We can add a dedicated service to postfix (see serverfault), and run it in verbose mode, to get more detailled logging:
% sudo postconf -Mf
[...]
10025      inet  n       -       -       -       -       smtpd
    -o syslog_name=postfix/smtpd/badstarttls
    -o smtpd_tls_security_level=none
    -o smtpd_helo_required=yes
    -o smtpd_helo_restrictions=pcre:/etc/postfix/helo_badstarttls_allow,reject
    -v
[...]
% cat /etc/postfix/helo_badstarttls_allow
/mx01.arz.at/ OK
/mx02.arz.at/ OK
/193.110.182.61/ OK
/193.110.182.62/ OK
We redirect the traffic from mx01.arz.at + mx02.arz.at towards our new postfix service, listening on port 10025:
% sudo iptables -t nat -A PREROUTING -p tcp -s 193.110.182.61 --dport 25 -j REDIRECT --to-port 10025
% sudo iptables -t nat -A PREROUTING -p tcp -s 193.110.182.62 --dport 25 -j REDIRECT --to-port 10025
With this setup we get very detailed logging, and it seems to confirm our suspicion that the mail server doesn t want to talk unencrypted with us:
[...]
postfix/smtpd/badstarttls/smtpd[3491900]: connect from mx01.arz.at[193.110.182.61]
[...]
postfix/smtpd/badstarttls/smtpd[3491901]: disconnect from mx01.arz.at[193.110.182.61] ehlo=1 quit=1 commands=2
postfix/smtpd/badstarttls/smtpd[3491901]: master_notify: status 1
postfix/smtpd/badstarttls/smtpd[3491901]: connection closed
[...]
Let s step back and revert those changes, back to our original postfix setup. Might the problem be related to our Let s Encrypt certificate? Let s see what we have:
% echo QUIT   openssl s_client -connect mail.example.com:25 -starttls
[...]
issuer=C = US, O = Let's Encrypt, CN = R3
---
No client certificate CA names sent
Peer signing digest: SHA384
Peer signature type: ECDSA
Server Temp Key: X25519, 253 bits
---
SSL handshake has read 4455 bytes and written 427 bytes
Verification: OK
---
New, TLSv1.3, Cipher is TLS_AES_256_GCM_SHA384
Server public key is 384 bit
[...]
We have an ECDSA based certificate, what about switching to RSA instead? Thanks to the wonderful dehydrated, this is as easy as:
% echo KEY_ALGO=rsa > certs/mail.example.com/config
% ./dehydrated -c --domain mail.example.com --force
% sudo systemctl reload postfix
With switching to RSA type key we get:
% echo QUIT   openssl s_client -connect mail.example.com:25 -starttls smtp
CONNECTED(00000003)
[...]
issuer=C = US, O = Let's Encrypt, CN = R3
---
No client certificate CA names sent
Peer signing digest: SHA256
Peer signature type: RSA-PSS
Server Temp Key: X25519, 253 bits
---
SSL handshake has read 5295 bytes and written 427 bytes
Verification: OK
---
New, TLSv1.3, Cipher is TLS_AES_256_GCM_SHA384
Server public key is 4096 bit
Which ciphers do we offer now? Let s check:
% testssl --cipher-per-proto -t=smtp mail.example.com:25
[...]
Hexcode  Cipher Suite Name (OpenSSL)       KeyExch.   Encryption  Bits     Cipher Suite Name (IANA/RFC)
-----------------------------------------------------------------------------------------------------------------------------
SSLv2
SSLv3
TLS 1
 xc014   ECDHE-RSA-AES256-SHA              ECDH 253   AES         256      TLS_ECDHE_RSA_WITH_AES_256_CBC_SHA
 x39     DHE-RSA-AES256-SHA                DH 2048    AES         256      TLS_DHE_RSA_WITH_AES_256_CBC_SHA
 x88     DHE-RSA-CAMELLIA256-SHA           DH 2048    Camellia    256      TLS_DHE_RSA_WITH_CAMELLIA_256_CBC_SHA
 xc019   AECDH-AES256-SHA                  ECDH 253   AES         256      TLS_ECDH_anon_WITH_AES_256_CBC_SHA
 x3a     ADH-AES256-SHA                    DH 2048    AES         256      TLS_DH_anon_WITH_AES_256_CBC_SHA
 x89     ADH-CAMELLIA256-SHA               DH 2048    Camellia    256      TLS_DH_anon_WITH_CAMELLIA_256_CBC_SHA
 x35     AES256-SHA                        RSA        AES         256      TLS_RSA_WITH_AES_256_CBC_SHA
 x84     CAMELLIA256-SHA                   RSA        Camellia    256      TLS_RSA_WITH_CAMELLIA_256_CBC_SHA
 xc013   ECDHE-RSA-AES128-SHA              ECDH 253   AES         128      TLS_ECDHE_RSA_WITH_AES_128_CBC_SHA
 x33     DHE-RSA-AES128-SHA                DH 2048    AES         128      TLS_DHE_RSA_WITH_AES_128_CBC_SHA
 x9a     DHE-RSA-SEED-SHA                  DH 2048    SEED        128      TLS_DHE_RSA_WITH_SEED_CBC_SHA
 x45     DHE-RSA-CAMELLIA128-SHA           DH 2048    Camellia    128      TLS_DHE_RSA_WITH_CAMELLIA_128_CBC_SHA
 xc018   AECDH-AES128-SHA                  ECDH 253   AES         128      TLS_ECDH_anon_WITH_AES_128_CBC_SHA
 x34     ADH-AES128-SHA                    DH 2048    AES         128      TLS_DH_anon_WITH_AES_128_CBC_SHA
 x9b     ADH-SEED-SHA                      DH 2048    SEED        128      TLS_DH_anon_WITH_SEED_CBC_SHA
 x46     ADH-CAMELLIA128-SHA               DH 2048    Camellia    128      TLS_DH_anon_WITH_CAMELLIA_128_CBC_SHA
 x2f     AES128-SHA                        RSA        AES         128      TLS_RSA_WITH_AES_128_CBC_SHA
 x96     SEED-SHA                          RSA        SEED        128      TLS_RSA_WITH_SEED_CBC_SHA
 x41     CAMELLIA128-SHA                   RSA        Camellia    128      TLS_RSA_WITH_CAMELLIA_128_CBC_SHA
TLS 1.1
 xc014   ECDHE-RSA-AES256-SHA              ECDH 253   AES         256      TLS_ECDHE_RSA_WITH_AES_256_CBC_SHA
 x39     DHE-RSA-AES256-SHA                DH 2048    AES         256      TLS_DHE_RSA_WITH_AES_256_CBC_SHA
 x88     DHE-RSA-CAMELLIA256-SHA           DH 2048    Camellia    256      TLS_DHE_RSA_WITH_CAMELLIA_256_CBC_SHA
 xc019   AECDH-AES256-SHA                  ECDH 253   AES         256      TLS_ECDH_anon_WITH_AES_256_CBC_SHA
 x3a     ADH-AES256-SHA                    DH 2048    AES         256      TLS_DH_anon_WITH_AES_256_CBC_SHA
 x89     ADH-CAMELLIA256-SHA               DH 2048    Camellia    256      TLS_DH_anon_WITH_CAMELLIA_256_CBC_SHA
 x35     AES256-SHA                        RSA        AES         256      TLS_RSA_WITH_AES_256_CBC_SHA
 x84     CAMELLIA256-SHA                   RSA        Camellia    256      TLS_RSA_WITH_CAMELLIA_256_CBC_SHA
 xc013   ECDHE-RSA-AES128-SHA              ECDH 253   AES         128      TLS_ECDHE_RSA_WITH_AES_128_CBC_SHA
 x33     DHE-RSA-AES128-SHA                DH 2048    AES         128      TLS_DHE_RSA_WITH_AES_128_CBC_SHA
 x9a     DHE-RSA-SEED-SHA                  DH 2048    SEED        128      TLS_DHE_RSA_WITH_SEED_CBC_SHA
 x45     DHE-RSA-CAMELLIA128-SHA           DH 2048    Camellia    128      TLS_DHE_RSA_WITH_CAMELLIA_128_CBC_SHA
 xc018   AECDH-AES128-SHA                  ECDH 253   AES         128      TLS_ECDH_anon_WITH_AES_128_CBC_SHA
 x34     ADH-AES128-SHA                    DH 2048    AES         128      TLS_DH_anon_WITH_AES_128_CBC_SHA
 x9b     ADH-SEED-SHA                      DH 2048    SEED        128      TLS_DH_anon_WITH_SEED_CBC_SHA
 x46     ADH-CAMELLIA128-SHA               DH 2048    Camellia    128      TLS_DH_anon_WITH_CAMELLIA_128_CBC_SHA
 x2f     AES128-SHA                        RSA        AES         128      TLS_RSA_WITH_AES_128_CBC_SHA
 x96     SEED-SHA                          RSA        SEED        128      TLS_RSA_WITH_SEED_CBC_SHA
 x41     CAMELLIA128-SHA                   RSA        Camellia    128      TLS_RSA_WITH_CAMELLIA_128_CBC_SHA
TLS 1.2
 xc030   ECDHE-RSA-AES256-GCM-SHA384       ECDH 253   AESGCM      256      TLS_ECDHE_RSA_WITH_AES_256_GCM_SHA384
 xc028   ECDHE-RSA-AES256-SHA384           ECDH 253   AES         256      TLS_ECDHE_RSA_WITH_AES_256_CBC_SHA384
 xc014   ECDHE-RSA-AES256-SHA              ECDH 253   AES         256      TLS_ECDHE_RSA_WITH_AES_256_CBC_SHA
 x9f     DHE-RSA-AES256-GCM-SHA384         DH 2048    AESGCM      256      TLS_DHE_RSA_WITH_AES_256_GCM_SHA384
 xcca8   ECDHE-RSA-CHACHA20-POLY1305       ECDH 253   ChaCha20    256      TLS_ECDHE_RSA_WITH_CHACHA20_POLY1305_SHA256
 xccaa   DHE-RSA-CHACHA20-POLY1305         DH 2048    ChaCha20    256      TLS_DHE_RSA_WITH_CHACHA20_POLY1305_SHA256
 xc0a3   DHE-RSA-AES256-CCM8               DH 2048    AESCCM8     256      TLS_DHE_RSA_WITH_AES_256_CCM_8
 xc09f   DHE-RSA-AES256-CCM                DH 2048    AESCCM      256      TLS_DHE_RSA_WITH_AES_256_CCM
 x6b     DHE-RSA-AES256-SHA256             DH 2048    AES         256      TLS_DHE_RSA_WITH_AES_256_CBC_SHA256
 x39     DHE-RSA-AES256-SHA                DH 2048    AES         256      TLS_DHE_RSA_WITH_AES_256_CBC_SHA
 xc077   ECDHE-RSA-CAMELLIA256-SHA384      ECDH 253   Camellia    256      TLS_ECDHE_RSA_WITH_CAMELLIA_256_CBC_SHA384
 xc4     DHE-RSA-CAMELLIA256-SHA256        DH 2048    Camellia    256      TLS_DHE_RSA_WITH_CAMELLIA_256_CBC_SHA256
 x88     DHE-RSA-CAMELLIA256-SHA           DH 2048    Camellia    256      TLS_DHE_RSA_WITH_CAMELLIA_256_CBC_SHA
 xc019   AECDH-AES256-SHA                  ECDH 253   AES         256      TLS_ECDH_anon_WITH_AES_256_CBC_SHA
 xa7     ADH-AES256-GCM-SHA384             DH 2048    AESGCM      256      TLS_DH_anon_WITH_AES_256_GCM_SHA384
 x6d     ADH-AES256-SHA256                 DH 2048    AES         256      TLS_DH_anon_WITH_AES_256_CBC_SHA256
 x3a     ADH-AES256-SHA                    DH 2048    AES         256      TLS_DH_anon_WITH_AES_256_CBC_SHA
 xc5     ADH-CAMELLIA256-SHA256            DH 2048    Camellia    256      TLS_DH_anon_WITH_CAMELLIA_256_CBC_SHA256
 x89     ADH-CAMELLIA256-SHA               DH 2048    Camellia    256      TLS_DH_anon_WITH_CAMELLIA_256_CBC_SHA
 x9d     AES256-GCM-SHA384                 RSA        AESGCM      256      TLS_RSA_WITH_AES_256_GCM_SHA384
 xc0a1   AES256-CCM8                       RSA        AESCCM8     256      TLS_RSA_WITH_AES_256_CCM_8
 xc09d   AES256-CCM                        RSA        AESCCM      256      TLS_RSA_WITH_AES_256_CCM
 x3d     AES256-SHA256                     RSA        AES         256      TLS_RSA_WITH_AES_256_CBC_SHA256
 x35     AES256-SHA                        RSA        AES         256      TLS_RSA_WITH_AES_256_CBC_SHA
 xc0     CAMELLIA256-SHA256                RSA        Camellia    256      TLS_RSA_WITH_CAMELLIA_256_CBC_SHA256
 x84     CAMELLIA256-SHA                   RSA        Camellia    256      TLS_RSA_WITH_CAMELLIA_256_CBC_SHA
 xc051   ARIA256-GCM-SHA384                RSA        ARIAGCM     256      TLS_RSA_WITH_ARIA_256_GCM_SHA384
 xc053   DHE-RSA-ARIA256-GCM-SHA384        DH 2048    ARIAGCM     256      TLS_DHE_RSA_WITH_ARIA_256_GCM_SHA384
 xc061   ECDHE-ARIA256-GCM-SHA384          ECDH 253   ARIAGCM     256      TLS_ECDHE_RSA_WITH_ARIA_256_GCM_SHA384
 xc02f   ECDHE-RSA-AES128-GCM-SHA256       ECDH 253   AESGCM      128      TLS_ECDHE_RSA_WITH_AES_128_GCM_SHA256
 xc027   ECDHE-RSA-AES128-SHA256           ECDH 253   AES         128      TLS_ECDHE_RSA_WITH_AES_128_CBC_SHA256
 xc013   ECDHE-RSA-AES128-SHA              ECDH 253   AES         128      TLS_ECDHE_RSA_WITH_AES_128_CBC_SHA
 x9e     DHE-RSA-AES128-GCM-SHA256         DH 2048    AESGCM      128      TLS_DHE_RSA_WITH_AES_128_GCM_SHA256
 xc0a2   DHE-RSA-AES128-CCM8               DH 2048    AESCCM8     128      TLS_DHE_RSA_WITH_AES_128_CCM_8
 xc09e   DHE-RSA-AES128-CCM                DH 2048    AESCCM      128      TLS_DHE_RSA_WITH_AES_128_CCM
 xc0a0   AES128-CCM8                       RSA        AESCCM8     128      TLS_RSA_WITH_AES_128_CCM_8
 xc09c   AES128-CCM                        RSA        AESCCM      128      TLS_RSA_WITH_AES_128_CCM
 x67     DHE-RSA-AES128-SHA256             DH 2048    AES         128      TLS_DHE_RSA_WITH_AES_128_CBC_SHA256
 x33     DHE-RSA-AES128-SHA                DH 2048    AES         128      TLS_DHE_RSA_WITH_AES_128_CBC_SHA
 xc076   ECDHE-RSA-CAMELLIA128-SHA256      ECDH 253   Camellia    128      TLS_ECDHE_RSA_WITH_CAMELLIA_128_CBC_SHA256
 xbe     DHE-RSA-CAMELLIA128-SHA256        DH 2048    Camellia    128      TLS_DHE_RSA_WITH_CAMELLIA_128_CBC_SHA256
 x9a     DHE-RSA-SEED-SHA                  DH 2048    SEED        128      TLS_DHE_RSA_WITH_SEED_CBC_SHA
 x45     DHE-RSA-CAMELLIA128-SHA           DH 2048    Camellia    128      TLS_DHE_RSA_WITH_CAMELLIA_128_CBC_SHA
 xc018   AECDH-AES128-SHA                  ECDH 253   AES         128      TLS_ECDH_anon_WITH_AES_128_CBC_SHA
 xa6     ADH-AES128-GCM-SHA256             DH 2048    AESGCM      128      TLS_DH_anon_WITH_AES_128_GCM_SHA256
 x6c     ADH-AES128-SHA256                 DH 2048    AES         128      TLS_DH_anon_WITH_AES_128_CBC_SHA256
 x34     ADH-AES128-SHA                    DH 2048    AES         128      TLS_DH_anon_WITH_AES_128_CBC_SHA
 xbf     ADH-CAMELLIA128-SHA256            DH 2048    Camellia    128      TLS_DH_anon_WITH_CAMELLIA_128_CBC_SHA256
 x9b     ADH-SEED-SHA                      DH 2048    SEED        128      TLS_DH_anon_WITH_SEED_CBC_SHA
 x46     ADH-CAMELLIA128-SHA               DH 2048    Camellia    128      TLS_DH_anon_WITH_CAMELLIA_128_CBC_SHA
 x9c     AES128-GCM-SHA256                 RSA        AESGCM      128      TLS_RSA_WITH_AES_128_GCM_SHA256
 x3c     AES128-SHA256                     RSA        AES         128      TLS_RSA_WITH_AES_128_CBC_SHA256
 x2f     AES128-SHA                        RSA        AES         128      TLS_RSA_WITH_AES_128_CBC_SHA
 xba     CAMELLIA128-SHA256                RSA        Camellia    128      TLS_RSA_WITH_CAMELLIA_128_CBC_SHA256
 x96     SEED-SHA                          RSA        SEED        128      TLS_RSA_WITH_SEED_CBC_SHA
 x41     CAMELLIA128-SHA                   RSA        Camellia    128      TLS_RSA_WITH_CAMELLIA_128_CBC_SHA
 xc050   ARIA128-GCM-SHA256                RSA        ARIAGCM     128      TLS_RSA_WITH_ARIA_128_GCM_SHA256
 xc052   DHE-RSA-ARIA128-GCM-SHA256        DH 2048    ARIAGCM     128      TLS_DHE_RSA_WITH_ARIA_128_GCM_SHA256
 xc060   ECDHE-ARIA128-GCM-SHA256          ECDH 253   ARIAGCM     128      TLS_ECDHE_RSA_WITH_ARIA_128_GCM_SHA256
TLS 1.3
 x1302   TLS_AES_256_GCM_SHA384            ECDH 253   AESGCM      256      TLS_AES_256_GCM_SHA384
 x1303   TLS_CHACHA20_POLY1305_SHA256      ECDH 253   ChaCha20    256      TLS_CHACHA20_POLY1305_SHA256
 x1301   TLS_AES_128_GCM_SHA256            ECDH 253   AESGCM      128      TLS_AES_128_GCM_SHA256
With switching our SSL certificate to RSA, we gained around 51 new cipher options, amongst them being ones that also mx01.arz.at claimed to support. FTR, the result from above is what you get with the default settings for postfix v3.5.18, being:
smtpd_tls_ciphers = medium
smtpd_tls_mandatory_ciphers = medium
smtpd_tls_mandatory_exclude_ciphers =
smtpd_tls_mandatory_protocols = !SSLv2, !SSLv3
But the delay between triggering the password reset mail and getting a mail server connect was getting bigger and bigger. Therefore while waiting for the next mail to arrive, I decided to capture the network traffic, to be able to look further into this if it should continue to be failing:
% sudo tshark -n -i eth0 -s 65535 -w arz.pcap -f "host 193.110.182.61 or host 193.110.182.62"
A few hours later the mail server connected again, and the mail went through!
postfix/smtpd[4162835]: connect from mx01.arz.at[193.110.182.61]
postfix/smtpd[4162835]: Anonymous TLS connection established from mx01.arz.at[193.110.182.61]: TLSv1.2 with cipher ECDHE-RSA-AES256-GCM-SHA384 (256/256 bits)
postfix/smtpd[4162835]: E50D6401E6: client=mx01.arz.at[193.110.182.61]
postfix/smtpd[4162835]: disconnect from mx01.arz.at[193.110.182.61] ehlo=2 starttls=1 mail=1 rcpt=1 data=1 quit=1 commands=7
Now also having the captured network traffic, we can check the details there:
[...]
% tshark -o smtp.decryption:true -r arz.pcap
    1 0.000000000 193.110.182.61   203.0.113.42 TCP 74 24699   25 [SYN] Seq=0 Win=29200 Len=0 MSS=1460 SACK_PERM=1 TSval=2261106119 TSecr=0 WS=128
    2 0.000042827 203.0.113.42   193.110.182.61 TCP 74 25   24699 [SYN, ACK] Seq=0 Ack=1 Win=65160 Len=0 MSS=1460 SACK_PERM=1 TSval=3233422181 TSecr=2261106119 WS=128
    3 0.020719269 193.110.182.61   203.0.113.42 TCP 66 24699   25 [ACK] Seq=1 Ack=1 Win=29312 Len=0 TSval=2261106139 TSecr=3233422181
    4 0.022883259 203.0.113.42   193.110.182.61 SMTP 96 S: 220 mail.example.com ESMTP
    5 0.043682626 193.110.182.61   203.0.113.42 TCP 66 24699   25 [ACK] Seq=1 Ack=31 Win=29312 Len=0 TSval=2261106162 TSecr=3233422203
    6 0.043799047 193.110.182.61   203.0.113.42 SMTP 84 C: EHLO mx01.arz.at
    7 0.043811363 203.0.113.42   193.110.182.61 TCP 66 25   24699 [ACK] Seq=31 Ack=19 Win=65280 Len=0 TSval=3233422224 TSecr=2261106162
    8 0.043898412 203.0.113.42   193.110.182.61 SMTP 253 S: 250-mail.example.com   PIPELINING   SIZE 20240000   VRFY   ETRN   AUTH PLAIN   AUTH=PLAIN   ENHANCEDSTATUSCODES   8BITMIME   DSN   SMTPUTF8   CHUNKING
    9 0.064625499 193.110.182.61   203.0.113.42 SMTP 72 C: QUIT
   10 0.064750257 203.0.113.42   193.110.182.61 SMTP 81 S: 221 2.0.0 Bye
   11 0.064760200 203.0.113.42   193.110.182.61 TCP 66 25   24699 [FIN, ACK] Seq=233 Ack=25 Win=65280 Len=0 TSval=3233422245 TSecr=2261106183
   12 0.085573715 193.110.182.61   203.0.113.42 TCP 66 24699   25 [FIN, ACK] Seq=25 Ack=234 Win=30336 Len=0 TSval=2261106204 TSecr=3233422245
   13 0.085610229 203.0.113.42   193.110.182.61 TCP 66 25   24699 [ACK] Seq=234 Ack=26 Win=65280 Len=0 TSval=3233422266 TSecr=2261106204
   14 1799.888108373 193.110.182.61   203.0.113.42 TCP 74 10330   25 [SYN] Seq=0 Win=29200 Len=0 MSS=1460 SACK_PERM=1 TSval=2262906007 TSecr=0 WS=128
   15 1799.888161311 203.0.113.42   193.110.182.61 TCP 74 25   10330 [SYN, ACK] Seq=0 Ack=1 Win=65160 Len=0 MSS=1460 SACK_PERM=1 TSval=3235222069 TSecr=2262906007 WS=128
   16 1799.909030335 193.110.182.61   203.0.113.42 TCP 66 10330   25 [ACK] Seq=1 Ack=1 Win=29312 Len=0 TSval=2262906028 TSecr=3235222069
   17 1799.956621011 203.0.113.42   193.110.182.61 SMTP 96 S: 220 mail.example.com ESMTP
   18 1799.977229656 193.110.182.61   203.0.113.42 TCP 66 10330   25 [ACK] Seq=1 Ack=31 Win=29312 Len=0 TSval=2262906096 TSecr=3235222137
   19 1799.977229698 193.110.182.61   203.0.113.42 SMTP 84 C: EHLO mx01.arz.at
   20 1799.977266759 203.0.113.42   193.110.182.61 TCP 66 25   10330 [ACK] Seq=31 Ack=19 Win=65280 Len=0 TSval=3235222158 TSecr=2262906096
   21 1799.977351663 203.0.113.42   193.110.182.61 SMTP 267 S: 250-mail.example.com   PIPELINING   SIZE 20240000   VRFY   ETRN   STARTTLS   AUTH PLAIN   AUTH=PLAIN   ENHANCEDSTATUSCODES   8BITMIME   DSN   SMTPUTF8   CHUNKING
   22 1800.011494861 193.110.182.61   203.0.113.42 SMTP 76 C: STARTTLS
   23 1800.011589267 203.0.113.42   193.110.182.61 SMTP 96 S: 220 2.0.0 Ready to start TLS
   24 1800.032812294 193.110.182.61   203.0.113.42 TLSv1 223 Client Hello
   25 1800.032987264 203.0.113.42   193.110.182.61 TLSv1.2 2962 Server Hello
   26 1800.032995513 203.0.113.42   193.110.182.61 TCP 1266 25   10330 [PSH, ACK] Seq=3158 Ack=186 Win=65152 Len=1200 TSval=3235222214 TSecr=2262906151 [TCP segment of a reassembled PDU]
   27 1800.053546755 193.110.182.61   203.0.113.42 TCP 66 10330   25 [ACK] Seq=186 Ack=3158 Win=36096 Len=0 TSval=2262906172 TSecr=3235222214
   28 1800.092852469 193.110.182.61   203.0.113.42 TCP 66 10330   25 [ACK] Seq=186 Ack=4358 Win=39040 Len=0 TSval=2262906212 TSecr=3235222214
   29 1800.092892905 203.0.113.42   193.110.182.61 TLSv1.2 900 Certificate, Server Key Exchange, Server Hello Done
   30 1800.113546769 193.110.182.61   203.0.113.42 TCP 66 10330   25 [ACK] Seq=186 Ack=5192 Win=41856 Len=0 TSval=2262906232 TSecr=3235222273
   31 1800.114763363 193.110.182.61   203.0.113.42 TLSv1.2 192 Client Key Exchange, Change Cipher Spec, Encrypted Handshake Message
   32 1800.115000416 203.0.113.42   193.110.182.61 TLSv1.2 117 Change Cipher Spec, Encrypted Handshake Message
   33 1800.136070200 193.110.182.61   203.0.113.42 TLSv1.2 113 Application Data
   34 1800.136155526 203.0.113.42   193.110.182.61 TLSv1.2 282 Application Data
   35 1800.158854473 193.110.182.61   203.0.113.42 TLSv1.2 162 Application Data
   36 1800.159254794 203.0.113.42   193.110.182.61 TLSv1.2 109 Application Data
   37 1800.180286407 193.110.182.61   203.0.113.42 TLSv1.2 144 Application Data
   38 1800.223005960 203.0.113.42   193.110.182.61 TCP 66 25   10330 [ACK] Seq=5502 Ack=533 Win=65152 Len=0 TSval=3235222404 TSecr=2262906299
   39 1802.230300244 203.0.113.42   193.110.182.61 TLSv1.2 146 Application Data
   40 1802.251994333 193.110.182.61   203.0.113.42 TCP 2962 [TCP segment of a reassembled PDU]
   41 1802.252034015 203.0.113.42   193.110.182.61 TCP 66 25   10330 [ACK] Seq=5582 Ack=3429 Win=63616 Len=0 TSval=3235224433 TSecr=2262908371
   42 1802.252279083 193.110.182.61   203.0.113.42 TLSv1.2 1295 Application Data
   43 1802.252288316 203.0.113.42   193.110.182.61 TCP 66 25   10330 [ACK] Seq=5582 Ack=4658 Win=64128 Len=0 TSval=3235224433 TSecr=2262908371
   44 1802.272816060 193.110.182.61   203.0.113.42 TLSv1.2 833 Application Data, Application Data
   45 1802.272827542 203.0.113.42   193.110.182.61 TCP 66 25   10330 [ACK] Seq=5582 Ack=5425 Win=64128 Len=0 TSval=3235224453 TSecr=2262908392
   46 1802.338807683 203.0.113.42   193.110.182.61 TLSv1.2 131 Application Data
   47 1802.398968611 193.110.182.61   203.0.113.42 TCP 66 10330   25 [ACK] Seq=5425 Ack=5647 Win=44800 Len=0 TSval=2262908518 TSecr=3235224519
   48 1863.257457500 193.110.182.61   203.0.113.42 TLSv1.2 101 Application Data
   49 1863.257495688 203.0.113.42   193.110.182.61 TCP 66 25   10330 [ACK] Seq=5647 Ack=5460 Win=64128 Len=0 TSval=3235285438 TSecr=2262969376
   50 1863.257654942 203.0.113.42   193.110.182.61 TLSv1.2 110 Application Data
   51 1863.257721010 203.0.113.42   193.110.182.61 TLSv1.2 97 Encrypted Alert
   52 1863.278242216 193.110.182.61   203.0.113.42 TCP 66 10330   25 [ACK] Seq=5460 Ack=5691 Win=44800 Len=0 TSval=2262969397 TSecr=3235285438
   53 1863.278464176 193.110.182.61   203.0.113.42 TCP 66 10330   25 [RST, ACK] Seq=5460 Ack=5723 Win=44800 Len=0 TSval=2262969397 TSecr=3235285438
% tshark -O tls -r arz.pcap
[...]
Transport Layer Security
    TLSv1 Record Layer: Handshake Protocol: Client Hello
        Content Type: Handshake (22)
        Version: TLS 1.0 (0x0301)
        Length: 152
        Handshake Protocol: Client Hello
            Handshake Type: Client Hello (1)
            Length: 148
            Version: TLS 1.2 (0x0303)
            Random: 4575d1e7c93c09a564edc00b8b56ea6f5d826f8cfe78eb980c451a70a9c5123f
                GMT Unix Time: Dec  5, 2006 21:09:11.000000000 CET
                Random Bytes: c93c09a564edc00b8b56ea6f5d826f8cfe78eb980c451a70a9c5123f
            Session ID Length: 0
            Cipher Suites Length: 26
            Cipher Suites (13 suites)
                Cipher Suite: TLS_ECDHE_RSA_WITH_AES_256_GCM_SHA384 (0xc030)
                Cipher Suite: TLS_ECDHE_RSA_WITH_AES_128_GCM_SHA256 (0xc02f)
                Cipher Suite: TLS_ECDHE_RSA_WITH_AES_256_CBC_SHA384 (0xc028)
                Cipher Suite: TLS_ECDHE_RSA_WITH_AES_128_CBC_SHA256 (0xc027)
                Cipher Suite: TLS_ECDHE_RSA_WITH_AES_256_CBC_SHA (0xc014)
                Cipher Suite: TLS_ECDHE_RSA_WITH_AES_128_CBC_SHA (0xc013)
                Cipher Suite: TLS_RSA_WITH_AES_256_GCM_SHA384 (0x009d)
                Cipher Suite: TLS_RSA_WITH_AES_128_GCM_SHA256 (0x009c)
                Cipher Suite: TLS_RSA_WITH_AES_256_CBC_SHA256 (0x003d)
                Cipher Suite: TLS_RSA_WITH_AES_128_CBC_SHA256 (0x003c)
                Cipher Suite: TLS_RSA_WITH_AES_256_CBC_SHA (0x0035)
                Cipher Suite: TLS_RSA_WITH_AES_128_CBC_SHA (0x002f)
                Cipher Suite: TLS_EMPTY_RENEGOTIATION_INFO_SCSV (0x00ff)
[...]
Transport Layer Security
    TLSv1.2 Record Layer: Handshake Protocol: Server Hello
        Content Type: Handshake (22)
        Version: TLS 1.2 (0x0303)
        Length: 89
        Handshake Protocol: Server Hello
            Handshake Type: Server Hello (2)
            Length: 85
            Version: TLS 1.2 (0x0303)
            Random: cf2ed24e3300e95e5f56023bf8b4e5904b862bb2ed8a5796444f574e47524401
                GMT Unix Time: Feb 23, 2080 23:16:46.000000000 CET
                Random Bytes: 3300e95e5f56023bf8b4e5904b862bb2ed8a5796444f574e47524401
            Session ID Length: 32
            Session ID: 63d041b126ecebf857d685abd9d4593c46a3672e1ad76228f3eacf2164f86fb9
            Cipher Suite: TLS_ECDHE_RSA_WITH_AES_256_GCM_SHA384 (0xc030)
[...]
In this network dump we see what cipher suites are offered, and the TLS_ECDHE_RSA_WITH_AES_256_GCM_SHA384 here is the Cipher Suite Name in IANA/RFC speak. Whis corresponds to the ECDHE-RSA-AES256-GCM-SHA384 in openssl speak (see Mozilla s Mozilla s cipher suite correspondence table), which we also saw in the postfix log. Mission accomplished! :) Now, if we re interested in avoiding certain ciphers and increase security level, we can e.g. get rid of the SEED, CAMELLIA and all anonymous ciphers, and could accept only TLS v1.2 + v1.3, by further adjusting postfix s main.cf:
smtpd_tls_ciphers = high
smtpd_tls_exclude_ciphers = aNULL CAMELLIA
smtpd_tls_mandatory_ciphers = high
smtpd_tls_mandatory_protocols = TLSv1.2 TLSv1.3
smtpd_tls_protocols = TLSv1.2 TLSv1.3
Which would then gives us:
% testssl --cipher-per-proto -t=smtp mail.example.com:25
[...]
Hexcode  Cipher Suite Name (OpenSSL)       KeyExch.   Encryption  Bits     Cipher Suite Name (IANA/RFC)
-----------------------------------------------------------------------------------------------------------------------------
SSLv2
SSLv3
TLS 1
TLS 1.1
TLS 1.2
 xc030   ECDHE-RSA-AES256-GCM-SHA384       ECDH 253   AESGCM      256      TLS_ECDHE_RSA_WITH_AES_256_GCM_SHA384
 xc028   ECDHE-RSA-AES256-SHA384           ECDH 253   AES         256      TLS_ECDHE_RSA_WITH_AES_256_CBC_SHA384
 xc014   ECDHE-RSA-AES256-SHA              ECDH 253   AES         256      TLS_ECDHE_RSA_WITH_AES_256_CBC_SHA
 x9f     DHE-RSA-AES256-GCM-SHA384         DH 2048    AESGCM      256      TLS_DHE_RSA_WITH_AES_256_GCM_SHA384
 xcca8   ECDHE-RSA-CHACHA20-POLY1305       ECDH 253   ChaCha20    256      TLS_ECDHE_RSA_WITH_CHACHA20_POLY1305_SHA256
 xccaa   DHE-RSA-CHACHA20-POLY1305         DH 2048    ChaCha20    256      TLS_DHE_RSA_WITH_CHACHA20_POLY1305_SHA256
 xc0a3   DHE-RSA-AES256-CCM8               DH 2048    AESCCM8     256      TLS_DHE_RSA_WITH_AES_256_CCM_8
 xc09f   DHE-RSA-AES256-CCM                DH 2048    AESCCM      256      TLS_DHE_RSA_WITH_AES_256_CCM
 x6b     DHE-RSA-AES256-SHA256             DH 2048    AES         256      TLS_DHE_RSA_WITH_AES_256_CBC_SHA256
 x39     DHE-RSA-AES256-SHA                DH 2048    AES         256      TLS_DHE_RSA_WITH_AES_256_CBC_SHA
 x9d     AES256-GCM-SHA384                 RSA        AESGCM      256      TLS_RSA_WITH_AES_256_GCM_SHA384
 xc0a1   AES256-CCM8                       RSA        AESCCM8     256      TLS_RSA_WITH_AES_256_CCM_8
 xc09d   AES256-CCM                        RSA        AESCCM      256      TLS_RSA_WITH_AES_256_CCM
 x3d     AES256-SHA256                     RSA        AES         256      TLS_RSA_WITH_AES_256_CBC_SHA256
 x35     AES256-SHA                        RSA        AES         256      TLS_RSA_WITH_AES_256_CBC_SHA
 xc051   ARIA256-GCM-SHA384                RSA        ARIAGCM     256      TLS_RSA_WITH_ARIA_256_GCM_SHA384
 xc053   DHE-RSA-ARIA256-GCM-SHA384        DH 2048    ARIAGCM     256      TLS_DHE_RSA_WITH_ARIA_256_GCM_SHA384
 xc061   ECDHE-ARIA256-GCM-SHA384          ECDH 253   ARIAGCM     256      TLS_ECDHE_RSA_WITH_ARIA_256_GCM_SHA384
 xc02f   ECDHE-RSA-AES128-GCM-SHA256       ECDH 253   AESGCM      128      TLS_ECDHE_RSA_WITH_AES_128_GCM_SHA256
 xc027   ECDHE-RSA-AES128-SHA256           ECDH 253   AES         128      TLS_ECDHE_RSA_WITH_AES_128_CBC_SHA256
 xc013   ECDHE-RSA-AES128-SHA              ECDH 253   AES         128      TLS_ECDHE_RSA_WITH_AES_128_CBC_SHA
 x9e     DHE-RSA-AES128-GCM-SHA256         DH 2048    AESGCM      128      TLS_DHE_RSA_WITH_AES_128_GCM_SHA256
 xc0a2   DHE-RSA-AES128-CCM8               DH 2048    AESCCM8     128      TLS_DHE_RSA_WITH_AES_128_CCM_8
 xc09e   DHE-RSA-AES128-CCM                DH 2048    AESCCM      128      TLS_DHE_RSA_WITH_AES_128_CCM
 xc0a0   AES128-CCM8                       RSA        AESCCM8     128      TLS_RSA_WITH_AES_128_CCM_8
 xc09c   AES128-CCM                        RSA        AESCCM      128      TLS_RSA_WITH_AES_128_CCM
 x67     DHE-RSA-AES128-SHA256             DH 2048    AES         128      TLS_DHE_RSA_WITH_AES_128_CBC_SHA256
 x33     DHE-RSA-AES128-SHA                DH 2048    AES         128      TLS_DHE_RSA_WITH_AES_128_CBC_SHA
 x9c     AES128-GCM-SHA256                 RSA        AESGCM      128      TLS_RSA_WITH_AES_128_GCM_SHA256
 x3c     AES128-SHA256                     RSA        AES         128      TLS_RSA_WITH_AES_128_CBC_SHA256
 x2f     AES128-SHA                        RSA        AES         128      TLS_RSA_WITH_AES_128_CBC_SHA
 xc050   ARIA128-GCM-SHA256                RSA        ARIAGCM     128      TLS_RSA_WITH_ARIA_128_GCM_SHA256
 xc052   DHE-RSA-ARIA128-GCM-SHA256        DH 2048    ARIAGCM     128      TLS_DHE_RSA_WITH_ARIA_128_GCM_SHA256
 xc060   ECDHE-ARIA128-GCM-SHA256          ECDH 253   ARIAGCM     128      TLS_ECDHE_RSA_WITH_ARIA_128_GCM_SHA256
TLS 1.3
 x1302   TLS_AES_256_GCM_SHA384            ECDH 253   AESGCM      256      TLS_AES_256_GCM_SHA384
 x1303   TLS_CHACHA20_POLY1305_SHA256      ECDH 253   ChaCha20    256      TLS_CHACHA20_POLY1305_SHA256
 x1301   TLS_AES_128_GCM_SHA256            ECDH 253   AESGCM      128      TLS_AES_128_GCM_SHA256
Don t forget to also adjust the smpt_tls_* accordingly (for your sending side). For further information see the Postfix TLS Support documentation. Also check out options like tls_ssl_options (setting it to e.g. NO_COMPRESSION) and tls_preempt_cipherlist (setting it to yes would prefer the servers order of ciphers over clients). Conclusions:

20 June 2023

Vasudev Kamath: Notes: Experimenting with ZRAM and Memory Over commit

Introduction The ZRAM module in the Linux kernel creates a memory-backed block device that stores its content in a compressed format. It offers users the choice of compression algorithms such as lz4, zstd, or lzo. These algorithms differ in compression ratio and speed, with zstd providing the best compression but being slower, while lz4 offers higher speed but lower compression.
Using ZRAM as Swap One interesting use case for ZRAM is utilizing it as swap space in the system. There are two utilities available for configuring ZRAM as swap: zram-tools and systemd-zram-generator. However, Debian Bullseye lacks systemd-zram-generator, making zram-tools the only option for Bullseye users. While it's possible to use systemd-zram-generator by self-compiling or via cargo, I preferred using tools available in the distribution repository due to my restricted environment.
Installation The installation process is straightforward. Simply execute the following command:
apt-get install zram-tools
Configuration The configuration involves modifying a simple shell script file /etc/default/zramswap sourced by the /usr/bin/zramswap script. Here's an example of the configuration I used:
# Compression algorithm selection
# Speed: lz4 > zstd > lzo
# Compression: zstd > lzo > lz4
# This is not inclusive of all the algorithms available in the latest kernels
# See /sys/block/zram0/comp_algorithm (when the zram module is loaded) to check
# the currently set and available algorithms for your kernel [1]
# [1]  https://github.com/torvalds/linux/blob/master/Documentation/blockdev/zram.txt#L86
ALGO=zstd
# Specifies the amount of RAM that should be used for zram
# based on a percentage of the total available memory
# This takes precedence and overrides SIZE below
PERCENT=30
# Specifies a static amount of RAM that should be used for
# the ZRAM devices, measured in MiB
# SIZE=256000
# Specifies the priority for the swap devices, see swapon(2)
# for more details. A higher number indicates higher priority
# This should probably be higher than hdd/ssd swaps.
# PRIORITY=100
I chose zstd as the compression algorithm for its superior compression capabilities. Additionally, I reserved 30% of memory as the size of the zram device. After modifying the configuration, restart the zramswap.service to activate the swap:
systemctl restart zramswap.service
Using systemd-zram-generator For Debian Bookworm users, an alternative option is systemd-zram-generator. Although zram-tools is still available in Debian Bookworm, systemd-zram-generator offers a more integrated solution within the systemd ecosystem. Below is an example of the translated configuration for systemd-zram-generator, located at /etc/systemd/zram-generator.conf:
# This config file enables a /dev/zram0 swap device with the following
# properties:
# * size: 50% of available RAM or 4GiB, whichever is less
# * compression-algorithm: kernel default
#
# This device's properties can be modified by adding options under the
# [zram0] section below. For example, to set a fixed size of 2GiB, set
#  zram-size = 2GiB .
[zram0]
zram-size = ceil(ram * 30/100)
compression-algorithm = zstd
swap-priority = 100
fs-type = swap
After making the necessary changes, reload systemd and start the systemd-zram-setup@zram0.service:
systemctl daemon-reload
systemctl start systemd-zram-setup@zram0.service
The systemd-zram-generator creates the zram device by loading the kernel module and then creates a systemd.swap unit to mount the zram device as swap. In this case, the swap file is called zram0.swap.
Checking Compression and Details To verify the effectiveness of the swap configuration, you can use the zramctl command, which is part of the util-linux package. Alternatively, the zramswap utility provided by zram-tools can be used to obtain the same output. During my testing with synthetic memory load created using stress-ng vm class I found that I can reach upto 40% compression ratio.
Memory Overcommit Another use case I was looking for is allowing the launching of applications that require more memory than what is available in the system. By default, the Linux kernel attempts to estimate the amount of free memory left on the system when user space requests more memory (vm.overcommit_memory=0). However, you can change this behavior by modifying the sysctl value for vm.overcommit_memory to 1. To demonstrate this, I ran a test using stress-ng to request more memory than the system had available. As expected, the Linux kernel refused to allocate memory, and the stress-ng process could not proceed.
free -tg                                                                                                                                                                                          (Mon,Jun19) 
                total        used        free      shared  buff/cache   available
 Mem:              31          12          11           3          11          18
 Swap:             10           2           8
 Total:            41          14          19
sudo stress-ng --vm=1 --vm-bytes=50G -t 120                                                                                                                                                       (Mon,Jun19) 
 stress-ng: info:  [1496310] setting to a 120 second (2 mins, 0.00 secs) run per stressor
 stress-ng: info:  [1496310] dispatching hogs: 1 vm
 stress-ng: info:  [1496312] vm: gave up trying to mmap, no available memory, skipping stressor
 stress-ng: warn:  [1496310] vm: [1496311] aborted early, out of system resources
 stress-ng: info:  [1496310] vm:
 stress-ng: warn:  [1496310]         14 System Management Interrupts
 stress-ng: info:  [1496310] passed: 0
 stress-ng: info:  [1496310] failed: 0
 stress-ng: info:  [1496310] skipped: 1: vm (1)
 stress-ng: info:  [1496310] successful run completed in 10.04s
By setting vm.overcommit_memory=1, Linux will allocate memory in a more relaxed manner, assuming an infinite amount of memory is available.
Conclusion ZRAM provides disks that allow for very fast I/O, and compression allows for a significant amount of memory savings. ZRAM is not restricted to just swap usage; it can be used as a normal block device with different file systems. Using ZRAM as swap is beneficial because, unlike disk-based swap, it is faster, and compression ensures that we use a smaller amount of RAM itself as swap space. Additionally, adjusting the memory overcommit settings can be beneficial for scenarios that require launching memory-intensive applications. Note: When running stress tests or allocating excessive memory, be cautious about the actual memory capacity of your system to prevent out-of-memory (OOM) situations. Feel free to explore the capabilities of ZRAM and optimize your system's memory management. Happy computing!

11 June 2023

Petter Reinholdtsen: What did I learn from OpenSnitch this summer?

With yesterdays release of Debian 12 Bookworm, I am happy to know the the interactive application firewall OpenSnitch is available for a wider audience. I have been running it for a few weeks now, and have been surprised about some of the programs connecting to the Internet. Some programs are obviously calling out from my machine, like the NTP network based clock adjusting system and Tor to reach other Tor clients, but others were more dubious. For example, the KDE Window manager try to look up the host name in DNS, for no apparent reason, but if this lookup is blocked the KDE desktop get periodically stuck when I use it. Another surprise was how much Firefox call home directly to mozilla.com, mozilla.net and googleapis.com, to mention a few, when I visit other web pages. This direct connection happen even if I told Firefox to always use a proxy, and the proxy setting is ignored for this traffic. Other surprising connections come from audacity and dirmngr (I do not use Gnome). It took some trial and error to get a good default set of permissions. Without it, I would get popups asking for permissions at any time, also the most inconvenient ones where I am in the middle of a time sensitive gaming session. I suspect some application developers should rethink when then need to use network connections or DNS lookups, and recommend testing OpenSnitch (only apt install opensnitch away in Debian Bookworm) to locate and report any surprising Internet connections on your desktop machine. At the moment the upstream developer and Debian package maintainer is working on making the system more reliable in Debian, by enabling the eBPF kernel module to track processes and connections instead of depending in content in /proc/. This should enter unstable fairly soon. As usual, if you use Bitcoin and want to show your support of my activities, please send Bitcoin donations to my address 15oWEoG9dUPovwmUL9KWAnYRtNJEkP1u1b.

9 October 2022

Sergio Talens-Oliag: Shared networking for Virtual Machines and Containers

This entry explains how I have configured a linux bridge, dnsmasq and iptables to be able to run and communicate different virtualization systems and containers on laptops running Debian GNU/Linux. I ve used different variations of this setup for a long time with VirtualBox and KVM for the Virtual Machines and Linux-VServer, OpenVZ, LXC and lately Docker or Podman for the Containers.

Required packagesI m running Debian Sid with systemd and network-manager to configure the WiFi and Ethernet interfaces, but for the bridge I use bridge-utils with ifupdown (as I said this setup is old, I guess ifupdow2 and ifupdown-ng will work too). To start and stop the DNS and DHCP services and add NAT rules when the bridge is brought up or down I execute a script that uses:
  • ip from iproute2 to get the network information,
  • dnsmasq to provide the DNS and DHCP services (currently only the dnsmasq-base package is needed and it is recommended by network-manager, so it is probably installed),
  • iptables to configure NAT (for now docker kind of forces me to keep using iptables, but at some point I d like to move to nftables).
To make sure you have everything installed you can run the following command:
sudo apt install bridge-utils dnsmasq-base ifupdown iproute2 iptables

Bridge configurationThe bridge configuration for ifupdow is available on the file /etc/network/interfaces.d/vmbr0:
# Virtual servers NAT Bridge
auto vmbr0
iface vmbr0 inet static
    address         10.0.4.1
    network         10.0.4.0
    netmask         255.255.255.0
    broadcast       10.0.4.255
    bridge_ports    none
    bridge_maxwait  0
    up              /usr/local/sbin/vmbridge $ IFACE  start nat
    pre-down        /usr/local/sbin/vmbridge $ IFACE  stop nat
Warning: To use a separate file with ifupdown make sure that /etc/network/interfaces contains the line:
source /etc/network/interfaces.d/*
or add its contents to /etc/network/interfaces directly, if you prefer.
This configuration creates a bridge with the address 10.0.4.1 and assumes that the machines connected to it will use the 10.0.4.0/24 network; you can change the network address if you want, as long as you use a private range and it does not collide with networks used in your Virtual Machines all should be OK. The vmbridge script is used to start the dnsmasq server and setup the NAT rules when the interface is brought up and remove the firewall rules and stop the dnsmasq server when it is brought down.

The vmbridge scriptThe vmbridge script launches an instance of dnsmasq that binds to the bridge interface (vmbr0 in our case) that is used as DNS and DHCP server. The DNS server reads the /etc/hosts file to publish local DNS names and forwards all the other requests to the the dnsmasq server launched by NetworkManager that is listening on the loopback interface. As this server already does catching we disable it for our server, with the added advantage that, if we change networks, new requests go to the new resolvers because the DNS server handled by NetworkManager gets restarted and flushes its cache (this is useful if we connect to a new network that has internal DNS servers that are configured to do split DNS for internal services; if we use this model all requests get the internal address as soon as the DNS server is queried again). The DHCP server is configured to provide IPs to unknown hosts for a sub range of the addresses on the bridge network and use fixed IPs if the /etc/ethers file has a MAC with a matching hostname on the /etc/hosts file. To make things work with old DHCP clients the script also adds checksums to the DHCP packets using iptables (when the interface is not linked to a physical device the kernel does not add checksums, but we can fix it adding a rule on the mangle table). If we want external connectivity we can pass the nat argument and then the script creates a MASQUERADE rule for the bridge network and enables IP forwarding. The script source code is the following:
/usr/local/sbin/vmbridge
#!/bin/sh
set -e
# ---------
# VARIABLES
# ---------
LOCAL_DOMAIN="vmnet"
MIN_IP_LEASE="192"
MAX_IP_LEASE="223"
# ---------
# FUNCTIONS
# ---------
get_net()  
  NET="$(
    ip a ls "$ BRIDGE " 2>/dev/null   sed -ne 's/^.*inet \(.*\) brd.*$/\1/p'
  )"
  [ "$NET" ]   return 1
 
checksum_fix_start()  
  iptables -t mangle -A POSTROUTING -o "$ BRIDGE " -p udp --dport 68 \
    -j CHECKSUM --checksum-fill 2>/dev/null   true
 
checksum_fix_stop()  
  iptables -t mangle -D POSTROUTING -o "$ BRIDGE " -p udp --dport 68 \
    -j CHECKSUM --checksum-fill 2>/dev/null   true
 
nat_start()  
  [ "$NAT" = "yes" ]   return 0
  # Configure NAT
  iptables -t nat -A POSTROUTING -s "$ NET " ! -d "$ NET " -j MASQUERADE
  # Enable forwarding (just in case)
  echo 1 >/proc/sys/net/ipv4/ip_forward
 
nat_stop()  
  [ "$NAT" = "yes" ]   return 0
  iptables -t nat -D POSTROUTING -s "$ NET " ! -d "$ NET " \
    -j MASQUERADE 2>/dev/null   true
 
do_start()  
  # Bridge address
  _addr="$ NET%%/* "
  # DNS leases (between .MIN_IP_LEASE and .MAX_IP_LEASE)
  _dhcp_range="$ _addr%.* .$ MIN_IP_LEASE ,$ _addr%.* .$ MAX_IP_LEASE "
  # Bridge mtu
  _mtu="$(
    ip link show dev "$ BRIDGE "  
      sed -n -e '/mtu/   s/^.*mtu \([0-9]\+\).*$/\1/p  '
  )"
  # Compute extra dnsmasq options
  dnsmasq_extra_opts=""
  # Disable gateway when not using NAT
  if [ "$NAT" != "yes" ]; then
    dnsmasq_extra_opts="$dnsmasq_extra_opts --dhcp-option=3"
  fi
  # Adjust MTU size if needed
  if [ -n "$_mtu" ] && [ "$_mtu" -ne "1500" ]; then
    dnsmasq_extra_opts="$dnsmasq_extra_opts --dhcp-option=26,$_mtu"
  fi
  # shellcheck disable=SC2086
  dnsmasq --bind-interfaces \
    --cache-size="0" \
    --conf-file="/dev/null" \
    --dhcp-authoritative \
    --dhcp-leasefile="/var/lib/misc/dnsmasq.$ BRIDGE .leases" \
    --dhcp-no-override \
    --dhcp-range "$ _dhcp_range " \
    --domain="$ LOCAL_DOMAIN " \
    --except-interface="lo" \
    --expand-hosts \
    --interface="$ BRIDGE " \
    --listen-address "$ _addr " \
    --no-resolv \
    --pid-file="$ PIDF " \
    --read-ethers \
    --server="127.0.0.1" \
    $dnsmasq_extra_opts
  checksum_fix_start
  nat_start
 
do_stop()  
  nat_stop
  checksum_fix_stop
  if [ -f "$ PIDF " ]; then
    kill "$(cat "$ PIDF ")"   true
    rm -f "$ PIDF "
  fi
 
do_status()  
  if [ -f "$ PIDF " ] && kill -HUP "$(cat "$ PIDF ")"; then
    echo "dnsmasq RUNNING"
  else
    echo "dnsmasq NOT running"
  fi
 
do_reload()  
  [ -f "$ PIDF " ] && kill -HUP "$(cat "$ PIDF ")"
 
usage()  
  echo "Uso: $0 BRIDGE (start stop [nat]) status reload"
  exit 1
 
# ----
# MAIN
# ----
[ "$#" -ge "2" ]   usage
BRIDGE="$1"
OPTION="$2"
shift 2
NAT="no"
for arg in "$@"; do
  case "$arg" in
  nat) NAT="yes" ;;
  *) echo "Unknown arg '$arg'" && exit 1 ;;
  esac
done
PIDF="/var/run/vmbridge-$ BRIDGE -dnsmasq.pid"
case "$OPTION" in
start) get_net && do_start ;;
stop) get_net && do_stop ;;
status) do_status ;;
reload) get_net && do_reload ;;
*) echo "Unknown command '$OPTION'" && exit 1 ;;
esac
# vim: ts=2:sw=2:et:ai:sts=2

NetworkManager ConfigurationThe default /etc/NetworkManager/NetworkManager.conf file has the following contents:
[main]
plugins=ifupdown,keyfile
[ifupdown]
managed=false
Which means that it will leave interfaces managed by ifupdown alone and, by default, will send the connection DNS configuration to systemd-resolved if it is installed. As we want to use dnsmasq for DNS resolution, but we don t want NetworkManager to modify our /etc/resolv.conf we are going to add the following file (/etc/NetworkManager/conf.d/dnsmasq.conf) to our system:
/etc/NetworkManager/conf.d/dnsmasq.conf
[main]
dns=dnsmasq
rc-manager=unmanaged
and restart the NetworkManager service:
$ sudo systemctl restart NetworkManager.service
From now on the NetworkManager will start a dnsmasq service that queries the servers provided by the DHCP servers we connect to on 127.0.0.1:53 but will not touch our /etc/resolv.conf file.

Configuring systemd-resolvedIf we start using our own name server but our system has systemd-resolved installed we will no longer need or use the DNS stub; programs using it will use our dnsmasq server directly now, but we keep running systemd-resolved for the host programs that use its native api or access it through /etc/nsswitch.conf (when libnss-resolve is installed). To disable the stub we add a /etc/systemd/resolved.conf.d/disable-stub.conf file to our machine with the following content:
# Disable the DNS Stub Listener, we use our own dnsmasq
[Resolve]
DNSStubListener=no
and restart the systemd-resolved to make sure that the stub is stopped:
$ sudo systemctl restart systemd-resolved.service

Adjusting /etc/resolv.confFirst we remove the existing /etc/resolv.conf file (it does not matter if it is a link or a regular file) and then create a new one that contains at least the following line (we can add a search line if is useful for us):
nameserver 10.0.4.1
From now on we will be using the dnsmasq server launched when we bring up the vmbr0 for multiple systems:
  • as our main DNS server from the host (if we use the standard /etc/nsswitch.conf and libnss-resolve is installed it is queried first, but the systemd-resolved uses it as forwarder by default if needed),
  • as the DNS server of the Virtual Machines or containers that use DHCP for network configuration and attach their virtual interfaces to our bridge,
  • as the DNS server of docker containers that get the DNS information from /etc/resolv.conf (if we have entries that use loopback addresses the containers that don t use the host network tend to fail, as those addresses inside the running containers are not linked to the loopback device of the host).

TestingAfter all the configuration files and scripts are in place we just need to bring up the bridge interface and check that everything works:
$ # Bring interface up
$ sudo ifup vmbr0
$ # Check that it is available
$ ip a ls dev vmbr0
4: vmbr0: <NO-CARRIER,BROADCAST,MULTICAST,UP> mtu 1500 qdisc noqueue state DOWN
          group default qlen 1000
    link/ether 0a:b8:ef:b8:07:6c brd ff:ff:ff:ff:ff:ff
    inet 10.0.4.1/24 brd 10.0.4.255 scope global vmbr0
       valid_lft forever preferred_lft forever
$ # View the listening ports used by our dnsmasq servers
$ sudo ss -tulpan   grep dnsmasq
udp UNCONN 0 0  127.0.0.1:53     0.0.0.0:* users:(("dnsmasq",pid=1733930,fd=4))
udp UNCONN 0 0  10.0.4.1:53      0.0.0.0:* users:(("dnsmasq",pid=1705267,fd=6))
udp UNCONN 0 0  0.0.0.0%vmbr0:67 0.0.0.0:* users:(("dnsmasq",pid=1705267,fd=4))
tcp LISTEN 0 32 10.0.4.1:53      0.0.0.0:* users:(("dnsmasq",pid=1705267,fd=7))
tcp LISTEN 0 32 127.0.0.1:53     0.0.0.0:* users:(("dnsmasq",pid=1733930,fd=5))
$ # Verify that the DNS server works on the vmbr0 address
$ host www.debian.org 10.0.4.1
Name: 10.0.4.1
Address: 10.0.4.1#53
Aliases:
www.debian.org has address 130.89.148.77
www.debian.org has IPv6 address 2001:67c:2564:a119::77

Managing running systemsIf we want to update DNS entries and/or MAC addresses we can edit the /etc/hosts and /etc/ethers files and reload the dnsmasq configuration using the vmbridge script:
$ sudo /usr/local/sbin/vmbridge vmbr0 reload
That call sends a signal to the running dnsmasq server and it reloads the files; after that we can refresh the DHCP addresses from the client machines or start using the new DNS names immediately.

26 August 2022

Antoine Beaupr : How to nationalize the internet in Canada

Rogers had a catastrophic failure in July 2022. It affected emergency services (as in: people couldn't call 911, but also some 911 services themselves failed), hospitals (which couldn't access prescriptions), banks and payment systems (as payment terminals stopped working), and regular users as well. The outage lasted almost a full day, and Rogers took days to give any technical explanation on the outage, and even when they did, details were sparse. So far the only detailed account is from outside actors like Cloudflare which seem to point at an internal BGP failure. Its impact on the economy has yet to be measured, but it probably cost millions of dollars in wasted time and possibly lead to life-threatening situations. Apart from holding Rogers (criminally?) responsible for this, what should be done in the future to avoid such problems? It's not the first time something like this has happened: it happened to Bell Canada as well. The Rogers outage is also strangely similar to the Facebook outage last year, but, to its credit, Facebook did post a fairly detailed explanation only a day later. The internet is designed to be decentralised, and having large companies like Rogers hold so much power is a crucial mistake that should be reverted. The question is how. Some critics were quick to point out that we need more ISP diversity and competition, but I think that's missing the point. Others have suggested that the internet should be a public good or even straight out nationalized. I believe the solution to the problem of large, private, centralised telcos and ISPs is to replace them with smaller, public, decentralised service providers. The only way to ensure that works is to make sure that public money ends up creating infrastructure controlled by the public, which means treating ISPs as a public utility. This has been implemented elsewhere: it works, it's cheaper, and provides better service.

A modest proposal Global wireless services (like phone services) and home internet inevitably grow into monopolies. They are public utilities, just like water, power, railways, and roads. The question of how they should be managed is therefore inherently political, yet people don't seem to question the idea that only the market (i.e. "competition") can solve this problem. I disagree. 10 years ago (in french), I suggested we, in Qu bec, should nationalize large telcos and internet service providers. I no longer believe is a realistic approach: most of those companies have crap copper-based networks (at least for the last mile), yet are worth billions of dollars. It would be prohibitive, and a waste, to buy them out. Back then, I called this idea "R seau-Qu bec", a reference to the already nationalized power company, Hydro-Qu bec. (This idea, incidentally, made it into the plan of a political party.) Now, I think we should instead build our own, public internet. Start setting up municipal internet services, fiber to the home in all cities, progressively. Then interconnect cities with fiber, and build peering agreements with other providers. This also includes a bid on wireless spectrum to start competing with phone providers as well. And while that sounds really ambitious, I think it's possible to take this one step at a time.

Municipal broadband In many parts of the world, municipal broadband is an elegant solution to the problem, with solutions ranging from Stockholm's city-owned fiber network (dark fiber, layer 1) to Utah's UTOPIA network (fiber to the premises, layer 2) and municipal wireless networks like Guifi.net which connects about 40,000 nodes in Catalonia. A good first step would be for cities to start providing broadband services to its residents, directly. Cities normally own sewage and water systems that interconnect most residences and therefore have direct physical access everywhere. In Montr al, in particular, there is an ongoing project to replace a lot of old lead-based plumbing which would give an opportunity to lay down a wired fiber network across the city. This is a wild guess, but I suspect this would be much less expensive than one would think. Some people agree with me and quote this as low as 1000$ per household. There is about 800,000 households in the city of Montr al, so we're talking about a 800 million dollars investment here, to connect every household in Montr al with fiber and incidentally a quarter of the province's population. And this is not an up-front cost: this can be built progressively, with expenses amortized over many years. (We should not, however, connect Montr al first: it's used as an example here because it's a large number of households to connect.) Such a network should be built with a redundant topology. I leave it as an open question whether we should adopt Stockholm's more minimalist approach or provide direct IP connectivity. I would tend to favor the latter, because then you can immediately start to offer the service to households and generate revenues to compensate for the capital expenditures. Given the ridiculous profit margins telcos currently have 8 billion $CAD net income for BCE (2019), 2 billion $CAD for Rogers (2020) I also believe this would actually turn into a profitable revenue stream for the city, the same way Hydro-Qu bec is more and more considered as a revenue stream for the state. (I personally believe that's actually wrong and we should treat those resources as human rights and not money cows, but I digress. The point is: this is not a cost point, it's a revenue.) The other major challenge here is that the city will need competent engineers to drive this project forward. But this is not different from the way other public utilities run: we have electrical engineers at Hydro, sewer and water engineers at the city, this is just another profession. If anything, the computing science sector might be more at fault than the city here in its failure to provide competent and accountable engineers to society... Right now, most of the network in Canada is copper: we are hitting the limits of that technology with DSL, and while cable has some life left to it (DOCSIS 4.0 does 4Gbps), that is nowhere near the capacity of fiber. Take the town of Chattanooga, Tennessee: in 2010, the city-owned ISP EPB finished deploying a fiber network to the entire town and provided gigabit internet to everyone. Now, 12 years later, they are using this same network to provide the mind-boggling speed of 25 gigabit to the home. To give you an idea, Chattanooga is roughly the size and density of Sherbrooke.

Provincial public internet As part of building a municipal network, the question of getting access to "the internet" will immediately come up. Naturally, this will first be solved by using already existing commercial providers to hook up residents to the rest of the global network. But eventually, networks should inter-connect: Montr al should connect with Laval, and then Trois-Rivi res, then Qu bec City. This will require long haul fiber runs, but those links are not actually that expensive, and many of those already exist as a public resource at RISQ and CANARIE, which cross-connects universities and colleges across the province and the country. Those networks might not have the capacity to cover the needs of the entire province right now, but that is a router upgrade away, thanks to the amazing capacity of fiber. There are two crucial mistakes to avoid at this point. First, the network needs to remain decentralised. Long haul links should be IP links with BGP sessions, and each city (or MRC) should have its own independent network, to avoid Rogers-class catastrophic failures. Second, skill needs to remain in-house: RISQ has already made that mistake, to a certain extent, by selling its neutral datacenter. Tellingly, MetroOptic, probably the largest commercial dark fiber provider in the province, now operates the QIX, the second largest "public" internet exchange in Canada. Still, we have a lot of infrastructure we can leverage here. If RISQ or CANARIE cannot be up to the task, Hydro-Qu bec has power lines running into every house in the province, with high voltage power lines running hundreds of kilometers far north. The logistics of long distance maintenance are already solved by that institution. In fact, Hydro already has fiber all over the province, but it is a private network, separate from the internet for security reasons (and that should probably remain so). But this only shows they already have the expertise to lay down fiber: they would just need to lay down a parallel network to the existing one. In that architecture, Hydro would be a "dark fiber" provider.

International public internet None of the above solves the problem for the entire population of Qu bec, which is notoriously dispersed, with an area three times the size of France, but with only an eight of its population (8 million vs 67). More specifically, Canada was originally a french colony, a land violently stolen from native people who have lived here for thousands of years. Some of those people now live in reservations, sometimes far from urban centers (but definitely not always). So the idea of leveraging the Hydro-Qu bec infrastructure doesn't always work to solve this, because while Hydro will happily flood a traditional hunting territory for an electric dam, they don't bother running power lines to the village they forcibly moved, powering it instead with noisy and polluting diesel generators. So before giving me fiber to the home, we should give power (and potable water, for that matter), to those communities first. So we need to discuss international connectivity. (How else could we consider those communities than peer nations anyways?c) Qu bec has virtually zero international links. Even in Montr al, which likes to style itself a major player in gaming, AI, and technology, most peering goes through either Toronto or New York. That's a problem that we must fix, regardless of the other problems stated here. Looking at the submarine cable map, we see very few international links actually landing in Canada. There is the Greenland connect which connects Newfoundland to Iceland through Greenland. There's the EXA which lands in Ireland, the UK and the US, and Google has the Topaz link on the west coast. That's about it, and none of those land anywhere near any major urban center in Qu bec. We should have a cable running from France up to Saint-F licien. There should be a cable from Vancouver to China. Heck, there should be a fiber cable running all the way from the end of the great lakes through Qu bec, then up around the northern passage and back down to British Columbia. Those cables are expensive, and the idea might sound ludicrous, but Russia is actually planning such a project for 2026. The US has cables running all the way up (and around!) Alaska, neatly bypassing all of Canada in the process. We just look ridiculous on that map. (Addendum: I somehow forgot to talk about Teleglobe here was founded as publicly owned company in 1950, growing international phone and (later) data links all over the world. It was privatized by the conservatives in 1984, along with rails and other "crown corporations". So that's one major risk to any effort to make public utilities work properly: some government might be elected and promptly sell it out to its friends for peanuts.)

Wireless networks I know most people will have rolled their eyes so far back their heads have exploded. But I'm not done yet. I want wireless too. And by wireless, I don't mean a bunch of geeks setting up OpenWRT routers on rooftops. I tried that, and while it was fun and educational, it didn't scale. A public networking utility wouldn't be complete without providing cellular phone service. This involves bidding for frequencies at the federal level, and deploying a rather large amount of infrastructure, but it could be a later phase, when the engineers and politicians have proven their worth. At least part of the Rogers fiasco would have been averted if such a decentralized network backend existed. One might even want to argue that a separate institution should be setup to provide phone services, independently from the regular wired networking, if only for reliability. Because remember here: the problem we're trying to solve is not just technical, it's about political boundaries, centralisation, and automation. If everything is ran by this one organisation again, we will have failed. However, I must admit that phone services is where my ideas fall a little short. I can't help but think it's also an accessible goal maybe starting with a virtual operator but it seems slightly less so than the others, especially considering how closed the phone ecosystem is.

Counter points In debating these ideas while writing this article, the following objections came up.

I don't want the state to control my internet One legitimate concern I have about the idea of the state running the internet is the potential it would have to censor or control the content running over the wires. But I don't think there is necessarily a direct relationship between resource ownership and control of content. Sure, China has strong censorship in place, partly implemented through state-controlled businesses. But Russia also has strong censorship in place, based on regulatory tools: they force private service providers to install back-doors in their networks to control content and surveil their users. Besides, the USA have been doing warrantless wiretapping since at least 2003 (and yes, that's 10 years before the Snowden revelations) so a commercial internet is no assurance that we have a free internet. Quite the contrary in fact: if anything, the commercial internet goes hand in hand with the neo-colonial internet, just like businesses did in the "good old colonial days". Large media companies are the primary censors of content here. In Canada, the media cartel requested the first site-blocking order in 2018. The plaintiffs (including Qu becor, Rogers, and Bell Canada) are both content providers and internet service providers, an obvious conflict of interest. Nevertheless, there are some strong arguments against having a centralised, state-owned monopoly on internet service providers. FDN makes a good point on this. But this is not what I am suggesting: at the provincial level, the network would be purely physical, and regional entities (which could include private companies) would peer over that physical network, ensuring decentralization. Delegating the management of that infrastructure to an independent non-profit or cooperative (but owned by the state) would also ensure some level of independence.

Isn't the government incompetent and corrupt? Also known as "private enterprise is better skilled at handling this, the state can't do anything right" I don't think this is a "fait accomplit". If anything, I have found publicly ran utilities to be spectacularly reliable here. I rarely have trouble with sewage, water, or power, and keep in mind I live in a city where we receive about 2 meters of snow a year, which tend to create lots of trouble with power lines. Unless there's a major weather event, power just runs here. I think the same can happen with an internet service provider. But it would certainly need to have higher standards to what we're used to, because frankly Internet is kind of janky.

A single monopoly will be less reliable I actually agree with that, but that is not what I am proposing anyways. Current commercial or non-profit entities will be free to offer their services on top of the public network. And besides, the current "ha! diversity is great" approach is exactly what we have now, and it's not working. The pretense that we can have competition over a single network is what led the US into the ridiculous situation where they also pretend to have competition over the power utility market. This led to massive forest fires in California and major power outages in Texas. It doesn't work.

Wouldn't this create an isolated network? One theory is that this new network would be so hostile to incumbent telcos and ISPs that they would simply refuse to network with the public utility. And while it is true that the telcos currently do also act as a kind of "tier one" provider in some places, I strongly feel this is also a problem that needs to be solved, regardless of ownership of networking infrastructure. Right now, telcos often hold both ends of the stick: they are the gateway to users, the "last mile", but they also provide peering to the larger internet in some locations. In at least one datacenter in downtown Montr al, I've seen traffic go through Bell Canada that was not directly targeted at Bell customers. So in effect, they are in a position of charging twice for the same traffic, and that's not only ridiculous, it should just be plain illegal. And besides, this is not a big problem: there are other providers out there. As bad as the market is in Qu bec, there is still some diversity in Tier one providers that could allow for some exits to the wider network (e.g. yes, Cogent is here too).

What about Google and Facebook? Nationalization of other service providers like Google and Facebook is out of scope of this discussion. That said, I am not sure the state should get into the business of organising the web or providing content services however, but I will point out it already does do some of that through its own websites. It should probably keep itself to this, and also consider providing normal services for people who don't or can't access the internet. (And I would also be ready to argue that Google and Facebook already act as extensions of the state: certainly if Facebook didn't exist, the CIA or the NSA would like to create it at this point. And Google has lucrative business with the US department of defense.)

What does not work So we've seen one thing that could work. Maybe it's too expensive. Maybe the political will isn't there. Maybe it will fail. We don't know yet. But we know what does not work, and it's what we've been doing ever since the internet has gone commercial.

Subsidies The absurd price we pay for data does not actually mean everyone gets high speed internet at home. Large swathes of the Qu bec countryside don't get broadband at all, and it can be difficult or expensive, even in large urban centers like Montr al, to get high speed internet. That is despite having a series of subsidies that all avoided investing in our own infrastructure. We had the "fonds de l'autoroute de l'information", "information highway fund" (site dead since 2003, archive.org link) and "branchez les familles", "connecting families" (site dead since 2003, archive.org link) which subsidized the development of a copper network. In 2014, more of the same: the federal government poured hundreds of millions of dollars into a program called connecting Canadians to connect 280 000 households to "high speed internet". And now, the federal and provincial governments are proudly announcing that "everyone is now connected to high speed internet", after pouring more than 1.1 billion dollars to connect, guess what, another 380 000 homes, right in time for the provincial election. Of course, technically, the deadline won't actually be met until 2023. Qu bec is a big area to cover, and you can guess what happens next: the telcos threw up their hand and said some areas just can't be connected. (Or they connect their CEO but not the poor folks across the lake.) The story then takes the predictable twist of giving more money out to billionaires, subsidizing now Musk's Starlink system to connect those remote areas. To give a concrete example: a friend who lives about 1000km away from Montr al, 4km from a small, 2500 habitant village, has recently got symmetric 100 mbps fiber at home from Telus, thanks to those subsidies. But I can't get that service in Montr al at all, presumably because Telus and Bell colluded to split that market. Bell doesn't provide me with such a service either: they tell me they have "fiber to my neighborhood", and only offer me a 25/10 mbps ADSL service. (There is Vid otron offering 400mbps, but that's copper cable, again a dead technology, and asymmetric.)

Conclusion Remember Chattanooga? Back in 2010, they funded the development of a fiber network, and now they have deployed a network roughly a thousand times faster than what we have just funded with a billion dollars. In 2010, I was paying Bell Canada 60$/mth for 20mbps and a 125GB cap, and now, I'm still (indirectly) paying Bell for roughly the same speed (25mbps). Back then, Bell was throttling their competitors networks until 2009, when they were forced by the CRTC to stop throttling. Both Bell and Vid otron still explicitly forbid you from running your own servers at home, Vid otron charges prohibitive prices which make it near impossible for resellers to sell uncapped services. Those companies are not spurring innovation: they are blocking it. We have spent all this money for the private sector to build us a private internet, over decades, without any assurance of quality, equity or reliability. And while in some locations, ISPs did deploy fiber to the home, they certainly didn't upgrade their entire network to follow suit, and even less allowed resellers to compete on that network. In 10 years, when 100mbps will be laughable, I bet those service providers will again punt the ball in the public courtyard and tell us they don't have the money to upgrade everyone's equipment. We got screwed. It's time to try something new.

Updates There was a discussion about this article on Hacker News which was surprisingly productive. Trigger warning: Hacker News is kind of right-wing, in case you didn't know. Since this article was written, at least two more major acquisitions happened, just in Qu bec: In the latter case, vMedia was explicitly saying it couldn't grow because of "lack of access to capital". So basically, we have given those companies a billion dollars, and they are not using that very money to buy out their competition. At least we could have given that money to small players to even out the playing field. But this is not how that works at all. Also, in a bizarre twist, an "analyst" believes the acquisition is likely to help Rogers acquire Shaw. Also, since this article was written, the Washington Post published a review of a book bringing similar ideas: Internet for the People The Fight for Our Digital Future, by Ben Tarnoff, at Verso books. It's short, but even more ambitious than what I am suggesting in this article, arguing that all big tech companies should be broken up and better regulated:
He pulls from Ethan Zuckerman s idea of a web that is plural in purpose that just as pool halls, libraries and churches each have different norms, purposes and designs, so too should different places on the internet. To achieve this, Tarnoff wants governments to pass laws that would make the big platforms unprofitable and, in their place, fund small-scale, local experiments in social media design. Instead of having platforms ruled by engagement-maximizing algorithms, Tarnoff imagines public platforms run by local librarians that include content from public media.
(Links mine: the Washington Post obviously prefers to not link to the real web, and instead doesn't link to Zuckerman's site all and suggests Amazon for the book, in a cynical example.) And in another example of how the private sector has failed us, there was recently a fluke in the AMBER alert system where the entire province was warned about a loose shooter in Saint-Elz ar except the people in the town, because they have spotty cell phone coverage. In other words, millions of people received a strongly toned, "life-threatening", alert for a city sometimes hours away, except the people most vulnerable to the alert. Not missing a beat, the CAQ party is promising more of the same medicine again and giving more money to telcos to fix the problem, suggesting to spend three billion dollars in private infrastructure.

1 August 2022

Sergio Talens-Oliag: Using Git Server Hooks on GitLab CE to Validate Tags

Since a long time ago I ve been a gitlab-ce user, in fact I ve set it up on three of the last four companies I ve worked for (initially I installed it using the omnibus packages on a debian server but on the last two places I moved to the docker based installation, as it is easy to maintain and we don t need a big installation as the teams using it are small). On the company I work for now (kyso) we are using it to host all our internal repositories and to do all the CI/CD work (the automatic deployments are triggered by web hooks in some cases, but the rest is all done using gitlab-ci). The majority of projects are using nodejs as programming language and we have automated the publication of npm packages on our gitlab instance npm registry and even the publication into the npmjs registry. To publish the packages we have added rules to the gitlab-ci configuration of the relevant repositories and we publish them when a tag is created. As the we are lazy by definition, I configured the system to use the tag as the package version; I tested if the contents of the package.json where in sync with the expected version and if it was not I updated it and did a force push of the tag with the updated file using the following code on the script that publishes the package:
# Update package version & add it to the .build-args
INITIAL_PACKAGE_VERSION="$(npm pkg get version tr -d '"')"
npm version --allow-same --no-commit-hooks --no-git-tag-version \
  "$CI_COMMIT_TAG"
UPDATED_PACKAGE_VERSION="$(npm pkg get version tr -d '"')"
echo "UPDATED_PACKAGE_VERSION=$UPDATED_PACKAGE_VERSION" >> .build-args
# Update tag if the version was updated or abort
if [ "$INITIAL_PACKAGE_VERSION" != "$UPDATED_PACKAGE_VERSION" ]; then
  if [ -n "$CI_GIT_USER" ] && [ -n "$CI_GIT_TOKEN" ]; then
    git commit -m "Updated version from tag $CI_COMMIT_TAG" package.json
    git tag -f "$CI_COMMIT_TAG" -m "Updated version from tag"
    git push -f -o ci.skip origin "$CI_COMMIT_TAG"
  else
    echo "!!! ERROR !!!"
    echo "The updated tag could not be uploaded."
    echo "Set CI_GIT_USER and CI_GIT_TOKEN or fix the 'package.json' file"
    echo "!!! ERROR !!!"
    exit 1
  fi
fi
This feels a little dirty (we are leaving commits on the tag but not updating the original branch); I thought about trying to find the branch using the tag and update it, but I drop the idea pretty soon as there were multiple issues to consider (i.e. we can have tags pointing to commits present in multiple branches and even if it only points to one the tag does not have to be the HEAD of the branch making the inclusion difficult). In any case this system was working, so we left it until we started to publish to the NPM Registry; as we are using a token to push the packages that we don t want all developers to have access to (right now it would not matter, but when the team grows it will) I started to use gitlab protected branches on the projects that need it and adjusting the .npmrc file using protected variables. The problem then was that we can no longer do a standard force push for a branch (that is the main point of the protected branches feature) unless we use the gitlab api, so the tags with the wrong version started to fail. As the way things were being done seemed dirty anyway I thought that the best way of fixing things was to forbid users to push a tag that includes a version that does not match the package.json version. After thinking about it we decided to use githooks on the gitlab server for the repositories that need it, as we are only interested in tags we are going to use the update hook; it is executed once for each ref to be updated, and takes three parameters:
  • the name of the ref being updated,
  • the old object name stored in the ref,
  • and the new object name to be stored in the ref.
To install our hook we have found the gitaly relative path of each repo and located it on the server filesystem (as I said we are using docker and the gitlab s data directory is on /srv/gitlab/data, so the path to the repo has the form /srv/gitlab/data/git-data/repositories/@hashed/xx/yy/hash.git). Once we have the directory we need to:
  • create a custom_hooks sub directory inside it,
  • add the update script (as we only need one script we used that instead of creating an update.d directory, the good thing is that this will also work with a standard git server renaming the base directory to hooks instead of custom_hooks),
  • make it executable, and
  • change the directory and file ownership to make sure it can be read and executed from the gitlab container
On a console session:
$ cd /srv/gitlab/data/git-data/repositories/@hashed/xx/yy/hash.git
$ mkdir custom_hooks
$ edit_or_copy custom_hooks/update
$ chmod 0755 custom_hooks/update
$ chown --reference=. -R custom_hooks
The update script we are using is as follows:
#!/bin/sh
set -e
# kyso update hook
#
# Right now it checks version.txt or package.json versions against the tag name
# (it supports a 'v' prefix on the tag)
# Arguments
ref_name="$1"
old_rev="$2"
new_rev="$3"
# Initial test
if [ -z "$ref_name" ]    [ -z "$old_rev" ]   [ -z "$new_rev" ]; then
  echo "usage: $0 <ref> <oldrev> <newrev>" >&2
  exit 1
fi
# Get the tag short name
tag_name="$ ref_name##refs/tags/ "
# Exit if the update is not for a tag
if [ "$tag_name" = "$ref_name" ]; then
  exit 0
fi
# Get the null rev value (string of zeros)
zero=$(git hash-object --stdin </dev/null   tr '0-9a-f' '0')
# Get if the tag is new or not
if [ "$old_rev" = "$zero" ]; then
  new_tag="true"
else
  new_tag="false"
fi
# Get the type of revision:
# - delete: if the new_rev is zero
# - commit: annotated tag
# - tag: un-annotated tag
if [ "$new_rev" = "$zero" ]; then
  new_rev_type="delete"
else
  new_rev_type="$(git cat-file -t "$new_rev")"
fi
# Exit if we are deleting a tag (nothing to check here)
if [ "$new_rev_type" = "delete" ]; then
  exit 0
fi
# Check the version against the tag (supports version.txt & package.json)
if git cat-file -e "$new_rev:version.txt" >/dev/null 2>&1; then
  version="$(git cat-file -p "$new_rev:version.txt")"
  if [ "$version" = "$tag_name" ]   [ "$version" = "$ tag_name#v " ]; then
    exit 0
  else
    EMSG="tag '$tag_name' and 'version.txt' contents '$version' don't match"
    echo "GL-HOOK-ERR: $EMSG"
    exit 1
  fi
elif git cat-file -e "$new_rev:package.json" >/dev/null 2>&1; then
  version="$(
    git cat-file -p "$new_rev:package.json"   jsonpath version   tr -d '\[\]"'
  )"
  if [ "$version" = "$tag_name" ]   [ "$version" = "$ tag_name#v " ]; then
    exit 0
  else
    EMSG="tag '$tag_name' and 'package.json' version '$version' don't match"
    echo "GL-HOOK-ERR: $EMSG"
    exit 1
  fi
else
  # No version.txt or package.json file found
  exit 0
fi
Some comments about it:
  • we are only looking for tags, if the ref_name does not have the prefix refs/tags/ the script does an exit 0,
  • although we are checking if the tag is new or not we are not using the value (in gitlab that is handled by the protected tag feature),
  • if we are deleting a tag the script does an exit 0, we don t need to check anything in that case,
  • we are ignoring if the tag is annotated or not (we set the new_rev_type to tag or commit, but we don t use the value),
  • we test first the version.txt file and if it does not exist we check the package.json file, if it does not exist either we do an exit 0, as there is no version to check against and we allow that on a tag,
  • we add the GL-HOOK-ERR: prefix to the messages to show them on the gitlab web interface (can be tested creating a tag from it),
  • to get the version on the package.json file we use the jsonpath binary (it is installed by the jsonpath ruby gem) because it is available on the gitlab container (initially I used sed to get the value, but a real JSON parser is always a better option).
Once the hook is installed when a user tries to push a tag to a repository that has a version.txt file or package.json file and the tag does not match the version (if version.txt is present it takes precedence) the push fails. If the tag matches or the files are not present the tag is added if the user has permission to add it in gitlab (our hook is only executed if the user is allowed to create or update the tag).

9 July 2022

Dirk Eddelbuettel: Rcpp 1.0.9 on CRAN: Regular Updates

rcpp logo The Rcpp team is please to announce the newest release 1.0.9 of Rcpp which hit CRAN late yesterday, and has been uploaded to Debian as well. Windows and macOS builds should appear at CRAN in the next few days, as will builds in different Linux distribution and of course at r2u. The release was prepared om July 2, but it took a few days to clear a handful of spurious errors as false positives with CRAN this can when the set of reverse dependencies is so large, and the CRAN team remains busy. This release continues with the six-months cycle started with release 1.0.5 in July 2020. (This time, CRAN had asked for an interim release to silence a C++ warning; we then needed a quick follow-up to tweak tests.) As a reminder, interim dev or rc releases should generally be available in the Rcpp drat repo. These rolling release tend to work just as well, and are also fully tested against all reverse-dependencies. Rcpp has become the most popular way of enhancing R with C or C++ code. Right now, around 2559 packages on CRAN depend on Rcpp for making analytical code go faster and further, along with 252 in BioConductor. On CRAN, 13.9% of all packages depend (directly) on CRAN, and 58.5% of all compiled packages do. From the cloud mirror of CRAN (which is but a subset of all CRAN downloads), Rcpp has been downloaded 61.5 million times. This release is incremental and extends Rcpp with a number of small improvements all detailed in the NEWS file as well as below. We want to highlight the external contributions: a precious list tag is cleared on removal, and a move constructor and assignment for strings has been added (thanks to Dean Scarff), and (thanks to Bill Denney and Marco Colombo) two minor errors are corrected in the vignette documentation. A big Thank You! to everybody who contributed pull request, opened or answered issues, or questions at StackOverflow or on the mailing list. The full list of details follows.

Changes in Rcpp hotfix release version 1.0.9 (2022-07-02)
  • Changes in Rcpp API:
    • Accomodate C++98 compilation by adjusting attributes.cpp (Dirk in #1193 fixing #1192)
    • Accomodate newest compilers replacing deprecated std::unary_function and std::binary_function with std::function (Dirk in #1202 fixing #1201 and CRAN request)
    • Upon removal from precious list, the tag is set to null (I aki in #1205 fixing #1203)
    • Move constructor and assignment for strings have been added (Dean Scarff in #1219).
  • Changes in Rcpp Documentation:
    • Adjust one overflowing column (Bill Denney in #1196 fixing #1195)
    • Correct a typo in the FAQ (Marco Colombo in #1217)
  • Changes in Rcpp Deployment:
    • Accomodate four digit version numbers in unit test (Dirk)
    • Do not run complete test suite to limit test time to CRAN preference (Dirk in #1206)
    • Small updates to the CI test containers have been made
    • Some of changes also applied to an interim release 1.0.8.3 made for CRAN on 2022-03-14.

Thanks to my CRANberries, you can also look at a diff to the previous release. Questions, comments etc should go to the rcpp-devel mailing list off the R-Forge page. Bugs reports are welcome at the GitHub issue tracker as well (where one can also search among open or closed issues); questions are also welcome under rcpp tag at StackOverflow which also allows searching among the (currently) 2886 previous questions. If you like this or other open-source work I do, you can sponsor me at GitHub.

This post by Dirk Eddelbuettel originated on his Thinking inside the box blog. Please report excessive re-aggregation in third-party for-profit settings.

22 June 2022

John Goerzen: I Finally Found a Solid Debian Tablet: The Surface Go 2

I have been looking for a good tablet for Debian for well, years. I want thin, light, portable, excellent battery life, and a servicable keyboard. For a while, I tried a Lenovo Chromebook Duet. It meets the hardware requirements, well sort of. The problem is with performance and the OS. I can run Debian inside the ChromeOS Linux environment. That works, actually pretty well. But it is slow. Terribly, terribly, terribly slow. Emacs takes minutes to launch. apt-gets also do. It has barely enough RAM to keep its Chrome foundation happy, let alone a Linux environment also. But basically it is too slow to be servicable. Not just that, but I ran into assorted issues with having it tied to a Google account particularly being unable to login unless I had Internet access after an update. That and my growing concern over Google s privacy practices led me sort of write it off. I have a wonderful System76 Lemur Pro that I m very happy with. Plenty of RAM, a good compromise size between portability and screen size at 14.1 , and so forth. But a 10 goes-anywhere it s not. I spent quite a lot of time looking at thin-and-light convertible laptops of various configurations. Many of them were quite expensive, not as small as I wanted, or had dubious Linux support. To my surprise, I wound up buying a Surface Go 2 from the Microsoft store, along with the Type Cover. They had a pretty good deal on it since the Surface Go 3 is out; the highest-processor model of the Go 2 is roughly similar to the Go 3 in terms of performance. There is an excellent linux-surface project out there that provides very good support for most Surface devices, including the Go 2 and 3. I put Debian on it. I had a fair bit of hassle with EFI, and wound up putting rEFInd on it, which mostly solved those problems. (I did keep a Windows partition, and if it comes up for some reason, the easiest way to get it back to Debian is to use the Windows settings tool to reboot into advanced mode, and then select the appropriate EFI entry to boot from there.) Researching on-screen keyboards, it seemed like Gnome had the most mature. So I wound up with Gnome (my other systems are using KDE with tiling, but I figured I d try Gnome on it.) Almost everything worked without additional tweaking, the one exception being the cameras. The cameras on the Surfaces are a known point of trouble and I didn t bother to go to all the effort to get them working. With 8GB of RAM, I didn t put ZFS on it like I do on other systems. Performance is quite satisfactory, including for Rust development. Battery life runs about 10 hours with light use; less when running a lot of cargo builds, of course. The 1920 1280 screen is nice at 10.5 . Gnome with Wayland does a decent job of adjusting to this hi-res configuration. I took this as my only computer for a trip from the USA to Germany. It was a little small at times; though that was to be expected. It let me take a nicely small bag as a carryon, and being light, it was pleasant to carry around in airports. It served its purpose quite well. One downside is that it can t be powered by a phone charger like my Chromebook Duet can. However, I found a nice slim 65W Anker charger that could charge it and phones simultaneously that did the job well enough (I left the Microsoft charger with the proprietary connector at home). The Surface Go 2 maxes out at a 128GB SSD. That feels a bit constraining, especially since I kept Windows around. However, it also has a micro SD slot, so you can put LUKS and ext4 on that and use it as another filesystem. I popped a micro SD I had lying around into there and that felt a lot better storage-wise. I could also completely zap Windows, but that would leave no way to get firmware updates and I didn t really want to do that. Still, I don t use Windows and that could be an option also. All in all, I m pretty pleased with it. Around $600 for a fully-functional Debian tablet, with a keyboard is pretty nice. I had been hoping for months that the Pinetab would come back into stock, because I d much rather support a Linux hardware vendor, but for now I think the Surface Go series is the most solid option for a Linux tablet.

31 May 2022

Russell Coker: Links May 2022

dontkillmyapp.com is a web site about Android phone vendors who make their phones kill your apps when you don t want them to [1]. One of the many reasons why Pine and Purism offer the promise of better phones. This blog post about the Librem 5 camera is interesting [2]. Currently the Librem 5 camera isn t very usable for me as I just want to point and shoot, but it apparently works well for experts. Taking RAW photos is a good feature that I d like to have in all my camera phones. The Russian government being apparently unaware of the Streisand Effect has threatened Wikipedia for publishing facts about the war against Ukraine [3]. We all should publicise this as much as possible. The Wikipedia page is The 2022 Russian Invasion of Ukraine [4]. The Jerusalem Post has an interesting article about whether Mein Kampf should be published and studied in schools [5]. I don t agree with the conclusions about studying that book in schools, but I think that the analysis of the situation in that article is worth reading. One of the issues I have with teaching Mein Kampf and similar books is the quality of social studies teaching at the school I attended, I m pretty sure that teaching Mein Kampf in any way at that school would just turn out more neo-Nazis. Maybe better schools (IE not Christian private schools) could have productive classes about Mein Kampf Vanity Fair has an interesting article about the history of the private jet [6]. Current Affairs has an unusually informative article about why blockchain currencies should die in a fire [7]. The Nazi use of methamphetamine is well known, but Time has an insightful article about lesser known aspects of meth use [8]. How they considered meth as separate from the drugs they claimed were for the morally inferior is interesting. George Monbiot wrote an insightful article comparing the 2008 bank collapse to the current system of unstable food supplies [9]. JWZ wrote an insightful blog post about Following the Money regarding the push to reopen businesses even though the pandemic is far from over [10]. His conclusion is that commercial property owners are pushing the governments to give them more money. PsyPost has an interesting article on the correlation between watching Fox News and lacking knowledge of science and of society [11]. David Brin wrote an interesting paper about Disputation and how that can benefit society [12]. I think he goes too far in some of his claims, but he has interesting points. The overall idea of a Disputation arena for ideas is a really good one. I previously had a similar idea on a much smaller scale of having debates via Wiki [13].

22 May 2022

Russ Allbery: Review: On a Sunbeam

Review: On a Sunbeam, by Tillie Walden
Publisher: Tillie Walden
Copyright: 2016-2017
Format: Online graphic novel
Pages: 544
On a Sunbeam is a web comic that was published in installments between Fall 2016 and Spring 2017, and then later published in dead tree form. I read the on-line version, which is still available for free from its web site. It was nominated for an Eisner Award and won a ton of other awards, including the Los Angeles Times Book Prize. Mia is a new high school graduate who has taken a job with a construction crew that repairs old buildings (that are floating in space, but I'll get to that in a moment). Alma, Elliot, and Charlotte have been together for a long time; Jules is closer to Mia's age and has been with them for a year. This is not the sort of job one commutes to: they live together on a spaceship that travels to the job sites, share meals together, and are more of an extended family than a group of coworkers. It's all a bit intimidating for Mia, but Jules provides a very enthusiastic welcome and some orientation. The story of Mia's new job is interleaved with Mia's school experience from five years earlier. As a new frosh at a boarding school, Mia is obsessed with Lux, a school sport that involves building and piloting ships through a maze to capture orbs. Sent to the principal's office on the first day of school for sneaking into the Lux tower when she's supposed to be at assembly, she meets Grace, a shy girl with sparkly shoes and an unheard-of single room. Mia (a bit like Jules in the present timeline) overcomes Grace's reticence by being persistently outgoing and determinedly friendly, while trying to get on the Lux team and dealing with the typical school problems of bullies and in-groups. On a Sunbeam is science fiction in the sense that it seems to take place in space and school kids build flying ships. It is not science fiction in the sense of caring about technological extrapolation or making any scientific sense whatsoever. The buildings that Mia and the crew repair appear to be hanging in empty space, but there's gravity. No one wears any protective clothing or air masks. The spaceships look (and move) like giant tropical fish. If you need realism in your science fiction graphical novels, it's probably best not to think of this as science fiction at all, or even science fantasy despite the later appearance of some apparently magical or divine elements. That may sound surrealistic or dream-like, but On a Sunbeam isn't that either. It's a story about human relationships, found family, and diversity of personalities, all of which are realistically portrayed. The characters find their world coherent, consistent, and predictable, even if it sometimes makes no sense to the reader. On a Sunbeam is simply set in its own universe, with internal logic but without explanation or revealed rules. I kind of liked this approach? It takes some getting used to, but it's an excuse for some dramatic and beautiful backgrounds, and it's oddly freeing to have unremarked train tracks in outer space. There's no way that an explanation would have worked; if one were offered, my brain would have tried to nitpick it to the detriment of the story. There's something delightful about a setting that follows imaginary physical laws this unapologetically and without showing the author's work. I was, sadly, not as much of a fan of the art, although I am certain this will be a matter of taste. Walden mixes simple story-telling panels with sweeping vistas, free-floating domes, and strange, wild asteroids, but she uses a very limited color palette. Most panels are only a few steps away from monochrome, and the colors are chosen more for mood or orientation in the story (Mia's school days are all blue, the Staircase is orange) than for any consistent realism. There is often a lot of detail in the panels, but I found it hard to appreciate because the coloring confused my eye. I'm old enough to have been a comics reader during the revolution in digital coloring and improved printing, and I loved the subsequent dramatic improvement in vivid colors and shading. I know the coloring style here is an intentional artistic choice, but to me it felt like a throwback to the days of muddy printing on cheap paper. I have a similar complaint about the lettering: On a Sunbeam is either hand-lettered or closely simulates hand lettering, and I often found the dialogue hard to read due to inconsistent intra- and interword spacing or ambiguous letters. Here too I'm sure this was an artistic choice, but as a reader I'd much prefer a readable comics font over hand lettering. The detail in the penciling is more to my liking. I had occasional trouble telling some of the characters apart, but they're clearly drawn and emotionally expressive. The scenery is wildly imaginative and often gorgeous, which increased my frustration with the coloring. I would love to see what some of these panels would have looked like after realistic coloring with a full palette. (It's worth noting again that I read the on-line version. It's possible that the art was touched up for the print version and would have been more to my liking.) But enough about the art. The draw of On a Sunbeam for me is the story. It's not very dramatic or event-filled at first, starting as two stories of burgeoning friendships with a fairly young main character. (They are closely linked, but it's not obvious how until well into the story.) But it's the sort of story that I started reading, thought was mildly interesting, and then kept reading just one more chapter until I had somehow read the whole thing. There are some interesting twists towards the end, but it's otherwise not a very dramatic or surprising story. What it is instead is open-hearted, quiet, charming, and deeper than it looks. The characters are wildly different and can be abrasive, but they invest time and effort into understanding each other and adjusting for each other's preferences. Personal loss drives a lot of the plot, but the characters are also allowed to mature and be happy without resolving every bad thing that happened to them. These characters felt like people I would like and would want to get to know (even if Jules would be overwhelming). I enjoyed watching their lives. This reminded me a bit of a Becky Chambers novel, although it's less invested in being science fiction and sticks strictly to humans. There's a similar feeling that the relationships are the point of the story, and that nearly everyone is trying hard to be good, with differing backgrounds and differing conceptions of good. All of the characters are female or non-binary, which is left as entirely unexplained as the rest of the setting. It's that sort of book. I wouldn't say this is one of the best things I've ever read, but I found it delightful and charming, and it certainly sucked me in and kept me reading until the end. One also cannot argue with the price, although if I hadn't already read it, I would be tempted to buy a paper copy to support the author. This will not be to everyone's taste, and stay far away if you are looking for realistic science fiction, but recommended if you are in the mood for an understated queer character story full of good-hearted people. Rating: 7 out of 10

15 May 2022

Dirk Eddelbuettel: RcppArmadillo 0.11.1.1.0 on CRAN: Updates

armadillo image Armadillo is a powerful and expressive C++ template library for linear algebra and scientific computing. It aims towards a good balance between speed and ease of use, has syntax deliberately close to Matlab and is useful for algorithm development directly in C++, or quick conversion of research code into production environments. RcppArmadillo integrates this library with the R environment and language and is widely used by (currently) 978 other packages on CRAN, downloaded over 24 million times (per the partial logs from the cloud mirrors of CRAN), and the CSDA paper (preprint / vignette) by Conrad and myself has been cited 469 times according to Google Scholar. This release brings a first new upstream fix in the new release series 11.*. In particular, treatment of ill-conditioned matrices is further strengthened. We once again tested this very rigorously via three different RC releases each of which got a full reverse-dependencies run (for which results are always logged here). A minor issue with old g++ compilers was found once 11.1.0 was tagged to this upstream release is now 11.1.1. Also fixed is an OpenMP setup issue where Justin Silverman noticed that we did not propagate the -fopenmp setting correctly. The full set of changes (since the last CRAN release 0.11.0.0.0) follows.

Changes in RcppArmadillo version 0.11.1.1.0 (2022-05-15)
  • Upgraded to Armadillo release 11.1.1 (Angry Kitchen Appliance)
    • added inv_opts::no_ugly option to inv() and inv_sympd() to disallow inverses of poorly conditioned matrices
    • more efficient handling of rank-deficient matrices via inv_opts::allow_approx option in inv() and inv_sympd()
    • better detection of rank deficient matrices by solve()
    • faster handling of symmetric and diagonal matrices by cond()
  • The configure script again propagates the'found' case again, thanks to Justin Silverman for the heads-up and suggested fix (Dirk and Justin in #376 and #377 fixing #375).

Changes in RcppArmadillo version 0.11.0.1.0 (2022-04-14)
  • Upgraded to Armadillo release 11.0.1 (Creme Brulee)
    • fix miscompilation of inv() and inv_sympd() functions when using inv_opts::allow_approx and inv_opts::tiny options

Courtesy of my CRANberries, there is a diffstat report relative to previous release. More detailed information is on the RcppArmadillo page. Questions, comments etc should go to the rcpp-devel mailing list off the R-Forge page. If you like this or other open-source work I do, you can sponsor me at GitHub.

This post by Dirk Eddelbuettel originated on his Thinking inside the box blog. Please report excessive re-aggregation in third-party for-profit settings.

17 March 2022

Dirk Eddelbuettel: Rcpp 1.0.8.3: Hotfixing Hotfix

rcpp logo An even newer hot-fix release 1.0.8.3 of Rcpp follows the 1.0.8.2 release of a few days ago and got to CRAN this morning. A Debian upload will follow shortly, and Windows and macOS binaries will appear at CRAN in the next few days. This release again breaks with the six-months cycle started with release 1.0.5 in July 2020. When we addressed the CRAN request in 1.0.8.2 we forgot to dial testing down to their desired level (as three-part release numbers do automagically for us, whereas four-part do not). This is now taken care of, along with the hot-fix that was in 1.0.8.2 already. Rcpp has become the most popular way of enhancing R with C or C++ code. Right now, around 2522 packages on CRAN depend on Rcpp for making analytical code go faster and further, along with 239 in BioConductor. The full list of details for these two interim releases (and hence all changes accumulated since the last regular release, 1.0.8 in January) follows.

Changes in Rcpp hotfix release version 1.0.8.3 (2022-03-14)
  • Changes in Rcpp API:
    • Accomodate C++98 compilation by adjusting attributes.cpp (Dirk in #1193 fixing #1192)
    • Accomodate newest compilers replacing deprecated std::unary_function and std::binary_function with std::function (Dirk in #1202 fixing #1201 and CRAN request)
  • Changes in Rcpp Documentation:
    • Adjust one overflowing column (Bill Denney in #1196 fixing #1195)
  • Changes in Rcpp Deployment:
    • Accomodate four digit version numbers in unit test (Dirk)
    • Do not run complete test suite to limit test time to CRAN preference (Dirk)

Thanks to my CRANberries, you can also look at a diff to the previous release. Questions, comments etc should go to the rcpp-devel mailing list off the R-Forge page. Bugs reports are welcome at the GitHub issue tracker as well (where one can also search among open or closed issues); questions are also welcome under rcpp tag at StackOverflow which also allows searching among the (currently) 2843 previous questions. If you like this or other open-source work I do, you can sponsor me at GitHub.

This post by Dirk Eddelbuettel originated on his Thinking inside the box blog. Please report excessive re-aggregation in third-party for-profit settings.

12 March 2022

Dirk Eddelbuettel: Rcpp 1.0.8.2: Hotfix release per CRAN request

rcpp logo A new hot-fix release 1.0.8.2 of Rcpp just got to CRAN. It will also be uploaded to Debian shortly, and Windows and macOS binaries will appear at CRAN in the next few days. This release breaks with the six-months cycle started with release 1.0.5 in July 2020 as CRAN desired an update to silence nags from the newest clang version which turned a little loud over a feature deprecated in C++11 (namely std::unary_function() and std::binary_function()). This was easy to replace with std::function() which we did. The release also contains a minor bugfix relative to 1.0.8 and C++98 builds, and minor correction to one pdf vignette. The release was fully tested by us and CRAN as usual against all reverse dependencies. Rcpp has become the most popular way of enhancing R with C or C++ code. Right now, around 2519 packages on CRAN depend on Rcpp for making analytical code go faster and further, along with 239 in BioConductor. The full list of details for this interim release follows.

Changes in Rcpp hotfix release version 1.0.8.2 (2022-03-10)
  • Changes in Rcpp API:
    • Accomodate C++98 compilation by adjusting attributes.cpp (Dirk in #1193 fixing #1192)
    • Accomodate newest compilers replacing deprecated std::unary_function and std::binary_function with std::function (Dirk in #1202 fixing #1201 and CRAN request)
  • Changes in Rcpp Documentation:
    • Adjust one overflowing column (Bill Denney in #1196 fixing #1195)
  • Changes in Rcpp Deployment:
    • Accomodate four digit version numbers in unit test (Dirk)

Thanks to my CRANberries, you can also look at a diff to the previous release. Questions, comments etc should go to the rcpp-devel mailing list off the R-Forge page. Bugs reports are welcome at the GitHub issue tracker as well (where one can also search among open or closed issues); questions are also welcome under rcpp tag at StackOverflow which also allows searching among the (currently) 2843 previous questions. If you like this or other open-source work I do, you can sponsor me at GitHub.

This post by Dirk Eddelbuettel originated on his Thinking inside the box blog. Please report excessive re-aggregation in third-party for-profit settings.

Next.