Jonas Meurer: On CVE-2016-4484, a (securiy)? bug in the cryptsetup initramfs integration
On CVE-2016-4484, a (security)? bug in the cryptsetup initramfs integration
On November 4, I was made aware of a security vulnerability in the integration
of cryptsetup into initramfs. The vulnerability was discovered by security
researchers Hector Marco and Ismael Ripoll of CyberSecurity UPV Research
Group and got
CVE-2016-4484
assigned.
In this post I'll try to reflect a bit on
What CVE-2016-4484 is all about
Basically, the vulnerability is about two separate but related issues:
1. Initramfs rescue shell considered harmful
The main topic that Hector Marco and Ismael Ripoll address in their
publication
is that Debian exits into a rescue shell in case of failure during initramfs,
and that this can be triggered by entering a wrong password ~93 times in a
row.
Indeed the Debian initramfs implementation as provided by initramfs-tools
exits into a rescue shell (usually a busybox shell) after a defined amount of
failed attempts to make the root filesystem available. The loop in question
is in local_device_setup() at the local initramfs script
In general, this behaviour is considered as a feature: if the root device
hasn't shown up after 30 rounds, the rescue shell is spawned to provide the
local user/admin a way to debug and fix things herself.
Hector Marco and Ismael Ripoll argue
that in special environments, e.g. on public computers with password protected
BIOS/UEFI and bootloader, this opens an attack vector and needs to be regarded
as a security vulnerability:
It is common to assume that once the attacker has physical access to the
computer, the game is over. The attackers can do whatever they want. And
although this was true 30 years ago, today it is not.
There are many "levels" of physical access. [...]
In order to protect the computer in these scenarios: the BIOS/UEFI has one
or two passwords to protect the booting or the configuration menu; the GRUB
also has the possibility to use multiple passwords to protect unauthorized
operations.
And in the case of an encrypted system, the initrd shall block the maximum
number of password trials and prevent the access to the computer in that
case.
While Hector and Ismael have a valid point in that the rescue shell might
open an additional attack vector in special setups, this is not true for
the vast majority of Debian systems out there: in most cases a local attacker
can alter the boot order, replace or add boot devices, modify boot options in
the (GNU GRUB) bootloader menu or modify/replace arbitrary hardware parts.
The required scenario to make the initramfs rescue shell an additional attack
vector is indeed very special: locked down hardware, password protected
BIOS and bootloader but still local keyboard (or serial console) access are
required at least.
Hector and Ismael argue
that the default should be changed for enhanced security:
[...] But then Linux is used in more hostile environments, this helpful
(but naive) recovery services shall not be the default option.
For the reasons explained about, I tend to disagree to Hectors and Ismaels
opinion here. And after discussing this topic with several people I find my
opinion reconfirmed: the Debian Security Team disputes the security
impact of the
issue and others
agree.
But leaving the disputable opinion on a sane default aside, I don't think that
the cryptsetup package is the right place to change the default, if at all.
If you want added security by a locked down initramfs (i.e. no rescue shell
spawned), then at least the bootloader (GNU GRUB) needs to be locked down by
default as well.
To make it clear: if one wants to lock down the boot process, bootloader and
initramfs should be locked down together. And the right place to do this would
be the configurable behaviour of
grub-mkconfig.
Here, one can set a password for GRUB and the boot parameter 'panic=1' which
disables the spawning of a rescue shell in
initramfs.
But as mentioned, I don't agree that this would be sane defaults. The vast
majority of Debian systems out there don't have any security added by locked
down bootloader and initramfs and the benefit of a rescue shell for debugging
purposes clearly outrivals the minor security impact in my opinion.
For the few setups which require the added security of a locked down bootloader
and initramfs, we already have the relevant options documented in the Securing
Debian Manual:
- 4.3 Change the BIOS (again)
- 4.4 Set a LILO or GRUB password
- 4.5 Disable root prompt on the initramfs
- 4.6 Remove root prompt on the kernel
After discussing the topic with initramfs-tools maintainers today, Guilhem and
me (the cryptsetup maintainers) finally decided to not change any defaults and
just add a 'sleep 60' after the maximum allowed attempts were reached.
2. tries=n option ignored, local brute-force slightly cheaper
Apart from the issue of a rescue shell being spawned, Hector and Ismael also
discovered a programming bug in the cryptsetup initramfs integration. This bug
in the cryptroot initramfs local-top
script
allowed endless retries of passphrase input, ignoring the tries=n option of
crypttab (and the default of 3). As a result, theoretically unlimited
attempts to unlock encrypted disks were possible when processed during
initramfs stage. The attack vector here was that local brute-force attacks are
a bit cheaper. Instead of having to reboot after max tries were reached, one
could go on trying passwords.
Even though efficient brute-force attacks are mitigated by the
PBKDF2 implementation in cryptsetup,
this clearly is a real bug.
The reason for the bug was twofold:
- First, the condition in setup_mapping() responsible for making the
function fail when the maximum amount of allowed attempts is reached,
was never met:
setup_mapping()

  [...]
  # Try to get a satisfactory password $crypttries times
  count=0

  while [ $crypttries -le 0 ]   [ $count -lt $crypttries ]; do
      export CRYPTTAB_TRIED="$count"
      count=$(( $count + 1 ))
      [...]
  done
  if [ $crypttries -gt 0 ] && [ $count -gt $crypttries ]; then
      message "cryptsetup: maximum number of tries exceeded for $crypttarget"
      return 1
  fi
  [...]
As one can see, the while loop stops when $count -lt $crypttries.
Thus the second condition $count -gt $crypttries is never met. This
can easily be fixed by decreasing $count by one in case of a successful
unlock attempt along with changing the second condition to $count -ge
$crypttries:
setup_mapping()

  [...]
  while [ $crypttries -le 0 ]   [ $count -lt $crypttries ]; do
      [...]
      # decrease $count by 1, apparently last try was successful.
      count=$(( $count - 1 ))
      [...]
  done
  if [ $crypttries -gt 0 ] && [ $count -ge $crypttries ]; then
      [...]
  fi
  [...]
Christian Lamparter already spotted this bug
back in October 2011 and provided a (incomplete) patch,
but back then I even managed to merge the patch in an improper way,
making it even more useless: The patch by Christian forgot to decrease
$count by one in case of a successful unlock attempt, resulting in
warnings about maximum tries exceeded even for successful attemps in
some circumstances. But instead of adding the decrease myself and
keeping the (almost correct) condition $count -eq $crypttries for
detection of exceeded maximum tries, I changed back the condition to
the wrong original $count -gt $crypttries that again was never met.
Apparently I didn't test the fix properly back then. I definitely should
do better in future!
- Second, back in December 2013,
I added a cryptroot initramfs local-block script
as suggested by Goswin von Brederlow in order to fix bug #678692.
The purpose of the cryptroot initramfs local-block script is to invoke
the cryptroot initramfs local-top script again and again in a loop. This
is required to support complex block device stacks.
In fact, the numberless options of stacked block devices are one of the
biggest and most inglorious reasons that the cryptsetup initramfs
integration scripts became so complex over the years. After all we need
to support setups like rootfs on top of LVM with two separate encrypted
PVs or rootfs on top of LVM on top of dm-crypt on top of MD raid.
The problem with the local-block script is that exiting the
setup_mapping() function merely triggers a new invocation of the very
same function.
The guys who discovered the bug suggested a simple and good solution to
this bug: When maximum attempts are detected (by second condition from
above), the script sleeps for 60 seconds. This mitigates the brute-force
attack options for local attackers - even rebooting after max attempts
should be faster.
About disclosure, wording and clickbaiting
I'm happy that Hector and Ismael brought up the topic and made their argument
about the security impacts of an initramfs rescue shell, even though I have
to admit that I was rather astonished about the fact that they got a CVE
assigned.
Nevertheless I'm very happy that they informed the Security Teams of Debian and
Ubuntu prior to publishing their findings, which put me in the loop in turn.
Also Hector and Ismael were open and responsive when it came to discussing
their proposed fixes.
But unfortunately the way they advertised their finding was not very helpful.
They announced a speech about this topic at the DeepSec 2016 in Vienna with
the headline Abusing LUKS to Hack the System.
Honestly, this headline is missleading - if not wrong - in several ways:
- First, the whole issue is not about LUKS, neither is it about cryptsetup
itself. It's about Debians integration of cryptsetup into the initramfs,
which is a compeletely different story.
- Second, the term hack the system suggests that an exploit to break into
the system is revealed. This is not true. The device encryption is not
endangered at all.
- Third - as shown above - very special prerequisites need to be met in order
to make the mere existance of a LUKS encrypted device the relevant fact
to be able to spawn a rescue shell during initramfs.
Unfortunately, the way this issue was published lead to even worse articles
in the tech news press. Topics like Major security hole found in Cryptsetup
script for LUKS disk encryption
or Linux Flaw allows Root Shell During Boot-Up for LUKS Disk-Encrypted
Systems suggest that a major security vulnerabilty
was revealed and that it compromised the protection that cryptsetup respective
LUKS offer.
If these articles/news did anything at all, then it was causing damage to the
cryptsetup project,
which is not affected by the whole issue at all.
After the cat was out of the bag, Marco and Ismael aggreed that the way the
news picked up the issue was suboptimal, but I cannot fight the feeling that
the over-exaggeration was partly intended and that clickbaiting is taking
place here. That's a bit sad.
Links
1. Initramfs rescue shell considered harmful
The main topic that Hector Marco and Ismael Ripoll address in their
publication
is that Debian exits into a rescue shell in case of failure during initramfs,
and that this can be triggered by entering a wrong password ~93 times in a
row.
Indeed the Debian initramfs implementation as provided by initramfs-tools
exits into a rescue shell (usually a busybox shell) after a defined amount of
failed attempts to make the root filesystem available. The loop in question
is in local_device_setup() at the local initramfs script
In general, this behaviour is considered as a feature: if the root device
hasn't shown up after 30 rounds, the rescue shell is spawned to provide the
local user/admin a way to debug and fix things herself.
Hector Marco and Ismael Ripoll argue
that in special environments, e.g. on public computers with password protected
BIOS/UEFI and bootloader, this opens an attack vector and needs to be regarded
as a security vulnerability:
It is common to assume that once the attacker has physical access to the
computer, the game is over. The attackers can do whatever they want. And
although this was true 30 years ago, today it is not.
There are many "levels" of physical access. [...]
In order to protect the computer in these scenarios: the BIOS/UEFI has one
or two passwords to protect the booting or the configuration menu; the GRUB
also has the possibility to use multiple passwords to protect unauthorized
operations.
And in the case of an encrypted system, the initrd shall block the maximum
number of password trials and prevent the access to the computer in that
case.
While Hector and Ismael have a valid point in that the rescue shell might
open an additional attack vector in special setups, this is not true for
the vast majority of Debian systems out there: in most cases a local attacker
can alter the boot order, replace or add boot devices, modify boot options in
the (GNU GRUB) bootloader menu or modify/replace arbitrary hardware parts.
The required scenario to make the initramfs rescue shell an additional attack
vector is indeed very special: locked down hardware, password protected
BIOS and bootloader but still local keyboard (or serial console) access are
required at least.
Hector and Ismael argue
that the default should be changed for enhanced security:
[...] But then Linux is used in more hostile environments, this helpful
(but naive) recovery services shall not be the default option.
For the reasons explained about, I tend to disagree to Hectors and Ismaels
opinion here. And after discussing this topic with several people I find my
opinion reconfirmed: the Debian Security Team disputes the security
impact of the
issue and others
agree.
But leaving the disputable opinion on a sane default aside, I don't think that
the cryptsetup package is the right place to change the default, if at all.
If you want added security by a locked down initramfs (i.e. no rescue shell
spawned), then at least the bootloader (GNU GRUB) needs to be locked down by
default as well.
To make it clear: if one wants to lock down the boot process, bootloader and
initramfs should be locked down together. And the right place to do this would
be the configurable behaviour of
grub-mkconfig.
Here, one can set a password for GRUB and the boot parameter 'panic=1' which
disables the spawning of a rescue shell in
initramfs.
But as mentioned, I don't agree that this would be sane defaults. The vast
majority of Debian systems out there don't have any security added by locked
down bootloader and initramfs and the benefit of a rescue shell for debugging
purposes clearly outrivals the minor security impact in my opinion.
For the few setups which require the added security of a locked down bootloader
and initramfs, we already have the relevant options documented in the Securing
Debian Manual:
- 4.3 Change the BIOS (again)
- 4.4 Set a LILO or GRUB password
- 4.5 Disable root prompt on the initramfs
- 4.6 Remove root prompt on the kernel
After discussing the topic with initramfs-tools maintainers today, Guilhem and
me (the cryptsetup maintainers) finally decided to not change any defaults and
just add a 'sleep 60' after the maximum allowed attempts were reached.
2. tries=n option ignored, local brute-force slightly cheaper
Apart from the issue of a rescue shell being spawned, Hector and Ismael also
discovered a programming bug in the cryptsetup initramfs integration. This bug
in the cryptroot initramfs local-top
script
allowed endless retries of passphrase input, ignoring the tries=n option of
crypttab (and the default of 3). As a result, theoretically unlimited
attempts to unlock encrypted disks were possible when processed during
initramfs stage. The attack vector here was that local brute-force attacks are
a bit cheaper. Instead of having to reboot after max tries were reached, one
could go on trying passwords.
Even though efficient brute-force attacks are mitigated by the
PBKDF2 implementation in cryptsetup,
this clearly is a real bug.
The reason for the bug was twofold:
- First, the condition in setup_mapping() responsible for making the
function fail when the maximum amount of allowed attempts is reached,
was never met:
setup_mapping()
[...]
# Try to get a satisfactory password $crypttries times
count=0
while [ $crypttries -le 0 ] [ $count -lt $crypttries ]; do
export CRYPTTAB_TRIED="$count"
count=$(( $count + 1 ))
[...]
done
if [ $crypttries -gt 0 ] && [ $count -gt $crypttries ]; then
message "cryptsetup: maximum number of tries exceeded for $crypttarget"
return 1
fi
[...]
As one can see, the while loop stops when $count -lt $crypttries.
Thus the second condition $count -gt $crypttries is never met. This
can easily be fixed by decreasing $count by one in case of a successful
unlock attempt along with changing the second condition to $count -ge
$crypttries:
setup_mapping()
[...]
while [ $crypttries -le 0 ] [ $count -lt $crypttries ]; do
[...]
# decrease $count by 1, apparently last try was successful.
count=$(( $count - 1 ))
[...]
done
if [ $crypttries -gt 0 ] && [ $count -ge $crypttries ]; then
[...]
fi
[...]
Christian Lamparter already spotted this bug
back in October 2011 and provided a (incomplete) patch,
but back then I even managed to merge the patch in an improper way,
making it even more useless: The patch by Christian forgot to decrease
$count by one in case of a successful unlock attempt, resulting in
warnings about maximum tries exceeded even for successful attemps in
some circumstances. But instead of adding the decrease myself and
keeping the (almost correct) condition $count -eq $crypttries for
detection of exceeded maximum tries, I changed back the condition to
the wrong original $count -gt $crypttries that again was never met.
Apparently I didn't test the fix properly back then. I definitely should
do better in future!
- Second, back in December 2013,
I added a cryptroot initramfs local-block script
as suggested by Goswin von Brederlow in order to fix bug #678692.
The purpose of the cryptroot initramfs local-block script is to invoke
the cryptroot initramfs local-top script again and again in a loop. This
is required to support complex block device stacks.
In fact, the numberless options of stacked block devices are one of the
biggest and most inglorious reasons that the cryptsetup initramfs
integration scripts became so complex over the years. After all we need
to support setups like rootfs on top of LVM with two separate encrypted
PVs or rootfs on top of LVM on top of dm-crypt on top of MD raid.
The problem with the local-block script is that exiting the
setup_mapping() function merely triggers a new invocation of the very
same function.
The guys who discovered the bug suggested a simple and good solution to
this bug: When maximum attempts are detected (by second condition from
above), the script sleeps for 60 seconds. This mitigates the brute-force
attack options for local attackers - even rebooting after max attempts
should be faster.
About disclosure, wording and clickbaiting
I'm happy that Hector and Ismael brought up the topic and made their argument
about the security impacts of an initramfs rescue shell, even though I have
to admit that I was rather astonished about the fact that they got a CVE
assigned.
Nevertheless I'm very happy that they informed the Security Teams of Debian and
Ubuntu prior to publishing their findings, which put me in the loop in turn.
Also Hector and Ismael were open and responsive when it came to discussing
their proposed fixes.
But unfortunately the way they advertised their finding was not very helpful.
They announced a speech about this topic at the DeepSec 2016 in Vienna with
the headline Abusing LUKS to Hack the System.
Honestly, this headline is missleading - if not wrong - in several ways:
- First, the whole issue is not about LUKS, neither is it about cryptsetup
itself. It's about Debians integration of cryptsetup into the initramfs,
which is a compeletely different story.
- Second, the term hack the system suggests that an exploit to break into
the system is revealed. This is not true. The device encryption is not
endangered at all.
- Third - as shown above - very special prerequisites need to be met in order
to make the mere existance of a LUKS encrypted device the relevant fact
to be able to spawn a rescue shell during initramfs.
Unfortunately, the way this issue was published lead to even worse articles
in the tech news press. Topics like Major security hole found in Cryptsetup
script for LUKS disk encryption
or Linux Flaw allows Root Shell During Boot-Up for LUKS Disk-Encrypted
Systems suggest that a major security vulnerabilty
was revealed and that it compromised the protection that cryptsetup respective
LUKS offer.
If these articles/news did anything at all, then it was causing damage to the
cryptsetup project,
which is not affected by the whole issue at all.
After the cat was out of the bag, Marco and Ismael aggreed that the way the
news picked up the issue was suboptimal, but I cannot fight the feeling that
the over-exaggeration was partly intended and that clickbaiting is taking
place here. That's a bit sad.
Links
setup_mapping()
[...]
# Try to get a satisfactory password $crypttries times
count=0
while [ $crypttries -le 0 ] [ $count -lt $crypttries ]; do
export CRYPTTAB_TRIED="$count"
count=$(( $count + 1 ))
[...]
done
if [ $crypttries -gt 0 ] && [ $count -gt $crypttries ]; then
message "cryptsetup: maximum number of tries exceeded for $crypttarget"
return 1
fi
[...]
$count -lt $crypttries.
Thus the second condition $count -gt $crypttries is never met. This
can easily be fixed by decreasing $count by one in case of a successful
unlock attempt along with changing the second condition to $count -ge
$crypttries:
setup_mapping()
[...]
while [ $crypttries -le 0 ] [ $count -lt $crypttries ]; do
[...]
# decrease $count by 1, apparently last try was successful.
count=$(( $count - 1 ))
[...]
done
if [ $crypttries -gt 0 ] && [ $count -ge $crypttries ]; then
[...]
fi
[...]
- First, the whole issue is not about LUKS, neither is it about cryptsetup itself. It's about Debians integration of cryptsetup into the initramfs, which is a compeletely different story.
- Second, the term hack the system suggests that an exploit to break into the system is revealed. This is not true. The device encryption is not endangered at all.
- Third - as shown above - very special prerequisites need to be met in order to make the mere existance of a LUKS encrypted device the relevant fact to be able to spawn a rescue shell during initramfs.
 You might be aware of GRUB s loopback option for booting an ISO, I wrote about it in
 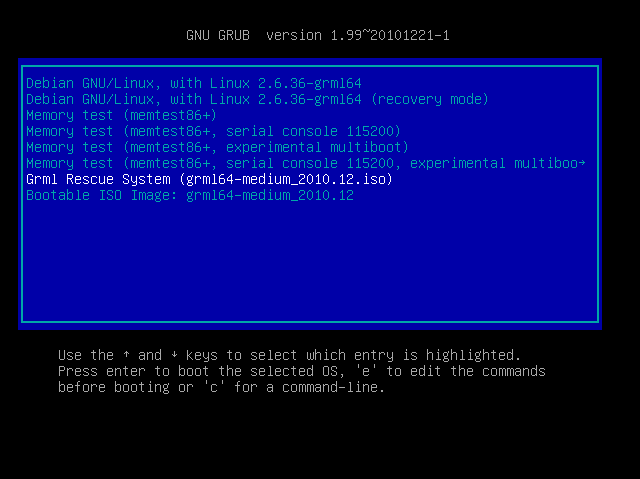 The Grml Rescue System entry is what grml-rescueboot provides and Bootable ISO Image is what s provided by grub-imageboot. Just select the entry you d like to use, press enter and and you should get the bootsplash of the according ISO.
BTW: I ve tested this with
The Grml Rescue System entry is what grml-rescueboot provides and Bootable ISO Image is what s provided by grub-imageboot. Just select the entry you d like to use, press enter and and you should get the bootsplash of the according ISO.
BTW: I ve tested this with  I was planning to attend