Two years ago, I wrote
Managing an External Display on Linux Shouldn t Be This Hard. Happily, since I wrote that post, most of those issues have been resolved.
But then you throw HiDPI into the mix and it all goes wonky.
If you re running X11, basically the story is that you can change the scale factor, but it only takes effect on newly-launched applications (which means a logout/in because some of your applications you can t really re-launch). That is a problem if, like me, you sometimes connect an external display that is HiDPI, sometimes not, or your internal display is HiDPI but others aren t. Wayland is far better, supporting on-the-fly resizes quite nicely.
I ve had two devices with HiDPI displays: a Surface Go 2, and a work-issued Thinkpad. The Surface Go 2 is
my ultraportable Linux tablet. I use it sparingly at home, and rarely with an external display. I just put Gnome on it, in part because Gnome had better on-screen keyboard support at the time, and left it at that.
On the work-issued Thinkpad, I really wanted to run KDE thanks to its
tiling support (I wound up using
bismuth with it). KDE was buggy with Wayland at the time, so I just stuck with X11 and ran my HiDPI displays at lower resolutions and lived with the fuzziness.
But now that
I have a Framework laptop with a HiDPI screen, I wanted to get this right.
I tried both Gnome and KDE. Here are my observations with both:
Gnome
I used
PaperWM with Gnome. PaperWM is a tiling manager with a unique horizontal ribbon approach. It grew on me; I think I would be equally at home, or maybe even prefer it, to my usual xmonad-style approach. Editing the active window border color required editing ~/.local/share/gnome-shell/extensions/paperwm@hedning:matrix.org/stylesheet.css and inserting background-color and border-color items in the paperwm-selection section.
Gnome continues to have an absolutely terrible picture for configuring things. It has no less than four places to make changes (Settings, Tweaks, Extensions, and dconf-editor). In many cases, configuration for a given thing is split between Settings and Tweaks, and sometimes even with Extensions, and then there are sometimes options that are only visible in dconf. That is, where the Gnome people have even allowed something to be configurable.
Gnome installs a power manager by default. It offers three options: performance, balanced, and saver. There is no explanation of the difference between them. None. What is it setting when I change the pref? A maximum frequency? A scaling governor? A balance between performance and efficiency cores? Not only that, but there s no way to tell it to just use performance when plugged in and balanced or saver when on battery. In an issue about adding that, a Gnome dev
wrote We re not going to add a preference just because you want one . KDE, on the other hand, aside from not mucking with your system s power settings in this way, has a nice panel with on AC and on battery and you can very easily tweak various settings accordingly. The hostile attitude from the Gnome developers in that thread was a real turnoff.
While Gnome has excellent support for Wayland, it doesn t (directly) support fractional scaling. That is, you can set it to 100%, 200%, and so forth, but no 150%. Well, unless you manage to discover that you can run
gsettings set org.gnome.mutter experimental-features "['scale-monitor-framebuffer']" first. (Oh wait, does that make a FIFTH settings tool? Why yes it does.) Despite its name, that allows you to select fractional scaling under Wayland. For X11 apps, they will be blurry, a problem that is optional under KDE (more on that below).
Gnome won t show the battery life time remaining on the task bar. Yikes. An
extension might work in some cases. Not only that, but the Gnome battery icon frequently failed to indicate AC charging when AC was connected, a problem that didn t exist on KDE.
Both Gnome and KDE support night light (warmer color temperatures at night), but Gnome s often didn t change when it should have, or changed on one display but not the other.
The appindicator extension is pretty much required, as otherwise a number of applications (eg, Nextcloud) don t have their icon display anywhere. It does, however, generate a significant amount of log spam. There may be a
fix for this.
Unlike KDE, which has a nice inobtrusive popup asking what to do, Gnome silently automounts USB sticks when inserted. This is often wrong; for instance, if I m about to dd a Debian installer to it, I definitely don t want it mounted. I learned this the hard way. It is particularly annoying because in a GUI, there is no reason to mount a drive before the user tries to access it anyhow. It looks like there is a dconf setting, but then to actually mount a drive you have to open up Files (because OF COURSE Gnome doesn t have a nice removable-drives icon like KDE does) and it s a bunch of annoying clicks, and I didn t want to use the GUI file manager anyway. Same for unmounting; two clicks in KDE thanks to the task bar icon, but in Gnome you have to open up the file manager, unmount the drive, close the file manager again, etc.
The ssh agent on Gnome doesn t start up for a Wayland session, though this is easily enough worked around.
The reason I completely soured on Gnome is that after using it for awhile, I noticed my laptop fans spinning up. One core would be constantly busy. It was busy with a kworker events task, something to do with sound events. Logging out would resolve it. I believe it to be a Gnome shell issue. I could find no resolution to this, and am unwilling to tolerate the decreased battery life this implies.
The Gnome summary: it looks nice out of the box, but you quickly realize that this is something of a paper-thin illusion when you try to actually use it regularly.
KDE
The KDE experience on Wayland was a little bit opposite of Gnome. While with Gnome, things start out looking great but you realize there are some serious issues (especially battery-eating), with KDE things start out looking a tad rough but you realize you can trivially fix them and wind up with a very solid system.
Compared to Gnome, KDE never had a battery-draining problem. It will show me estimated battery time remaining if I want it to. It will do whatever I want it to when I insert a USB drive. It doesn t muck with my CPU power settings, and lets me easily define on AC vs on battery settings for things like suspend when idle.
KDE supports fractional scaling, to any arbitrary setting (even with the gsettings thing above, Gnome still only supports it in 25% increments). Then the question is what to do with X11-only applications. KDE offers two choices. The first is Scaled by the system , which is also the only option for Gnome. With that setting, the X11 apps effectively run natively at 100% and then are scaled up within Wayland, giving them a blurry appearance on HiDPI displays. The advantage is that the scaling happens within Wayland, so the size of the app will always be correct even when the Wayland scaling factor changes. The other option is Apply scaling themselves , which uses native X11 scaling. This lets most X11 apps display crisp and sharp, but then if the system scaling changes, due to limitations of X11, you ll have to restart the X apps to get them to be the correct size. I appreciate the choice, and use Apply scaling by themselves because only a few of my apps aren t Wayland-aware.
I did encounter a few bugs in KDE under Wayland:
sddm, the display manager, would be slow to stop and cause a long delay on shutdown or reboot. This seems to be a known issue with sddm and Wayland, and is easily worked around by adding a systemd TimeoutStopSec.
Konsole, the KDE terminal emulator, has weird display artifacts when using fractional scaling under Wayland. I applied
some patches and rebuilt Konsole and then all was fine.
The Bismuth tiling extension has some pretty weird behavior under Wayland, but a
1-character patch fixes it.
On Debian, KDE mysteriously installed Pulseaudio instead of Debian s new default Pipewire, but that was easily fixed as well (and Pulseaudio also works fine).
Conclusions
I m sticking with KDE. Given that I couldn t figure out how to stop Gnome from deciding to eat enough battery to make my fan come on, the decision wasn t hard. But even if it weren t for that, I d have gone with KDE. Once a couple of things were patched, the experience is solid, fast, and flawless. Emacs (my main X11-only application) looks great with the self-scaling in KDE. Gimp, which I use occasionally, was terrible with the blurry scaling in Gnome.
Update: Corrected the gsettings command
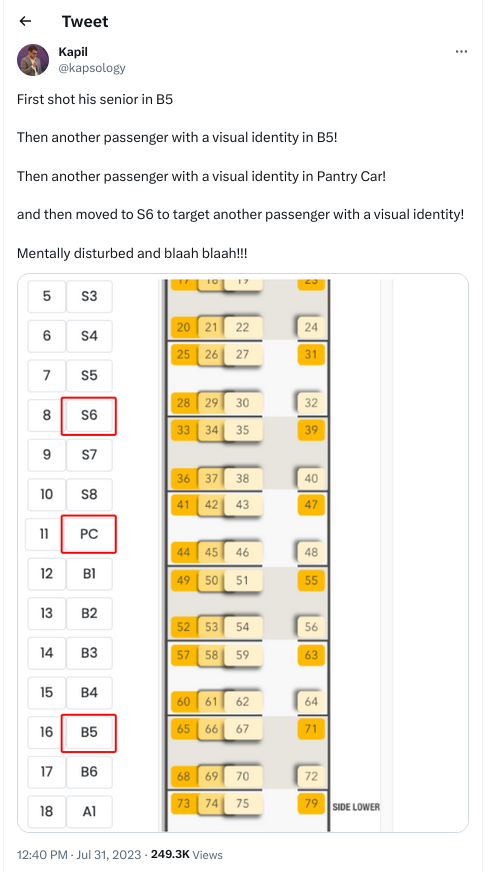
 Yes, that s right: today, April 6, I get a notification that they removed a post from August 12. The notification was dated April 4, but only showed up for me today.
I wonder why my post from August 12 was fine for nearly 8 months, and then all of a sudden, when the same website runs an article critical of Facebook, my 8-month-old post is a problem. Hmm.
Yes, that s right: today, April 6, I get a notification that they removed a post from August 12. The notification was dated April 4, but only showed up for me today.
I wonder why my post from August 12 was fine for nearly 8 months, and then all of a sudden, when the same website runs an article critical of Facebook, my 8-month-old post is a problem. Hmm.
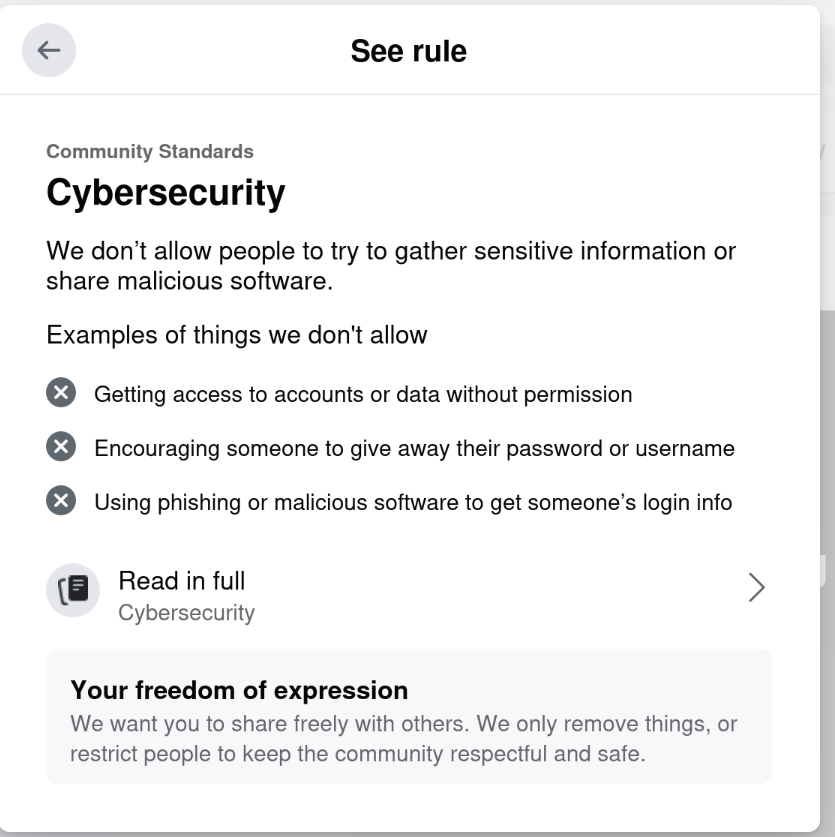 Riiiiiight. Cybersecurity.
This isn t even the first time they ve done this to me.
On September 11, 2021, they removed my post about the social network Mastodon (click that link for screenshot). A post that, incidentally, had been made 10 months prior to being removed.
While they ultimately reversed themselves, I subsequently wrote Facebook s Blocking Decisions Are Deliberate Including Their Censorship of Mastodon.
That this same pattern has played out a second time again with something that is a very slight challenege to Facebook seems to validate my conclusion. Facebook lets all sort of hateful garbage infest their site, but anything about climate change or their own censorship gets removed, and this pattern persists for years.
There s a reason I prefer Mastodon these days. You can find me there as @jgoerzen@floss.social.
So. I ve written this blog post. And then I m going to post it to Facebook. Let s see if they try to censor me for a third time. Bring it, Facebook.
Riiiiiight. Cybersecurity.
This isn t even the first time they ve done this to me.
On September 11, 2021, they removed my post about the social network Mastodon (click that link for screenshot). A post that, incidentally, had been made 10 months prior to being removed.
While they ultimately reversed themselves, I subsequently wrote Facebook s Blocking Decisions Are Deliberate Including Their Censorship of Mastodon.
That this same pattern has played out a second time again with something that is a very slight challenege to Facebook seems to validate my conclusion. Facebook lets all sort of hateful garbage infest their site, but anything about climate change or their own censorship gets removed, and this pattern persists for years.
There s a reason I prefer Mastodon these days. You can find me there as @jgoerzen@floss.social.
So. I ve written this blog post. And then I m going to post it to Facebook. Let s see if they try to censor me for a third time. Bring it, Facebook.

 I think while developing Wayland-as-an-ecosystem we are now entrenched into narrow concepts of how a desktop should work. While discussing Wayland protocol additions, a lot of concepts clash, people from different desktops with different design philosophies debate the merits of those over and over again never reaching any conclusion (just as you will never get an answer out of humans whether sushi or pizza is the clearly superior food, or whether CSD or SSD is better). Some people want to use Wayland as a vehicle to force applications to submit to their desktop s design philosophies, others prefer the smallest and leanest protocol possible, other developers want the most elegant behavior possible. To be clear, I think those are all very valid approaches.
But this also creates problems: By switching to Wayland compositors, we are already forcing a lot of porting work onto toolkit developers and application developers. This is annoying, but just work that has to be done. It becomes frustrating though if Wayland provides toolkits with absolutely no way to reach their goal in any reasonable way. For Nate s Photoshop analogy: Of course Linux does not break Photoshop, it is Adobe s responsibility to port it. But what if Linux was missing a crucial syscall that Photoshop needed for proper functionality and Adobe couldn t port it without that? In that case it becomes much less clear on who is to blame for Photoshop not being available.
A lot of Wayland protocol work is focused on the environment and design, while applications and work to port them often is considered less. I think this happens because the overlap between application developers and developers of the desktop environments is not necessarily large, and the overlap with people willing to engage with Wayland upstream is even smaller. The combination of Windows developers porting apps to Linux and having involvement with toolkits or Wayland is pretty much nonexistent. So they have less of a voice.
I think while developing Wayland-as-an-ecosystem we are now entrenched into narrow concepts of how a desktop should work. While discussing Wayland protocol additions, a lot of concepts clash, people from different desktops with different design philosophies debate the merits of those over and over again never reaching any conclusion (just as you will never get an answer out of humans whether sushi or pizza is the clearly superior food, or whether CSD or SSD is better). Some people want to use Wayland as a vehicle to force applications to submit to their desktop s design philosophies, others prefer the smallest and leanest protocol possible, other developers want the most elegant behavior possible. To be clear, I think those are all very valid approaches.
But this also creates problems: By switching to Wayland compositors, we are already forcing a lot of porting work onto toolkit developers and application developers. This is annoying, but just work that has to be done. It becomes frustrating though if Wayland provides toolkits with absolutely no way to reach their goal in any reasonable way. For Nate s Photoshop analogy: Of course Linux does not break Photoshop, it is Adobe s responsibility to port it. But what if Linux was missing a crucial syscall that Photoshop needed for proper functionality and Adobe couldn t port it without that? In that case it becomes much less clear on who is to blame for Photoshop not being available.
A lot of Wayland protocol work is focused on the environment and design, while applications and work to port them often is considered less. I think this happens because the overlap between application developers and developers of the desktop environments is not necessarily large, and the overlap with people willing to engage with Wayland upstream is even smaller. The combination of Windows developers porting apps to Linux and having involvement with toolkits or Wayland is pretty much nonexistent. So they have less of a voice.
 I will also bring my two protocol MRs to their conclusion for sure, because as application developers we need clarity on what the platform (either all desktops or even just a few) supports and will or will not support in future. And the only way to get something good done is by contribution and friendly discussion.

 For the purposes of what I m trying to fix, there are two paths that matter.
 This is a post I wrote in June 2022, but did not publish back then.
After first publishing it in December 2023, a perfectionist insecure
part of me unpublished it again. After receiving positive feedback, i
slightly amended and republish it now.
In this post, I talk about unpaid work in F/LOSS, taking on the example
of hackathons, and why, in my opinion, the expectation of volunteer work
is hurting diversity.
Disclaimer: I don t have all the answers, only some ideas and questions.
This is a post I wrote in June 2022, but did not publish back then.
After first publishing it in December 2023, a perfectionist insecure
part of me unpublished it again. After receiving positive feedback, i
slightly amended and republish it now.
In this post, I talk about unpaid work in F/LOSS, taking on the example
of hackathons, and why, in my opinion, the expectation of volunteer work
is hurting diversity.
Disclaimer: I don t have all the answers, only some ideas and questions.
 I was looking over the list of live music I'd seen this year and realised that
avante-garde composer William Basinski was actually last year and I had
forgotten to write about it!
In November 2022, Basinski headlined a night of performances which otherwise
featured folk from the venue's "Arists in Residence" programme, with some
affiliation to
I was looking over the list of live music I'd seen this year and realised that
avante-garde composer William Basinski was actually last year and I had
forgotten to write about it!
In November 2022, Basinski headlined a night of performances which otherwise
featured folk from the venue's "Arists in Residence" programme, with some
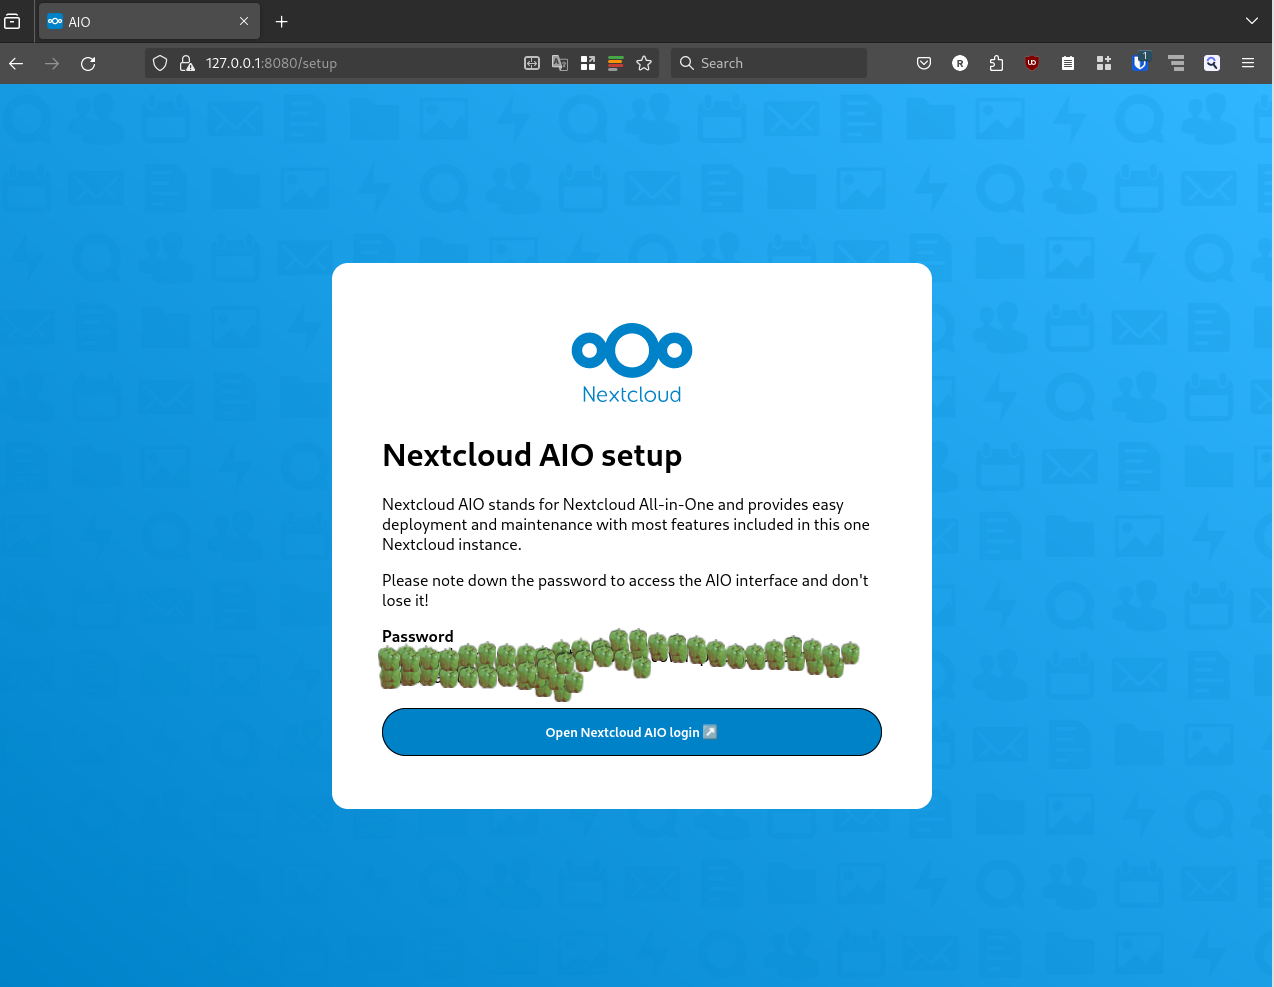
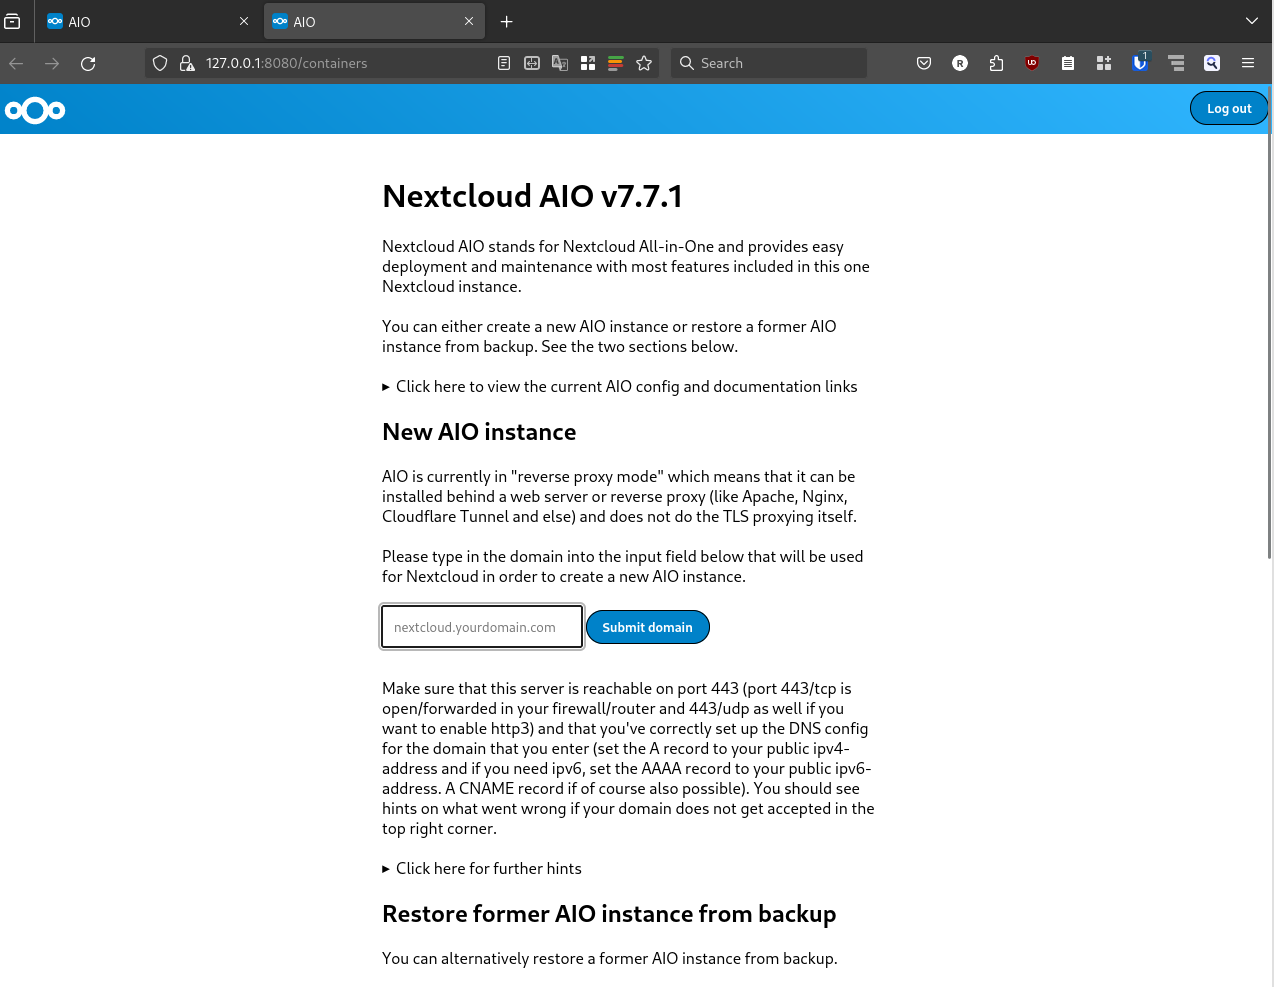
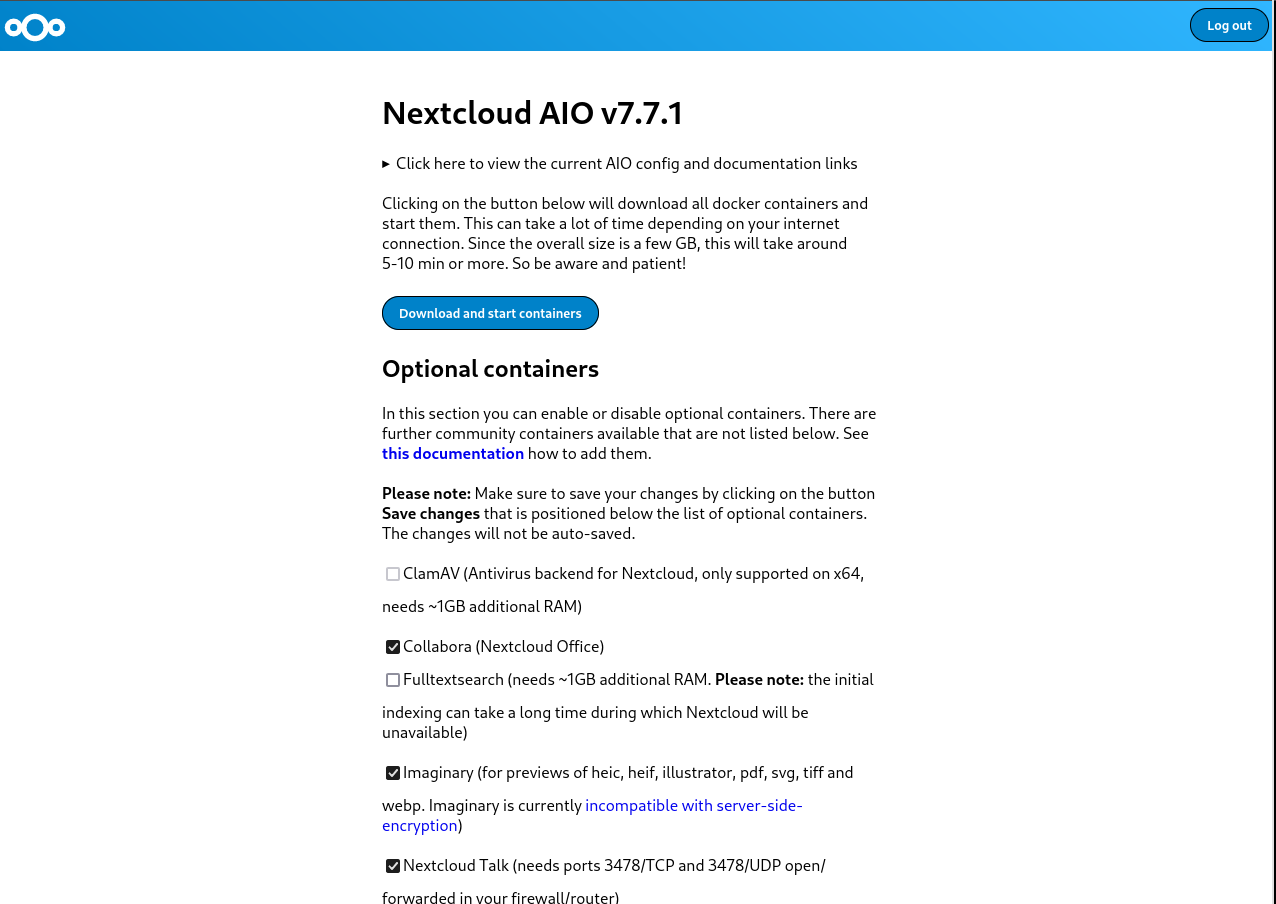
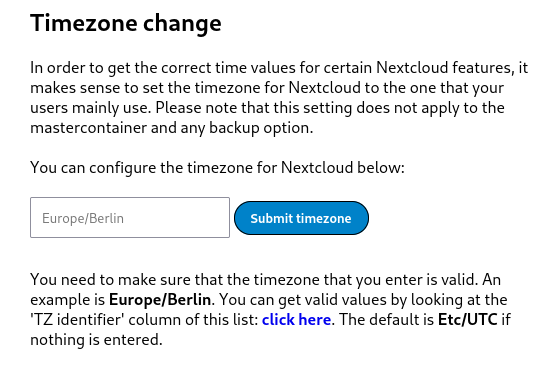
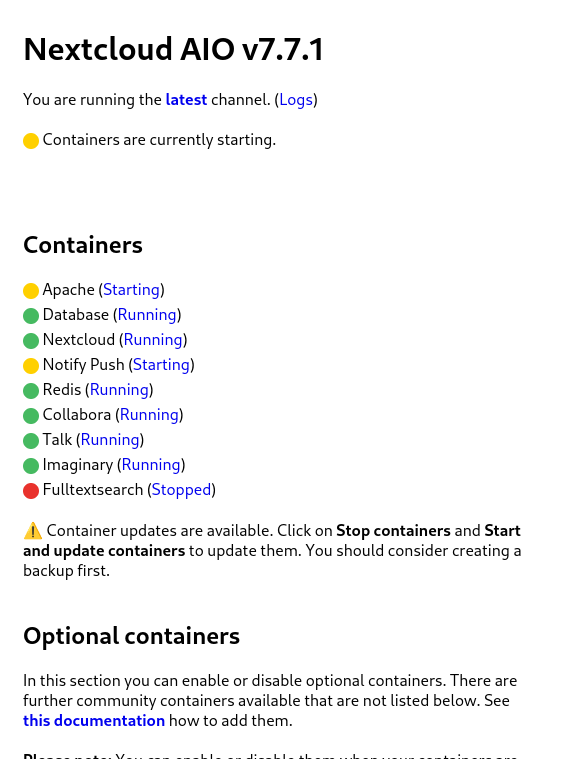
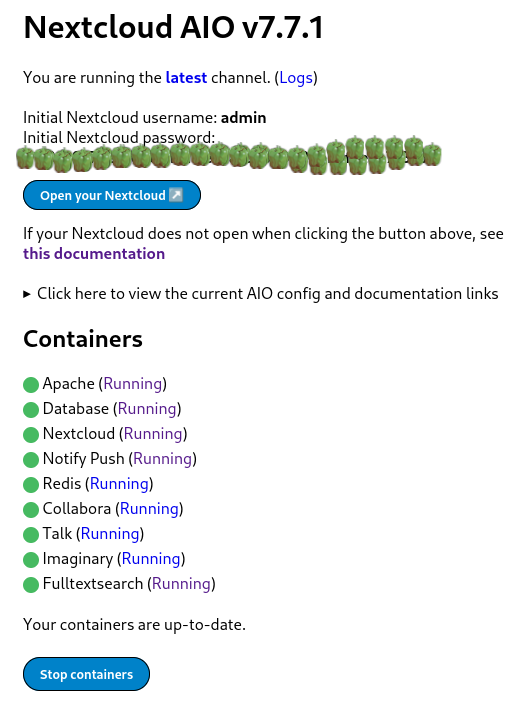
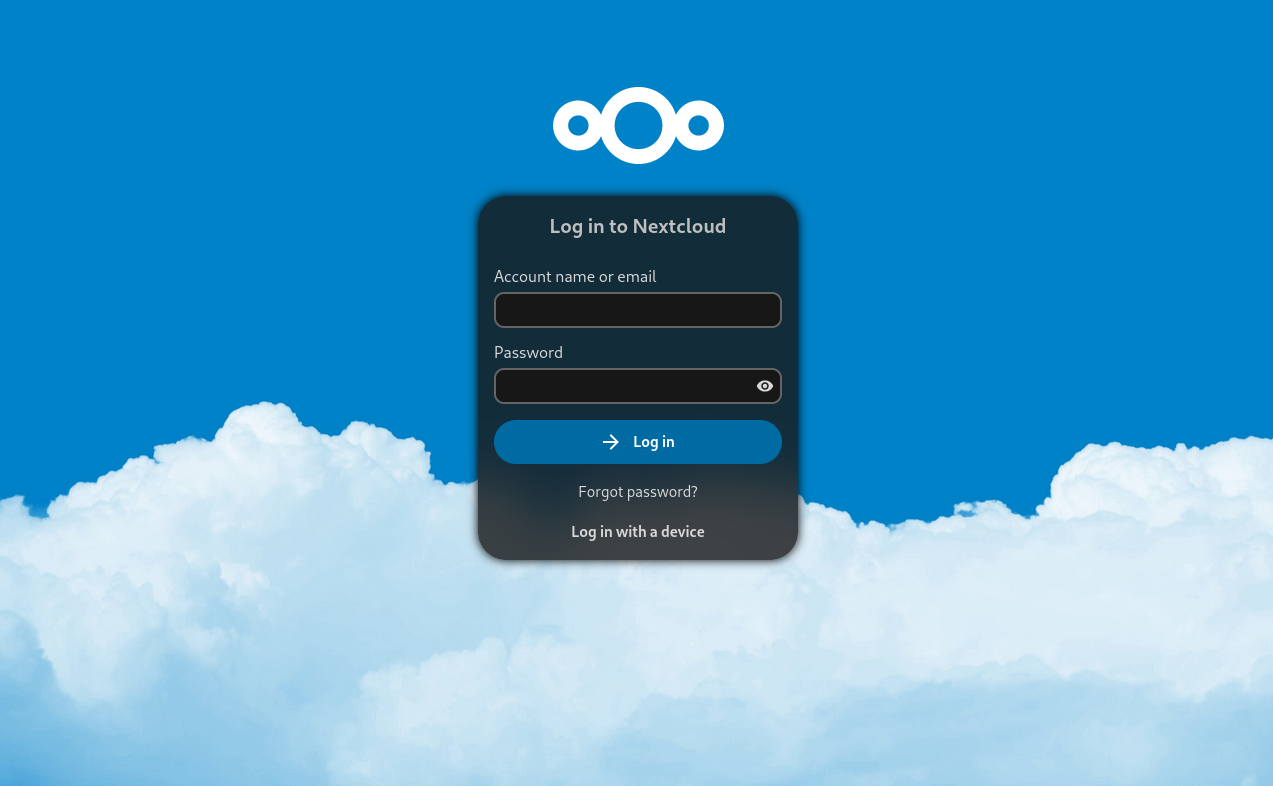
affiliation to  Nextcloud is a popular self-hosted solution for file sync and share as well as cloud apps such as document editing, chat and talk, calendar, photo gallery etc. This guide will walk you through setting up Nextcloud AIO using Docker Compose. This blog post would not be possible without immense help from Sahil Dhiman a.k.a.


 Welcome to the 43th post in the
 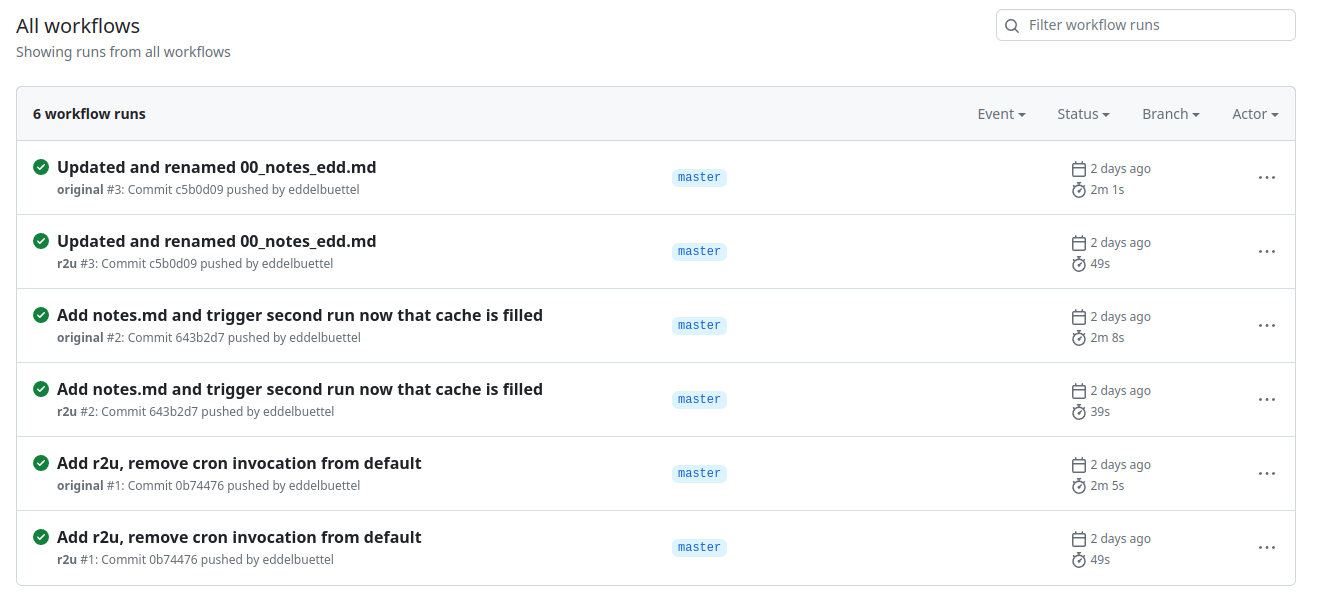 Turns out maybe not so much (yet ?). As the
 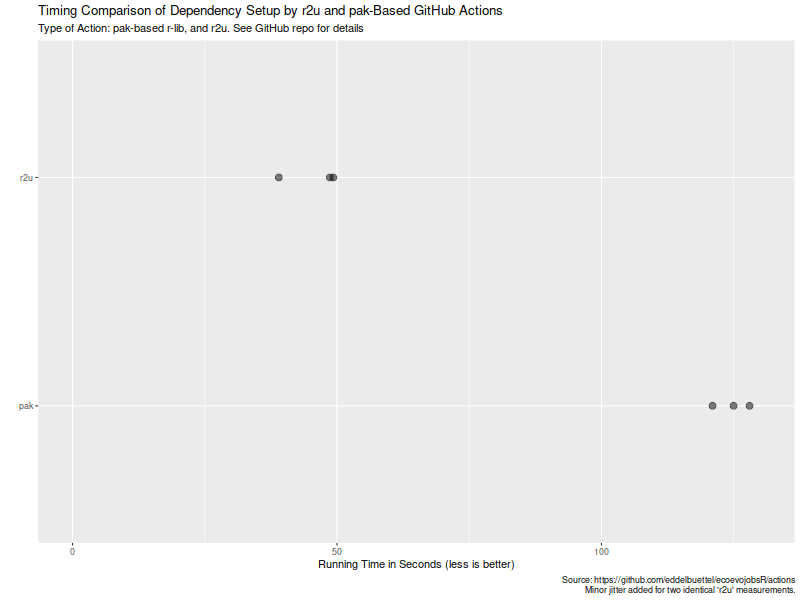 Now, this is of course entirely possibly that not all possible venues
for speedups were exploited in how the action setup was setup. If so,
please file an issue at the
Now, this is of course entirely possibly that not all possible venues
for speedups were exploited in how the action setup was setup. If so,
please file an issue at the