Search Results: "Ian Campbell"

25 July 2016

Martin Michlmayr: Debian on Jetson TK1

Debian on Jetson TK1 
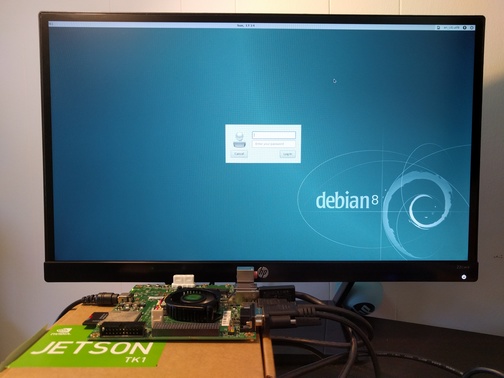
I became interested in running Debian on NVIDIA's Tegra platform recently. NVIDIA is doing a great job getting support for Tegra upstream (u-boot, kernel, X.org and other projects). As part of ensuring good Debian support for Tegra, I wanted to install Debian on a Jetson TK1, a development board from NVIDIA based on the Tegra K1 chip (Tegra 124), a 32-bit ARM chip. Ian Campbell enabled u-boot and Linux kernel support and added support in the installer for this device about a year ago. I updated some kernel options since there has been a lot of progress upstream in the meantime, performed a lot of tests and documented the installation process on the Debian wiki. Wookey made substantial improvements to the wiki as well. If you're interested in a good 32-bit ARM development platform, give Debian on the Jetson TK1 a try. There's also a 64-bit board. More on that later...

28 February 2016

Ian Campbell: Hotswapping a failed RAID device

Recently I started getting SMART warnings from on of the disks in my home NAS (a QNAP TS-419P II armel/kirkwood device running Debian Jessie):
Device: /dev/disk/by-id/ata-ST3000DM001-1CH166_W1F2QSV6 [SAT], Self-Test Log error count increased from 0 to 1
Meaning it was now time to switch out that disk from the RAID5 array. Since everytime this happens I have to go and lookup again what to do I've decided to write it down this time. I configure SMART to talk about devices by-id (giving me their name and model number) so first I needed to figure out what the kernel was calling this device (although mdadm is happy with the by-id path, various other bits are not):
# readlink /dev/disk/by-id/ata-ST3000DM001-1CH166_W1F2QSV6 
../../sdd
Next I needed to mark the device as failed in the array:
# mdadm --detail /dev/md0 
/dev/md0:
[...]
          State : clean 
 Active Devices : 4
Working Devices : 4
 Failed Devices : 0
  Spare Devices : 0
[...]
    Number   Major   Minor   RaidDevice State
       5       8       48        0      active sync   /dev/sdd
       1       8       32        1      active sync   /dev/sdc
       6       8       16        2      active sync   /dev/sdb
       4       8        0        3      active sync   /dev/sda
# mdadm --fail /dev/md0 /dev/disk/by-id/ata-ST3000DM001-1CH166_W1F2QSV6 
mdadm: set /dev/disk/by-id/ata-ST3000DM001-1CH166_W1F2QSV6 faulty in /dev/md0
# mdadm --detail /dev/md0 
/dev/md0:
[...]
 Active Devices : 3
Working Devices : 3
 Failed Devices : 1
  Spare Devices : 0
[...]
Number   Major   Minor   RaidDevice State
   0       0        0        0      removed
   1       8       32        1      active sync   /dev/sdc
   6       8       16        2      active sync   /dev/sdb
   4       8        0        3      active sync   /dev/sda
   5       8       48        -      faulty   /dev/sdd
If it had been the RAID subsystem rather than SMART monitoring which had first spotted the issue then this would have happened already (and I would had received a different mail from the RAID checks instead of SMART). Once the disk is marked as failed then actually remove it from the array:
# mdadm --remove /dev/md0 /dev/disk/by-id/ata-ST3000DM001-1CH166_W1F2QSV6 
mdadm: hot removed /dev/disk/by-id/ata-ST3000DM001-1CH166_W1F2QSV6 from /dev/md0
And finally tell the kernel to delete the device:
# echo 1 > /sys/block/sdd/device/delete 
At this point I can physically swap the disks. At this point I noticed there were some interesting messages in dmesg, either from the echo to the delete node in sysfs or from the physical switch of the disks:
[1779238.656459] md: unbind<sdd>
[1779238.659455] md: export_rdev(sdd)
[1779258.686720] sd 3:0:0:0: [sdd] Synchronizing SCSI cache
[1779258.700507] sd 3:0:0:0: [sdd] Stopping disk
[1779259.377589] ata4.00: disabled
[1779371.126202] ata4: exception Emask 0x10 SAct 0x0 SErr 0x180000 action 0x6 frozen
[1779371.133740] ata4: edma_err_cause=00000020 pp_flags=00000000, SError=00180000
[1779371.141003] ata4: SError:   10B8B Dispar  
[1779371.145309] ata4: hard resetting link
[1779371.468708] ata4: SATA link down (SStatus 0 SControl 300)
[1779371.474340] ata4: EH complete
[1779557.416735] ata4: exception Emask 0x10 SAct 0x0 SErr 0x4010000 action 0xe frozen
[1779557.424356] ata4: edma_err_cause=00000010 pp_flags=00000000, dev connect
[1779557.431264] ata4: SError:   PHYRdyChg DevExch  
[1779557.436008] ata4: hard resetting link
[1779563.357089] ata4: link is slow to respond, please be patient (ready=0)
[1779567.449096] ata4: SRST failed (errno=-16)
[1779567.453316] ata4: hard resetting link
I wonder if I should have used another method to detach the disk, perhaps poking the controller rather than the disk (which rang a vague bell in my memory from last time this happened) but in the end the disk is broken and the kernel seems to have coped so I'm not too worried about it. It looked like the new disk had already been recognised:
[1779572.593471] scsi 3:0:0:0: Direct-Access     ATA      HGST HDN724040AL A5E0 PQ: 0 ANSI: 5
[1779572.604187] sd 3:0:0:0: [sdd] 7814037168 512-byte logical blocks: (4.00 TB/3.63 TiB)
[1779572.612171] sd 3:0:0:0: [sdd] 4096-byte physical blocks
[1779572.618252] sd 3:0:0:0: Attached scsi generic sg3 type 0
[1779572.626754] sd 3:0:0:0: [sdd] Write Protect is off
[1779572.631771] sd 3:0:0:0: [sdd] Mode Sense: 00 3a 00 00
[1779572.632588] sd 3:0:0:0: [sdd] Write cache: enabled, read cache: enabled, doesn't support DPO or FUA
[1779572.665609]  sdd: unknown partition table
[1779572.671522] sd 3:0:0:0: [sdd] Attached SCSI disk
[1779855.362331]  sdd: unknown partition table
So I skipped trying to figure out how to perform a SCSI rescan and went straight to identifying that the new disk was called:
/dev/disk/by-id/ata-HGST_HDN724040ALE640_PK1338P4GY8ENB
and then tried to do a SMART conveyancing self-test with:
# smartctl -t conveyance /dev/disk/by-id/ata-HGST_HDN724040ALE640_PK1338P4GY8ENB
But this particular drive seems to not support that, so I went straight to editing /etc/smartd.conf to replace the old disk with the new one and:
# service smartmontools reload
With all that I was ready to add the new disk to the array:
# mdadm --add /dev/md0 /dev/disk/by-id/ata-HGST_HDN724040ALE640_PK1338P4GY8ENB
mdadm: added /dev/disk/by-id/ata-HGST_HDN724040ALE640_PK1338P4GY8ENB
# mdadm --detail /dev/md0 
/dev/md0:
[...] 
      State : clean, degraded, recovering 
 Active Devices : 3
Working Devices : 4
 Failed Devices : 0
  Spare Devices : 1
[...]
 Rebuild Status : 0% complete
[...]
Number   Major   Minor   RaidDevice State
   5       8       48        0      spare rebuilding   /dev/sdd
   1       8       32        1      active sync   /dev/sdc
   6       8       16        2      active sync   /dev/sdb
   4       8        0        3      active sync   /dev/sda
# cat /proc/mdstat 
Personalities : [raid6] [raid5] [raid4] 
md0 : active raid5 sdd[5] sda[4] sdb[6] sdc[1]
      5860538880 blocks super 1.2 level 5, 512k chunk, algorithm 2 [4/3] [_UUU]
      [>....................]  recovery =  0.0% (364032/1953512960) finish=1162.4min speed=28002K/sec
So now all that was left was to wait about 20 hours (with fingers crossed a second disk didn't die! spoiler: it didn't)

6 November 2015

Ian Campbell: Cambridge mini-Debconf

I am currently attending the mini-Debconf being held in space generously provided by ARM's offices in Cambridge, UK. Thanks to ARM and the other sponsors for making this possible. Yesterday I made a pass through the bug list for the Xen packages. According to the replies I have received from the BTS I looked at and acted on: Phew! Today I expect more of the same, starting with seeing where the new information in #799122 takes me.

5 November 2015

Lars Wirzenius: Obnam 1.18 released (backup software)

I have just released version 1.18 of Obnam, my backup program. See the website at http://obnam.org for details on what the program does. The new version is available from git (see http://git.liw.fi) and as Debian packages from http://code.liw.fi/debian, and uploaded to Debian, and soon in unstable. The NEWS file extract below gives the highlights of what's new in this version. Version 1.18, released 2015-11-04 Bug fixes: Minor changes:

16 May 2015

Ian Campbell: A vhosting git setup with gitolite and gitweb

Since gitorious' shutdown I decided it was time to start hosting my own git repositories for my own little projects (although the company which took over gitorious has a Free software offering it seems that their hosted offering is based on the proprietary version, and in any case once bitten, twice shy and all that). After a bit of investigation I settled on using gitolite and gitweb. I did consider (and even had a vague preference for) cgit but it wasn't available in Wheezy (even backports, and the backport looked tricky) and I haven't upgraded my VPS yet. I may reconsider cgit this once I switch to Jessie. The only wrinkle was that my VPS is shared with a friend and I didn't want to completely take over the gitolite and gitweb namespaces in case he ever wanted to setup git.hisdomain.com, so I needed something which was at least somewhat compatible with vhosting. gitolite doesn't appear to support such things out of the box but I found an interesting/useful post from Julius Plenz which included sufficient inspiration that I thought I knew what to do. After a bit of trial and error here is what I ended up with: Install gitolite The gitolite website has plenty of documentation on configuring gitolite. But since gitolite is in Debian its even more trivial than even the quick install makes out. I decided to use the newer gitolite3 package from wheezy-backports instead of the gitolite (v2) package from Wheezy. I already had backports enabled so this was just:
# apt-get install gitolite3/wheezy-backports
I accepted the defaults and gave it the public half of the ssh key which I had created to be used as the gitolite admin key. By default this added a user gitolite3 with a home directory of /var/lib/gitolite3. Since they username forms part of the URL used to access the repositories I want it to include the 3, so I edited /etc/passwd, /etc/groups, /etc/shadow and /etc/gshadow to say just gitolite but leaving the home directory as gitolite3. Now I could clone the gitolite-admin repo and begin to configure things. Add my user This was simple as dropping the public half into the gitolite-admin repo as keydir/ijc.pub, then git add, commit and push. Setup vhosting Between the gitolite docs and Julius' blog post I had a pretty good idea what I wanted to do here. I wasn't too worried about making the vhost transparent from the developer's (ssh:// URL) point of view, just from the gitweb and git clone side. So I decided to adapt things to use a simple $VHOST/$REPO.git schema. I created /var/lib/gitolite3/local/lib/Gitolite/Triggers/VHost.pm containing:
package Gitolite::Triggers::VHost;
use strict;
use warnings;
use File::Slurp qw(read_file write_file);
sub post_compile  
    my %vhost = ();
    my @projlist = read_file("$ENV HOME /projects.list");
    for my $proj (sort @projlist)  
        $proj =~ m,^([^/\.]*\.[^/]*)/(.*)$, or next;
        my ($host, $repo) = ($1,$2);
        $vhost $host  //= [];
        push @ $vhost $host  => $repo;
     
    for my $v (keys %vhost)  
        write_file("$ENV HOME /projects.$v.list",
                     atomic => 1  , join("\n",@ $vhost $v ));
     
 
1;
I then edited /var/lib/gitolite3/.gitolite.rc and ensured it contained:
LOCAL_CODE                =>  "$ENV HOME /local",
POST_COMPILE => [ 'VHost::post_compile', ],
(The first I had to uncomment, the second to add). All this trigger does is take the global projects.list, in which gitolite will list any repo which is configured to be accessible via gitweb, and split it into several vhost specific lists. Create first repository Now that the basics were in place I could create my first repository (for hosting qcontrol). In the gitolite-admin repository I edited conf/gitolite.conf and added:
repo hellion.org.uk/qcontrol
    RW+     =   ijc
After adding, committing and pushing I now have "/var/lib/gitolite3/projects.list" containing:
hellion.org.uk/qcontrol.git
testing.git
(the testing.git repository is configured by default) and /var/lib/gitolite3/projects.hellion.org.uk.list containing just:
qcontrol.git
For cloning the URL is:
gitolite@$ VPSNAME :hellion.org.uk/qcontrol.git
which is rather verbose ($ VPSNAME is quote long in my case too), so to simplify things I added to my .ssh/config:
Host gitolite
Hostname $ VPSNAME 
User gitolite
IdentityFile ~/.ssh/id_rsa_gitolite
so I can instead use:
gitolite:hellion.org.uk/qcontrol.git
which is a bit less of a mouthful and almost readable. Configure gitweb (http:// URL browsing) Following the documentation's advice I edited /var/lib/gitolite3/.gitolite.rc to set:
UMASK                           =>  0027,
and then:
$ chmod -R g+rX /var/lib/gitolite3/repositories/*
Which arranges that members of the gitolite group can read anything under /var/lib/gitolite3/repositories/*. Then:
# adduser www-data gitolite
This adds the user www-data to the gitolite group so it can take advantage of those relaxed permissions. I'm not super happy about this but since gitweb runs as www-data:www-data this seems to be the recommended way of doing things. I'm consoling myself with the fact that I don't plan on hosting anything sensitive... I also arranged things such that members of the groups can only list the contents of directories from the vhost directory down by setting g=x not g=rx on higher level directories. Potentially sensitive files do not have group permissions at all either. Next I created /etc/apache2/gitolite-gitweb.conf:
die unless $ENV GIT_PROJECT_ROOT ;
$ENV GIT_PROJECT_ROOT  =~ m,^.*/([^/]+)$,;
our $gitolite_vhost = $1;
our $projectroot = $ENV GIT_PROJECT_ROOT ;
our $projects_list = "/var/lib/gitolite3/projects.$ gitolite_vhost .list";
our @git_base_url_list = ("http://git.$ gitolite_vhost ");
This extracts the vhost name from $ GIT_PROJECT_ROOT (it must be the last element) and uses it to select the appropriate vhost specific projects.list. Then I added a new vhost to my apache2 configuration:
<VirtualHost 212.110.190.137:80 [2001:41c8:1:628a::89]:80>
        ServerName git.hellion.org.uk
        SetEnv GIT_PROJECT_ROOT /var/lib/gitolite3/repositories/hellion.org.uk
        SetEnv GITWEB_CONFIG /etc/apache2/gitolite-gitweb.conf
        Alias /static /usr/share/gitweb/static
        ScriptAlias / /usr/share/gitweb/gitweb.cgi/
</VirtualHost>
This configures git.hellion.org.uk (don't forget to update DNS too) and sets the appropriate environment variables to find the custom gitolite-gitweb.conf and the project root. Next I edited /var/lib/gitolite3/.gitolite.rc again to set:
GIT_CONFIG_KEYS                 => 'gitweb\.(owner description category)',
Now I can edit the repo configuration to be:
repo hellion.org.uk/qcontrol
    owner   =   Ian Campbell
    desc    =   qcontrol
    RW+     =   ijc
    R       =   gitweb
That R permission for the gitweb pseudo-user causes the repo to be listed in the global projects.list and the trigger which we've added causes it to be listed in projects.hellion.org.uk.list, which is where our custom gitolite-gitweb.conf will look. Setting GIT_CONFIG_KEYS allows those options (owner and desc are syntactic sugar for two of them) to be set here and propagated to the actual repo. Configure git-http-backend (http:// URL cloning) After all that this was pretty simple. I just added this to my vhost before the ScriptAlias / /usr/share/gitweb/gitweb.cgi/ line:
        ScriptAliasMatch \
                "(?x)^/(.*/(HEAD   \
                                info/refs   \
                                objects/(info/[^/]+   \
                                         [0-9a-f] 2 /[0-9a-f] 38    \
                                         pack/pack-[0-9a-f] 40 \.(pack idx))   \
                                git-(upload receive)-pack))$" \
                /usr/lib/git-core/git-http-backend/$1
This (which I stole straight from the git-http-backend(1) manpage causes anything which git-http-backend should deal with to be sent there and everything else to be sent to gitweb. Having done that access is enabled by editing the repo configuration one last time to be:
repo hellion.org.uk/qcontrol
    owner   =   Ian Campbell
    desc    =   qcontrol
    RW+     =   ijc
    R       =   gitweb daemon
Adding R permissions for daemon causes gitolite to drop a stamp file in the repository which tells git-http-backend that it should export it. Configure git daemon (git:// URL cloning) I actually didn't bother with this, git http-backend supports the smart HTTP mode which should be as efficient as the git protocol. Given that I couldn't see any reason to run another network facing daemon on my VPS. FWIW it looks like vhosting could have been achieved by using the --interpolated-path option. Conclusion There's quite a few moving parts, but they all seems to fit together quite nicely. In the end apart from adding www-data to the gitolite group I'm pretty happy with how things ended up.

10 May 2015

Ian Campbell: Qcontrol Homepage Moved to www.hellion.org.uk/qcontrol

Since gitorious has now shutdown I've (finally!) moved the qcontrol homepage to: http://www.hellion.org.uk/qcontrol. Source can now be found at http://git.hellion.org.uk/qcontrol.git.

27 January 2015

Thomas Goirand: OpenStack debian image available from cdimage.debian.org

About a year and a half after I started writing the openstack-debian-images package, I m very happy to announce to everyone that, thanks to Steve McIntyre s help, the official OpenStack Debian image is now generated at the same time as the official Debian CD ISO images. If you are a cloud user, if you use OpenStack on a private cloud, or if you are a public cloud operator, then you may want to download the weekly build of the OpenStack image from here: http://cdimage.debian.org/cdimage/openstack/testing/ Note that for the moment, there s only the amd64 arch available, but I don t think this is a problem: so far, I haven t found any public cloud provider offering anything else than Intel 64 bits arch. Maybe this will change over the course of this year, and we will need arm64, but this can be added later on. Now, for later plans: I still have 2 bugs to fix on the openstack-debian-images package (the default 1GB size is now just a bit too small for Jessie, and the script exits with zero in case of error), but nothing that prevents its use right now. I don t think it will be a problem for the release team to accept these small changes before Jessie is out. When generating the image, Steve also wants to generate a sources.tar.gz containing all the source packages that we include on the image. He already has the script (which is used as a hook script when running the build-openstack-debian-image script), and I am planning to add it as a documentation in /usr/share/doc/openstack-debian-images. Last, probably it would be a good idea to install grub-xen, just as Ian Campbell suggested to make it possible for this image to run in AWS or other Xen based clouds. I would need to be able to test this though. If you can contribute with this kind of test, please get in touch. Feel free to play with all of this, and customize your Jessie images if you need to. The script is (on purpose) very small (around 400 lines of shell script) and easy to understand (no function, it s mostly linear from top to bottom of the file), so it is also very easy to hack, plus it has a convenient hook script facility where you can do all sorts of things (copying files, apt-get install stuff, running things in the chroot, etc.). Again, thanks so much to Steve for working on using the script during the CD builds. This feels me with joy that Debian finally has official images for OpenStack.

18 January 2015

Ian Campbell: Using Grub 2 as a bootloader for Xen PV guests on Debian Jessie

I recently wrote a blog post on using grub 2 as a Xen PV bootloader for work. See Using Grub 2 as a bootloader for Xen PV guests over on https://blog.xenproject.org. Rather than repeat the whole thing here I'll just briefly cover the stuff which is of interest for Debian users (if you want all full background and the stuff on building grub from source etc then see the original post). TL;DR: With Jessie, install grub-xen-host in your domain 0 and grub-xen in your PV guests then in your guest configuration, depending on whether you want a 32- or 64-bit PV guest write either:
kernel = "/usr/lib/grub-xen/grub-i386-xen.bin"
or
kernel = "/usr/lib/grub-xen/grub-x86_64-xen.bin"
(instead of bootloader = ... or other kernel = ..., also omit ramdisk = ... and any command line related stuff (e.g. root = ..., extra = ..., cmdline = ... ) and your guests will boot using Grub 2, much like on native. In slightly more detail: The forthcoming Debian 8.0 (Jessie) release will contain support for both host and guest pvgrub2. This was added in version 2.02~beta2-17 of the package (bits were present before then, but -17 ties it all together). The package grub-xen-host contains grub binaries configured for the host, these will attempt to chainload an in-guest grub image (following the Xen x86 PV Bootloader Protocol) and fall back to searching for a grub.cfg in the guest filesystems. grub-xen-host is Recommended by the Xen meta-packages in Debian or can be installed by hand. The package grub-xen-bin contains the grub binaries for both the i386-xen and x86_64-xen platforms, while the grub-xen package integrates this into the running system by providing the actual pvgrub2 image (i.e. running grub-install at the appropriate times to create an image tailored to the system) and integration with the kernel packages (i.e. running update-grub at the right times), so it is the grub-xen which should be installed in Debian guests. At this time the grub-xen package is not installed in a guest automatically so it will need to be done manually (something which perhaps could be addressed for Stretch).

2 September 2014

Ian Campbell: Becoming A Debian Developer

After becoming a DM at Debconf12 in Managua, Nicaragua and entering the NM queue during Debconf13 in Vaumarcus, Switzerland I received the mail about 24 hours too late to officially become a DD during Debconf14 in Portland, USA. Nevertheless it was a very pleasant surprise to find the mail in my INBOX this morning confirming that my account had been created and that I was officially ijc@debian.org. Thanks to everyone who helped/encouraged me along the way! I don't imagine much will change in practice, I intend to remain involved in the kernel and Debian Installer efforts as well as continuing to contribute to the Xen packaging and to maintain qcontrol (both in Debian and upstream) and sunxi-tools. I suppose I also still maintain ivtv-utils and xserver-xorg-video-ivtv but they require so little in the way of updates that I'm not sure they count.

29 July 2014

Ian Campbell: Debian Installer ARM64 Dailies

It's taken a while but all of the pieces are finally in place to run successfully through Debian Installer on ARM64 using the Debian ARM64 port. So I'm now running nightly builds locally and uploading them to http://www.hellion.org.uk/debian/didaily/arm64/. If you have CACert in your CA roots then you might prefer the slightly more secure version. Hopefully before too long I can arrange to have them building on one of the project machines and uploaded to somewhere a little more formal like people.d.o or even the regular Debian Installer dailies site. This will have to do for now though. Warning The arm64 port is currently hosted on Debian Ports which only supports the unstable "sid" distribution. This means that installation can be a bit of a moving target and sometimes fails to download various installer components or installation packages. Mostly it's just a case of waiting for the buildd and/or archive to catch up. You have been warned! Installing in a Xen guest If you are lucky enough to have access to some 64-bit ARM hardware (such as the APM X-Gene, see wiki.xen.org for setup instructions) then installing Debian as a guest is pretty straightforward. I suppose if you had lots of time (and I do mean lots) you could also install under Xen running on the Foundation or Fast Model. I wouldn't recommend it though. First download the installer kernel and ramdisk onto your dom0 filesystem (e.g. to /root/didaily/arm64). Second create a suitable guest config file such as:
name = "debian-installer"
disk = ["phy:/dev/LVM/debian,xvda,rw"]
vif = [ '' ] 
memory = 512
kernel = "/root/didaily/arm64/vmlinuz"
ramdisk= "/root/didaily/arm64/initrd.gz"
extra = "console=hvc0 -- "
In this example I'm installing to a raw logical volume /dev/LVM/debian. You might also want to use randmac to generate a permanent MAC address for the Ethernet device (specified as vif = ['mac=xx:xx:xx:xx:xx:xx']). Once that is done you can start the guest with:
xl create -c cfg
From here you'll be in the installer and things carry on as usual. You'll need to manually point it to ftp.debian-ports.org as the mirror, or you can preseed by appending to the extra line in the cfg like so:
mirror/country=manual mirror/http/hostname=ftp.debian-ports.org mirror/http/directory=/debian
Apart from that there will be a warning about not knowing how to setup the bootloader but that is normal for now. Installing in Qemu To do this you will need a version of http://www.qemu.org which supports qemu-system-aarch64. The latest release doesn't yet so I've been using v2.1.0-rc3 (it seems upstream are now up to -rc5). Once qemu is built and installed and the installer kernel and ramdisk have been downloaded to $DI you can start with:
qemu-system-aarch64 -M virt -cpu cortex-a57 \
    -kernel $DI/vmlinuz -initrd $DI/initrd.gz \
    -append "console=ttyAMA0 -- " \
    -serial stdio -nographic --monitor none \
    -drive file=rootfs.qcow2,if=none,id=blk,format=qcow2 -device virtio-blk-device,drive=blk \
    -net user,vlan=0 -device virtio-net-device,vlan=0
That's using a qcow2 image for the rootfs, I think I created it with something like:
qemu-img create -f qcow2 rootfs.qcow2 4G
Once started installation proceeds much like normal. As with Xen you will need to either point it at the debian-ports archive by hand or preseed by adding to the -append line and the warning about no bootloader configuration is expected. Installing on real hardware Someone should probably try this ;-).

21 July 2014

Ian Campbell: sunxi-tools now available in Debian

I've recently packaged the sunxi tools for Debian. These are a set of tools produce by the Linux Sunxi project for working with the Allwinner "sunxi" family of processors. See the package page for details. Thanks to Steve McIntyre for sponsoring the initial upload. The most interesting component of the package are the tools for working with the Allwinner processors' FEL mode. This is a low-level processor mode which implements a simple USB protocol allowing for initial programming of the device and recovery which can be entered on boot (usually be pressing a special 'FEL button' somewhere on the device). It is thanks to FEL mode that most sunxi based devices are pretty much unbrickable. The most common use of FEL is to boot over USB. In the Debian package the fel and usb-boot tools are named sunxi-fel and sunxi-usb-boot respectively but otherwise can be used in the normal way described on the sunxi wiki pages. One enhancement I made to the Debian version of usb-boot is to integrate with the u-boot packages to allow you to easily FEL boot any sunxi platform supported by the Debian packaged version of u-boot (currently only Cubietruck, more to come I hope). To make this work we take advantage of Multiarch to install the armhf version of u-boot (unless your host is already armhf of course, in which case just install the u-boot package):
# dpkg --add-architecture armhf
# apt-get update
# apt-get install u-boot:armhf
Reading package lists... Done
Building dependency tree       
Reading state information... Done
The following NEW packages will be installed:
  u-boot:armhf
0 upgraded, 1 newly installed, 0 to remove and 1960 not upgraded.
Need to get 0 B/546 kB of archives.
After this operation, 8,676 kB of additional disk space will be used.
Retrieving bug reports... Done
Parsing Found/Fixed information... Done
Selecting previously unselected package u-boot:armhf.
(Reading database ... 309234 files and directories currently installed.)
Preparing to unpack .../u-boot_2014.04+dfsg1-1_armhf.deb ...
Unpacking u-boot:armhf (2014.04+dfsg1-1) ...
Setting up u-boot:armhf (2014.04+dfsg1-1) ...
With that done FEL booting a cubietruck is as simple as starting the board in FEL mode (by holding down the FEL button when powering on) and then:
# sunxi-usb-boot Cubietruck -
fel write 0x2000 /usr/lib/u-boot/Cubietruck_FEL/u-boot-spl.bin
fel exe 0x2000
fel write 0x4a000000 /usr/lib/u-boot/Cubietruck_FEL/u-boot.bin
fel write 0x41000000 /usr/share/sunxi-tools//ramboot.scr
fel exe 0x4a000000
Which should result in something like this on the Cubietruck's serial console:
U-Boot SPL 2014.04 (Jun 16 2014 - 05:31:24)
DRAM: 2048 MiB
U-Boot 2014.04 (Jun 16 2014 - 05:30:47) Allwinner Technology
CPU:   Allwinner A20 (SUN7I)
DRAM:  2 GiB
MMC:   SUNXI SD/MMC: 0
In:    serial
Out:   serial
Err:   serial
SCSI:  SUNXI SCSI INIT
Target spinup took 0 ms.
AHCI 0001.0100 32 slots 1 ports 3 Gbps 0x1 impl SATA mode
flags: ncq stag pm led clo only pmp pio slum part ccc apst 
Net:   dwmac.1c50000
Hit any key to stop autoboot:  0 
sun7i# 
As more platforms become supported by the u-boot packages you should be able to find them in /usr/lib/u-boot/*_FEL. There is one minor inconvenience which is the need to run sunxi-usb-boot as root in order to access the FEL USB device. This is easily resolved by creating /etc/udev/rules.d/sunxi-fel.rules containing either:
SUBSYSTEMS=="usb", ATTR idVendor =="1f3a", ATTR idProduct =="efe8", OWNER="myuser"
or
SUBSYSTEMS=="usb", ATTR idVendor =="1f3a", ATTR idProduct =="efe8", GROUP="mygroup"
To enable access for myuser or mygroup respectively. Once you have created the rules file then to enable:
# udevadm control --reload-rules
As well as the FEL mode tools the packages also contain a FEX (de)compiler. FEX is Allwinner's own hardware description language and is used with their Android SDK kernels and the fork of that kernel maintained by the linux-sunxi project. Debian's kernels follow mainline and therefore use Device Tree.

6 July 2014

Ian Campbell: Setting absolute date based Amazon S3 bucket lifecycles with curl

For my local backup regimen I use flexbackup to create a full backup twice a year and differential/incremental backups on a weekly/monthly basis. I then upload these to a new amazon S3 bucket for each half year (so each bucket corresponds to the a full backup plus the associated differentials and incrementals). I then set the bucket's lifecycle to archive to glacier (cheaper offline storage) from the month after that half year has ended (reducing costs) and to delete it a year after the half ends. It used to be possible to do this via the S3 web interface but the absolute date based options seem to have been removed in favour of time since last update, which is not what I want. However the UI will still display such lifecycles if they are configured and directs you to the REST API to set them up. I had a look around but couldn't any existing CLI tools to do this directly but I figured it must be possible with curl. A little bit of reading later I found that it was possible but it involved some faff calculating signatures etc. Luckily EricW has written Amazon S3 Authentication Tool for Curl (AKA s3curl) which automates the majority of that faff. The tool is "New BSD" licensed according to that page or Apache 2.0 license according to the included LICENSE file and code comments. Setup Following the included README setup ~/.s3curl containing your id and secret key (I called mine personal which I then use below). Getting the existing lifecycle Retrieving an existing lifecycle is pretty easy. For the bucket which I used for the first half of 2014:
$ s3curl --id=personal -- --silent http://$bucket.s3.amazonaws.com/?lifecycle   xmllint --format -
<?xml version="1.0" encoding="UTF-8"?>
<LifecycleConfiguration xmlns="http://s3.amazonaws.com/doc/2006-03-01/">
  <Rule>
    <ID>Archive and Expire</ID>
    <Prefix/>
    <Status>Enabled</Status>
    <Transition>
      <Date>2014-07-31T00:00:00.000Z</Date>
      <StorageClass>GLACIER</StorageClass>
    </Transition>
    <Expiration>
      <Date>2015-01-31T00:00:00.000Z</Date>
    </Expiration>
  </Rule>
</LifecycleConfiguration>
See GET Bucket Lifecycle for details of the XML. Setting a new lifecycle The desired configuration needs to be written to a file. For example to set the lifecycle for the bucket I'm going to use for the second half of 2014:
$ cat s3.lifecycle
<LifecycleConfiguration>
  <Rule>
    <ID>Archive and Expire</ID>
    <Prefix/>
    <Status>Enabled</Status>
    <Transition>
      <Date>2015-01-31T00:00:00.000Z</Date>
      <StorageClass>GLACIER</StorageClass>
    </Transition>
    <Expiration>
      <Date>2015-07-31T00:00:00.000Z</Date>
    </Expiration>
  </Rule>
</LifecycleConfiguration>
$ s3curl --id=personal --put s3.lifecycle --calculateContentMd5 -- http://$bucket.s3.amazonaws.com/?lifecycle
See PUT Bucket Lifecycle for details of the XML.

11 April 2014

Ian Campbell: qcontrol 0.5.3

Update: Closely followed by 0.5.4 to fix an embarassing brown paper bag bug: Get it from gitorious or http://www.hellion.org.uk/qcontrol/releases/0.5.4/. I've just released qcontrol 0.5.3. Changes since the last release: Get it from gitorious or http://www.hellion.org.uk/qcontrol/releases/0.5.3/. The Debian package will be uploaded shortly.

26 December 2013

Ian Campbell: Running ARM Grub on U-boot on Qemu

At the Mini-debconf in Cambridge back in November there was an ARM Sprint (which Hector wrote up as a Bits from ARM porters mail). During this there a brief discussion about using GRUB as a standard bootloader, particularly for ARM server devices. This has the advantage of providing a more "normal" (which in practice means "x86 server-like") as well as flexible solution compared with the existing flash-kernel tool which is often used on ARM. On ARMv7 devices this will more than likely involve chain loading from the U-Boot supplied by the manufacturer. For test and development it would be useful to be able to set up a similar configuration using Qemu. Cross-compilers Although this can be built and run on an ARM system I am using a cross compiler here. I'm using gcc-linaro-arm-linux-gnueabihf-4.8-2013.08_linux from Linaro, which can be downloaded from the linaro-toolchain-binaries page on Launchpad. (It looks like 2013.10 is the latest available right now, I can't see any reason why that wouldn't be fine). Once the cross-compiler has been downloaded unpack it somewhere, I will refer to the resulting gcc-linaro-arm-linux-gnueabihf-4.8-2013.08_linux directory as $CROSSROOT. Make sure $CROSSROOT/bin (which contains arm-linux-gnueabihf-gcc etc) is in your $PATH. Qemu I'm using the version packaged in Jessie, which is 1.7.0+dfsg-2. We need both qemu-system-arm for running the final system and qemu-user to run some of the tools. I'd previously tried an older version of qemu (1.6.x?) and had some troubles, although they may have been of my own making... Das U-boot for Qemu First thing to do is to build a suitable u-boot for use in the qemu emulated environment. Since we need to make some configuration changes we need to build from scratch. Start by cloning the upstream git tree:
$ git clone git://git.denx.de/u-boot.git
$ cd u-boot
I am working on top of e03c76c30342 "powerpc/mpc85xx: Update CONFIG_SYS_FSL_TBCLK_DIV for T1040" dated Wed Dec 11 12:49:13 2013 +0530. We are going to use the Versatile Express Cortex-A9 u-boot but first we need to enable some additional configuration options: You can add all these to include/configs/vexpress_common.h:
#define CONFIG_API
#define CONFIG_SYS_MMC_MAX_DEVICE   1
#define CONFIG_CMD_EXT2
#define CONFIG_CMD_ECHO
Or you can apply the patch which I sent upstream:
$ wget -O - http://patchwork.ozlabs.org/patch/304786/raw   git apply --index
$ git commit -m "Additional options for grub-on-uboot"
Finally we can build u-boot:
$ make CROSS_COMPILE=arm-linux-gnueabihf- vexpress_ca9x4_config
$ make CROSS_COMPILE=arm-linux-gnueabihf-
The result is a u-boot binary which we can load with qemu. GRUB for ARM Next we can build grub. Start by cloning the upstream git tree:
$ git clone git://git.sv.gnu.org/grub.git
$ cd grub
By default grub is built for systems which have RAM at address 0x00000000. However the Versatile Express platform which we are targeting has RAM starting from 0x60000000 so we need to make a couple of modifications. First in grub-core/Makefile.core.def we need to change arm_uboot_ldflags, from:
-Wl,-Ttext=0x08000000
to
-Wl,-Ttext=0x68000000
and second we need make a similar change to include/grub/offsets.h changing GRUB_KERNEL_ARM_UBOOT_LINK_ADDR from 0x08000000 to 0x68000000. Now we are ready to build grub:
$ ./autogen.sh
$ ./configure --host arm-linux-gnueabihf
$ make
Now we need to build the final grub "kernel" image, normally this would be taken care of by grub-install but because we are cross building grub we cannot use this and have to use grub-mkimage directly. However the version we have just built is for the ARM target and not for host we are building things on. I've not yet figured out how to build grub for ARM while building the tools for the host system (I'm sure it is possible somehow...). Luckily we can use qemu to run the ARM binary:
$ cat load.cfg
set prefix=(hd0)
$ qemu-arm -r 3.11 -L $CROSSROOT/arm-linux-gnueabihf/libc \
    ./grub-mkimage -c load.cfg -O arm-uboot -o core.img -d grub-core/ \
    fat ext2 probe terminal scsi ls linux elf msdospart normal help echo
Here we create load.cfg which is the setup script which will be built into the grub kernel, our version just sets the root device so that grub can find the rest of its configuration. Then we use qemu-arm-static to invoke grub-mkimage. The "-r 3.11" option tells qemu to pretend to be a 3.11 kernel (which is required by the libc used by our cross compiler, without this you will get a fatal: kernel too old message) and "-L $CROSSROOT/..." tells it where to find the basic libraries, such as the dynamic linker (luckily grub-mkimage doesn't need much in the way of libraries so we don't need a full cross library environment. The grub-mkimage command passes in the load.cfg and requests an output kernel targeting arm-uboot, core.img is the output file and the modules are in grub-core (because we didn't actually install grub in the target system, normally these would be found in /boot/grub). Lastly we pass in a list of default modules to build into the kernel, including filesystem drivers (fat, ext2), disk drivers (scsi), partition handling (msdos), loaders (linux, elf), the menu system (normal) and various other bits and bobs. So after all the we now have our grub kernel in core.img. Putting it all together Before we can launch qemu we need to create various disk images. Firstly we need some images for the 2 64M flash devices:
$ dd if=/dev/zero of=pflash0.img bs=1M count=64
$ dd if=/dev/zero of=pflash1.img bs=1M count=64
We will initialise these later from the u-boot command line. Secondly we need an image for the root filesystem on an MMC device. I'm using a FAT formatted image here simply for the convenience of using mtools to update the images during development.
$ dd if=/dev/zero of=mmc.img bs=1M count=16
$ /sbin/mkfs.vfat mmc.img
Thirdly we need a kernel, device tree and grub configuration on our root filesystem. For the first two I extracted them from the standard armmp kernel flavour package. I used the backports.org version 3.11-0.bpo.2-armmp version and extracted /boot/vmlinuz-3.11-0.bpo.2-armmp as vmlinuz and /usr/lib/linux-image-3.11-0.bpo.2-armmp/vexpress-v2p-ca9.dtb as dtb. Then I hand coded a simple grub.cfg:
menuentry 'Linux'  
        echo "Loading vmlinuz"
        set root='hd0'
        linux /vmlinuz console=ttyAMA0 ro debug
        devicetree /dtb
 
In a real system the kernel and dtb would be provided by the kernel packages and grub.cfg would be generated by update-grub. Now that we have all the bits we need copy them into the root of mmc.img. Since we are using a FAT formatted image we can use mcopy from the mtools package.
$ mcopy -v -o -n -i mmc.img core.img dtb vmlinuz grub.cfg ::
Finally after all that we can run qemu passing it our u-boot binary and the mmc and flash images and requesting a Cortex-A9 based Versatile Express system with 1GB of RAM:
$ qemu-system-arm -M vexpress-a9 -kernel u-boot -m 1024m -sd mmc.img \
    -nographic -pflash pflash0.img -pflash pflash1.img
Then at the VExpress# prompt we can configure the default bootcmd to load grub and save the environment to the flash images. The backslash escapes (\$ and \;) should be included as written here so that e.g. the variables are only evaluated when bootcmd is evaluated and not immediately when setting bootcmd and the bootm is set as part of bootcmd instead of executed immediately:
VExpress# setenv bootcmd fatload mmc 0:0 \$ loadaddr  core.img \; bootm \$ loadaddr 
VExpress# saveenv
Now whenever we boot the system it will automatically load boot grub from the mmc and launch it. Grub in turn will load the Linux binary and DTB and launch those. I haven't actually configure Linux with a root filesystem here so it will eventually panic after failing to find root. Future work The most pressing issue is the hard coded load address built in to the grub kernel image. This is something which needs to be discussed with the upstream grub maintainers as well as the Debian package maintainers. Now that the ARM packages have hit Debian (in experimental in the 2.02~beta2-1 package) I also plan to start looking at debian-installer integration as well as updating flash-kernel to setup the chain load of grub instead of loading a kernel directly.

5 October 2013

Ian Campbell: qcontrol: support for x86 devices

Until now qcontrol has mostly only supported only ARM (kirkwood) based devices (upstream has a configuration example for the HP Media Vault too, but I don't know if it is used). Debian bug #712191 asked for at least some basic support for x86 based devices. The mostly don't use the QNAP PIC used on the ARM devices so much of the qcontrol functionality is irrelevant but at least some of them do have a compatible A125 LCD. Unfortunately I don't have any x86 QNAP devices and I've been unable to figure out a way to detect that we are running on an QNAP box as opposed to any random x86 box so I've not been able to implement the hardware auto-detection used on ARM to configure qcontrol for the appropriate device at installation time. I don't want to include a default configuration which tries to drive an LCD on some random serial port since I have no way of knowing what will be on the other end or what the device might do if sent random bytes of the LCD control protocol. So I've implemented debconf prompting for the device type which is used only if auto-detection fails, so it shouldn't change anything for existing users on ARM. You can find this in version 0.5.2-3~exp1 in experimental (see DebianExperimental on the Debian wiki for how to use experimental). Currently the package only knows about the existing set of ARM platforms and a default "unknown" platform, which has an empty configuration. If you have a QNAP device (ARM or x86) which is not currently supported then please install the package from experimental and tailor /etc/qcontrol.conf for you platform (e.g. by uncommenting the a125 support and giving it the correct serial port). Then send me the result along with the device's name. If the device is an ARM one please also send me the contents of /proc/cpuinfo too so I can implement auto-detection. If you know how to detect a particular x86 QNAP device programmatically (via DMI decoding, PCI probing, sysfs etc, but make sure it is 100% safe on non-QNAP platforms) then please do let me know.

29 September 2013

Ian Campbell: qcontrol 0.5.2

I've just released qcontrol 0.5.2. Changes since the last release: Get it from gitorious or http://www.hellion.org.uk/qcontrol/releases/0.5.2/. The Debian package will be uploaded shortly.

12 August 2013

Ian Campbell: Heading to DebConf 13

Going to DebConf13! Seems like DebConf 13 is in full swing, I'm not heading over until tomorrow because I spent the weekend at the Bloodstock Festival. As sad as I am to miss the Cheese and Wine party tonight, having seen a dozen or so excellent bands since Friday, lubricated by a few gallons of Hobgoblin, and rounded off by Exodus, Anthrax & Slayer last night I think I made the right call! So I got home around lunchtime today, unpacked my rucksack, scrubbed myself clean, repacked again for Switzerland (no tent this time). Next up is a curry with my parents tonight and then catching the Eurostar tomorrow morning, I'll have plenty of time for hacking on my cubieboard2 on the train and finally arrive in Vaumarcus tomorrow evening. See everyone soon!

24 July 2013

Jan Wagner: Frag is bigger than frame.

Since 2 weeks I'm faced with some problems at a Xen hosting environment based on Debian wheezy. The issue is, that one specific domU is regularly failing network. The investigations showed, that no network packets from and to this system are seen on the the network interface in the domU and on the bridge interface in the dom0.
The funny part is, that the firewall on the dom0 now is logging packet rejects on the interface of the effected system and one interface of an other specific domU for the destination address. One pack and rejects on both interfaces ... really strange!
Shutting down the domU and recreating them doesn't help. Even if restarting other domUs, those are also effected by now. The only way to fix is to reboot the entire dom0. After several investigations I stumpled upon the following in the dmesg:
vif-xm116: Frag is bigger than frame.
vif-xm116: fatal error; disabling device
xenbr0: port 4(vif-xm116) entering disabled state
A quick search at the famouse search engine revealed, there seems something bigger. Even a Debian bug is open since February. Unfortunately this problem is still unfixed in wheezy and squeeze.
But ... there is hope in sight! Ian Campbell provided packages based on top of the latest kernel packages with a call for testing. Installing them seems to fix the issue in my environment. So we just have to hope this will get fixed soon, as this regression is really annoying. Thanks to all who make this happen in advance!

3 July 2013

Ian Campbell: Emesinae -- Yet Another Bug Tracker

Quite a while ago at a Xen hackathon (I think the Cambridge one in 2011, has it really been 2 years?) the topic of bug tracking came up. The developers who were present (myself included) expressed a general dislike for web based bug trackers, and in particular the existing bugzilla wasn't working for us for a variety of reasons (primarily lack of resource for care and general tending of it). They also liked the existing work flow based around mails to the Xen mailing lists, there was a feeling that this fits well with the demographics of the bugs which get reported to Xen: a sizable number of the issues are configuration errors or misunderstandings which can usually quickly be dealt with through a small email thread (followed by a request to please update the wiki). The project also gets quite a few bug reports which are initially "unactionable" due to of lack logs or a coherent description, in these cases a little bit of back and forth can quickly determine whether the reporter is going to provide the necessary additional information (this is something we are also trying to fix with clearer guidance and an ongoing effort to provide a reportbug-like tool for Xen). However there were concerns that bigger issues which couldn't be dealt with quickly were falling through the cracks. We kicked around a few ideas for how a bug tracker that met our needs might work and that was mostly that. Since then I've kicked the ideas around in my head a bit and searched for an existing system which would fit what was required. In the end I didn't find anything which quite fitted the bill and about six months ago I was looking for an interesting hacking project (perhaps something a bit different to my day job, hypervisor and kernel hacking) so I decided to bite the bullet, dust of my rusty Perl skills and hack something together. Yes, that's right, I've written Yet Another Bug Tracker(tm). I confess I feel a bit dirty for doing so. I've taken a fair bit of inspiration from debbugs (the Debian bug tracker) but I've turned the concept a little on its head. Debbugs is effectively instantiating a new mailing list for each bug report (each NNNNNN@bugs.debian.org can be thought of as a mailing list plus some additional bug specific metadata). Instead I implemented a model which takes an existing mailing list and acts as a list archive which provides a mechanism to track individual threads (or subthreads) as bugs (each bug is effectively a root Message-Id plus a little bit of metadata). In common with debbugs bugs are created and subsequently manipulated by sending mail to a special control@ address. Commands are available to create bugs as well as to graft and prune subthreads onto existing bugs (to cope with people who break threading or offtopic subthreads etc). There is also a read-only web interface for browsing the bugs. Internally the system is subscribed to the list and records details of each message and their relationships (e.g. References headers etc) in a sqlite database. A set of CGI scripts (using the Perl CGI module) provide an interface to browse bugs. Since the system tracks bugs based on mailing list threads I've named it Emesinae which is a "thread-legged bug" (yes, I spent longer than is strictly necessary browsing entomological websites). I've made the code available on gitorious under a GPLv2 license, see https://gitorious.org/emesinae. I announced an alpha instance of Emesinae back in May which tracks the xen-devel mailing list. You can find the bug tracker at http://bugs.xenproject.org/xen/. Since then I've been slowly fleshing out some more useful features (such as tagging of affected branches). It's not seen a great deal of uptake from the Xen developers yet but there are already some bugs being tracked and I'm hopeful that it will prove useful in the long run. In any case it was a fun hacking project for a few rainy evenings (and a couple more train and plane journeys).

12 May 2013

Ian Campbell: qcontrol 0.5.1

I've just released qcontrol 0.5.1. Changes since the last release: I also put together a very basic homepage. Get it from gitorious or http://www.hellion.org.uk/qcontrol/releases/0.5.1/. The Debian package will be uploaded shortly.

Next.