Search Results: "Andy Simpkins"

27 August 2023

Steve McIntyre: We're back!

It's August Bank Holiday Weekend, we're in Cambridge. It must be the Debian UK OMGWTFBBQ!. We're about halfway through, and we've already polished off lots and lots of good food and beer. Lars is making pancakes as I write this, :-) We had an awesome game of Mao last night. People are having fun! Many thanks to a number of awesome friendly people for again sponsoring the important refreshments for the weekend. It's hungry/thirsty work celebrating like this!

21 April 2022

Andy Simpkins: Firmware and Debian

There has been a flurry of activity on the Debian mailing lists ever since Steve McIntyre raised the issue of including non-free firmware as part of official Debian installation images. Firstly I should point out that I am in complete agreement with Steve s proposal to include non-free firmware as part of an installation image. Likewise I think that we should have a separate archive section for firmware. Because without doing so it will soon become almost impossible to install onto any new hardware. However, as always the issue is more nuanced than a first glance would suggest. Lets start by defining what is firmware? Firmware is any software that runs outside the orchestration of the operating system. Typically firmware will be executed on a processor(s) separate from the processor(s) running the OS, but this does not need to be the case. As Debian we are content that our systems can operate using fully free and open source software and firmware. We can install our OS without needing any non-free firmware. This is an illusion! Each and every PC platform contains non-free firmware It may be possible to run free firmware on some Graphics controllers, Wi-Fi chip-sets, or Ethernet cards and we can (and perhaps should) choose to spend our money on systems where this is the case. When installing a new system we might still be forced to hold our nose and install with non-free firmware on the peripheral before we are able to upgrade it to FLOSS firmware later if this is exists or is even possible to do so. However after the installation we are running a full FLOSS system in terms of software and firmware. We all (almost without exception) are running propitiatory firmware whether we like it or not. Even after carefully selecting graphics and network hardware with FLOSS firmware options we still haven t escaped from non-free-firmware. Other peripherals contain firmware too each keyboard, disk (SSDs and Spinning rust). Even your USB memory stick that you use to contain the Debian installation image contains a microcontroller and hence also contains firmware that runs on it.
  1. Much of this firmware can not even be updated.
  2. Some can be updated, but is stored in FLASH ROM and the hardware vendor has defeated all programming methods (possibly circumnavigated with a hardware mod).
  3. Some of it can be updated but requires external device programmers (and often the programming connections are a series of test points dotted around the board and not on a header in order to make programming as difficult as possible).
  4. Sometimes the firmware can be updated from within the host operating system (i.e. Debian)
  5. Sometimes, as Steve pointed out in his post, the hardware vendor has enough firmware on a peripheral to perform basic functions perhaps enough to install the OS, but requires additional firmware to enable specific feature (i.e. higher screen resolutions, hardware accelerated functions etc.)
  6. Finally some vendors don t even bother with any non-volatile storage beyond a basic boot loader and firmware must be loaded before the device can be used in any mode.
What about the motherboard? If we are lucky we might be able to run a FLOSS implementation of the UEFI subsystem (edk2/tianocore for example), indeed the non AMD64/i386 platforms based around ARM, MIPS architectures are often the most free when it comes to firmware. What about the microcode on the processor? Personally I wasn t aware that that this was updatable firmware until the Spectre and Meltdown classes of vulnerabilities arose a few years back. So back to Debian images including non-free firmware. This is specifically to address the last two use cases mentioned above, i.e. where firmware needs to be loaded to achieve a minimum functioning of a device. Although it could also include motherboard support, and microcode as well. As far as I can tell the proposal exists for several reasons: #1 Because some freely distributable firmware is required for more and more devices, in order to install Debian, or because whilst Debian can be installed a desktop environment can not be started or fully function #2 Because frankly it is less work to produce, test and maintain fewer installation images As someone who performs tests on our images, this clearly gets my vote :-) and perhaps most important of all.. #3 Because our least experienced users, and new users will download an official image and give up if things don t just work TM Steve s proposal option 5 would address theses issues and I fully support it. I would love to see separate repositories for firmware and firmware-none free. Additionally to accompany firmware non-free I would like to have information on what the firmware actually does. Can I run my hardware without it, what function(s) are limited without the firmware, better yet is there a FLOSS equivalent that I can load instead? Is this something that we can present in Debian installer? I would love not to require non-free firmware, but if I can t, I would love if DI would enable a user to make an informed choice as to what, if any, firmware is installed. Should we be requesting (requiring?) this information for any non-free firmware image that we carry in the archive? Finally lets consider firmware in the wider general case, not just the case where we need to load firmware from within Debian each and every boot. Personally I am annoyed whenever a hardware manufacturer has gone out of their way to prevent firmware updates. Lets face it software contains bugs, and we can assume that the software making up a firmware image will as well. Critical (security) vulnerabilities found in firmware, especially if this runs on the same processor(s) as the OS can impact on the wider system, not just the device itself. This will mean that, without updatable firmware, the hardware itself should be withdrawn from use whilst it would otherwise still function. By preventing firmware updates vendors are forcing early obsolescence in the hardware they sell, perhaps good for their bottom line, but certainly no good for users or the environment. Here I can practice what I preach. As an Electronic Engineer / Systems architect I have been beating the drum for In System Updatable firmware for ALL programmable devices in a system, be it a simple peripheral or a deeply embedded system. I can honestly say that over the last 20 years (yes I have been banging this particular drum for that long) I have had 100% success in arguing this case commercially. Having device programmers in R&D departments is one thing, but that is additional cost for production, and field service. Needing custom programming headers or even a bed of nails fixture to connect your target device to a programmer is more trouble than it is worth. Finally, the ability to update firmware in the field means that you can launch your product on schedule, make a sale and ship to a customer even if the first thing that you need to do is download an update. Offering that to any project manager will make you very popular indeed. So what if this firmware is non-free? As long as the firmware resides in non-volatile media without needing the OS to interact with it, we as a project don t need to carry it in our archives. And we as principled individuals can vote with our feet and wallets by choosing to purchase devices that have free firmware. But where that isn t an option, I ll take updatable but non-free firmware over non-free firmware that can not be updated any day of the week. Sure, the manufacture can choose to no longer support the firmware, and it is shocking how soon this happens often in the consumer market, the manufacture has withdrawn support for a product before it even reaches the end user (In which case we should boycott that manufacture in future until they either change their ways of go bust). But again if firmware can be updated in system that would at least allow the possibility of open firmware to arise. Indeed the only commercial case I have seen to argue against updatable firmware has been either for DRM, in which case good lets get rid of both, or for RF licence compliance, and even then it is tenuous because in this case the manufacture wants ISP for its own use right up until a device is shipped out the door, typically achived by blowing one time programmable fuse links .

19 April 2022

Steve McIntyre: Firmware - what are we going to do about it?

TL;DR: firmware support in Debian sucks, and we need to change this. See the "My preference, and rationale" Section below. In my opinion, the way we deal with (non-free) firmware in Debian is a mess, and this is hurting many of our users daily. For a long time we've been pretending that supporting and including (non-free) firmware on Debian systems is not necessary. We don't want to have to provide (non-free) firmware to our users, and in an ideal world we wouldn't need to. However, it's very clearly no longer a sensible path when trying to support lots of common current hardware. Background - why has (non-free) firmware become an issue? Firmware is the low-level software that's designed to make hardware devices work. Firmware is tightly coupled to the hardware, exposing its features, providing higher-level functionality and interfaces for other software to use. For a variety of reasons, it's typically not Free Software. For Debian's purposes, we typically separate firmware from software by considering where the code executes (does it run on a separate processor? Is it visible to the host OS?) but it can be difficult to define a single reliable dividing line here. Consider the Intel/AMD CPU microcode packages, or the U-Boot firmware packages as examples. In times past, all necessary firmware would normally be included directly in devices / expansion cards by their vendors. Over time, however, it has become more and more attractive (and therefore more common) for device manufacturers to not include complete firmware on all devices. Instead, some devices just embed a very simple set of firmware that allows for upload of a more complete firmware "blob" into memory. Device drivers are then expected to provide that blob during device initialisation. There are a couple of key drivers for this change: Due to these reasons, more and more devices in a typical computer now need firmware to be uploaded at runtime for them to function correctly. This has grown: At the beginning of this timeline, a typical Debian user would be able to use almost all of their computer's hardware without needing any firmware blobs. It might have been inconvenient to not be able to use the WiFi, but most laptops had wired ethernet anyway. The WiFi could always be enabled and configured after installation. Today, a user with a new laptop from most vendors will struggle to use it at all with our firmware-free Debian installation media. Modern laptops normally don't come with wired ethernet now. There won't be any usable graphics on the laptop's screen. A visually-impaired user won't get any audio prompts. These experiences are not acceptable, by any measure. There are new computers still available for purchase today which don't need firmware to be uploaded, but they are growing less and less common. Current state of firmware in Debian For clarity: obviously not all devices need extra firmware uploading like this. There are many devices that depend on firmware for operation, but we never have to think about them in normal circumstances. The code is not likely to be Free Software, but it's not something that we in Debian must spend our time on as we're not distributing that code ourselves. Our problems come when our user needs extra firmware to make their computer work, and they need/expect us to provide it. We have a small set of Free firmware binaries included in Debian main, and these are included on our installation and live media. This is great - we all love Free Software and this works. However, there are many more firmware binaries that are not Free. If we are legally able to redistribute those binaries, we package them up and include them in the non-free section of the archive. As Free Software developers, we don't like providing or supporting non-free software for our users, but we acknowledge that it's sometimes a necessary thing for them. This tension is acknowledged in the Debian Free Software Guidelines. This tension extends to our installation and live media. As non-free is officially not considered part of Debian, our official media cannot include anything from non-free. This has been a deliberate policy for many years. Instead, we have for some time been building a limited parallel set of "unofficial non-free" images which include non-free firmware. These non-free images are produced by the same software that we use for the official images, and by the same team. There are a number of issues here that make developers and users unhappy:
  1. Building, testing and publishing two sets of images takes more effort.
  2. We don't really want to be providing non-free images at all, from a philosophy point of view. So we mainly promote and advertise the preferred official free images. That can be a cause of confusion for users. We do link to the non-free images in various places, but they're not so easy to find.
  3. Using non-free installation media will cause more installations to use non-free software by default. That's not a great story for us, and we may end up with more of our users using non-free software and believing that it's all part of Debian.
  4. A number of users and developers complain that we're wasting their time by publishing official images that are just not useful for a lot (a majority?) of users.
We should do better than this. Options The status quo is a mess, and I believe we can and should do things differently. I see several possible options that the images team can choose from here. However, several of these options could undermine the principles of Debian. We don't want to make fundamental changes like that without the clear backing of the wider project. That's why I'm writing this...
  1. Keep the existing setup. It's horrible, but maybe it's the best we can do? (I hope not!)
  2. We could just stop providing the non-free unofficial images altogether. That's not really a promising route to follow - we'd be making it even harder for users to install our software. While ideologically pure, it's not going to advance the cause of Free Software.
  3. We could stop pretending that the non-free images are unofficial, and maybe move them alongside the normal free images so they're published together. This would make them easier to find for people that need them, but is likely to cause users to question why we still make any images without firmware if they're otherwise identical.
  4. The images team technically could simply include non-free into the official images, and add firmware packages to the input lists for those images. However, that would still leave us with problem 3 from above (non-free generally enabled on most installations).
  5. We could split out the non-free firmware packages into a new non-free-firmware component in the archive, and allow a specific exception only to allow inclusion of those packages on our official media. We would then generate only one set of official media, including those non-free firmware packages. (We've already seen various suggestions in recent years to split up the non-free component of the archive like this, for example into non-free-firmware, non-free-doc, non-free-drivers, etc. Disagreement (bike-shedding?) about the split caused us to not make any progress on this. I believe this project should be picked up and completed. We don't have to make a perfect solution here immediately, just something that works well enough for our needs today. We can always tweak and improve the setup incrementally if that's needed.)
These are the most likely possible options, in my opinion. If you have a better suggestion, please let us know! I'd like to take this set of options to a GR, and do it soon. I want to get a clear decision from the wider Debian project as to how to organise firmware and installation images. If we do end up changing how we do things, I want a clear mandate from the project to do that. My preference, and rationale Mainly, I want to see how the project as a whole feels here - this is a big issue that we're overdue solving. What would I choose to do? My personal preference would be to go with option 5: split the non-free firmware into a special new component and include that on official media. Does that make me a sellout? I don't think so. I've been passionately supporting and developing Free Software for more than half my life. My philosophy here has not changed. However, this is a complex and nuanced situation. I firmly believe that sharing software freedom with our users comes with a responsibility to also make our software useful. If users can't easily install and use Debian, that helps nobody. By splitting things out here, we would enable users to install and use Debian on their hardware, without promoting/pushing higher-level non-free software in general. I think that's a reasonable compromise. This is simply a change to recognise that hardware requirements have moved on over the years. Further work If we do go with the changes in option 5, there are other things we could do here for better control of and information about non-free firmware:
  1. Along with adding non-free firmware onto media, when the installer (or live image) runs, we should make it clear exactly which firmware packages have been used/installed to support detected hardware. We could link to docs about each, and maybe also to projects working on Free re-implementations.
  2. Add an option at boot to explicitly disable the use of the non-free firmware packages, so that users can choose to avoid them.
Acknowledgements Thanks to people who reviewed earlier versions of this document and/or made suggestions for improvement, in particular:

20 September 2021

Andy Simpkins: COVID-19

Nearly 4 weeks after contracting COVID-19 I am finally able to return to work Yes I have had both Jabs (my 2nd dose was back in June), and this knocked me for six. I spent most of the time in bed, and only started to get up and about 10 days ago. I passed this on to both my wife and daughter (my wife has also been double jabbed), fortunately they didn t get it as bad as me and have been back at work / school for the last week. I also passed it on to a friend at the UK Debian BBQ, hosted once again by Sledge and Randombird, before I started showing symptoms. Fortunately (after a lot of PCR tests for attendees) it doesn t look like I passed it to anyone else I wouldn t wish this on anyone. I went on holiday back in August (still in England) thinking that having both jabs we would be fine. We stayed in self catering accommodation and we spent our time outside, we visited open air museums, walked around gardens etc, however we did eat out in relatively empty pubs and restaurants. And yes we did all have face masks on when we went indoors (although obviously we removed them whilst eating). I guess that is when I caught this, but have no idea exactly when or where. Even after vaccination, it is still possible to both catch and spread this virus. Fortunately having been vaccinated my resulting illness was (statistically) less bad than it would otherwise have been. I dread to think how bad I would have been if I had not already been vaccinated, I suspect that I would have ended up in ICU. I am still very tired, and have been told it may take many more weeks to get back to my former self. Other than being overweight, prior to this I have been in good health. If you are reading this and have NOT yet had a vaccine and one is available for you, please, please get it done.

14 August 2021

Andy Simpkins: Debian Bullseye Released

Wow. It is 21:49 in the evening here (I am with isy and sledge in Cambridge) and image testing has completed! The images are being signed, and sledge is running through the final steps to push them out to our servers, and from there out onto the mirror and torrent networks to be available for public download.

We have had help testing installation images from the regular team; amacater and schweer. With schweer, as ever, covering the edu images. Thank you. This release we were joined by bitin who kindly ran through a couple of tests of the default netinst image with both UEFI and BIOS based VMs, before joining a release party. Moving onto the live images, linux-fan once again spent time testing i386 images on vintage hardware. Getting a desktop environment to work on a Pentium (4?) machine with 1GiB RAM from a live-image sees the number of desktops that will run in this environment get fewer all the time. Again highvoltage was around to run tests on some of the images.

liz, contributed for the first time indeed raised her first bug report as well. I hope that you had fun thanks for joining us today. smcv, also joined in the testing fun a long time DD is this the first time you have run through image smoke tests on release day? thanks! Many thanks to everyone taking time to test installation and live images. Of cause building and testing images doesn t happen in isolation. There is a huge team that puts together and releases the project that is Debin .
On a release day there are many teams working flat out: dsa, ftp, publicity, release, web, and ourselves as the cd/images team.
But that is just activity on a release day
There are all the other teams that are needed to produce the distribution, who work tirelessly day in, day out. Curating the 1,152,960,944 lines of code in Debian bullseye are over more than 6,208 people!!
Some of the contributors are shown in https://contributors.debian.org/contributors/flat
THANK YOU In the 15 minutes it has taken me to compile this post (many thanks to cnote and jmw for facts and figures they published on debian micronews), the last of the image release process has completed by sledge and that s it. Installation images for Debian 11 Bullseye are out in the big wide world, joining the official archives that became available at 10:35 this morning.

Andy Simpkins: Bullseye release part 1

And so it begins
Release of Debian 11 Bullseye is in progress. Building install media is underway, and we ll be downloading and smoke testing these images just as soon as they become available. Want to help test some images? see https://wiki.debian.org/Teams/DebianCD/ReleaseTesting/Bullseye_r0 We expect to be at this until the small hours of Sunday morning
watching the build progress, awaiting images to test

17 July 2021

Andy Simpkins: Duel boot Debian and Windows

Installing a new laptop New is a 2nd hand Thinkpad T470p laptop that I intend to duel boot with windows.
I have been a Debian user for over 20 years, I use windows at work for the proprietary EDA Altium , but I have never had a windows installation on my laptop. This machine will to be different it is the first laptop that I have owned that has sufficient GPU to realistically run Altium.. I will try it in a VM later (if that works it will be my preferred choice), but for now I want to try a duel boot system. So where to start? Step one Debian wiki https://wiki.debian.org/DimentionedDualBoot/Windows My laptop was purchased from a dealer / refurbisher. This means that they had confirmed that the hardware was functional, wiped it down and then installed a clean copy of Windows on the whole system. What it doesn t mean is that the system was set for UEFI boot and that the EFI partition is set correctly . I turned on UEFI and made sure that Legacy BIOS mode was disabled. Next I re-installed Windows, making sure to leave enough disk space for may later Debian install. (if you already have UEFI / secure boot enabled then you could skip the reinstall and instead re-size your disk) Eeew! Windows now wants to show me adverts, it doesn t give me the option to never show me ads, but at least I could insist that it doesn t display tailored ads based on the obvious snooping of my web browsing habits just another reason to use Debian. Now to install Debian I want an encrypted file system, and because I want to dual boot I can t just follow the guided installation in the Debian installer. So I shall detail what I did here. Indeed I took several attempts at this and eventually asked for help as I had still messed up (I thought I was doing it correctly but had missed out a step) First the boiler plate DI Now for the interesting bit Partitioning the disk(s) Select MANUAL disk partitioning I have the following partitions: /dev/nvmen0p1
1.0MB FREE SPACE
#1 536.9 MB B K ESP
400.0 GB FREE SPACE
#3 16.8 MB Microsoft reserved partition
#4 111.6 GB ntfs Basic data partition
335.4 kB FREE SPACE Set use I now have the following partitions: LVM VG VG-Skink
#1 32 GB f swap swap
LVM VG VG-System
#1 367.5 GB f ext4 /
Encrypted volume
#1 399.5 GB K lvm
/dev/nvmen0p1
1.0MB FREE SPACE
#1 536.9 MB B K ESP
#2 500.2 MB F ext2 /boot
#5 399.2 GB K crypto skink
#3 16.8 MB Microsoft reserved partition
#4 111.6 GB ntfs Basic data partition
335.4 kB FREE SPACE Boiler plate debian install continues The system will install a base system Sit back and wait a for the system to install Well that didn t take very long Damn this new laptop is quick. I suspect that is nvme solid state storage, no longer limited to SATA bus speeds (and even that wasn t slow)

20 September 2020

Andy Simpkins: Using an IP camera in conference calls

My webcam has broken, something that I have been using a lot during the last few months for some reason. A friend of mine suggested that I use the mic and camera on my mobile phone instead. There is a simple app droidcam that makes the phone behave as a simple webcam, it also has a client application to run on your PC to capture the web-stream and present it as a video device. All well and good but I would like to keep propitiatory software off my PCs (I have a hard enough time accepting it on a phone but I have to draw a line somewhere). I decided that there had to be a simple way to ingest that stream and present it as a local video device on a Linux box. It turns out that it is a lot simpler than I thought it would be. I had it working within 10 minutes! Packages needed: ffmpeg, v4l2loopback-utils
sudo apt-get install ffmpeg v4l2loopback-utils
Start the loop-back device:
sudo modprobe v4l2loopback
Ingest video and present on loop-back device:
ffmpeg -re -i <URL_VideoStream> -vcodec rawvideo -pix_fmt yuv420p -f v4l2 /dev/video0
Where

-re
Read input at native frame rate. Mainly used to simulate a grab
device, or live input stream (e.g. when reading from a file). Should
not be used with actual grab devices or live input streams (where it
can cause packet loss). By default ffmpeg attempts to read the
input(s) as fast as possible. This option will slow down the reading
of the input(s) to the native frame rate of the input(s). It is
useful for real-time output (e.g. live streaming).
-i <source>
In this case my phone running droidcam http://10.14.1.100:4747/video
-vcodec rawvideo
Select the output video codec to raw video (as expected for /dev/video#)
-pix_fmt yuv420p
Set pixel format. in this example tell ffmpeg that the video will
be yuv colour space at 420p resolution
-f v4l2 /dev/video0
Force the output to be in video for Linux 2 (v4l2) format bound to
device /dev/video0

3 June 2020

Andy Simpkins: Getting Co-ap tools working on Debian

At work we have a wonderful pyhon tool that we are able to send CoAP messages to and from our products. Perfect for development work. However recently I needed to install a copy of the tools onto my personal laptop because the only work laptops I have access to have completely dead batteries and so are not suitable for taking out into a field to perform RF range tests .

As a company we have chosen not to package internal development tools I think that this is a mistake, but this is not my decision. So I simply copied across the coap tools directory and tried to run them. Obviously nothing worked! However, the error messages were enough to work out what dependencies I needed to resolve. Error #1 Missing libasan.so.2 shared library
By a process of deduction we found that gcc5 contains libasan2, quite old.
Debian s snapshots was our saviour here:
wget http://snapshot.debian.org/archive/debian/20180412T100152Z/pool/main/g/gcc-5/libasan2_5.5.0-12_amd64.deb

wget http://snapshot.debian.org/archive/debian/20180412T100152Z/pool/main/g/gcc-5/gcc-5-base_5.5.0-12_amd64.deb

dpkg -i ./gcc-5-base_5.5.0-12_amd64.deb ./libasan2_5.5.0-12_amd64.deb

great that was enough to get the port bindings to work
Error #2 google.protobuf When I tried to issue coap requests I ran into missing python3 imports google.protobuf fortunately this is found packaged in Debian buster as party of python3-protobuf
apt-get install python3-protobuf
Done! everything works :-)

6 January 2017

Mark Brown: OpenTAC sprint

This weekend Toby Churchill kindly hosted a hacking weekend for OpenTAC myself, Michael Grzeschik, Steve McIntyre and Andy Simpkins got together to bring up the remaining bits of the hardware on the current board revision and get some of the low level tooling like production flashing for the FTDI serial ports on the board up and running. It was a very productive weekend, we verified that everything was working with only few small mods needed for the board . Personally the main thing I worked on was getting most of an initial driver for the EMC1701 written. That was the one component without Linux support and allowed us to verify that the power switching and measurement for the systems under test was working well. There s still at least one more board revision and quite a bit of software work to do (I m hoping to get the EMC1701 upstream for v4.8) but it was great to finally see all the physical components of the system working well and see it managing a system under test, this board revision should support all the software development that s going to be needed for the final board. Thanks to all who attended, Pengutronix for sponsoring Michael s attendance and Toby Churchill for hosting! Team at work
Group photo

18 May 2016

Andy Simpkins: OpenTAC sprint, Cambridge

Last weekend saw a small group get togeather in Cambridge to hack on the OpenTAC. OpenTAC is an OpenHardware OpenSoftware test platform, designed specificly to aid automated testing and continious intergration. Aimed at small / mobile / embedded targets OpenTAC v1 provides all of the support infrastructure to drive up to 8 DUTs (Device Under Test) to your test or CI system.
Each of the 8 EUT ports provides:
  • A serial port (either RS232 levels on an DB9 socket, or 3V3 TTL on a molex kk plug)
  • USB Power (up-to 2A with a software defined fuse, and alarm limits)
  • USB data interconnect
  • Ethernet
All ports on the EUT interface are relay issolated, this means that cables to your EUT can be unplugged under software control (we are aware of several SoC development boards that latch up if there is a serial port connected before power is applied). Additionly there are 8 GPIO lines that can be used as switch controls to any EUT (perhaps to put a specific EUT into a programming mode, reboot it or even start it) Anyway, back to the hacking weekend. .. Joining Steve McIntyre and myself were Mark Brown, and Michael Grzeschik (sorry Michael, I couldn t find a homepage). Mark traveled down from Scotland whilst Michael flew in from Germany for the weekend. Gents we greatly apprecate you taking the time and expence to join us this weekend. I should also thank my employer Toby Churchill Ltd. for allowing us to use the office to host the event. A lot of work got done, and I beleive we have now fully tested and debugged the hardware. We have also made great progress with the device tree and dvice drivers for the platform. Mark got the EUT power system working as proof of concept, and has taken an OpenTAC board back with him to turn this into suitable drivers and hopfully push them up stream. Meanwhile Michael spent his time working on the system portion of the device tree; OpenTAC s internal power sequancing, thermal managment subsystem, and USB hub control. Steve got to grips with the USB serial converters (including how to read and program their internal non-volatile settings). Finally I was able to explain hardware sequancing to everyone, and to modify boards to overcome some of my design mistakes (the biggest was by far the missing sence resistors for the EUT power managment)

1 March 2016

Vincent Sanders: Hope is tomorrow's veneer over today's disappointment.

Recently I have been very hopeful about the 96boards Hikey SBC and as Evan Esar predicted I have therefore been very disappointed. I was given a Hikey after a Linaro connect event some time ago by another developer who could not get the system working usefully and this is the tale of what followed.
The Standard Design
This board design was presented as Linaro creating a standard for the 64bit Single Board Computer (SBC) market. So I had expected that a project with such lofty goals would have considered many factors and provided at least as good a solution as the existing 32bit boards.

The lamentable hubris of creating a completely new form factor unfortunately sets a pattern for the whole enterprise. Given the aim towards "makers" I would have accepted that the system would not be a ATX PC size motherboard, but mini/micro/nano and pico ITX have been available for several years.

If opting for a smaller "credit card" form factor why not use one of the common ones that have already been defined by systems such as the Raspberry Pi B+? Instead now every 96Board requires special cases and different expansion boards.

Not content with defining their own form factor the design also uses a 8-18V supply, this is the only SBC I own that is not fed from a 5V supply. I understand that a system might require more current than a micro USB connector can provide, but for example the Banana Pi manages with a DC barrel jack readily capable of delivering 25W which would seem more than enough

The new form factor forced the I/O connectors to be placed differently to other SBC, given the opportunity to concentrate all connectors on one edge (like ATX designs) and avoid the issues where two or three sides are used. The 96board design instead puts connectors on two edges removing any possible benefit this might have given.

The actual I/O connectors specified are rather strange. There is a mandate for HDMI removing the possibility of future display technology changes. The odd USB arrangement of two single sockets instead of a stacked seems to be an attempt to keep height down but the expansion headers and CPU heatsink mean this is largely moot.

The biggest issue though is mandating WIFI but not Ethernet (even as an option), everything else in the design I could logically understand but this makes no sense. It means the design is not useful for many applications without adding USB devices.

Expansion is presented as a 2mm pitch DIL socket for "low speed" signals and a high density connector for "high speed" signals. The positioning and arrangement of these connectors proffered an opportunity to improve upon previous SBC designs which was not taken. The use of 2mm pitch and low voltage signals instead of the more traditional 2.54mm pitch 3.3v signals means that most maker type applications will need adapting from the popular Raspberry Pi and Arduino style designs.

In summary the design appears to have been a Linaro project to favour one of their members which took a Hisilicon Android phone reference design and put it onto a board with no actual thought beyond getting it done. Then afterwards attempted to turn that into a specification, this has simply not worked as an approach.

My personal opinion is that this specification is fatally flawed and, is a direct cause of, the bizarre situation where the "consumer" specification exists alongside the "enterprise" edition which itself has an option of microATX form factor anyhow!
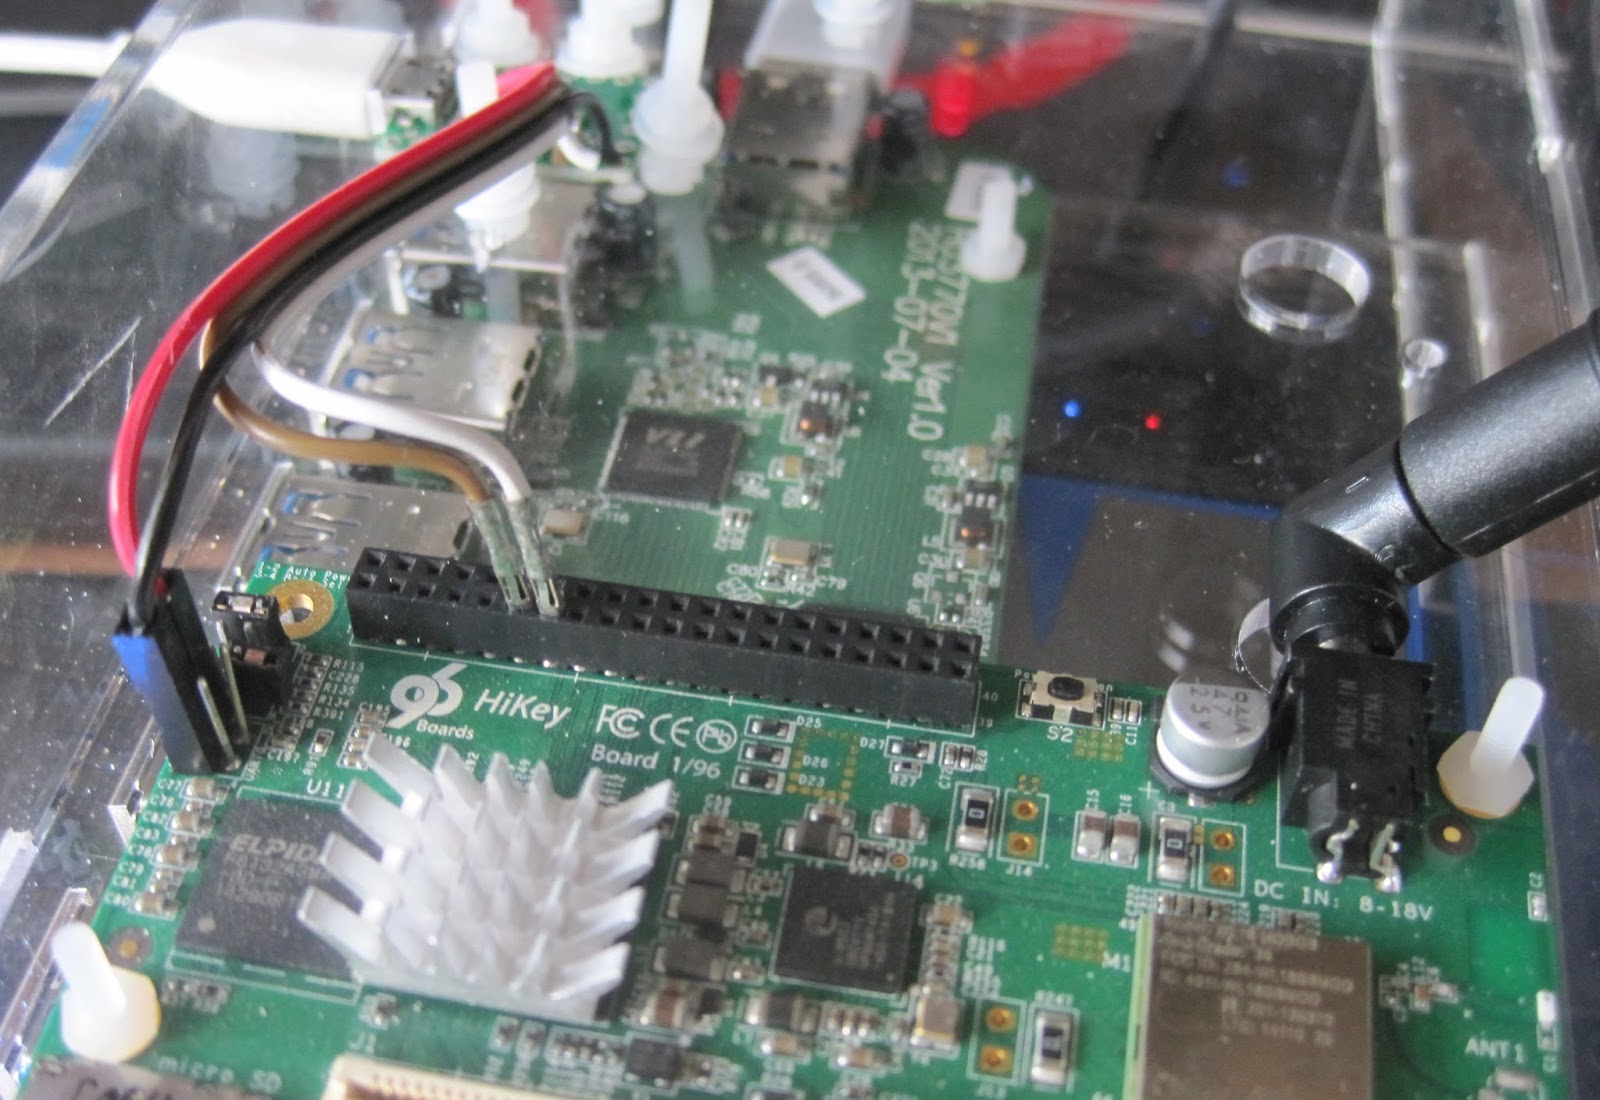
The ImplementationIf we ignore the specification appearing to be nothing more than a codification of the original HiKey design we can look at the HiKey as an implementation.

Initially the board required modifying to add headers to attach a USB to 1.8V LVTTL serial adaptor on the UART0 serial port. Once Andy Simpkins had made this change for me I was able to work through the instructions and attempt to install a bootloader and OS image.

The initial software was essentially HiSilicon vendor code using the Android fastboot system to configure booting. There was no source and the Ubuntu OS images were an obvious afterthought to the Android images. Just getting these images installed required a great deal of effort, repetition and debugging. It was such a dreadful experience this signalled the commencement one of the repeated hiatuses throughout this project, the allure of 64 bit ARM computing has its limits even for me.

When I returned to the project I attempted to use the system from the on-board eMMC but the pre-built binary only kernel and OS image were very limited. Building a replacement kernel , or even modules for the existing one proved fruitless and the system was dreadfully unstable.

I wanted to use the system as a builder for some Open Source projects but the system instability ruled this out. I considered attempting to use virtualisation which would also give better system isolation for builder systems. By using KVM running a modern host kernel and OS as a guest this would also avoid issues with the host systems limitations. At which point I discovered the system had no virtualisation enabled apparently because the bootloader lacked support.

In addition to these software issues there were hardware problems, despite forcing the use of USB for all additional connectivity the USB implementation was dreadful. For a start all USB peripherals have to run at the same speed! One cannot mix full (12Mbit) and high speed (480Mbit) devices which makes adding a USB Ethernet and SATA device challenging when you cannot use a keyboard.

And because I needed more challenges only one of the USB root hubs was functional. In effect this made the console serial port critical as it was the only reliable way to reconfigure the system without a keyboard or network link (and WIFI was not reliable either)

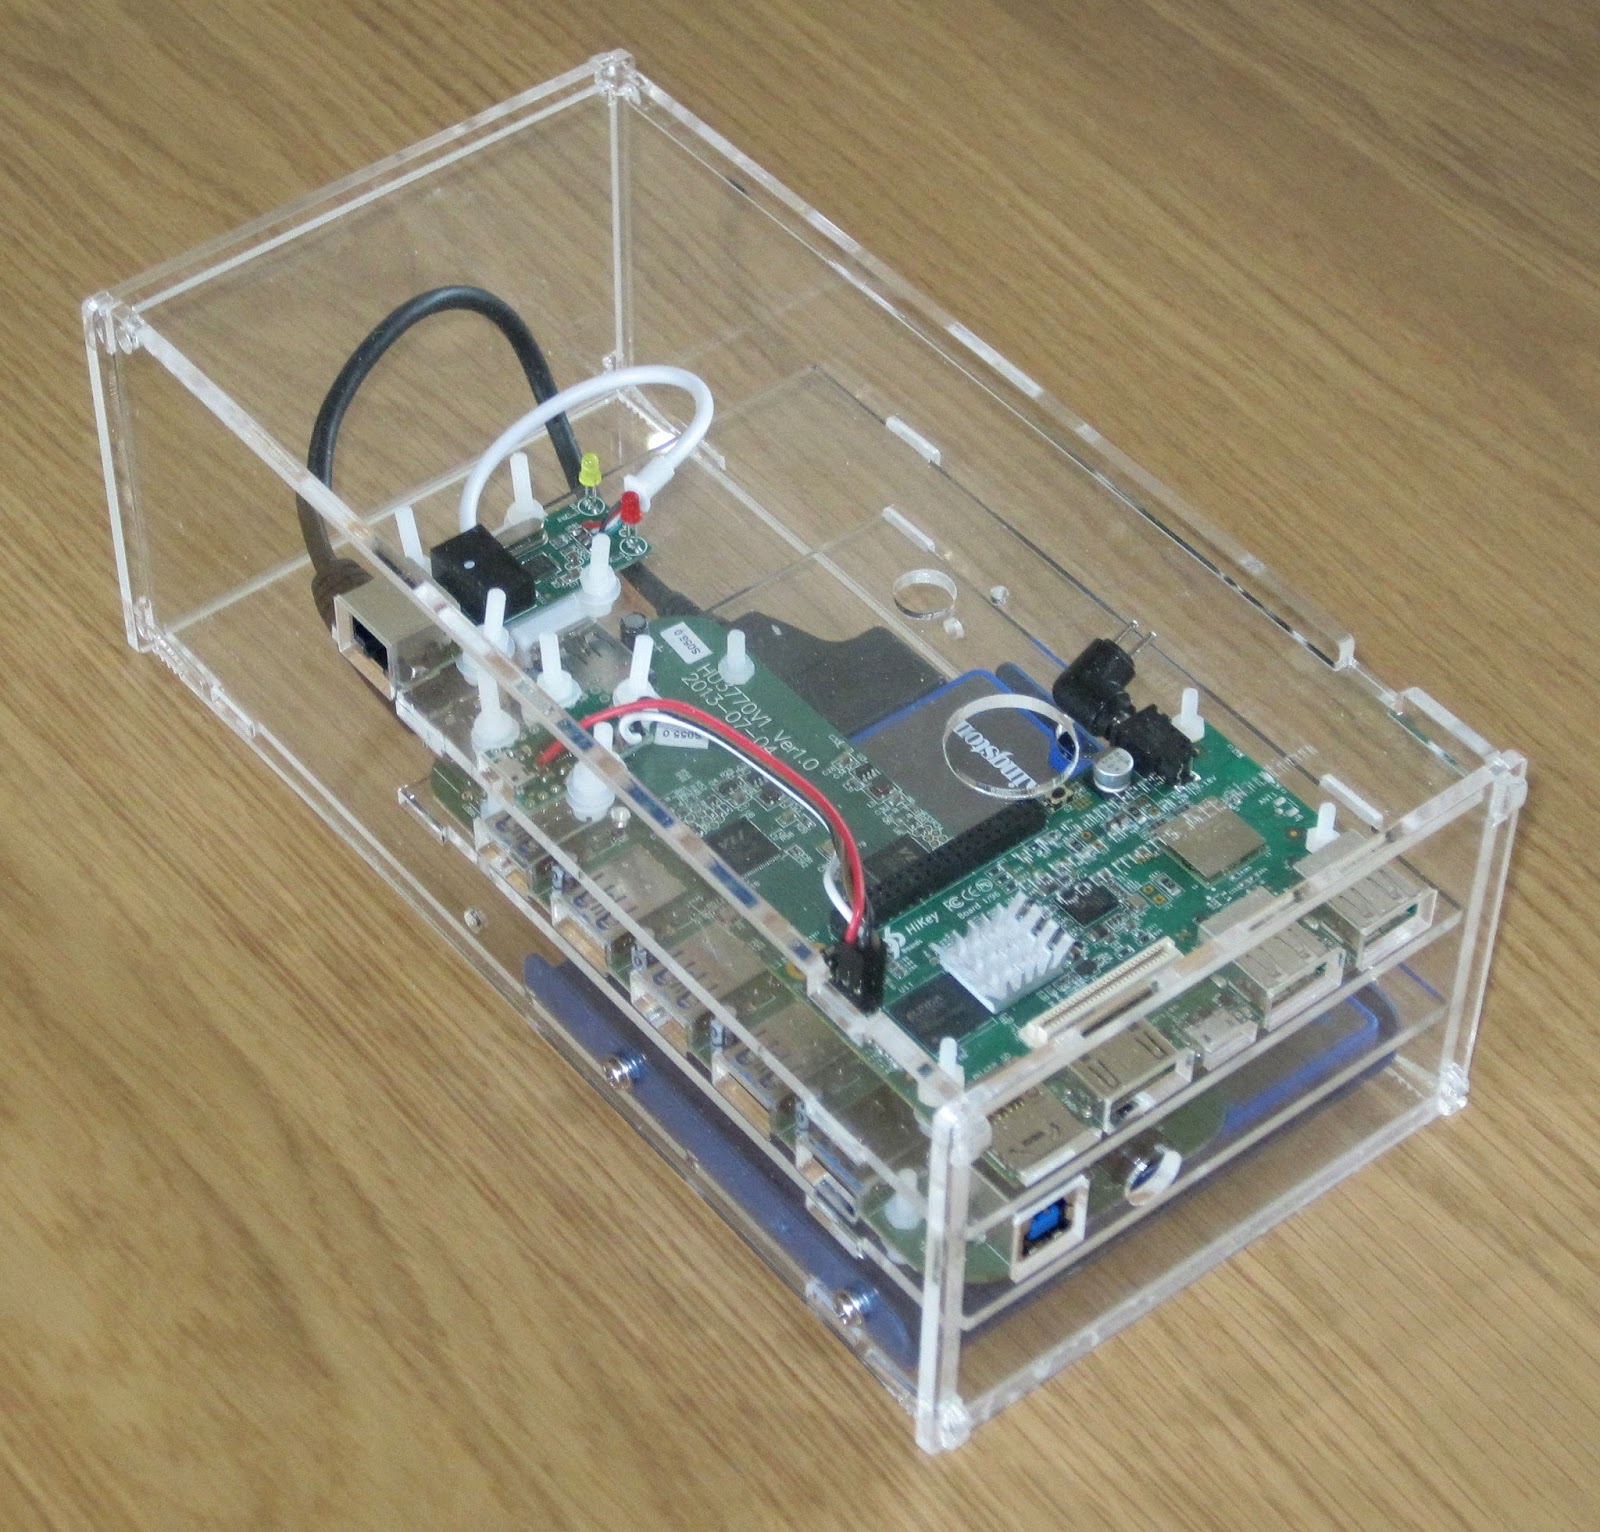
After another long pause in proceedings I decided that I should house all the components together and that perhaps being out on my bench might be the cause of some instability. I purchased a powered Amazon basics USB 2 hub, an Ethernet adaptor and a USB 2 SATA interface in the hope of accessing some larger mass storage.

The USB hub power supply was 12V DC which matched the Hikey requirements so I worked out I could use a single 4A capable supply and run a 3.5inch SATA hard drive too. I designed a laser cut enclosure and mounted all the components. As it turned out I only had a 2.5inch hard drive handy so the enclosure is a little over size. If I were redoing this design I would attempt to make it fit in 1U of height and be mountable in a 19inch rack instead it is an 83mm high (under 2U) box.

A new software release had also become available which purported to use an UEFI bootloader after struggling to install this version unsuccessfully, made somewhat more problematic by the undocumented change from UART0 (unpopulated header) to UART3 on the low speed 2mm pitch header. The system seemed to start the kernel which panicked and hung either booting from eMMC or SD card. Once again the project went on hold after spending tens of hours trying to make progress.
Third time's a charmAs the year rolled to a close I once again was persuaded to look at the hikey, I followed the much improved instructions and installed the shiny new November software release which appears to have been made for the re-release of the Hikey through LeMaker. This time I obtained a Debian "jessie" system that booted from the eMMC.

Having a booted system meant I could finally try and use it. I had decided to try and use the system to host virtual machines used as builders within the NetSurf CI system.

The basic OS uses a mixture of normal Debian packages with some replacements from Linaro repositories. I would have prefered to see more use of Debain packages even if they were from the backports repositories but on the positive side it is good to see the use of Debian instead of Ubuntu.

The kernel is a heavily patched 3.18 built in a predominantly monolithic (without modules) manner with the usual exceptions such as the mali and wifi drivers (both of which appear to be binary blobs). The use of a non-mainline capable SoC means the standard generic distribution kernels cannot be used and unless Linaro choose to distribute a kernel with the feature built in it is necessary to compile your own from sources.

The default install has a linaro user which I renamed to my user and ensured all the ssh keys and passwords on the system were changed. This is an important step when using this pre-supplied images as often a booted system is identical to every other copy.

To access mass storage my only option was via USB, indeed to add any additional expansion that is the only choice. The first issue here is that the USB host support is compiled in so when the host ports are initialised it is not possible to select a speed other than 12MBit. The speed is changed to 480Mbit by using a user space application found in the users home directory (why this is not a tool provided by a package and held in sbin I do not know).

When the usb_speed tool is run there is a chance that the previously enumerated devices will be rescanned and what was /dev/sda has become /dev/sdb if this happens there is a high probability that the system must be rebooted to prevent random crashes due to the "zombie" device.

Because the speed change operation is unreliable it cannot be reliably placed in the boot sequence so this must be executed by hand on each boot to get access to the mass storage.

NetSurf project already uses a x86_64 virtual host system which runs an LLVM physical volume from which we allocate logical volumes for each VM. I initially hoped to do this with the hikey but as soon as I tried to use the logical volume with a VM the system locked up with nothing shown on console. I did not really try very hard to discover why and instead simply used files on disc for virtual drives which seemed to work.

To provide reliable network access I used a USB attached Ethernet device, this like the mass storage suffered from unreliable enumeration and for similar reasons could not be automated requiring manually using the serial console to start the system.

Once the system was started I needed to install the guest VM. I had hoped I might be able to install locally from Debian install media as I do for x86 using the libvirt tools. After a great deal of trial and error I finally was forced to abandon this approach when I discovered the Linaro kernel is lacking iso9660 support so installing from standard media was not possible.

Instead I used the instructions provided by Leif Lindholm to create a virtual machine image on my PC and copied the result across. These instructions are great except I used version 2.5 of Qemu instead of 2.2 which had no negative effect. I also installed the Debian backports for Jessie to get an up to date 4.3 kernel.

After copying the image to the Hikey I started it by hand from the command line as a four core virtual machine and was successfully able to log in. The guest would operate for up to a day before stopping with output such as

$
Message from syslogd@ciworker13 at Jan 29 07:45:28 ...
kernel:[68903.702501] BUG: soft lockup - CPU#0 stuck for 27s! [mv:24089]

Message from syslogd@ciworker13 at Jan 29 07:45:28 ...

kernel:[68976.958028] BUG: soft lockup - CPU#2 stuck for 74s! [swapper/2:0]

Message from syslogd@ciworker13 at Jan 29 07:47:39 ...
kernel:[69103.199724] BUG: soft lockup - CPU#3 stuck for 99s! [swapper/3:0]

Message from syslogd@ciworker13 at Jan 29 07:53:21 ...
kernel:[69140.321145] BUG: soft lockup - CPU#3 stuck for 30s! [rs:main Q:Reg:505]

Message from syslogd@ciworker13 at Jan 29 07:53:21 ...
kernel:[69192.880804] BUG: soft lockup - CPU#0 stuck for 21s! [jbd2/vda3-8:107]

Message from syslogd@ciworker13 at Jan 29 07:53:21 ...
kernel:[69444.805235] BUG: soft lockup - CPU#3 stuck for 22s! [swapper/3:0]

Message from syslogd@ciworker13 at Jan 29 07:55:21 ...
kernel:[69570.177600] BUG: soft lockup - CPU#1 stuck for 112s! [systemd:1]

Timeout, server 192.168.7.211 not responding.

After this output the host system would not respond and had to be power cycled never mind the guest!

Once I changed to single core operation the system would run for some time until the host suffered from the dreaded kernel OOM killer. I was at a loss as to why the oom killer was running as the VM was only allocated half the physical memory (512MB) allowing the host what I presumed to be an adequate amount.

By adding a 512MB swapfile the system was able to push the few hundred kilobytes it wanted to swap and the system was now stable! The swapfile of course has to be started by hand as the external storage is unreliable and unavailable at boot.

I converted the qemu command line to a libvirt config using the virsh tool
virsh domxml-from-native qemu-argv cmdln.args
The converted configuration required manual editing to get a working system but now I have a libvirt based VM guest I can control along with all my other VM using the virt-manager tool.

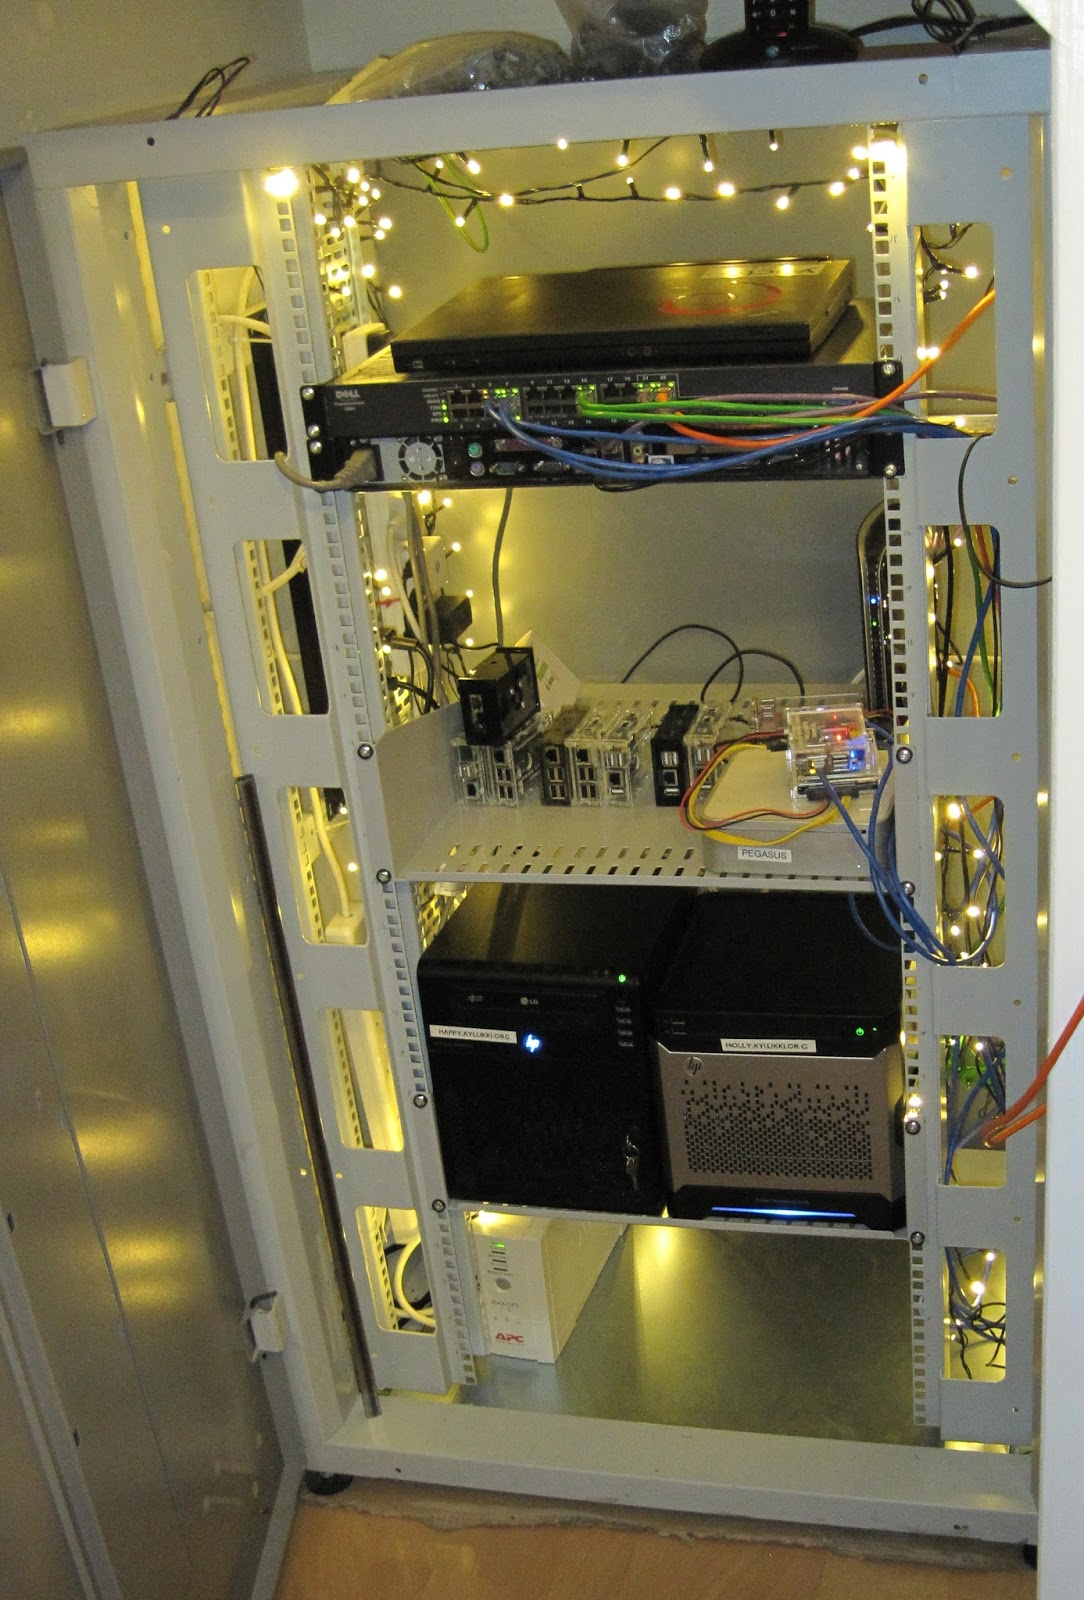
This system is now stable and has been in production use for a month at time of writing. The one guest VM is a single core 512MB aarch64 system which takes over 1100 seconds (19 minutes) to do what a Banana Pi 2 dual core 1GB memory 32bit native ARM system manages in 300 seconds.

It seems the single core limited memory system with USB SATA attached storage is very, very slow.

I briefly attempted to run the CI system job natively within the host system but within minutes it crashed hard and required a power cycle to retrieve, it had also broken the UEFI boot. I must thank Leif for walking me through recovering the system otherwise I would have needed to start over.
ConclusionsI must stress these conclusions and observations are my own and do not represent anyone else.

My main conclusions are:

  • My experience is of a poorly conceived, designed and implemented product rushed to market before it was ready.
  • It was the first announced 64bit ARM single board computer to market but that lead was squandered with issues around availability, reliability and software.
  • Value for money appears poor. Product is 70 plus an additional 50 for USB hubs, power supplies, USB Ethernet and USB SATA. Other comparable SBC are around the 30 mark and require fewer extras.
  • The limited I/O within the core product yields a heavy reliance on USB
  • The USB system is poorly implemented resulting in large additional administrative burdens.
  • Limited memory of 1Gigabyte reduces the scope for making use of the benefits of 64bit processors.
  • Recent change to UEFI bootloader is very welcome and something I would like to see across all aarch64 platforms. This is the time for there to be a single unified boot method, having to deal with multiple bad copies of bootloaders in the 32bit world was painful, perhaps this mistake can be avoided in the future.
  • The kernel provision is abysmal and nothing like the quality I would expect from Linaro. The non-upstream kernel combined with missing features after almost a year of development is inexplicable.
  • The Pine64 with 2G of memory and the Raspberry Pi 3 with its de-facto standard form factor are both preferable despite their limitations in other areas.
This project has taken almost a year to get to the final state and has been one of the least enjoyable within that time. The only reason I have a running system at the end of it is sheer bloody mindedness because after spending hundreds of hours of my free time I was not prepared to see it all go to waste.

To be fair, the road I travelled is now much smoother and if the application is suited to having a mobile phone without a screen then the Hikey probably works as a solution. For me, however, the Hikey product with the current hardware and software limitations is not something I would recommend in preference to other options.

8 December 2015

Vincent Sanders: I said it was wired like a Christmas tree

I have recently acquired a 27U high 19 inch rack in which I hope to consolidate all the computing systems in my home that do not interact well with humans.

My main issue is that modern systems are just plain noisy, often with multiple small fans whining away. I have worked to reduce this noise by using quieter components as replacements but in the end it is simply better to be able to put these systems in a box out of the way.

The rack was generously given to me by Andy Simpkins and aside from being a little dirty having been stored for some time was in excellent condition. While the proverbs "never look a gift horse in the mouth" and "beggars cannot be choosers" are very firmly at the front of my mind there were a few minor obstacles to overcome to make it fit in its new role with a very small budget.

The new home for the rack was to be a space under the stairs where, after careful measurement, I determined it would just fit. After an hour or two attempting to manoeuvre a very heavy chunk of steel into place I determined it was simply not possible while it was assembled. So I ended up disassembling and rebuilding the whole rack in a confined space.

The rack is 800mm wide IMRAK 1400 rather than the more common 600mm width which means it employs "cable reducing channels" to allow the mounting of standard width rack units. Most racks these days come with four posts in the corners to allow for longer kit to be supported front and back. This particular rack was not fitted with the rear posts and a brief call to the supplier indicated that any spares from them would be eyewateringly expensive (almost twice the cost of purchasing a new rack from a different supplier) so I had to get creative.

Shelves that did not require the rear rails were relatively straightforward and I bought two 500mm deep cantilever type from Orion (I have no affiliation with them beyond being a satisfied customer).

I took a trip to the local hardware store and purchased some angle brackets and 16mm steel square tube. From this I made support rails which means the racked kit has support to its rear rather than relying solely on being supported by its rack ears.

The next problem was the huge hole in the bottom of the rack where I was hoping to put the UPS and power switching. This hole is intended for use with raised flooring where cables enter from below, when not required it is filled in with a "bottom gland plate". Once again the correct spares for the unit were not within my budget.

Around a year ago I built several systems for open source projects from parts generously donated by Mythic Beasts (yes I did recycle servers used to build a fort). I still had some leftover casework from one of those servers so ten minutes with an angle grinder and a drill and I made myself a suitable plate.

The final problem I faced is that it is pretty dark under the stairs and while putting kit in the rack I could not see what I was doing. After some brief Googling I decided that all real rack lighting solutions were pretty expensive and not terribly effective.

At this point I was interrupted by my youngest son trying to assemble the Christmas tree and the traditional "none of the lights work" so we went off to the local supermarket to buy some bulbs. Instead we bought a 240 LED string for 10 (15usd) in the vague hope that next year they will not be broken.

I immediately had a light bulb moment and thought how a large number of efficient LED bulbs at a low price would be ideal for lighting a rack. So my rack is indeed both wired like and as a Christmas tree!

Now I just have to finish putting all the systems in there and I will be able to call the project a success.

11 November 2015

Bits from Debian: New Debian Developers and Maintainers (September and October 2015)

The following contributors got their Debian Developer accounts in the last two months:
  • ChangZhuo Chen (czchen)
  • Eugene Zhukov (eugene)
  • Hugo Lefeuvre (hle)
  • Milan Kupcevic (milan)
  • Timo Weing rtner (tiwe)
  • Uwe Kleine-K nig (ukleinek)
  • Bernhard Schmidt (berni)
  • Stein Magnus Jodal (jodal)
  • Prach Pongpanich (prach)
  • Markus Koschany (apo)
  • Andy Simpkins (rattustrattus)
The following contributors were added as Debian Maintainers in the last two months:
  • Miguel A. Col n V lez
  • Afif Elghraoui
  • Bastien Roucari s
  • Carsten Schoenert
  • Tomasz Nitecki
  • Christoph Ulrich Scholler
  • Mechtilde Stehmann
  • Alexandre Viau
  • Daniele Tricoli
  • Russell Sim
  • Benda Xu
  • Andrew Kelley
  • Ivan Udovichenko
  • Shih-Yuan Lee
  • Edward Betts
  • Punit Agrawal
  • Andreas Boll
  • Dave Hibberd
  • Alexandre Detiste
  • Marcio de Souza Oliveira
  • Andrew Ayer
  • Alf Gaida
Congratulations!

19 October 2014

Neil Williams: OpenTAC an automation lab in a box

I ve previously covered running LAVA on ARM devices, now that the packages are in Debian. I ve also covered setting up the home lab, including the difficulty in obtaining the PDU and relying on another machine to provide USB serial converters with inherent problems of needing power to keep the same devices assigned to the same ser2net ports. There have been ideas about how to improve the situation. Conferences are a prime example setting up a demo involving LAVA means bringing a range of equipment, separate power bricks, separate network switches (with power bricks), a device of some kind to connect up the USB serial converters (and power brick) and then the LAVA server (with SATA drive and power brick) that is without the actual devices and their cables and power. Each of those power cables tend to be a metre long, with networking and serial, it quickly becomes a cable spaghetti. Ideas around this also have application inside larger deployments, so the hardware would need to daisy-chain to provide services to a rack full of test devices. The objective is a single case providing network, power and serial connectivity to a number of test devices over a single power input and network uplink. Naturally, with a strong free software and open development bias, the unit will be Open Hardware running Debian, albeit with a custom Beaglebone Linux kernel. It s a Test Automation Controller, so we re using the name OpenTAC. Progress Open hardware ARM device running Debian to automate tests on 4 to 8 devices, initially aimed at LAVA support for Linaro engineers. Power distribution, serial console, network and optional GPIO extensions. The design involves:
  • A Beaglebone Black (revC)
    • USB hotplug support required, certainly during development.
  • Custom PCB connected as a Beaglebone Cape, designed by Andy Simpkins.
  • Base board provides 4 channels:
    • 5V Power delivered over USB
    • Ethernet standard Cat5, no LEDs
    • Serial connectivity
      • RS232
      • UART
    • GPIO
  • Internal gigabit network switch
  • Space for a board like a CubieTruck (with SATA drive) to act as LAVA server
  • Daughter board:
    • Same basic design as the base board, providing another 4 channels, equivalent to the base channels. When the daughter board is fitted, a second network switch would be added instead of the CubieTruck.
  • Power consumption measurement per channel
    • queries made via the Beaglebone Black over arbitrary time periods, including during the test itself.
  • The GPIO lines can be used to work around issues with development boards under test, including closing connections which may be required to get a device to reboot automatically, without manual intervention.
  • Serial connections to test devices can be isolated during device power-cycles this allows for devices which pull power over the serial connection. (These are typically hardware design issues but the devices still need to be tested until the boards can be modified or replaced.)
  • Thermal control, individual fan control via the Beaglebone Black.
  • 1U case rackable or used alone on the desk of developers.
  • Software design:
    • lavapdu backend module for PDU control (opentac.py) & opentac daemon on the BBB
      • telnet opentac-01 3225
    • ser2net for serial console control
      • telnet opentac-01 4000
The initial schematics are now complete and undergoing design review. A lot of work remains

1 October 2014

Vincent Sanders: It is a bad plan that admits of no modification

I find it somewhat interesting that thousands of years later that our society still uses Publilius Syrus sententiae though I imagine the tendency to leave well enough alone means such phrases stay in usage.

Marvell ARM system - Photo from Steve McIntyre
One weekend Steve McIntyre asked me if I could find a source of some of some 40mm fans for some systems with some pretty strict requirements. They needed to be long life and shift a lot of air to combat a persistent overheating issue.

I sat with him and went through the Farnell utterly hateful parametric web interface and eventually came up with a couple of options which were very expensive. Only then did I stop and ask what the actual problem was.

Marvell ARM system Original internal cooling arrangement - Photo from Steve McIntyre
Steve showed me one of the Debian ARM buildd boxes which are Marvell development machines. These systems are powerful quad core machines housed in compact steel enclosures.

There is a single 40mm fan trying to provide cooling for the entire enclosure. When the units are placed horizontally and used intermittently this proves adequate. Unfortunately when the system are arranged vertically in a rack and run at full load continuously they often overheat and have to be restarted. In addition the small high speed fans need replacing frequently as their bearings wore out quickly.

Debian ARM buildd systems - Photo from Steve McIntyreThis was obviously causing some issues for the ARM Debian ports which Steve wanted to rectify. After talking the problem through for a while we came to the conclusion we could use much larger 60mm fans to blow air directly through the top of the case onto the cpu heatsink.

Larger fans can be run much more slowly to move a similar volume of air to the smaller 40mm fans which gives a much longer service life.

Hole punch and Drilling template
Steve proceeded to order enough parts to allow us to modify all the Debian systems, this worked out cheaper than a single "special" 40mm high volume fan.

I acquired a rather large steel hole punch, I chose this tool because it produces a much superior finish to a hole cutter and this project demanded a high level of finish (not to mention I loved having a valid excuse to own and use a huge allen key!)

If we had simply been modifying a single case I would have measured and marked up by hand. With the prospect of altering at least eight I laser cut a template from plywood which Andy Simpkins took great glee in excessively annotating.

We also used the opportunity to add bolt holes to securely attach the 2.5 inch SATA drives instead of using sticky pads.

Steve and I modified a single system to begin with both to check our alignment and the efficacy of the change. We were pleasantly surprised to discover that hoiby could now repeatedly do kernel compiles with all four cores flat out which was not possible before. The measured CPU temperature, which had previously been around 90 C, did not rise above 40 C

Steve and Andy on the assembly line
Steve, Andy and I then arranged a day where we took all the remaining units out of the rack at ARM, modified and returned them. We used the facilities at the Cambridge Makespace where I am a member to do the modifications.

I broke two 3mm drill bits and dulled a 4mm bit drilling all the holes, Roger Smith was good enough to loan us the use of his "Christmas tree bit" to ream the fan hole out to 16mm so we could thread the hole punch and cut the 60mm fan aperture out.

six modified systems ready to be re-racked.
We managed to get quite an assembly line going and, in my opinion, the results look pretty professional.

It has been several months since we did this work and these systems continue to run without issue. To complete the story we can see some graphs courtesy of the DSA munin instance.

CPU load on arnold.debian.org
You can clearly see the huge drop in temperature at the end of Week 25 despite the continuously high CPU load. Also there is only a single gap in the data after the changes (these indicate crashes where data was not recorded) where before there were frequent and extensive times where the systems were simply unusable.

CPU Temperature of arnold.debian.org
One reason I continue to enjoy Debian so much is the wide variety of ways in which I can contribute not only by maintaining my packages. Sometimes this kind of work does not receive the credit it deserves and hopefully highlights a small part of the frantic paddling that goes on under the serene surface of the Debian project to keep things "just working".

26 January 2014

Neil Williams: Home server rack

The uses of this particular rack I ll cover in future entries this is about how I made the rack itself, with help from friends (Steve McIntyre & Andy Simpkins). A common theme is making allowances for using dev kit boards ready-to-rack ARM servers are not here yet. My aim was to have 4, possibly 6 ARM dev kit boards running services from home, so there was no need for a standard 42U rack, a 9U rack is enough. Hence:
Wall Mounted 9U 450mm deep 19 inch rack enclosure glass door To run various other services around the house (firewall, file server etc.), a microserver was also necessary:
HP 704941-421 ProLiant Micro Server (AMD Turion II Neo N54L 2.2GHz, 2GB RAM, 250GB HDD, 2 Core, 7th Generation) I chose to mount that on a bookcase beneath the wall mounted rack as it kept all the cables at the bottom of the rack itself. The microserver needed a second gigabit network card fitted to cope with being a firewall as well, if you do the same, ensure you find a suitable card with a low profile bracket. Some are described as being low profile but do not package the low profile bracket, only a low profile card and a full height bracket.
Intel EXPI9301CTBLK PRO1000 Network Card note the low profile bracket in the pack. The first of the dev kit requirements is the lack of boards which can be racked, so shelves are going to be needed, leading on to something to stop the boards wandering across the shelf when the cables are adjusted velcro pads in my case. Second requirement is that dev kit boards are notorious for not rebooting cleanly. Nothing to do with the image being run, the board just doesn t cut power or doesn t come back after cutting power. Sometimes this is down to early revisions of the board, sometimes the board pulls enough power through the USB serial converter to remain alive, whatever the cause, it won t reboot without user involvement. So a PDU becomes necessary remotely controllable. New units tend to be expensive and/or only suitable for larger racks, I managed to find an older 8 port APC unit, something like: (Don t be surprised if that becomes a dead link search for APC Smart Slot Master Switch Power Distribution Unit). Talking of power, I m looking to use SATA drives with these boards and the boards themselves come with a variety of wall wart plugs or USB cables, so a number of IEC sockets are needed not the usual plugs:
Power cable IEC C14 plug 13A socket 25 cm or, for devices which genuinely need 2A to boot (use the 1A for attached SATA or leave empty):

Black Universal 3.1A 15W 5V Dual USB Rapid Mains Charger Plug Check the power output rating of the USB plugs used to connect to the mains as well many are 1A or less. Keep the right plug for the right board.
Power is going to also be a problem if, like me, you want to run SATA drives off boards which support SATA. The lack of a standard case means that ATX power is awkward, so check out some cheap SATA enclosures to get a SATA connector with USB power. I am using these enclosures (prices seem to have risen since I obtained them):

Startech 2.5 inch eSATA USB External Hard Drive Enclosure for SATA HDD Along with these:
eSATA to SATA Serial External Shielded Cable 1m because the iMx53 boards have SATA connectors but the enclosure exports eSATA. Whilst this might seem awkward, the merit of having both eSATA and simple USB power on one enclosure is not to be under-estimated. (Avoid the stiffer black cables space will get tight inside the rack.) Naturally, a 2.5 inch SATA drive is going to be needed for each enclosure, I m using HDD but SSD is also an option. Also, consider simple 2 or 3 way fused adaptors so that the board and the SATA drive can be powered from a single PDU port, this makes rebooting much simpler if the board needs a power supply with integrated plug instead of over USB. Now to the networking (2 x 8 port was cheaper than 1 x 16):
Netgear GS108 8-port Gigabit Ethernet Unmanaged Switch Don t forget the cat5 cables too you ll want lots of short cables, 1m or shorter inside the rack and a few longer ones going to the microserver and wall socket. I used 8x1m. Naturally, on the floor below your rack you are going to put a UPS, so the PDU power then needs to be converted to draw from the UPS via IEC plugs instead of standard mains. I decided to use a 6 gang extension 1m cable with an IEC plug it was the only bit of wiring I had to do and even those are available ready-made if you want to do it that way. Depending on the board, you may need your own serial to USB converters, you ll certainly need some powered USB hubs. I m using a wall mounted 9U rack, so I also needed a masonry drill and 4 heavy duty masonry M8 bolts. The rack comes with a mounting plate which needs to be bolted to the wall but nothing else is included. This step is much easier with someone else to take the weight of the rack as it is guided into the brackets on the mounting plate the bracket may need a little persuasion to allow for the bolt heads to not get in the way during mounting. Once mounted, the holes in the back of the rack allow for plenty of room, it s just getting to that point. The rack has side panels which latch out easily, providing easy maintenance. The glass door can be easily reversed to open from the opposite side. However, the key in the glass door is largely useless. The expectation is that the units in the rack are attached at the front but the dev boards on shelves are not going to be protected by a key in the front door. The key therefore ends up being little more than a handle for the glass door. OK. If you ve got this far, it s a case of putting things together:
Economy Cage Nut Tool 19 inch racking for cagenut extraction Yes, you really do want one. Fine, do without the premium one, but the economy one will save you a lot of (physical) pain. At this stage, it becomes clear that the normal 19 inch server rack shelves don t leave a lot of room at the back of the rack for the cables and there are a lot of cables. Each board has power, USB serial connection and network. The SATA has power too. The PDU has a power lead and you ll need network switches too. The network switches need power and an uplink cable. I positioned the supports in the rack as far forward as possible and attached the shelves to give enough room for the PDU on the base of the rack, the network switches resting on top and the extension bar (with the heavier, stiffer cables) at the back. (I need to bring my shelves another 1 or 2 positions further forward as there is barely enough room for one cable between the shelf and the back of the rack and that makes moving boards around harder than it needs to be.) The PDU defaults to enabling all ports at startup, so connect to it over telnet and turn off the ports before connecting things and sorting out the network interface to what the rest of the lab needs. (I m using a 10. range and the PDU was originally set to use 192.168.1.) That s about it as far as the hardware setup is concerned. Just time to label up each board, note down which PDU port does which device, which serial to USB converter is on which device on the microserver and check the power my initial problem with one board was traced to the inability of the board to power SATA off the on-board USB port even when using the provided 2A power supply. That meant adding a standard mains adaptor to feed both the SATA power and the board power off the one PDU port there is little point powering off the board but not the SATA, or vice versa. I haven t totalled up the expenditure but the biggest expenses were the microserver and the wall mounted rack but don t underestimate how much it will cost to buy 6 IEC plugs, various USB serial converters and how much you may spend on peripheral items. There is quite a lot of room on the 2 shelves for more boards, what will limit the deployment in this rack is space for the cables, especially power. The shorter the power cables, the easier it will be to maintain the devices in the rack. It might be worth looking at a 12U rack, if only to give plenty of space for cables. Once I ve got the software working, I ll describe what this rack will be doing it s got something to do with Debian, ARM, Linux and tests but you ve probably already guessed that much

25 January 2013

Neil Williams: Hard drive death

My 1Tb laptop drive started misbehaving a few weeks ago, just spending a lot of time spinning when it should have been reading frequently changed files (like the browser cache). I was tempted to blame the browser at that point as no other packages appeared affected.

Wednesday night, a routine package upgrade on unstable brought in a bunch of qt4 updates which I wanted and a virtual box update that I didn't see much point in delaying ... 15 minutes later I couldn't work out why the virtualbox dkms task was still running, spotted it spinning in depmod and found some alarming messages in dmesg about short reads and errors reading from the hard drive. Hmm. The hard drive was out of control at this point, it quickly became apparent that no disc access was going to be possible and I couldn't get to a terminal to kill the current tasks, so I killed the power. The fsck which followed reboot showed more of the errors I'd seen in dmesg and fell back to the manual intervention stage. A few hours of confirming attempts to fix the errors, fsck finally finished. A short amount of usage showed that although fsck had finished, the drive was not happy and was starting to give short reads on other parts of the filesystem, resulting in ~40% of the filesystem appearing to be read-only when the rest was read-write. Somehow, I didn't think this was a welcome feature as the areas affected appeared to be quite random.

The drive in question was a replacement for the original 300Gb drive supplied with the ThinkPad, so a quick bit of switching of drives into a caddy and I could rsync my data off the large drive onto the smaller one. The rsync itself took a lot longer than it should have done because it got lots of short reads too. (Principally in /lib/modules/3.2.0-4/ and in the browser cache directories which had been the original symptom as well as most other places where one could have expected processes to have open files when the drive failed).

Now the 1Tb drive was a pig to fit into the Thinkpad originally because it was too big for the bay but I fitted it anyway. Yes, that was probably a mistake. It certainly meant that in order to fit it I had to not put the drive into the useful caddy provided by Lenovo which makes removal of the drive simple. Indeed the drive was wedged into the bay so tightly that it wasn't going to come out with normal levels of persuasion. This probably contributed to the failure of the drive, so live and learn.

With help from Andy Simpkins (it's always handy to have a hardware engineer on hand at times like this), the keyboard was lifted out, the case was dismantled and just enough room was made to get a screwdriver in behind the sata drive and lever it out of the bay. OK, rebuild laptop, put replacement drive into the caddy (because the smaller capacity drive is also a lot smaller in height than the 1Tb and therefore has plenty of clearance between it and the bay) and move on to the software recovery stage.

Hint: if this happens again, before turning off the broken system for the last time, just remember to download a recent Debian ISO to a USB stick - it saves having to ask someone else or find another machine to do the download. (Thanks Andy...)

OK, so after the usual complaints on reboot that there was no operating system, F12 got the boot order menu up and I was in Debian Installer Rescue Mode. Reinstalling grub failed initially for a few reasons:

  1. I'd deliberately not copied /dev /proc and /sys from the old harddrive but I'd also forgotten to create empty ones on the new drive...
  2. /etc/fstab helpfully referred to / as a UUID which no longer applied, so that had to be edited
  3. grub was confused and couldn't find the root filesystem

A few iterations later, I had a working /dev directory inside the /target chroot, bind mounted from the /dev outside the chroot, I was able to mount proc and sys, so grub was finally happy to reinstall itself and then update the initramfs setup for the new drive.

Reboot, another fsck, all appeared well. I was able to login via the terminal but not in X. Hmmm. Stop xdm, startx manually from the terminal, problems with /tmp/ - permission denied. Oops. Yes, it does help to create /tmp with the right permissions....

The final stage was to complete the dpkg --configure -a from the original failure. I've yet to reinstall the 3.2.0-4 kernel, so I'm back on 3.2.0-3 but that's OK.

So now I'm back on the original drive, albeit temporarily without any swap whatsoever (because I didn't partition the replacement drive to create /dev/sda5 before doing the copy) and now I remember the second reason I wanted to replace the original drive with the 1Tb drive - the original drive is as NOISY as hell. The whole edge of the laptop vibrates constantly, to the point that I can feel the vibration under the keys as I type. It's not that the drive is loose in the bay, it's just a constant vibration.

But, I have kept all my data and I have a usable laptop for the BSP this weekend. I will be looking at an SSD drive to replace this one though and having also found my old Acer laptop with power supply, I can now reference this entry when I transfer the system a second time.