Search Results: "Andrea Veri"

2 December 2015

Andrea Veri: Three years and counting

It s been a while since my last what s been happening behind the scenes e-mail so I m here to report on what has been happening within the GNOME Infrastructure, its future plans and my personal sensations about a challenge that started around three (3) years ago when Sriram Ramkrishna and Jeff Schroeder proposed my name as a possible candidate for coordinating the team that runs the systems behind the GNOME Project. All this followed by the official hiring achieved by Karen Sandler back in February 2013. The GNOME Infrastructure has finally reached stability both in terms of reliability and uptime, we didn t have any service disruption this and the past year and services have been running smoothly as they were expected to in a project like the one we are managing. As many of you know service disruptions and a total lack of maintenance were very common before I joined back in 2013, I m so glad the situation has dramatically changed and developers, users, passionates are now able to reach our websites, code repositories, build machines without experiencing slowness, downtimes or
unreachability. Additionally all these groups of people now have a reference point they can contact in case they need help when coping with the infrastructure they daily use. The ticketing system allows users to get in touch with the members of the Sysadmin Team and receive support right away within a very short period of time (Also thanks to Pagerduty, service the Foundation is kindly sponsoring) Before moving ahead to the future plans I d like to provide you a summary of what has been done during these roughly three years so you can get an idea of why I define the changes that happened to the infrastructure a complete revamp:
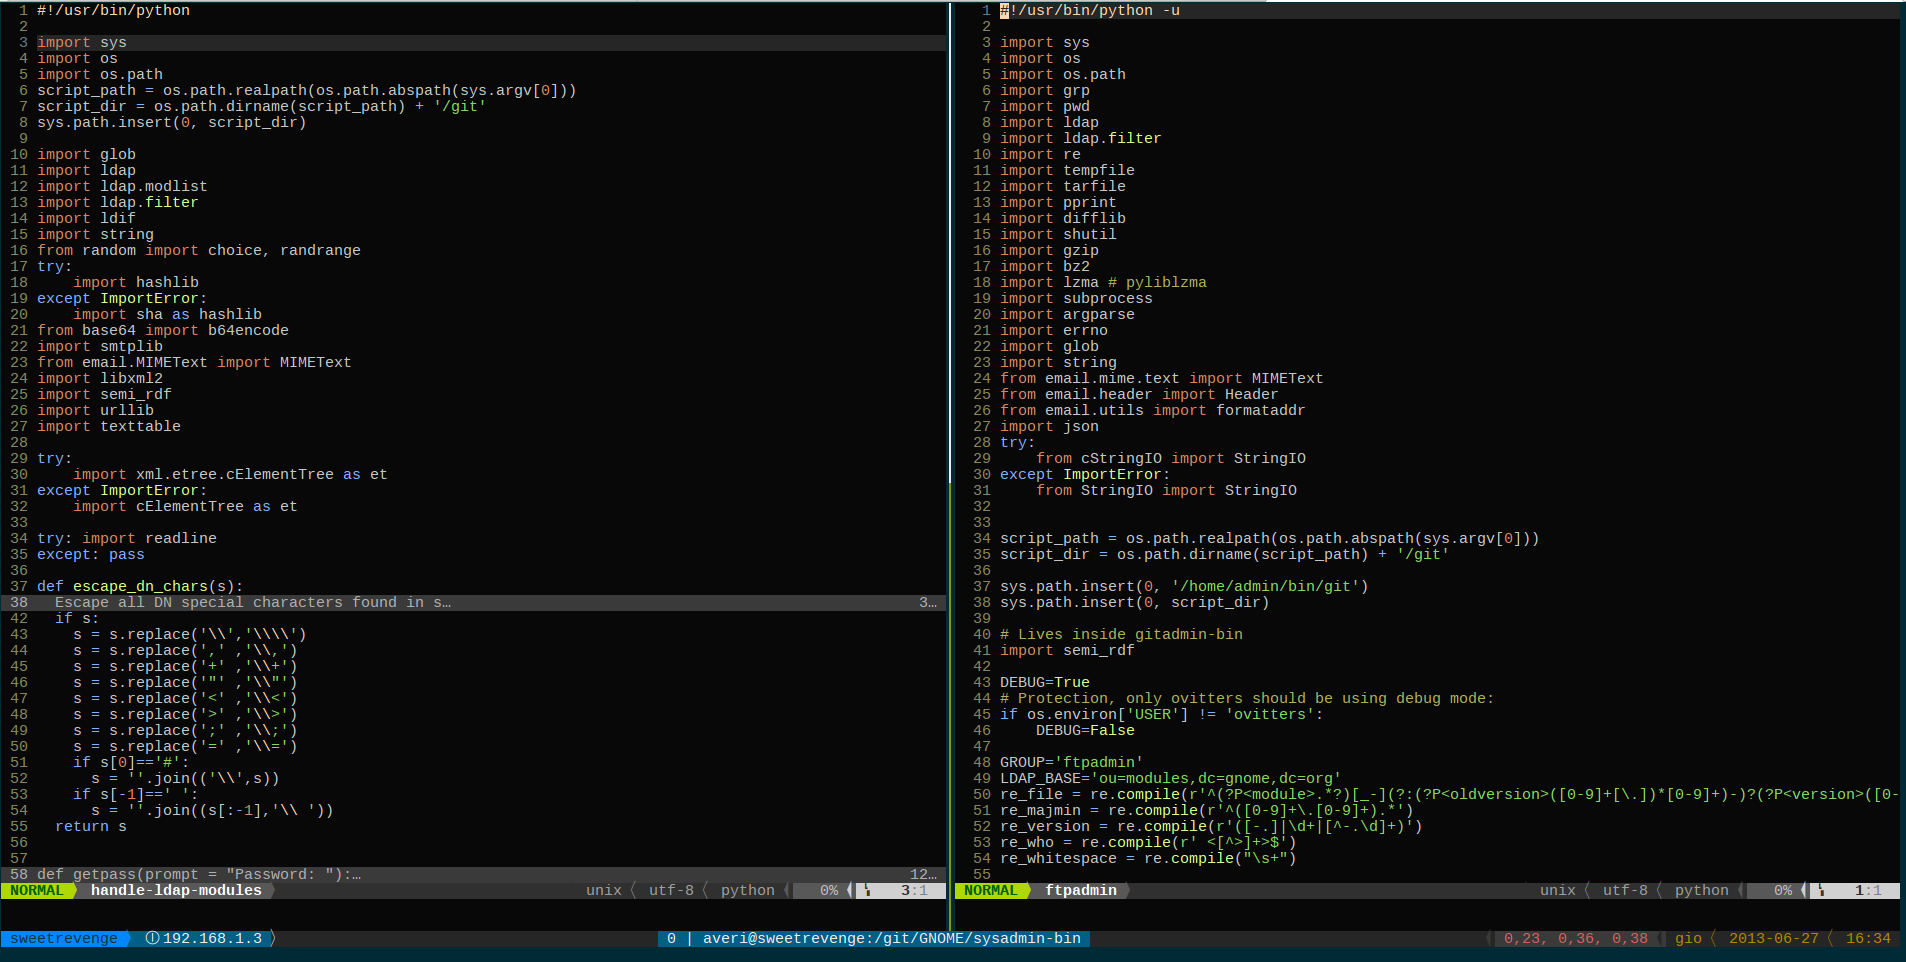
  1. Recycled several ancient machines migrating services off of them while consolidating them by placing all their configuration on our central configuration management platform ran by Puppet. This includes a grand total of 7 machines that were replaced by new hardware and extended warranties the Foundation kindly sponsored.
  2. We strenghten our websites security by introducing SSL certificates everywhere and recently replacing them with SHA2 certificates.
  3. We introduced several services such as Owncloud, the Commits Bot, the Pastebin, the Etherpad, Jabber, the GNOME Github mirror.
  4. We restructured the way we backup our machines also thanks to the Fedora Project sponsoring the disk space on their backup facility. The way we were used to handle backups drastically changed from early years where a magnetic tape facility was in charge of all the burden of archiving our data to today where a NetApp is used together with rdiff-backup.
  5. We upgraded Bugzilla to the latest release, a huge thanks goes to Krzesimir Nowak who kindly helped us building the migration tools.
  6. We introduced the GNOME Apprentice program open-sourcing our internal Puppet repository and cleansing it (shallow clones FTW!) from any sensitive information which now lives on a different repository with restricted access.
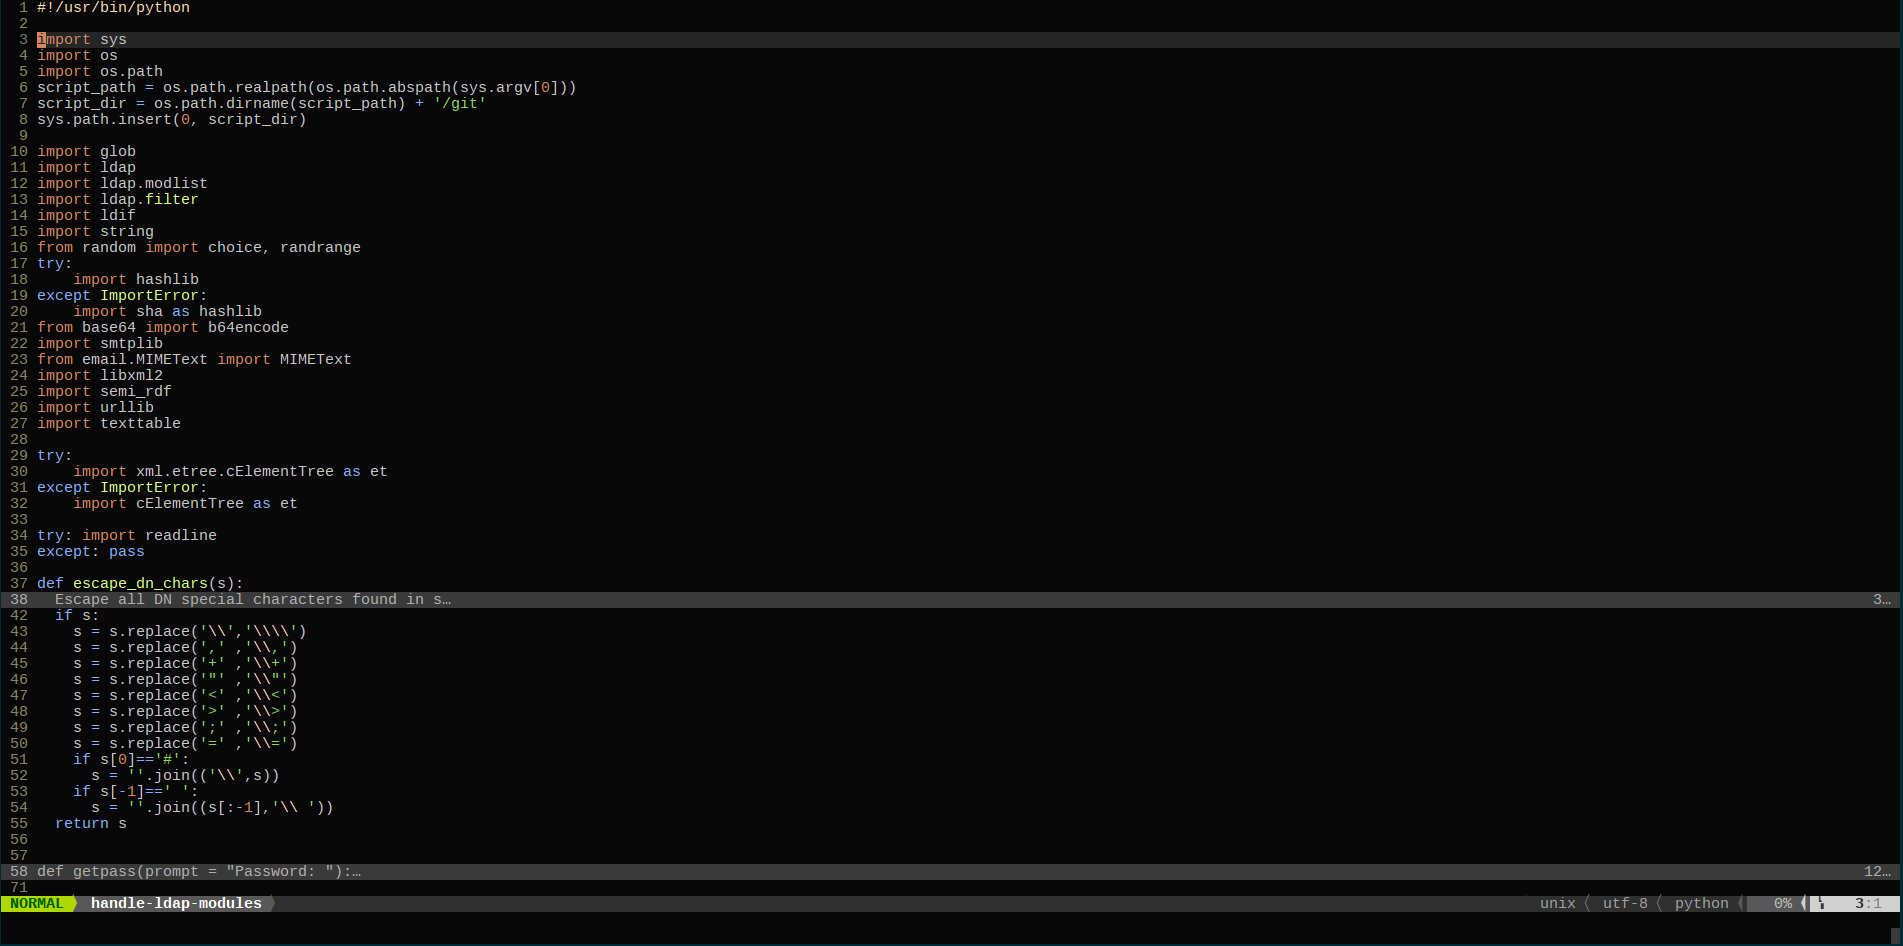
  7. We retired Mango and our OpenLDAP instance in favor of FreeIPA which allows users to modify their account information on their own without waiting for the Accounts Team to process the change.
  8. We documented how our internal tools are customized to play together making it easy for future Sysadmin Team members to learn how the infrastructure works and supersede existing members in case they aren t able to keep up their position anymore.
  9. We started providing hosting to the GIMP and GTK projects which now completely rely on the GNOME Infrastructure. (DNS, email, websites and other services infrastructure hosting)
  10. We started providing hosting not only to the GIMP and GTK projects but to localized communities as well such as GNOME Hispano and GNOME Greece
  11. We configured proper monitoring for all the hosted services thanks to Nagios and Check-MK
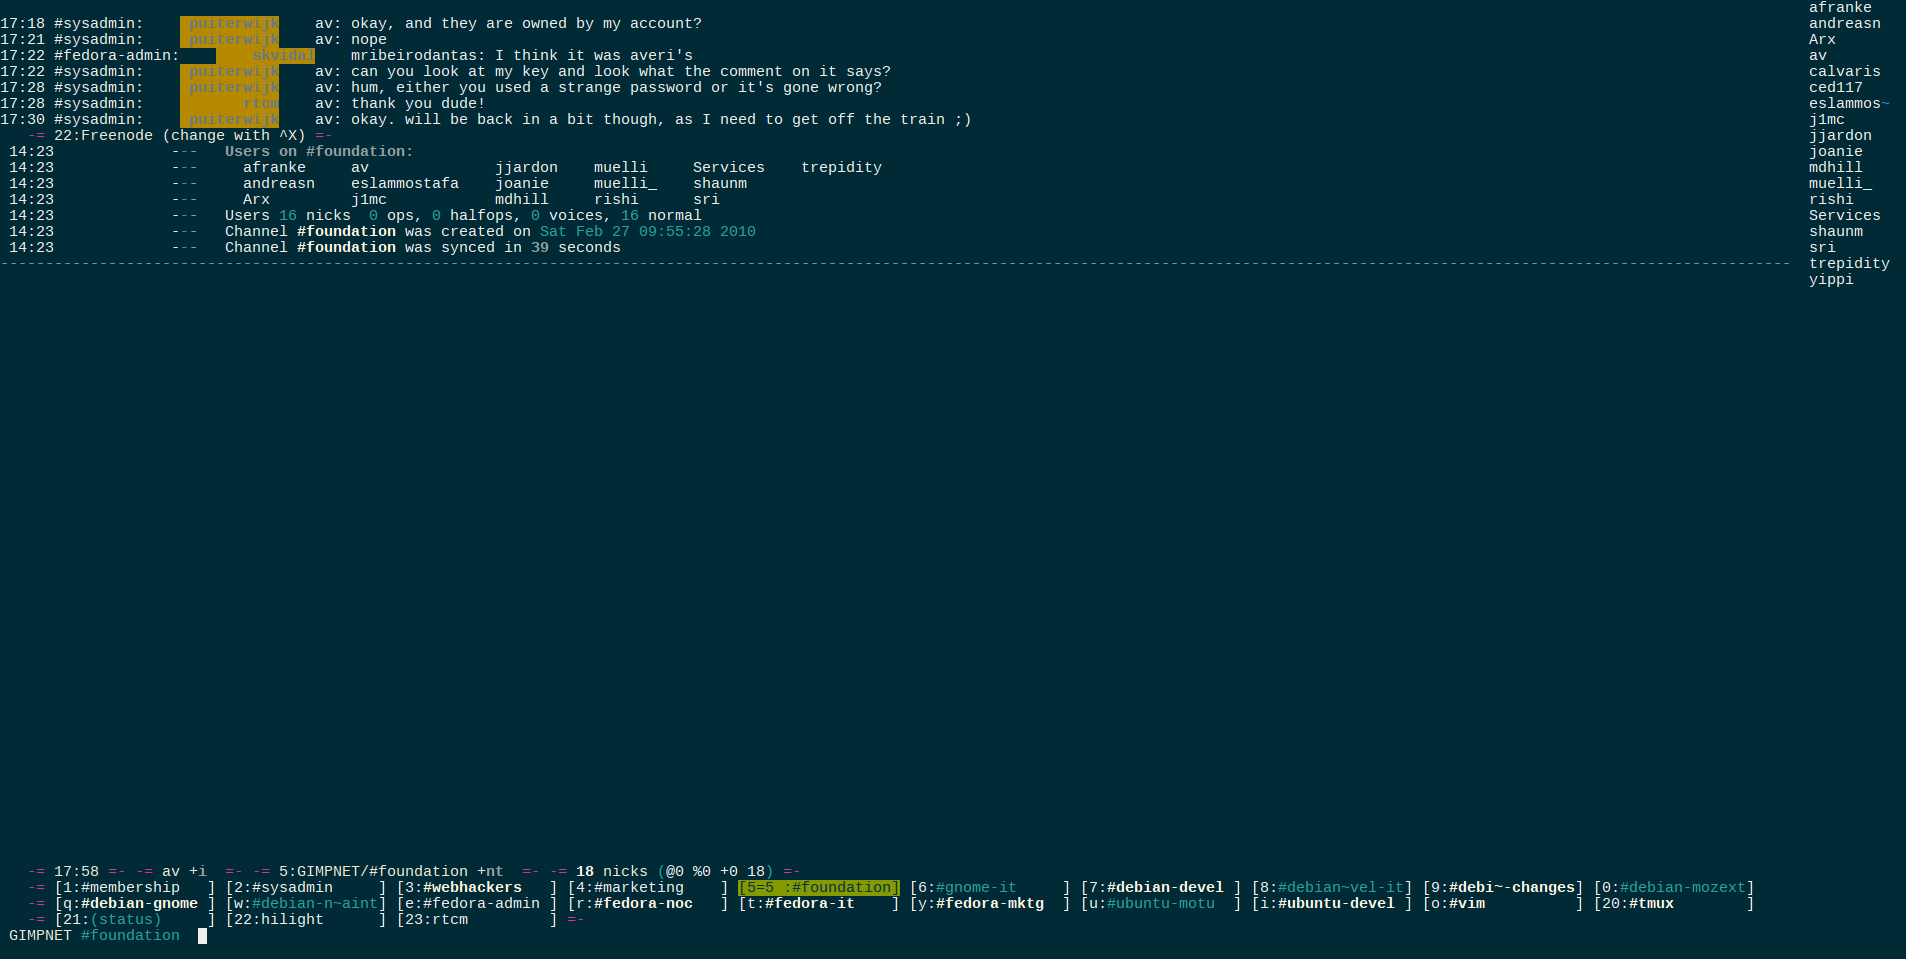
  12. We migrated the IRC network to a newer ircd with proper IRC services (Nickserv, Chanserv) in place.
  13. We made sure each machine had a configured management (mgmt) and KVM interface for direct remote access to the bare metal machine itself, its hardware status and all the operations related to it. (hard reset, reboot, shutdown etc.)
  14. We upgraded MoinMoin to the latest release and made a substantial cleanup of old accounts, pages marked as spam and trashed pages.
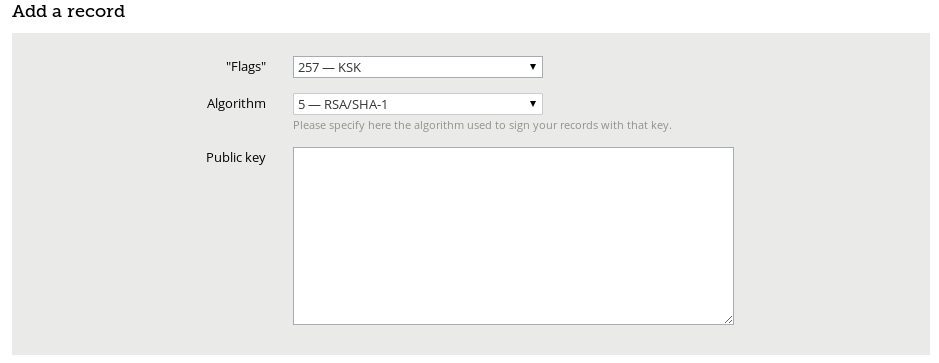
  15. We deployed DNSSEC for several domains we manage including gnome.org, guadec.es, gnomehispano.es, guadec.org, gtk.org and gimp.org
  16. We introduced an account de-activation policy which comes into play when a contributor not committing to any of the hosted repositories at git.gnome.org since two years is caught by the script. The account in question is marked as inactive and the gnomecvs (from the old cvs days) and ftpadmin groups are removed.
  17. We planned mass reboots of all the machines roughly every month for properly applying security and kernel updates.
  18. We introduced Mirrorbrain (MB), the mirroring service serving GNOME and related modules tarballs and software all over the world. Before introducing MB GNOME had several mirrors located in all the main continents and at the same time a very low amount of users making good use of them. Many organizations and companies behind these mirrors decided to not host GNOME sources anymore as the statistics of usage were very poor and preferred providing the same service to projects that really had a demand for these resources. MB solved all this allowing a proper redirect to the closest mirror (through mod_geoip) and making sure the sources checksum matched across all the mirrors and against the original tarball uploaded by a GNOME maintainer and hosted at master.gnome.org.
I can keep the list going for dozens of other accomplished tasks but I m sure many of you are now more interested in what the future plans actually are in terms of where the GNOME Infrastructure should be in the next couple of years. One of the main topics we ve been discussing will be migrating our Git infrastructure away from cgit (which is mainly serving as a code browsing tool) to a more complete platform that is surely going to include a code review tool of some sort. (Gerrit, Gitlab, Phabricator) Another topic would be migrating our mailing lists to Mailman 3 / Hyperkitty. This also means we definitely need a staging infrastructure in place for testing these kind of transitions ideally bound to a separate Puppet / Ansible repository or branch. Having a different repository for testing purposes will also mean helping apprentices to test their changes directly on a live system and not on their personal computer which might be running a different OS / set of tools than the ones we run on the GNOME Infrastructure. What I also aim would be seeing GNOME Accounts being the only authentication resource in use within the whole GNOME Infrastructure. That means one should be able to login to a specific service with the same username / password in use on the other hosted services. That s been on my todo list for a while already and it s probably time to push it forward together with Patrick Uiterwijk, responsible of Ipsilon s development at Red Hat and GNOME Sysadmin. While these are the top priority items we are soon receiving new hardware (plus extended warranty renewals for two out of the three machines that had their warranty renewed a while back) and migrating some of the VMs off from the current set of machines to the new boxes is definitely another task I d be willing to look at in the next couple of months (one machine (ns-master.gnome.org) is being decommissioned giving me a chance to migrate away from BIND into NSD). The GNOME Infrastructure is evolving and it s crucial to have someone maintaining it. On this side I m bringing to your attention the fact the assigned Sysadmin funds are running out as reported on the Board minutes from the 27th of October. On this side Jeff Fortin started looking for possible sponsors and came up with the idea of making a brochure with a set of accomplished tasks that couldn t have been possible without the Sysadmin fundraising campaign launched by Stormy Peters back in June 2010 being a success. The Board is well aware of the importance of having someone looking at the infrastructure that runs the GNOME Project and is making sure the brochure will be properly reviewed and published. And now some stats taken from the Puppet Git Repository:
$ cd /git/GNOME/puppet && git shortlog -ns
3520 Andrea Veri
506 Olav Vitters
338 Owen W. Taylor
239 Patrick Uiterwijk
112 Jeff Schroeder
71 Christer Edwards
4 Daniel Mustieles
4 Matanya Moses
3 Tobias Mueller
2 John Carr
2 Ray Wang
1 Daniel Mustieles Garc a
1 Peter Baumgarten
and from the Request Tracker database (52388 being my assigned ID):
mysql> select count(*) from Tickets where LastUpdatedBy = '52388';
+----------+
  count(*)  
+----------+
  3613  
+----------+
1 row in set (0.01 sec)
mysql> select count(*) from Tickets where LastUpdatedBy = '52388' and Status = 'Resolved';
+----------+
  count(*)  
+----------+
  1596  
+----------+
1 row in set (0.03 sec)
It s been a long run which made me proud, for the things I learnt, for the tasks I ve been able to accomplish, for the great support the GNOME community gave me all the time and most of all for the same fact of being part of the team responsible of the systems hosting the GNOME Project. Thank you GNOME community for your continued and never ending backing, we daily work to improve how the services we host are delivered to you and the support we receive back is fundamental for our passion and enthusiasm to remain high!

28 January 2015

Andrea Veri: The GNOME Infrastructure Apprentice Program

Many times it happened seeing someone joining the #sysadmin IRC channel requesting participation to the team after having spent around 5 minutes trying to explain what the skills and the knowledge were and why this person felt it was the right figure for the position. And it was always very disappointing for me having to reject all these requests as we just didn t have the infrastructure in place to let new people join the rest of the team with limited privileges. With the introduction of FreeIPA, more fine-grained ACLs (and hiera-eyaml-gpg for securing tokens, secrets, passwords out of Puppet itself) we are so glad to announce the launch of the GNOME Infrastructure Apprentice Program (from now till the end of the post just Program ). If you are familiar with the Fedora Infrastructure and how it works you might know what this is about already. If you don t please read further ahead. The Program will allow apprentices to join the Sysadmin Team with a limited set of privileges which mainly consist in being able to access the Puppet repository and all the stored configuration files that run the machines powering the GNOME Infrastructure every day. Once approved to the Program apprentices will be able to submit patches for review to the team and finally see their work merged on the production environment if the proposed changes matched the expectations and addressed comments. While the Program is open to everyone to join, we have some prerequisites in place. The interested person should be:
  1. Part of an existing FOSS community
  2. Familiar with how a FOSS Project works behind the scenes
  3. Familiar with popular tools like Puppet, Git
  4. Familiar with RHEL as the OS of choice
  5. Familiar with popular Sysadmin tools, softwares and procedures
  6. Eager to learn new things, make constructive discussions with a team, provide feedback and new ideas
If you feel like having all the needed prerequisites and would be willing to join follow these steps:
  1. Subscribe to the gnome-infrastructure and infrastructure-announce mailing lists
  2. Join the #sysadmin IRC channel on irc.gnome.org
  3. Send a presentation e-mail to the gnome-infrastructure mailing list stating who you are, what your past experiences and plans are as an Apprentice
  4. Once the presentation has been sent an existing Sysadmin Team member will evaluate your application and follow-up with you introducing you to the Program
More information about the Program is available here.

7 October 2014

Andrea Veri: The GNOME Infrastructure is now powered by FreeIPA!

As preannounced here the GNOME Infrastructure switched to a new Account Management System which is reachable at https://account.gnome.org. All the details will follow. Introduction It s been a while since someone actually touched the underlaying authentication infrastructure that powers the GNOME machines. The very first setup was originally configured by Jonathan Blandford (jrb) who configured an OpenLDAP istance with several customized schemas. (pServer fields in the old CVS days, pubAuthorizedKeys and GNOME modules related fields in recent times) While OpenLDAP-server was living on the GNOME machine called clipboard (aka ldap.gnome.org) the clients were configured to synchronize users, groups, passwords through the nslcd daemon. After several years Jeff Schroeder joined the Sysadmin Team and during one cold evening (date is Tue, February 1st 2011) spent some time configuring SSSD to replace the nslcd daemon which was missing one of the most important SSSD features: caching. What surely convinced Jeff to adopt SSSD (a very new but promising sofware at that time as the first release happened right before 2010 s Christmas) and as the commit log also states ( New sssd module for ldap information caching ) was SSSD s caching feature. It was enough for a certain user to log in once and the /var/lib/sss/db directory was populated with its login information preventing the LDAP daemon in charge of picking up login details (from the LDAP server) to query the LDAP server itself every single time a request was made against it. This feature has definitely helped in many occasions especially when the LDAP server was down for a particular reason and sysadmins needed to access a specific machine or service: without SSSD this wasn t ever going to work and sysadmins were probably going to be locked out from the machines they were used to manage. (except if you still had /etc/passwd , /etc/group and /etc/shadow entries as fallback) Things were working just fine except for a few downsides that appeared later on:
  1. the web interface (view) on our LDAP user database was managed by Mango, an outdated tool which many wanted to rewrite in Django that slowly became a huge dinosaur nobody ever wanted to look into again
  2. the Foundation membership information were managed through a MySQL database, so two databases, two sets of users unrelated to each other
  3. users were not able to modify their own account information on their own but even a single e-mail change required them to mail the GNOME Accounts Team which was then going to authenticate their request and finally update the account.
Today s infrastructure changes are here to finally say the issues outlined at (1, 2, 3) are now fixed. What has changed? The GNOME Infrastructure is now powered by Red Hat s FreeIPA which bundles several FOSS softwares into one big bundle all surrounded by an easy and intuitive web UI that will help users update their account information on their own without the need of the Accounts Team or any other administrative entity. Users will also find two custom fields on their Overview page, these being Foundation Member since and Last Renewed on date . As you may have understood already we finally managed to migrate the Foundation membership database into LDAP itself to store the information we want once and for all. As a side note it might be possible that some users that were Foundation members in the past won t find any detail stored on the Foundation fields outlined above. That is actually expected as we were able to migrate all the current and old Foundation members that had an LDAP account registered at the time of the migration. If that s your case and you still would like the information to be stored on the new setup please get in contact with the Membership Committee at stating so. Where can I get my first login credentials? Let s make a little distinction between users that previously had access to Mango (usually maintainers) and users that didn t. If you were used to access Mango before you should be able to login on the new Account Management System by entering your GNOME username and the password you were used to use for loggin in into Mango. (after loggin in the very first time you will be prompted to update your password, please choose a strong password as this account will be unique across all the GNOME Infrastructure) If you never had access to Mango, you lost your password or the first time you read the word Mango on this post you thought why is he talking about a fruit now? you should be able to reset it by using the following command:
ssh -l yourgnomeuserid account.gnome.org
The command will start an SSH connection between you and account.gnome.org, once authenticated (with the SSH key you previously had registered on our Infrastructure) you will trigger a command that will directly send your brand new password on the e-mail registered for your account. From my tests seems GMail sees the e-mail as a phishing attempt probably because the body contains the word password twice. That said if the e-mail won t appear on your INBOX, please double-check your Spam folder. Now that Mango is gone how can I request a new account? With Mango we used to have a form that automatically e-mailed the maintainer of the selected GNOME module which was then going to approve / reject the request. From there and in the case of a positive vote from the maintainer the Accounts Team was going to create the account itself. With the recent introduction of a commit robot directly on l10n.gnome.org the number of account requests reduced its numbers. In addition to that users will now be able to perform pretty much all the needed maintenance on their accounts themselves. That said and while we will probably work on building a form in the future we feel that requesting accounts can definitely be achieved directly by mailing the Accounts Team itself which will mail the maintainer of the respective module and create the account. As just said the number of account creations has become very low and the queue is currently clear. The documentation has been updated to reflect these changes at: https://wiki.gnome.org/AccountsTeam
https://wiki.gnome.org/AccountsTeam/NewAccounts The migration of all the user data and ACLs has been massive and I ve been spending a lot of time reviewing the existing HBAC rules trying to spot possible errors or misconfigurations. If you happen to not being able to access a certain service as you were used to in the past, please get in contact with the Sysadmin Team. All the possible ways to contact us are available at https://wiki.gnome.org/Sysadmin/Contact. What is missing still? Now that the Foundation membership information has been moved to LDAP I ll be looking at porting some of the existing membership scripts to it. What I managed to port already are welcome e-mails for new or existing members. (renewals) Next step will be generating a membership page from LDAP (to populate http://www.gnome.org/foundation/membership) and all the your-membership-is-going-to-lapse e-mails that were being sent till today. Other news /home/users mount on master.gnome.org You will notice that loggin in into master.gnome.org will result in your home directory being empty, don t worry, you did not lose any of your files but master.gnome.org is now currently hosting your home directories itself. As you may have been aware of adding files to the public_html directory on master resulted in them appearing on your people.gnome.org/~userid space. That was unfortunately expected as both master and webapps2 (the machine serving people.gnome.org s webspaces) were mounting the same GlusterFS share. We wanted to prevent that behaviour to happen as we wanted to know who has access to what resource and where. From today master s home directories will be there just as a temporary spot for your tarballs, just scp and use ftpadmin against them, that should be all you need from master. If you are interested in receiving or keeping using your people.gnome.org s webspace please mail stating so. Other news a shiny and new error 500 page has been deployed Thanks to Magdalen Berns (magpie) a new error 500 web page has been deployed on all the Apache istances we host. The page contains an iframe of status.gnome.org and will appear every single time the web server behind the service you are trying to reach will be unreachable for maintenance or other purposes. While I hope you won t see the page that often you can still enjoy it at https://static.gnome.org/error-500/500.html. Make sure to whitelist status.gnome.org on your browser as it currently loads it without https. (as the service is currently hosted on OpenShift which provides us with a *.rhcloud.com wildcard certificate, which differs from the CN the browser would expect it to be)

Andrea Veri: The GNOME Infrastructure is now powered by FreeIPA!

As preannounced here the GNOME Infrastructure switched to a new Account Management System which is reachable at https://account.gnome.org. All the details will follow. Introduction It s been a while since someone actually touched the underlying authentication infrastructure that powers the GNOME machines. The very first setup was originally configured by Jonathan Blandford (jrb) who configured an OpenLDAP istance with several customized schemas. (pServer fields in the old CVS days, pubAuthorizedKeys and GNOME modules related fields in recent times) While OpenLDAP-server was living on the GNOME machine called clipboard (aka ldap.gnome.org) the clients were configured to synchronize users, groups, passwords through the nslcd daemon. After several years Jeff Schroeder joined the Sysadmin Team and during one cold evening (date is Tue, February 1st 2011) spent some time configuring SSSD to replace the nslcd daemon which was missing one of the most important SSSD features: caching. What surely convinced Jeff to adopt SSSD (a very new but promising sofware at that time as the first release happened right before 2010 s Christmas) and as the commit log also states ( New sssd module for ldap information caching ) was SSSD s caching feature. It was enough for a certain user to log in once and the /var/lib/sss/db directory was populated with its login information preventing the LDAP daemon in charge of picking up login details (from the LDAP server) to query the LDAP server itself every single time a request was made against it. This feature has definitely helped in many occasions especially when the LDAP server was down for a particular reason and sysadmins needed to access a specific machine or service: without SSSD this wasn t ever going to work and sysadmins were probably going to be locked out from the machines they were used to manage. (except if you still had /etc/passwd , /etc/group and /etc/shadow entries as fallback) Things were working just fine except for a few downsides that appeared later on:
  1. the web interface (view) on our LDAP user database was managed by Mango, an outdated tool which many wanted to rewrite in Django that slowly became a huge dinosaur nobody ever wanted to look into again
  2. the Foundation membership information were managed through a MySQL database, so two databases, two sets of users unrelated to each other
  3. users were not able to modify their own account information on their own but even a single e-mail change required them to mail the GNOME Accounts Team which was then going to authenticate their request and finally update the account.
Today s infrastructure changes are here to finally say the issues outlined at (1, 2, 3) are now fixed. What has changed? The GNOME Infrastructure is now powered by Red Hat s FreeIPA which bundles several FOSS softwares into one big bundle all surrounded by an easy and intuitive web UI that will help users update their account information on their own without the need of the Accounts Team or any other administrative entity. Users will also find two custom fields on their Overview page, these being Foundation Member since and Last Renewed on date . As you may have understood already we finally managed to migrate the Foundation membership database into LDAP itself to store the information we want once and for all. As a side note it might be possible that some users that were Foundation members in the past won t find any detail stored on the Foundation fields outlined above. That is actually expected as we were able to migrate all the current and old Foundation members that had an LDAP account registered at the time of the migration. If that s your case and you still would like the information to be stored on the new setup please get in contact with the Membership Committee at stating so. Where can I get my first login credentials? Let s make a little distinction between users that previously had access to Mango (usually maintainers) and users that didn t. If you were used to access Mango before you should be able to login on the new Account Management System by entering your GNOME username and the password you were used to use for loggin in into Mango. (after loggin in the very first time you will be prompted to update your password, please choose a strong password as this account will be unique across all the GNOME Infrastructure) If you never had access to Mango, you lost your password or the first time you read the word Mango on this post you thought why is he talking about a fruit now? you should be able to reset it by using the following command:
ssh -l yourgnomeuserid account.gnome.org
The command will start an SSH connection between you and account.gnome.org, once authenticated (with the SSH key you previously had registered on our Infrastructure) you will trigger a command that will directly send your brand new password on the e-mail registered for your account. From my tests seems GMail sees the e-mail as a phishing attempt probably because the body contains the word password twice. That said if the e-mail won t appear on your INBOX, please double-check your Spam folder. Now that Mango is gone how can I request a new account? With Mango we used to have a form that automatically e-mailed the maintainer of the selected GNOME module which was then going to approve / reject the request. From there and in the case of a positive vote from the maintainer the Accounts Team was going to create the account itself. With the recent introduction of a commit robot directly on l10n.gnome.org the number of account requests reduced its numbers. In addition to that users will now be able to perform pretty much all the needed maintenance on their accounts themselves. That said and while we will probably work on building a form in the future we feel that requesting accounts can definitely be achieved directly by mailing the Accounts Team itself which will mail the maintainer of the respective module and create the account. As just said the number of account creations has become very low and the queue is currently clear. The documentation has been updated to reflect these changes at: https://wiki.gnome.org/AccountsTeam
https://wiki.gnome.org/AccountsTeam/NewAccounts I was used to have access to a specific service but I don t anymore, what should I do? The migration of all the user data and ACLs has been massive and I ve been spending a lot of time reviewing the existing HBAC rules trying to spot possible errors or misconfigurations. If you happen to not being able to access a certain service as you were used to in the past, please get in contact with the Sysadmin Team. All the possible ways to contact us are available at https://wiki.gnome.org/Sysadmin/Contact. What is missing still? Now that the Foundation membership information has been moved to LDAP I ll be looking at porting some of the existing membership scripts to it. What I managed to port already are welcome e-mails for new or existing members. (renewals) Next step will be generating a membership page from LDAP (to populate http://www.gnome.org/foundation/membership) and all the your-membership-is-going-to-lapse e-mails that were being sent till today. Other news /home/users mount on master.gnome.org You will notice that loggin in into master.gnome.org will result in your home directory being empty, don t worry, you did not lose any of your files but master.gnome.org is now currently hosting your home directories itself. As you may have been aware of adding files to the public_html directory on master resulted in them appearing on your people.gnome.org/~userid space. That was unfortunately expected as both master and webapps2 (the machine serving people.gnome.org s webspaces) were mounting the same GlusterFS share. We wanted to prevent that behaviour to happen as we wanted to know who has access to what resource and where. From today master s home directories will be there just as a temporary spot for your tarballs, just scp and use ftpadmin against them, that should be all you need from master. If you are interested in receiving or keeping using your people.gnome.org s webspace please mail <accounts AT gnome DOT org> stating so. Other news a shiny and new error 500 page has been deployed Thanks to Magdalen Berns (magpie) a new error 500 web page has been deployed on all the Apache istances we host. The page contains an iframe of status.gnome.org and will appear every single time the web server behind the service you are trying to reach will be unreachable for maintenance or other purposes. While I hope you won t see the page that often you can still enjoy it at https://static.gnome.org/error-500/500.html. Make sure to whitelist status.gnome.org on your browser as it currently loads it without https. (as the service is currently hosted on OpenShift which provides us with a *.rhcloud.com wildcard certificate, which differs from the CN the browser would expect it to be) Updates UPDATE on status.gnome.org s SSL certificate: the certificate has been provisioned and it should result in the 500 s page to be displayed correctly with no warnings from your browser. UPDATE from Adam Young on Kerberos ports being closed on many DC s firewalls:
The next version of upstream MIT Kerberos will have support for fetching a ticket via ports 443 and marshalling the request over HTTPS. We ll need to run a proxy on the server side, but we should be able to make it work: Read up here
http://adam.younglogic.com/2014/06/kerberos-firewalls

3 May 2014

Andrea Veri: Adding reCAPTCHA support to Mailman

The GNOME and many other infrastructures have been recently attacked by an huge amount of subscription-based spam against their Mailman istances. What the attackers were doing was simply launching a GET call against a specific REST API URL passing all the parameters it needed for a subscription request (and confirmation) to be sent out. Understanding it becomes very easy when you look at the following example taken from our apache.log:
May 3 04:14:38 restaurant apache: 81.17.17.90, 127.0.0.1 - - [03/May/2014:04:14:38 +0000] "GET /mailman/subscribe/banshee-list?email=example@me.com&amp;fullname=&amp;pw=123456789&amp;pw-conf=123456789&amp;language=en&amp;digest=0&amp;email-button=Subscribe HTTP/1.1" 403 313 "http://spam/index2.html" "Mozilla/5.0 (Windows NT 6.1; WOW64) AppleWebKit/537.36 (KHTML, like Gecko) Chrome/34.0.1847.131 Safari/537.36"
As you can the see attackers were sending all the relevant details needed for the subscription to go forward (and specifically the full name, the email, the digest option and the password for the target list). At first we tried to either stop the spam by banning the subnets where the requests were coming from, then when it was obvious that more subnets were being used and manual intervention was needed we tried banning their User-Agents. Again no luck, the spammers were smart enough to change it every now and then making it to match an existing browser User-Agent. (with a good percentage to have a lot of false-positives) Now you might be wondering why such an attack caused a lot of issues and pain, well, the attackers made use of addresses found around the web for their malicius subscription requests. That means we received a lot of emails from people that have never heard about the GNOME mailing lists but received around 10k subscription requests that were seemingly being sent by themselves. It was obvious we needed to look at a backup solution and luckily someone on our support channel suggested the freedesktop.org sysadmins recently added CAPTCHAs support to Mailman. I m now sharing the patch and providing a few more details on how to properly set it up on either DEB or RPM based distributions. Credits for the patch should be given to Debian Developer Tollef Fog Heen, who has been so kind to share it with us. Before patching your installation make sure to install the python-recaptcha package (tested on Debian with Mailman 2.1.15) on DEB based distributions and python-recaptcha-client on RPM based distributions. (I personally tested it against Mailman release 2.1.15, RHEL 6) The Patch
diff --git a/Mailman/Cgi/listinfo.py b/Mailman/Cgi/listinfo.py
index 4a54517..d6417ca 100644
--- a/Mailman/Cgi/listinfo.py
+++ b/Mailman/Cgi/listinfo.py
@@ -22,6 +22,7 @@
 
 import os
 import cgi
+import sys
 
 from Mailman import mm_cfg
 from Mailman import Utils
@@ -30,6 +31,8 @@ from Mailman import Errors
 from Mailman import i18n
 from Mailman.htmlformat import *
 from Mailman.Logging.Syslog import syslog
+sys.path.append("/usr/share/pyshared")
+from recaptcha.client import captcha
 
 # Set up i18n
 _ = i18n._
@@ -200,6 +203,9 @@ def list_listinfo(mlist, lang):
     replacements[''] = mlist.FormatFormStart('listinfo')
     replacements[''] = mlist.FormatBox('fullname', size=30)
 
+    # Captcha
+    replacements[''] = captcha.displayhtml(mm_cfg.RECAPTCHA_PUBLIC_KEY, use_ssl=False)
+
     # Do the expansion.
     doc.AddItem(mlist.ParseTags('listinfo.html', replacements, lang))
     print doc.Format()
diff --git a/Mailman/Cgi/subscribe.py b/Mailman/Cgi/subscribe.py
index 7b0b0e4..c1c7b8c 100644
--- a/Mailman/Cgi/subscribe.py
+++ b/Mailman/Cgi/subscribe.py
@@ -21,6 +21,8 @@ import sys
 import os
 import cgi
 import signal
+sys.path.append("/usr/share/pyshared")
+from recaptcha.client import captcha
 
 from Mailman import mm_cfg
 from Mailman import Utils
@@ -132,6 +130,17 @@ def process_form(mlist, doc, cgidata, lang):
     remote = os.environ.get('REMOTE_HOST',
                             os.environ.get('REMOTE_ADDR',
                                            'unidentified origin'))
+
+    # recaptcha
+    captcha_response = captcha.submit(
+        cgidata.getvalue('recaptcha_challenge_field', ""),
+        cgidata.getvalue('recaptcha_response_field', ""),
+        mm_cfg.RECPTCHA_PRIVATE_KEY,
+        remote,
+        )
+    if not captcha_response.is_valid:
+        results.append(_('Invalid captcha'))
+
     # Was an attempt made to subscribe the list to itself?
     if email == mlist.GetListEmail():
         syslog('mischief', 'Attempt to self subscribe %s: %s', email, remote)
Additional setup Then on the /var/lib/mailman/templates/en/listinfo.html template (right below <mm-digest-question-end>) add:
      <tr>
        <td>Please fill out the following captcha</td>
        <td><mm-recaptcha-javascript></TD>
      </tr>
Make also sure to generate a public and private key at https://www.google.com/recaptcha and add the following paramaters on your mm_cfg.py file: Loading reCAPTCHAs images from a trusted HTTPS source can be done by changing the following line:
replacements[''] = captcha.displayhtml(mm_cfg.RECAPTCHA_PUBLIC_KEY, use_ssl=False)
to
replacements[''] = captcha.displayhtml(mm_cfg.RECAPTCHA_PUBLIC_KEY, use_ssl=True)
EPEL 6 related details A few additional details should be provided in case you are setting this up against a RHEL 6 host: (or any other machine using the EPEL 6 package python-recaptcha-client-1.0.5-3.1.el6) Importing the recaptcha.client module will fail for some strange reason, importing it correctly can be done this way:
ln -s /usr/lib/python2.6/site-packages/recaptcha/client /usr/lib/mailman/pythonlib/recaptcha
and then fix the imports also making sure sys.path.append( /usr/share/pyshared ) is not there:
from recaptcha import captcha
That s not all, the package still won t work as expected given the API_SSL_SERVER, API_SERVER and VERIFY_SERVER variables on captcha.py are outdated (filed as bug #1093855), substitute them with the following ones:
API_SSL_SERVER="https://www.google.com/recaptcha/api"
API_SERVER="http://www.google.com/recaptcha/api"
VERIFY_SERVER="www.google.com"
And then on line 76:
url = "https://%s/recaptcha/api/verify" % VERIFY_SERVER,
That should be all! Enjoy!

24 December 2013

Andrea Veri: Manage passwords with pass

Fighting with passwords have always been one of my favorite battles in the past and unfortunately the former always won. I never liked using the root user that much for administering a machine and made a massive use of sudo, I won t list all the benefits of using sudo, but the following wiki page has a pretty nice overview of them. Said that, when using sudo it s definitely ideal to combine a strong password that is also easy to remember and type again when prompted. Sadly strong passwords that are also easy to remember can be considered an oxymoron. How hard would it be to recall a 30+ chars long password? Honestly that would be close to impossible for an human being but what if a little software available on the major GNU/Linux distributions could handle that for us? That s where pass comes handy, but what is pass? from the pass manpage itself:
pass is a very simple password store that keeps passwords inside gpg2(1) encrypted files inside a simple directory tree residing at ~/.password-store. The pass utility provides a series of commands for manipulating the password store, allowing the user to add, remove, edit, synchronize, generate, and manipulate passwords.
I m sure that a lot of you guys have been looking for a tool like this one for ages: pass allows you to generate very strong passwords with pwgen, GPG encrypt them with your GPG Key, store them safely on your disk and make them available whenever you need them with a single command. But let s move to the practice, give the following steps a try and enjoy how powerful your pass setup will be. First setup 1. Install the software:
yum/apt-get install pass

2. Generate a GPG Key if you don t have one already, a detailed guide can be found here. 3. Initialize your passwords storage. (GPGKEYID can be retrieved by running gpg list-keys and then looking for a line similar to this one: pub 4096R/B3A6223D 2012-06-25)
pass init GPGKEYID

4. Generate your first password and call it sudo_password given you are going to make use of it as your brand new sudo password. (we want it at least 30+ chars long)
pass generate sudo_password 30

5. (Optional) Create as much passwords as you need and make sure to save them with unique names, that way you will be able to identify what a password is used for easily.
pass generate gmail_password 30

Additional maintenance commands on your password database 1. Look at the existing passwords on your database.
pass ls

Result:
Password Store
  gmail_password
  sudo_password
  root_password

2. Manually edit a password.
pass edit password_name

3. Remove a password from your database.
pass rm password_name

4. Copy a password on your clipboard and paste it.
pass -c password_name

Are you wondering if pass supports a VCS? Yeah, it does, it currently allows you to manage your passwords database with Git, so that each applied change to the database will be tracked through a VCS so that you won t forget when and how you updated a specific password.

13 November 2013

Andrea Veri: Configuring DNSSEC on your personal domain

Today I ll be working out how to properly configure DNSSEC on a BIND9 installation, I ll also make sure to give you all the needed instructions to properly verify if a specific domain is being correctly covered by DNSSEC itself. In addition to that a few more details will be provided about adding the relevant SSHFP s entries on your DNS zone files to be able to automatically verify the authenticity of your domain when connecting to it with SSH avoiding any possible MITM attack. First of all, let s create the Zone Signing Key (ZSK) which is the key that will be responsible to sign any other record on the zone file which is not a DNSKEY record itself:
dnssec-keygen -a RSASHA1 -b 1024 -n ZONE gnome.org


Note: the dnssec-keygen binary file should be part of bind97 (RHEL 5) or bind (RHEL6) package according to yum whatprovides: RHEL 5:
32:bind97-9.7.0-17.P2.el5_9.2.x86_64 : The Berkeley Internet Name Domain (BIND) DNS (Domain Name System) server
Repo : rhel-x86_64-server-5
Matched from:
Filename : /usr/sbin/dnssec-keygen


RHEL 6:
32:bind-9.8.2-0.17.rc1.el6.3.x86_64 : The Berkeley Internet Name Domain (BIND) DNS (Domain Name System) server
Repo : rhel-x86_64-server-6
Matched from:
Filename : /usr/sbin/dnssec-keygen


Then, create the Key Signing Key (KSK), which will be used to sign all the DNSKEY records:
dnssec-keygen -a RSASHA1 -b 2048 -n ZONE -f KSK gnome.org


Creating the above keys can take several minutes, when done copy the public keys to the zone file this way:
cat Kgnome.org*.key >> gnome.org


When done you can clean out the useless bits from the zone file and just leave the DNSKEY records (which are not commented out as you will notice) An additional and cleaner way of accomplishing the above is to use the INCLUDE rule on the zone file itself as follows:
$INCLUDE /srv/dnssec-keys/Kgnome.org+005+12345.key
$INCLUDE /srv/dnssec-keys/Kgnome.org+005+67890.key


Choosing which method to use is really up to you. Once that is done you can go ahead and sign the zone file. As of myself I m making use of the do-domain script taken from the Fedora Infrastructure Team s repositories. If you are going to use it yourself, make sure to adjust all the relevant variables to match your setup, especially keyspath, region_zones, template_zone, signed_zones and AREA. The do-domain script also checks your zone file through named-checkzone before signing it.
/me while editing the do-domains script with the preview of gnome-code-assistance!

/me while editing the do-domains script with the preview of gnome-code-assistance!

If instead you don t want to use the script above, you can sign the zone file manually in the following way:
dnssec-signzone -K /path/to/your/dnssec/keys -e +3024000 -N INCREMENT gnome.org


By default, the above command will append .signed to the file name, you can modify that behaviour by appending the -f flag to the dnssec-signzone call. The -N INCREMENT will increment the serial number automatically making use of the RFC 1982 arithmetics while the -e flag will extend the zone signature end date from the default 30 days to 35. (this way we can safely run a monthly cron job that will sign the zone file automatically) You can make use of the following script to achieve the above:
#!/bin/sh
SIGNZONE="/usr/sbin/dnssec-signzone"
DNSSEC_KEYS="/srv/dnssec-keys"
NAMEDCHROOT="/var/named/chroot"
ZONEFILES="gnome.org"
cd $NAMEDCHROOT
for ZONE in $ZONEFILES; do
$SIGNZONE -K $DNSSEC_KEYS -e +3024000 -f $ZONE.signed -N INCREMENT $ZONE
done
/sbin/service named reload


Once the zone file has been signed just make sure to include it on named.conf and restart named:
zone "gnome.org"  
file "gnome.org.signed";
 ;


When you re done with that we should be moving ahead adding a DS record for our domain at our domain registrar. My example is taken from the known gandi.net registrar.
gandi

Gandi s DNSSEC interface

Select KSK (257) and (RSA/SHA-1) on the dropdown list and paste your public key on the box. You will find the public key you need on one of the Kgnome.org*.key files, you should look for the DNSKEY 257 entry as dig DNSKEY gnome.org shows:
;; ANSWER SECTION:
gnome.org. 888 IN DNSKEY 257 3 5 AwEAAbRD7AymDFuKc2iXta7HXZMleMkUMwjOZTsn4f75ZUp0of8TJdlU DtFtqifEBnFcGJU5r+ZVvkBKQ0qDTTjayL54Nz56XGGoIBj6XxbG8Es+ VbZCg0RsetDk5EsxLst0egrvOXga27jbsJ+7Me3D5Xp1bkBnQMrXEXQ9 C43QfO2KUWJVljo1Bii3fTfnHSLRUsbRn8Puz+orK71qxs3G9mgGR6rm n91brkpfmHKr3S9Rbxq8iDRWDPiCaWkI7qfASdFk4TLV0gSVlA3OxyW9 TCkPZStZ5r/WRW2jhUY/kjHERQd4qX5dHAuYrjJSV99P6FfCFXoJ3ty5 s3fl1RZaTo8=


Once that is done you should have a fully covered DNSSEC domain, you can verify that this way:
dig . DNSKEY   grep -Ev '^($ ;)' > root.keys
dig +sigchase +trusted-key=./root.keys gnome.org. A   cat -n


The result:
105 ;; WE HAVE MATERIAL, WE NOW DO VALIDATION
106 ;; VERIFYING DS RRset for org. with DNSKEY:59085: success
107 ;; OK We found DNSKEY (or more) to validate the RRset
108 ;; Ok, find a Trusted Key in the DNSKEY RRset: 19036
109 ;; VERIFYING DNSKEY RRset for . with DNSKEY:19036: success
110
111 ;; Ok this DNSKEY is a Trusted Key, DNSSEC validation is ok: SUCCESS

Bonus content: Adding SSHFP entries for your domain and verifying them You can retrieve the SSHFP entries for a specific host with the following command:
ssh-keygen -r $(hostname --fqdn) -f /etc/ssh/ssh_host_rsa_key.pub


When retrieved just add the SSHFP entry on the zone file for your domain and verify it:
ssh -oVerifyHostKeyDNS=yes -v subdomain.gnome.org


Or directly add the above parameter into your /etc/ssh/ssh_config file this way:
VerifyHostKeyDNS=yes


And run ssh -v subdomain.gnome.org , the result you should receive:
debug1: Server host key: RSA 00:39:fd:1a:a4:2c:6b:28:b8:2e:95:31:c2:90:72:03
debug1: found 1 secure fingerprints in DNS
debug1: matching host key fingerprint found in DNS
debug1: ssh_rsa_verify: signature correct

That s it! Enjoy!

27 June 2013

Andrea Veri: Two years later: Vim, Tmux and my Linux desktop

It s been two years since my latest blog post about my Linux desktop and many things have changed since then. I completely moved all my machines to GNOME 3, switched my main editor from nano to vim and my terminal multiplexer from screen to tmux. What didn t change at all except for a tweaks on the theme is my Irssi setup. dircolors_solarized Switching from nano to vim has been a pain at first, nano is really a straightforward editor, it does what you actually need from a CLI editor but while it works just fine when modifying configuration or text files, it s a bit limiting when it comes to programming. Vim on the other hand is highly customizable in every single part also thanks to its huge amount of plugins. Honestly I admit I spent several hours watching videos, reading documentation, trying out key bindings and I m not completely used to vim to be as much productive I would like to be with it. What I found to be the common error of vim s newcomers is their willingness to look around the web for a complete vimrc configuration file, full of key bindings, custom settings and personalizations. That s definitely something you should avoid when learning to use vim, the perfect vimrc doesn t objectively exist, each of us should spend some time investigating what is the best configuration for your needs and build a vimrc accordingly time by time. vimIt will probably take months to have a complex vimrc file matching your needs completely, until then you won t be able to define your vimrc to be ultimate . And that s actually why wgetting someone else s vimrc and copying it to your home folder won t make you an expert of vim, it ll probably make your life harder when trying a specific action with the stock settings will result in something you wouldn t have expected thanks to a particular key binding on the vimrc you downloaded. tmux The other tool that definitely improved my productivity is Tmux given the huge amount of open terminals I had every day during my sysadmin s duties at GNOME. Each day usually started with one or two open terminals mainly meant for random maintenance issues, after a few hours the amount of open terminals jumped to around 30. irssi Switching between tabs became a pain and the usual amount of time spent finding out which terminal had the the specific remote connection I needed was surprisingly sticking around 10 seconds. I looked around for a possible solution and found Tmux, it has been a joy finding out how easy it was to set it up and get used to it. I m now able to divide my 27 inches monitor into several panels and switch between them with a little keybinding, in addition you can set up as many windows (and consequently as many panels) as you wish, that way I can divide my programming windows from the ones specifically meant as remote consoles. From there I can detach / attach my previous Tmux session with one command and keep working on the same files and connections I had open the last time I used Tmux. In addition to the above tools I ve kept being an huge fan of Irssi and some of its plugins that have improved my overall productivity when daily chatting with Fedora, Debian and GNOME contributors. What actually changed on it since two years ago is the theme which is currently a mix between the Solarized and the XChat themes. Please don t hesitate to ask me any question if you are curious about learning something more about my current working setup! :-)

13 December 2012

Andrea Veri: The future is Cloudy

Have you ever heard someone talking extensively about Cloud Computing or generally Clouds? and have you ever noticed the fact many people (even the ones who present themselves as experts) don t really understand what a Cloud is at all? That happened to me multiple times and one of the most common misunderstandings is many see the Cloud as something being on the internet. Many companies add a little logo representing a cloud on their frontpage and without a single change on their infrastructure (but surely with a price increment) they start calling their products as being on the Cloud. Given the lack of knowledge about this specific topic people tend to buy the product presented as being on the Cloud without understanding what they really bought. But what Cloud Computing really means? it took several years and more than fifteen drafts to the National Institute of Standards and Technology s (NIST) to find a definition. The final accepted proposal:

Cloud computing is a model for enabling ubiquitous, convenient, on-demand network access to a shared pool of configurable computing resources (e.g., networks, servers, storage, applications and services) that can be rapidly provisioned and released with minimal management effort or service provider interaction.

The above definition requires a few more clarifications specifically when it comes to understand where should we focus on while checking for a Cloud Computing solution. A few key points:
  1. On-demand self-service: every consumer will be able to unilaterally provision multiple computing capabilities like server time, storage, bandwidth, dedicated RAM or CPU without requiring any sort of human interaction from their respective Cloud providers.
  2. Rapid elasticity and scalability: all the computing capabilities outlined above can be elastically provisioned and released depending on how much demand my company will have in a specific period of time. Suppose the X company is launching a new product today and it expects a very large number of customers. The X company will add more resources to their Cloud for the very first days (where they suppose the load to be very high) and then it ll scale the resources back as they were before. Elasticity and scalability permit the X company to improve and enhance their infrastructure when they need it with an huge saving in monetary terms.
  3. Broad network access: capabilities are available over the network and accessed through standard mechanisms that promote use by heterogeneous thin or thick client platforms (e.g., mobile phones, tablets, laptops, and workstations).
  4. Measured service: Cloud systems allow maximum transparency between the provider and the consumer, the usage of all the resources is monitored, controlled, and reported. The consumer knows how much will spend, when and in how long.
  5. Resource pooling: each provider s computing resources are pooled to serve multiple consumers at the same time. The consumer has no control or knownledge over the exact location of the provided resources but may be able to specify location at a higher level of abstraction (e.g., country, state, or datacenter).
  6. Resources price: when buying a Cloud service make sure the cost for two units of RAM, storage, CPU, bandwidth, server time is exactly the double of the price of one unit of the same capability. An example, if a provider offers you one hour of bandwitdh for 1 Euro, the price of two hours will have to be 2 Euros.
Another common error I usually hear is people feeling Cloud Computing just as a place to put their files online as a backup or for sharing them with co-workers and friends. That is just one of the available Cloud features , specifically the Cloud Storage , where typical examples are companies like Dropbox, Spideroak, Google Drive, iCloud and so on. But let s make a little note about the other three features :
  1. Infrastructure as a Service (IaaS): the capability provided to the consumer is to provision processing, storage, networks, and other fundamental computing resources where the consumer is able to deploy and run arbitrary software, which can include operating systems and applications. In this specific case the consumer has still no control or management over the underlying Cloud infrastructure but has control over operating systems, storage, and deployed applications. A customer will be able to add and destroy virtual machines (VMs), install an operating system on them based on custom kickstart files and eventually manage selected networking components like firewalls, hosted domains, accounts.
  2. Platform as a Service (PaaS). the capability provided to the consumer is to deploy onto the cloud infrastructure consumer-created or acquired applications created using programming languages, libraries, services, and tools (like Mysql + PHP + PhpMyAdmin or Ruby on Rails) supported by the provider. In this specific case the consumer has still no control or management over the Cloud infrastructure itself (servers, OSs, storage, bandiwitdh etc.) but has control over the deployed applications and configuration settings for the application-hosting environment.
  3. Software as a Service (SaaS): the capability provided to the consumer is to use the provider s applications running on a Cloud infrastructure. The applications are accessible through various client devices, such as a browser, a mobile phone or a program interface. The consumer doesn t not manage nor control the Cloud infrastructure (servers, OSs, storage, bandwidth, etc.) that allows the applications to run. Even the provided applications aren t customizable by the consumer, which should rely on limited configuration settings.
The Cloud Computing technology is reasonably the future but can we trust Cloud providers? Are we sure that no one will ever have access to our files except us? and what about governments interested in acquiring a specific customer data hosted on the Cloud? I always suggest to read deeply both the Privacy Policy and Terms of Use of a certain service before signing in especially when it comes to choose a Cloud storage provider. Many providers have the same aspect, they seem to provide the same resources, the same amount of storage for the same price but legally they may present different problems, and that is the case of Spideroak vs Dropbox. Quoting from the Dropbox s Privacy Policy:
Compliance with Laws and Law Enforcement Requests; Protection of DropBox s Rights. We may disclose to parties outside Dropbox files stored in your Dropbox and information about you that we collect when we have a good faith belief that disclosure is reasonably necessary to (a) comply with a law, regulation or compulsory legal request; (b) protect the safety of any person from death or serious bodily injury; (c) prevent fraud or abuse of DropBox or its users; or (d) to protect Dropbox s property rights. If we provide your Dropbox files to a law enforcement agency as set forth above, we will remove Dropbox s encryption from the files before providing them to law enforcement. However, Dropbox will not be able to decrypt any files that you encrypted prior to storing them on Dropbox.
It s evident that Dropbox employees can access your data or be forced by legal process to turn over your data unencrypted. On the other side, Spideroak on its latest update to its Privacy Policy states that data stored on their Cloud is encrypted and inaccessible without user s key, which is stored locally on user s computers. And what about the latest research paper, titled Cloud Computing in Higher Education and Research Institutions and the USA Patriot Act written by the legal experts of the University of Amsterdam s Institute for Information Law stating the anti-terror Patriot Act could be theoretically used by U.S. law enforcement to bypass strict European privacy laws to acquire citizen data within the European Union without their consensus? The only requirement for the data acquisition is the provider being an U.S company or an European company conducting systematic business in the U.S. For example an Italian company storing their documents (protected by the European privacy laws and under the general Italian jurisdiction) on a provider based in Europe but conducting systematic business in the United States, could be forced by U.S. law enforcement to transfer data to the U.S. territory for inspection by law enforcement agencies. Does someone really care about the privacy of companies, consumers and users at all? or better does privacy exists at all for the millions of the people that connect to the internet every day?

4 December 2012

Andrea Veri: My favorite WordPress Plugins

It took me a while to build a complete WordPress blog with all the things I needed, from modifying the default Twenty Eleven theme to broadcasting my posts directly on Twitter. WordPress has a nice selection of plugins and given the fact I spent a few days evaluating all the possibilities, I decided to share my own setup to speed up the process in case you are willing to build a WordPress powered blog. The plugins:
  • Akismet. This plugin checks your comments against the Akismet web service to see if they look like spam or not and lets you review the spam it catches under your blog s Comments admin screen.
  • All in one Favicon. The following plugin adds a Favicon to your site and the WordPress admin pages. It currently supports all three Favicon types (ico,png,gif).
  • Digg Digg. This plugin adds a floating bar with several share buttons directly on your posts. Readers will be able to share to Google+, Facebook, Twitter, Reddit, Stumbleupon with just one click. A must have.
  • Flexi Pages Widget is a highly configurable WordPress sidebar widget to list pages and sub-pages. Also, if you are using a Child theme and your Home-link doesn t appear in your Pages navigation menu without either modifying the functions.php or adding the page manually through the Pages menu, this plugin will do the work for you. You are one click away from fixing many pages-related problems.
  • Google Analyticator, it adds the necessary JavaScript code to enable Google Analytics. Includes widgets for Analytics data display.
  • Google Authenticator will add a two-step-authentication for your blog. This will require you to own an Android or an iPhone though. After verifying your phone with the plugin your login prompt will have one more field called Google Authenticator Code , accessing your blog won t be possible without the code generated by the authenticator every 30 seconds.
  • Google XML Sitemaps will generate a special XML sitemap which will help search engines to better index your blog.
  • WordPress Backup to Dropbox. Your hosting doesn t provide you with a backup solution or it provides it with an excessive cost? Don t worry, this plugin will keep your valuable WordPress website, its media and database backed up to Dropbox. You can select how often the backup should run, you can exclude huge files from being backed up, everything with one single and easy interface.
  • Social broadcasts posts to Twitter and/or Facebook, pull in reactions from each (replies, retweets, comments, likes ) as comments. Social will aggregate the various mentions, retweets, @replies, comments and responses and republish them as WordPress comments.
  • SEO Ultimate is a powerful all-in-one SEO plugin, available free for WordPress bloggers. You can take control of your on-page SEO with user-friendly settings and tools for optimizing your titles, meta data, robots tags, canonicalization, autolinks, post slugs, and much more.
  • Jetpack adds many features that were available to WordPress.com users but they weren t present on self-hosted WordPress installs. Jetpack is a plugin that connects to WordPress.com and enables awesome features. I simply love the combo of Jetpack and the Follow button based on it. Readers will be able to subscribe to your blog and receive mail notifications whenever a new article will be published. Another handy feature is the optimization that Jetpack provides for Mobile phones. Just enable this feature on the admin menu and browsing your blog through a Mobile device will be a pleasant experience.
  • Revision Control will give the user more control over the Revision functionality. The plugin allows the user to set a site-global setting (Settings -> Revisions) for pages/posts to enable/disable/limit the number of revisions which are saved for the page/post.
  • Speedy Page Redirection adds a meta box to your page and post screens, you can then enter a new destination URL to which the page will be redirected.
  • Twenty Eleven Theme Extensions is an easy-to-use plugin designed for use with the latest default WordPress theme, Twenty Eleven. It adds a set of customizable features for the theme, designed to add more flexibility to the theme s design without having to modify the template files.
And a few modifications I made on my Child theme for the Twenty Eleven theme to suit my needs: Remove the navigation buttons on the header. On the Child theme s style.css:
#access, #branding .only-search #s, .entry-header .comments-link  
display: none;
 
Remove the gray line on the top of the header s banner. On the Child theme s style.css:
#branding  
border-top: none;
 
.and a little tip about WordPress itself: have you ever wondered how you could install/update/remove a WordPress theme or plugin without FTP access? Here s how! On the config.php file:
/*** Updates WordPress without FTP credentials. ***/
define('FS_METHOD','direct');
If you know any other handy WordPress Tip or Plugin, please share!

22 November 2012

Andrea Veri: The Linux s perception of my neighbours

I live in a little village close to the city and one of the houses close to my property is for rent since more than ten years. A lot of families and people succeeded in that house and every time someone new joined my Linux evangelist hat jumped in my head. I ve always presented myself as a Linux geek to my neighbours and it has been nice seeing how the Linux word evolved (with funny and surprising quotes) during the past ten years in their minds. A friend of mine (Aretha Battistutta) made a little comic strip out of the topic and the result is simply amazing. Enjoy!

15 October 2012

Andrea Veri: Some statistics about GNOME.org

The GNOME infrastructure runs a Piwik s istance and it s been amazing seeing some of the statistics published there. A few details: Traffic during the 27/09/2012 GNOME 3.6 Launch Visits: 23063 Page views: 50352 Traffic during the last month. (from 15/09/2012 to 15/10/2012) Visits: 187598 Page views: 454313 Traffic during the last six months. (from 15/05/2012 to 15/10/2012) Visits: 773153 Page views: 1867200 GNOME is growing really fast and a great thank you goes to its great community and contributors! Let s keep rocking!

6 October 2012

Andrea Veri: SSH Tunneling for VNC

Logging in into a Linux machine and executing the hundreds commands available is just one of the most common usages of OpenSSH. Another interesting and very useful usage is tunneling some specific (or even all) traffic from your local machine to an external machine you have access to. Today we ll analyze how to access a certain virtual machine s console by tunneling the relevant VNC port locally and accessing it through your favorite VNC client. The scenario:
  1. Machine A is our main virtualization machine and hosts several virtual machines. (VMs)
  2. Each VM has its own VNC port assigned. (usually the port range goes from 5900 to 5910 or even more if the hosted VMs are more than 10)
  3. We ll be using libvirt, thus virsh.
We first need to find out which port got assigned to the VM we want to have console access to:
sudo virsh
virsh # list
Id   Name   Status
----------------------------------------------------
5    foo    running
6    bar    running
7    foobar running
virsh # vncdisplay foobar
:3
We, then, create a tunnel which redirects all the traffic from the main virtualization machine s port to the port we gonna specify in the next command:
ssh -f -N -L 5910:localhost:5903 user@machine-A.com
A few details about the previous command:
  1. -N tells SSH to not execute any command after logging in.
  2. -f tells SSH to hide into the background just before the command gets executed.
  3. -L enables the port forwarding between the local (client) host and the host on the remote side.
And why did I choose respectively port 5903 and 5910? While you can adjust port 5910 with your own choice (that will just move the tunneled traffic from port 5910 to your favorite port), that won t work as expected with port 5903 since each VNC port is binded to the number of display virsh assigned to it. (for example, the bar VM may be running on display 5, thus its vncdisplay port will be 5905) When done, fire up your favorite VNC client and create a new connection with the following details:
Protocol: VNC - Virtual Network Computing
Server: localhost - 127.0.0.1
Port: 5910
The connection will load and you ll be put in front of your foobar VM console.

2 October 2012

Andrea Veri: An interview with Allan Day

A few days ago I had the great pleasure to interview Allan Day, GNOME designer and enthusiastic contributor. Me: Hello Allan, mind presenting yourself? Allan: I m a designer working on the GNOME Project. I ve been involved for quite a few years now. Last year I was lucky to be hired by Red Hat to work in their Desktop Team. Me: Can you tell us something more about GNOME 4? Can we alias it GNOME OS? Allan: GNOME 4 isn t something that is being seriously considered right now, at least as far as I m aware. Those of us in the GNOME Project are thinking about the future though, and have been setting some big goals for the next few years. Who knows, maybe those things will lead to a big new version? It s probably too soon to tell though. Me: Which new features will be introduced in the incoming GNOME 3.6, and what about GNOME 3.8? Allan: 3.6 is already out, so you can read the release notes if you want to find out about it. I was really happy with it, and the last release had quite a lot of new features. My personal favourites where the input sources work, the Lock Screen and the work we need on notifications and the Message Tray. Oh, and I m really pleased with the new Clocks application that we released a preview of. Members of the community are still proposing features for 3.8, so it s a little early to say what we will be working on for the next six months. I think I d be happy if we can continue to polish the core user experience, and hopefully get some more new applications off the ground. Me: GNOME Fallback is due to be completely dropped, are you in favor of that choice and why? Allan: I think that s mostly a technical discussion, and I m not a developer. Also, GNOME needs to have an open discussion about that question as a community which is something we might be doing at this year s Boston
Summit. What I would say is that it is important for us to deliver high quality user experiences, so if fallback mode isn t good enough, or if it is holding back the primary GNOME 3 UX, then we obviously need to think about what needs to happen. Me: Ubuntu has recently released the first two Alphas of the Ubuntu GNOME Remix, do you think this will strengthen the cooperation between GNOME and Canonical as in the past? Allan: As far as I understand it, the GNOME Remix is a community effort, and isn t coming from Canonical itself. That said, we always want to see more involvement in GNOME by Canonical and Ubuntu. Me: Do you see anything in the current GNOME 3 that would require an improvement? and can you add a few words about the brand new login screen recently introduced? Allan: GNOME 3 is getting better all the time, and I m particularly pleased with the latest version. That said, there is plenty of work still to do. I think the big area for us right now is to filling the missing blanks in our application story, so we have a suite of consistent core applications. That will enable people to access content more easily, and will serve as a springboard for other new GNOME applications. What to say about the Lock Screen?! Well, it was originally conceived as something that is like a screensaver, but is really really useful (rather than just looking pretty). We wanted something that looks cool when the machine is locked, but we also wanted to add plenty of features on top, like having media playback controls and built-in notifications. The idea is to make some things possible without having to enter a password, like pausing your music or checking to see if you have received any emails. Me: Many have argued new contributors most of the times aren t redirected correctly to their area of interest, thus they lose interest in contributing and leave. Do you feel anything could be improved in how GNOME welcomes new contributors? Allan: That s a good observation. I agree that one of the hardest things about contributing to open source projects is finding the right place to start. In GNOME we are working to help with this, such as through new mentoring schemes, but there is certainly more that we could do. One thing would be to run more online events, like bug days. Another thing is advertising good tasks for newcomers; we do some of that, but we could be better at it. Me: Anything else you would like to add? Allan: Just that anyone is always welcome in GNOME! That s what we re about really creating opportunities for people, having fun and making great technologies.

17 September 2012

Andrea Veri: Building Debian packages with Deb-o-Matic

Today I ll be telling you about an interesting way to build your Debian packages using Deb-o-Matic, a tool developed and maintained by Luca Falavigna. Some more details about this tool from the package s description:
Deb-o-Matic is an easy to use build machine for Debian source packages based on pbuilder, written in Python. It provides a simple tool to automate build of source packages with limited user interaction and a simple configuration. It has some useful features such as automatic update of pbuilder, automatic scan and selection of source packages to build and modules support.
The setup. 1. Download the package.
apt-get install debomatic
2. Modify the main configuration file as follows:
[default]
builder: pbuilder
packagedir: /home/john/debomatic # Take note of the following path since we'll need it for later use.
configdir: /etc/debomatic/distributions
pbuilderhooks: /usr/share/debomatic/pbuilderhooks
maxbuilds: 3 # The number of builds you can perform at the same time.
inotify: 1
sleep: 60 # The sleep time between one build and another.
logfile: /var/log/debomatic.log
[gpg]
gpg: 0 # Change to 1 if you want Deb-O-Matic to check the GPG signature of the uploaded packages.
keyring: /etc/debomatic/debomatic.gpg # Add the GPG Keys you want Deb-O-Matic to accept in this keyring.
[modules]
modules: 1 # A list of all the available modules will follow right after.
modulespath: /usr/share/debomatic/modules
[runtime]
alwaysupdate: unstable experimental precise
distblacklist:
modulesblacklist: Lintian Mailer
mapper:  'sid': 'unstable',
'wheezy': 'testing',
'squeeze': 'stable' 
[lintian]
lintopts: -i -I -E --pedantic # Run Lintian in Pedantic mode.
[mailer] # You need an SMTP server running on your machine for the mailer to work. You can have a look at the 'Ssmtp' daemon which is a one-minute-setup MTA, check an example over here.
fromaddr: debomatic@localhost
smtphost: localhost
smtpport: 25
authrequired: 0
smtpuser: user
smtppass: pass
success: /etc/debomatic/mailer/build_success.mail-template # Update the build success or failure mails as you wish by modifying the relevant files.
failure: /etc/debomatic/mailer/build_failure.mail-template
[internals]
configversion = 010a
The available modules are:
  1. Contents , which acts as a dpkg -c over the built packages.
  2. DateStamp , which displays build start and finish times into a file in the build directory.
  3. Lintian , which stores Lintian output on top of the built package in the pool directory.
  4. Mailer , which sends a reply to the uploader once the build has finished.
  5. PrevBuildCleaner , which deletes all files generated by the previous build.
  6. Repository , which generates a local repository of built packages.
2. Configure dput to upload package s sources to your local repository, edit the /etc/dput.cf file and add this entry:
[debomatic]
method = local
incoming = /home/john/debomatic
or the following if you are going to upload the files to a different machine through SSH:
[debomatic]
login = john
fqdn = debomatic.example.net
method = scp
incoming = /debomatic
3. Add a new Virtual Host on Apache and access the repository / built packages directly through your browser:
<VirtualHost *:80>
ServerAdmin john@example.net
ServerName debomatic.example.net
DocumentRoot /home/john/debomatic
<Directory /home/john/debomatic>
Options Indexes FollowSymLinks MultiViews
AllowOverride None
Order allow,deny
allow from all
</Directory>
</VirtualHost>
4. Start the daemon:
sudo /etc/init.d/debomatic start
5. (Optional) Add your repository to APT s sources.list:
deb http://debomatic.example.net/ unstable main contrib non-free
6. (Optional) Start Deb-O-Matic at system s startup by modifying the /etc/init.d/debomatic file at line 21:
- [ -x "$DAEMON" ]   exit 0
- [ "$DEBOMATIC_AUTOSTART" = 0 ] && exit 0
+ [ -x "$DAEMON" ]   exit 0
+ [ "$DEBOMATIC_AUTOSTART" = 1 ] && exit 0
and finally add it to the desired runlevels:
update-rc.d debomatic defaults
Enjoy!

15 September 2012

Andrea Veri: Manage your website through Git

Ever wondered how you can update your website (in our case a static website with a bunch of HTML and PHP files) by committing to a Git repository hosted on a different server? if the answer to the previous question is yes, then you are in the right place. The scenario: - Website hosted on server A.
- Git repository hosted on server B. and a few details about why would you opt for maintaining your website through Git:
  1. You need multiple people to access the static content of your website and you also want to maintain all the history of changes together with all the Git s magic.
  2. You think using an FTP server is not secure enough.
  3. You think giving out SSH access or more permissions on the server to multiple users it s not what you want. (also using scp will overwrite the files directly with all its consequences)
the setup, on server A: 1. Clone the Git repository over the directory that your Web server will serve.
cd /srv/www.domain.com/http && sudo git clone http://git.example.com/git/domain.git
2. Grab the needed package:
apt-get install fishpolld or yum install fishpolld
3. Set up a topic (called website_update) that will call a git pull each time the repository hosted on server B receives an update. (the file has to be placed into the /etc/fishpoll.d directory)
#!/bin/bash
PATH="/usr/local/sbin:/usr/local/bin:/sbin:/bin:/usr/sbin:/usr/bin"
WEBSITEDIR="/srv/www.domain.com/http"
if [ -d "$ WEBSITEDIR " ]; then
cd "$ WEBSITEDIR "
else
echo "Unable to access theme directory. Failing."
exit 1
fi
git pull
4. Add a little configuration file that will enable the website_update s topic at daemon s startup. (you should name it website_update.conf)
[fishpoll]
on_start = True
5. Open the relevant port on Iptables so that server A and server B can communicate as expected, the daemon runs over port 27527.
-A INPUT -m state --state NEW -m tcp -p tcp -s server-B-IP --dport 27527 -j ACCEPT
6. Start the daemon. (by default, logs are sent to syslog but you can run the daemon in Debug mode by using the -D flag)
sudo /etc/init.d/fishpolld start or sudo systemctl start fishpolld.service or sudo /usr/sbin/fishpolld -D
and on server B: 1. Grab the needed package:
apt-get install fishpoke or yum install fishpoke
2. Configure the relevant Git hook (post-update, located into the hooks directory) and make it executable.
#!/bin/sh
echo "Triggering update of configuration on server A"
fishpoke server-A-IP-or-DNS website_update
Finally test the whole setup by committing to the repository hosted on server B and verify your changes being sent live on your website!

30 June 2012

Andrea Veri: Nagios IRC Notifications

Lately (as I earlier pointed out on my blog) I ve been working on improving GNOME s infrastructure monitoring services. After configuring XMPP it was time to find out a good way for sending out relevant notifications to our IRC channel hosted on GIMPNET. I achieved that with a nice combo: supybot + supybot-notify, all that mixed up with a few grains of Nagios command definitions. But here we go with a little step-by-step guide: Requirements 1. Install supybot and configure a new installation:
apt-get install supybot or yum install supybot
mkdir /home/$user/nagbot && cd /home/$user/nagbot
supybot-wizard (follow the directions to get the bot initially configured)
2. Install and load the supybot-notify plugin by doing:
git clone git://git.fedorahosted.org/supybot-notify.git && cd supybot-notify
mkdir -p /home/$user/nagbot/plugins/notify && cp -r * /home/$user/nagbot/plugins/notify
Finally, load the plugin. (this will require you to authenticate to the bot) Nagios configuration 1. Add the relevant command definitions to the commands.cfg file:
# 'notify-by-ircbot' command definition
define command 
    command_name    notify-by-ircbot
    command_line    /usr/bin/printf "%b" "#channel $NOTIFICATIONTYPE$ - $HOSTALIAS$/$SERVICEDESC$ is $SERVICESTATE$: $SERVICEOUTPUT$ ($$(hostname -s))"   nc -w 1 localhost 5050
     
# 'host-notify-by-ircbot' command definition
define command 
	command_name	host-notify-by-ircbot
	command_line	/usr/bin/printf "%b" "#channel $NOTIFICATIONTYPE$ - $HOSTALIAS$ is $HOSTSTATE$: $HOSTOUTPUT$ ($$(hostname -s))"   nc -w 1 localhost 5050
	 
* adjust the Netcat s host and port to your needs, in my case Supybot and Nagios were running on the same host. In the case of a Supybot running on a different host than Nagios, tweak Iptables to allow the desired port:
-A INPUT -m state --state NEW,ESTABLISHED -m tcp -p tcp --dport 5050 -j ACCEPT
2. Add a new entry on the contacts.cfg file:
define contact 
 	contact_name    nagbot
   	use             generic-contact
        alias		Nagios IRC Bot
        email           example@example.com
        service_notification_commands   notify-by-ircbot
 	host_notification_commands      host-notify-by-ircbot
 
3. Reload Nagios:
sudo /etc/init.d/nagios3 reload
And finally, enjoy the result:
 PROBLEM - $hostalias/load average is CRITICAL: CRITICAL - load average: 30.45, 16.24, 7.16 (nagioshost)
 RECOVERY - $hostalias/load average is OK: OK - load average: 0.06, 0.60, 3.65 (nagioshost)

18 February 2012

Andrea Veri: Nagios XMPP Notifications for GTalk

While improving GNOME s servers Nagios Notifications, I ended up working on a nice way to notify the relevant folks through GTalk in case something could go wrong on any of the hosted services. Looking around on the web, I found Seth Vidal s script, modified it to suit my needs and made it working with GTalk, here s the result:
#!/usr/bin/python -tt
import warnings
warnings.simplefilter("ignore")
import xmpp
from xmpp.protocol import Message
from optparse import OptionParser
import ConfigParser
import sys
import os
parser = OptionParser()
opts, args = parser.parse_args()
if len(args) < 1:
    print "xmppsend message [to whom, multiple args]"
    sys.exit(1)
msg = args[0]
msg = msg.replace('\\n', '\n')
# Connect to the server
c  =  xmpp.Client('gmail.com')
c.connect( ( 'talk.google.com', 5223 ) )
# Authenticate to the server
jid  =  xmpp.protocol.JID( 'example@gmail.com' )
c.auth( jid.getNode( ), 'yourgmailpassword' )
if len(args) < 2:
    r = c.getRoster()
    for user in r.keys():
        if user == username:
            continue
        c.send(Message(user, '%s' % msg))
else:
    for user in args[1:]:
        c.send(Message(user, '%s' % msg))
I, then, added the command definitions on the relevant Nagios configuration file:
define command 
        command_name    host-notify-by-xmpp
        command_line    /home/user/bin/xmppsend "Host '$HOSTALIAS$' is $HOSTSTATE$ - Info : $HOSTOUTPUT$" $CONTACTPAGER$
         
define command 
        command_name    notify-by-xmpp
        command_line    /home/user/bin/xmppsend "$NOTIFICATIONTYPE$ $HOSTNAME$ $SERVICEDESC$ $SERVICESTATE$ $SERVICEOUTPUT$ $LONGDATETIME$" $CONTACTPAGER$
         
And in the end on contacts.cfg:
define contact  
        contact_name    admin
        use             generic-contact
        alias           Full Name
        email           example@gmail.com
        pager           example@gmail.com
        service_notification_commands   notify-by-xmpp
        host_notification_commands      host-notify-by-xmpp
 
When done just reload the configuration files with:
sudo /etc/init.d/nagios3 reload
Enjoy your new XMPP Nagios notifications! Update: if you don t want the script to store your username or password, you can use the following modified script together with a nice config file like this one:
[xmpp_nagios]
username=example@gmail.com
password=yourgmailpassword
Then you can invoke xmppsend this way:
xmppsend -a config.ini

Next.