Search Results: "ed"

13 August 2015

Julien Danjou: Reading LWN.net with Pocket

I've started to use Pocket a few months ago to store my backlog of things to read. It's especially useful as I can use it to read content offline since we still don't have any Internet access in places such as airplanes or the Paris metro. It's only 2015 after all. I am also a LWN.net subscriber for years now, and I really like their articles from the weekly edition. Unfortunately, as the access is restricted to subscribers, you need to login: it makes it impossible to add these articles to Pocket directly. Sad. Yesterday, I thought about that and decided to start hacking on it. LWN provides a feature called "Subscriber Link" that allows you to share an article with a friend. I managed to use that feature to share the articles with my friend Pocket! As doing that every week is tedious, I wrote a small Python program called lwn2pocket that I published on GitHub. Feel free to use it, hack it and send pull requests.

Tiago Bortoletto Vaz: c3video for debconf #4

This is a follow-up to my previous post related the DebConf videoteam using a new software stack for the next conferences: http://acaia.ca/~tiago/posts/c3video-for-dc-take-3/. As mentioned before, C3TT provides a set of scripts which will work in background for most reviewing and video processing tasks. The first will just check if the talk is done and mark the related ticket as recorded. The second script, B-mount4cut, does a nice job by mounting a custom fuse filesystem providing the following files (more detailed explanation here: uncut.dv: full original dv file used as input file for the final trimming. project.kdenlive: Kdenlive project file for the operator. Once it's saved with the trim marks, fuse-vdv will do a parse on it and use the marks for cutting. cut.dv: contains only the frames between the trim marks extracted from project.kdenlive. cut-complete.dv: contains the frames between the trim marks extracted from project.kdenlive, plus a prepended intro and an appended video. Paths for these files should be previously set in the web interface as properties Processing.Path.Outro and Processing.Path.Intros. The outro file can be, for instance, an appended video file with a common thanks for sponsors. The intro files is usually an individual frame for each talk, being a colorful presentation poster. We can also set the intro duration in the Processing.Duration.Intro property. cut.wav: demuxed audio from cut.dv Note: in fact, fuse-vdv provides virtual video files as a concatenation of original input files, so avoiding copying large and redundant data. Ideally, these fuse mountpoints will be shared over the network for operators via glusterFS, but I'll skip that for now. After adding the trimming marks and saving the project using Kdenlive, the operator should go to the web interface and mark the ticket as cut:
/images/c3tt_cut.png

Mark ticket as cut

Note: I've been able to do the marks in Kdenlive using double-click in the video, then editing the crop start/end options. The buttons "[" and "]" didn't work in my Kdenlive version for some unknown reason. In the current DebConf video environment I had to make a link builder for translating the path/file names to the C3TT format. So, for the Amsterdam/2015-08-13/09:57:02.dv we should have a amsterdam-2015.08.13-09_57_02.dv symlink. From now the system will delivery the next tasks to C-cut-postprocessor script. This script will just check the marks from the Kdenlive project file and do the cutting job. So far it has worked perfectly here for the first video sessions in DebCamp, with zero hack in the original code, wow! Next post will be about the encoding script, named D-encoding.

Steve Kemp: Making an old android phone useful again

I've got an HTC Desire, running Android 2.2. It is old enough that installing applications such as thsoe from my bank, etc, fails. The process of upgrading the stock ROM/firmware seems to be: All in all .. not ideal .. in any sense. I wish there were a more "official" way to go. For the moment I guess I'll ignore the problem for another year. My nokia phone does look pretty good ..

Elena 'valhalla' Grandi: Finding people who have already signed your key

Finding people who have already signed your key

To be sure not to waste time during a ksp to meet people with whom I have already exchanged fingerprints, I decided to do a quick check of the list.

I had already downloaded a recent wotsap db https://wot.siccegge.de/ to ~/.wotsapdb;


$ wotsap $MY_KEY > signatures.txt


I've then edited the file, keeping just the signature sections:

This key is signed by, excluding cross-signatures:
[...]
This key is cross-signed with:
[...]
Keys signed by this key, excluding cross-signatures:
[...]


And then grepped the keys in the kps file in that list (maybe doing the reverse would have been better, whatever)


$ for K in grep "^pub" ksp-dc15.txt cut -c 15-22 ; do grep $K signatures.txt ; done


The first characters on each line tells you if it is a cross signature (X,X), if you have signed the key (-,X) or if they have signed your key (X,-), so that you can mark them on the ksp list as "ignore", "ask if there were problems with your fingerprint / ID", "ask whether they have received your signatures" as relevant.

I only had a few results, so the next step was done by hand.

Gunnar Wolf: It has landed.

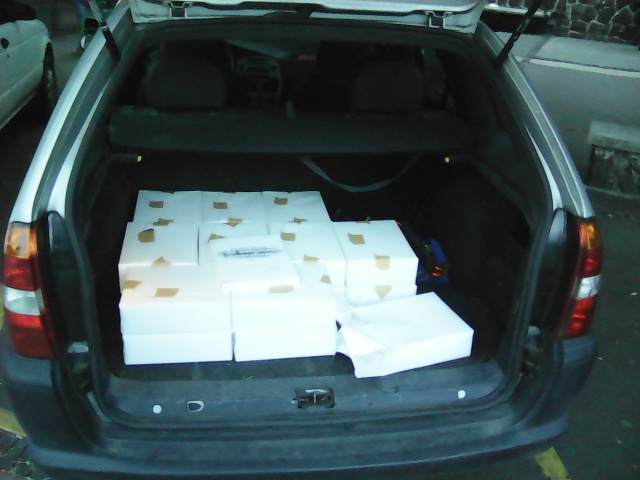
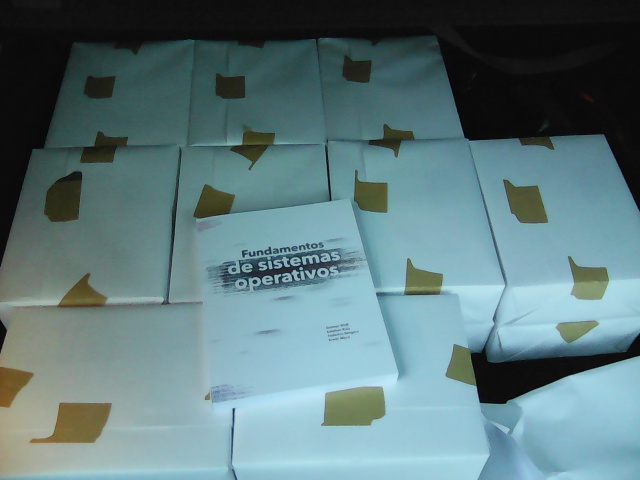
Basically everybody who knows me is aware that, basically for the last two years, I have been writing a book on Operating Systems for use in my class and, of course, in any similar class. Well, long story short, as of today: What's that in my car trunk? Lets have a closer look. Finally, Facultad de Ingenier a finished printing the book! So... Well, some minor data points: Anyway... Very happy here :D
AttachmentSize
IMG_20150812_193756.t.jpg106.36 KB
IMG_20150812_193805.t.jpg82.22 KB

Matthew Palmer: Your "Infrastructure as Code" is still code!

Whether you re a TDD zealot, or you just occasionally write a quick script to reproduce some bug, it s a rare coder who doesn t see value in some sort of automated testing. Yet, somehow, in all of the new-age Infrastructure as Code mania, we appear to have forgotten this, and the tools that are commonly used for implementing Infrastructure as Code have absolutely woeful support for developing your Infrastructure Code. I believe this has to change. At present, the state of the art in testing system automation code appears to be, spin up a test system, run the manifest/state/whatever, and then use something like serverspec or testinfra to SSH in and make sure everything looks OK . It s automated, at least, but it isn t exactly a quick process. Many people don t even apply that degree of rigour to their system config systems, and rely on manual testing, or even just doing it live! , to shake out the bugs they ve introduced. Speed in testing is essential. As the edit-build-test-debug cycle gets longer, frustration grows exponentially. If it takes two minutes to get a something went wrong report out of my tests, I m not going to run them very often. If I m not running my tests very often, then I m not likely to write tests much, and suddenly oops. Everything s on fire. In traditional software development, the unit tests are the backbone of the fast feedback cycle. You re running thousands of tests per second, ideally, and an entire test run might take 5-10 seconds. That s the sweet spot, where you can code and test in a rapid cycle of ever-increasing awesomeness. Interestingly, when I ask the users of most infrastructure management systems about unit testing, they either get a blank look on their face, or, at best, point me in the direction of the likes of Test Kitchen, which is described quite clearly as an integration platform, not a unit testing platform. Puppet has rspec-puppet, which is a pretty solid unit testing framework for Puppet manifests although it isn t widely used. Others, though nobody seems to have any ideas. The blank look is near-universal. If infrastructure developers want to be taken seriously, we need to learn a little about what s involved in the development part of the title we ve bestowed upon ourselves. This means knowing what the various types of testing are, and having tools which enable and encourage that testing. It also means things like release management, documentation, modularity and reusability, and considering backwards compatibility. All of this needs to apply to everything that is within the remit of the infrastructure developer. You don t get to hand-wave away any of this just because it s just configuration! . This goes double when your just configuration! is a hundred lines of YAML interspersed with templating directives (SaltStack, I m looking at you).

12 August 2015

Tiago Bortoletto Vaz: c3video for debconf #3

This is a follow-up to my previous post related the DebConf videoteam using a new software stack for the next conferences: http://acaia.ca/~tiago/posts/c3video-for-dc-take-2/. An outdated documentation for current subject is available at https://wiki.fem.tu-ilmenau.de/streaming/projekte/c3/28c3/crs/pipeline. Although the system may work differently nowadays, the basic idea remains the same. A newer, but incomplete documentation can be found in https://repository.fem.tu-ilmenau.de/trac/c3tt/wiki. Btw, CCC people from #voc at hackint.eu have been very kind and supportive. I've set an instance of C3TT for DebConf15 in http://c3tt.acaia.ca/. If you want to play with it just ping me in #debconf-video at oftc. As you can see, we can keep a single external C3TT server for all Debian events, without much work left to the local side, doesn't it sound amazing?
Setting a new conference Go to Projects, then Create. In the project area we'll need to import the Tickets. Tickets will come from the schedule file, which is a XML as generated from frab. With a minor hack we've been able to make the schedule XML from DebConf Summit quite compatible to it (kudos cate!):
/images/import_tickets.png

Importing tickets

By importing the schedule from https://summit.debconf.org/debconf15.xml we'll be asked from which rooms we want to import the events. Usually those that have video coverage will be selected:
/images/chosing_rooms.png

Choosing rooms

Then, we may want to exclude some talks that we won't provide video:
/images/chosing_talks.png

Choosing talks

We're also required to adjust some Properties for a given conference. An example with some explanation of these properties is availabe at https://c3voc.de/wiki/c3tracker. For my initial tests the ones below seem to be enough:
/images/c3tt_properties.png

Setting properties

The backend: basic understand The screen UI mentioned above will run a set of scripts in background which will automate most of the tasks, preparing videos for cutting to deploying them in different online services. Tab 0: A-recording-scheduler Each 30 seconds it will check if there's any ticket in the state scheduled or recording. It's based in the start/end datetime of the talk, so the ticket will be kept as scheduled (current < talk start), or marked as recording (start => current =< end) or recorded (current > end). Tab 1: B-mount4cut Each 30 seconds it will check if there's any ticket in the state recorded. That means the talk is already finished, and the raw video file is available in the path which has previously been set as a property (Path.Capture) in the web interface. For each ticket marked as recorded it will try to find the related video file in the capture path. The file format should be <room>-YYYY-MM-DD_HH-MM-SS.<extension>. The script will then use fuse-vdv to create a custom filesystem with some needed files for human interaction (fancy stuff!). Here's an example of talks in a room called Heidelberg, after being recorded and auto-mounted by the B-mount4cut script:
/images/c3tt_fuse.png

Mounting custom fuse FS

The human interaction is just a short review process using Kdenlive. The reviewers will access these files via a glusterFS network share. There's even a Debian Virtualbox image provided for that, including all the necessary tools. I'm going into this right now and will report what I get in the next hours. Hopefully the following scripts will also be covered, very soon-ish :) Tab 2: C-cut-postprocessor Tab 3: D-encoding Tab 4: E-postencoding (auphonic) Tab 5: F-postprocessing(upload) DebCamp is fun.

Elena 'valhalla' Grandi: Printing a 2965 lines text file

Printing a 2965 lines text file

Let us image I have a reason https://people.debian.org/~anibal/ksp-dc15/ksp-dc15.html to print a text file that is 2965 lines long, is encoded in utf-8 (so a2ps and enscript don't work) and I don't want to destroy a whole forest for it.

I've started by using xelatex to get a nicely typeset A5 page with my file in a monospaced font: partecipants.tex

\documentclass[a5paper] article
\usepackage fontspec
\usepackage[left=1cm,right=1cm,top=0.8cm,bottom=1cm,foot=0.2cm] geometry
\usepackage listings

\lstset %
basicstyle=\ttfamily\scriptsize,
frame=none,
keepspaces=true,


\begin document
\lstinputlisting ksp-dc15.txt
\end document


This gets compiled into partecipants.pdf with


$ xelatex partecipants.tex


And resulted in 44 pages, 4 less than the 48 needed by a2ps, and printable on just 11 A4 sheets.

I wanted it to be easily manageable while walking around, taking notes into it while standing, so I decided to arrange it in booklet form:


$ pdfbook partecipants.pdf


The result, partecipants-book.pdf was printed (two sided, of course) folded and stitched in the middle.

I could have arranged it into signatures, but this would have required an additional sheet to bring the number of pages to a multiple of 16.

I know that there are electronic alternatives around, and I've also considered just carrying around the file and adding notes (to a copy?) with vim, but I'd trust a paper copy more.

Daniel Pocock: Recording live events like a pro (part 2: video)

In the first blog in this series, we looked at how to capture audio effectively for a range of different events. While recording audio appears less complicated than video, it remains fundamental to a good recording. For some types of event, like a speech or a debate, you can have quite a bad video with poor lighting and other defects but people will still be able to watch it if the audio is good. Therefore, if you haven't already looked at the previous blog, please do so now. As mentioned in the earlier blog, many people now have high quality equipment for recording both audio and video and a wide range of opportunities to use it, whether it is a talk at a conference, a wedding or making a Kickstarter video. The right camera for video recording The fundamental piece of equipment is the camera itself. You may have a DSLR camera that can record video or maybe you have a proper handheld video camera. The leading DSLR cameras, combined with a good lens, make higher quality recordings than many handheld video cameras. Unfortunately, although you pay good money to buy a very well engineered DSLR that could easily record many hours of video, most DSLRs are crippled to record a maximum of 30 minutes in one recording. This issue and some workarounds are discussed later in this blog. If you don't have any camera at all you need to think carefully about which type to buy. If you are only going to use it once you may want to consider renting or borrowing or asking for other people attending the event to bring whatever cameras they have to help make multiple recordings (the crowdsourcing solution). If you are a very keen photographer then you will probably have a preference for a DSLR. Accessories Don't just look at the cost of your camera and conclude that is all the budget you need. For professional quality video recording, you will almost certainly need some accessories. You may find they are overpriced at the retail store where you bought your camera, but you still need some of them, so have a look online.
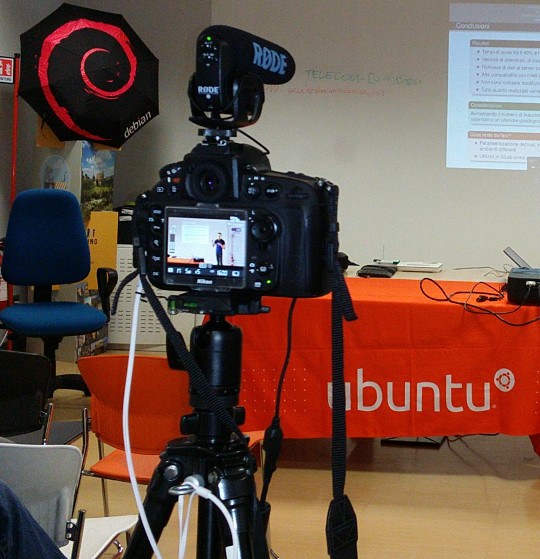
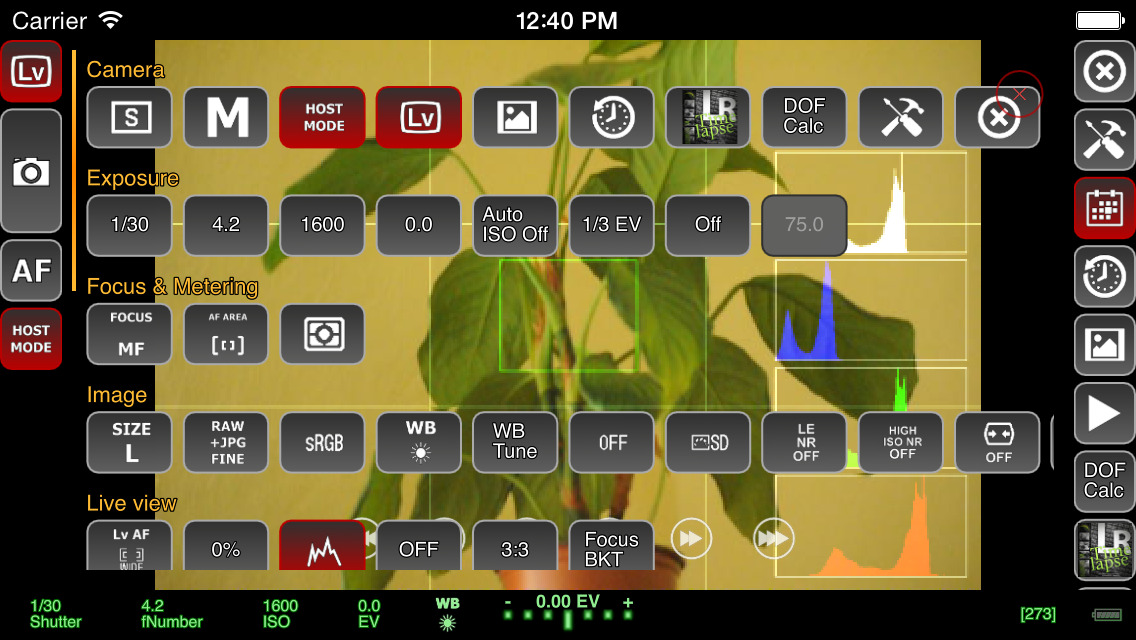
Recording a talk at a free software event with a Nikon D800 on a very basic tripod with Rode VideoMic Pro, headphones (white cable) and external power (black cable) If you want to capture audio with the camera and record it in the video file (discussed in more detail below), you will need to purchase a microphone that mounts on the camera. The built-in microphones on cameras are often quite bad, even on the most expensive cameras. If you are just using the built-in microphone for reference audio (to help with time synchronization when you combine different audio files with the video later) then the built-in microphone may be acceptable. Camera audio is discussed in more detail below. If your camera has a headphone socket, get some headphones for listening to the audio. Make sure you have multiple memory cards. Look carefully at the speed of the memory cards, slow ones are cheaper but they can't keep up with the speed of writing 1080p video. At a minimum, you should aim to buy memory cards that can handle one or two days worth of data for whatever it is you do. A tripod is essential for most types of video. If you use a particularly heavy camera or lens or if you are outdoors and it may be windy you will need a heavier tripod for stability. For video, it is very useful to have a tripod with a handle for panning left and right but if the camera will be stationary for the whole recording then the handle is not essential. Carrying at least one spare battery is another smart move. On one visit to the Inca Trail in Peru, we observed another member of our group hiking up and down the Andes with a brand new DSLR that they couldn't use because the battery was flat. For extended periods of recording, batteries will not be sufficient and you will need to purchase a mains power supply (PSU). These are available for most types of DSLR and video camera. The camera vendors typically design cameras with unusual power sockets so that you can only use a very specific and heavily overpriced PSU from the same company. Don't forget a surge protector too. There are various smartphone apps that allow you to remotely control the camera from the screen of your phone, such as the qDslrDashboard app. These often give a better preview than the screen built-in to the camera and may even allow you to use the touch screen to focus more quickly on a specific part of the picture. A regular USB cable is not suitable for this type of app, you need to buy a USB On-The-Go (OTG) cable.
Screenshot of qDslrDashboard app on a smartphone, controlling a DSLR camera If you plan to copy the video from the camera to a computer at the event, you will need to make sure you have a fast memory card reader. The memory card readers in some laptops are quite slow and others can be quite fast so you may not need to buy an extra card reader. Camera audio Most cameras, including DSLRs, have a built-in microphone and a socket for connecting an external microphone. The built-in microphones obtain very poor quality sound. For many events, it is much better to have independent microphones, such as a lapel microphone attached to a smartphone or wireless transmitter. Those solutions are described in part one of this blog series. Nonetheless, there are still some benefits of capturing audio in the camera. The biggest benefit is the time synchronization: if you have audio recordings in other devices, you will need to align them with the video using post-production software. If the camera recorded an audio stream too, even if the quality is not very good, you can visualize the waveform on screen and use it to align the other audio recordings much more easily and precisely. If the camera will be very close to the people speaking then it may be acceptable to use a microphone mounted on the camera. This will be convenient for post-production because the audio will be synchronized with the video. It may still not be as good as a lapel microphone though, but the quality of these camera-mounted microphones is still far higher than the built-in microphones. I've been trying the Rode VideoMic Pro, it is definitely better than recording with the built-in microphone on the camera and also better than the built-in microphone on my phone. One problem that most people encounter is the sound of the lens autofocus mechanism being detected by the microphone. This occurs with both the built-in microphone and any other microphone you mount on the camera. A microphone mounted on top of the camera doesn't detect this noise with the same intensity as the built-in microphone but it is still present in the recordings. If using a camera-mounted microphone to detect the audio from an audience, you may need to have an omnidirectional microphone. Many camera-mounted microphones are directional and will not detect very much sound from the sides or behind the camera. When using any type of external microphone with the camera, it is recommend to disable automatic gain control (AGC) in the camera settings and then manually adjust the microphone sensitivity/volume level. Use headphones A final word on audio - most good cameras have an audio output socket. Connect headphones and wear them, to make sure you are always capturing audio. Otherwise, if the microphone's battery goes flat or if a wireless microphone goes out of range you may not notice. Choosing a lens The more light you get, the better. Bigger and more expensive lenses allow more light into the camera. Many of the normal lenses sold with a DSLR camera are acceptable but if it is a special occasion you may want to rent a more expensive lens for the day. If you already have a lens, it is a very good idea to test it in conditions similar to those you expect for the event you want to record. Recording duration limits Most DSLR cameras with video capability impose a 30 minute maximum recording duration This is basically the result of a friendly arrangement between movie studios and politicians to charge an extra tax on video recording technology and potentially make the movie studio bosses richer, supposedly justified by the fact that a tiny but exaggerated number of people use their cameras to record movies at the cinema. As a consequence, most DSLR manufacturers limit the duration of video recording so their product won't be subject to the tax, ensuring the retail price is lower and more attractive. On top of this, many DSLR cameras also have a 4GB file size limit if they use the FAT filesystem. Recording 1080p video at a high frame rate may hit the file size limit in 10 minutes, well before you encounter the 30 minute maximum recording duration. To deal with the file size issue, you can record at 720p instead of 1080p and use the frame rate 24fps. For events longer than 30 minutes or where you really want 1080p or a higher frame rate, there are some other options you can consider:
  • Buy or rent a proper video camera instead of using a DSLR camera
  • Using multiple cameras that can stop and be restarted at different times.
  • Manually stopping and restarting the camera if there are breaks in the event where it is safe to do so.
  • Use an app to control the camera and program it to immediately restart the recording each time it stops
  • Extract the raw output from the camera's HDMI socket and record into some other device or computer. There are several purpose-built devices
    that can be used this way with an embedded SSD for storage.
  • There are also some people distributing unofficial/alternative firmware images that remove the artificial 30 minute recording limit.
Camera settings There are many online tutorials and demonstration videos on YouTube that will help you optimize the camera settings for video. You may have already made recordings using the automatic mode. Adjusting some or all of the settings manually may help you create a more optimal recording. You will need to spend some time familiarizing yourself with the settings first. The first thing to check is white balance. This tells the camera the type of lighting in the location. If you set this incorrectly then the colours will be distorted. Many cameras have the ability to automatically set the white balance. For video, you may be able to change one or more settings that control the recording quality. These settings control the file compression ratio and image size. Typical image size settings are 720p and 1080p. Compression ratio may be controlled by a high/medium/low quality setting. Choosing the highest quality and biggest picture requires more space on the memory card and also means you reach the 4GB file size limit more quickly. A higher quality setting also implies a faster memory card is required, because the rate of megabytes per second written to the memory card is higher. Next you need to think about the frame rate. Events that involve fast moving subjects, such as sports, typically benefit from a higher frame rate. For other events it is quite acceptable to use 24 frames per second (fps). Higher frame rates also imply bigger file size and a requirement for a faster memory card. Once you have decided on the frame rate, the next thing to do is set the shutter speed. Use a shutter speed that is double the frame rate. For example, if using 24fps or 25fps, use a 1/50 shutter speed. The final two settings you need to adjust are the ISO and aperture. Set these based on the lighting conditions and extent to which the subjects are moving. For example, if the setting is dark or if you are trying to record fast moving subjects like athletes, vehicles or animals, use an ISO value of 800 or higher. Once you have chosen ISO, adjust the aperture to ensure the picture is sufficiently illuminated. Aperture also has a significant impact on the depth of field. Operating the camera: zoom and focus Many people use zoom lenses. It is not always necessary to change the zoom while recording a video, you can use software to zoom in and out on individual parts of the picture when editing it in post-production. If you do change the zoom while recording, it may be more difficult to maintain focus. Almost all lenses support manual focus (turning the focus ring by hand) and many support automatic focus. When shooting photographs with a DSLR, the mirror is down and the camera can use dedicated sensors for focus and light sensing. When shooting video, the mirror is up and the camera can not use the same focus sensors that are used in photography. Video recording uses a digital focussing algorithm based on contrast in the picture. If you take a lot of photos you are probably quite accustomed to the fast and precise autofocus for photography and you will notice that keeping a video in focus is more challenging. As mentioned already, one of the first things you can do to keep focus simple is to avoid zooming while recording. Record in a higher resolution than you require and then zoom with software later. Some people record using 4k resolution even when they only want to produce a 720p video, as they can digitally zoom in to different parts of the 4k recording without losing detail. If the subject is very stationary (people sitting at a desk for an interview is a typical example), you may be able to set the camera to manual focus and not change it at all while recording. If you choose to enable autofocus while recording, any built-in camera microphone or microphone mounted on the camera is likely to detect sounds from the motorized focus system. Ultimately, the autofocus mechanism is not accurate for all subjects and you may be unable to stop them moving around so you will need to change the focus manually while recording. It requires some practice to be able to do this quickly without overshooting the right focus. To make life more tricky, Nikon and Canon focus rings rotate in the opposite direction, so if you are proficient using one brand you may feel awkward if you ever have to use the other. A good way to practice this skill is to practice while in the car or on the train, pointing at different subjects outside the window and trying to stay in focus as you move from one subject to the next. Make a trial run Many events, from weddings right up to the Olympic Games opening ceremony, have a trial run the day before. One reason for that is to test the locations and settings of all the recording and broadcasting equipment. If a trial run isn't possible for your event, you may find some similar event to practice recording and test your equipment. For example, if you are planning to record a wedding, you could try and record a Sunday mass in the same church. Backup and duplicate the recordings before leaving the event If you only have one copy of the recordings and the equipment is stolen or damaged you may be very disappointed. Before your event, make a plan to duplicate the raw audio and video recordings so that several people can take copies away with them. Decide in advance who will be responsible for this, ensure there will be several portable hard disks and estimate how much time it will take to prepare the copies and factor this into the schedule. Conclusion All the products described can be easily purchased from online retailers. You may not need every accessory that is mentioned as it depends on the type of event you record. The total cost of buying or renting the necessary accessories may be as much as the cost of the camera itself so if you are new to this you may need to think carefully about making a budget with a spreadsheet to do it correctly. Becoming familiar with the camera controls and practicing the techniques for manual focus and zoom can take weeks or months. If you enjoy photography this can be time well spent but if you don't enjoy it then you may not want to commit the time necessary to make good quality video. Don't rule out options like renting equipment instead of buying it or crowdsourcing, asking several participants or friends to help make recordings with their own equipment. For many events, audio is far more indispensable than video and as emphasizing at the beginning of this article, it is recommended that you should be one hundred percent confident in your strategy for recording audio before you start planning to record video.

Daniel Pocock: UK wakes up to airport tax and data grab

The UK has just woken up to the fact that retailers at airports have been playing the VAT system. The focus of the media coverage has been on the VAT money, failing to give much emphasis to the fact this is also a sophisticated and coordinated attack on personal privacy. This situation has been obvious to me for years and it doesn't just occur in the UK. Whenever one of these retailers asks me for a boarding pass, I always refuse. Sometimes they lie to me and tell me that it is mandatory to let them scan my boarding pass: I tell them that a travel companion has the boarding passes and at this point they usually find some way to complete the transaction without further comment. It is only necessary to pay the correct amount With the rise of payment cards, people seem to be forgetting that you can pay for things in cash. If I have the right change to pay for something in this scenario, I typically put it on the counter and walk away. Why should I have to waste my time helping a poorly trained cashier understand VAT? I already deal with enough computer problems in the job I'm paid to do, why should I lose my time when on vacation explaining to a cashier that their computer is failing to correctly deduct 20% VAT? Whenever showing a boarding pass or passport It is far too common for people to try and scan or copy documents these days. When somebody in an airport shop or hotel asks to see a document, I don't let it out of my hands. It is not hard to cover the barcode with your fingers too. This prevents them making an unauthorized copy or using a barcode scanner to extract personal data. Some of these staff literally try to snatch the documents out of people's hands and drop them onto a scanner next to their till. In some countries hotels are obliged to look at your passport and make a record of the name but they often have no obligation to photocopy or scan it and it is often a huge risk if they do. If the airports are genuinely concerned about the security of passengers, they would be just as thorough in protecting data as they are in the hunt for terrorists. For example, they could give VAT-free passengers colour-coded boarding passes or some other vouchers without any personal information on them. VAT diversion funds customer data grab Shops pocket an extra 20% of the price of a product and they condition everybody, staff and customers, to having all customer data expropriated from the boarding pass at the point of sale, even the customers not eligible for a tax refund are unnecessarily having their data hoovered up in this way. The VAT money diverted away from both the tax man and the customer is rolled back into the system to fund the data grab. UK law promises customers significant protection from unlawful use of personal data, so how can these retailers lie to passengers and tell them that scanning the boarding pass is mandatory? Why not ask the Information Commission's Office to check up on this? Paying the correct amount and walking away It is not hard for people to add up the amount of VAT included in a price, deduct it themselves, give the correct and exact amount of cash to the cashier and walk away. Just type the price into your smart phone, divide by 1.2 and you can see the amount to pay. For example, if a product costs 24.95, just type 24.95 1.2 into the calculator on your phone and you find that you have to pay 20.79. It may only be necessary to show a boarding pass or ID for purchasing duty-free alcohol or tobacco. Not just for airports Carrying a correct amount of cash doesn't just help navigate the data grab in airports. Consider some of the other scenarios:
  • A long queue at the cashier in a petrol station, typically on a Sunday afternoon. Did you ever notice somebody who just walks past the queue and puts the exact change (or a cheque) on the counter and drives away while everybody else is waiting to pay with some payment card and scan their loyalty card?
  • Restaurant in a tourist spot, you receive a bill and notice they have added VAT and service charges or something you didn't ask for like bread. In European countries and Australia, the price next to each dish on the menu is the only price you have to pay, just like the price on the shelf in a shop or the price on a web page. If you have the right change you can just pay that amount and walk away without a discussion. In the US the taxes are added later and some tourist hot spots in Europe try this with English speaking customers, thinking that if they are American they won't complain.
  • Hotel tries to insist on a currency conversion when charging your credit card. Maybe you've already realized that dynamic currency conversion (DCC) used by retailers often adds at least 3% to a purchase but some hotels try to go way beyond this. The booking confirmation page you printed from their web site gives you a total price in one currency, perhaps USD or EUR and they use some arbitrary exchange rate, with a whopping 30% margin or more, to convert to the local currency and ask you to insert your PIN number or sign a credit card authorization. The best answer to this practice is usually to carry banknotes in the currency used for the booking, paying that exact amount in cash and if they try to argue, just keep counting out the bank notes to prove it matches the confirmation page. Hotels only get away with this trick because few people check the rate, even fewer carry sufficient cash and you may not be able to use local cash machines to get the currency specified in your booking. This is a situation I've encountered in eastern Europe and South America where it is common to quote in EUR and USD even if that isn't the domestic currency.

11 August 2015

Tiago Bortoletto Vaz: c3video for debconf #2

This is a follow-up to my previous post related the DebConf videoteam using a new software stack for the next conferences: http://acaia.ca/~tiago/posts/c3video-for-dc-take-1/.
Installing C3TT scripts There's a video (in German) which gives an idea about how the C3TT works: https://www.youtube.com/watch?v=K-KHbAcTo9I It basically gives the volunteers a web interface to cut and review the recordings, wich communicates with a set of scripts running in background which will automate some tasks. "Installing" the set of scripts is just a matter of placing them in a common directory and installing some Perl dependencies, mostly which are already packaged for Debian. First check it out from the svn repository (fun fact: the web interface is coded in php in a git repository, the scripts are mostly written in perl with a little of bash, in a subversion repository. Both the conference and media system is are in ruby :)
$ svn co https://subversion.fem.tu-ilmenau.de/repository/cccongress
$ mkdir /opt/crs; mv cccongress/trunk/tools /opt/crs/
A few libraries required:
$ apt-get install libboolean-perl libmath-round-perl libdatetime-perl libwww-curl-perl libconfig-inifiles-perl libxml-simple-perl
$ perl -MCPAN -e 'install XML::RPC::Fast'
In the web tracker create a project, go to all projects => workers and create a worker (I'll try to explain it later). Go edit the worker and we'll see the token and secret that should be used in the scripts to talk to the interface.
cd  /opt/crs/tools/tracker3.0
Create a file tracker-profile.sh with the follow lines (using our correct values):
export CRS_TRACKER=http://localhost/rpc
export CRS_TOKEN=2q24M7LW4Rk31YNW4tWKv8koNvyM3V4s
export CRS_SECRET=5j8SyCS35W2SBk2XIM4IWeDUqF9agG1x
We also need to build and install the fuse-vdv package from trunk/tools (if working with dv files, otherwise fuse-ts package). Next step is run the scripts. Fortunatelly a nice UI has been done using screen with multiple tabs, which can be alternated using a <Ctrl+a> <number> combination.
cd  /opt/crs/tools/tracker3.0 && /start-screenrc-dv.sh
We'll get the following:
/images/screen-c3tt-dv.png

Screen tabs from C3TT

In a next post I'll try to explain a bit of how the web system work together with the scripts and how to do a basic setup for a real conference. I hope to get there soon!

Jonathan McDowell: Programming the FST-01 (gnuk) with a Bus Pirate + OpenOCD

Last year at DebConf14 Lucas authorized the purchase of a handful of gnuk devices, one of which I obtained. At the time it only supported 2048 bit RSA keys. I took a look at what might be involved in adding 4096 bit support during DebConf and managed to brick my device several times in doing so. Thankfully gniibe was on hand with his STLinkV2 to help me recover. However subsequently I was loathe to experiment further at home until I had a suitable programmer. As it is this year has been busy and the 1.1.x release train is supposed to have 4K RSA (as well as ECC) support. DebConf15 is coming up and I felt I should finally sort out playing with the device properly. I still didn t have a suitable programmer. Or did I? Could my trusty Bus Pirate help? The FST-01 has an STM32F103TB on it. There is an exposed SWD port. I found a few projects that claimed to do SWD with a Bus Pirate - Will Donnelly has a much cloned Python project, the MC HCK project have a programmer in Ruby and there s LibSWD though that s targeted to smarter programmers. None of them worked for me; I could get the Python bits as far as correctly doing the ID of the device, but not reading the option bytes or successfully flashing (though I did manage an erase). Enter the old favourite, OpenOCD. This already has SWD support and there s an outstanding commit request to add Bus Pirate support. NodoNogard has a post on using the ST-Link/V2 with OpenOCD and the FST-01 which provided some useful pointers. I grabbed the patch from Gerrit, applied it to OpenOCD git and built an openocd.cfg that contained:
source [find interface/buspirate.cfg]
buspirate_port /dev/ttyUSB0
buspirate_vreg 1
buspirate_mode normal
transport select swd
source [find target/stm32f1x.cfg]
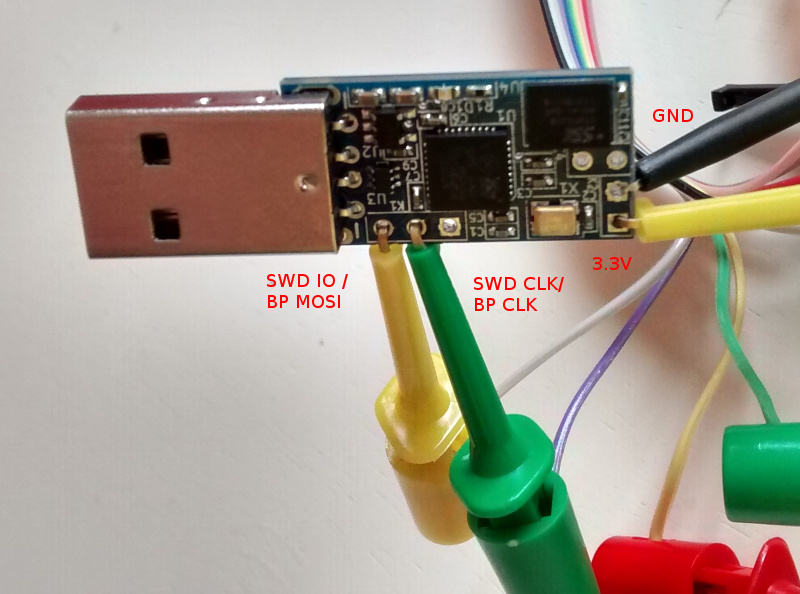
My BP has the Seeed Studio probe cable, so my hookups look like this: Bus Pirate + FST-01 SWD connection That s BP MOSI (grey) to SWD IO, BP CLK (purple) to SWD CLK, BP 3.3V (red) to FST-01 PWR and BP GND (brown) to FST-01 GND. Once that was done I fired up OpenOCD in one terminal and did the following in another:
$ telnet localhost 4444
Trying ::1...
Trying 127.0.0.1...
Connected to localhost.
Escape character is '^]'.
Open On-Chip Debugger
> reset halt
target state: halted
target halted due to debug-request, current mode: Thread
xPSR: 0x01000000 pc: 0xfffffffe msp: 0xfffffffc
Info : device id = 0x20036410
Info : SWD IDCODE 0x1ba01477
Error: Failed to read memory at 0x1ffff7e2
Warn : STM32 flash size failed, probe inaccurate - assuming 128k flash
Info : flash size = 128kbytes
> stm32f1x unlock 0
Device Security Bit Set
stm32x unlocked.
INFO: a reset or power cycle is required for the new settings to take effect.
> reset halt
target state: halted
target halted due to debug-request, current mode: Thread
xPSR: 0x01000000 pc: 0xfffffffe msp: 0xfffffffc
> flash write_image erase /home/noodles/checkouts/gnuk/src/build/gnuk.elf
auto erase enabled
wrote 109568 bytes from file /home/noodles/checkouts/gnuk/src/build/gnuk.elf in 95.055603s (1.126 KiB/s)
> stm32f1x lock 0
stm32x locked
> reset halt
target state: halted
target halted due to debug-request, current mode: Thread 
xPSR: 0x01000000 pc: 0x08000280 msp: 0x20005000
Then it was a matter of disconnecting the gnuk from the BP, plugging it into my USB port and seeing it come up successfully:
usb 1-2: new full-speed USB device number 11 using xhci_hcd
usb 1-2: New USB device found, idVendor=234b, idProduct=0000
usb 1-2: New USB device strings: Mfr=1, Product=2, SerialNumber=3
usb 1-2: Product: Gnuk Token
usb 1-2: Manufacturer: Free Software Initiative of Japan
usb 1-2: SerialNumber: FSIJ-1.1.7-87063020
usb 1-2: ep 0x82 - rounding interval to 1024 microframes, ep desc says 2040 microframes
More once I actually have a 4K key loaded on it.

Tiago Bortoletto Vaz: c3video for debconf #1

Some context DebConf has provided live streaming and recordings from talks since 2004. We used to work with a set of scripts which worked together with Pentabarf for most of videoteam tasks, including volunteer shifts coordination, reviewing process, encoding and deployment. Things has changed since DebConf14, when Pentabarf was replaced by Summit as the conference management system. Without those old Pentabarf features and hacks we had to invent new ways of dealing with the video workflow in DebConf. We gave veyepar a try in 2014, and we will probably do it again in DebConf15. However, for a long term solution we are considering the software stack from CCC Video Operation Center, which so far I see as a free, solid and community-oriented mix of Debian-friendly tools. I will be reporting the progress on setting up and testing the CCC software strucutre for DebConf. Having the opportunity of being in DebCamp together with other videoteam folks will certainly make things easier :)
Setting up the CCC Ticket Tracker C3TT is a ticket/tracker system used by CCC for reviewing/encoding process. The web side of C3TT is written in PHP and can be cloned from http://git.fem.tu-ilmenau.de/cccongress.git. Some documentation is available at https://repository.fem.tu-ilmenau.de/trac/c3tt/wiki and from https://c3voc.de/wiki/c3tracker. What I've done so far to get it working: Installing some dependencies:
$ apt-get install postgresql-9.4 php5-pgsql php5-xsl postgresql-contrib-9.4 php5-xmlrpc php5 php5-curl
Creating database and users:
$ su -s /bin/bash postgres
$ createuser -DRS dc15
$ createdb -O dc15 c3tt
$ psql
postgres=# ALTER ROLE dc15 WITH PASSWORD 'xxx';
Basic site config using lighttpd:
$HTTP["host"] =~ "c3tt\.your\.host"  
  server.document-root = "/var/www/c3tt/Public/"
  alias.url = ("/javascript/" => "/var/www/js/")
  url.rewrite-once = ( ".*\.(js ico gif jpg png css)$" => "$0", "^(.*?)$" => "index.php/$1",)
   
Running the installer script:
$ php -q Install/install.php
This will ask you some questions, then will create the config file and populate the database. At this point you should be able to access the ticket track system from your browser. The set of scripts from C3TT doesn't need to be installed in the same host as the web side, they communicate via XML/RPC. In a next post I will report the installation and initial setup for these scripts.

Matthias Klumpp: AppStream/DEP-11 for everyone! (beta!)

One of the things we discussed at this year s Akademy conference is making AppStream work on Kubuntu.appstream-logo On Debian-based systems, we use a YAML-based implementation of AppStream, called DEP-11 . DEP-11 exists for historical reasons (the DEP-11 YAML format was a superset of AppStream once) and because YAML, unlike XML, is one accepted file format by the Debian FTPMasters team, who we want to have on board when adding support for AppStream. So I ve spent the last few days on setting up the DEP-11 generator for Kubuntu, as well as improving it greatly to produce more meaningful error messages and to generate better output. It became a bit slower in the process, but the greatly improved diagnostics data is worth it. For example, maintainers of Debian packages will now get a more verbose explanation of issues found with metadata in their packages, making them easier to fix for people who didn t get in contact with AppStream yet. At time, we generate AppStream metadata for Tanglu, Kubuntu and Debian, but so far only Tanglu makes real use of it by shipping it in a .deb package. Shipping the data as package is only a workaround though, for a proper implementation, the data will be downloaded by Apt. To achieve that, the data needs to reach the archive first, which is something that I can hopefully discuss and implement with the FTPMasters team of Debian at this year s Debconf. When this is done, the new metadata will automatically become available in tools like GNOME-Software or Muon Discover. How can I see if there are issues with my package? The dep11-generator tool will return HTML pages to show both the extracted metadata, as well as issues with it. You can find the information for the respective distribution here: Each issue tag will contain a detailed explanation of what went wrong. Errors generally lead to ignoring the metadata, so it will not be processed. Warnings usually concern things which might reduce the amount of metadata or make it less useful, while Info-type hints contain information on how to improve the metadata or make it more useful. Can I use the data already? Yes, you can. You just need to place the compressed YAML files in /var/cache/app-info/yaml and the icons in /var/cache/app-info/icons/<suite>-<component>/<size>, for example: /var/cache/app-info/icons/jessie-amd64/64 64 I think I found a bug in the generator In that case, please report the issue against the appstream-dep11 package at Debian, or file an issue at Github.. The only reason why I announce this feature now is to find remaining generator bugs, before officially announcing the feature on debian-devel-announce. When will this be officially announced? I want to give this feature a little bit more testing, and ideally have the integration into the archive ready, so people can see how the metadata looks like when rendered in GNOME-Software/Discover. I also want to write a bit more documentation to help Debian developers and upstreams to improve their metadata. Ideally, I also want to incorporate some feedback at Debconf when announcing full AppStream support in Debian. So take all the stuff you ve read above as a little sneak peek  Debconf15goingI will also give a talk at Debconf, titled AppStream, Limba, XdgApp Where we are going. The aim of this talk is to give an insight i tnto the new developments happening in the software distribution area, and what the goal of these different projects is (the talk should give an overview of what s in the oven and how it will impact Debian). So if you are interested, please drop by :-) Maybe setting up a BOF would also be a good idea.

10 August 2015

Norbert Preining: Updating my dual-boot Linux laptop to Windows 10

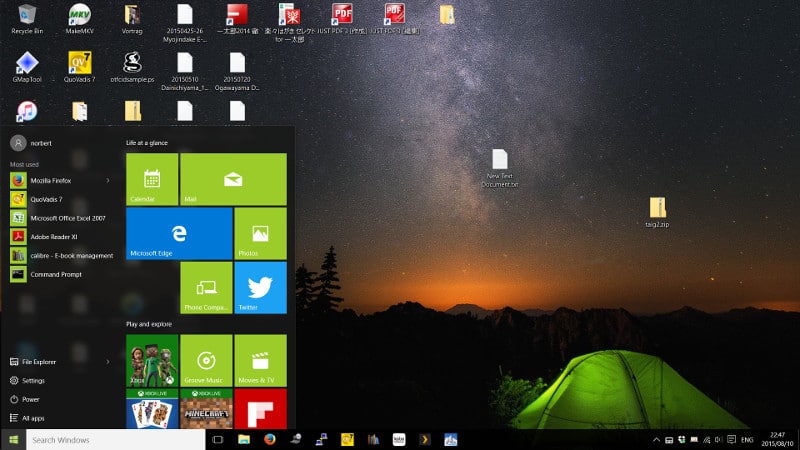
Ok, I have to admit, I still have Windows on my laptop. I do about 90% of my work on the Linux (Debian) side, but there are some applications where I don t have an alternative: Word (yes, I know LibreOffice, but it is still not capable enough to handle Japanese forms without breaking the layout), and much more, QuoVadis, a GPS and digital map program where I do have my whole history of moutaineering and bundled knowledge as mountain guide. So for the time being, I cannot switch away from Windows. Not to mention some of the Steam games that only work on Windows, unfortunately. So the other day I went ahead and accepted the upgrade offer and let Windows do its part win10 The machine is a Sony Vaio I have reported already many times, see the posts of the tag Vaio. All in all, it was a very smooth upgrade, to my complete suprise: On the other hand, as it is well documented, Windows 10 is a beast when it comes to collecting all kinds of data. There are a lot of settings to be turned off just to make sure not all your details down to your shoe size and the x-ray of your grandparents are transmitted to Microsoft. I used the German Computer News page heise where I found this article. All in all for now I am happy with the current situation, I could boot back into my comfy Linux and know that if it is necessary, I can switch to Windows (10) for some dirty work.

Carl Chenet: Retweet, a simple bot to retweet tweets from a user

Follow me on Identi.ca or Twitter or Diaspora*diaspora-banner For a small project related to the french-speaking Hacker News-style website le Journal du hacker, I needed to retweet every tweets from a Twitter account to another one. So here it is : Retweet I wanted to keep it simple, stupid, and coded in Python if I needed to extend it myself for the projet Le Journal du hacker. logo-journal-du-hacker It was quite easy to reach these goals, but the project is also well documented and should be quite simple to install, configure and use. What about you? Do you also have this kind of needs? Don t hesitate to fork the project, report bugs, ask for feature requests and let us know in the comments of this post ;)

Daniel Pocock: Going 4K

I recently started using a 4K monitor. I've generally had a positive experience and thought I would share some comments about it. What can you do with 4K resolution?
  • View the entire London Underground map or Swiss railway map without having to zoom or scroll
  • Run a mail client like Thunderbird/Icedove and an IRC client side-by-side
  • Run Eclipse and the Android emulator side-by-side
  • Run Eclipse and some other program you are debugging side-by-side
  • When reading a PDF, show a whole page at a time but only using half the screen
Are there hardware issues? Originally the hardware was expensive and people would have to do things like using multiple cables to join their video card to their 4K screen. The latest generation of video cards and monitors don't have this problem. I chose to use NVIDIA's entry-level Quadro K420 card, the smallest and least expensive Quadro supporting 4K. The PC is a HP Z800 workstation. HP suggests they only certify the K420 with their latest workstations (e.g. Z840) but I have observed no problem using it in a Z800. The monitor is a 32" BenQ display. After reading comments from other 4K users, I felt that any monitor less than 30" would not help me get the most from the world of 4K. The monitor connects to the video card using a DisplayPort 1.2 cable that was in the box with the monitor. I've been able to get sound through the monitor but I found the volume is always a bit low and at one point sound stopped completely. What about software issues? Everything just appeared to work although the fonts are a bit smaller than what I'm used to. This appears to be related to DPI issues. DPI is not automatically detected and several applications have their own way of handling non-standard DPI. Discussion about this started on the debian-devel mailing list, given that non-standard DPI will be an issue with many newer monitors, handheld devices and more exotic displays such as televisions. Some web sites just don't look so good when the browser window is maximized to 4K resolution while others use the extra space really well. For example, using the AirBNB search, the maps show more detail but using another hotel booking site I found that it was still trying to render a map within a constant size region using less than ten percent of the page.

Matthias Klumpp: Akademy 2015

I am very late with this, but I still wanted to write a few words about Akademy 2015. First of all: It was an awesome conference! Meeting all the great people involved with KDE and seeing who I am working with (as in: face to face, not via email) was awesome. We had some very interesting discussions on a wide variety of topics, and also enjoyed quite some beer together. Particularly important to me was of course talking to Daniel Vr til who is working on XdgApp, and Aleix Pol of Muon Discover fame.
Also meeting with the other Kubuntu members was awesome I haven t seen some of them for about 3 years, and also met many cool people for the first time. My talk on AppStream/Limba went well, except that I got slightly confused by the timer showing that I had only 2 minutes left, after I had just completed the first half of my talk. It turned out that the timer was wrong  Another really nice aspect was to be able to get an insight into areas where I am usually not involved with, like visual design. It was really interesting to learn about the great work others are doing and to talk to people about their work and I also managed to scratch an itch in the Systemsettings application, where three categories had shown the same icon. Now Systemsettings looks like it is supposed to be, finally :-) The only thing I could maybe complain about was the weather, which was more Scotland/Wales like than Spanish but that didn t stop us at all, not even at the social event outside. So I actually don t complain  We also managed to discuss some new technical stuff, like AppStream for Kubuntu, and plenty of other things that I ll write about in a separate blog post. Generally, I got so many new impressions from this year s Akademy, that I could write a 10-pages long blogpost about it while still having to leave out things.

Kudos to the organizers of this Akademy, you did a fantastic job! I also want to thank the Ubuntu community for funding my flight, and the Kubuntu community for pushing me a little to attend :-). KDE is a great community with people driving the development of Free Software forward. The diversity of people, projects and ideas in KDE is a pleasure, and I am very happy to be part of this community. Akademy2015

Steve Kemp: A brief look at the weed file store

Now that I've got a citizen-ID, a pair of Finnish bank accounts, and have enrolled in a Finnish language-course (due to start next month) I guess I can go back to looking at object stores, and replicated filesystems. To recap my current favourite, despite the lack of documentation, is the Camlistore project which is written in Go. Looking around there are lots of interesting projects being written in Go, and so is my next one the seaweedfs, which despite its name is not a filesystem at all, but a store which is accessed via HTTP. Installation is simple, if you have a working go-lang environment:
go get github.com/chrislusf/seaweedfs/go/weed
Once that completes you'll find you have the executable bin/weed placed beneath your $GOPATH. This single binary is used for everything though it is worth noting that there are distinct roles: In our demo we'll have three hosts one, the master, two and three which are storage nodes. First of all we start the master:
root@one:~# mkdir /node.info
root@one:~# weed master -mdir /node.info -defaultReplication=001
Then on the storage nodes we start them up:
root@two:~# mkdir /data;
root@two:~# weed volume -dir=/data -max=1  -mserver=one.our.domain:9333
Then the second storage-node:
root@three:~# mkdir /data;
root@three:~# weed volume -dir=/data -max=1 -mserver=one.our.domain:9333
At this point we have a master to which we'll talk (on port :9333), and a pair of storage-nodes which will accept commands over :8080. We've configured replication such that all uploads will go to both volumes. (The -max=1 configuration ensures that each volume-store will only create one volume each. This is in the interest of simplicity.) Uploading content works in two phases: We'll do that like so:
laptop ~ $ curl -X POST http://one.our.domain:9333/dir/assign
 "fid":"1,06c3add5c3","url":"192.168.1.100:8080","publicUrl":"192.168.1.101:8080","count":1 
client ~ $ curl -X PUT -F file=@/etc/passwd  http://192.168.1.101:8080/1,06c3add5c3
 "name":"passwd","size":2137 
In the first command we call /dir/assign, and receive a JSON response which contains the IPs/ports of the storage-nodes, along with a "file ID", or fid. In the second command we pick one of the hosts at random (which are the IPs of our storage nodes) and make the upload using the given ID. If the upload succeeds it will be written to both volumes, which we can see directly by running strings on the files beneath /data on the two nodes. The next part is retrieving a file by ID, and we can do that by asking the master server where that ID lives:
client ~ $ curl http://one.our.domain:9333/dir/lookup?volumeId=1,06c3add5c3
 "volumeId":"1","locations":[
  "url":"192.168.1.100:8080","publicUrl":"192.168.1.100:8080" ,
  "url":"192.168.1.101:8080","publicUrl":"192.168.1.101:8080" 
] 
Or, if we prefer we could just fetch via the master - it will issue a redirect to one of the volumes that contains the file:
client ~$ curl http://one.our.domain:9333/1,06c3add5c3
<a href="http://192.168.1.100:8080/1,06c3add5c3">Moved Permanently</a>
If you follow redirections then it'll download, as you'd expect:
client ~ $ curl -L http://one.our.domain:9333/1,06c3add5c3
root:x:0:0:root:/root:/bin/bash
..
That's about all you need to know to decide if this is for you - in short uploads require two requests, one to claim an identifier, and one to use it. Downloads require that your storage-volumes be publicly accessible, and will probably require a proxy of some kind to make them visible on :80, or :443. A single "weed volume .." process, which runs as a volume-server can support multiple volumes, which are created on-demand, but I've explicitly preferred to limit them here. I'm not 100% sure yet whether it's a good idea to allow creation of multiple volumes or not. There are space implications, and you need to read about replication before you go too far down the rabbit-hole. There is the notion of "data centres", and "racks", such that you can pretend different IPs are different locations and ensure that data is replicated across them, or only within-them, but these choices will depend on your needs. Writing a thin middleware/shim to allow uploads to be atomic seems simple enough, and there are options to allow exporting the data from the volumes as .tar files, so I have no undue worries about data-storage. This system seems reliable, and it seems well designed, but people keep saying "I'm not using it in production because .. nobody else is" which is an unfortunate problem to have. Anyway, I like it. The biggest omission is really authentication. All files are public if you know their IDs, but at least they're not sequential ..

Lunar: Reproducible builds: week 15 in Stretch cycle

What happened in the reproducible builds effort this week: Toolchain fixes Guillem Jover uploaded dpkg/1.18.2 which makes dependency comparisons deep by comparing not only the first dependency alternative, to get them sorted in a reproducible way. Original patch by Chris Lamb. Dhole updated the patch adding support for SOURCE_DATE_EPOCH in gettext. A modified package is in the experimental reproducible repository. Valentin Lorentz submitted a patch adding support for SOURCE_DATE_EPOCH to ocamldoc. Valentin Lorentz also opened a bug about the inability to set an arbitrary RNG seed for ocamlopt which would be a way to fix an issue affecting many OCaml packages. Dhole submitted a patch adding support for SOURCE_DATE_EPOCH in qhelpgenerator. A modified package has been sent to the experimental repository as well. Several packages have been updated for the experimental toolchain: doxygen (akira), and dpkg (h01ger). Also, h01ger has built and uploaded all experimental packages having arch:any packages for armhf: dpkg, gettext, doxygen, fontforge, libxslt and texlive-bin. We are now providing our toolchain for armhf and amd64. Packages fixed As you might have noticed, Debian sid is currently largely uninstallable, due to the GCC 5 transition, which also can be see in our reproducibility test setup. Please help! The following packages became reproducible due to changes in their build dependencies: glosstex, indent, ktikz, liblouis, libmicrohttpd, linkchecker, multiboot, qterm, rrep, trueprint, twittering-mode. The following packages became reproducible after getting fixed: Patches submitted which have not made their way to the archive yet: Lunar reported an issue on an unstable ABI from a generated header in icedove reminding of an issue affecting libical-dev. The bug has since been fixed by Carsten Schoenert. akira identified an unreferenced embeded code copy (causing unreproducibility!) in gperf. reproducible.debian.net The scheduler has temporarily been changed to not schedule any already tested packages for sid and experimental, due to the the GCC 5 transitions, which are well visible in our graphs now. On the plus side this has caused our stretch testing to catch up (and improve stats). (h01ger) depwait packages (packages where the Build-Depends cannot be satisfied) are now listed in the last 24h and last 48h pages (Mattia Rizzolo) Two new amd64 build nodes (with 8 cores and 32 GB RAM each) have been added, kindly sponsored by Profitbricks. (h01ger) The 4 armhf (setup last week by Vagrant Cascadian) and 2 amd64 build nodes have been made available to Jenkins. Remote job scheduling has been implemented and 35 new jobs have been added for pbuilder and schroot creation and maintenance of the nodes. (h01ger) The manual scheduler gained a flag (-a/--architecture) to select which arch to schedule in. (Mattia Rizzolo) armhf will only be testing stretch for now, due to limited hardware ressources. (h01ger) The page listing maintainers of unreproducible packages gained internal anchors. As an example, one can now link to unreproducible orphaned packages. (Mattia Rizzolo) Packages with a bug tagged pending are marked using a new symbol: a brown P (Mattia Rizzolo) diffoscope development debbindiff is now called diffoscope! It also has a website at diffoscope.org. The name was changed to better reflect that it became a general purpose tool, capable of comparing many different archive formats, or directories. Version 29 is the renaming release. Amongst a couple of other cosmetic changes a favicon showing the new logo has been added to the generated HTML reports. Version 30 replaces the file matching algorithm for files listed in .changes to a smarter one that removes only the version number. It also fixes a bug where squashfs directories were being extracted even if their content was being compared at a later stage. It also fixes an issue with the test suite that was detected by debci. Documentation update More rationale have been added for supporting SOURCE_DATE_EPOCH The unfinished Reproducible Builds HOWTO is now visible on the web, feedback and patches most welcome. Package reviews 261 obsolete reviews have been removed, 73 added and 145 updated this week.

Next.

Previous.