Search Results: "js"

22 July 2014

Neil Williams: Validating ARMMP device tree blobs

I ve done various bits with ARMMP and LAVA on this blog already, usually waiting until I ve got all the issues ironed out before writing it up. However, this time I m just going to do a dump of where it s at, how it works and what can be done. I m aware that LAVA can seem mysterious at first, the package description has improved enormously recently, thanks to exposure in Debian: LAVA is a continuous integration system for deploying operating systems onto physical and virtual hardware for running tests. Tests can be simple boot testing, bootloader testing and system level testing, although extra hardware may be required for some system tests. Results are tracked over time and data can be exported for further analysis. The LAVA documentation has a glossary of terms like result bundle and all the documentation is also available in the lava-server-doc package. The goal is to validate the dtbs built for the Debian ARMMP kernel. One of the most accessible ways to get the ARMMP kernel onto a board for testing is tftp using the Debian daily DI builds. Actually using the DI initrd can come later, once I ve got a complete preseed config so that the entire install can be automated. (There are some things to sort out in LAVA too before a full install can be deployed and booted but those are at an early stage.) It s enough at first to download the vmlinuz which is common to all ARMMP deployments, supply the relevant dtb, partner those with a minimal initrd and see if the board boots. The first change comes when this process is compared to how boards are commonly tested in LAVA with a zImage or uImage and all/most of the modules already built in. Packaged kernels won t necessarily raise a network interface or see the filesystem without modules, so the first step is to extend a minimal initramfs to include the armmp modules.
apt install pax u-boot-tools
The minimal initramfs I selected is one often used within LAVA:
wget http://images.armcloud.us/lava/common/linaro-image-minimal-initramfs-genericarmv7a.cpio.gz.u-boot
It has a u-boot header added, as most devices using this would be using u-boot and this makes it easier to debug boot failures as the initramfs doesn t need to have the header added, it can simply be downloaded to a local directory and passed to the board as a tftp location. To modify it, the u-boot header needs to be removed. Rather than assuming the size, the u-boot tools can (indirectly) show the size:
$ ls -l linaro-image-minimal-initramfs-genericarmv7a.cpio.gz.u-boot
-rw-r--r-- 1 neil neil  5179571 Nov 26  2013 linaro-image-minimal-initramfs-genericarmv7a.cpio.gz.u-boot
$ mkimage -l linaro-image-minimal-initramfs-genericarmv7a.cpio.gz.u-boot 
Image Name:   linaro-image-minimal-initramfs-g
Created:      Tue Nov 26 22:30:49 2013
Image Type:   ARM Linux RAMDisk Image (gzip compressed)
Data Size:    5179507 Bytes = 5058.11 kB = 4.94 MB
Load Address: 00000000
Entry Point:  00000000
Referencing http://www.omappedia.com/wiki/Development_With_Ubuntu, the header size is the file size minus the data size listed by mkimage.
5179571 - 5179507 == 64
So, create a second file without the header:
dd if=linaro-image-minimal-initramfs-genericarmv7a.cpio.gz.u-boot of=linaro-image-minimal-initramfs-genericarmv7a.cpio.gz skip=64 bs=1
decompress it
gunzip linaro-image-minimal-initramfs-genericarmv7a.cpio.gz
Now for the additions
dget http://ftp.uk.debian.org/debian/pool/main/l/linux/linux-image-3.14-1-armmp_3.14.12-1_armhf.deb
(Yes, this process will need to be repeated when this package is rebuilt, so I ll want to script this at some point.)
dpkg -x linux-image-3.14-1-armmp_3.14.12-1_armhf.deb kernel-dir
cd kernel-dir
Pulling in the modules we need for most needs, comes thanks to a script written by the Xen folks. The set is basically disk, net, filesystems and LVM.
find lib -type d -o -type f -name modules.\*  -o -type f -name \*.ko  \( -path \*/kernel/lib/\* -o  -path \*/kernel/crypto/\* -o  -path \*/kernel/fs/mbcache.ko -o  -path \*/kernel/fs/ext\* -o  -path \*/kernel/fs/jbd\* -o  -path \*/kernel/drivers/net/\* -o  -path \*/kernel/drivers/ata/\* -o  -path \*/kernel/drivers/scsi/\* -o -path \*/kernel/drivers/md/\* \)   pax -x sv4cpio -s '%lib%/lib%' -d -w >../cpio
gzip -9f cpio
original Xen script (GPL-3+) I found it a bit confusing that i is used for extract by cpio, but that s how it is. Extract the minimal initramfs to a new directory:
sudo cpio -id < ../linaro-image-minimal-initramfs-genericarmv7a.cpio
Extract the new cpio into the same location. (Yes, I could do this the other way around and pipe the output of find into the already extracted location but that's for when I get a script to do this):
sudo cpio --no-absolute-filenames -id < ../ramfs/cpio
CPIO Manual Use newc format, the new (SVR4) portable format, which supports file systems having more than 65536 i-nodes. (4294967295 bytes)
(41M)
find .   cpio -H newc -o > ../armmp-image.cpio
... and add the u-boot header back:
mkimage -A arm -T ramdisk -C none -d armmp-image.cpio.gz debian-armmp-initrd.cpio.gz.u-boot
Now what? Now send the combination to LAVA and test it. Results bundle for a local LAVA test job using this technique. (18k) submission JSON - uses file:// references, so would need modification before being submitted to LAVA elsewhere. complete log of the test job (72k) Those familiar with LAVA will spot that I haven't optimised this job, it boots the ARMMP kernel into a minimal initramfs and then expects to find apt and other tools. Actual tests providing useful results would use available tools, add more tools or specify a richer rootfs. The tests themselves are very quick (the job described above took 3 minutes to run) and don't need to be run particularly often, just once per board type per upload of the ARMMP kernel. LAVA can easily run those jobs in parallel and submission can be automated using authentication tokens and the lava-tool CLI. lava-tool can be installed without lava-server, so can be used in hooks for automated submissions. Extensions That's just one DTB and one board. I have a range of boards available locally: * iMX6Q Wandboard (used for this test)
* iMX.53 Quick Start Board (needs updated u-boot)
* Beaglebone Black
* Cubie2
* CubieTruck
* arndale (no dtb?)
* pandaboard Other devices available could involve ARMv7 devices hosted at www.armv7.com and validation.linaro.org - as part of a thank you to the Debian community for providing the OS which is (now) running all of the LAVA infrastructure. That doesn't cover all of the current DTBs (and includes many devices which have no DTBs) so there is plenty of scope for others to get involved. Hopefully, the above will help get people started with a suitable kernel+dtb+initrd and I'd encourage anyone interested to install lava-server and have a go at running test jobs based on those so that we start to build data about as many of the variants as possible. (If anyone in DI fancies producing a suitable initrd with modules alongside the DI initrd for armhf builds, or if anyone comes up with a patch for DI to do that, it would help enormously.) This will at least help Debian answer the question of what the Debian ARMMP package can actually support. For help on LAVA, do read through the documentation and then come to us at #linaro-lava or the linaro-validation mailing list or file bugs in Debian: reportbug lava-server. , so you can ask me. I'm giving one talk on the LAVA software and there will be a BoF on validation and CI in Debian.

17 July 2014

Juliana Louback: Contribute a JSCommunicator Translation

To those who don t know, JSCommunicator is a SIP communication tool developed in HTML and JavaScript, currently supporting audio/video calls and SIP SIMPLE instant messaging. We ve recently added i18n internationalization support for English, Portuguese, Spanish, French and now Hebrew. We would like to have support for other languages and it s a pretty straightforward process to add a translation, so even if you do not have a tech background you can contribute! Setup First, create and account in Github. Github is a hosting service for git repositories and open source projects get to use Github for FREE! As a result, many open source project repositories are hosted on Github, including but not limited to JSCommunicator. Once you have created your git account, follow steps 1-4 in the section Setting up git listed in Github s setup tutorial. This will help you install git and configure anything you need. Fork Now fork the JSCommunicator repo. I really like the word fork . Great term. If this is your first fork, know that this will make a copy of the JSCommunicator repo and all its respective code to your Github account. Here s how we go about it:
  1. Sign in to Github
  2. Browse to https://github.com/JLouback/jscommunicator
  3. Somewhere around the upper left corner, you will see a button labeled Fork . Click that.
fork You should now have your own JSCommunicator repository on your Github account. On your main page select the tab Repositories . It should be the first on the list. The url will be https://github.com/YOUR-USERNAME/jscommunicator. My Github username is JLouback, so my jscommunicator repo can be found at https://github.com/JLouback/jscommunicator. Clone Now you should download all that code to your local machine so you can edit it. On your JSCommunicator page somewhere around the lower right corner you ll see a field entitled HTTPS clone URL: clone I don t know if this is correct, but you can just copy the URL on your browser too. I do that. Now on your terminal, navigate to the directory you d like to place your repository and enter
git clone https://github.com/YOUR-USERNAME/jscommunicator
The current directory should now have a folder named jscommunicator and in it is all the JSCommunicator code. Switch branches The JSCommunicator repo has a branch for the i18n support. A branch is basically a copy of the code that you can modify without changing the original code. It s great for adding new features, once everything is done and tested you can add the new feature to the original code. A more detailed explanation of branches can be found here. On the terminal, enter
cd jscommunicator
git branch -a
This will list all the branches in the repository, both local and remote. There should be a branch named remotes/origin/i18n-support . Switch to this branch by entering
git checkout --track origin/i18n-support
This will create a local branch named i18n-support with all the contents of the remote i18n-branch in https://github.com/opentelecoms-org/jscommunicator. Create a .properties file Now your jscommunicator directory will have some new files for the internationalization functionality. Among them you should find an INTERNATIONALIZATION_README file with instructions for adding a JSCommunicator translation. It s a less detailed version of this post, but it s worth a read in case I ve missed something here. Go to the directory internationalization . You ll see a few .properties files with different language codes. Choose the language of your preference for the translation base and make a copy of it in the internationalization directory. Your copy should be named Messages_LANGUAGECODE.properties . For example, the language code for german is de , so the german file should be named Messages_de.properties . If you re not sure about the code for your language, please check out this list of ISO 639-1 language codes so you re using the same code as (most) browsers. The .properties file is list of key-value pairs, a word or a few words joined by _ which is the key, the equals sign = then a word or phrase which is the value. Do not change anything to the left of the equals sign. Translate what is on the right of the equals sign. Modify available_languages.xml Go back to the root directory (jscommunicator) and open the file named available_languages.ruby . This .ruby has a series of language elements. At the end of the last </language> add a new language element with your language display name and code, copying the previous languge elements. You actually can put your language element anwhere, as long as it s after the ' and before the , as well as not cutting into any of the other language elements. Your display name should be the name of the language in its native language, for example for a french translation we ll put Fran ais (I think). And the code is the code we used for the .properties file. Here s how it should look:
<language>
    <display>Deutsch</display>
    <code>de</code>
</language>
Save your changes and voila! Test your work Once you ve made a .properties file, JSCommunicator will automatically load your translation if you ve set your browser preference to that language. If your browser preference is french, it will load the Messages_fr.properties. If your browser preference is a language we don t have a translation for (let s say german), JScommunicator will load the default Messages.properties file which is in english. The available_languages.ruby is used to build a language selection menu. If you add a language element without a corresponding .properties file, JSCommunicator will throw a JS error and load the default (english) translation. The same happens if you use different language codes in the .properties file name and the available_languages.ruby. The error won t disturb your use of JSCommunicator, it just won t load the language you selected. No harm, no foul. But if you want others to use your translation, do take care to do this correctly. If you read the INTERNATIONALIZATION_README, you will have seen that we need the jquery.i18n.properties.js file that s included in the .html pages. You can download that code here. Be sure to place it in the jscommunicator directory. This is only necessary if you want to see your addition at work, you don t need this file to contribute your translation. There are other 3rd party code dependencies to run JSCommunicator too as you may have noticed. Just creating the .properties file and adding a language element to available_languages.ruby, if done correctly, is enough to make a pull request. Commit Here s the part where we load all your local changes to your remote repository. In the terminal, navigate to the root directory (jscommunicator) and enter
git add internationalization/Messages_de.properties
git add available_languages.ruby
Of course, please replace Messages_de.properties with the name of your new .properties file. And mind you, we don t have a german translation yet! Then enter
git commit -m "German translation"
You can enter whatever you d like in the part, it s a good idea to explain what language you are adding. Now we can push the changes:
git push -u origin i18n-support
You should now see the changes you made in your Github account page at github.com/YOUR_USER/jscommunicator. The message you put in double quotations ( ) in the commit will be beside each modified file. This push also creates a new branch in your jscommunicator repository, now you will have a master and a i18n-support branch. Pull Now it s time to share your translation with everyone else if you feel so inclined. Your version of JSCommunicator has a new translation but not the official version. First navigate to you jscommunicator repo at github.com/YOUR_USER/jscommunicator and make sure you are on the i18n-branch as that will contain your changes. branches Click the green button directly to the left of the branch drop down menu shown above. This will create a pull request to add your new code to the official jscommunicator code. Once you click that button, you should see this: pull Make sure that the base repo (the first on the line above the green Create pull request button) is opentelecoms-org:i18n-support and not opentelecoms-org:master or another branch name. If it is, just click Edit on the right and you ll be able to select the branch from a dropdown like so: pullEdit If first repo is opentelecoms-org:i18n-support and the second is YOUR_USER:i18n-support and you ve verified (scroll down) that there are 2 files changed which are your new .properties file and the added element to the available_languages.xml, go ahead and press create pull request. It ll open a window with a text box you can add an explanation to with one final Create pull request button. Click that and you re done! You ve kindly contributed with a translation for JSCommunicator!

16 July 2014

Juliana Louback: Become an Open-source Contributor Video Conference

A couple weeks ago I was contacted by Yehuda Korotkin through one of the Debian mailing lists. Yehuda is a tech professor at one of Israel s leading colleges for women. He proposed a video conference to present the open source community to his class and explain how they can contribute to open source projects. I volunteered to participate and last Monday (July 14th 2014) we had our virtual meeting, which I hope was the first of many. Shauna G. also participated from Boston, making it a Israel - USA - Brazil meetup. Pretty impressive, eh? The conference was hosted on Google Hangouts, the video is available for viewing here. Run time is around 2.5 hours so to save you time I ve kindly posted a summary of the conference! To be frank, I look ghastly half the time so I d much prefer that you read this post. First there was a Q&A period which was more of a discussion panel, followed by a hands-on session where the girls made their first contribution to an open source project. Here s the gist of it: Q&A Hands on For the practical part of our conference, Yehuda s students contributed to Jscommunicator s Issue #5 which requests i18n support for major languages. JSCommunicator is a SIP communication tool developed in HTML and JavaScript, currently supporting audio/video calls and SIP SIMPLE instant messaging. First we set up Github in their local machines and forked the Jscommunicator repo. We learned the basic git commands needed to push changes to their remote repositories and to create a pull requests. This is explained in further detail here. At the end of the conference with nearly an hour overtime due to my tendency to be overly verbose, Yehuda s class made their first contribution with a Hebrew translation for Jscommunicator! All in all, it was great to virtually meet Yehuda and his epic students who all seemed very clever engineers. I m looking forward to our next meetup once I gain some time-management skills.

11 July 2014

Russ Allbery: Net::Duo 1.00

This is the first release of Net::Duo, which provides an object-oriented Perl interface for the Duo Security REST APIs. It attempts to abstract some of the API details and provide an object-oriented view of the returned objects in order to make use of the API in Perl code more natural than dealing with JSON data structures directly. Currently, some parts of the Auth and Admin APIs are implemented alongside with generic methods to call any of the JSON-based APIs. The approach I took with this module was a bit of a science experiment, and I'm still not entirely sure what I think about the results. Duo Security offers sample Perl code that provides the equivalent of the call and call_json Net::Duo methods but stops there. One sends in data structures and gets back data structures from JSON and manipulates everything in that format. I prefer a more object-oriented style, and want the module to do a bit more of the work for me, so this implementation wraps some of the APIs in objects with method calls. For updates, there are setters for the object itself and then a commit method to push the changes to Duo. This requires more implementation effort, and each API that should get richer treatment has to be modelled, but the resulting code looks like more natural object-oriented code. I wasn't completely sure going in if the effort to reward tradeoff made sense, and having finished the module sufficiently for Stanford's immediate needs, I'm still not sure. It was certainly more effort to write the base module this way, but on the other hand it also meant that I could map Perl notions of true and false to Duo's and provide much simpler methods for common operations. I still think this will make the code more maintainable in the long run, but I think it's within the margin of difference of opinion. Regardless, you can get the latest version from the Net::Duo distribution page and shortly from CPAN as well.

Joseph Bisch: GSoC Update

It has been a couple of months since my last GSoC update and a lot has happened since then. You can view the web interface at metrics.debian.net. There is a dynamic interface viewable with JavaScript enabled, and a static interface viewable with JS disabled. I am currently working on the dynamic interface. In the weeks since my last blog post I have accomplished a lot. There is support for pull and push metrics. Pull metrics run on the debmetrics server and pull data from some source. Push metrics run on a remote server and push data to the debmetrics server via HTTP POST. There is flask code and the static interface portion uses a general route, so that the flask code does not need to be modified every time a metric is added. There is a makefile that runs manifest2index.py and manifest2orm.py to generate the index page of the web interface and the SQLAlchemy model code respectively. I have a config file that allows the user to set the location of the manifest, pull_scripts, and graph_scripts directories. I have a debmetrics.wsgi file for easy deployment of debmetrics. There is a single layout.html that is the base layout for all the other pages. Nosetests is used for tests. Sphinx and readthedocs are used for the documentation. I wrote a minified_grabber script that downloads all the JS and css files that are not included with debmetrics itself. That helps make deployment easy. If you want to take a look at the code you can view the repository. I still have more work to do before the end of GSoC, mostly with the dynamic web interface and packaging of debmetrics. To keep up to date on my progress, you can either read this blog, or you can read the soc-corrdination mailing list.

10 July 2014

Steve Kemp: Blogspam moved, redis alternatives being examined

As my previous post suggested I'd been running a service for a few years, using Redis as a key-value store. Redis is lovely. If your dataset will fit in RAM. Otherwise it dies hard. Inspired by Memcached, which is a simple key=value store, redis allows for more operations: using sets, using hashes, etc, etc. As it transpires I mostly set keys to values, so it crossed my mind last night an alternative to rewriting the service to use a non-RAM-constrained service might be to juggle redis out and replace it with something else. If it were possible to have a redis-compatible API which secretly stored the data in leveldb, sqlite, or even Berkley DB, then that would solve my problem of RAM-constraints, and also be useful. Looking around there are a few projects in this area nds fork of redis, ssdb, etc. I was hoping to find a Perl Redis::Server module, but sadly nothing exists. I should look at the various node.js stub-servers which exist as they might be easy to hack too. Anyway the short version is that this might be a way forward, the real solution might be to use sqlite or postgres, but that would take a few days work. For the moment the service has been moved to a donated guest and has 2Gb of RAM instead of the paltry 512Mb it was running on previously. Happily the server is installed/maintained by my slaughter tool so reinstalling took about ten minutes - the only hard part was migrating the Redis-contents, and that's trivial thanks to the integrated "slave of" support. (I should write that up regardless though.)

6 July 2014

Ian Campbell: Setting absolute date based Amazon S3 bucket lifecycles with curl

For my local backup regimen I use flexbackup to create a full backup twice a year and differential/incremental backups on a weekly/monthly basis. I then upload these to a new amazon S3 bucket for each half year (so each bucket corresponds to the a full backup plus the associated differentials and incrementals). I then set the bucket's lifecycle to archive to glacier (cheaper offline storage) from the month after that half year has ended (reducing costs) and to delete it a year after the half ends. It used to be possible to do this via the S3 web interface but the absolute date based options seem to have been removed in favour of time since last update, which is not what I want. However the UI will still display such lifecycles if they are configured and directs you to the REST API to set them up. I had a look around but couldn't any existing CLI tools to do this directly but I figured it must be possible with curl. A little bit of reading later I found that it was possible but it involved some faff calculating signatures etc. Luckily EricW has written Amazon S3 Authentication Tool for Curl (AKA s3curl) which automates the majority of that faff. The tool is "New BSD" licensed according to that page or Apache 2.0 license according to the included LICENSE file and code comments. Setup Following the included README setup ~/.s3curl containing your id and secret key (I called mine personal which I then use below). Getting the existing lifecycle Retrieving an existing lifecycle is pretty easy. For the bucket which I used for the first half of 2014:
$ s3curl --id=personal -- --silent http://$bucket.s3.amazonaws.com/?lifecycle   xmllint --format -
<?xml version="1.0" encoding="UTF-8"?>
<LifecycleConfiguration xmlns="http://s3.amazonaws.com/doc/2006-03-01/">
  <Rule>
    <ID>Archive and Expire</ID>
    <Prefix/>
    <Status>Enabled</Status>
    <Transition>
      <Date>2014-07-31T00:00:00.000Z</Date>
      <StorageClass>GLACIER</StorageClass>
    </Transition>
    <Expiration>
      <Date>2015-01-31T00:00:00.000Z</Date>
    </Expiration>
  </Rule>
</LifecycleConfiguration>
See GET Bucket Lifecycle for details of the XML. Setting a new lifecycle The desired configuration needs to be written to a file. For example to set the lifecycle for the bucket I'm going to use for the second half of 2014:
$ cat s3.lifecycle
<LifecycleConfiguration>
  <Rule>
    <ID>Archive and Expire</ID>
    <Prefix/>
    <Status>Enabled</Status>
    <Transition>
      <Date>2015-01-31T00:00:00.000Z</Date>
      <StorageClass>GLACIER</StorageClass>
    </Transition>
    <Expiration>
      <Date>2015-07-31T00:00:00.000Z</Date>
    </Expiration>
  </Rule>
</LifecycleConfiguration>
$ s3curl --id=personal --put s3.lifecycle --calculateContentMd5 -- http://$bucket.s3.amazonaws.com/?lifecycle
See PUT Bucket Lifecycle for details of the XML.

1 July 2014

Martin Pitt: deb, click, schroot, LXC, QEMU, phone, cloud: One autopkgtest to Rule Them All!

We currently use completely different methods and tools of building test beds and running tests for Debian vs. Click packages, for normal uploads vs. CI airline landings vs. upstream project merge proposal testing, and keep lots of knowledge about Click package test metadata external and not easily accessible/discoverable. Today I released autopkgtest 3.0 (and 3.0.1 with a few minor updates) which is a major milestone in unifying how we run package tests both locally and in production CI. The goals of this are: So, let s dive into the new features! New runner: adt-virt-ssh We want to run tests on real hardware such as a laptop of a particular brand with a particular graphics card, or an Ubuntu phone. We also want to restructure our current CI machinery to run tests on a real OpenStack cloud and gradually get rid of our hand-maintained QA lab with its test machines. While these use cases seem rather different, they both have in common that there is an already existing machine which is pretty much only accessible with ssh. Once you have an ssh connection, they look pretty much the same, you just need different initial setup (like fiddling with adb, calling nova boot, etc.) to prepare them. So the new adt-virt-ssh runner factorizes all the common bits such as communicating with adt-run, auto-detecting sudo availability, doing SSH connection sharing etc., and delegates the target specific bits to a setup script . E. g. we could specify --setup-script ssh-setup-nova or --setup-script ssh-setup-adb which would then get called with open at the appropriate time by adt-run; it calls the nova commands to create a VM, or run a few adb commands to install/start ssh and install the public key. Then autopkgtest does its thing, and eventually calls the script with cleanup again. The actual protocol is a bit more involved (see manpage), but that s the general idea. autopkgtest now ships readymade scripts for these two use cases. So you could e. g. run the libpng tests in a temporary cloud VM:
# if you don't have one, create it with "nova keypair-create"
$ nova keypair-list
[...]
  pitti   9f:31:cf:78:50:4f:42:04:7a:87:d7:2a:75:5e:46:56  
# find a suitable image
$ nova image-list 
[...]
  ca2e362c-62c9-4c0d-82a6-5d6a37fcb251   Ubuntu Server 14.04 LTS (amd64 20140607.1) - Partner Image                           ACTIVE    
$ nova flavor-list 
[...]
  100   standard.xsmall    1024        10     10                 1       1.0           N/A        
# now run the tests: please be patient, this takes a few mins!
$ adt-run libpng --setup-commands="apt-get update" --- ssh -s /usr/share/autopkgtest/ssh-setup/nova -- \
   -f standard.xsmall -i ca2e362c-62c9-4c0d-82a6-5d6a37fcb251 -k pitti
[...]
adt-run [16:23:16]: test build:  - - - - - - - - - - results - - - - - - - - - -
build                PASS
adt-run: @@@@@@@@@@@@@@@@@@@@@@@@@@@@@@@@@@@@@@@@ tests done.
Please see man adt-virt-ssh for details how to use it and how to write setup scripts. There is also a commented /usr/share/autopkgtest/ssh-setup/SKELETON template for writing your own for your use cases. You can also not use any setup script and just specify user and host name as options, but please remember that the ssh runner cannot clean up after itself, so never use this on important machines which you can t reset/reinstall! Test dependency installation without apt/root Ubuntu phones with system images have a read-only file system where you can t install test dependencies with apt. A similar case is using the null runner without root. When apt-get install is not available, autopkgtest now has a reduced fallback mode: it downloads the required test dependencies, unpacks them into a temporary directory, and runs the tests with $PATH, $PYTHONPATH, $GI_TYPELIB_PATH, etc. pointing to the unpacked temp dir. Of course this only works for packages which are relocatable in that way, i. e. libraries, Python modules, or command line tools; it will totally fail for things which look for config files, plugins etc. in hardcoded directory paths. But it s good enough for the purposes of Click package testing such as installing autopilot, libautopilot-qt etc. Click package support autopkgtest now recognizes click source directories and *.click package arguments, and introduces a new test metadata specification syntax in a click package manifest. This is similar in spirit and capabilities to DEP-8 debian/tests/control, except that it s using JSON:
    "x-test":  
        "unit": "tests/unittests",
        "smoke":  
            "path": "tests/smoketest",
            "depends": ["shunit2", "moreutils"],
            "restrictions": ["allow-stderr"]
         ,
        "another":  
            "command": "echo hello > /tmp/world.txt"
         
     
For convenience, there is also some magic to make running autopilot tests particularly simple. E. g. our existing click packages usually specify something like
    "x-test":  
        "autopilot": "ubuntu_calculator_app"
     
which is enough to do what I mean , i. e. implicitly add the autopilot test depends and run autopilot with the specified test module name. You can specify your own dependencies and/or commands, and restrictions etc., of course. So with this, and the previous support for non-apt test dependencies and the ssh runner, we can put all this together to run the tests for e. g. the Ubuntu calculator app on the phone:
$ bzr branch lp:ubuntu-calculator-app
# built straight from that branch; TODO: where is the official" download URL?
$ wget http://people.canonical.com/~pitti/tmp/com.ubuntu.calculator_1.3.283_all.click
$ adt-run ubuntu-calculator-app/ com.ubuntu.calculator_1.3.283_all.click --- \
      ssh -s /usr/share/autopkgtest/ssh-setup/adb
[..]
Traceback (most recent call last):
  File "/tmp/adt-run.KfY5bG/tree/tests/autopilot/ubuntu_calculator_app/tests/test_simple_page.py", line 93, in test_divide_with_infinity_length_result_number
    self._assert_result("0.33333333")
  File "/tmp/adt-run.KfY5bG/tree/tests/autopilot/ubuntu_calculator_app/tests/test_simple_page.py", line 63, in _assert_result
    self.main_view.get_result, Eventually(Equals(expected_result)))
  File "/usr/lib/python3/dist-packages/testtools/testcase.py", line 406, in assertThat
    raise mismatch_error
testtools.matchers._impl.MismatchError: After 10.0 seconds test failed: '0.33333333' != '0.3'
Ran 33 tests in 295.586s
FAILED (failures=1)
Note that the current adb ssh setup script deals with some things like applying the autopilot click AppArmor hooks and disabling screen dimming, but it does not do the first-time setup (connecting to network, doing the gesture intro) and unlocking the screen. These are still on the TODO list, but I need to find out how to do these properly. Help appreciated! Click app tests in schroot/containers But, that s not the only thing you can do! autopkgtest has all these other runners, so why not try and run them in a schroot or container? To emulate the environment of an Ubuntu Touch session I wrote a --setup-commands script:
adt-run --setup-commands /usr/share/autopkgtest/setup-commands/ubuntu-touch-session \
    ubuntu-calculator-app/ com.ubuntu.calculator_1.3.283_all.click --- schroot utopic
This will actually work in the sense of running (and succeeding) the autopilot tests, but it will fail due to a lot of libust[11345/11358]: Error: Error opening shm /lttng-ust-wait... warnings on stderr. I don t know what these mean, just that I also see them on the phone itself occasionally. I also wrote another setup-commands script which emulates read-only apt , so that you can test the unpack only fallback. So you could prepare a container with click and the App framework preinstalled (so that it doesn t always take ages to install them), starting from a standard adt-build-lxc container:
$ sudo lxc-clone -o adt-utopic -n click
$ sudo lxc-start -n click
  # run "sudo apt-get install click ubuntu-sdk-libs ubuntu-app-launch-tools" there
  # then "sudo powerdown"
# current apparmor profile doesn't allow remounting something read-only
$ echo "lxc.aa_profile = unconfined"   sudo tee -a /var/lib/lxc/click/config
Now that container has enough stuff preinstalled to be reasonably fast to set up, and the remaining test dependencies (mostly autopilot) work fine with the unpack/$*_PATH fallback:
$ adt-run --setup-commands /usr/share/autopkgtest/setup-commands/ubuntu-touch-session \
          --setup-commands /usr/share/autopkgtest/setup-commands/ro-apt \
          ubuntu-calculator-app/ com.ubuntu.calculator_1.3.283_all.click \
          --- lxc -es click
This will successfully run all the tests, and provided you have apt-cacher-ng installed, it only takes a few seconds to set up. This might be a nice thing to do on merge proposals, if you don t have an actual phone at hand, or don t want to clutter it up. autopkgtest 3.0.1 will be available in Utopic tomorrow (through autosyncs). If you can t wait to try it out, download it from my people.c.c page . Feedback appreciated!

23 June 2014

Wouter Verhelst: The art of soccer, and ivory towers

Twenty years ago, I was sixteen and in high school. The school at the time, if memory serves right, was the "Kunsthumaniora voor muziek en woord van het gemeenschapsonderwijs" in Brussels (which translates approximately to "art high school for music and word of the communal educational branch"... that's not entirely right, but it's late and I'm too tired to look for a dictionary). I was taking drama classes there. No, I'm not making this up. Except maybe the sixteen bit I might be off by one or two years. Hey, I did a lot of things during high school. Stop looking at me like that. At one point in time during my stint in drama, a group of educational interns the sort of people who would be teaching some sort of stuff somewhere after their graduation cooperated with our school to come up with a whole day of classes around one subject. I'll never forget the title: "Can art rescue the democracy?" If that sounds pompous and silly, that's because it was. However, I was at art school, fer crying out loud, so I drank it up like it was cool-aid. Which it wasn't. It was worse. At the end of the day (literally, that is), the educational interns had booked some hot shot art person for a debate. I've since completely forgotten his name. He must've been not that hot shot after all, since I never even once read anything about him in the next few years. Of course I can't exclude the most recent decade, not remembering him and all, but whatever. I also don't remember whether he was a hot shot art critic, a hot shot artist, or just some random hot shot person who writes about art, but doesn't actually do it himself. Whatever. One of the main topics during the whole day was the point about how artsy people find it extremely difficult to define what art actually is. I mean, it's all they do all day, but they can't come up with a decent definition of the damn thing. During the afternoon break, just before the debate with this maybe-sortof-semi hot shot art person, I walk around the playground and think about the whole thing. And come up with some personal definition of art. My definition. As the time of the debate comes up, the hot shot art person sits in the front of the gym behind some table, and the whole school (literally) is sitting in chairs in the rest of the gym. Some questions are asked. Many of those are just shot down. At some point, I raise my finger when it's asked if anyone has further questions. I walk up to the microphone. I ask him: "Could we maybe define art as that thing that, though it might be easy to reproduce, in no case is easy to produce?" He sits (he never got up, really). He thinks. I stand, and wait. After a few seconds of this, he answers. He seems impressed. His reply is something along the lines of "that's not a perfect definition, but it's pretty good. There's a lot to be said for that, and I urge you to write about art when you grow older". I never followed his advice. I got a bit more interested in art, but quickly found out that art consists of one group of people who spend their time doing things other people find pretty, and another group of people who spend their time doing things that makes other people "think", whatever that is. They may not have a brain, they may be silly as hell, but they still want to "think". It's not for me, it's never been. Art, that is -- not the think bit. That is something I don't mind doing. Don't get me wrong. I still like art. I like going to museums from time to time; I like the performing arts. I mean, I play the flute. Not the piano, not the guitar, not the flipping drums, the flute. Which I like, for what it's worth. But if the intent is to make people think, there are better ways to do that. If I want to make people think, I'm not going to make some obscure object that may or may not have a message, in the hope that a millionaire with no better use for his money would buy it just to make his friends jealous, after which he's going to put it in a safe for a few years so he can sell it at a higher value. Without thinking about it. If I want to make people think, I'm not going to write a play or piece of music that's so obscure it will make people all confused, so they can fill their evening afterwards drinking cocktails at a reception, claiming it was all nice and thought-provoking, quoting little parts of it to people they've never met, just so they can make their social status look more than it actually is. Good thing I never finished drama school, I suppose. No, if I want to make people think, I'll try doing so where it actually matters. Like, say, in politics. Not that I have any political ambitions, mind you. But I think the answer to that question of twenty years ago should be a firm "no." Art cannot rescue democracy. Not if they don't have a lot of interesting things to say to anyone but themselves. Maybe the reverse is true, though; maybe democracy can rescue art. Not that I care much. Why is all this relevant today? A few days ago, as I was driving somewhere, there was some show on the radio relating to the current exploits of the Belgian national soccer team. There are a lot of them these days. Radio shows about that subject, that is not Belgian national soccer teams. I suppose having a lot of competition makes it hard to find a new angle to come up with, and still keep things interesting. I also suppose having a lot of stuff going on about that squad gets people annoyed if they're not the least bit interested. I suppose that could be a new angle. Presumably that radio host supposed the same, because he'd been looking for, and asking questions of, people who didn't like soccer and who weren't going to watch the match. Most of them said they weren't interested and added one or two words about what they were going to be doing instead. One of them said that "they" would be better off spending money on "art and culture", rather than on soccer. No, I don't know who "they" were, he didn't say. Never mind that, let me go on now. I don't know who this dude was; they the radio people didn't say. He sounded like someone between 50 and 65, and had a somewhat tenor-y voice. I suspect he had two kids, and a mercedes. Yes, I just made that up. The part about the kids. And the car. No, it doesn't matter. But it's still likely. He sounded like that sort of guy. Whoever this dude was, though, I'd like to just say one thing: Dude, you're an idiot. There's a time and a place for everything. The time and place for art is "everywhen", and "in any random art gallery, opera house, or theatre, out of the public eye". Not because the rest of us doesn't want to deal with art, but because artsy people like it that way. They like to feel all pompous and important, and therefore use difficult words. Words that nobody except those along with them in their ivory tower like to use. Words that don't actually mean anything. But in doing so, they make this Art thing uninteresting to look at for people who don't care about their pompous and silly words. And strengthen the walls of their ivory tower. Only to complain later on that nobody ever shows up at art galleries, and that the really good ones keep going out of business. The time and place for the world championship soccer is "once every four years", and "everywhere". Not because soccer people want to annoy you although, yes, I'll grant you that the KBVB has gone a little overboard with the merchandising this time around but rather because it's so simple. You kick the ball, and you hit the goal. There, done. Everyone can do it. Yes, true, there are some pompous people talking about it on TV, too. And yes, true, some people are better at it than others. But nobody claims you can't do soccer unless you're part of the "in" club. There are plenty of people who claim you can't do art unless you are. And if everyone can do it, then everyone can understand it. If you can understand it, it's easier to enjoy it. This is why so few people enjoy cricket or baseball outside of the few countries where it's popular. That's also why so few people enjoy art: because you make it so difficult. And people just don't care. They want to be entertained. I'm not saying that soccer is the best sport in the world, or that watching it is the most entertaining thing one can do. It isn't. In fact, beyond the national team, I'm not really following it all that well myself. If through some weird spacial anomaly the world championship would suddenly cease to exist and I would be the only person alive remembering it, I don't think I'd spend a lot of time trying to get it back. But don't compare it to art. Because, well, in the grand scheme of things, neither of those two really matters all that much. That is all.

10 June 2014

Steve Kemp: I'm still not a developer, but ..

Some coding updates: My templer static site generator has now been uploaded to CPAN, and is available as App::Templer. I've converted most of my Dockerfiles to work with docker 1.0.0, which is nice. I also hacked up a fun DNS-server for sharing JSON-encoded data, within a LAN or other environment: Finally I updated the blogspam-detecting site a little, on the back-end. The code is now running inside Docker containers which means I can redeploy more easily in the future. My blog post about looking for a job received some attention via a Reddit advert I posted to /r/edinburgh + /r/sysadmin, but thus far has mostly resulted in people wanting me to write code for them .. which is frustrating. For the moment I'm working on a fun challenge involving (email) spam-detection. That takes me back.

9 June 2014

Daniel Pocock: reSIProcate v1.9 with WebRTC now available for Fedora 20 users

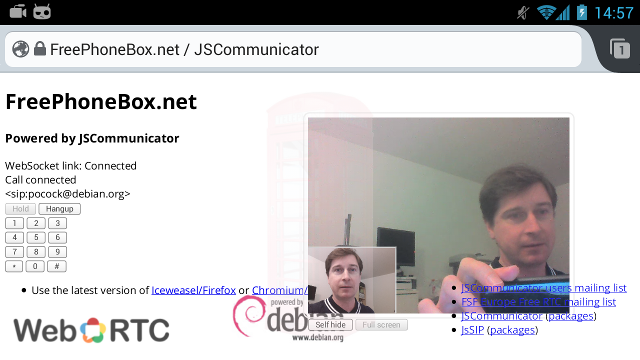
reSIProcate v1.9 has now moved from testing to stable and is available for Fedora 20 users. Version 1.9.7 has also propagated to Debian testing and wheezy-backports, delivering improved stability as discussed in my previous blog. Ready to try WebRTC? The quickest way to set up your own WebRTC trial is to install the repro (reSIProcate SIP proxy) packages for your preferred Linux distribution and then copy JSCommunicator into a directory on your web server. My earlier blog get WebRTC going faster gives specific examples of entries needed in repro.config.. WebRTC Calling from Android I've continued to have success making and receiving calls with both the Firefox and Chrome apps on Android. This is a great way to reach out to friends and family using free software for communication. More details and some screenshots are available in my earlier blog on Android WebRTC.

7 June 2014

Vasudev Kamath: Exposing function in python module using entry_points, WSME in a Flask webapp

The heading might be ambiguous, but I couldn't figure out better heading so let me start by explaining what I'm trying to solve here.
Problem I have a python module which contains a function which I want to expose as a REST web service in a Flask application. I use WSME for Flask application, which actually needs signature of function in question and problem comes to picture because function to be exposed is foreign to Flask application, it resides in separate python module.
Solution While reading Julien Danjou's Hackers Guide To Python book I came across the setuptools entry_points concept which can be used to extend existing feature of a tool like plug-ins. So here I'm going to use this entry_points feature from setuptools to provide function in the module which can expose the signature of function[s] to be exposed through REST. Of course this means I need to modify module in question to write entry_points and function for giving out signature of function to be exposed. I will explain this with small example. I have a dummy module which provides a add function and a function which exposes the add functions signature.
def add(a, b):
    return a + b
def expose_rest_func():
    return [add, int, int, int]
This is stored in dummy/__init__.py file. I use pbr tool to package my python module. Below is content of setup.cfg file.
[metadata]
name = dummy
author = Vasudev Kamath
author-email = kamathvasudev@gmail.com
summary = Dummy module for testing purpose
version = 0.1
license = MIT
description-file =
  README.rst
requires-python = >= 2.7
[files]
packages =
  dummy
[entry_points] =
myapp.api.rest =
  rest = dummy:expose_rest_func
The special thing in above file is entry_points section, which defines function to be hooked into entry_point. In our case entry_point myapp.api.rest is used by our Flask application to interact with modules which expose them. The function which will be got accessing the entry_point is expose_rest_func which gives the function to be exposed its arg types and return types as a list. If we are looking at only supporting python3 it was sufficient to know function name only and use function annotations in function definition. Since I want to support both python2 and python3 this is out of question. Now, just run the following command in virtualenv to get the module installed.
PBR_VERSION=0.1 python setup.py sdist
pip install dist/dummy_module-0.1.tar.gz
Now if you want to see if the module is exposing entry_point or not just use entry_point_inspector tool after installing you will get a command called epi if you run it as follows you should note the dummy_module in its output
epi group list
+-----------------------------+
  Name                         
+-----------------------------+
  cliff.formatter.completion   
  cliff.formatter.list         
  cliff.formatter.show         
  console_scripts              
  distutils.commands           
  distutils.setup_keywords     
  egg_info.writers             
  epi.commands                 
  flake8.extension             
  setuptools.file_finders      
  setuptools.installation      
  myapp.api.rest               
  stevedore.example.formatter  
  stevedore.test.extension     
  wsme.protocols               
+-----------------------------+
So our entry_point is exposed now, we need to access it in our Flask application and expose the function using WSME. It is done by below code.
from wsmeext.flask import signature
import flask
import pkg_resources
def main():
   app = flask.Flask(__name__)
   app.config['DEBUG'] = True
   for entrypoint in pkg_resources.iter_entry_points('myapp.api.rest'):
       # Ugly but fix is only supporting python3
       func_signature = entrypoint.load()()
       app.route('/' + func_signature[0].__name__, methods=['POST'])(
           signature(func_signature[-1],
               *func_signature[1:-1])(func_signature[0]))
   app.run()
if __name__ == '__main__':
    main()
entry_point myapp.api.rest are iterated using the pkg_resources package provided by setuptools, when I load the entry_point I get back the function to be used which is called in same place to get function signature. Then I'm calling Flask and WSME decorator functions (yeah instead of decorating I'm using them directly over function to be exposed). The code looks bit ugly at the place where I'm accessing list using slices but I can't help it due to limitation of python2 with python3 there is new packing and unpacking stuff which makes code look bit more cooler see below.
from wsmeext.flask import signature
import flask
import pkg_resources
def main():
    app = flask.Flask(__name__)
    app.config['DEBUG'] = True
    for entrypoint in pkg_resources.iter_entry_points('silpa.api.rest'):
        func, *args, rettype = entrypoint.load()()
        app.route('/' + func.__name__, methods=['POST'])(
        signature(rettype, *args)(func_signature[0]))
    app.run()
if __name__ == '__main__':
    main()
You can access the service at http://localhost:5000/add depending on Accept header of HTTP you will get either XML or JSON response. If you access it from browser you will get XML response.
Usecase Now if you are wondering what is the reason behind this experience, this is for SILPA Project. I'm trying to implement REST service for all Indic language computing module. Since all these module are independent of SILPA which is a Flask web app I had to find a way to achieve this, and this is what I came up with.
Conclusion I'm not sure if there is any other approaches to achieve this, if there I would love to hear about them. You can write your comments and suggestion over email

6 June 2014

Gunnar Wolf: What defines an identity?

I must echo John Sullivan's post: GPG keysigning and government identification. John states some very important reasons for people everywhere to verify the identities of those parties they sign GPG keys with in a meaningful way, and that means, not just trusting government-issued IDs. As he says, It's not the Web of Amateur ID Checking. And I'll take the opportunity to expand, based on what some of us saw in Debian, on what this means. I know most people (even most people involved in Free Software development not everybody needs to join a globally-distributed, thousand-people-strong project such as Debian) are not that much into GPG, trust keyrings, or understand the value of a strong set of cross-signatures. I know many people have never been part of a key-signing party. I have been to several. And it was a very interesting experience. Fun, at the beginning at least, but quite tiring at the end. I was part of what could very well constitute the largest KSP ever in DebConf5 (Finland, 2005). Quite awe-inspiring We were over 200 people, all lined up with a printed list on one hand, our passport (or ID card for EU citizens) in the other. Actwally, we stood face to face, in a ribbon-like ring. And, after the basic explanation was given, it was time to check ID documents. And so it began. The rationale of this ring is that every person who signed up for the KSP would verify each of the others' identities. Were anything fishy to happen, somebody would surely raise a voice of alert. Of course, the interaction between every two people had to be quick More like a game than like a real check. "Hi, I'm #142 on the list. I checked, my ID is OK and my fingerprint is OK." "OK, I'm #35, I also printed the document and checked both my ID and my fingerprint are OK." The passport changes hands, the person in front of me takes the unique opportunity to look at a Mexican passport while I look at a Somewhere-y one. And all is fine and dandy. The first interactions do include some chatter while we grab up speed, so maybe a minute is spent Later on, we all get a bit tired, and things speed up a bit. But anyway, we were close to 200 people That means we surely spent over 120 minutes (2 full hours) checking ID documents. Of course, not all of the time under ideal lighting conditions. After two hours, nobody was checking anything anymore. But yes, as a group where we trust each other more than most social groups I have ever met, we did trust on others raising the alarm were anything fishy to happen. And we all finished happy and got home with a bucketload of signatures on. Yay! One year later, DebConf happened in Mexico. My friend Martin Krafft tested the system, perhaps cheerful and playful in his intent but the flaw in key signing parties such as the one I described he unveiled was huge: People join the KSP just because it's a social ritual, without putting any thought or judgement in it. And, by doing so, we ended up dilluting instead of strengthening our web of trust. Martin identified himself using an official-looking ID. According to his recount of the facts, he did start presenting a German ID and later switched to this other document. We could say it was a real ID from a fake country, or that it was a fake ID. It is up to each person to judge. But anyway, Martin brought his Transnational Republic ID document, and many tens of people agreed to sign his key based on it Or rather, based on it plus his outgoing, friendly personality. I did, at least, know perfectly well who he was, after knowing him for three years already. Many among us also did. Until he reached a very dilligent person, Manoj, that got disgusted by this experiment and loudly denounced it. Right, Manoj is known to have strong views, and using fake IDs is (or, at least, was) outside his definition of fair play. Some time after DebConf, a huge thread erupted questioning Martin's actions, as well as questioning what do we trust when we sign an identity document (a GPG key). So... We continued having traditional key signing parties for a couple of years, although more carefully and with more buzz regarding these issues. Until we finally decided to switch the protocol to a better one: One that ensures we do get some more talk and inter-personal recognition. We don't need everybody to cross-sign with everyone else A better trust comes from people chatting with each other and being able to actually pin-point who a person is, what do they do. And yes, at KSPs most people still require ID documents in order to cross-sign. Now... What do I think about this? First of all, if we have not ever talked for at least enough time for me to recognize you, don't be surprised: I won't sign your key or request you to sign mine (and note, I have quite a bad memory when it comes to faces and names). If it's the first conference (or social ocassion) we come together, I will most likely not look for key exchanges either. My personal way of verifying identities is by knowing the other person. So, no, I won't trust a government-issued ID. I know I will be signing some people based on something other than their name, but hey I know many people already who live pseudonymously, and if they choose for whatever reason to forgo their original name, their original name should not mean anything to me either. I know them by their pseudonym, and based on that pseudonym I will sign their identities. But... *sigh*, this post turned out quite long, and I'm not yet getting anywhere ;-) But what this means in the end is: We must stop and think what do we mean when we exchange signatures. We are not validating a person's worth. We are not validating that a government believes who they claim to be. We are validating we trust them to be identified with the (name,mail,affiliation) they are presenting us. And yes, our signature is much more than just a social rite It is a binding document. I don't know if a GPG signature is legally binding anywhere (I'm tempted to believe it is, as most jurisdictions do accept digital signatures, and the procedure is mathematically sound and criptographically strong), but it does have a high value for our project, and for many other projects in the Free Software world. So, wrapping up, I will also invite (just like John did) you to read the E-mail self-defense guide, published by the FSF in honor of today's Reset The Net effort.

5 June 2014

John Sullivan: GPG keysigning and government identification

Please stop recommending that checking government-issued ID is a good way to verify someone's identity before signing their GPG key. Have you been a US bartender before? Or held any other position where you've had to verify an ID? It's not an easy thing to do. People in those positions have books of valid IDs from different states. They have lights that show the security marks. They still get it wrong regularly. A very amateur fake ID, or borrowed real ID, will fool just about everyone in any informal context. What's even worse is that people have a habit of happily looking at passports from other countries than their own, and nodding knowingly. It's fun, but be honest, you have no idea what you're doing. How about just signing keys with people you would actually say you know well enough to trust? It's not the Web of Amateur ID Checking. ID checking is at best ineffective against the threats it's supposed to address, and is probably actually damaging to the Web of Trust because of the false sense of security. No idea what I'm talking about? Learn to encrypt your email by reading the FSF's new Email Self-Defense Guide, published in honor of today's Reset The Net effort.
4 June 2014

Daniel Pocock: Trialing the xTuple/PostBooks next generation web UI

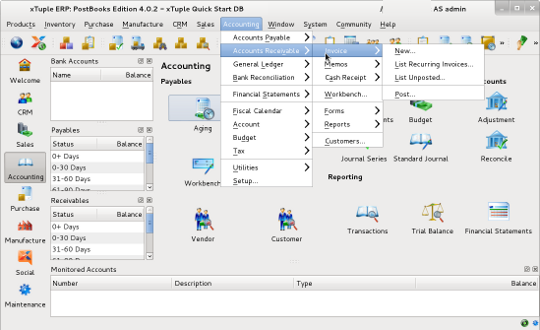
For some time I've been using PostBooks to keep track of finances. The traditional PostBooks system has a powerful Qt GUI. The xTuple team have been hard at work creating a shiny new web-based user interface. The traditional UI has no dedicated server - all users communicate directly with the PostgreSQL database where stored procedures and triggers ensure the correct logic is applied. The new model provides an xTuple application server that can handle requests from web users and potentially other third-party apps too. Who is it for? Some people may feel that the web UI is intended to appeal to mobile users. While it is useful for mobile and tablet devices, this is not strictly the aim, John has discussed this in a blog. One benefit of the web UI is that accountants and book-keepers do not need to have a copy of every exact PostBooks version that every client is using. Given that many people only need their accountant to look at their books for just a few hours at the end of each year, the ease of access with a web UI will make a big difference. Installing it quickly The xTuple Git repository provides a script to install the whole server quickly. Initially it just supported a single Ubuntu release, I just contributed some tweaks to generalize it for Debian wheezy and potentially other releases. It doesn't appear too difficult to generalize it further for Fedora or RHEL users. To get going, I recommend trying it in a fresh virtual machine, either in a server environment or desktop VirtualBox solution. The installation script will install various packages on the machine and mess about with the PostgreSQL setup so you will not want to run the automated setup script on any machine where you have existing databases. Once the virtual machine is setup, make sure sudo is installed and configured:
# apt-get install sudo
# visudo
and then run the install as your normal user:
git clone --recursive git://github.com/xtuple/xtuple.git
cd xtuple
git remote add XTUPLE git://github.com/xtuple/xtuple.git
git fetch XTUPLE
git checkout git describe --abbrev=0
chmod a+x scripts/install_xtuple.sh
scripts/install_xtuple.sh
If all goes well, 5-10 minutes later it is ready to run:
cd node-datasource
node main.js
The port numbers will appear on the screen and you can connect with a web browser. Trying it out Despite my comments above to the effect that this is not primarily aimed at mobile, the first and second device I tested with were both mobile devices, Samsung Galaxy S3 and a Samsung Galaxy Note 3. I feel the Note is far better for this type of application, primarily due to screen size and the fact that most of the forms in the application have fields that launch popup menus. It appears to work in both Chrome and Firefox on these devices. One handy feature is that the mobile device can dial numbers directly from the CRM address book, this is facilitated with the tel URI. My impression is that this is still a product that is in the final stages of development, although some people will be able to use it almost immediately. One significant thing to note is that the database schema is very stable due to the long history of the traditional xTuple/PostBooks products.

2 June 2014

Rapha&#235;l Hertzog: My Free Software Activities since January 2014

If you follow my blog closely, you noticed that I skipped all my usual monthly summaries in 2014. It s not that I stopped doing free software work, instead I was just too busy to be able to report about what I did. As an excuse, let me tell you that we just moved into a new house which was in construction since may last year. The lack of visible activity on my blog resulted in a steady decrease of the amount of donations received (January: 70.72 , February: 71.75 , March: 51.25 , April: 39.9 , May: 40.33 ). Special thanks to all the people who kept supporting my work even though I stopped reporting about it. So let s fix this. This report will be a bit less detailed since it covers the whole period since the start of the year. Debian France Preparations related to general assemblies. The year started with lots of work related to Debian France. First I took care of setting up limesurvey with Alexandre Delano to handle the vote to pick our new logo:

The new logo of Debian France I also helped Sylvestre Ledru to finalize and close the accounting books for 2013 in preparation for the general assembly that was due later in the month. I wrote the moral report of the president to be presented to the assembly. And last step, I collected vote mandates to ensure that we were going to meet the quorum for the extraordinary assembly that was planned just after the usual yearly assembly. The assemblies took place during a two days mini-debconf in Paris (January 17-18) where I was obviously present even though I gave no talk besides announcing the logo contest winner and thanking people for their participation.
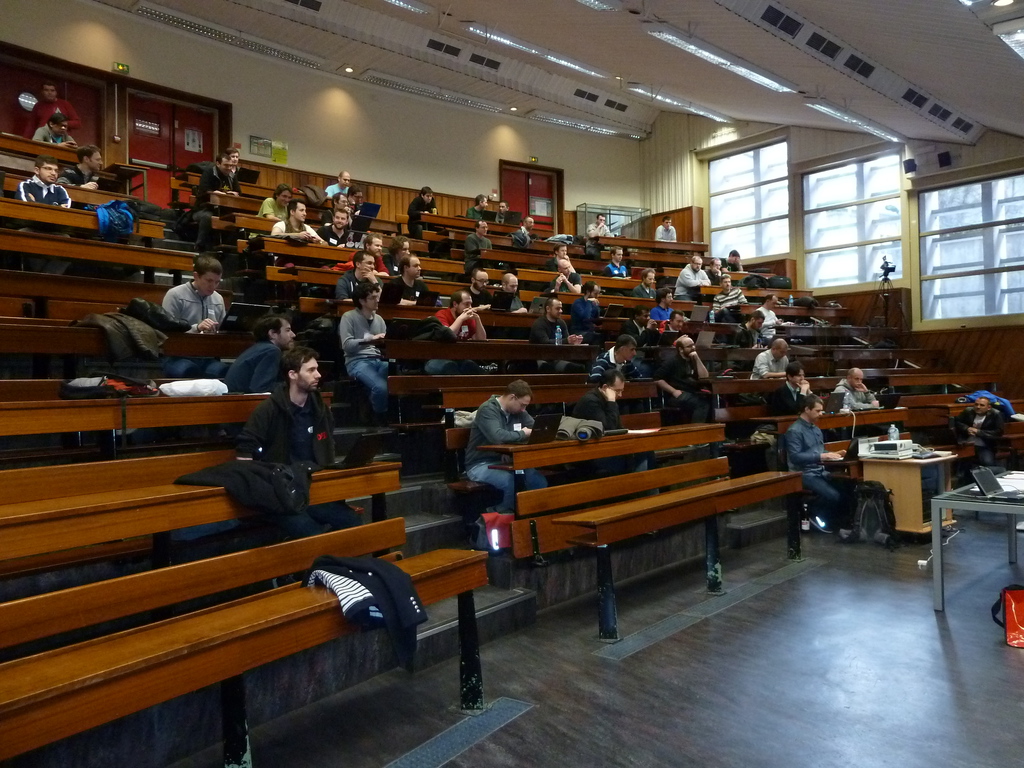
Assembl e g n rale 2014 de Debian France

The Debian France members during the general assembly

It s worth noting that the extraordinary assembly was meant primarily to enshrine in our bylaws the possibility to act as a trusted organization for Debian. This status should be officialized by the Debian project leader (Lucas Nussbaum) in the upcoming weeks since we answered satisfactorily to all questions. Our paypal donation form and the accounting tools behind it are ready. Galette packaging and members map. I managed to hand over the package maintenance of galette to Fran ois-R gis Vuillemin. I sponsored all his uploads and we packaged a new plugin that allows to create a map with all the members who accept to share their location. The idea was to let people meet each other when they don t live far away with the long term goal to have Debian France organized activities not only in Paris but everywhere in France. New contributor game. Last but not least, I organized a game to encourage people to do their first contribution to Debian by offering them a copy of my book if they managed to complete a small Debian project. We got many interesting projects but the result so far seem to be very mixed. Many people did not complete their project (yet) that said for the few that did substantial work, it was rather good and they seem to be interested to continue to contribute. Debian France booth at Solutions Linux in Paris. Like each year, I spent two days in Paris to help man the Debian France booth at Solutions Linux. We had lots of goodies on sale and we made more than 2000 EUR in earnings during the two days. I also used this opportunity to try to convince companies to support the new Debian LTS effort.
Debian France booth at Solutions Linux

Tanguy Ortolo and Fernando Lagrange behind the Debian France booth

The Debian Administrator s Handbook In the last days of 2013, we released the wheezy update of the book. Then I quickly organized everything needed so that the various translation teams can now focus their efforts on the latest release of the book. Later (in February) I announced the availability of the French and Spanish translations. Debian Squeeze LTS When the security team called for help to try to put in place long term support for Squeeze, I replied positively because I m convinced that it s very important if Debian wants to stay an acceptable choice in big deployments and because I knew that some of my customers would be interested Thus I followed all the discussions (on a semi-private list first and then on debian-lts@lists.debian.org) and contributed my own experience. I have also taken up the responsibility to coordinate with the Debian contributors who can be hired to work on Squeeze LTS so that we have a clear common offer for all the companies who have offered financial support towards Squeeze LTS. Expect further news on this front in the upcoming days/weeks. Tryton I have been a long time user of SQL-Ledger to manage the accounting of my company Freexian. But while the license is free software, the project is not. It s the work of a single developer who doesn t really accept help. I have thus been considering to move to something else for a long time but never did anything. This year, after some rough evaluation, I decided to switch to Tryton for my company. It s probably not a wise choice from a business perspective because that migration took me many hours of unpaid labor but from a free software perspective it s definitely better than everything else I saw. I contributed a lot of bug reports and a few patches already (#3596, #3631, #3633, #3665, #3667, #3694, #3695, #3696, #3697) mainly about problems found in the French chart of accounts but also about missing features for my use case. I also accepted to sponsor Matthias Berhle, who is maintaining the official Debian packages of Tryton. He s already a Debian maintainer so it s mainly a matter of reviewing new source packages and granting him the required rights. Misc Debian work Thanks See you next month for a new summary of my activities.

2 comments Liked this article? Click here. My blog is Flattr-enabled.

Daniel Pocock: Fixing WebRTC dropouts

A few people have observed dropouts using WebRTC, including the new Debian community service at rtc.debian.org I've been going over some of these problems and made some improvements. If you tried it before and had trouble, please try again (rtc.debian.org is running with some of the fixes already). If anybody else has seen these problems or continues to experience them, please let the reSIProcate community know about it through the repro-users mailing list. WebSocket link disconnects immediately when call starts In this case, you may see the picture of the other person for a split second and then the websocket link disconnects and JSCommunicator re-initializes itself. People observing this problem had sometimes found that audio-only calls would work more frequently. I believe one reason for this problem has been some incorrect handling of the OpenSSL error queue. I posted my observations about this on the resiprocate developer's list and included a fix for it in the recent 1.9.7 release. Call starts, no remote picture appears, call stops after 20 seconds or so In this case, if you look closely in the JavaScript console, you may see that one of the endpoints has sent a SIP BYE message. A BYE message usually includes a reason such as this: Reason: SIP ;cause=200; text="RTP Timeout"
This particular reason (RTP Timeout) may indicate that the TURN server is faulty, not running at all or is not reachable due to one or both users being behind a firewall. If you experience this problem but some other reason code appears, please share your observations on the repro-users mailing list so it can be improved. For those people who have firewall problems, this will eventually be resolved when the browsers support TURN over a TLS connection through a HTTP proxy. We also hope to provide better feedback in the JavaScript UI of JSCommunicator to tell people their call was blocked by a firewall.

13 May 2014

Jose Luis Rivas: angular-geocomplete's first version

So I was needing a resulting JSON array with possible solutions for a given address or city name and then angular-geocomplete was made. The great thing is that you can use it together with typeahead and now you have address/location autocomplete, just like the one on Google Maps. And yes, it does uses Google Maps's API. What's the advantage of this thing? You get coordinates together with all the names. Installable via bower as well with bower install angular-geocomplete. Any issue: to the GitHub tracker.

5 May 2014

Vincent Bernat: Dashkiosk: manage dashboards on multiple displays

Dashkiosk is a solution to manage dashboards on multiple displays. It comes in four parts:
  1. A server will manage the screens by sending URL to be displayed. A web interface enables an administrator to configure groups of dashboards and attach them to a set of displays.
  2. A receiver runs in a browser attached to each screen. On start, it contacts the server and waits for the URL to display.
  3. An Android application provides a simple fullscreen webview to display the receiver.
  4. A Chromecast custom receiver which will run the regular receiver to display dashboards using Google Chromecast devices. The server is able to drive Chromecast devices through nodecastor, a reimplementation of the sender API.
For a demo, have a look at the following video (it is also available as an Ogg Theora video).

4 May 2014

Francois Marier: What's in a debian/ directory?

If you're looking to get started at packaging free software for Debian, you should start with the excellent New Maintainers' Guide or the Introduction to Debian Packaging on the Debian wiki. Once you know the basics, or if you prefer to learn by example, you may be interested in the full walkthrough which follows. We will look at the contents of three simple packages.

node-libravatar This package is a node.js library for the Libravatar service. Version 2.0.0-3 of that package contains the following files in its debian/ directory:
  • changelog
  • compat
  • control
  • copyright
  • docs
  • node-libravatar.install
  • rules
  • source/format
  • watch

debian/control
Source: node-libravatar
Priority: extra
Maintainer: Francois Marier <francois@debian.org>
Build-Depends: debhelper (>= 9)
Standards-Version: 3.9.4
Section: web
Homepage: https://github.com/fmarier/node-libravatar
Vcs-Git: git://git.debian.org/collab-maint/node-libravatar.git
Vcs-Browser: http://git.debian.org/?p=collab-maint/node-libravatar.git;a=summary
Package: node-libravatar
Architecture: all
Depends: $ shlibs:Depends , $ misc:Depends , nodejs
Description: libravatar library for NodeJS
 This library allows web application authors to make use of the free Libravatar
 service (https://www.libravatar.org). This service hosts avatar images for
 users and allows other sites to look them up using email addresses.
 .
 node-libravatar includes full support for federated avatar servers.
This is probably the most important file since it contains the bulk of the metadata about this package. Maintainer is a required field listing the maintainer of that package, which can be a person or a team. It only contains a single value though, any co-maintainers will be listed under the optional Uploaders field. Build-Depends lists the packages which are needed to build the package (e.g. a compiler), as opposed to those which are needed to install the binary package (e.g. a library it uses). Standards-Version refers to the version of the Debian Policy that this package complies with. The Homepage field refers to the upstream homepage, whereas the Vcs-* fields point to the repository where the packaging is stored. If you take a look at the node-libravatar packaging repository you will see that it contains three branches:
  • upstream is the source as it was in the tarball downloaded from upstream.
  • master is the upstream branch along with all of the Debian customizations.
  • pristine-tar is unrelated to the other two branches and is used by the pristine-tar tool to reconstitute the original upstream tarball as needed.
After these fields comes a new section which starts with a Package field. This is the definition of a binary package, not to be confused with the Source field at the top of this file, which refers to the name of the source package. In this particular example, they are both the same and there is only one of each, however this is not always the case, as we'll see later. Inside that binary package definition, lives the Architecture field which is normally one of these two:
  • all for a binary package that will work on all architectures but only needs to be built once
  • any for a binary package that will work everywhere but that will need to be built separately for each architecture
Finally, the last field worth pointing out is the Depends field which lists all of the runtime dependencies that the binary package has. This is what will be pulled in by apt-get when you apt-get install node-libravatar. The two variables will be substituted later by debhelper.

debian/changelog
node-libravatar (2.0.0-3) unstable; urgency=low
  * debian/watch: poll github directly
  * Bump Standards-Version up to 3.9.4
 -- Francois Marier <francois@debian.org>  Mon, 20 May 2013 12:07:49 +1200
node-libravatar (2.0.0-2) unstable; urgency=low
  * More precise license tag and upstream contact in debian/copyright
 -- Francois Marier <francois@debian.org>  Tue, 29 May 2012 22:51:03 +1200
node-libravatar (2.0.0-1) unstable; urgency=low
  * New upstream release
    - new non-backward-compatible API
 -- Francois Marier <francois@debian.org>  Mon, 07 May 2012 14:54:19 +1200
node-libravatar (1.1.1-1) unstable; urgency=low
  * Initial release (Closes: #661771)
 -- Francois Marier <francois@debian.org>  Fri, 02 Mar 2012 15:29:57 +1300
This may seem at first like a mundane file, but it is very important since it is the canonical source of the package version (2.0.0-3 in this case). This is the only place where you need to bump the package version when uploading a new package to the Debian archive. The first line also includes the distribution where the package will be uploaded. It is usually one of these values:
  • unstable for the vast majority of uploads
  • stable for uploads that have been approved by the release maintainers and fix serious bugs in the stable version of Debian
  • stable-security for security fixes to the stable version of Debian that cannot wait until the next stable point release and have been approved by the security team
Packages uploaded to unstable will migrate automatically to testing provided that a few conditions are met (e.g. no release-critical bugs were introduced). The length of time before that migration is influenced by the urgency field (low, medium or high) in the changelog entry. Another thing worth noting is that the first upload normally needs to close an ITP (Intent to Package) bug.

debian/rules
#!/usr/bin/make -f
# -*- makefile -*-
%:
    dh $@ 
override_dh_auto_test:
As can be gathered from the first two lines of this file, this is a Makefile. This is what controls how the package is built. There's not much to see and that's because most of its content is automatically added by debhelper. So let's look at it in action by building the package:
$ git buildpackage -us -uc
and then looking at parts of the build log (../node-libravatar_2.0.0-3_amd64.build):
 fakeroot debian/rules clean
dh clean 
   dh_testdir
   dh_auto_clean
   dh_clean
One of the first things we see is the debian/rules file being run with the clean target. To find out what that does, have a look at the dh_auto_clean which states that it will attempt to delete build residues and run something like make clean using the upstream Makefile.
 debian/rules build
dh build 
   dh_testdir
   dh_auto_configure
   dh_auto_build
Next we see the build target being invoked and looking at dh_auto_configure we see that this will essentially run ./configure and its equivalents. The dh_auto_build helper script then takes care of running make (or equivalent) on the upstream code. This should be familiar to anybody who has ever built a piece of free software from scratch and has encountered the usual method for building from source:
./configure
make
make install
Finally, we get to actually build the .deb:
 fakeroot debian/rules binary
dh binary 
   dh_testroot
   dh_prep
   dh_installdirs
   dh_auto_install
   dh_install
...
   dh_md5sums
   dh_builddeb
dpkg-deb: building package  node-libravatar' in  ../node-libravatar_2.0.0-3_all.deb'.
Here we see a number of helpers, including dh_auto_install which takes care of running make install. Going back to the debian/rules, we notice that there is manually defined target at the bottom of the file:
override_dh_auto_test:
which essentially disables dh_auto_test by replacing it with an empty set of commands. The reason for this becomes clear when we take a look at the test target of the upstream Makefile and the dependencies it has: tap, a node.js library that is not yet available in Debian. In other words, we can't run the test suite on the build machines so we need to disable it here.

debian/compat
9
This file simply specifies the version of debhelper that is required by the various helpers used in debian/rules. Version 9 is the latest at the moment.

debian/copyright
Format: http://www.debian.org/doc/packaging-manuals/copyright-format/1.0/
Upstream-Name: node-libravatar
Upstream-Contact: Francois Marier <francois@libravatar.org>
Source: https://github.com/fmarier/node-libravatar
Files: *
Copyright: 2011 Francois Marier <francois@libravatar.org>
License: Expat
Files: debian/*
Copyright: 2012 Francois Marier <francois@debian.org>
License: Expat
License: Expat
 Permission is hereby granted, free of charge, to any person obtaining a copy of this
 software and associated documentation files (the "Software"), to deal in the Software
 without restriction, including without limitation the rights to use, copy, modify,
 merge, publish, distribute, sublicense, and/or sell copies of the Software, and to
 permit persons to whom the Software is furnished to do so, subject to the following
 conditions:
 .
 The above copyright notice and this permission notice shall be included in all copies
 or substantial portions of the Software.
 .
 THE SOFTWARE IS PROVIDED "AS IS", WITHOUT WARRANTY OF ANY KIND, EXPRESS OR IMPLIED,
 INCLUDING BUT NOT LIMITED TO THE WARRANTIES OF MERCHANTABILITY, FITNESS FOR A
 PARTICULAR PURPOSE AND NONINFRINGEMENT. IN NO EVENT SHALL THE AUTHORS OR COPYRIGHT
 HOLDERS BE LIABLE FOR ANY CLAIM, DAMAGES OR OTHER LIABILITY, WHETHER IN AN ACTION OF
 CONTRACT, TORT OR OTHERWISE, ARISING FROM, OUT OF OR IN CONNECTION WITH THE SOFTWARE
 OR THE USE OR OTHER DEALINGS IN THE SOFTWARE.
This machine-readable file lists all of the different licenses encountered in this package. It requires that the maintainer audits the upstream code for any copyright statements that might be present in addition to the license of the package as a whole.

debian/docs
README.md
This file contains a list of upstream files that will be copied into the /usr/share/doc/node-libravatar/ directory by dh_installdocs.

debian/node-libravatar.install
lib/*    usr/lib/nodejs/
The install file is used by dh_install to supplement the work done by dh_auto_install which, as we have seen earlier, essentially just runs make install on the upstream Makefile. Looking at that upstream Makefile, it becomes clear that the files will need to be installed manually by the Debian package since that Makefile doesn't have an install target.

debian/watch
version=3
https://github.com/fmarier/node-libravatar/tags /fmarier/node-libravatar/archive/node-libravatar-([0-9.]+)\.tar\.gz
This is the file that allows Debian tools like the Package Tracking System to automatically detect that a new upstream version is available. What it does is simply visit the upstream page which contains all of the release tarballs and look for links which have an href matching the above regular expression. Running uscan --report --verbose will show us all of the tarballs that can be automatically discovered using this watch file:
-- Scanning for watchfiles in .
-- Found watchfile in ./debian
-- In debian/watch, processing watchfile line:
   https://github.com/fmarier/node-libravatar/tags /fmarier/node-libravatar/archive/node-libravatar-([0-9.]+)\.tar\.gz
-- Found the following matching hrefs:
     /fmarier/node-libravatar/archive/node-libravatar-2.0.0.tar.gz
     /fmarier/node-libravatar/archive/node-libravatar-1.1.1.tar.gz
     /fmarier/node-libravatar/archive/node-libravatar-1.1.0.tar.gz
     /fmarier/node-libravatar/archive/node-libravatar-1.0.1.tar.gz
     /fmarier/node-libravatar/archive/node-libravatar-1.0.0.tar.gz
Newest version on remote site is 2.0.0, local version is 2.0.0
 => Package is up to date
-- Scan finished

pylibravatar This second package is the equivalent Python library for the Libravatar service. Version 1.6-2 of that package contains similar files in its debian/ directory, but let's look at two in particular:
  • control
  • upstream/signing-key.asc

debian/control
Source: pylibravatar
Section: python
Priority: optional
Maintainer: Francois Marier <francois@debian.org>
Build-Depends: debhelper (>= 9), python-all, python3-all
Standards-Version: 3.9.5
Homepage: https://launchpad.net/pyLibravatar
...
Package: python-libravatar
Architecture: all
Depends: $ misc:Depends , $ python:Depends , python-dns, python
Description: Libravatar module for Python 2
 Module to make use of the federated Libravatar.org avatar hosting service
 from within Python applications.
...
Package: python3-libravatar
Architecture: all
Depends: $ misc:Depends , $ python3:Depends , python3-dns, python3
Description: Libravatar module for Python 3
 Module to make use of the federated Libravatar.org avatar hosting service
 from within Python applications.
...
Here is an example of a source package (pylibravatar) which builds two separate binary packages: python-libravatar and python3-libravatar. This highlights the fact that a given upstream source can be split into several binary packages in the archive when it makes sense. In this case, there is no point in Python 2 applications pulling in the Python 3 files, so the two separate packages make sense. Another common example is the use of a -doc package to separate the documentation from the rest of a package so that it doesn't need to be installed on production servers for example.

debian/upstream/signing-key.asc
-----BEGIN PGP PUBLIC KEY BLOCK-----
Version: GnuPG v1
mQINBEpQYz4BEAC7REQD1za69RUnkt6nRCFhSJmmoeJc+yEiWTKc9GOIMAwJDme1
+CMYgVn4Xzf1VQYwD/lE+mfWgyeMomLQjDM1mxx/LOM2a1WWPOk9+PvQwKfRJy92
...
UxDtZm/4yUmU6KvHvOGiDCMuIiB+MqhqJJ5wf80wXhzu8nmC+fyGt6nvu0ggMle8
sAMgXt/aQUTZE5zNCQ==
=RkTO
-----END PGP PUBLIC KEY BLOCK-----
This is simply the OpenPGP key that the upstream developer uses to sign release tarballs. Since PGP signatures are available on the upstream download page, it's possible to instruct uscan to check signatures before downloading tarballs. The way to do that is to use the pgpsigurlmange option in debian/watch:
version=3
opts=pgpsigurlmangle=s/$/.asc/ https://pypi.python.org/pypi/pyLibravatar https://pypi.python.org/packages/source/p/pyLibravatar/pyLibravatar-(.*)\.tar\.gz
which is simply a regular expression replacement string which takes the tarball URL and converts it to the URL of the matching PGP signature.

fcheck The last package we will look at is a file integrity checker. It essentially goes through all of the files in /usr/bin/ and /usr/lib/ and stores a hash of them in its database. When one of these files changes, you get an email. In particular, we will look at the following files in the debian/ directory of version 2.7.59-18:
  • dirs
  • fcheck.cron.d
  • fcheck.postrm
  • fcheck.postinst
  • patches/
  • README.Debian
  • rules
  • source/format

debian/patches This directory contains ten patches as well as a file called series which lists the patches that should be applied to the upstream source and in which order. Should you need to temporarily disable a patch, simply remove it from this file and it will no longer be applied at build time. Let's have a look at patches/04_cfg_sha256.patch:
Description: Switch to sha256 hash algorithm
Forwarded: not needed
Author: Francois Marier <francois@debian.org>
Last-Update: 2009-03-15
--- a/fcheck.cfg
+++ b/fcheck.cfg
@@ -149,8 +149,7 @@ TimeZone        = EST5EDT
 #$Signature      = /usr/bin/sum
 #$Signature      = /usr/bin/cksum
 #$Signature      = /usr/bin/md5sum
-$Signature      = /bin/cksum
-
+$Signature      = /usr/bin/sha256sum
 # Include an optional configuration file.
This is a very simple patch which changes the default configuration of fcheck to promote the use of a stronger hash function. At the top of the file is a bunch of metadata in the DEP-3 format. Why does this package contain so many customizations to the upstream code when Debian's policy is to push fixes upstream and work towards reduce the delta between upstream and Debian's code? The answer can be found in debian/control:
Homepage: http://web.archive.org/web/20050415074059/www.geocities.com/fcheck2000/
This package no longer has an upstream maintainer and its original source is gone. In other words, the Debian package is where all of the new bug fixes get done.

debian/source/format
3.0 (quilt)
This file contains what is called the source package format. What it basically says is that the patches found in debian/patches/ will be applied to the upstream source using the quilt tool at build time.

debian/fcheck.postrm
#!/bin/sh
# postrm script for fcheck
#
# see: dh_installdeb(1)
set -e
# summary of how this script can be called:
#        * <postrm>  remove'
#        * <postrm>  purge'
#        * <old-postrm>  upgrade' <new-version>
#        * <new-postrm>  failed-upgrade' <old-version>
#        * <new-postrm>  abort-install'
#        * <new-postrm>  abort-install' <old-version>
#        * <new-postrm>  abort-upgrade' <old-version>
#        * <disappearer's-postrm>  disappear' <overwriter>
#          <overwriter-version>
# for details, see http://www.debian.org/doc/debian-policy/ or
# the debian-policy package
case "$1" in
    remove upgrade failed-upgrade abort-install abort-upgrade disappear)
    ;;
    purge)
      if [ -e /var/lib/fcheck/fcheck.dbf ]; then
        echo "Purging old database file ..."
        rm -f /var/lib/fcheck/fcheck.dbf
      fi
      rm -rf /var/lib/fcheck
      rm -rf /var/log/fcheck
      rm -rf /etc/fcheck
    ;;
    *)
        echo "postrm called with unknown argument \ $1'" >&2
        exit 1
    ;;
esac
# dh_installdeb will replace this with shell code automatically
# generated by other debhelper scripts.
#DEBHELPER#
exit 0
This script is one of the many possible maintainer scripts that a package can provide if needed. This particular one, as the name suggests, will be run after the package is removed (apt-get remove fcheck) or purged (apt-get remove --purge fcheck). Looking at the case statement above, it doesn't do anything extra in the remove case, but it deletes a few files and directories when called with the purge argument.

debian/README.Debian This optional README file contains Debian-specific instructions that might be useful to users. It supplements the upstream README which is often more generic and cannot assume a particular system configuration.

debian/rules
#!/usr/bin/make -f
# -*- makefile -*-
# Sample debian/rules that uses debhelper.
# This file was originally written by Joey Hess and Craig Small.
# As a special exception, when this file is copied by dh-make into a
# dh-make output file, you may use that output file without restriction.
# This special exception was added by Craig Small in version 0.37 of dh-make.
# Uncomment this to turn on verbose mode.
#export DH_VERBOSE=1
build-arch:
build-indep:
build: build-stamp
build-stamp:
    dh_testdir
    pod2man --section=8 $(CURDIR)/debian/fcheck.pod > $(CURDIR)/fcheck.8
    touch build-stamp
clean:
    dh_testdir
    dh_testroot
    rm -f build-stamp 
    rm -f $(CURDIR)/fcheck.8
    dh_clean
install: build
    dh_testdir
    dh_testroot
    dh_prep
    dh_installdirs
    cp $(CURDIR)/fcheck $(CURDIR)/debian/fcheck/usr/sbin/fcheck
    cp $(CURDIR)/fcheck.cfg $(CURDIR)/debian/fcheck/etc/fcheck/fcheck.cfg
# Build architecture-independent files here.
binary-arch: build install
# Build architecture-independent files here.
binary-indep: build install
    dh_testdir
    dh_testroot
    dh_installdocs
    dh_installcron
    dh_installman fcheck.8
    dh_installchangelogs
    dh_installexamples
    dh_installlogcheck
    dh_link
    dh_strip
    dh_compress
    dh_fixperms
    dh_installdeb
    dh_shlibdeps
    dh_gencontrol
    dh_md5sums
    dh_builddeb
binary: binary-indep binary-arch
.PHONY: build clean binary-indep binary-arch binary install
This is an example of a old-style debian/rules file which you still encounter in packages which haven't yet upgraded to the latest version of debhelper 9, as can be shown by the contents of debian/compat:
8
It does essentially the same thing that what we've seen in the build log, but in a more verbose way.

debian/dirs
usr/sbin
etc/fcheck
This file contains a list of directories that dh_installdirs will create in the build directory. The reason why these directories need to be created is that files are copied into these directories in the install target of the debian/rules file. Note that this is different from directories which are created at the time of installation of the package. In that case, the directory (e.g. /var/log/fcheck/) must be created in the postinst script and removed in the postrm script.

debian/fcheck.cron.d
#
# Regular cron job for the fcheck package
#
30 */2  * * *   root    test -x /usr/sbin/fcheck && if ! nice ionice -c3 /usr/sbin/fcheck -asxrf /etc/fcheck/fcheck.cfg >/var/run/fcheck.out 2>&1; then mailx -s "ALERT: [fcheck]  hostname --fqdn " root </var/run/fcheck.out ; /usr/sbin/fcheck -cadsxlf /etc/fcheck/fcheck.cfg ; fi ; rm -f /var/run/fcheck.out
This file is the cronjob which drives the checks performed by this package. It will be copied to /etc/cron.d/fcheck by dh_installcron.

Next.

Previous.