Search Results: "will"

1 July 2011

Matthew Palmer: Metablogging

I ve taken the plunge, and converted my blog from a venerable but largely unmaintain(ed able) blosxom setup that I ve had since 2005 (OMG!) into a new and shiny Jekyll-backed system. The main benefits are that I m more comfortable hacking away at Jekyll (being written in Ruby), and my blog post submission no longer requires me to e-mail my blog posts to myself to put them up (that was just an artifact of how I set it up all those years ago, but it had worked so I wasn t willing to change it just for the sake of it). Jekyll s superior (for me) hackability has reaped dividends already I ve put together a home-grown comments system, which fulfils my primary requirements of being as close to completely statically-generated as it s possible to be (about 10 lines of PHP is the only dynamic content), and doesn t involve JavaScript or putting my blog comments in the cloud .

30 June 2011

Michael Casadevall: On porting the installer (Part 1)...

So as Alpha 2 approaches, I find myself working towards porting the alternate installer/d-i to the pandaboard to support the netboot installer. There's not a lot of documentation that describes the internals of d-i, nor what bits are platform specific.

This is especially true when working towards creating a new subarchitecture since lots of little places have to be touched, kernels usually have to be tweaked, and all other sorts of odds and ins. This post isn't a comprehensive guide to what's necessary, but just little tidbits of what I did, just some random odds and ends.

The first step of any enablement is to have something you can run and boot. The netboot images, as well as the alternate kernel and ramdisk are built out of the debian-installer package. In the debian-installer package, several config files for driving the process are located in build/config/$arch/$subarch. For omap4, we have the following files:

boot/arm/generate-partitioned-filesystem
build/config/armel.cfg
build/config/armel/omap4.cfg
build/config/armel/omap4/cdrom.cfg
build/config/armel/omap4/netboot.cfg

boot/arm/generate-partitioned-filesystem is a shell script that takes a VFAT blob, and spits out a proper MBR and partition table.

build/config/armel.cfg simply is a list subarchitectures to build, and some sane-ish kernel defaults for armel.

build/config/armel/omap4.cfg is also a simple config file which specifies the type of images we're building, and the kernel to use in d-i. This file looks like this:

MEDIUM_SUPPORTED = netboot cdrom

# The version of the kernel to use.
KERNELVERSION := 2.6.38-1309-omap4
# we use non-versioned filenames in the omap kernel udeb
KERNELNAME = vmlinuz
VERSIONED_SYSTEM_MAP =

As a point of clarification, 'cdrom' is a bit of a misdemeanor; it refers to the alternate installer kernel and ramdisk used by alternate images, and not the type of media. Other types of images exist such as 'floppy' and 'hd-install', but these are specialized images, and out of scope for this blog post.

Each file in build/config/armel/omap4/* is a makefile thats called in turn for each image that created. The most interesting of this is the netboot.cfg

MEDIA_TYPE = netboot image
SUBARCH = omap4
TARGET = $(TEMP_INITRD) $(TEMP_KERNEL) omap4
EXTRANAME = $(MEDIUM)
INITRD_FS = initramfs

MANIFEST-INITRD = "netboot initrd"
MANIFEST-KERNEL = "kernel image to netboot"
INSTALL_PATH = $(SOME_DEST)/$(EXTRANAME)

omap4:
# Make sure our build envrionment is clean
rm -rf $(INSTALL_PATH)
mkdir -p $(INSTALL_PATH)

# Generate uImage/uInitrd
mkimage -A arm -O linux -T kernel -C none -a 0x80008000 -e 0x80008000 -n "Ubuntu kernel" -d $(TEMP_KERNEL) $(INSTALL_PATH)/uImage
mkimage -A arm -O linux -T ramdisk -C none -a 0x0 -e 0x0 -n "debian-installer ramdisk" -d $(TEMP_INITRD) $(INSTALL_PATH)/uInitrd

# Generate boot.scrs
mkimage -A arm -T script -C none -n "Ubuntu boot script (serial)" -d boot/arm/boot.script-omap4-serial $(INSTALL_PATH)/boot.scr-serial
mkimage -A arm -T script -C none -n "Ubuntu boot script (framebuffer)" -d boot/arm/boot.script-omap4-fb $(INSTALL_PATH)/boot.scr-fb

# Create DD'able filesystems
mkdosfs -C $(INSTALL_PATH)/boot.img-fat-serial 10240
mcopy -i $(INSTALL_PATH)/boot.img-fat-serial $(INSTALL_PATH)/uImage ::uImage
mcopy -i $(INSTALL_PATH)/boot.img-fat-serial $(INSTALL_PATH)/uInitrd ::uInitrd
mcopy -i $(INSTALL_PATH)/boot.img-fat-serial /usr/lib/x-loader/omap4430panda/MLO ::MLO
mcopy -i $(INSTALL_PATH)/boot.img-fat-serial /usr/lib/u-boot/omap4_panda/u-boot.bin ::u-boot.bin
cp $(INSTALL_PATH)/boot.img-fat-serial $(INSTALL_PATH)/boot.img-fat-fb
mcopy -i $(INSTALL_PATH)/boot.img-fat-serial $(INSTALL_PATH)/boot.scr-serial ::boot.scr
mcopy -i $(INSTALL_PATH)/boot.img-fat-fb $(INSTALL_PATH)/boot.scr-fb ::boot.scr
boot/arm/generate-partitioned-filesystem $(INSTALL_PATH)/boot.img-fat-fb $(INSTALL_PATH)/boot.img-fb
boot/arm/generate-partitioned-filesystem $(INSTALL_PATH)/boot.img-fat-serial $(INSTALL_PATH)/boot.img-serial

# Generate manifests
update-manifest $(INSTALL_PATH)/uImage "Linux kernel for OMAP Boards"
update-manifest $(INSTALL_PATH)/uInitrd "initrd for OMAP Boards"
update-manifest $(INSTALL_PATH)/boot.scr-fb "Boot script for booting OMAP netinstall initrd and kernel from SD card. Uses framebuffer display"
update-manifest $(INSTALL_PATH)/boot.scr-serial "Boot script for booting OMAP netinstall initrd and kernel from SD card. Uses serial output"
update-manifest $(INSTALL_PATH)/boot.img-serial "Boot image for booting OMAP netinstall. Uses serial output"
update-manifest $(INSTALL_PATH)/boot.img-fb "Boot image for booting OMAP netinstall. Uses framebuffer output"

The vast majority of this is fairly straightforward. TARGET represents the targets called by make. There are tasks for creating a vmlinuz and initrd that must be included. The omap4 target then handles specialized handling for the omap4/netboot image.

omap4 requires a VFAT boot partition on the SD card with a proper filesystem and MBR. The contents of the filesystem are straightforward:

MLO - also known as x-loader, a first stage bootloader
u-boot.bin - u-boot binary, second stage bootloader, used to book the kernel
uImage - linux kernel with special uboot header (created with mkimage)
uInitrd - d-i ramdisk with special uboot header
boot.scr - special boot script for u-boot for commands to execute at startup.

MLO and u-boot.bin are copied in from x-loader-omap4-panda and u-boot-linaro-omap4-panda which are listed as build-deps in the control file for d-i. boot.scr is generated from a plain-text file:

fatload mmc 0:1 0x80000000 uImage
fatload mmc 0:1 0x81600000 uInitrd
setenv bootargs vram=32M mem=456M@0x80000000 mem=512M@0xA0000000 fixrtc quiet debian-installer/framebuffer=false console=ttyO2,115200n8
bootm 0x80000000 0x81600000

These are u-boot commands that simply load the uImage/uInitrd into RAM, set the command line, and then boot into it.

When porting the installer, it is mostly a task of putting your subarchitecture name in the right places, then adding the necessary logic in places to spit out an image that boots. This provides a sane base to start working on porting other bits of the installer. When d-i is uploaded to Launchpad, these files end up in http://ports.ubuntu.com/ubuntu-ports/dists/oneiric/main/installer-armel/current/images/

My next blog post will go a bit into udebs, and understanding how d-i does architecture detection, and introducing flash-kernel.

Russell Coker: Links June 2011

TED has published a list of resources for suicide prevention and to help survivors and their families [1]. Psychology Today has an interesting article by Paula J. Caplan, Ph.D about the recent US Supreme Court decision denying female employees of Walmart the ability to file a class action lawsuit about their poor pay and working conditions [2]. She describes the problem as a focus on rights of the ruling class vs fairness to the workers, it could also be described as prioritising perceived rights of the rich over the rights of workers to fair treatment. It seems to me that her article has relevance to some of the discussions related to the treatment of women in the Free Software community. New Scientist has an interesting article by Ferris Jabr about the use of MRI to discover brain-wave patterns correlated with Autism in sleeping toddlers [3]. This doesn t seem likely to be useful for scanning the entire population as it currently has a false-positive rate of 7/43 (which would make false-positives outnumber true-positives by about 15:1). But it does seem likely to do some good in identifying young children who might be on the Autism Spectrum. Shea Hembry gave an amusing TED talk about how he created art works for 100 fictional artists for his own exhibition [4]. He created a biography for each artist and every one had a unique style of art. Steve Keil gave a passionate TED talk about the benefits of play for children and for adults [5]. He focussed on the benefits for Bulgaria (where his talk was given) but it all applies to all humans. Frederic Bastiat s 1850 essays on economics are interesting, informatice, and well written [6]. Some of the themes such as the supposed economic benefits of maintaining a large army are the subject of political debate today. Paula J. Caplan, Ph.D wrote an insightful article for Psychology Today about the recent US supreme court decision in regard to the Wal-mart case [7]. Her article seems to have some obvious parallels to the situation in the FOSS community. The idea of rights vs fairness, beliefs that are unconscious or unexamined, and the comparison of attitudes towards racial vs sexual discrimination (in terms of not treating sexual discrimination and harassment seriously) seem to all apply clearly. Al Jazeera reports that the Fukushima disaster is worse than is reported in the mainstream western press [8]. Generally I wouldn t be inclined to trust al Jazeera if other news sources were reliable. But unfortunately reliable news related to contentious issues such as nuclear power is quite rare. It will probably be quite a long time before we can be confident that we know much about Fukushima, everyone who knows seems to be lying.

Raphaël Hertzog: How to start contributing to Debian?

I often get requests of persons who would like to contribute to Debian but who don t know where to start. Let s try to answer this question properly so that I can give out this URL the next time that I am asked. The Debian website has a page explaining how to help Debian. While it provides no less than 10 suggestions in a daunting text-only list, it s difficult to know what to do next once you picked up something that you could do. I will try to fix this by providing concrete information for each cases in upcoming articles but in the mean time I propose you another approach to start with. Before answering your question ( what can I do for Debian ), we need to know some information about you. What motivates you? You re a volunteer, you re not doing stuff for Debian because someone told you so. You must have some intrinsic motivation and the ultimate motivation is usually that you re enjoying what you re doing. So what are you enjoying and/or what are your motivations ? On the opposite, make sure to know what you hate and what you want to stay far away from. Maybe you dislike a programming language so much that you don t want to be involved in a project where you would have to use it, etc. Write down the answers to the questions, you might need them later when you ll ask other Debian contributors how you can help. What are your skills? If you re not interested in learning new skills, then you must obviously select a task where your current skills are sufficient. Again make a list of your skills and in particular of skills that you d like to practice! Here s a non-exhaustive list of skills to consider: How much time can you spend on Debian? This is the last important information that you need to communicate whenever you re asking someone else what you could do for Debian. There s no point giving you a big task if you can only spend 30 minutes every week. On the opposite if you can work on Debian full time during a week (because you re between 2 contracts or because you re in vacation), it s equally important to know. In general contributing to Debian requires time, you should be ready to spend at least several hours per week and possibly more at the start while you re learning everything. Find something to do At this point you have a generic idea of what you d like to do but you re still missing a concrete objective. Let s try to find one, we ll explore several ways to do this. Scratch your itch The best objectives are those that satisfy your own needs. Here are some examples: If you re a good Debian citizen, you have already filed bugs for issues that bugged you. Then you can browse http://bugs.debian.org/from:hertzog@debian.org to find out some ideas of stuff to do (obviously replace hertzog@debian.org by your own email address). Join a team If you don t have a specific itch to scratch, you might want to focus your work on a specific team. Head over to wiki.debian.org/Teams and browse the list of teams. You ll surely find one that works in an area that you like. If you select a packaging team, pick one that works on packages that you re actually using. Some of the teams have instructions for newcomers, follow them when that is the case. Otherwise join the mailing list and the IRC channel, and get a feel of how the team works. See if it suits you, you can follow several teams at the same time and pick the one that you prefer after a few days/weeks. Once you have lurked a bit, if you still don t know how you could help, then just ask on the mailing list. Include all the answers you have collected to the 3 questions on your motivations, your skills and your time available. Focus on a specific package You can concentrate your work on a specific package even if you re in a team, it s often a good idea. But I list it separately because not all packages are team maintained and you might want to help maintain a package where there s a single maintainer currently. I leave it up to you to find a way to select a package that interests you Then head over to the package tracking system: http://packages.qa.debian.org/dpkg (replace dpkg by the name of the package that interests you) Fill in the form in the bottom-left corner with your email and select opts in the drop-down list, then click go . You get a new form where you can select the information that you ll receive, I recommend you to keep everything except upload-binary and to validate the form. From now on, you get the same mails than the maintainer (and a bit more actually), and it s a good idea to inform the maintainer that you subscribed and that you re going to help a bit. Maybe he s willing to grant you commit rights immediately, maybe he will ask you to send patches for a start. The important thing is to create a good relationship. In any case (even if you did not get any answer from the maintainer), you should be free to help triage existing bugs and to help deal with the flow of incoming bugs (including forwarding bugs when appropriate). Help a Debian developer Paul Tagliamonte once blogged Hey, DDs, need help?. He offered his help to overworked Debian developers . His post was missing all the information required (cf motivations/skills/time) but the approach is a good one. The best way to start contributing is to work with existing Debian developers. Even if you just want to be sponsored for your own pet package, you should consider that mentoring is a burden for many Debian developers and that you re more likely to get a sponsor if you have an existing relationship with a Debian developer that you helped. Pick a developer that works in an area that is of interest, and offer him your help. To simplify things even further, I have created a wiki page where you can find out how you can help me and thus build a relationship with me. That s it for now, I hope this article will help you to start contributing. Don t forget to subscribe to my newsletter to not miss future articles for new contributors. Note that you can refer to this article with the following URL: http://raphaelhertzog.com/go/contributing/ (easier to type and remember).

13 comments Liked this article? Click here. My blog is Flattr-enabled.

Robert Collins: dmraid (fakeraid) mirror + striped

While some folk look down on fakeraid (that is BIOS based RAID-until-OS-takes-over) solutions, I think they are pretty neat: they let a user get many of the benefits of dedicated controller cards at a fraction of the cost. The benefits include the usual ones for RAID more spindles to handle IO, tolerance of disk failures. And unlike pure LVM solutions, you can boot from a degraded RAID 1 / 5 / 10 set because the BIOS knows how. In some ways this is better than dedicated cards, because we have the software take over, so we can change the algorithms for IO dispatch all the way down to the individual devices :) However, these RAID volumes are in a pretty awkward spot for installers and bootloaders: inside a running Linux environment they look like software RAID which cannot be depended on for booting, but at boot time they look like hard disks which cannot be looked under the hood. I recently got a new desktop machine which has one of these motherboards, and fortuitously my old desktop I was replacing had the same size disks so I had 4 disks and the option of using a RAID setup. Apparently I m a sucker for punishment because I went for a RAID 10 (that is two RAID volumes made up of two-disk mirrors (the RAID 1 component), and then those two volumes are combined via striping (the RAID 0 component). This has the potential for pretty nice performance: in principle any read can come from one of 2 disks, and every 64KB (the stripe size) of linear data will switch to the other mirror set, giving a nice boost. Writes need to write to 2 disks always, but every 64KB worth of data will alternate mirror sets, also giving a boost. Sadly we (Ubuntu) aren t ready for this yet: there are two key bugs that make this layout almost impossible to install into. This blog post is for my exo-memory, I want to be able to figure out what I did next time around :) . Firstly parted_devices, a helper used by Ubiquity and debian-installer to determine which block devices are actually disk drives that one can partition and install onto, has a confused heuristic when dealing with dmraid it looks for devices which are not layered on other dmraid devices. This handily excludes partitions, but has the undesirable effect of excluding that striped device because it is layered on the two mirrored devices. Bug 560748 was filed about that, and I ve added a workaround to it basically disabling the filtering, so its not suitable as a long term fix, but it will let one select the RAID volume correctly. Secondly, grub2, which needs to figure out what the name at boot time of the RAID volume will be currently gets confused. I don t know enough to really explain and be correct in my explanation but I do have a fugly patch which worked for me. Bug 803658 tracks this defect. The basic approach I took was to say that dmraid devices should be an abstraction layer we don t peek under: if it claims to be a disk, well then its a disk. As grub does actually work that way - it talks to INT 13h the BIOS support for booting off of the RAID volume is entirely sufficient. Sadly neither bug is at the point where the patches can be rolled into Ubuntu itself, but the workaround should let folk get up and running. In both cases, build the package locally in the installer, install it, then after than run ubiquity and things should install. After the install, you will need to reapply the patch in the resulting installed environment, or things like update-grub will die on you! (huge thanks to cjwatson and ev for giving me some tips while I investigated this)

29 June 2011

Christoph Egger: Debconf11

debconf banner I'm coming as well! Really looking forward to meet the people from Debconf9 again. Also people from the Games Team and the buildd and kfreebsd folks. And ideally there will be some more people interested in (Common) Lisp as well, we'll see

Wouter Verhelst: NBD support in debian-installer

... is now working. It isn't finished yet; there are still some loose ends. But at least it works; if you combine this kernel with this debian-installer image, you'll be able to install to an NBD target. Known bugs: Other than that, it should work fine; testing is welcome (but note standard development code caveats apply).

Jonas Smedegaard: The year of the FreedomBox

I am involved in developing something coined as the FreedomBox. Explaining it to my mum the other day, she wisely asks if it, albeit clearly an exciting challenge we've picked, really is doable? Surely the World has gone sour, but is such radical change even possible? Annoying question! And clever :-) For some years, tech media has tried predict when Linux have reached momentum for ordinary users. That current or next year was to become the Year of the Linux Desktop. Funny thing, seen in restrospect, is how "the year" kept being postponed, and when finally OLPC paved the way for the boom of Netbooks and arguably we got there, the World had moved on: Now Free Sofware is as common and as usable on desktops as commercially driven systems. It is taken for granted, not praised, and we look forward for the Next Big Challenge (as geeks) or Next Big Excitement (as users). Perhaps a similar fate is to be expected for FreedomBox: Initially when sparking our interest, and repeatedly since although we still today have nothing concrete to show - indeed even before we started hacking on it or knew the name of our dreams - our Prophet declared the Year of the FreedomBox. Not explicitly, but the cleverly phrased "right now." I am excited and proud to be working on FreedomBox, and foolishly hope it will be ready for worldwide consumption in a very recent "right now" - well aware that most likely it won't happen like that. Thing is, I don't really care how it happens, if only something does. This is due to the way we work: Hacking may appear from outside as larger projects, but really is juggling piles of small pieces for an eternal jigsaw puzzle, with each piece usable in multiple ways and across projects. I do not work only on FreedomBox, just as I did not work only on Sugar before that, or only with Debian as my platform: I work on Freedom-enabling technologies and ways to frame them for the Real World to use them with a vengeance. I sure hope you take the results for granted. That's true success!

Vincent Bernat: Alternate Android firmware on Samsung Galaxy S

I have bought a Samsung Galaxy S Android phone some time ago. One of the first thing that you try to do with such a phone is to switch to some alternate firmware (the coined term is ROM ), like CyanogenMod. Flashing a firmware is a whole new universe. You are told about a lot of proprietary tools, you need to download a lot of things from MegaUpload and friends and nobody really explains what s going on under the hood. I was a bit lost at first. I will not provide a step-by-step guide since I cannot afford to stay up-to-date. Such a guide is usually posted on some forum. It assumes you are running Windows and provides appropriate download links. You must follow it (and check that it is recent enough). I will just provide you some background to understand those guides.

Android firmwares There are several Android firmwares. Most of them are specific to a given phone (or its close variations). They can be sorted in three categories:
  1. Official firmwares from the phone manufacturer include a kernel with appropriate drivers and, usually, a customized interface (HTC Sense for HTC, TouchWiz for Samsung). Some manufacturers will lag a lot behind Android schedule and you may not get all the new shiny features.
  2. Modified firmwares are built from the official firmwares. They usually add a lot of hacks on top of the original firmware, remove some cruft but are still closely related to the official firmware.
  3. Firmwares built from Android Open Source Project (the open source version of Android) do not share nothing with the official firmware except some bits related to the kernel (drivers, hacks).

Darky ROM Darky ROM is a modified firmware. It takes the original firmware from Samsung, adds a custom kernel (based on the source of the official kernel), adds a lot of hacks, some additional applications and removes some unwanted cruft. This is a very nice firmware which is quite snappy. This is a drop-in replacement for the default firmware: you will only get improvements. The latest version is 10.1 and there is a neat guide on how to install it.

CyanogenMod CyanogenMod is a firmware built from AOSP. It supports several devices and provide an unified firmware on all of them. Support for the Samsung Galaxy S is recent and is not present in the stable build. However, some RC build is now available. Be sure to read the FAQ (most notably the part saying that you need to install from Froyo 2.2 because the bootloader provided by Samsung with Gingerbread 2.3 is not compatible). You can also grab some information from the wiki. The major drawback of using this firmware instead of going for a modified firmware like Darky ROM is that the battery life may suck. I now need to charge my phone every day instead of once every two days. On the plus side, you get a very clean firmware with a lot of features and almost no cruft. For example, the notification bar can be customized and OpenVPN is available out of the box. Moreover, almost everything is open source (if you don t install Google apps). You can see this firmware as an open source distribution for your phone. There is no need to download random files linked from a random forum to make it work. There is no package manager, though. Despite the bad battery life, I prefer this firmware.

Prerequisites Before trying to flash a new firmware, there are some tools that you need to have. Note that you don t need root access to flash a new firmware.

Download & recovery mode Before trying to install any firmware, you must check that your phone can access download and recovery modes. The download mode allows to flash any new firmware, even if the current firmware does not boot at all. As long as this mode is available, there is very little chance that you brick your phone. To access those modes, you need to use the three-button combo . Here are the steps (your phone should not be plugged):
  1. Power off the phone (wait for the phone to vibrate).
  2. Hold the Volume down button for download mode. Hold the Volume up button for recovery mode.
  3. Hold the Home button.
  4. Hold the Power button. The phone will start.
  5. Once you have the Samsung logo displayed on the screen, release the Power button.
  6. Only release the two other buttons when you enter the recovery mode or download mode. The recovery mode displays a menu. The download mode displays a big yellow Android logo.
If after ten tries, you are unable to access those modes, maybe they have been disabled. Keep reading, there is a solution.

Heimdall Heimdall is a tool to flash a new firmware to your phone. This is not a mandatory tool but you will have to use it if something goes wrong. Most guides will tell you to use Odin. It is a leaked Samsung tool running on Windows only. You can use Heimdall instead.
$ git clone https://github.com/Benjamin-Dobell/Heimdall.git
Cloning into Heimdall...
remote: Counting objects: 423, done.
remote: Compressing objects: 100% (271/271), done.
remote: Total 423 (delta 220), reused 332 (delta 138)
Receiving objects: 100% (423/423), 5.91 MiB   962 KiB/s, done.
Resolving deltas: 100% (220/220), done.
$ cd Heimdall/heimdall
$ sudo apt-get install libusb-1.0-0-dev
$ ./configure && make
[...]
$ sudo cp 60-heimdall-galaxy-s.rules /etc/udev/rules.d
$ sudo /etc/init.d/udev reload
You need to use this tool while in download mode. You can test it, while in download mode, with:
$ ./heimdall print-pit
This will display the partition table of your phone. This is enlightening to know what it contains:
  • IBL+PBL is the boot loader, be extra careful with it;
  • PIT is the partition table;
  • EFS contains some important data like IEMEI, be extra careful with it;
  • SBL is the second boot loader;
  • SBL2 is the backup of the second boot loader;
  • PARAM contains some images used as various stage of the boot process;
  • KERNEL is the kernel;
  • RECOVERY is the backup of the kernel;
  • FACTORYFS contains /system file system which is some kind of root file system;
  • DBDATA contains /data file system which is the database to store application parameters;
  • CACHE contains /cache file system which contains the Dalvik cache;
  • MODEM contains the firmware for the modem.
As we will see, Heimdall is able to flash any of those partitions with flash subcommand.

adb adb stands for Android Debug Bridge. Among other things, this tool allow you to drive your phone through the USB connection. You can get a shell, reboot into download or recovery mode, push files to your Android device, etc. To get this tool, you need to download the full Android SDK.
$ tar zxvf ~/download/android-sdk_r11-linux_x86.tgz
$ cd android-sdk-linux_x86
$ tools/android update sdk
[select Android SDK Platform-tools]
$ platform-tools/adb shell
# uname -a
Linux localhost 2.6.35.7-I9000XWJVH-CL184813 #Dark_Core_2.4 PREEMPT Mon May 16 15:02:38 EEST 2011 armv7l GNU/Linux
The important commands are:
  • shell to get a shell on the device;
  • reboot recovery to reboot in recovery mode;
  • reboot download to reboot in download mode;
  • push to put a file on the phone;
  • pull to retrieve a file;
  • install to install an application from its APK;
  • logcat to see the logs and what happens, very useful!

Restore download mode If your phone is missing download mode, you can recover it with the help of adb and heimdall. You need to grab some official firmware and extract boot.bin and Sbl.bin from it.
$ adb reboot download
$ heimdall flash --primary-boot ~/download/boot.bin --secondary-boot ~/download/Sbl.bin
Be extra careful here. You may brick your phone. Double check that you grab the correct files and that they are really for your phone (there exists some variants). It worked for me.

Installing a new firmware While you can switch from one firmware to another without losing your data, it is better to wipe your system and your data before switching firmware. This means that you will lose all your applications and the data inside them (list of contacts, SMS, preferences). However, nothing will ever modify your data in the internal SD card or in the external SD card (which are both inside the phone). They usually contains your music and your photos. There are two ways to install a firmware:
  1. via Heimdall, or
  2. using the recovery.

Heimdall When a guide tells you to use Odin, you can use Heimdall instead. Odin takes a TAR file. You should untar it and uses its content with Heimdall. For example:
$ ./heimdall flash --repartition --pit s1_odin_20100512.pit \
>                  --factoryfs factoryfs.rfs \
>                  --cache cache.rfs --dbdata dbdata.rfs \
>                  --param param.lfs --modem modem.bin \
>                  --kernel zImage --secondary-boot Sbl.bin 
Claiming interface again...   Success
Setting up interface...   Success
Beginning session...
Handshaking with Loke...   Success
Uploading PIT
PIT upload successful
Uploading SBL
100%
SBL upload successful
Uploading KERNEL
100%
KERNEL upload successful
Uploading MODEM
100%
MODEM upload successful
Uploading PARAM
100%
PARAM upload successful
Uploading FACTORYFS
100%
FACTORYFS upload successful
Uploading DBDATAFS
100%
DBDATAFS upload successful
Uploading CACHE
100%
CACHE upload successful
Ending session...
Rebooting device...
You may be interested to update your modem using Heimdall. This is usually independent of the firmware you want to use. Also, no need to provide a PIT file if you don t want to repartition. Heimdall can read the current one and flash only one of the partitions.

Recovery mode The base recovery shipped with the Samsung Galaxy S does not have a lot of options. Moreover, it may be locked and will accept to install only signed firmwares. Most firmwares come with ClockWorkMod, a more advanced recovery. Once you get it, you will be able to use any ZIP file to install a new firmware. My advice is to try to get ClockWorkMod as soon as possible. If you are root, you can install ROM Manager that will install it for you. If you are not root, most custom firmwares will provide ClockWorkMod. Therefore, you can just install a custom firmware with Heimdall. There exists special firmwares just for this, like EZbase. If you want to install CyanogenMod, be sure to download a Froyo firmware, not a Gingerbread one. Keep in mind that the recovery is located inside the kernel. It is not self-contained in the bootloader (unlike download mode). If you don t want to flash a whole firmware (and lose everything on your phone) just to get the recovery, you can just flash the kernel. The ClockWorkMod recovery comes with an utility to backup your whole phone. This way, you can easily restore your previous firmware if you don t like the current one. This is what is called a Nandroid backup.

Lagfix A lot of guides will tell you to enable or disable lagfix. Samsung shipped the Galaxy S with some crappy filesystem called RFS (which is some kind of enhanced FAT). It is slow and seems responsible for some lags that may happen on the interface. A lagfix is a way to replace this filesystem by something better, like EXT4 or YAFFS2. The process is pretty straighforward and consist to backup all the partition to the SD card, reformat it with another filesystem and restore the backup. The lagfix may be applied automatically with some firmware (like CyanogenMod) or you may request it in the recovery mode (most modified firmwares work this way). In this case, it will be applied automatically on the next boot. You should disable it before installing another firmware with the recovery mode (no need if you install it with Heimdall).

Applications You can find many free (as in free speech) applications for Android. Unfortunately, Android Market does not allow to use this criteria as a filter. F-Droid is an alternate market featuring only FOSS applications. Here is a short selection of free applications:
  • ADW.Launcher is a home replacement app. It is very configurable and themable.
  • K-9 Mail is a very nice email client.
  • Xabber is a XMPP/Jabber client.
  • ConnectBot is an SSH client (as well as a terminal).
  • DroidWall is an application firewall (using Netfilter). It lets you select which application can access to Internet depending on your connection (wifi or 3G).
  • Barcode Scanner decodes 1D/2D barcode including QR codes.
  • OsmAnd is a replacement for Google Maps using OpenStreetMap. The free version on Android Market is out-dated. Buy the plus version or download it throught F-Droid.
Another must-have application is Titanium Backup which allows to backup any application with data. Unfortunately, this is not a free (as in free speech) application.

Vincent Bernat: Alternate Android firmware on Samsung Galaxy S

I have bought a Samsung Galaxy S Android phone some time ago. One of the first thing that you try to do with such a phone is to switch to some alternate firmware (the coined term is ROM ), like CyanogenMod. Flashing a firmware is a whole new universe. You are told about a lot of proprietary tools, you need to download a lot of things from MegaUpload and friends and nobody really explains what s going on under the hood. I was a bit lost at first. I will not provide a step-by-step guide since I cannot afford to stay up-to-date. Such a guide is usually posted on some forum. It assumes you are running Windows and provides appropriate download links. You must follow it (and check that it is recent enough). I will just provide you some background to understand those guides.

Android firmwares There are several Android firmwares. Most of them are specific to a given phone (or its close variations). They can be sorted in three categories:
  1. Official firmwares from the phone manufacturer include a kernel with appropriate drivers and, usually, a customized interface (HTC Sense for HTC, TouchWiz for Samsung). Some manufacturers will lag a lot behind Android schedule and you may not get all the new shiny features.
  2. Modified firmwares are built from the official firmwares. They usually add a lot of hacks on top of the original firmware, remove some cruft but are still closely related to the official firmware.
  3. Firmwares built from Android Open Source Project (the open source version of Android) do not share nothing with the official firmware except some bits related to the kernel (drivers, hacks).

Darky ROM Darky ROM is a modified firmware. It takes the original firmware from Samsung, adds a custom kernel (based on the source of the official kernel), adds a lot of hacks, some additional applications and removes some unwanted cruft. This is a very nice firmware which is quite snappy. This is a drop-in replacement for the default firmware: you will only get improvements. The latest version is 10.1 and there is a neat guide on how to install it.

CyanogenMod CyanogenMod is a firmware built from AOSP. It supports several devices and provide an unified firmware on all of them. Support for the Samsung Galaxy S is recent and is not present in the stable build. However, some RC build is now available. Be sure to read the FAQ (most notably the part saying that you need to install from Froyo 2.2 because the bootloader provided by Samsung with Gingerbread 2.3 is not compatible). You can also grab some information from the wiki. The major drawback of using this firmware instead of going for a modified firmware like Darky ROM is that the battery life may suck. I now need to charge my phone every day instead of once every two days. On the plus side, you get a very clean firmware with a lot of features and almost no cruft. For example, the notification bar can be customized and OpenVPN is available out of the box. Moreover, almost everything is open source (if you don t install Google apps). You can see this firmware as an open source distribution for your phone. There is no need to download random files linked from a random forum to make it work. There is no package manager, though. Despite the bad battery life, I prefer this firmware.

Prerequisites Before trying to flash a new firmware, there are some tools that you need to have. Note that you don t need root access to flash a new firmware.

Download & recovery mode Before trying to install any firmware, you must check that your phone can access download and recovery modes. The download mode allows to flash any new firmware, even if the current firmware does not boot at all. As long as this mode is available, there is very little chance that you brick your phone. To access those modes, you need to use the three-button combo . Here are the steps (your phone should not be plugged):
  1. Power off the phone (wait for the phone to vibrate).
  2. Hold the Volume down button for download mode. Hold the Volume up button for recovery mode.
  3. Hold the Home button.
  4. Hold the Power button. The phone will start.
  5. Once you have the Samsung logo displayed on the screen, release the Power button.
  6. Only release the two other buttons when you enter the recovery mode or download mode. The recovery mode displays a menu. The download mode displays a big yellow Android logo.
If after ten tries, you are unable to access those modes, maybe they have been disabled. Keep reading, there is a solution.

Heimdall Heimdall is a tool to flash a new firmware to your phone. This is not a mandatory tool but you will have to use it if something goes wrong. Most guides will tell you to use Odin. It is a leaked Samsung tool running on Windows only. You can use Heimdall instead.
$ git clone https://github.com/Benjamin-Dobell/Heimdall.git
Cloning into Heimdall...
remote: Counting objects: 423, done.
remote: Compressing objects: 100% (271/271), done.
remote: Total 423 (delta 220), reused 332 (delta 138)
Receiving objects: 100% (423/423), 5.91 MiB   962 KiB/s, done.
Resolving deltas: 100% (220/220), done.
$ cd Heimdall/heimdall
$ sudo apt-get install libusb-1.0-0-dev
$ ./configure && make
[...]
$ sudo cp 60-heimdall-galaxy-s.rules /etc/udev/rules.d
$ sudo /etc/init.d/udev reload
You need to use this tool while in download mode. You can test it, while in download mode, with:
$ ./heimdall print-pit
This will display the partition table of your phone. This is enlightening to know what it contains:
  • IBL+PBL is the boot loader, be extra careful with it;
  • PIT is the partition table;
  • EFS contains some important data like IEMEI, be extra careful with it;
  • SBL is the second boot loader;
  • SBL2 is the backup of the second boot loader;
  • PARAM contains some images used as various stage of the boot process;
  • KERNEL is the kernel;
  • RECOVERY is the backup of the kernel;
  • FACTORYFS contains /system file system which is some kind of root file system;
  • DBDATA contains /data file system which is the database to store application parameters;
  • CACHE contains /cache file system which contains the Dalvik cache;
  • MODEM contains the firmware for the modem.
As we will see, Heimdall is able to flash any of those partitions with flash subcommand.

adb adb stands for Android Debug Bridge. Among other things, this tool allow you to drive your phone through the USB connection. You can get a shell, reboot into download or recovery mode, push files to your Android device, etc. To get this tool, you need to download the full Android SDK.
$ tar zxvf ~/download/android-sdk_r11-linux_x86.tgz
$ cd android-sdk-linux_x86
$ tools/android update sdk
[select Android SDK Platform-tools]
$ platform-tools/adb shell
# uname -a
Linux localhost 2.6.35.7-I9000XWJVH-CL184813 #Dark_Core_2.4 PREEMPT Mon May 16 15:02:38 EEST 2011 armv7l GNU/Linux
The important commands are:
  • shell to get a shell on the device;
  • reboot recovery to reboot in recovery mode;
  • reboot download to reboot in download mode;
  • push to put a file on the phone;
  • pull to retrieve a file;
  • install to install an application from its APK;
  • logcat to see the logs and what happens, very useful!

Restore download mode If your phone is missing download mode, you can recover it with the help of adb and heimdall. You need to grab some official firmware and extract boot.bin and Sbl.bin from it.
$ adb reboot download
$ heimdall flash --primary-boot ~/download/boot.bin --secondary-boot ~/download/Sbl.bin
Be extra careful here. You may brick your phone. Double check that you grab the correct files and that they are really for your phone (there exists some variants). It worked for me.

Installing a new firmware While you can switch from one firmware to another without losing your data, it is better to wipe your system and your data before switching firmware. This means that you will lose all your applications and the data inside them (list of contacts, SMS, preferences). However, nothing will ever modify your data in the internal SD card or in the external SD card (which are both inside the phone). They usually contains your music and your photos. There are two ways to install a firmware:
  1. via Heimdall, or
  2. using the recovery.

Heimdall When a guide tells you to use Odin, you can use Heimdall instead. Odin takes a TAR file. You should untar it and uses its content with Heimdall. For example:
$ ./heimdall flash --repartition --pit s1_odin_20100512.pit \
>                  --factoryfs factoryfs.rfs \
>                  --cache cache.rfs --dbdata dbdata.rfs \
>                  --param param.lfs --modem modem.bin \
>                  --kernel zImage --secondary-boot Sbl.bin 
Claiming interface again...   Success
Setting up interface...   Success
Beginning session...
Handshaking with Loke...   Success
Uploading PIT
PIT upload successful
Uploading SBL
100%
SBL upload successful
Uploading KERNEL
100%
KERNEL upload successful
Uploading MODEM
100%
MODEM upload successful
Uploading PARAM
100%
PARAM upload successful
Uploading FACTORYFS
100%
FACTORYFS upload successful
Uploading DBDATAFS
100%
DBDATAFS upload successful
Uploading CACHE
100%
CACHE upload successful
Ending session...
Rebooting device...
You may be interested to update your modem using Heimdall. This is usually independent of the firmware you want to use. Also, no need to provide a PIT file if you don t want to repartition. Heimdall can read the current one and flash only one of the partitions.

Recovery mode The base recovery shipped with the Samsung Galaxy S does not have a lot of options. Moreover, it may be locked and will accept to install only signed firmwares. Most firmwares come with ClockWorkMod, a more advanced recovery. Once you get it, you will be able to use any ZIP file to install a new firmware. My advice is to try to get ClockWorkMod as soon as possible. If you are root, you can install ROM Manager that will install it for you. If you are not root, most custom firmwares will provide ClockWorkMod. Therefore, you can just install a custom firmware with Heimdall. There exists special firmwares just for this, like EZbase. If you want to install CyanogenMod, be sure to download a Froyo firmware, not a Gingerbread one. Keep in mind that the recovery is located inside the kernel. It is not self-contained in the bootloader (unlike download mode). If you don t want to flash a whole firmware (and lose everything on your phone) just to get the recovery, you can just flash the kernel. The ClockWorkMod recovery comes with an utility to backup your whole phone. This way, you can easily restore your previous firmware if you don t like the current one. This is what is called a Nandroid backup.

Lagfix A lot of guides will tell you to enable or disable lagfix. Samsung shipped the Galaxy S with some crappy filesystem called RFS (which is some kind of enhanced FAT). It is slow and seems responsible for some lags that may happen on the interface. A lagfix is a way to replace this filesystem by something better, like EXT4 or YAFFS2. The process is pretty straighforward and consist to backup all the partition to the SD card, reformat it with another filesystem and restore the backup. The lagfix may be applied automatically with some firmware (like CyanogenMod) or you may request it in the recovery mode (most modified firmwares work this way). In this case, it will be applied automatically on the next boot. You should disable it before installing another firmware with the recovery mode (no need if you install it with Heimdall).

Applications You can find many free (as in free speech) applications for Android. Unfortunately, Android Market does not allow to use this criteria as a filter. F-Droid is an alternate market featuring only FOSS applications. Here is a short selection of free applications:
  • ADW.Launcher is a home replacement app. It is very configurable and themable.
  • K-9 Mail is a very nice email client.
  • Xabber is a XMPP/Jabber client.
  • ConnectBot is an SSH client (as well as a terminal).
  • DroidWall is an application firewall (using Netfilter). It lets you select which application can access to Internet depending on your connection (wifi or 3G).
  • Barcode Scanner decodes 1D/2D barcode including QR codes.
  • OsmAnd is a replacement for Google Maps using OpenStreetMap. The free version on Android Market is out-dated. Buy the plus version or download it throught F-Droid.
Another must-have application is Titanium Backup which allows to backup any application with data. Unfortunately, this is not a free (as in free speech) application.

Russell Coker: Pool Parties

Periodically Free Software people from other countries visit Melbourne on business trips. Usually when someone is sent any distance on a business trip (IE to Australia from anywhere other than NZ) they will stay in a good hotel (4 star or better), this generally means that they have a pool in their hotel. 5 star hotels and the newer serviced apartment hotels tend to have really good pools (1/4 olympic size isn t uncommon). Hotel pools are very under-utilised, their main purpose AFAIK is to boost the hotel star rating my experience is that it s not common to meet other people in a hotel pool. While food and drinks are often banned in the pool area my observation is that the only rule which matters is no glass . So hotel pools are almost ideal for pool parties, you just need to drink from cans or from drinks in plastic bottles that are poured into plastic cups. If any Free Software person finds themself staying in a hotel in Melbourne Australia with not much to do in the evenings or weekends then one option is to call for a pool party. I ve asked on a local mailing list and it seems that there is enough interest for a small party, the local mailing lists can be used to arrange a party. Also one thing to note is that some hotels have outdoor pools, while Australia is generally a warm place the southern parts of Australia (such as Melbourne) get quite cold in winter, an outdoor pool is not going to be fun for the colder half of the year. So getting a hotel with an indoor pool is very important during the April-September period.

Lars Wirzenius: A tiny step towards TDDD and FreedomBox-NAS

I've taken a tiny step towards getting together a prototype toolset for developing an initial development iteration of the NAS functionality of the FreedomBox. Here's what I am trying to do: In essence, this means I want to specify the functionality of the system I am building using automated tests. As soon as those tests pass, I will write more tests, and make them pass. When I can't think of new relevant tests, I know I'm done. I'm building a simple tool, systest, that will execute the tests. It is built on top of Python's unittest library, because that makes my implementation simple. I've now developed systest far enough that I can almost automatically do this: (The command line would be something like this: ./build-fbxnas && virsh start fbxnas && sleep 30 && ~/systest/systest --target=192.168.122.89 --user=tomjon ~/systest/tests-debian-base-install.py --user-ssh-private-key=tomjon.secret
--log=foo.log --user-password=password1
where build-fbxnas is a wrapper script around vmdebootstrap. But I didn't actually run that command, and it's lacking the virt-install command to actually set up the virtual machine the first time.) systest contains very little code, but to get that far, I had to shave some yaks, and that made writing it rather an unpleasant experience. The tests so far really simple, and don't test NAS stuff at all, just that the basic Debian install works: only the ssh port is open, and basic networking and such things work. However, now that I've gotten this much to work, I can start writing NAS tests. (smbclient may be my next yak. This would be a lot easier if I had ever used Samba for anything real...) systest and vmdebootstrap are on Gitorious. No .debs yet, this stuff is much too raw, but you can run them from the checkouts, no install necessary. PS. If anyone knows how to query KVM or libvirt for the IP address assigned by their internal DHCP server to the virtual machine guest, automatically, without asking the actual virtual machine, please tell.

Mehdi Dogguy: I m going to DebConf 2011

I m really happy to be able to attend DebConf11. It will be my third DebConf. I hope it will be as productive and enjoyable as past editions :) I ll arrive on July 20th and stay until the end of DebConf. See you all there soon!

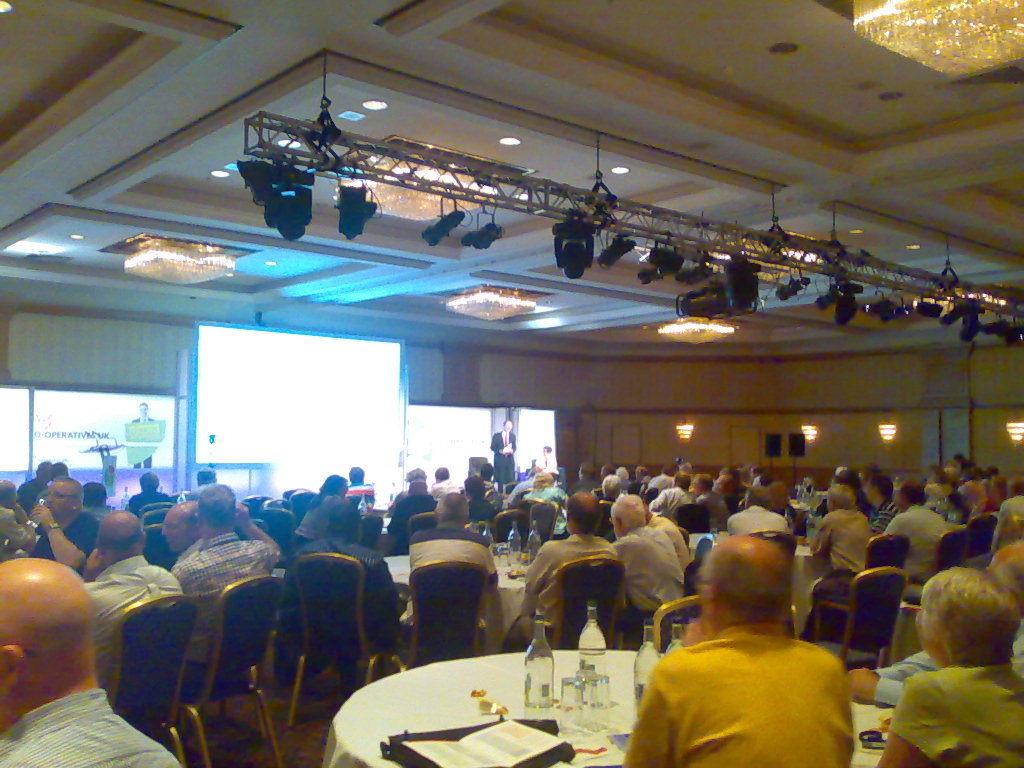
MJ Ray: Co-operatives Fortnight and Congress 2011 (#coops14 and #cc11)

It s Co-operatives Fortnight until 9 July and our co-op is supporting many events: As you may know, we ve already done two events: First, last Friday, Michael attended the Co-operatives UK Annual Meeting on our behalf. Co-operatives UK is our national co-ordinating co-op and the figurehead for the movement in this country. I didn t see the meeting (the live video link didn t work for me, as before), but Michael reports:
The AGM seemed well organized; it was good to hear about the work they re doing and the concerns regarding the co-operative situation in Poland. I think it s important to exercise one s ability to vote, but would have liked more opportunity to speak with people.
We couldn t send anyone to the Mary Portas session on Friday evening, but Paul Dale Smith summarised the session and RuthRosselson described it as Mary Portas tells Co-op Congress how it is . Then on Saturday, I was in Manchester for The Power of Co-operation, thanks to support from software.coop and The Co-operative Bank. The first session I attended, on mutualisting the Post Office was interesting and pretty full, but I found some later sessions rather frustrating. As well as my usual concerns about surrendering to uncritical use of private-sector software, I got quite annoyed by two sessions on member engagement where the presenters seemed to talk for almost the full time without letting the audience engage! Not good for my blood pressure, that, especially when I feel they re missing something! But the real value of the day was in the fascinating discussions I had with many people in the short breaks in the plenary, or while wandering around the exhibition and the marketplace. For example, it was great to see Revolver still selling the T-shirts I mentioned here in 2009 as well as giving out free samples of their brilliant fairtrade coffee. What comes from the various discussions will probably decide whether we attend similar events in future. Were you in Birmingham? How was it for you? Are you supporting Co-operatives Fortnight? How, where, when and why?

Dominique Dumont: New configuration editor for LCDPROC

Hello The last version (1.247, available in Debian unstable as libconfig-model-perl) of Config::Model provides a brand new model for /etc/LCDd.conf. With this model, you can edit or validate your lcdproc configuration. To edit this configuration the first time, you will have to run:
config-edit -application lcdproc -force
The -force option is required to load the file the first time. (because the default LCDd.conf file contains configuration options for all drivers, even though only one them if usefull). You will get this screen:
lcdproc configuration editor

config-edit on lcdproc configuration

In this screen, you can setup the driver for your adress with a right click on Driver parameter. Once youv e selected the driver and clicked on store , the driver will be listed in the left part of the window so you can tune the parameters of this specific driver:

editing imonclcd paramaters

In this screen, I ve turned the backlight off and added a small note to remember why. This small note will be writted in a comment in /etc/LCDd.conf. Once all required modifications are done, it s time to save the configuration file using the menu entry File -> save Now, let s see the resulting file (which is a bit long due to the amount of comments in the original LCDd.conf file):
## This file was written by Config::Model
## You may modify the content of this file. Configuration
## modifications will be preserved. Modifications in
## comments may be mangled.
# LCDd.conf -- configuration file for the LCDproc server daemon LCDd
#
# This file contains the configuration for the LCDd server.
#
# The format is ini-file-like. It is divided into sections that start at
# markers that look like [section]. Comments are all line-based comments,
# and are lines that start with '
#
# The server has a 'central' section named [server]. For the menu there is
# a section called [menu]. Further each driver has a section which
# defines how the driver acts.
#
# The drivers are activated by specifiying them in a driver= line in the
# server section, like:
#
#   Driver=curses
#
# This tells LCDd to use the curses driver.
# The first driver that is loaded and is capable of output defines the
# size of the display. The default driver to use is curses.
# If the driver is specified using the -d  command line option,
# the Driver= options in the config file are ignored.
#
# The drivers read their own options from the respective sections.
[server]
# Where can we find the driver modules ?
# IMPORTANT: Make sure to change this setting to reflect your
#            specific setup! Otherwise LCDd won't be able to find
#            the driver modules and will thus not be able to
#            function properly.
# NOTE: Always place a slash as last character !
DriverPath=/usr/lib/lcdproc/
# Tells the server to load the given drivers. Multiple lines can be given.
# The name of the driver is case sensitive and determines the section
# where to look for further configuration options of the specific driver
# as well as the name of the dynamic driver module to load at runtime.
# The latter one can be changed by giving af File= directive in the
# driver specific section.
#
# The following drivers are supported:
#   bayrad, CFontz, CFontz633, CFontzPacket, curses, CwLnx, ea65,
#   EyeboxOne, g15, glcdlib, glk, hd44780, icp_a106, imon, imonlcd,
#   IOWarrior, irman, joy, lb216, lcdm001, lcterm, lirc, lis, MD8800,
#   mdm166a, ms6931, mtc_s16209x, MtxOrb, mx5000, NoritakeVFD, picolcd,
#   pyramid, sed1330, sed1520, serialPOS, serialVFD, shuttleVFD, sli,
#   stv5730, svga, t6963, text, tyan, ula200, xosd
Driver=imonlcd
# Tells the driver to bind to the given interface
Bind=127.0.0.1
# Listen on this specified port; defaults to 13666.
Port=13666
ReportLevel=3
# Sets the reporting level; defaults to 2 (warnings and errors only).
# ReportLevel=3
# Should we report to syslog instead of stderr ? [default: no; legal: yes, no]
# ReportToSyslog=yes
# User to run as.  LCDd will drop its root priviledges, if any,
# and run as this user instead.
User=nobody
Foreground=no
Hello=    Hello
Hello=    LCDproc!
GoodBye=    GoodBye
GoodBye=    LCDproc!
# The server will stay in the foreground if set to true.
# Foreground=no
# Hello message: each entry represents a display line; default: builtin
# Hello="  Welcome to"
# Hello="   LCDproc!"
# GoodBye message: each entry represents a display line; default: builtin
# GoodBye="Thanks for using"
# GoodBye="   LCDproc!"
# Sets the default time in seconds to displays a screen.
WaitTime=5
# If yes, the the serverscreen will be rotated as a usual info screen. If no,
# it will be a background screen, only visible when no other screens are
# active. The special value 'blank' is similar to no, but only a blank screen
# is displayed. [default: on; legal: on, off, blank]
# ServerScreen=no
# Set master backlight setting. If set to 'open' a client may control the
# backlight for its own screens (only). [default: open; legal: off, open, on]
# Backlight=open
# Set master heartbeat setting. If set to 'open' a client may control the
# heartbeat for its own screens (only). [default: open; legal: off, open, on]
# Heartbeat=open
# set title scrolling speed [default: 10; legal: 0-10]
# TitleSpeed=10
# The "...Key=" lines define what the server does with keypresses that
# don't go to any client.
# These are the defaults:
ToggleRotateKey=Enter
PrevScreenKey=Left
NextScreenKey=Right
ScrollUpKey=Up
ScrollDownKey=Down
# ScrollUpKey=Up
# ScrollDownKey=Down
# If you have only 4 keys, you can choose to use this:
# ToggleRotateKey=Enter
# PrevScreenKey=Up
# NextScreenKey=Down
# If you have only 3 keys, you can choose to use this:
# ToggleRotateKey=Enter
# PrevScreenKey=Up
[menu]
# You can configure what keys the menu should use. Note that the MenuKey
# will be reserved exclusively, the others work in shared mode.
# The following works excellent with 4 keys or more.
MenuKey=Escape
EnterKey=Enter
UpKey=Up
DownKey=Down
LeftKey=Left
RightKey=Right
[imonlcd]
Protocol=0
OnExit=2
Device=/dev/lcd0
# My fishes dont like the glow
Backlight=off
DiscMode=0
You will notice a few things: If you need to update the file, you will have to run:
sudo config-edit -application lcdproc
The -force option is no longer needed. If you don t like to click, you can run:
config-edit -application lcdproc -ui none -save
For instance:
config-edit -application lcdproc -ui none -save 'server driver=imonlcd - imonlcd Device="/dev/lcd1" '
Further reading If you want to know more about lcdproc model, you can view: Under the hood I was too lazy to write myself the models of all drivers (about 3500 lines for them all). All models were generated from the LCDd.conf template file provided by lcdproc project. This blog explains how this was done. But the result is far from perfect. Event though LCDd.conf comments give a lot of semantic information, parameter types could be better adjusted and some of the examples provided in LCDd.conf confuse the model generator.
So the current comments are good, but not enough. In the future, we could decide on better structural conventions for the comments that would give users the information they need and give a model generator enough information to generate better models. This will hopefully be the topic of yet another blog All the best

Charles Plessy: BioPerl and regression tests

Two weeks ago, I updated the packages containing the BioPerl modules bioperl and bioperl-run, which allowed to resume the work done on GBrowse, one of the genome browsers available in Debian. As many Perl modules, BioPerl has extensive regression tests. Some of them need access to external services, and are disabled by default as the Internet is not available in our build farm. Nevertheless, they can be triggered through the environment variable DEB_MAINTAINER_MODE when building the package locally. Bioperl successfully passes all off-line tests, and a part of the on-line tests is already corrected its development branch. In contrary, BioPerl-Run fail the tests for Bowtie, DBA, EMBOSS, Genewise, Hmmer, PAML, SABlastPlus, T-Coffee and gmap-run. In some cases, like EMBOSS, it is because a command has been renamed in Debian. In other cases, in particular DBA et Genewise, it is much more difficult to figure out on which side is the problem. Regression tests are essential to determine if a package works or not on ports others than the one used by the packager (amd64 in my case). Even simple ones can be useful. In the case of T-Coffee, that has a rudimentary test that I have activated recently, it showed that the packages distributed on armel are not working at all. Running regression tests when building packages have advantages, in particular to have the results published for each port automatically as part of the build logs. But is also cause problems. First, a package would need to build-depend on every software it can interact with, in order to test it comprehensively. In the example of bioperl-run, it makes it impossible to build on armel as long as t-coffee is broken there. Second, this approach does not help the user to test similarly a program installed on his computer. Maybe the Debian Enhancement Proposal 8, to test binary packages with material provided by their source packages, will solve these two problems.

28 June 2011

Matthew Palmer: SSL Session Caching (in nginx)

Given that I was responsible for putting together the system architecture for Github when they moved away from their previous services provider to Anchor Systems, I keep an eye on what's going on there even though I've gotten out of professional IT. Recently(ish), Ryan Tomayko blogged about some experiments in using Amazon CloudFront as a CDN for static assets. While discussing as-yet unsolved performance issues, he quoted a tweet from Shopify's CEO (who I would have thought would have known better):
Protip to make SSL fast: terminate in your load balancer, that makes SSL session cookies actually work.
No, no, NO -- a million times NOOOOOO! Load balancers are, by their very nature, performance chokepoints. You can't horizontally scale your load balancer, because if you do (by, say, putting another load balancer in front of it -- don't laugh, I've seen it done) you've just re-introduced all the same problems that putting SSL on the load balancer was supposed to accomplish (that is, getting SSL session caching to work). The only thing you accomplish by putting your SSL sessions onto the load balancer is bring the moment your load balancer melts down through excessive CPU usage that much closer. I dunno, maybe Shopify doesn't actually do that much traffic or something, but I certainly wouldn't be signing up for that headache if it were my infrastructure. (Sidenote: yes, I know that you can get "SSL hardware accelerators", that put the basic crypto operations into dedicated silicon, but they're rarely cheap, and you can't horizontally scale those, either. They're effectively a specialised and outrageously expensive form of "scaling by bigger hardware" -- which is a valid method of scaling, but one with fairly terminal limitations that certainly wouldn't make it practical for Github). The problem you're trying to solve by centralising SSL operations is that SSL includes a mechanism whereby a client making a new TCP connection can say "here's the crypto details from last time I connected to you" and the server can just pull out all of the per-connection data that would otherwise take a long time (several TCP round trips and a smallish chunk of CPU time) to setup. This can make SSL connections a lot snappier (in Ryan's opinion, "We spend roughly as much time handshaking as we do generating the average dynamic request."), so they're a definite win if you can do it (and yes, you can do it). Webservers don't typically do this caching by default, but setting up a simple SSL session cache for a single nginx or Apache webserver is pretty trivial. Testing it is simple, too: just install gnutls-bin and run:
	gnutls-cli -V -r HOSTNAME  grep 'Session ID'
If all three Session IDs are the same, then you've got SSL session caching running. (If you're wondering why I'm using gnutls-cli rather than openssl s_client, it's because openssl is living in the pre-IPv6 dark ages, and I've got IPv6-only services running I wanted to test). So that's great for your little single-server hosting setup, but per-machine caches aren't much use when you're running behind a load balancer, Github style, because each SSL-enabled TCP connection can very well end up on a different server, and a per-machine cache won't help you very much. (If you think the answer to this problem is "session affinity", you're setting yourself up for a whole other world of pain and suffering.) Here's the kicker, though -- the SSL session is just a small, opaque chunk of bytes (OpenSSL appears to store it internally as an ASN.1 string, but that's an irrelevant implementation detail). An SSL session cache is just a mapping of the SSL session ID (a string) to the SSL session data (another string). We know how to do "shared key-value caches" -- we have the technology. There won't be too many large-scale sites out there that aren't using memcached (or something practically equivalent). So, rather than stuff around trying to run a load balancer with enough grunt to handle all your SSL communication for all time, you can continue to horizontally scale the whole site with as many backend webservers as you need. All that's needed is to teach your SSL-using server to talk to a shared key-value cache. Far be it for me to claim any sort of originality in this idea, though -- patches for Apache's mod_ssl to do this have been floating around for a while, and according to the release notes, the 2.4 series will have it all built-in. However, Github uses nginx, to great effect, and nobody's done the work to put this feature into nginx (that I could find, anyway). Until now. I present, for the edification of all, a series of patches to nginx 0.8.x to provide memcached-enabled SSL session caching. Porting them to other versions of nginx hopefully won't be too arduous, and if you ask nicely I might give it a shot. If you don't use memcached (gasp!), my work should at least be a template to allow you to hook into whatever system you prefer. Sharding the memcached calls wouldn't be hard either, but I'm not a huge fan of that when other options are available. I had originally hoped to be able to say "it works at Github!" as a testimonial, but for some reason it hasn't been deployed there yet (go forth and pester!), so instead I'm just releasing it out there for people to try out on a "well, I don't know that it doesn't work" basis. If it breaks anything, it's not my fault; feel free to supply patches if you want to fix anything I've missed.

Sam Hartman: Dream Plug

As part of trying to help with Freedom Box, I gained access to a Dream Plug The Dream Plug is one of the leading possible platforms for Freedom Box. Computationally it s sexy for a low-power device. There s a 1200 mhz arm with 512m of RAM. As a platform to enable people to create novel applications, it s great. It has multiple USB ports, two ethernets, a built-in 802.11B/G access point, bluetooth, audio, ESATA, Micro SD and full-sized SD. So, whether you application needs storage, networking, audio, or some interesting side device, you re covered. With the optional JTAG adapter it s even fairly friendly to developers: there are options for recovering from most failures and full console access. If you re looking at a reference platform that s still nominally embedded, but that allows you to play around thinking about what your application could do, this is a great option. However, especially for Freedom Box, it s important to remember that the reference board a developer wants is not the same as a cost-reduced product on which to actually deploy something for people to buy. The Dream Plug is wrong for every actual deployment I ve imagined. First, it s huge. If you happen to have free power plugs on your wall with lots of space above and below them, it might be an option. If however, you re like everyone I know and have power strips, constrained spacing, etc, then the industrial engineering will disappoint at every turn. I was hoping for something that kind of looked like an Apple Airport Express. It s significantly larger than that in every dimension. Also, the plug is oriented the wrong way for minimizing the fraction of the power strip it takes up. The power supply part of the device can be detached, although even that is way too huge for a power strip, and the cable between the power supply and the computer is fairly short. You can reconfigure the device without its plug nature: running a cord from a normal power outlet to the power supply. But then if you have to detach the power supply for heat management reasons, you get a cord from the outlet to the power supply and another cord from the supply to the device. Add a few USB or ESATA devices and the octopus of cables begins to resemble some arcane mechanism. (So far, no elder gods have appeared though.) The other issue is that you almost never want all the functionality. You pay for the bluetooth, audio and ESATA in terms of cost, heat and space regardless of whether you use them. I don t have a lot of applications that really take advantage of the full array of hardware. The firmware update mechanism is decidedly not targeted at end-users. The version I obtained had a hacked copy of Debian lenny. No mechanism was provided for replacing the image in a safe manner that did not potentially require the optional highly-non-end-user-compatible JTAG board if something got interrupted. You could either unscrew the device and get to the micro SD card containing the image, or run software to replace the image from within Debian lenny. It s possible to configure the boot loader to run an update image off USB or SD until that succeeds, but doing that is also a non-end-user operation. In conclusion, the name is perfect. This is exactly what hackers need to dream about the power of small computers everywhere. However we must not forget that there s a step required to turn dreams into reality. Just as with any fully proprietary product, Freedom Box will require cost reduction steps, semi-custom boards and actual OEMs to truly be usable. The claim in the previous sentence that the Freedom Box may have proprietary elements is disquieting to some. I think we can put together a software stack that is free with the possible exception of some device firmware. However, my suspicion is that anyone who turns that into a fully realized end-user product will add proprietary elements. I suspect some of the results of the cost reduction process such as resulting semi-custom boards will be proprietary. In many cases though, I suspect some proprietary software elements will be introduced.

27 June 2011

Matthew Palmer: SSL Session Caching (in nginx)

Given that I was responsible for putting together the system architecture for Github when they moved away from their previous services provider to Anchor Systems, I keep an eye on what's going on there even though I've gotten out of professional IT. Recently(ish), Ryan Tomayko blogged about some experiments in using Amazon CloudFront as a CDN for static assets. While discussing as-yet unsolved performance issues, he quoted a tweet from Shopify's CEO (who I would have thought would have known better):
Protip to make SSL fast: terminate in your load balancer, that makes SSL session cookies actually work.
No, no, NO -- a million times NOOOOOO! Load balancers are, by their very nature, performance chokepoints. You can't horizontally scale your load balancer, because if you do (by, say, putting another load balancer in front of it -- don't laugh, I've seen it done) you've just re-introduced all the same problems that putting SSL on the load balancer was supposed to accomplish (that is, getting SSL session caching to work). The only thing you accomplish by putting your SSL sessions onto the load balancer is bring the moment your load balancer melts down through excessive CPU usage that much closer. I dunno, maybe Shopify doesn't actually do that much traffic or something, but I certainly wouldn't be signing up for that headache if it were my infrastructure. (Sidenote: yes, I know that you can get "SSL hardware accelerators", that put the basic crypto operations into dedicated silicon, but they're rarely cheap, and you can't horizontally scale those, either. They're effectively a specialised and outrageously expensive form of "scaling by bigger hardware" -- which is a valid method of scaling, but one with fairly terminal limitations that certainly wouldn't make it practical for Github). The problem you're trying to solve by centralising SSL operations is that SSL includes a mechanism whereby a client making a new TCP connection can say "here's the crypto details from last time I connected to you" and the server can just pull out all of the per-connection data that would otherwise take a long time (several TCP round trips and a smallish chunk of CPU time) to setup. This can make SSL connections a lot snappier (in Ryan's opinion, "We spend roughly as much time handshaking as we do generating the average dynamic request."), so they're a definite win if you can do it (and yes, you can do it). Webservers don't typically do this caching by default, but setting up a simple SSL session cache for a single nginx or Apache webserver is pretty trivial. Testing it is simple, too: just install gnutls-bin and run:
	gnutls-cli -V -r HOSTNAME  grep 'Session ID'
If all three Session IDs are the same, then you've got SSL session caching running. (If you're wondering why I'm using gnutls-cli rather than openssl s_client, it's because openssl is living in the pre-IPv6 dark ages, and I've got IPv6-only services running I wanted to test). So that's great for your little single-server hosting setup, but per-machine caches aren't much use when you're running behind a load balancer, Github style, because each SSL-enabled TCP connection can very well end up on a different server, and a per-machine cache won't help you very much. (If you think the answer to this problem is "session affinity", you're setting yourself up for a whole other world of pain and suffering.) Here's the kicker, though -- the SSL session is just a small, opaque chunk of bytes (OpenSSL appears to store it internally as an ASN.1 string, but that's an irrelevant implementation detail). An SSL session cache is just a mapping of the SSL session ID (a string) to the SSL session data (another string). We know how to do "shared key-value caches" -- we have the technology. There won't be too many large-scale sites out there that aren't using memcached (or something practically equivalent). So, rather than stuff around trying to run a load balancer with enough grunt to handle all your SSL communication for all time, you can continue to horizontally scale the whole site with as many backend webservers as you need. All that's needed is to teach your SSL-using server to talk to a shared key-value cache. Far be it for me to claim any sort of originality in this idea, though -- patches for Apache's mod_ssl to do this have been floating around for a while, and according to the release notes, the 2.4 series will have it all built-in. However, Github uses nginx, to great effect, and nobody's done the work to put this feature into nginx (that I could find, anyway). Until now. I present, for the edification of all, a series of patches to nginx 0.8.x to provide memcached-enabled SSL session caching. Porting them to other versions of nginx hopefully won't be too arduous, and if you ask nicely I might give it a shot. If you don't use memcached (gasp!), my work should at least be a template to allow you to hook into whatever system you prefer. Sharding the memcached calls wouldn't be hard either, but I'm not a huge fan of that when other options are available. I had originally hoped to be able to say "it works at Github!" as a testimonial, but for some reason it hasn't been deployed there yet (go forth and pester!), so instead I'm just releasing it out there for people to try out on a "well, I don't know that it doesn't work" basis. If it breaks anything, it's not my fault; feel free to supply patches if you want to fix anything I've missed.

Raphaël Hertzog: Deciphering one of dpkg s weirdest errors: short read on buffer copy

As a Debian/Ubuntu user, you re likely to be exposed at some point to an error reported by dpkg. In a series of articles, I ll explain some of the errors that you might encounter. Some error messages can be confusing at times. Most of the error strings do not appear very often and developers thus tend to use very terse description of the underlying problem. In other cases the architecture of the software makes it difficult to pin-point the real problem because the part that displays the error is several layers above the one that generated the initial error. This is for example the case with this error of dpkg:
Unpacking replacement xulrunner-1.9.2 ...
dpkg-deb (subprocess): data: internal gzip read error: '<fd:0>: too many length or distance symbols'
dpkg-deb: error: subprocess <decompress> returned error exit status 2
dpkg: error processing /var/cache/apt/archives/xulrunner-1.9.2_1.9.2.17+build3+nobinonly-0ubuntu1_amd64.deb (--unpack):
 short read on buffer copy for backend dpkg-deb during  ./usr/lib/xulrunner-1.9.2.17/components/libdbusservice.so'
First, the decompression layer discovers something unexpected in the data read in the .deb file and dpkg-deb outputs the error message coming from zlib ( too many length or distance symbols ). This causes the premature end of dpkg-deb --fsys-tarfile that dpkg had executed to extract the .data.tar archive from the deb file. In turn, dpkg informs us that dpkg-deb did not send all the data that were announced (and hence the short read in the error message) and that were meant to be part of the file /usr/lib/xulrunner-1.9.2.17/components/libdbusservice.so . That s all nice but it doesn t help you much in general. What you must understand from the above is that the .deb file is corrupted (sometimes just truncated). In theory it should not happen since APT verifies the checksums of files when they are downloaded. But computers are not infallible and even if the downloaded data was good, it can have been corrupted when stored on disk (for example cheap SSD disks are known to not last very well). Try removing the file (usually with apt-get clean since it s stored in APT s cache) and let APT download it again. Chances are that it will work on the second try. Otherwise consider doing a memory and HDD check as something is probably broken in your computer.
Join my free newsletter and learn more tips for users.

4 comments Liked this article? Click here. My blog is Flattr-enabled.

Next.

Previous.