Search Results: "tar"

30 July 2011

Torsten Werner: DebConf11: Jigsaw Progress in Debian

Tom Marble and Guillaume Mazoyer gave a talk about Jigsaw Progress in Debian during DebConf11 in Banja Luka. Guillaume is a Google Summer of Code student mentored by Tom and Sylvestre Ledru. The project is about modularizing OpenJDK which replaces the old fashioned classpath by a modulepath that knows about versioned dependencies. It can reduce the memory footprint and the startup time for applications running in the JVM. It would be interesting to match Debian package versions to Jigsaw module versions. Debian could influence the JDK version 8 in this area. Upstream is already building Debian packages but they do not follow the Debian policy and do not use the Debian packaging tools. Guillaume has uploaded 2 packages (jtharness, jtreg) to Debian. These packages are needed to run the upstream testsuite which ships 3484 individual tests. More than 99% of them are working in Debian. There is a GIT repository of his Jigsaw work at http://anonscm.debian.org/gitweb/?p=pkg-java/jigsaw.git;a=summary. The slides of the talk are available at http://penta.debconf.org/dc11_schedule/events/718.en.html.

Wouter Verhelst: Re: Pere

Fellow Debian Developer Petter Reinholdsen, who is also on Planet Debian, recently blogged about two things that I just have to respond to. I'd post a comment on his blog, but unfortunately his blog does not support comments (booh!). In his first blog post, titled "What is missing in the Debian desktop, or why my parents use Kubuntu", he complains about the lack of a "simple GUI based upgrade of packages". That already exists and is in Debian; if you install the default GNOME desktop, you'll get an icon in the (freedesktop.org) system tray (so it's not a gnome applet) that will tell you when there're updates available. It uses a system tray thingy, so it's not gnome-specific, and you can still use it if you use KDE instead of gnome though I should add that it's something my parents keep ignoring, even after I've told them. Oh well. The same blog post contains two more items that I don't disagree with, and is then followed with a complain about "Better browser handling of some MIME types". This is actually a bug in Firefox upstream, not Debian; ubuntu may have patched their Firefox, but feature requests to fix this issue have been posted in the Firefox Bugzilla. Meanwhile, a workaround exists. His second blog post is about the boot process. Petter is involved with the sysvinit system, and has some valid points in that some scripts in rcS.d really don't belong there. Petter wants to move many scripts, including those setting up the network, out of rcS.d. I don't think that's a very good idea. Currently, a system admin has four options: boot to a 'normal' login prompt (just boot, don't modify the kernel command line); boot to a single-user system (by adding 'single' to the kernel command line; this runs rcS and rc1 scripts); boot to a very minimally set up system (by adding 'emergency'; this just mounts the root filesystem, does some very minor setup (like doing the keyboard mapping) and allows the user to get a root shell); or just boot to a shell, period (by adding 'init=/bin/bash'). While it makes obvious sense that rcS.d shouldn't contain too much stuff (otherwise you might as well not bother with having it at all), I'm not sure that moving the mounting of 'network-based filesystems mounted by default at bootup time' away from rcS.d is a good idea. Sometimes things go horribly wrong after the networked filesystems are mounted, because some things are misconfigured on those networked file systems. We currently have two states that bring the system up to 'networked filesystems mounted, system not fully booted', and two that bring the system up to 'root filesystem mounted, you figure it out from there'. That seems well divided, and I don't think changing that is a good idea.

Vincent Bernat: Plot benchmark results with matplotlib

In the past week, I ran a lot of benchmarks using a Spirent Avalanche which is an appliance providing performance testing of network related products (a load balancer, a router, a web server, ). The reporting module does not provide a lot of flexibility and the plots are not the most beautiful ones. Fortunately, the results are also exported as CSV. matplotlib is a python plotting library which produces great figures without making things hard when they should be easy. It is a good replacement for GNU Plot and you don t need a lot of Python knowledge to use it. The documentation includes a fine user s guide that should get you started in less than 20 minutes.

Quick introduction You can use matplotlib from IPython to experiment:
$ ipython -pylab
Python 2.6.7 (r267:88850, Jul 10 2011, 08:11:54) 
Type "copyright", "credits" or "license" for more information.
  Welcome to pylab, a matplotlib-based Python environment.
  For more information, type 'help(pylab)'.
> In [1]: plot([1,1,4,5,10,11])
When you are ready, you can build a simple Python script:
#!/usr/bin/env python
from matplotlib.pylab import *
plot([1,1,4,5,10,11])
savefig("my-plot.pdf")

Grabbing results from CSV Data are contained into a file named realtime.csv. It contains the raw data as well as some general information about the benchmark (test name, description, paramaters ). We need to skip those. Fortunately, csv2rec() allows to load data from a CSV file into a record array and skip the first rows if necessary.
from matplotlib.pylab import *
import sys, os
import gzip
skip = 0
for line in gzip.open(sys.argv[1]):
    if line.startswith("Seconds Elapsed,"):
        break
    skip = skip + 1
ava = csv2rec(gzip.open(sys.argv[1]),skiprows=skip)
Now, the Elapsed seconds column can be accessed with ava['elapsed_seconds'].

General structure I need 4 plots:
  • successful, unsuccesful and attempted transactions per second,
  • minimum, average and maximum response time per page,
  • Avalanche CPU usage,
  • incoming and outgoing bandwidth.
The most important plot is the first one. The second one is less important and the last ones are here only to check we did not hit some bottleneck during the benchmark. We want to produce a page like this: General structure matplotlib allows to plot subfigures. We create 4 subfigures sharing the same X axis (which the number of seconds elapsed since the beginning of the benchmark). We save the result to PDF.
# Create the figure (A4 format)
figure(num=None, figsize=(8.27, 11.69), dpi=100)
ax1 = subplot2grid((4, 2), (0, 0), rowspan=2, colspan=2)
# [...]
ax2 = subplot2grid((4, 2), (2, 0), colspan=2, sharex=ax1)
# [...]
ax3 = subplot2grid((4, 2), (3, 0), sharex=ax1)
# [...]
ax4 = subplot2grid((4, 2), (3, 1), sharex=ax1)
# [...]
# Save to PDF
savefig("%s.pdf" % TITLE)

Bandwidth plot Let s start with the easiest plot: bandwidth usage.
# Plot 4: Bandwidth
ax4 = subplot2grid((4, 2), (3, 1), sharex=ax1)
plot(ava['seconds_elapsed'], ava['incoming_traffic_kbps']/1000.,
     'b-', label='Incoming traffic')
plot(ava['seconds_elapsed'], -ava['outgoing_traffic_kbps']/1000.,
     'r-', label='Outgoing traffic')
grid(True, which="both", linestyle="dotted")
ylabel("Mbps", fontsize=7)
xticks(fontsize=7)
yticks(fontsize=7)
Here, in the suplot positioned in (3,1), we plot the number of seconds elapsed versus the incoming traffic with a blue line (b-). We also plot the seconds elapsed versus the outgoing traffic with a red line (r-). Here is the result: Bandwidth plot Most functions of matplotlib are exposed as a method of the object they refer to and as a global function. In the latest case, the function is applied to the latest created figure or plotting area. For example, plot() is called a function and therefore refer to the plotting area ax4. We could have written ax4.plot() instead.

CPU plot The average CPU utilization data available in the CSV file needs to be normalized. We assume the Avalanche to be mostly idle on start. The plotting part is pretty similar to our previous case.
# CPU
max = np.max(ava['average_cpu_utilization'])
order = 10**np.floor(np.log10(max))
max = np.ceil(max/order)*order
cpu = (max - ava['average_cpu_utilization'])*100/max
# Plot 3: CPU
ax3 = subplot2grid((4, 2), (3, 0), sharex=ax1)
plot(ava['seconds_elapsed'],
     cpu,
     'r-', label="Avalanche CPU")
grid(True, which="both", linestyle="dotted")
ylabel("Avalanche CPU%", fontsize=7)
xticks(fontsize=7)
yticks(fontsize=7)

Response time We would like to plot response time. We have three corresponding metrics: minimum response time, average response time, maximum response time. Because those metrics start from 0 ms up to several seconds, a logarithmic scale is used:
# Plot 2: response time
ax2 = subplot2grid((4, 2), (2, 0), colspan=2, sharex=ax1)
plot(ava['seconds_elapsed'], ava['minimum_response_time_per_page_msec'],
     'b-', label="Minimum response time")
plot(ava['seconds_elapsed'], ava['maximum_response_time_per_page_msec'],
     'r-', label="Maximum response time")
plot(ava['seconds_elapsed'], ava['average_response_time_per_page_msec'],
     'g-', linewidth=2, label="Average response time")
legend(loc='upper left', fancybox=True, shadow=True, prop=dict(size=8))
grid(True, which="major", linestyle="dotted")
yscale("log")
ylabel("Response time (msec)", fontsize=9)
xticks(fontsize=9)
yticks(fontsize=9)
This is also the first graphic with a legend. Response time plot

Transactions per second The most important plot is the number of transactions per second.
# Plot 1: TPS
ax1 = subplot2grid((4, 2), (0, 0), rowspan=2, colspan=2)
plot(ava['seconds_elapsed'], ava['desired_load_transactionssec'],
     '-', color='0.7', label="Desired Load")
plot(ava['seconds_elapsed'], ava['successful_transactionssecond'],
     'g:', label="Successful")
plot(ava['seconds_elapsed'], smooth(ava['successful_transactionssecond']),
     'g-', linewidth=2)
plot(ava['seconds_elapsed'], ava['attempted_transactionssecond'],
     'b-', label="Attempted")
plot(ava['seconds_elapsed'], ava['aborted_transactionssecond'],
     'k-', label="Aborted")
plot(ava['seconds_elapsed'][:-1], ava['unsuccessful_transactionssecond'][:-1],
     'r-', label="Unsuccessful")
legend(loc='upper left', fancybox=True, shadow=True, prop=dict(size=10))
grid(True, which="both", linestyle="dotted")
ylabel("Transactions/s")
The number of successful transactions is plotted twice: when the benchmarked equipment becomes overloaded, we get a lot of noise in this metric and it can be difficult to read. Therefore, we plot a smoothed version with the help of NumPy:
import numpy as np
def smooth(x, win=4):
    s = np.r_[x[win-1:0:-1],x,x[-1:-win:-1]]
    w = np.ones(win, 'd')
    y = np.convolve(w/w.sum(),s,mode='valid')
    return y[(win-1)/2:-(win-1)/2]
np.r_() is just here to extend our data by the size of the window. np.ones() build a weight vector of the size of the window. If the window is 4, we get [0.25, 0.25, 0.25, 0.25]. We use this vector to apply a convolution to the original data. Here is the result: Transactions plot The original data is a green dotted line while the smoothed one is a green thick line. What about the three annotations? matplotlib allows to put annotations on a figure. Here is how this is done:
# Noticeable points
count = 0
def highlight(index, reason):
    global count
    if index and index > 0:
        x,y = (ava['seconds_elapsed'][index],
               smooth(ava['successful_transactionssecond'])[index])
        plot([x], [y], 'ko')
        annotate('%d TPS\n(%s)' % (y,reason), xy=(x,y),
                 xytext=(20, -(count+4.7)*22), textcoords='axes points',
                 arrowprops=dict(arrowstyle="-",
                 connectionstyle="angle,angleA=0,angleB=80,rad=10"),
                 horizontalalignment='left',
                 verticalalignment='bottom',
                 fontsize=8)
        count = count + 1
highlight(np.argmax(smooth(ava['successful_transactionssecond'])), "Max TPS")
highlight(np.argmax(cpu > 99), "CPU>99%")
highlight(np.argmax(ava['average_response_time_per_page_msec'] > 500), ">500ms")
highlight(np.argmax(ava['average_response_time_per_page_msec'] > 100), ">100ms")
np.argmax() returns the index of the first maximum value. The trick here is that when I write ava['average_response_time_per_page_msec'] > 100, I get an array with 1 when the value is more than 100 and 0 otherwise. Therefore, np.argmax() will return the first index where the value is superior to 100 ms. The highlight() function will add a point (plot([x], [y], 'ko')) on the smoothed successful transactions par second plot and add an annotation with some fancy arrow. Look at this benchmark of nginx as SSL termination for a complete output of this script.

Tim Retout: Lessons

Some things I have learnt this week at DebConf: I have quietly resolved to spend more time doing things that I enjoy, that maximise the use of my skills, and which help other people; and spend less time on the opposite. So far, I have tidied up various outstanding commitments that were weighing on my mind, and offered mdbtools for adoption. I started doing some RC bug NMUs again, because on a good day they hit all three of my criteria. Some ideas are already forming in my mind of other things to do, so I shall never be short of tasks.

Petter Reinholdtsen: What should start from /etc/rcS.d/ in Debian? - almost nothing

In the Debian boot system, several packages include scripts that are started from /etc/rcS.d/. In fact, there is a bite more of them than make sense, and this causes a few problems. What kind of problems, you might ask. There are at least two problems. The first is that it is not possible to recover a machine after switching to runlevel 1. One need to actually reboot to get the machine back to the expected state. The other is that single user boot will sometimes run into problems because some of the subsystems are activated before the root login is presented, causing problems when trying to recover a machine from a problem in that subsystem. A minor additional point is that moving more scripts out of rcS.d/ and into the other rc#.d/ directories will increase the amount of scripts that can run in parallel during boot, and thus decrease the boot time. So, which scripts should start from rcS.d/. In short, only the scripts that _have_ to execute before the root login prompt is presented during a single user boot should go there. Everything else should go into the numeric runlevels. This means things like lm-sensors, fuse and x11-common should not run from rcS.d, but from the numeric runlevels. Today in Debian, there are around 115 init.d scripts that are started from rcS.d/, and most of them should be moved out. Do your package have one of them? Please help us make single user and runlevel 1 better by moving it. Scripts setting up the screen, keyboard, system partitions etc. should still be started from rcS.d/, but there is for example no need to have the network enabled before the single user login prompt is presented. As always, things are not so easy to fix as they sound. To keep Debian systems working while scripts migrate and during upgrades, the scripts need to be moved from rcS.d/ to rc2.d/ in reverse dependency order, ie the scripts that nothing in rcS.d/ depend on can be moved, and the next ones can only be moved when their dependencies have been moved first. This migration must be done sequentially while we ensure that the package system upgrade packages in the right order to keep the system state correct. This will require some coordination when it comes to network related packages, but most of the packages with scripts that should migrate do not have anything in rcS.d/ depending on them. Some packages have already been updated, like the sudo package, while others are still left to do. I wish I had time to work on this myself, but real live constrains make it unlikely that I will find time to push this forward.

29 July 2011

Axel Beckert: Notes from the Emacs Skills Exchange Session at DebConf11

Thomas Koch asked at DebConf 11 for a Skills Exchange session about Emacs. As nobody stepped up for that session for quite some time, I did. But I knew just the answers to half of his questions by mind, so I left the remainder for someone else. Luckily Kan-Ru Chen and Sebastian Tennant stepped up for most of the remainder. We had a quite full meeting room and the notes that Kan-Ru and me prepared in Gobby (debian package) got collaboratively extended from being a braindump and guide what to talk about to a quite helpful, but compact and dense Emacs introduction. I ll probably use this as a base for an Emacs tutorial or workshop at some European FLOSS events, but I wouldn t be able to have such a good and comprehensive base for that without that Skills Exchange session. So thanks to all who contributed! Update, 02:31: There also seem to exist an Emacs Lisp implementation of the Obby protocol called Ebby, but it doesn t seem to support the 0.5 version of Gobby, only version 0.3.

Jaldhar Vyas: hello_minix-i386.deb

NEW YORK, Jul 29, 2011 PreventaConf The crowd of thousands gathered here to attend PreventaConf 2011 were abuzz over the unveiling of the culmination of 3 years of aimless arsing about^ww^w concentrated development which has led to the porting of dpkg to the MINIX 3 operating system. dselect on Minix Women fainted, men wept openly, medical personnel were kept busy dealing with the many instances of heart seizure, multisensory hallucination and spontaneous combustion which accompanied this momentous event. Much remains to be done. Still this is a major milestone of which the Debian Minix developers are justifiably proud.

Guido G nther: Puppet Git Hooks

During todays very interesting Puppet Skills Exchange given by Christian Hofstaedtler at Debconf 11 it was recommended to syntax check puppet manifests in git commit hooks. Since I wanted to do the same some time ago and I couldn't find anything that does manifests, ruby and erb I wrote some hooks that can be either used on commit or on the remote site when receiving the update. The git archive of this can be found at:
git clone git://honk.sigxcpu.org/git/puppet-helpers.git
This blog is flattr enabled.

Julien Blache: Debian on a big cluster: BTDT

After months working on getting the cluster up and running via proof-of-concept, demos, tests, meetings, negotiations and the like, the press release is now out! We ve got that big thingy running and it s doing pretty well. Been there, done that, waiting for the t-shirt any moment now (hint, hint) :)

Michael Prokop: The Zsh Pony

I was giving a skills exchange session about Zsh at DebConf 11. I wasn t expected to prepare the session, but since there was no video projector available in the meeting room I started to work on some notes. Looks like I suffer from presentation driven development, so the notes turned out to become bigger than expected. If you re interested in my Zsh pony then head over to grml.org/zsh-pony. PS: I plan to provide the zsh pony at github, but my org-mode file still causes an error 500 at github. Github support is already aware of it. In the meantime I m happy to receive feedback, patches and contributions via mail.

Petter Reinholdtsen: What is missing in the Debian desktop, or why my parents use Kubuntu

While at Debconf11, I have several times during discussions mentioned the issues I believe should be improved in Debian for its desktop to be useful for more people. The use case for this is my parents, which are currently running Kubuntu which solve the issues. I suspect these four missing features are not very hard to implement. After all, they are present in Ubuntu, so if we wanted to do this in Debian we would have a source.
  1. Simple GUI based upgrade of packages. When there are new packages available for upgrades, a icon in the KDE status bar indicate this, and clicking on it will activate the simple upgrade tool to handle it. I have no problem guiding both of my parents through the process over the phone. If a kernel reboot is required, this too is indicated by the status bars and the upgrade tool. Last time I checked, nothing with the same features was working in KDE in Debian.
  2. Simple handling of missing Firefox browser plugins. When the browser encounter a MIME type it do not currently have a handler for, it will ask the user if the system should search for a package that would add support for this MIME type, and if the user say yes, the APT sources will be searched for packages advertising the MIME type in their control file (visible in the Packages file in the APT archive). If one or more packages are found, it is a simple click of the mouse to add support for the missing mime type. If the package require the user to accept some non-free license, this is explained to the user. The entire process make it more clear to the user why something do not work in the browser, and make the chances higher for the user to blame the web page authors and not the browser for any missing features.
  3. Simple handling of missing multimedia codec/format handlers. When the media players encounter a format or codec it is not supporting, a dialog pop up asking the user if the system should search for a package that would add support for it. This happen with things like MP3, Windows Media or H.264. The selection and installation procedure is very similar to the Firefox browser plugin handling. This is as far as I know implemented using a gstreamer hook. The end result is that the user easily get access to the codecs that are present from the APT archives available, while explaining more on why a given format is unsupported by Ubuntu.
  4. Better browser handling of some MIME types. When displaying a text/plain file in my Debian browser, it will propose to start emacs to show it. If I remember correctly, when doing the same in Kunbutu it show the file as a text file in the browser. At least I know Opera will show text files within the browser. I much prefer the latter behaviour.
There are other nice features as well, like the simplified suite upgrader, but given that I am the one mostly doing the dist-upgrade, it do not matter much. I really hope we could get these features in place for the next Debian release. It would require the coordinated effort of several maintainers, but would make the end user experience a lot better.

28 July 2011

Tanguy Ortolo: Using a gamepad under GNU/Linux

Saitek PS2700 gamepad I have just bought a gamepad, the Saitek V.3 Cyborg Rumble Pad (also marketed as PS2700), mainly to play at SuperTuxKart under Debian GNU/Linux. It works perfectly, except for one minor feature, and it can be used for playing and as an X11 input device.System support This device uses USB HID so it is directly supported by the Linux kernel, with its module joydev, I guess: it appears as /dev/input/eventX and /dev/input/jsY. It can be tested with jstest-gtk from the package jstest-gtk: it has 7 axes (two sticks, one directional pad and two triggers that count as one single axis) and 13 buttons (4 regular, 2 rear, the 2 triggers that also send button events, 3 specials and the 2 sticks that can be clicked). They are presented in an order that is rather logical, except the trigger axis is inserted between the two axis of the second stick. It also features two strange buttons: Game support I only tested SuperTuxKart, but I think any game able to use a gamepad or a joystick should support it: after all, they all use the same protocol. The default mapping is rather logical but I find it more convenient to use the triggers rather than the main stick to accelerate and brake. I do not know if the vibration feature can be used at all, because I do not know how it is exposed and I do not think I have any game that would be able to take advantage of it. X.Org support This is an interesting feature: X.Org has a joystick(4) driver, available in the package xserver-xorg-input-joystick that allows you to use a joystick or a gamepad as an input device, both for pointing and typing. So, just for fun, I installed the joystick driver. It installs a default configuration file as /usr/share/X11/xorg.conf.d/50-joystick.conf, that is enough to provide features equivalent to a regular mouse. But given the number of axes and buttons of my pad, it deserved a special configuration in /etc/X11/xorg.conf.d/rumblepad.conf:
Section "InputClass"
    Identifier  "Rumble Pad"
    Option      "MatchIsJoystick"   "on"
    Option      "MatchProduct"      "Cyborg V.3 Rumble Pad"
    # Main stick axes: point
    Option      "MapAxis1"          "mode=relative axis=+1x deadzone=5000"
    Option      "MapAxis2"          "mode=relative axis=+1y deadzone=5000"
    # Second stick axes: scroll
    Option      "MapAxis3"          "mode=relative axis=+1zx deadzone=5000"
    Option      "MapAxis5"          "mode=relative axis=+1zy deadzone=5000"
    # Triggers: scroll vertically
    Option      "MapAxis4"          "mode=relative axis=+1zy deadzone=5000"
    # Directional pad: point
    Option      "MapAxis6"          "mode=accelerated axis=+1x deadzone=5000"
    Option      "MapAxis7"          "mode=accelerated axis=+1y deadzone=5000"
    # Buttons 1, 2 and 3 : click (no use for button 4)
    Option      "MapButton1"        "button=1"
    Option      "MapButton2"        "button=2"
    Option      "MapButton3"        "button=3"
    Option      "MapButton4"        "none"
    # Rear buttons: back and forward
    Option      "MapButton5"        "key=166"   # XF86Back
    Option      "MapButton6"        "key=167"   # XF86Forward
    # Triggers: no use
    Option      "MapButton7"        "none"
    Option      "MapButton8"        "none"
    # Special buttons
    Option      "MapButton9"        "key=135"   # select : Menu
    Option      "MapButton10"       "key=172"   # start : XF86AudioPlay
    Option      "MapButton13"       "key=180"   # home : XF86HomePage
    # Sticks click: click
    Option      "MapButton11"       "button=1"  # clic left stick
    Option      "MapButton12"       "button=3"  # clic right stick
EndSection
It is commented, but here is what it does: It is worth noting that joysticks have one feature that mice do not have: they allow to scroll at a variable speed, proportional to the shift of an analogue stick. This is the meaning of these zx and zy axes I mapped to the second stick, and it provides a scrolling experience that is far superior from that of a mouse wheel.

Dirk Eddelbuettel: Rcpp 0.9.6

A new maintenance release version 0.9.6 of Rcpp went onto CRAN and into Debian earlier today. This release contains a fix which helps the RppEigen package (mentioned previously on this blog), as well as an addition which permits user-defined finalizers for external pointer objects (following a suggestion on the mailing list). Two new examples where added: a Gibbs sampler illustration (blogged about as well) and a Rcpp-based Fibonacci implementation following a question on StackOverflow. And while that last example is clearly degenerate, the 700+ fold net speedup (as shown in my answer) is still pretty neat. The complete NEWS entry is below; more details are in the ChangeLog file in the package and on the Rcpp Changelog page.
0.9.6   2011-07-26
    o   Added helper traits to facilitate implementation of the RcppEigen
        package: The is_eigen_base traits identifies if a class derives from
        EigenBase using SFINAE; and new dispatch layer was added to wrap() to
        help RcppEigen
    o   XPtr now accepts a second template parameter, which is a function
        taking a pointer to the target class. This allows the developper to
        supply his/her own finalizer. The template parameter has a default
        value which retains the original behaviour (calling delete on the
        pointer)
    o   New example RcppGibbs, extending Sanjog Misra's Rcpp illustration of
        Darren Wilkinson's comparison of MCMC Gibbs Sampler implementations;
        also added short timing on Normal and Gaussian RNG draws between Rcpp
        and GSL as R's rgamma() is seen to significantly slower
    o   New example on recursively computing a Fibonacci number using Rcpp and
        comparing this to R and byte-compiled R for a significant speed gain
Thanks to CRANberries, you can also look at a diff to the previous release 0.9.5. As always, even fuller details are on the Rcpp Changelog page and the Rcpp page which also leads to the downloads, the browseable doxygen docs and zip files of doxygen output for the standard formats. A local directory has source and documentation too. Questions, comments etc should go to the rcpp-devel mailing list off the R-Forge page

27 July 2011

Chris Lamb: Official Redis packages for Debian "squeeze"

Due to high demand I have prepared official Redis packages for Debian "squeeze":
  1. Add the following line to /etc/apt/sources.list:

    deb http://backports.debian.org/debian-backports squeeze-backports main
    
  2. Update your local package lists:

    sudo apt-get update
    
  3. Install redis-server with:

    sudo apt-get -t squeeze-backports install redis-server
    
The current version number in this repository may be found here. Bugs should be reported in the usual way. For the sections of the web community who insist on hitting problems solved years ago, here is why you should use these packages over installing Redis manually:

26 July 2011

Martin F. Krafft: Wisdom tooth left in Bosnia

For those who care or wonder: the reason why I hold a white icepack to my cheek here at Debconf11 in Banja Luka, Bosnia & Hercegovina, talk fairly little and try not to smile is because I had one of my wisdom teeth removed this morning by one of the local dentists. Some might cringe at the idea of submitting yourself to such a treatment in Bosnia, but I have to say that Doctor Sa a Dabi did a splendid job, even though we weren t really able to communicate a lot. Still, 45 minutes after I entered the office, I saw my tooth on the table and was able to leave again. My tooth had been building up an infection for several weeks, and it was starting to become unbearable. Therefore I decided to simply bite the bullet, after having seen the x-rays and judging that it wouldn t be too hard to remove. It wasn t, the pain is now minor, the swelling mostly under control, the drugs are beer-compatible, and you all should just enjoy while I cannot talk for tomorrow I ll be back!

Matthew Garrett: Further adventures in EFI booting

Many people still install Linux from CDs. But a growing number install from USB. In an ideal world you'd be able to download one image that would let you do either, but it turns out that that's quite difficult. Shockingly enough, it's another situation where the system firmware exists to make your life difficult.

Booting a hard drive is pretty easy. The BIOS reads the first 512 bytes off the drive, copies them to RAM and executes them. That code is then responsible for either starting your bootloader or identifying the currently active partition and jumping to its boot sector, but before too long you're in a happy place where you're executing whatever you want to. Life is good. So you'd think that CDs would work in a similar way. The ISO 9660 format even leaves a whole 32KB at the start of a filesystem, which is enough space for a pretty awesome bootloader. But no. This is not how CDs work. That would be far too easy.

Let's imagine we're back in the 90s. People want to be able to boot off CD without needing a boot floppy to do so. And you're a PC vendor with a BIOS that's been lovingly[1] forced into a tiny piece of flash and which has to execute out of an almost as tiny piece of RAM if you want your users to be able to play any games. Letting boot code read arbitrary content off the CD would mean adding a new set of interrupt hooks, and that's going to be even more complicated because CDs have a sector size of 2K while hard drives are 512 bytes[2] and who's going to pay to implement this and for the extra flash and RAM and look surely there has to be another way?

So, of course, another way was found. The El Torito specification defines a way for shoving a reference to some linear blocks into the ISO 9660 header. The BIOS reads those blocks into memory and then redirects either the floppy or hard drive access interrupts (depending on the El Torito type) to that region. The boot code can then proceed as if it had been read off a floppy without all the trouble of actually putting a floppy in the machine, and the extra code required in the system BIOS is minimal.

USB sticks, however, are treated as hard drives. The BIOS won't look for El Torito images on them. Instead, it'll try to execute a boot sector. That isn't there on a CD image. Sigh.

A few years ago a piece of software called isohybrid popped up and solved this problem nicely. isohybrid is a companion to isolinux, which itself is a bootloader that fits into an El Torito image and can then load your kernel and installer from CD. isohybrid takes an ISO image, adds an x86 boot sector and partition table and does some more fiddling to turn a valid ISO image into one that can be copied directly onto a USB stick and booted. The world suddenly becomes a better place.

But that's BIOS. EFI makes this easier, right? Right?

No. EFI does not make this easier.

Despite EFI being a modern firmware for the modern world[3], EFI implementations are not required to be able to understand ISO 9660. In fact, I've never seen one that does. FAT is all the spec requires, and FAT is typically all you get. Nor will EFI just execute some arbitrary boot code from the start of the CD. So, how does EFI boot off CD?

El Torito. Obviously.

It's not quite as bad as it sounds, merely almost as bad as it sounds. While the typical way of using El Torito for a long time was to use floppy or hard drive emulation, it also supports a "No emulation" mode. It also supports setting a type flag for your media, which means you can distinguish between images intended for BIOS booting and EFI booting. But the fact remains that your CD has to include an embedded FAT partition that then contains a bootloader that's able to read ISO 9660 because your firmware is too inept to handle that itself[4].

How about USB sticks? Thankfully, booting these on EFI doesn't require any boot sectors at all. Instead you just have to have a partition table, a FAT partition and a bootloader in a well known location in that FAT partition. The required partition is, in fact, identical to the one you need in an El Torito image. And so this is where we start introducing some extra hacks.

Like I said earlier, isohybrid fakes up an MBR and adds some boot code that points at the actual bootloader. It needs to do a little more on EFI. The first problem is that the isohybrid MBR partition has to cover the entire ISO 9660 filesystem on the USB stick so that the operating system can access it later, but the El Torito FAT image is inside that partition. A lot of MBR-based code becomes very unhappy if you try to set up a partition that's a subset of another partition. So we can't really use MBR. On to GPT.

GPT, or the GUID Partition Table, is the EFI era's replacement for MBR partitions. It has two main advantages over MBR - firstly it can cover partitions larger than 2TB without having to increase sector size, and secondly it doesn't have the primary/logical partition horror that still makes MBR more difficult than it has any right to be. The format is pretty simple - you have a header block 1 logical block into the media (so 512 bytes on a typical USB stick), and then a pointer to a list of partitions. There's then a secondary table one block from the end of the disk, which points at another list of partitions. Both blocks have multiple CRCs that guarantee that neither the header nor the partition list have been corrupted. It turns out to be a relatively straightforward modification of isohybrid to get it to look for a secondary EFI image and construct a GPT entry pointing at it. This works surprisingly well, and media prepared this way will boot EFI machines if burned to a CD or written to a USB stick.

There's a few quirks. Macs will show two boot icons for these CDs[6], one marked "EFI Boot" and one helpfully marked "Windows"[7], with the latter booting the BIOS El Torito image. That's a little irritating, but not insurmountable. The other issue is that older Macs won't look for boot loaders in the legacy locations. This is where things start getting horrible.

Back in the old days, Apple boot media used to have a special "blessed" folder. Attempting to boot would involve the firmware looking for such a folder and then using that to start itself up. Any folder in the filesystem could be blessed. Modern hardware doesn't use boot folders, but does use boot files. For an HFS+ filesystem, the inode of the bootloader is written to a specific offset in the filesystem superblock and the firmware simply finds that inode and executes it. And this appears to be all that older Macs support.

So, having written a small tool to bless an HFS+ partition, I tried the obvious first step of burning a CD with three El Torito images (one BIOS, one FAT, one HFS+). It failed. While Refit could see the bootloader in the HFS+ image, the firmware appeared to have no interest at all in booting off it. Yet Apple install media would boot. What was the difference?

The difference, obviously, was that these earlier Macs don't appear to support El Torito booting. The Apple install media contained an Apple partition map.

The Apple partition map (APM) is Apple's legacy partition table format. Apple mostly dropped it when they went to x86, where it's retained for two purposes. The first is for drives that need to be shared between Intel Macs and PPC ones. The second seems to be for their install DVDs. Some further playing revealed that burning a CD with an APM entry pointing at the HFS+ filesystem on the CD gave me a boot icon. Problem solved?

Not really. Remember how I earlier mentioned that ISO 9660 leaves 32KB at the start of the image, and that an isohybrid image then writes an MBR and boot sector in the first 512 bytes of that, and the GPT header starts 512 bytes into a drive? That means that it's easy to produce an ISO that has both a boot sector, MBR partition table and GPT. None of them overlap. APM, on the other hand, has a header that's located at byte 0 of the media, overlapping with the boot sector. And it has a partition listing that's located at sector 1, overlapping with the GPT. Is all lost?

No. Merely sanity.

The first thing to remember is that the boot sector is just raw assembler. It's a byte stream that's executed by the CPU. And there's a lot of things you can tell a CPU to do that result in nothing happening. Peter Jones pointed out that the only bits of the AFP header you actually need are the letters "ER", followed by the sector size as a two byte big endian integer. These disassemble to harmless instructions, so we can simply move the boot code down a little and stick these at the beginning. A PC that executes it will read straight through the bizarre (but harmless) Apple bytes and then execute the real boot code.

The second thing that's important here is that we were just given the opportunity to specify the sector size. The GPT is only relevant when the image is written to a USB stick, so assumes a sector size of 512 bytes. So when the GPT starts one sector into the drive, it's actually starting 512 bytes into the drive. APM also starts one sector into the drive, but we can simply put a different sector size into the header and suddenly we're able to choose where that's going to be. 2K seems like a good choice, and so the firmware will now look for the header at byte 2048.

That's still in them middle of the GPT partition listing, though. Except we can avoid that as well. GPT lets you specify where the partition listing starts and doesn't require it to be immediately after the header. So we can offset the partition listing to, say, byte 8192 and leave a hole for the Apple partition map.

And, shockingly, this works. Setting up a CD this way gives a boot icon on old Macs. On new Macs, it gives three - one for legacy boot, one for EFI boot via FAT and one for EFI boot via HFS. Less than ideal, but eh. The one remaining problem is that this doesn't work for USB sticks (the firmware sees the GPT and ignores the APM), so we also need to add a GPT entry for the HFS+ partition. Job done.

So, it is possible to produce install media that will work if burned to CD or written to a USB stick. It's even possible to produce a version that will work on Macs, as long as you're willing to put up with three partition tables and an x86 boot sector that doubles as an APM header. And patches to isohybrid to do all of this will be turning up as soon as I tidy the code to the point where it works without having to hack in offsets by hand.

[1] Insert some other adverb here if you feel like it
[2] Why yes, 15 years later BIOSes still tend to assume 512 bytes. Which is why your 4K sector disk is much harder to work with than you'd like it to be.
[3] Ever noticed how the modern world involves a great deal of suffering, misery and death? EFI fits into that world perfectly.
[4] Obviously if you want your media to be bootable via both BIOS and EFI you need to produce a CD with two El Torito images. BIOS systems should ignore the image that says it's for EFI, and EFI systems should ignore the BIOS one. Some especially creative BIOS authors[5] have decided that users shouldn't have their choices limited in such a way, and so pop up a screen that says:
1.
2.
Select CD-ROM boot type:

and wait for the user to press a key. The lack of labels after the numbers is not a typographical error on my part.
[5] Older (pre-2009, and some 2009 models) Apple hardware has this bug if a dual-El Torito CD is booted via the BIOS compatibility layer. This is especially unfortunate because said machines often fail to provide a working keyboard emulation at this stage, resulting in you being stuck forever at an impressively unhelpful screen. This isn't a Linux bug, since it's happening before we've run any of our code at all. It's not even limited to Linux. 64-bit install media for Vista SP1, Windows 7 and Server 2008 all have similar El Torito layout and all trigger the same bug on Apple hardware. Apple's aware of this, and has resolved the issue by declaring that these machines don't support 64 bit Windows.
[6] Even further investigation reveals that Apple will show you as many icons as there are El Torito images, which is a rare example of Apple giving the user the freedom to brutally butcher their extremities if they so desire
[7] "Windows" is Apple code for "Booting via BIOS compatibility". The Apple boot menu will call any filesystem with a BIOS boot sector Windows.

Joachim Breitner: SAT-solving the testing transition problem

It is half-time for me at DebCamp/DebConf11 in Banja Luka, Bosnia-Herzegovina, and that is a good time to write about my work so far. I started with some finger exercises, such as the HTML copying for gnome-terminal (as blogged previously) and cosmetic changes to the buildd.debian.org/status website. After that, I began my main project: A SAT-based solver for the testing transition problem. In Debian, new software first enters a repository called unstable, where it is tested. Once some requirements are fulfilled (package has been in unstable for usually at least 10 days and has no new release critical bugs), it is entitled to enter the repository called testing, which will eventually form a new stable Debian release. But some packages need to migrate together, usually because either requires the new version of the other. Also, no packages in testing ought to become uninstallable by some seemingly unrelated change. The software that decides these things is called britney. It is sufficiently good in making sure nothing bad happens, but not smart enough to figure out what to do in case more than two packages need to migrate simultaneously. My goal is to improve this. Now, the the various requirements can all be expressed as predicative formulas, and a lot of research has been going into writing good solvers for such problems, called SAT-solvers. Hence my plan was to only specify what we expect from a testing migration, but leave the search for a solution to such a general purpose and highly optimized program. My initial progress was good and I had some result after two days of hacking, and the approach is promising. Because the data sets are pretty large (1.5GB of input data, the final SAT problem has 1.8 million clauses with 250.000 variables), so I learned quite a bit about profiling and optimizing Haskell programs, and that parsec is slower than working with BS.lines and BS.split to parse simple input. I also used the FFI to use dpkg code directly to compare Debian version numbers. At some point I noticed that I actually want to solve PMAX-SAT problems: Given two set of clauses, hard clauses and soft clauses, find a variable assignment that fulfills the hard clauses and as many of the soft clauses as possible. Unfortunately, there are no fast Free PMAX-SAT solvers around. The ones that I found and that were fast enough that I could use them, msuncore by Joao Marques-Silva at the University College Dublin and MiniMaxSat by Federico Heras at the Universitat Polit cnica de Catalunya, are only available as statically linked binaries. It is a shame that this is acceptable by the academic community; imagine mathematicians would stop including the proofs in their papers, and only share their theorems. So if you happen to have written a PMAX-SAT solver and can solve this instance (in weighted DIMACS format) in less than five minutes, and want to brag that the Debian project is using your code, then please release it under a Free license (e.g. GPL or BSD) and tell me about it! The code of my SAT-based solver is, of course, available, though slightly unpolished. Parts of it (notably the interface to picosat and the PMAX-SAT solvers) might be of general interest and I plan to put them on Hackage as a separate license. Update: I have contacted the authors of the SAT solvers mentioned above, and they have reconfirmed that they have no intention of releasing the source. Now I put my hope in maxsatz2009 by Chumin LI, which is GPL but was not able to cope with my large instance directly; I think I need to change the memory management.

Flattr this post

John Goerzen: Jacob and the Amazing Technicolor Adding Machine

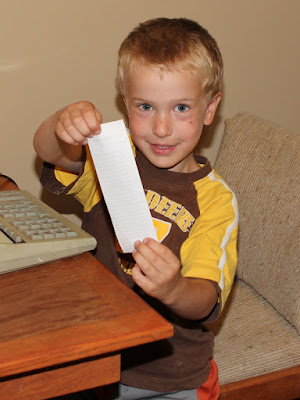
Jacob has been eagerly awaiting this day for at least, well, 2 days now. This morning he started asking questions. All day long he has been wondering how long until the big event. And that event is the arrival of the UPS truck carrying a special $8 package for him. And in that $8 package is not a DVD, or a book, or a toy, but rather 12 rolls of adding machine tape (totaling 1/3 of a mile). Oh yes, our four-year-old can hardly contain his excitement over office supplies. Let me back up a bit to explain. I am always on the lookout for a certain kind of toy. The sort of thing that you don t find in the toy section of a store. The sort of thing that is interesting and engages the curiosity of our boys, that most people would consider would toss, and that usually costs less than $5. Along those lines, Jacob has an old manual typewriter he can use, he and I built a switchbox full of switches and light bulbs that the boys love to play with, we built him a command-line-only PC out of spare parts, the boys have some radios they can use, and one day I salvaged a decades-old adding machine that was going to be thrown out. Jacob liked it he enjoys number and letter games and had some fun, but didn t zealously engage with it until just a few days ago. He sat down at his table and started making cards . He will print out a bunch of numbers, making a strip a couple of feet long, and then say, Dad, I made another card for you! We will then happily accept the card and he will continue making more. Here he is, holding up one of his cards: Jacob had a ton of fun making them, and Oliver wanted in on the action too. Oliver was somewhat interested in the adding machine, but not as much as Jacob, and Jacob didn t want to share. So somehow they decided that Oliver would run and get cards from Jacob and then take them to whatever parent Jacob said. Today Jacob said, Dad, the Oliver delivery service will bring you a card! Saturday morning we had some time to hang around and play, so we played some adding machine tape games. I tucked some long cards under my waistband, and the boys happily chased me all over the house trying to get them back. We also decorated: And here is what the room looked like after some cleanup: That orange bucket on the desk is my card bucket where I can put all the cards he gives me. He even helpfully empties it out into the recycle bin when there are too many old cards in it! But then tragedy struck it was out of paper! I ordered a 12-roll pack off Amazon, and boy was it a long couple of days until it arrived. Today before the UPS truck got here, I showed him how we could feed old paper through and print on the back side an incredible innovation, it seemed! Terah had a conversation with him earlier that went like this: Terah: Jacob, we need to clean up the house. Jacob: Why? Terah: Because some people are coming over. Jacob: Who is OH YES! The UPS delivery man! Yes, let s clean! Terah: Ah, well yes he will be here too, but your great uncle and aunt are coming. Jacob: Oh yay! And the UPS man! It is hard to describe Jacob s excitement when the package arrived. I quickly opened it up, and at his great uncle s prompting, he counted to see if he really did get 12 rolls of paper. IT IS TWELVE ROLLS! YAY! And then we quickly installed it in the machine and off he went. At his great uncle s prompting, he started writing a J on each card . This meant Jacob , or maybe he d put two J s, meaning To John From Jacob , or perhaps the two J s meant To Terah From Jacob he d always have to clue us in. Anyhow, for an $8 investment in paper this has brought hours of joy to our boys. Even though Jacob isn t yet really using it to perform arithmetic, it is setting him up to enjoy that sort of thing and encouraging his curiosity. Both good things.

Benjamin Mako Hill: Lawn Scrabble

The Acetarium, where I live, runs what we like to think of as the world's smallest artistic residency program by hosting artists, social scientists, hackers, and free software and free culture folks for periods of 1-3 months. Our most recently graduated resident, Noah, built a lawn scrabble set on the Media Lab ShopBot and held a Scrabble picnic this weekend with some former Acetarium residents and others. I don't really like playing Scrabble, so you can see me working on an essay (and verifying words) in the background. /copyrighteous/images/lawn_scrabble_01.jpg

/copyrighteous/images/lawn_scrabble_02.jpg Thanks to Ben Schwartz as I yoinked these pictures from his blog.

25 July 2011

Andrea Veri: Backup your Gmail in a few easy steps!

I ve actually spent a few hours searching around for a good backup solution for my mailbox until I decided to stick with getmail. What you ll be able to achieve after reading this HowTo and deploying the following setup is:
  1. A full backup of your e-mail DATA in the Mbox format. (yes, Gmail s labels / folders as well)
  2. Prevent getmail to mark all mails as read after delivering them. (this was a pretty bad issue since getmail was marking all my mails as read even if I did not access my e-mail at all)
  3. Keep your backups up-to-date with the latest content from your mailbox. (by default getmail grabs all the DATA from your mailbox and fills up the Mbox / Maildir content keeping deleted mails. So let s say I deleted a mail two days ago, well it ll still appear on today s backups. This behaviour is definitely unwanted)
I ll now move to explain a few details about my new configuration but before moving to tweak getmail s main config file, please do the following change on _retrieverbases.py* :
return self._getmsgpartbyid(msgid, (RFC822) ) to return self._getmsgpartbyid(msgid, (BODY.PEEK[]) )
When done grab the following getmailrc and adapt it to your needs**:
[retriever]
type = SimpleIMAPSSLRetriever ## or SimplePOP3SSLRetriever.
server = imap.gmail.com ## or pop.gmail.com for POP3.
username = example@gmail.com
password = password ## so-called Gmail s labels should be listed one by one here for getmail to retrieve mail from them successfully. mailboxes = ( INBOX , [Gmail]/Sent mail ,
ubuntu , gnome/example , linux/example ) [destination]
type = Mboxrd
path = ~/.getmail/backup.mbox [options]
delivered_to = false ## No delivered_to header added automatically.
received = false ## No received header added automatically.
verbose = 2 ## getmail will print messages about each of its actions.
When done we should go ahead setting up getmail s directories and config file:
mkdir $HOME/.getmail cp $HOME/getmailrc $HOME/.getmail/ ## Adapt $HOME/getmailrc to whatever dir you put that file into.
But pretty much all the remaining work will be done by a small shell script I wrote:
#!/bin/sh WORKDIR=$HOME/.getmail
date= date +%d-%m-%Y_%H:%M if [ ! -f $WORKDIR/backup.mbox ]
then
touch $WORKDIR/backup.mbox
fi getmail > $WORKDIR/getmail.log
OUT=$?
if [ $OUT -eq 0 ]
then
mkdir -p $WORKDIR/backups/ && mv $WORKDIR/backup.mbox $WORKDIR/backups/backup_$date.mbox ;
else [ $OUT -eq 1 ]
exit 1
fi ## Cleanup older than 3 days backups
find $WORKDIR/backups/* -mtime +3 -exec rm ;
cd $WORKDIR && rm -rf oldmail-* ;
This script will:
  1. Run getmail using the getmailrc config file you previously worked on.
  2. If the above command will be successful, it ll create a backups dir into $HOME/.getmail and move the latest Mbox file there appending a date and time to its name. (by doing this we are sure next getmail run will happen on an empty backup.mbox file, thus it will just contain the latest content from your mailbox)
  3. It ll re-create a backup.mbox file on $HOME/.getmail to avoid the next getmail run to fail.
  4. In the end, it ll clean up older than 3 days backups to avoid a too crowded backups folder. (it removes the oldmail file as well since it is useless in our case)
In the end set up a cronjob that will run the above script and generate the backups for you every one hour:
0 * * * * $HOME/.getmail/getmail_run.sh > /dev/null
Feel free to let me know if you ve encountered any issue while following the above HowTo. Enjoy! * /usr/share/getmail4/getmailcore/_retrieverbases.py on line 901. ** More documentation about the getmailrc file and syntax can be found on getmail s documentation page.

Next.

Previous.