Search Results: "edd"

31 August 2020

Russ Allbery: Review: Men at Arms

Review: Men at Arms, by Terry Pratchett
Series: Discworld #15
Publisher: Harper
Copyright: 1993
Printing: November 2013
ISBN: 0-06-223740-3
Format: Mass market
Pages: 420
Men at Arms is the fifteenth Discworld novel and a direct plot sequel to Guards! Guards!. You could start here without missing too much, but starting with Guards! Guards! would make more sense. And of course there are cameos (and one major appearance) by other characters who are established in previous books. Carrot, the adopted dwarf who joined the watch in Guards! Guards!, has been promoted to corporal. He is now in charge of training new recruits, a role that is more important because of the Night Watch's new Patrician-ordered diversity initiative. The Watch must reflect the ethnic makeup of the city. That means admitting a troll, a dwarf... and a woman? Trolls and dwarfs hate each other because dwarfs mine precious things out of rock and trolls are composed of precious things embedded in rocks, so relations between the new recruits are tense. Captain Vimes is leaving the Watch, and no one is sure who would or could replace him. (The reason for this is a minor spoiler for Guards! Guards!) A magical weapon is stolen from the Assassin's Guild. And a string of murders begins, murders that Vimes is forbidden by Lord Vetinari from investigating and therefore clearly is going to investigate. This is an odd moment at which to read this book. The Night Watch are not precisely a police force, although they are moving in that direction. Their role in Ankh-Morpork is made much stranger by the guild system, in which the Thieves' Guild is responsible for theft and for dealing with people who steal outside of the quota of the guild. But Men at Arms is in part a story about ethics, about what it means to be a police officer, and about what it looks like when someone is very good at that job. Since I live in the United States, that makes it hard to avoid reading Men at Arms in the context of the current upheavals about police racism, use of force, and lack of accountability. Men at Arms can indeed be read that way; community relations, diversity in the police force, the merits of making two groups who hate each other work together, and the allure of violence are all themes Pratchett is working with in this novel. But they're from the perspective of a UK author writing in 1993 about a tiny city guard without any of the machinery of modern police, so I kept seeing a point of clear similarity and then being slightly wrong-footed by the details. It also felt odd to read a book where the cops are the heroes, much in the style of a detective show. This is in no way a problem with the book, and in a way it was helpful perspective, but it was a strange reading experience.
Cuddy had only been a guard for a few days but already he had absorbed one important and basic fact: it is almost impossible for anyone to be in a street without breaking the law.
Vimes and Carrot are both excellent police officers, but in entirely different ways. Vimes treats being a cop as a working-class job and is inclined towards glumness and depression, but is doggedly persistent and unable to leave a problem alone. His ethics are covered by a thick layer of world-weary cynicism. Carrot is his polar opposite in personality: bright, endlessly cheerful, effortlessly charismatic, and determined to get along with everyone. On first appearance, this contrast makes Vimes seem wise and Carrot seem a bit dim. That is exactly what Pratchett is playing with and undermining in Men at Arms. Beneath Vimes's cynicism, he's nearly as idealistic as Carrot, even though he arrives at his ideals through grim contrariness. Carrot, meanwhile, is nowhere near as dim as he appears to be. He's certain about how he wants to interact with others and is willing to stick with that approach no matter how bad of an idea it may appear to be, but he's more self-aware than he appears. He and Vimes are identical in the strength of their internal self-definition. Vimes shows it through the persistent, grumpy stubbornness of a man devoted to doing an often-unpleasant job, whereas Carrot verbally steamrolls people by refusing to believe they won't do the right thing.
Colon thought Carrot was simple. Carrot often struck people as simple. And he was. Where people went wrong was thinking that simple meant the same thing as stupid.
There's a lot going on in this book apart from the profiles of two very different models of cop. Alongside the mystery (which doubles as pointed commentary on the corrupting influence of violence and personal weaponry), there's a lot about dwarf/troll relations, a deeper look at the Ankh-Morpork guilds (including a horribly creepy clown guild), another look at how good Lord Vetinari is at running the city by anticipating how other people will react, a sarcastic dog named Gaspode (originally seen in Moving Pictures), and Pratchett's usual collection of memorable lines. It is also the origin of the now-rightfully-famous Vimes boots theory:
The reason that the rich were so rich, Vimes reasoned, was because they managed to spend less money. Take boots, for example. He earned thirty-eight dollars a month plus allowances. A really good pair of leather boots cost fifty dollars. But an affordable pair of boots, which were sort of OK for a season or two and then leaked like hell when the cardboard gave out, cost about ten dollars. Those were the kind of boots Vimes always bought, and wore until the soles were so thin that he could tell where he was in Ankh-Morpork on a foggy night by the feel of the cobbles. But the thing was that good boots lasted for years and years. A man who could afford fifty dollars had a pair of boots that'd still be keeping his feet dry in ten years' time, while the poor man who could only afford cheap boots would have spent a hundred dollars on boots in the same time and would still have wet feet. This was the Captain Samuel Vimes 'Boots' theory of socioeconomic unfairness.
Men at Arms regularly makes lists of the best Discworld novels, and I can see why. At this point in the series, Pratchett has hit his stride. The plots have gotten deeper and more complex without losing the funny moments, movie and book references, and glorious turns of phrase. There is also a lot of life philosophy and deep characterization when one pays close attention to the characters.
He was one of those people who would recoil from an assault on strength, but attack weakness without mercy.
My one complaint is that I found it a bit overstuffed with both characters and subplots, and as a result had a hard time following the details of the plot. I found myself wanting a timeline of the murders or a better recap from one of the characters. As always with Pratchett, the digressions are wonderful, but they do occasionally come at the cost of plot clarity. I'm not sure I recommend the present moment in the United States as the best time to read this book, although perhaps there is no better time for Carrot and Vimes to remind us what good cops look like. But regardless of when one reads it, it's an excellent book, one of the best in the Discworld series to this point. Followed, in publication order, by Soul Music. The next Watch book is Feet of Clay. Rating: 8 out of 10

Dirk Eddelbuettel: RcppCCTZ 0.2.9: API Header Added

A new minor release 0.2.9 of RcppCCTZ is now on CRAN. RcppCCTZ uses Rcpp to bring CCTZ to R. CCTZ is a C++ library for translating between absolute and civil times using the rules of a time zone. In fact, it is two libraries. One for dealing with civil time: human-readable dates and times, and one for converting between between absolute and civil times via time zones. And while CCTZ is made by Google(rs), it is not an official Google product. The RcppCCTZ page has a few usage examples and details. This package was the first CRAN package to use CCTZ; by now at least three others do using copies in their packages which remains less than ideal. This version adds a header file for the recently-exported three functions.

Changes in version 0.2.9 (2020-08-30)
  • Provide a header RcppCCZT_API.h for client packages.
  • Show a simple example of parsing a YYYYMMDD HHMMSS.FFFFFF date.

We also have a diff to the previous version thanks to CRANberries. More details are at the RcppCCTZ page; code, issue tickets etc at the GitHub repository. If you like this or other open-source work I do, you can now sponsor me at GitHub. For the first year, GitHub will match your contributions.

This post by Dirk Eddelbuettel originated on his Thinking inside the box blog. Please report excessive re-aggregation in third-party for-profit settings.

30 August 2020

Dirk Eddelbuettel: RcppSMC 0.2.2: Small updates

A new release 0.2.2 of the RcppSMC package arrived on CRAN earlier today (and once again as a very quick pretest-publish within minutes of submission). RcppSMC provides Rcpp-based bindings to R for the Sequential Monte Carlo Template Classes (SMCTC) by Adam Johansen described in his JSS article. Sequential Monte Carlo is also referred to as Particle Filter in some contexts. This releases contains two fixes from a while back that had not been released, a CRAN-requested update plus a few more minor polishes to make it pass R CMD check --as-cran as nicely as usual.

Changes in RcppSMC version 0.2.2 (2020-08-30)
  • Package helper files .editorconfig added (Adam in #43).
  • Change const correctness and add return (Leah in #44).
  • Updates to continuous integration and R versions used (Dirk)
  • Accomodate CRAN request, other updates to CRAN Policy (Dirk in #49 fixing #48).

Courtesy of CRANberries, there is a diffstat report for this release. More information is on the RcppSMC page. Issues and bugreports should go to the GitHub issue tracker. If you like this or other open-source work I do, you can now sponsor me at GitHub. For the first year, GitHub will match your contributions.

This post by Dirk Eddelbuettel originated on his Thinking inside the box blog. Please report excessive re-aggregation in third-party for-profit settings.

Jonathan Carter: The metamorphosis of Loopy Loop

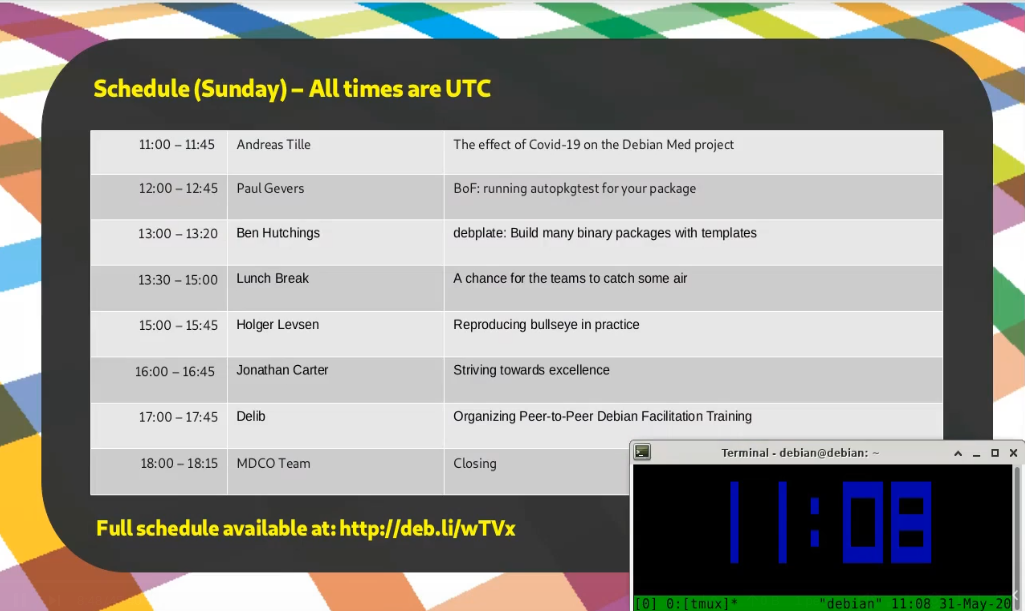
Dealing with the void during MiniDebConf Online #1 Between 28 and 31 May this year, we set out to create our first ever online MiniDebConf for Debian. Many people have been meaning to do something similar for a long time, but it just didn t work out yet. With many of us being in lock down due to COVID-19, and with the strong possibility looming that DebConf20 might have had to become an online event, we rushed towards organising the first ever Online MiniDebConf and put together some form of usable video stack for it. I could go into all kinds of details on the above, but this post is about a bug that lead to a pretty nifty feature for DebConf20. The tool that we use to capture Jitsi calls is called Jibri (Jitsi Broadcasting Infrustructure). It had a bug (well, bug for us, but it s an upstream feature) where Jibri would hang up after 30s of complete silence, because it would assume that the call has ended and that the worker can be freed up again. This would result in the stream being ended at the end of every talk, so before the next talk, someone would have to remember to press play again in their media player or on the video player on the stream page. Hrmph. Easy solution on the morning that the conference starts? I was testing a Debian Live image the night before in a KVM and thought that I might as well just start a Jitsi call from there and keep a steady stream of silence so that Jibri doesn t hang up. It worked! But the black screen and silence on stream was a bit eery. Because this event was so experimental in nature, and because we were on such an incredibly tight timeline, we opted not to seek sponsors for this event, so there was no sponsors loop that we d usually stream during a DebConf event. Then I thought Ah! I could just show the schedule! .

The stream looked bright and colourful (and was even useful!) and Jitsi/Jibri didn t die. I thought my work was done. As usual, little did I know how untrue that was. The silence was slightly disturbing after the talks, and people asked for some music. Playing music on my VM and capturing the desktop audio in to Jitsi was just a few pulseaudio settings away, so I spent two minutes finding some freely licensed tracks that sounded ok enough to just start playing on the stream. I came across mini-albums by Captive Portal and Cinema Noir, During the course of the MiniDebConf Online I even started enjoying those. Someone also pointed out that it would be really nice to have a UTC clock on the stream. I couldn t find a nice clock in a hurry so I just added a tmux clock in the meantime while we deal with the real-time torrent of issues that usually happens when organising events like this.
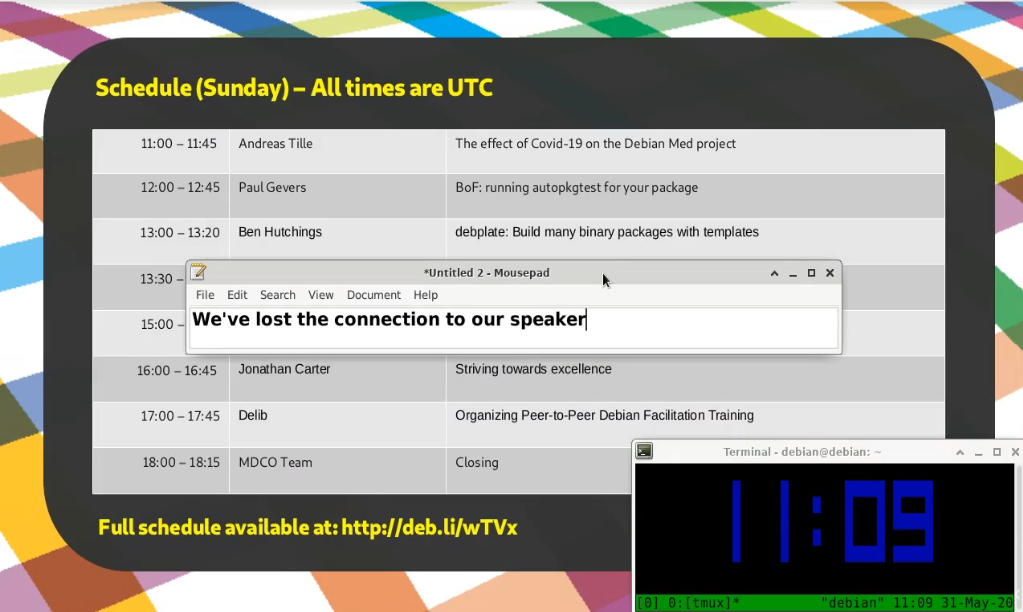
Speaking of issues, during our very first talk of the last day, our speaker had a power cut during the talk and abruptly dropped off. Oops! So, since I had a screenshare open from the VM to the stream, I thought I d just pop in a quick message in a text editor to let people know that we re aware of it and trying to figure out what s going on.
In the end, MiniDebConf Online worked out all right. Besides the power cut for our one speaker, and another who had a laptop that was way too under-powered to deal with video, everything worked out very well. Even the issues we had weren t show-stoppers and we managed to work around them.

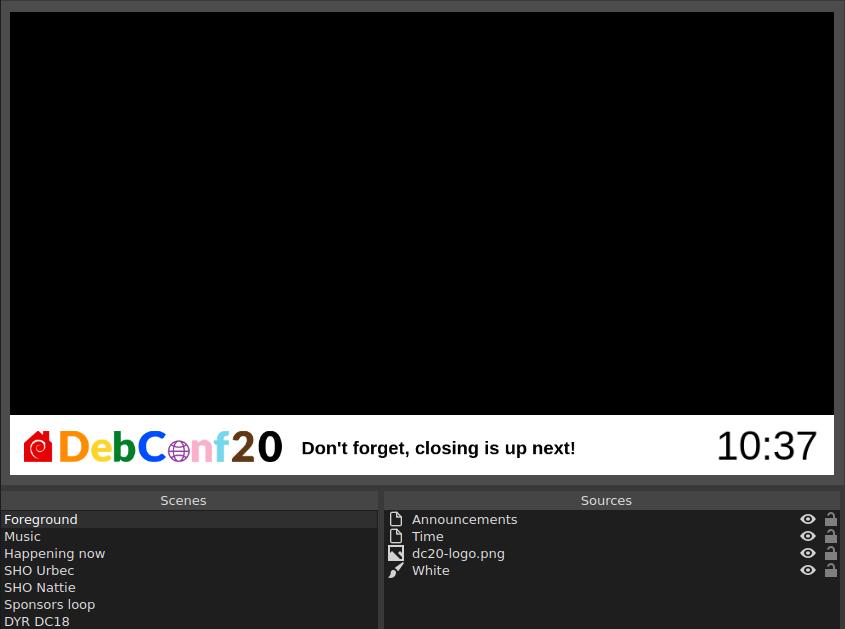
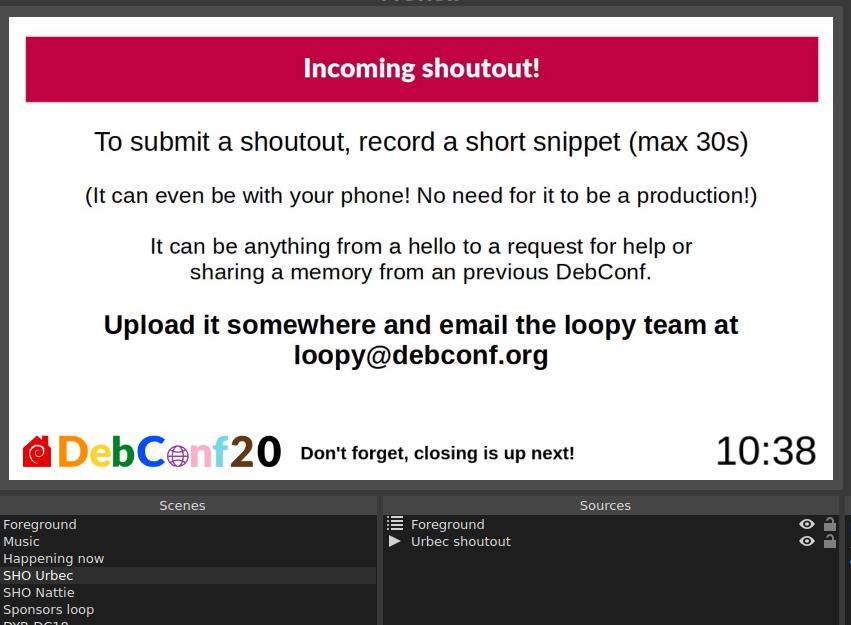
DebConf20 Moves Online For DebConf, we usually show a sponsors loop in between sessions. It s great that we give our sponsors visibility here, but in reality people see the sponsors loop and think Talk over! and then they look away. It s also completely silent and doesn t provide any additional useful information. I was wondering how I could take our lessons from MDCO#1 and integrate our new tricks with the sponsors loop. That is, add the schedule, time, some space to type announcements on the screen and also add some loopable music to it. I used OBS before in making my videos, and like the flexibility it provides when working with scenes and sources. A scene is what you would think of as a screen or a document with its own collection of sources or elements. For example, a scene might contain sources such as a logo, clock, video, image, etc. A scene can also contain another scene. This is useful if you want to contain a banner or play some background music that is shared between scenes.

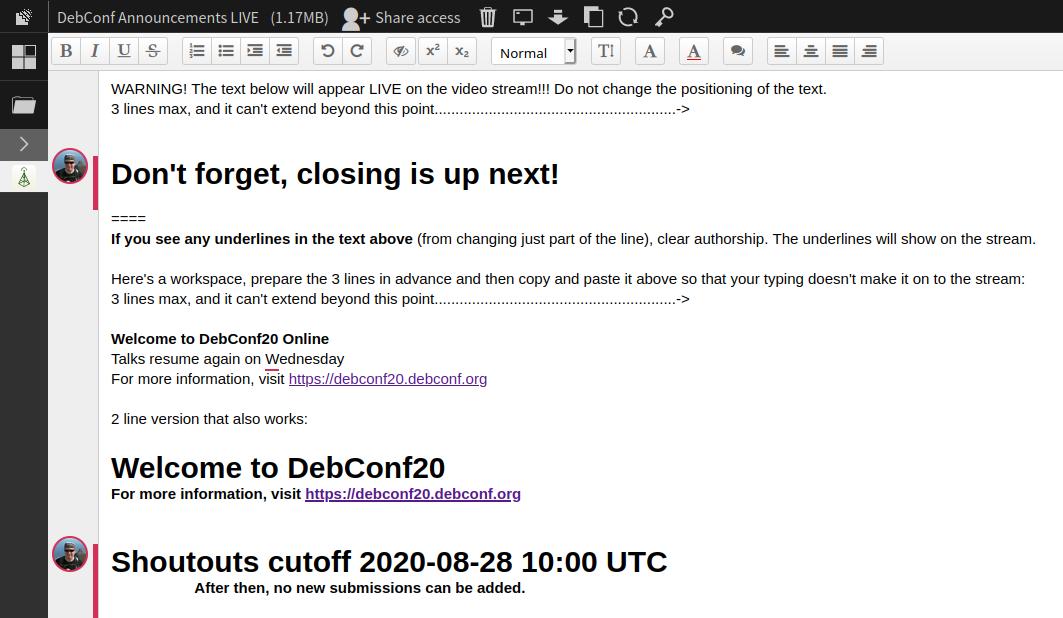
The above screenshots illustrate some basics of scenes and sources. First with just the DC20 banner, and then that used embedded in another scene. For MDCO#1, I copied and pasted the schedule into a LibreOffice Impress slide that was displayed on the stream. Having to do this for all 7 days of DebConf, plus dealing with scheduling changes would be daunting. So, I started to look in to generating some schedule slides programmatically. Stefano then pointed me to the Happening Now page on the DebConf website, where the current schedule block is displayed. So all I would need to do in OBS was to display a web page. Nice! Unfortunately the OBS in Debian doesn t have the ability to display web pages out of the box (we need to figure out CEF in Debian), but fortunately someone provides a pre-compiled version of the plugin called Linux Browser that works just fine. This allowed me to easily add the schedule page in its own scene. Being able to display a web page solved another problem. I wasn t fond of having to type / manage the announcements in OBS. It would either be a bit prone to user error, and if you want to edit the text while the loop is running, you d have to disrupt the loop, go to the foreground scene, and edit the text before resuming the loop. That s a bit icky. Then I thought that we could probably just get that from a web page instead. We could host some nice html snippet in a repository in salsa, and then anyone could easily commit an MR to update the announcement. But then I went a step further, use an etherpad! Then anyone in the orga team can quickly update the announcement and it would be instantly changed on the stream. Nice! So that small section of announcement text on the screen is actually a whole web browser with an added OBS filter to crop away all the pieces we don t want. Overkill? Sure, but it gave us a decent enough solution that worked in time for the start of DebConf. Also, being able to type directly on to the loop screen works out great especially in an emergency. Oh, and uhm the clock is also a website rendered in its own web browser :-P
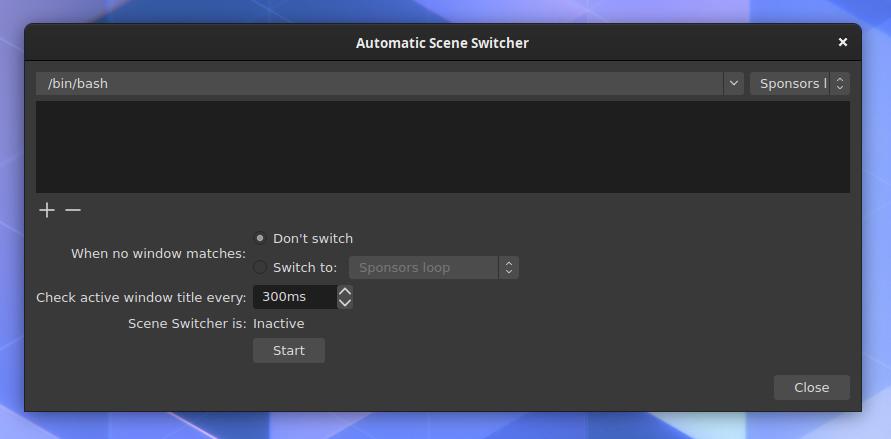
So, I had the ability to make scenes, add elements and add all the minimal elements I wanted in there. Great! But now I had to figure out how to switch scenes automatically. It s probably worth mentioning that I only found some time to really dig into this right before DebConf started, so with all of this I was scrambling to find things that would work without too many bugs while also still being practical. Now I needed the ability to switch between the scenes automatically / programmatically. I had never done this in OBS before. I know it has some API because there are Android apps that you can use to control OBS with from your phone. I discovered that it had an automatic scene switcher, but it s very basic. It can only switch based on active window, which can be useful in some cases, but since we won t have any windows open other than OBS, this tool was basically pointless.
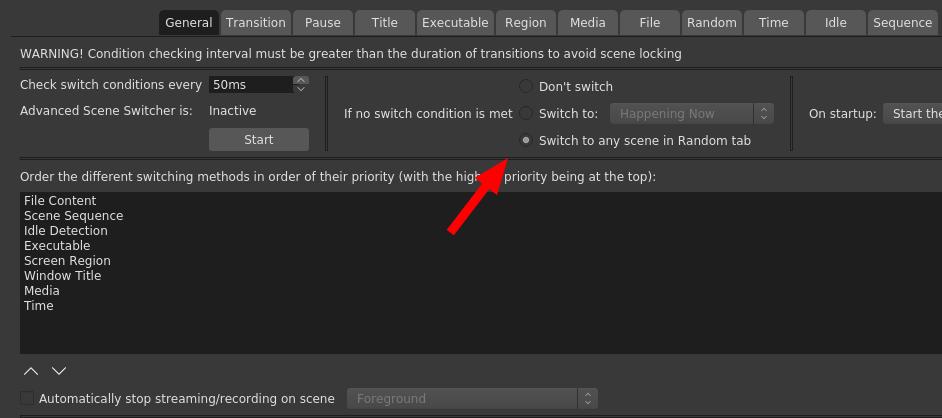
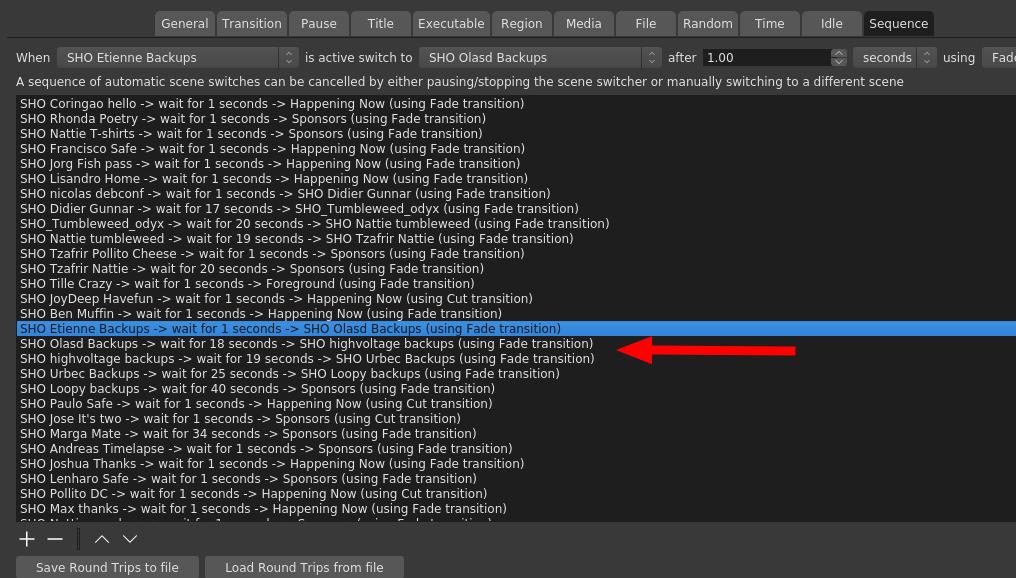
After some quick searches, I found a plugin called Advanced Scene Switcher. This plugin can do a lot more, but has some weird UI choices, and is really meant for gamers and other types of professional streamers to help them automate their work flow and doesn t seem at all meant to be used for a continuous loop, but, it worked, and I could make it do something that will work for us during the DebConf. I had a chicken and egg problem because I had to figure out a programming flow, but didn t really have any content to work with, or an idea of all the content that we would eventually have. I ve been toying with the idea in my mind and had some idea that we could add fun facts, postcards (an image with some text), time now in different timezones, Debian news (maybe procured by the press team), cards that contain the longer announcements that was sent to debconf-announce, perhaps a shout out or two and some photos from previous DebConfs like the group photos. I knew that I wouldn t be able to build anything substantial by the time DebConf starts, but adding content to OBS in between talks is relatively easy, so we could keep on building on it during DebConf. Nattie provided the first shout out, and I made 2 video loops with the DC18/19 pictures and also two Did you know cards. So the flow I ended up with was: Sponsors -> Happening Now -> Random video (which would be any of those clips) -> Back to sponsors. This ended up working pretty well for quite a while. With the first batch of videos the sponsor loop would come up on average about every 2 minutes, but as much shorter clips like shout outs started to come in faster and faster, it made sense to play a few 2-3 shout-outs before going back to sponsors. So here is a very brief guide on how I set up the sequencing in Advanced Scene Switcher.
If no condition was met, a video would play from the Random tab.
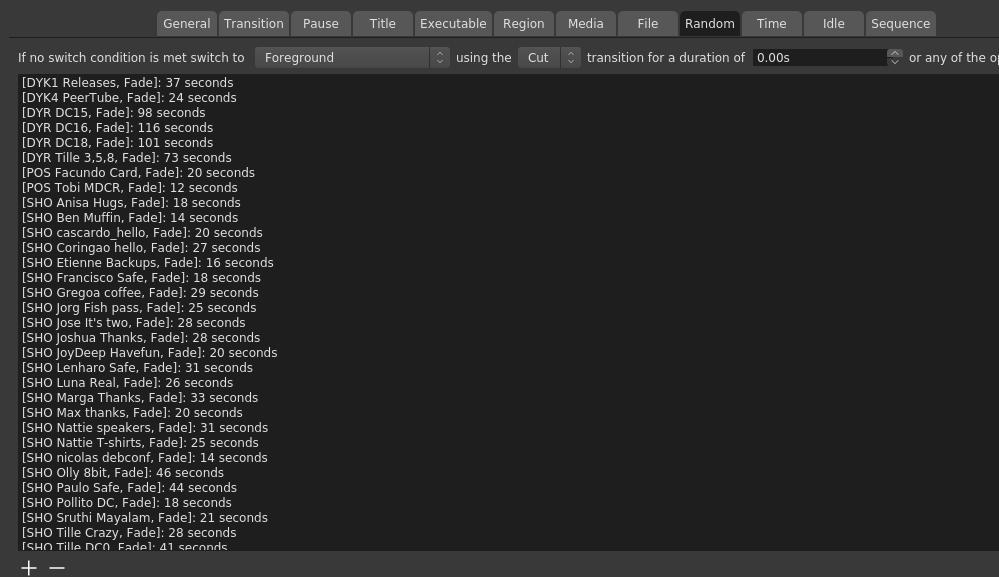
Then in the Random tab, I added the scenes that were part of the random mix. Annoyingly, you have to specify how long it should play for. If you don t, the no condition thingy is triggered and another video is selected. The time is also the length of the video minus one second, because
You can t just say that a random video should return back to a certain scene, you have to specify that in the sequence tab for each video. Why after 1 second? Because, at least in my early tests, and I didn t circle back to this, it seems like 0s can randomly either mean instantly, or never. Yes, this ended up being a bit confusing and tedious, and considering the late hours I worked on this, I m surprised that I didn t manage to screw it up completely at any point. I also suspected that threads would eventually happen. That is, when people create video replies to other videos. We had 3 threads in total. There was a backups thread, beverage thread and an impersonation thread. The arrow in the screenshot above points to the backups thread. I know it doesn t look that complicated, but it was initially somewhat confusing to set up and make sense out of it.
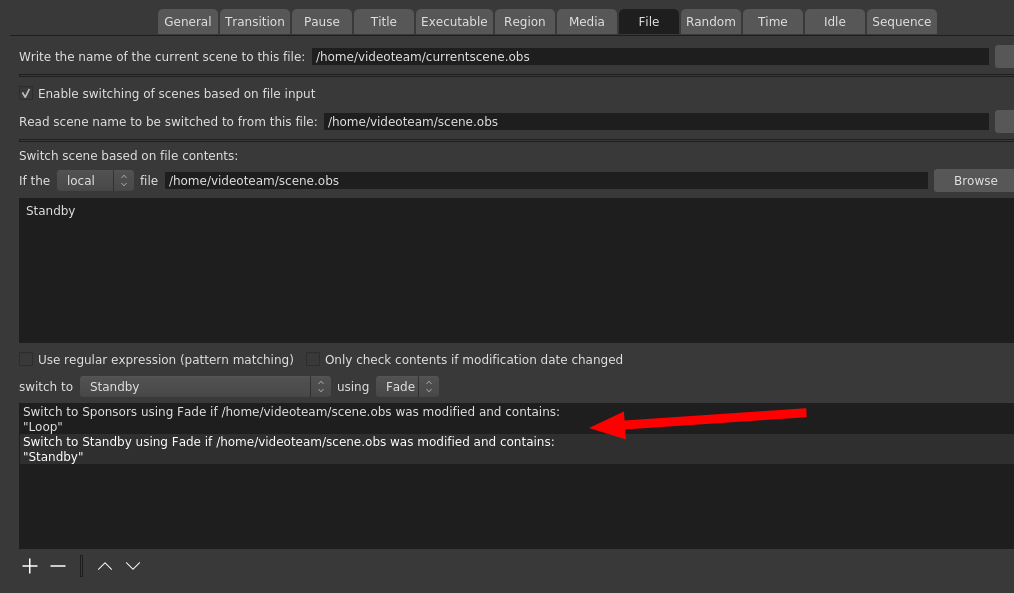
For the next event, the Advanced Scene Switcher might just get some more taming, or even be replaced entirely. There are ways to drive OBS by API, and even the Advanced Scene Switcher tool can be driven externally to some degree, but I think we definitely want to replace it by the next full DebConf. We had the problem that when a talk ended, we would return to the loop in the middle of a clip, which felt very unnatural and sometimes even confusing. So Stefano helped me with a helper script that could read the socket from Vocto, which I used to write either Loop or Standby to a file, and then the scene switcher would watch that file and keep the sponsors loop ready for start while the talks play. Why not just switch to sponsors when the talk ends? Well, the little bit of delay in switching would mean that you would see a tiny bit of loop every time before switching to sponsors. This is also why we didn t have any loop for the ad-hoc track (that would have probably needed another OBS instance, we ll look more into solutions for this for the future).
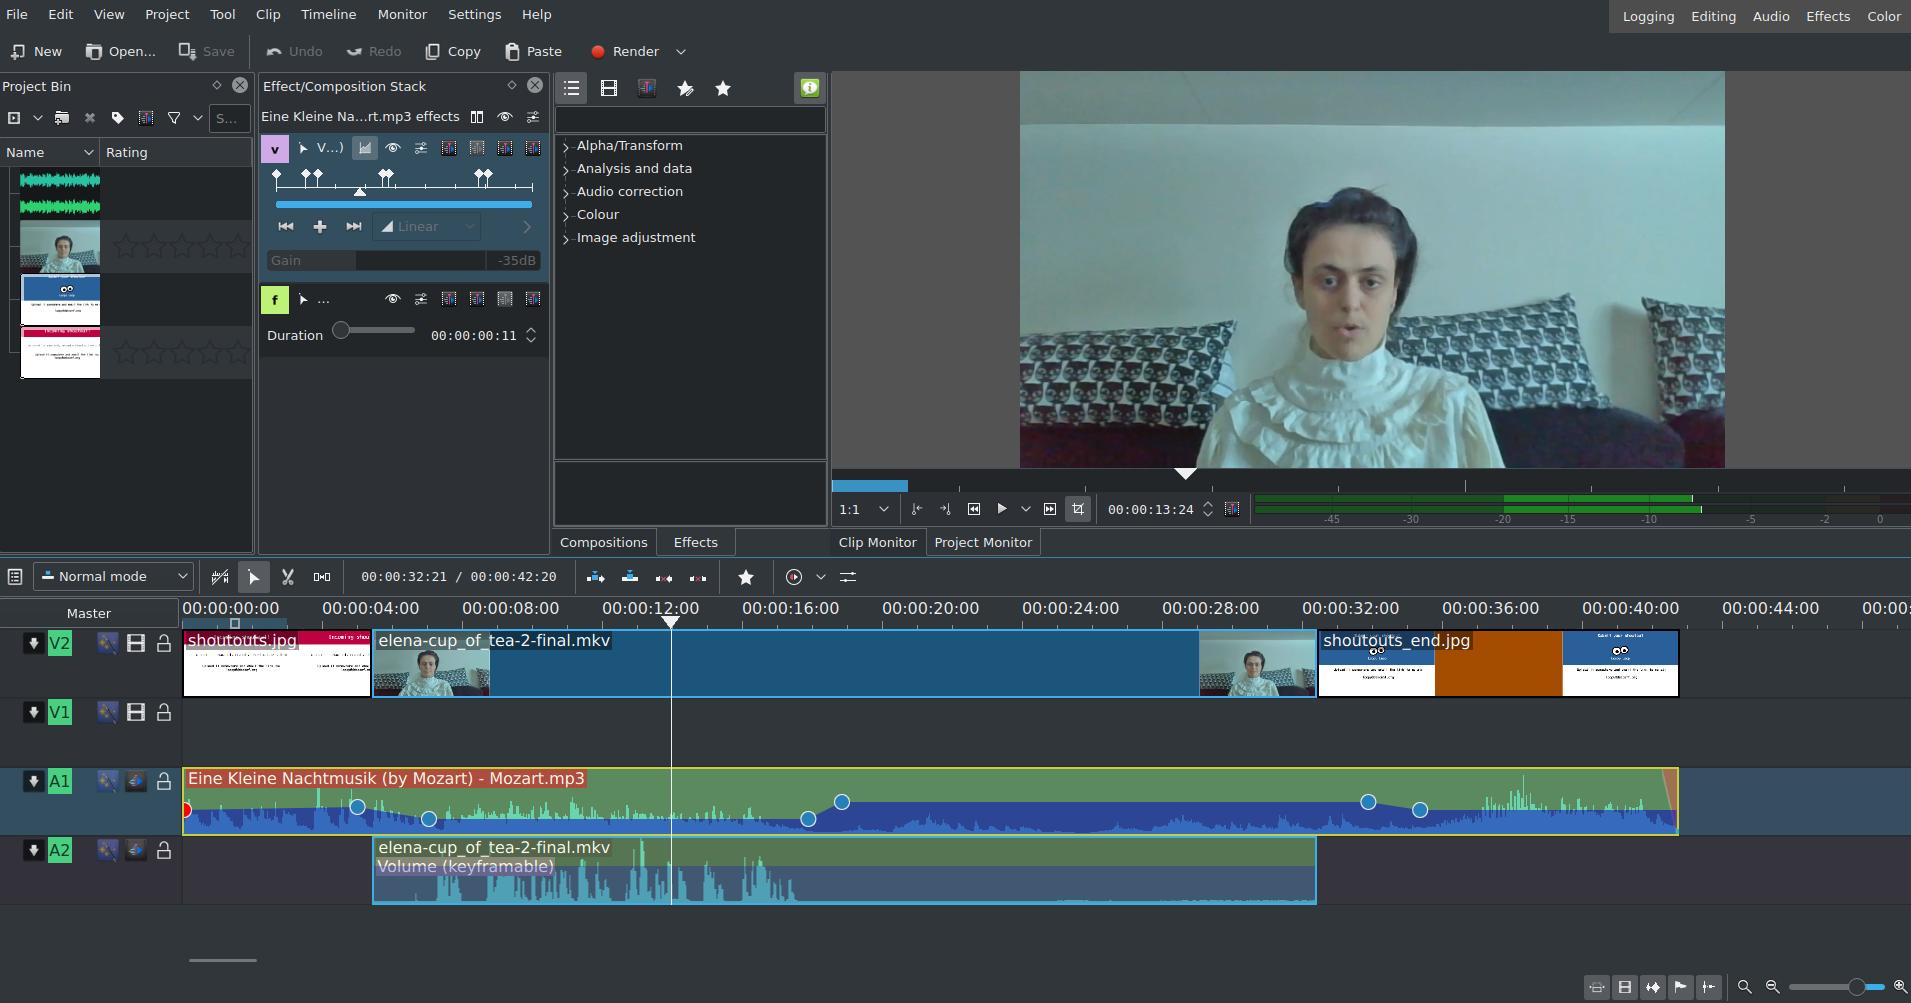
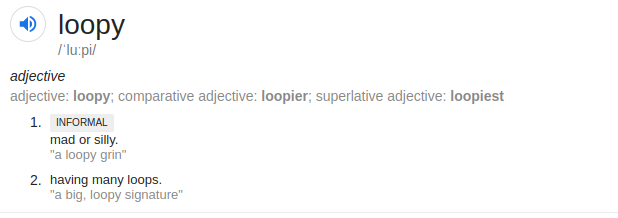
Then for all the clips. There were over 50 of them. All of them edited by hand in kdenlive. I removed any hard clicks, tried to improve audibility, remove some sections at the beginning and the end that seemed extra and added some music that would reduce in volume when someone speaks. In the beginning, I had lots of fun with choosing music for the clips. Towards the end, I had to rush them through and just chose the same tune whether it made sense or not. For comparison of what a difference the music can make, compare the original and adapted version for Valhalla s clip above, or this original and adapted video from urbec. This part was a lot more fun than dealing with the video sequencer, but I also want to automate it a bit. When I can fully drive OBS from Python I ll likely instead want to show those cards and control music volume from Python (what could possibly go wrong ). The loopy name happened when I requested an @debconf.org alias for this. I was initially just thinking about loop@debconf.org but since I wanted to make it clear that the purpose of this loop is also to have some fun, I opted for loopy instead:
I was really surprised by how people took to loopy. I hoped it would be good and that it would have somewhat positive feedback, but the positive feedback was just immense. The idea was that people typically saw it in between talks. But a few people told me they kept it playing after the last talk of the day to watch it in the background. Some asked for the music because they want to keep listening to it while working (and even for jogging!?). Some people also asked for recordings of the loop because they want to keep it for after DebConf. The shoutouts idea proved to be very popular. Overall, I m very glad that people enjoyed it and I think it s safe to say that loopy will be back for the next event.
Also throughout this experiment Loopy Loop turned into yet another DebConf mascot. We gain one about every DebConf, some by accident and some on purpose. This one was not quite on purpose. I meant to make an image for it for salsa, and started with an infinite loop symbol. That s a loop, but by just adding two more solid circles to it, it looks like googly eyes, now it s a proper loopy loop! I like the progress we ve made on this, but there s still a long way to go, and the ideas keep heaping up. The next event is quite soon (MDCO#2 at the end of November, and it seems that 3 other MiniDebConf events may also be planned), but over the next few events there will likely be significantly better graphics/artwork, better sequencing, better flow and more layout options. I hope to gain some additional members in the team to deal with incoming requests during DebConf. It was quite hectic this time! The new OBS also has a scripting host that supports Python, so I should be able to do some nice things even within OBS without having to drive it externally (like, display a clock without starting a web browser).

The Loopy Loop Music The two mini albums that mostly played during the first few days were just a copy and paste from the MDCO#1 music, which was:

For shoutout tracks, that were later used in the loop too (because it became a bit monotonous), most of the tracks came from freepd.com: I have much more things to say about DebConf20, but I ll keep that for another post, and hopefully we can get all the other video stuff in a post from the video team, because I think there s been some real good work done for this DebConf. Also thanks to Infomaniak who was not only a platinum sponsor for this DebConf, but they also provided us with plenty of computing power to run all the video stuff on. Thanks again!

28 August 2020

Dirk Eddelbuettel: anytime 0.3.9: More Minor Maintenance

A new minor release of the anytime package arrived on CRAN yesterday. This is the twentieth release, but sadly we seem to be spinning our wheels just accomodating CRAN (which the two or three last releases focused on). Code and functionality remain mature and stable, of course. anytime is a very focused package aiming to do just one thing really well: to convert anything in integer, numeric, character, factor, ordered, format to either POSIXct or Date objects and to do so without requiring a format string as well as accomodating different formats in one input vector. See the anytime page, or the GitHub README.md for a few examples. This release once again has to play catchup with CRAN as r-devel now changes how tzone propagates when we do as.POSIXct(as.POSIXlt(Sys.time()) which is now no longer equal to as.POSIXct(Sys.time()) even for a fixed, stored Sys.time() call result. Probably for the better, but an issue for now so we effectively just reduced test coverage. Call it progress . The full list of changes follows.

Changes in anytime version 0.3.9 (2020-08-26)
  • Skip one test file that is impossible to run across different CRAN setups, and life is definitely too short for these games.
  • Change remaining http:// to https:// because, well, you know.

Courtesy of CRANberries, there is a comparison to the previous release. More information is on the anytime page. The issue tracker tracker off the GitHub repo can be use for questions and comments. If you like this or other open-source work I do, you can now sponsor me at GitHub. For the first year, GitHub will match your contributions.

This post by Dirk Eddelbuettel originated on his Thinking inside the box blog. Please report excessive re-aggregation in third-party for-profit settings.

26 August 2020

Dirk Eddelbuettel: #29: Easy, Reliable, Fast Linux CRAN Binaries via BSPM

Welcome to the 29th post in the randomly repeating R recommendations series or R4 for short. Our last post #28 introduced RSPM, and just before that we also talked in #27 about binary installations on Ubuntu (which was also a T4 video). This post is joined with I aki Ucar and mainly about work we have done with his bspm package.

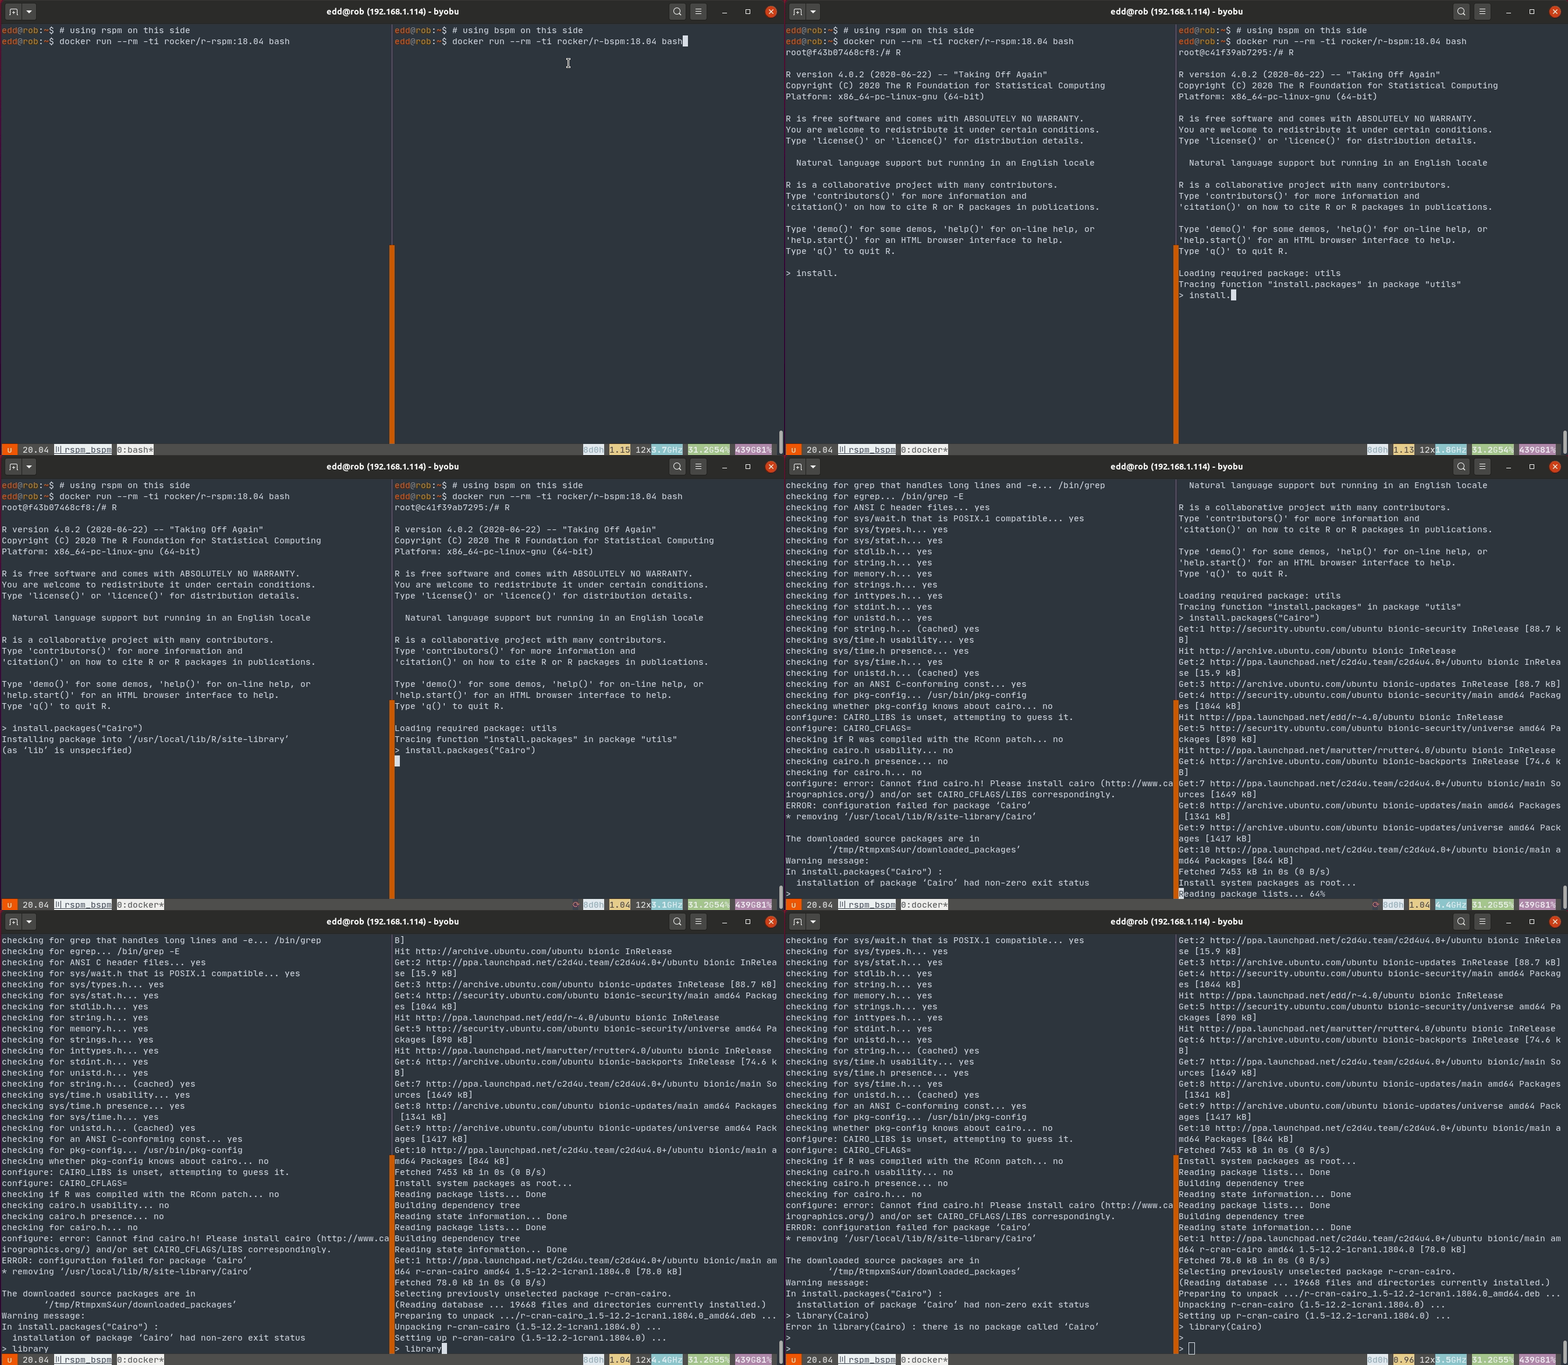
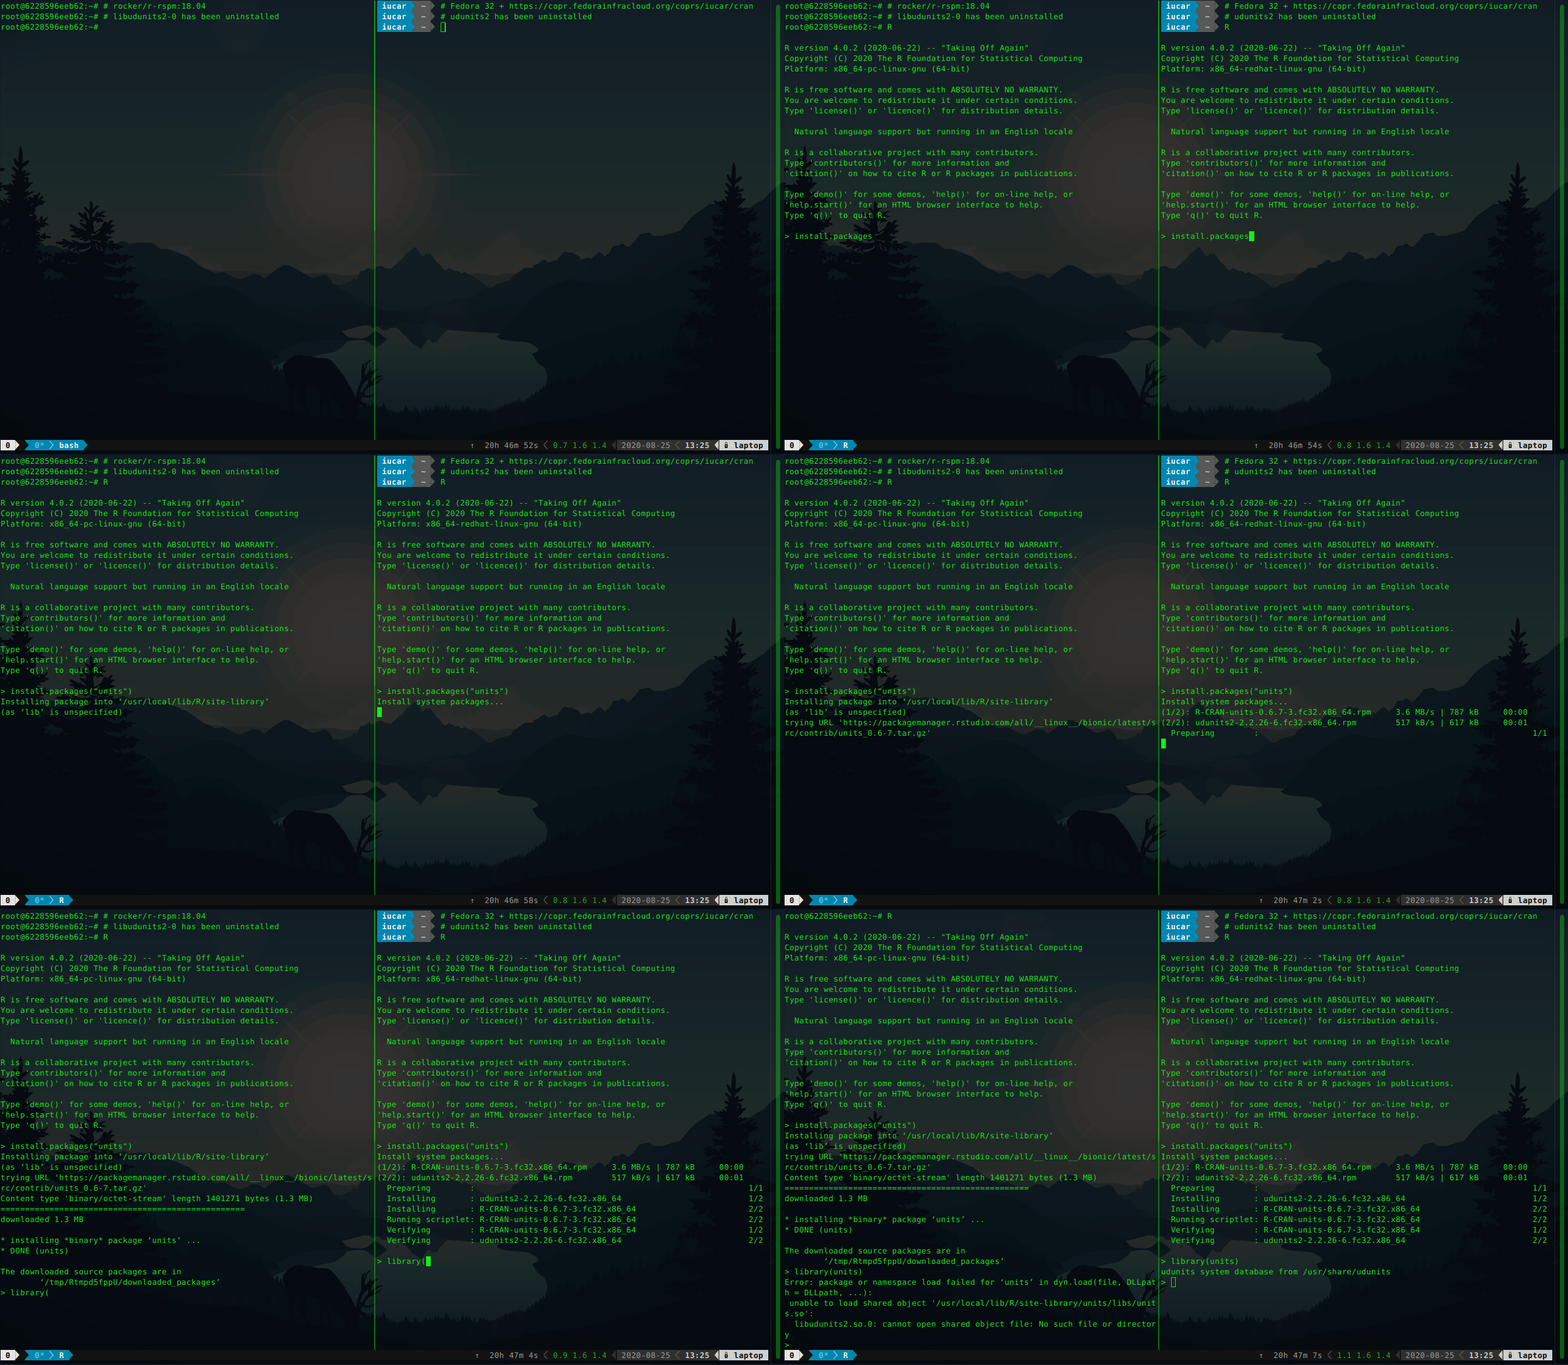
Background CRAN has been a cornerstone of the success of R in recent years. As a well-maintained repository with stringent quality control, it ensures users have access to highest-quality statistical / analytical software that just works . Users on Windows and macOS also benefit from faster installation via pre-compiled binary packages. Linux users generally install from source, which can be more tedious and, often, much slower. Those who know where to look have had access to (at least some) binaries for years as well (and one of us blogged and vlogged about this at length). Debian users get close to 1000 CRAN and BioConductor packages (and, true to Debian form, for well over a dozen hardware platforms). Michael Rutter maintains a PPA with 4600 binaries for three different Ubuntu flavors (see c2d4u4.0+). More recently, Fedora joined the party with 16000 (!!) binaries, essentially all of CRAN, via a Copr repository (see iucar/cran). The buzz currently is however with RSPM, a new package manager by RStudio. An audacious project, it provides binaries for several Linux distributions and releases. It has already been tested in many RStudio Cloud sessions (including with some of our students) as well as some CI integrations. RSPM cuts across and takes the breadth of CRAN across several Linux distributions, bringing installation of pre-built CRAN packages a binaries under their normal CRAN package names. Another nice touch is the integration with install.packages(): these binaries are installed in a way that is natural for R users but as binaries. It is however entirely disconnected from the system package management. This means that the installation of a package requiring an external library may succeed and still fail, as a required library simply cannot be pulled in directly by RSPM. So what is needed is a combination. We want binaries that are aware of their system dependencies but accessible directly from R just like RSPM offers it. Enter BSPM the Bridge to System Package Manager package (also on CRAN). The first illustration (using Ubuntu 18.04) shows RSPM on the left, and BSPM on the right, both installing the graphics package Cairo (and both using custom Rocker containers). This fails for RSPM as no binary is present and a source build fails for the familiar lack of a -dev package. It proceeds just fine on the right under BSPM. A second illustration shows once again RSPM on the left, and BSPM on the right (this time on Fedora), both installing the units package without a required system dependency. The installation of units works for BSPM as the dependency libudunits is brought in, but fails under RSPM. The binary installation succeeds in both cases, but the missing dependency (the UDUNITS2 library) is brought in only by BSPM. Consequently, the package fails to load under RSPM.

Summary To conclude, highlights of BSPM are:
  • direct installation of binary packages from R via R commands under their normal CRAN names (just like RSPM);
  • full integration with the system package manager, delivering system installations (improving upon RSPM);
  • full dependency resolution for R packages, including system requirements (improving upon RSPM).
This offers easy, reliable, fast installation of R packages, and we invite you to pick all three. We recommend usage with either Ubuntu with the 4.6k packages via the Rutter PPA, or Fedora via the even more complete Copr repository (which already includes a specially-tailored version of BSPM called CoprManager). We hope this short note wets your appetite to learn more about bspm (which is itself on CRAN) and the two sets of Rocker containers shown. The rocker/r-rspm container comes in two two flavours for Ubuntu 18.04 and 20.04. Similarly, the rocker/r-bspm container comes in the same two two flavours for Ubuntu 18.04 and 20.04, as well as in a Debian testing variant. Feedback is appreciated at the bspm or rocker issue trackers. If you like this or other open-source work I do, you can now sponsor me at GitHub. For the first year, GitHub will match your contributions.

This post by Dirk Eddelbuettel originated on his Thinking inside the box blog. Please report excessive re-aggregation in third-party for-profit settings.

23 August 2020

Vincent Bernat: Zero-Touch Provisioning for Cisco IOS

The official documentation to automatically upgrade and configure on first boot a Cisco switch running on IOS, like a Cisco Catalyst 2960-X Series switch, is scarce on details. This note explains how to configure the ISC DHCP Server for this purpose.
When booting for the first time, Cisco IOS sends a DHCP request on all ports:
Dynamic Host Configuration Protocol (Discover)
    Message type: Boot Request (1)
    Hardware type: Ethernet (0x01)
    Hardware address length: 6
    Hops: 0
    Transaction ID: 0x0000117c
    Seconds elapsed: 0
    Bootp flags: 0x8000, Broadcast flag (Broadcast)
    Client IP address: 0.0.0.0
    Your (client) IP address: 0.0.0.0
    Next server IP address: 0.0.0.0
    Relay agent IP address: 0.0.0.0
    Client MAC address: Cisco_6c:12:c0 (b4:14:89:6c:12:c0)
    Client hardware address padding: 00000000000000000000
    Server host name not given
    Boot file name not given
    Magic cookie: DHCP
    Option: (53) DHCP Message Type (Discover)
    Option: (57) Maximum DHCP Message Size
    Option: (61) Client identifier
        Length: 25
        Type: 0
        Client Identifier: cisco-b414.896c.12c0-Vl1
    Option: (55) Parameter Request List
        Length: 12
        Parameter Request List Item: (1) Subnet Mask
        Parameter Request List Item: (66) TFTP Server Name
        Parameter Request List Item: (6) Domain Name Server
        Parameter Request List Item: (15) Domain Name
        Parameter Request List Item: (44) NetBIOS over TCP/IP Name Server
        Parameter Request List Item: (3) Router
        Parameter Request List Item: (67) Bootfile name
        Parameter Request List Item: (12) Host Name
        Parameter Request List Item: (33) Static Route
        Parameter Request List Item: (150) TFTP Server Address
        Parameter Request List Item: (43) Vendor-Specific Information
        Parameter Request List Item: (125) V-I Vendor-specific Information
    Option: (255) End
It requests a number of options, including the Bootfile name option 67, the TFTP server address option 150 and the Vendor-Identifying Vendor-Specific Information Option 125 or VIVSO. Option 67 provides the name of the configuration file located on the TFTP server identified by option 150. Option 125 includes the name of the file describing the Cisco IOS image to use to upgrade the switch. This file only contains the name of the tarball embedding the image.1 Configuring the ISC DHCP Server to answer with the TFTP server address and the name of the configuration file is simple enough:
filename "ob2-p2.example.com";
option tftp-server-address 172.16.15.253;
However, if you want to also provide the image for upgrade, you have to specify a hexadecimal-encoded string:2
option vivso 00:00:00:09:24:05:22:63:32:39:36:30:2d:6c:61:6e:62:61:73:65:6b:39:2d:74:61:72:2e:31:35:30:2d:32:2e:53:45:31:31:2e:74:78:74;
Having a large hexadecimal-encoded string inside a configuration file is quite unsatisfying. Instead, the ISC DHCP Server allows you to express this information in a more readable way using the option space statement:
# Create option space for Cisco and encapsulate it in VIVSO/vendor space
option space cisco code width 1 length width 1;
option cisco.auto-update-image code 5 = text;
option vendor.cisco code 9 = encapsulate cisco;
# Image description for Cisco IOS ZTP
option cisco.auto-update-image = "c2960-lanbasek9-tar.150-2.SE11.txt";
# Workaround for VIVSO option 125 not being sent
option vendor.iana code 0 = string;
option vendor.iana = 01:01:01;
Without the workaround mentioned in the last block, the ISC DHCP Server would not send back option 125. With such a configuration, it returns the following answer, including a harmless additional enterprise 0 encapsulated into option 125:
Dynamic Host Configuration Protocol (Offer)
    Message type: Boot Reply (2)
    Hardware type: Ethernet (0x01)
    Hardware address length: 6
    Hops: 0
    Transaction ID: 0x0000117c
    Seconds elapsed: 0
    Bootp flags: 0x8000, Broadcast flag (Broadcast)
    Client IP address: 0.0.0.0
    Your (client) IP address: 172.16.15.6
    Next server IP address: 0.0.0.0
    Relay agent IP address: 0.0.0.0
    Client MAC address: Cisco_6c:12:c0 (b4:14:89:6c:12:c0)
    Client hardware address padding: 00000000000000000000
    Server host name not given
    Boot file name: ob2-p2.example.com
    Magic cookie: DHCP
    Option: (53) DHCP Message Type (Offer)
    Option: (54) DHCP Server Identifier (172.16.15.252)
    Option: (51) IP Address Lease Time
    Option: (1) Subnet Mask (255.255.248.0)
    Option: (6) Domain Name Server
    Option: (3) Router
    Option: (150) TFTP Server Address
        Length: 4
        TFTP Server Address: 172.16.15.252
    Option: (125) V-I Vendor-specific Information
        Length: 49
        Enterprise: Reserved (0)
        Enterprise: ciscoSystems (9)
            Length: 36
            Option 125 Suboption: 5
                Length: 34
                Data: 63323936302d6c616e626173656b392d7461722e3135302d 
    Option: (255) End

  1. The reason of this indirection is still puzzling me. I suppose it could be because updating the image name directly in option 125 is quite a hassle.
  2. It contains the following information:
    • 0x00000009: Cisco s Enterprise Number,
    • 0x24: length of the enclosed data,
    • 0x05: Cisco s auto-update sub-option,
    • 0x22: length of the sub-option data, and
    • filename of the image description (c2960-lanbasek9-tar.150-2.SE11.txt).

16 August 2020

Andrej Shadura: Useful FFmpeg commands for video editing

As a response to Antonio Terceiro s blog post, I m publishing some FFmpeg commands I ve been using recently. Embedding subtitles Sometimes you have a video with subtitles in multiple languages and you don t want to clutter the directory with a lot of similarly-named files or maybe you want to be able to easily transfer the video and subtitles at once. In this case, it may be useful to embed to subtitles directly into the video container file.
ffmpeg -i video.mp4 -i video.eng.srt -map 0:v -map 0:a -c copy -map 1 \
        -c:s:0 mov_text -metadata:s:s:0 language="eng" video-out.mp4
This commands recodes the subtitle file into a format appropriate for the MP4 container and embeds it with a metadata element telling the video player what language it is in. You can add multiple subtitles at once, or you can also transcode the audio to AAC while doing so (I found that a lot of Android devices can t play Ogg Vorbis streams):
ffmpeg -i video.mp4 -i video.deu.srt -i video.eng.srt -map 0:v -map 0:a \
        -c:v copy -c:a aac -map 1 -c:s:0 mov_text -metadata:s:s:0 language="deu" \
                           -map 2 -c:s:1 mov_text -metadata:s:s:1 language="eng" video-out.mp4
Hard subtitles Sometimes you need to play the video with subtitles on devices not supporting them. In that case, it may be useful to hardcode the subtitles directly into the video stream:
ffmpeg -i video.mp4 -vf subtitles=video.eng.srt video-out.mp4
Unfortunately, if you also want to apply more transformations to the video, it starts getting tricky, the -vf option is no longer enough:
ffmpeg -i video.mp4 -i overlay.jpg -filter:a "volume=10" \
        -filter_complex '[0:v][1:v]overlay[outv];[outv]subtitles=video.eng.srt' \
                        video-out.mp4
This command adds an overlay to the video stream (in my case I overlaid a full frame over the original video offering some explanations), increases the volume ten times and adds hard subtitles. P.S. You can see the practical application of the above in this video with a head of one of the electoral commissions in Belarus forcing the members of the staff to manipulate the voting results. I transcribed the video in both Russian and English and encoded the English subtitles into the video.

14 August 2020

Keith Packard: picolibc-news

Picolibc Updates I thought work on picolibc would slow down at some point, but I keep finding more things that need work. I spent a few weeks working in libm and then discovered some important memory allocation bugs in the last week that needed attention too. Cleaning up the Picolibc Math Library Picolibc uses the same math library sources as newlib, which includes code from a range of sources: The original SunPro math code had been split into two levels at some point:
  1. IEEE-754 functions. These offer pure IEEE-754 semantics, including return values and exceptions. They do not set the POSIX errno value. These are all prefixed with __ieee754_ and can be called directly by applications if desired.
  2. POSIX functions. These can offer POSIX semantics, including setting errno and returning expected values when errno is set.
New Code Sponsored by ARM Szabolcs Nagy and Wilco Dijkstra's work in the last few years has been to improve the performance of some of the core math functions, which is much appreciated. They've adopted a more modern coding style (C99) and written faster code at the expense of a larger memory foot print. One interesting choice was to use double computations for the float implementations of various functions. This makes these functions shorter and more accurate than versions done using float throughout. However, for machines which don't have HW double, this pulls in soft double code which adds considerable size to the resulting binary and slows down the computations, especially if the platform does support HW float. The new code also takes advantage of HW fused-multiply-add instructions. Those offer more precision than a sequence of primitive instructions, and so the new code can be much shorter as a result. The method used to detect whether the target machine supported fma operations was slightly broken on 32-bit ARM platforms, where those with 'float' fma acceleration but without 'double' fma acceleration would use the shorter code sequence, but with an emulated fma operation that used the less-precise sequence of operations, leading to significant reductions in the quality of the resulting math functions. I fixed the double fma detection and then also added float fma detection along with implementations of float and double fma for ARM and RISC-V. Now both of those platforms get fma-enhanced math functions where available. Errno Adventures I'd submitted patches to newlib a while ago that aliased the regular math library names to the __ieee754_ functions when the library was configured to not set errno, which is pretty common for embedded environments where a shared errno is a pain anyways. Note the use of the word can in remark about the old POSIX wrapper functions. That's because all of these functions are run-time switchable between _IEEE_ and _POSIX_ mode using the _LIB_VERSION global symbol. When left in the usual _IEEE_ mode, none of this extra code was ever executed, so these wrapper functions never did anything beyond what the underlying __ieee754_ functions did. The new code by Nagy and Dijkstra changed how functions are structured to eliminate the underlying IEEE-754 api. These new functions use tail calls to various __math_ error reporting functions. Those can be configured at library build time to set errno or not, centralizing those decisions in a few functions. The result of this combination of source material is that in the default configuration, some library functions (those written by Nagy and Dijkstra) would set errno and others (the old SunPro code) would not. To disable all errno references, the library would need to be compiled with a set of options, -D_IEEE_LIBM to disable errno in the SunPro code and -DWANT_ERRNO=0 to disable errno in the new code. To enable errno everywhere, you'd set -D_POSIX_MODE to make the default value for _LIB_VERSION be _POSIX_ instead of _IEEE_. To clean all of this up, I removed the run-time _LIB_VERSION variable and made that compile-time. In combination with the earlier work to alias the __ieee754_ functions to the regular POSIX names when _IEEE_LIBM was defined this means that the old SunPro POSIX functions now only get used when _IEEE_LIBM is not defined, and in that case the _LIB_VERSION tests always force use of the errno setting code. In addition, I made the value of WANT_ERRNO depend on whether _IEEE_LIBM was defined, so now a single definition (-D_IEEE_LIBM) causes all of the errno handling from libm to be removed, independent of which code is in use. As part of this work, I added a range of errno tests for the math functions to find places where the wrong errno value was being used. Exceptions As an alternative to errno, C also provides for IEEE-754 exceptions through the fenv functions. These have some significant advantages, including having independent bits for each exception type and having them accumulate instead of sharing errno with a huge range of other C library functions. Plus, they're generally implemented in hardware, so you get exceptions for both library functions and primitive operations. Well, you should get exceptions everywhere, except that the GCC soft float libraries don't support them at all. So, errno can still be useful if you need to know what happened in your library functions when using soft floats. Newlib has recently seen a spate of fenv support being added for various architectures, so I decided that it would be a good idea to add some tests. I added tests for both primitive operations, and then tests for library functions to check both exceptions and errno values. Oddly, this uncovered a range of minor mistakes in various math functions. Lots of these were mistakes in the SunPro POSIX wrapper functions where they modified the return values from the __ieee754_ implementations. Simply removing those value modifications fixed many of those errors. Fixing Memory Allocator bugs Picolibc inherits malloc code from newlib which offers two separate implementations, one big and fast, the other small and slow(er). Selecting between them is done while building the library, and as Picolibc is expected to be used on smaller systems, the small and slow one is the default. Contributed by someone from ARM back in 2012/2013, nano-mallocr reminds me of the old V7 memory allocator. A linked list, sorted in address order, holds discontiguous chunks of available memory. Allocation is done by searching for a large enough chunk in the list. The first one large enough is selected, and if it is large enough, a chunk is split off and left on the free list while the remainder is handed to the application. When the list doesn't have any chunk large enough, sbrk is called to get more memory. Free operations involve walking the list and inserting the chunk in the right location, merging the freed memory with any immediately adjacent chunks to reduce fragmentation. The size of each chunk is stored just before the first byte of memory used by the application, where it remains while the memory is in use and while on the free list. The free list is formed by pointers stored in the active area of the chunk, so the only overhead for chunks in use is the size field. Something Something Padding To deal with the vagaries of alignment, the original nano-mallocr code would allow for there to be 'padding' between the size field and the active memory area. The amount of padding could vary, depending on the alignment required for a particular chunk (in the case of memalign, that padding can be quite large). If present, nano-mallocr would store the padding value in the location immediately before the active area and distinguish that from a regular size field by a negative sign. The whole padding thing seems mysterious to me -- why would it ever be needed when the allocator could simply create chunks that were aligned to the required value and a multiple of that value in size. The only use I could think of was for memalign; adding this padding field would allow for less over-allocation to find a suitable chunk. I didn't feel like this one (infrequent) use case was worth the extra complexity; it certainly caused me difficulty in reading the code. A Few Bugs In reviewing the code, I found a couple of easy-to-fix bugs. Time For Testing Once I had uncovered a few bugs in this code, I decided that it would be good to write a few tests to exercise the API. With the tests running on four architectures in nearly 60 variants, it seemed like I'd be able to uncover at least a few more failures: These new tests did find bugs. But not where I expected them. Which is why I'm so fond of testing. GCC Optimizations One of my tests was to call calloc and make sure it returned a chunk of memory that appeared to work or failed with a reasonable value. To my surprise, on aarch64, that test never finished. It worked elsewhere, but on that architecture it hung in the middle of calloc itself. Which looked like this:
void * nano_calloc(malloc_size_t n, malloc_size_t elem)
 
    ptrdiff_t bytes;
    void * mem;
    if (__builtin_mul_overflow (n, elem, &bytes))
     
    RERRNO = ENOMEM;
    return NULL;
     
    mem = nano_malloc(bytes);
    if (mem != NULL) memset(mem, 0, bytes);
    return mem;
 
Note the naming here -- nano_mallocr uses nano_ prefixes in the code, but then uses #defines to change their names to those expected in the ABI. (No, I don't understand why either). However, GCC sees the real names and has some idea of what these functions are supposed to do. In particular, the pattern:
foo = malloc(n);
if (foo) memset(foo, '\0', n);
is converted into a shorter and semantically equivalent:
foo = calloc(n, 1);
Alas, GCC doesn't take into account that this optimization is occurring inside of the implementation of calloc. Another sequence of code looked like this:
chunk->size = foo
nano_free((char *) chunk + CHUNK_OFFSET);
Well, GCC knows that the content of memory passed to free cannot affect the operation of the application, and so it converted this into:
nano_free((char *) chunk + CHUNK_OFFSET);
Remember that nano_mallocr stores the size of the chunk just before the active memory. In this case, nano_mallocr was splitting a large chunk into two pieces, setting the size of the left-over part and placing that on the free list. Failing to set that size value left whatever was there before for the size and usually resulted in the free list becoming quite corrupted. Both of these problems can be corrected by compiling the code with a couple of GCC command-line switches (-fno-builtin-malloc and -fno-builtin-free). Reworking Malloc Having spent this much time reading through the nano_mallocr code, I decided to just go through it and make it easier for me to read today, hoping that other people (which includes 'future me') will also find it a bit easier to follow. I picked a couple of things to focus on:
  1. All newly allocated memory should be cleared. This reduces information disclosure between whatever code freed the memory and whatever code is about to use the memory. Plus, it reduces the effect of un-initialized allocations as they now consistently get zeroed memory. Yes, this masks bugs. Yes, this goes slower. This change is dedicated to Kees Cook, but please blame me for it not him.
  2. Get rid of the 'Padding' notion. Every time I read this code it made my brain hurt. I doubt I'll get any smarter in the future.
  3. Realloc could use some love, improving its efficiency in common cases to reduce memory usage.
  4. Reworking linked list walking. nano_mallocr uses a singly-linked free list and open-codes all list walking. Normally, I'd switch to a library implementation to avoid introducing my own bugs, but in this fairly simple case, I think it's a reasonable compromise to open-code the list operations using some patterns I learned while working at MIT from Bob Scheifler.
  5. Discover necessary values, like padding and the limits of the memory space, from the environment rather than having them hard-coded.
Padding To get rid of 'Padding' in malloc, I needed to make sure that every chunk was aligned and sized correctly. Remember that there is a header on every allocated chunk which is stored before the active memory which contains the size of the chunk. On 32-bit machines, that size is 4 bytes. If the machine requires allocations to be aligned on 8-byte boundaries (as might be the case for 'double' values), we're now going to force the alignment of the header to 8-bytes, wasting four bytes between the size field and the active memory. Well, the existing nano_mallocr code also wastes those four bytes to store the 'padding' value. Using a consistent alignment for chunk starting addresses and chunk sizes has made the code a lot simpler and easier to reason about while not using extra memory for normal allocation. Except for memalign, which I'll cover in the next section. realloc The original nano_realloc function was as simple as possible:
mem = nano_malloc(new_size);
if (mem)  
    memcpy(mem, old, MIN(old_size, new_size));
    nano_free(old);
 
return mem;
However, this really performs badly when the application is growing a buffer while accumulating data. A couple of simple optimizations occurred to me:
  1. If there's a free chunk just after the original location, it could be merged to the existing block and avoid copying the data.
  2. If the original chunk is at the end of the heap, call sbrk() to increase the size of the chunk.
The second one seems like the more important case; in a small system, the buffer will probably land at the end of the heap at some point, at which point growing it to the size of available memory becomes quite efficient. When shrinking the buffer, instead of allocating new space and copying, if there's enough space being freed for a new chunk, create one and add it to the free list. List Walking Walking singly-linked lists seem like one of the first things we see when learning pointer manipulation in C:
for (element = head; element; element = element->next)
    do stuff ...
However, this becomes pretty complicated when 'do stuff' includes removing something from the list:
prev = NULL;
for (element = head; element; element = element->next)
    ...
    if (found)
        break;
    ...
    prev = element
if (prev != NULL)
    prev->next = element->next;
else
    head = element->next;
An extra variable, and a test to figure out how to re-link the list. Bob showed me a simpler way, which I'm sure many people are familiar with:
for (ptr = &head; (element = *ptr); ptr = &(element->next))
    ...
    if (found)
        break;
*ptr = element->next;
Insertion is similar, as you would expect:
for (ptr = &head; (element = *ptr); ptr = &(element->next))
    if (found)
        break;
new_element->next = element;
*ptr = new_element;
In terms of memory operations, it's the same -- each 'next' pointer is fetched exactly once and the list is re-linked by performing a single store. In terms of reading the code, once you've seen this pattern, getting rid of the extra variable and the conditionals around the list update makes it shorter and less prone to errors. In the nano_mallocr code, instead of using 'prev = NULL', it actually used 'prev = free_list', and the test for updating the head was 'prev == element', which really caught me unawares. System Parameters Any malloc implementation needs to know a couple of things about the system it's running on:
  1. Address space. The maximum range of possible addresses sets the limit on how large a block of memory might be allocated, and hence the size of the 'size' field. Fortunately, we've got the 'size_t' type for this, so we can just use that.
  2. Alignment requirements. These derive from the alignment requirements of the basic machine types, including pointers, integers and floating point numbers which are formed from a combination of machine requirements (some systems will fault if attempting to use memory with the wrong alignment) along with a compromise between memory usage and memory system performance.
I decided to let the system tell me the alignment necessary using a special type declaration and the 'offsetof' operation:
typedef struct  
    char c;
    union  
    void *p;
    double d;
    long long ll;
    size_t s;
      u;
  align_t;
#define MALLOC_ALIGN        (offsetof(align_t, u))
Because C requires struct fields to be stored in order of declaration, the 'u' field would have to be after the 'c' field, and would have to be assigned an offset equal to the largest alignment necessary for any of its members. Testing on a range of machines yields the following alignment requirements:
Architecture Alignment
x86_64 8
RISC-V 8
aarch64 8
arm 8
x86 4
So, I guess I could have just used a constant value of '8' and not worried about it, but using the compiler-provided value means that running picolibc on older architectures might save a bit of memory at no real cost in the code. Now, the header containing the 'size' field can be aligned to this value, and all allocated blocks can be allocated in units of this value. memalign memalign, valloc and pvalloc all allocate memory with restrictions on the alignment of the base address and length. You'd think these would be simple -- allocate a large chunk, align within that chunk and return the address. However, they also all require that the address can be successfully passed to free. Which means that the allocator needs to do some tricks to make it all work. Essentially, you allocate 'lots' of memory and then arrange that any bytes at the head and tail of the allocation can be returned to the free list. The tail part is easy; if it's large enough to form a free chunk (which must contain the size and a 'next' pointer for the free list), it can be split off. Otherwise, it just sits at the end of the allocation being wasted space. The head part is a bit tricky when it's not large enough to form a free chunk. That's where the 'padding' business came in handy; that can be as small as a 'size_t' value, which (on 32-bit systems) is only four bytes. Now that we're giving up trying to reason about 'padding', any extra block at the start must be big enough to hold a free block, which includes the size and a next pointer. On 32-bit systems, that's just 8 bytes which (for most of our targets) is the same as the alignment value we're using. On 32-bit systems that can use 4-byte alignment, and on 64-bit systems, it's possible that the alignment required by the application for memalign and the alignment of a chunk returned by malloc might be off by too small an amount to create a free chunk. So, we just allocate a lot of extra space; enough so that we can create a block of size 'toosmall + align' at the start and create a free chunk of memory out of that. This works, and at least returns all of the unused memory back for other allocations. Sending Patches Back to Newlib I've sent the floating point fixes upstream to newlib where they've already landed on master. I've sent most of the malloc fixes, but I'm not sure they really care about seeing nano_mallocr refactored. If they do, I'll spend the time necessary to get the changes ported back to the newlib internal APIs and merged upstream.

11 August 2020

Dirk Eddelbuettel: RcppSimdJson 0.1.1: More Features

A first update following for the exciting RcppSimdJson 0.1.0 release last month is now on CRAN. Version 0.1.1 brings further enhancements such direct parsing of raw chars, working with compressed files as well as much expanded querying ability all thanks to Brendan, some improvements to our demos thanks to Daniel as well as a small fix via a one-liner borrowed from upstream for a reported UBSAN issue. RcppSimdJson wraps the fantastic and genuinely impressive simdjson library by Daniel Lemire and collaborators. Via very clever algorithmic engineering to obtain largely branch-free code, coupled with modern C++ and newer compiler instructions, it results in parsing gigabytes of JSON parsed per second which is quite mindboggling. The best-case performance is faster than CPU speed as use of parallel SIMD instructions and careful branch avoidance can lead to less than one cpu cycle use per byte parsed; see the video of the talk by Daniel Lemire at QCon (also voted best talk). The detailed list of changes follows.

Changes in version 0.1.1 (2020-08-10)
  • Corrected incorrect file deletion when mixing local and remote files (Brendan in #34) closing #33.
  • Added support for raw vectors, compressed files, and compressed downloads (Dirk and Brendan in #36, #39, and #45 closing #35 and addressing issues raised in #40 and #44).
  • Examples in two demos are now more self-sufficient (Daniel Lemire and Dirk in #42).
  • Expanded query functionality to include single, flat, and nested queries (Brendan in #45 closing #43).
  • Split error handling parameters from error_ok/on_error into parse_error_ok/on_parse_error and query_error_ok/on_query_error (Brendan in #45).
  • One-line upstream change to address sanitizer error on cast.

Courtesy of CRANberries, there is also a diffstat report for this release. For questions, suggestions, or issues please use the issue tracker at the GitHub repo. If you like this or other open-source work I do, you can now sponsor me at GitHub. For the first year, GitHub will match your contributions.

This post by Dirk Eddelbuettel originated on his Thinking inside the box blog. Please report excessive re-aggregation in third-party for-profit settings.

10 August 2020

Dirk Eddelbuettel: nanotime 0.3.1: Misc Build Fixes for Yuge New Features!

The nanotime 0.3.0 release four days ago was so exciting that we decided to do it again! Kidding aside, and fairly extensive tests notwithstanding we were bitten by a few build errors: who knew clang on macOS needed extra curlies to be happy, another manifestation of Solaris having no idea what a timezone setting America/New_York is, plus some extra pickyness from the SAN tests and whatnot. So Leonardo and I gave it some extra care over the weekend, uploaded it late yesterday and here we are with 0.3.1. Thanks again to CRAN for prompt processing even though they are clearly deluged shortly before their (brief) summer break. nanotime relies on the RcppCCTZ package for (efficient) high(er) resolution time parsing and formatting up to nanosecond resolution, and the bit64 package for the actual integer64 arithmetic. Initially implemented using the S3 system, it has benefitted greatly from work by Leonardo Silvestri who rejigged internals in S4 and now added new types for periods, intervals and durations. The NEWS snippet adds full details.

Changes in version 0.3.1 (2020-08-09)
  • Several small cleanups to ensure a more robust compilation (Leonardo and Dirk in #75 fixing #74).
  • Show Solaris some extra love by skipping tests and examples with a timezone (Dirk in #76).

Thanks to CRANberries there is also a diff to the previous version. More details and examples are at the nanotime page; code, issue tickets etc at the GitHub repository. If you like this or other open-source work I do, you can now sponsor me at GitHub. For the first year, GitHub will match your contributions.

This post by Dirk Eddelbuettel originated on his Thinking inside the box blog. Please report excessive re-aggregation in third-party for-profit settings.

Arnaud Rebillout: GoAccess 1.4, a detailed tutorial

GoAccess v1.4 was just released a few weeks ago! Let's take this chance to write a loooong tutorial. We'll go over every steps to install and operate GoAccess. This is a tutorial aimed at those who don't play sysadmin every day, and that's why it's so long, I did my best to provide thorough explanations all along, so that it's more than just a "copy-and-paste" kind of tutorial. And for those who do play sysadmin everyday: please try not to fall asleep while reading, and don't hesitate to drop me an e-mail if you spot anything inaccurate in here. Thanks! Introduction So what's GoAccess already? GoAccess is a web log analyzer, and it allows you to visualize the traffic for your website, and get to know a bit more about your visitors: how many visitors and hits, for which pages, coming from where (geolocation, operating system, web browser...), etc... It does so by parsing the access logs from your web server, be it Apache, NGINX or whatever. GoAccess gives you different options to display the statistics, and in this tutorial we'll focus on producing a HTML report. Meaning that you can see the statistics for your website straight in your web browser, under the form of a single HTML page. For an example, you can have a look at the stats of my blog here: http://goaccess.arnaudr.io. GoAccess is written in C, it has very few dependencies, it had been around for about 10 years, and it's distributed under the MIT license. Assumptions This tutorial is about installing and configuring, so I'll assume that all the commands are run as root. I won't prefix each of them with sudo. I use the Apache web server, running on a Debian system. I don't think it matters so much for this tutorial though. If you're using NGINX it's fine, you can keep reading. Also, I will just use the name SITE for the name of the website that we want to analyze with GoAccess. Just replace that with the real name of your site. I also assume the following locations for your stuff: If you have your stuff in /srv/SITE/ log,www instead, no worries, just adjust the paths accordingly, I bet you can do it. Installation The latest version of GoAccess is v1.4, and it's not yet available in the Debian repositories. So for this part, you can follow the instructions from the official GoAccess download page. Install steps are explained in details, so there's nothing left for me to say :) When this is done, let's get started with the basics. We're talking about the latest version v1.4 here, let's make sure:
$ goaccess --version
GoAccess - 1.4.
...
Now let's try to create a HTML report. I assume that you already have a website up and running. GoAccess needs to parse the access logs. These logs are optional, they might or might not be created by your web server, depending on how it's configured. Usually, these log files are named access.log, unsurprisingly. You can check if those logs exist on your system by running this command:
find /var/log -name access.log
Another important thing to know is that these logs can be in different formats. In this tutorial we'll assume that we work with the combined log format, because it seems to be the most common default. To check what kind of access logs your web server produces, you must look at the configuration for your site. For an Apache web server, you should have such a line in the file /etc/apache2/sites-enabled/SITE.conf:
CustomLog $ APACHE_LOG_DIR /SITE/access.log combined
For NGINX, it's quite similar. The configuration file would be something like /etc/nginx/sites-enabled/SITE, and the line to enable access logs would be something like:
access_log /var/log/nginx/SITE/access.log
Note that NGINX writes the access logs in the combined format by default, that's why you don't see the word combined anywhere in the line above: it's implicit. Alright, so from now on we assume that yes, you have access log files available, and yes, they are in the combined log format. If that's the case, then you can already run GoAccess and generate a report, for example for the log file /var/log/apache2/access.log
goaccess \
    --log-format COMBINED \
    --output /tmp/report.html \
    /var/log/apache2/access.log
It's possible to give GoAccess more than one log files to process, so if you have for example the file access.log.1 around, you can use it as well:
goaccess \
    --log-format COMBINED \
    --output /tmp/report.html \
    /var/log/apache2/access.log \
    /var/log/apache2/access.log.1
If GoAccess succeeds (and it should), you're on the right track! All is left to do to complete this test is to have a look at the HTML report created. It's a single HTML page, so you can easily scp it to your machine, or just move it to the document root of your site, and then open it in your web browser. Looks good? So let's move on to more interesting things. Web server configuration This part is very short, because in terms of configuration of the web server, there's very little to do. As I said above, the only thing you want from the web server is to create access log files. Then you want to be sure that GoAccess and your web server agree on the format for these files. In the part above we used the combined log format, but GoAccess supports many other common log formats out of the box, and even allows you to parse custom log formats. For more details, refer to the option --log-format in the GoAccess manual page. Another common log format is named, well, common. It even has its own Wikipedia page. But compared to combined, the common log format contains less information, it doesn't include the referrer and user-agent values, meaning that you won't have it in the GoAccess report. So at this point you should understand that, unsurprisingly, GoAccess can only tell you about what's in the access logs, no more no less. And that's all in term of web server configuration. Configuration to run GoAccess unprivileged Now we're going to create a user and group for GoAccess, so that we don't have to run it as root. The reason is that, well, for everything running unattended on your server, the less code runs as root, the better. It's good practice and common sense. In this case, GoAccess is simply a log analyzer. So it just needs to read the logs files from your web server, and there is no need to be root for that, an unprivileged user can do the job just as well, assuming it has read permissions on /var/log/apache2 or /var/log/nginx. The log files of the web server are usually part of the adm group (though it might depend on your distro, I'm not sure). This is something you can check easily with the following command:
ls -l /var/log   grep -e apache2 -e nginx
As a result you should get something like that:
drwxr-x--- 2 root adm 20480 Jul 22 00:00 /var/log/apache2/
And as you can see, the directory apache2 belongs to the group adm. It means that you don't need to be root to read the logs, instead any unprivileged user that belongs to the group adm can do it. So, let's create the goaccess user, and add it to the adm group:
adduser --system --group --no-create-home goaccess
addgroup goaccess adm
And now, let's run GoAccess unprivileged, and verify that it can still read the log files:
setpriv \
    --reuid=goaccess --regid=goaccess \
    --init-groups --inh-caps=-all \
    -- \
    goaccess \
    --log-format COMBINED \
    --output /tmp/report2.html \
    /var/log/apache2/access.log
setpriv is the command used to drop privileges. The syntax is quite verbose, it's not super friendly for tutorials, but don't be scared and read the manual page to learn what it does. In any case, this command should work, and at this point, it means that you have a goaccess user ready, and we'll use it to run GoAccess unprivileged. Integration, option A - Run GoAccess once a day, from a logrotate hook In this part we wire things together, so that GoAccess processes the log files once a day, adds the new logs to its internal database, and generates a report from all that aggregated data. The result will be a single HTML page. Introducing logrotate In order to do that, we'll use a logrotate hook. logrotate is a little tool that should already be installed on your server, and that runs once a day, and that is in charge of rotating the log files. "Rotating the logs" means moving access.log to access.log.1 and so on. With logrotate, a new log file is created every day, and log files that are too old are deleted. That's what prevents your logs from filling up your disk basically :) You can check that logrotate is indeed installed and enabled with this command (assuming that your init system is systemd):
systemctl status logrotate.timer
What's interesting for us is that logrotate allows you to run scripts before and after the rotation is performed, so it's an ideal place from where to run GoAccess. In short, we want to run GoAccess just before the logs are rotated away, in the prerotate hook. But let's do things in order. At first, we need to write a little wrapper script that will be in charge of running GoAccess with the right arguments, and that will process all of your sites. The wrapper script This wrapper is made to process more than one site, but if you have only one site it works just as well, of course. So let me just drop it on you like that, and I'll explain afterward. Here's my wrapper script:
 1
 2
 3
 4
 5
 6
 7
 8
 9
10
11
12
13
14
15
16
17
18
19
20
21
22
23
24
25
26
27
28
29
30
31
32
33
34
35
36
37
38
39
40
41
42
43
44
45
46
47
48
49
50
#!/bin/bash
# Process log files /var/www/apache2/SITE/access.log,
# only if /var/lib/goaccess-db/SITE exists.
# Create HTML reports in $1, a directory that must exist.
set -eu
OUTDIR=
LOGDIR=/var/log/apache2
DBDIR=/var/lib/goaccess-db
fail()   echo >&2 "$@"; exit 1;  
[ $# -eq 1 ]   fail "Usage: $(basename $0) OUTPUT_DIRECTORY"
OUTDIR=$1
[ -d "$OUTDIR" ]   fail "'$OUTDIR' is not a directory"
[ -d "$LOGDIR" ]   fail "'$LOGDIR' is not a directory"
[ -d "$DBDIR"  ]   fail "'$DBDIR' is not a directory"
for d in $(find "$LOGDIR" -mindepth 1 -maxdepth 1 -type d); do
    site=$(basename "$sitedir")
    dbdir=$DBDIR/$site
    logfile=$d/access.log
    outfile=$OUTDIR/$site.html
    if [ ! -d "$dbdir" ]   [ ! -e "$logfile" ]; then
        echo "  Skipping site '$site'"
        continue
    else
        echo "  Processing site '$site'"
    fi
    setpriv \
        --reuid=goaccess --regid=goaccess \
        --init-groups --inh-caps=-all \
        -- \
    goaccess \
        --agent-list \
        --anonymize-ip \
        --persist \
        --restore \
        --config-file /etc/goaccess/goaccess.conf \
        --db-path "$dbdir" \
        --log-format "COMBINED" \
        --output "$outfile" \
        "$logfile"
done
So you'd install this script at /usr/local/bin/goaccess-wrapper for example, and make it executable:
chmod +x /usr/local/bin/goaccess-wrapper
A few things to note: As is, the script makes the assumption that the logs for your site are logged in a sub-directory /var/log/apache2/SITE/. If it's not the case, adjust that in the wrapper accordingly. The name of this sub-directory is then used to find the GoAccess database directory /var/lib/goaccess-db/SITE/. This directory is expected to exist, meaning that if you don't create it yourself, the wrapper won't process this particular site. It's a simple way to control which sites are processed by this GoAccess wrapper, and which sites are not. So if you want goaccess-wrapper to process the site SITE, just create a directory with the name of this site under /var/lib/goaccess-db:
mkdir -p /var/lib/goaccess-db/SITE
chown goaccess:goaccess /var/lib/goaccess-db/SITE
Now let's create an output directory:
mkdir /tmp/goaccess-reports
chown goaccess:goaccess /tmp/goaccess-reports
And let's give a try to the wrapper script:
goaccess-wrapper /tmp/goaccess-reports
ls /tmp/goaccess-reports
Which should give you:
SITE.html
At the same time, you can check that GoAccess populated the database with a bunch of files:
ls /var/lib/goaccess-db/SITE
Setting up the logrotate prerotate hook At this point, we have the wrapper in place. Let's now add a pre-rotate hook so that goaccess-wrapper runs once a day, just before the logs are rotated away. The logrotate config file for Apache2 is located at /etc/logrotate.d/apache2, and for NGINX it's at /etc/logrotate.d/nginx. Among the many things you'll see in this file, here's what is of interest for us: In the config file, there is also this snippet:
prerotate
    if [ -d /etc/logrotate.d/httpd-prerotate ]; then \
        run-parts /etc/logrotate.d/httpd-prerotate; \
    fi; \
endscript
It indicates that scripts in the directory /etc/logrotate.d/httpd-prerotate/ will be executed before the rotation takes place. Refer to the man page run-parts(8) for more details... Putting all of that together, it means that logs from the web server are rotated once a day, and if we want to run scripts just before the rotation, we can just drop them in the httpd-prerotate directory. Simple, right? Let's first create this directory if it doesn't exist:
mkdir -p /etc/logrotate.d/httpd-prerotate/
And let's create a tiny script at /etc/logrotate.d/httpd-prerotate/goaccess:
1
2
#!/bin/sh
exec goaccess-wrapper /tmp/goaccess-reports
Don't forget to make it executable:
chmod +x /etc/logrotate.d/httpd-prerotate/goaccess
As you can see, the only thing that this script does is to invoke the wrapper with the right argument, ie. the output directory for the HTML reports that are generated. And that's all. Now you can just come back tomorrow, check the logs, and make sure that the hook was executed and succeeded. For example, this kind of command will tell you quickly if it worked:
journalctl   grep logrotate
Integration, option B - Run GoAccess once a day, from a systemd service OK so we've just seen how to use a logrotate hook. One downside with that is that we have to drop privileges in the wrapper script, because logrotate runs as root, and we don't want to run GoAccess as root. Hence the rather convoluted syntax with setpriv. Rather than embedding this kind of thing in a wrapper script, we can instead run the wrapper script from a [systemd][] service, and define which user runs the wrapper straight in the systemd service file. Introducing systemd niceties So we can create a systemd service, along with a systemd timer that fires daily. We can then set the user and group that execute the script straight in the systemd service, and there's no need for setpriv anymore. It's a bit more streamlined. We can even go a bit further, and use systemd parameterized units (also called templates), so that we have one service per site (instead of one service that process all of our sites). That will simplify the wrapper script a lot, and it also looks nicer in the logs. With this approach however, it seems that we can't really run exactly before the logs are rotated away, like we did in the section above. But that's OK. What we'll do is that we'll run once a day, no matter the time, and we'll just make sure to process both log files access.log and access.log.1 (ie. the current logs and the logs from yesterday). This way, we're sure not to miss any line from the logs. Note that GoAccess is smart enough to only consider newer entries from the log files, and discard entries that are already in the database. In other words, it's safe to parse the same log file more than once, GoAccess will do the right thing. For more details see "INCREMENTAL LOG PROCESSING" from man goaccess. systemd]: https://freedesktop.org/wiki/Software/systemd/ Implementation And here's how it all looks like. First, a little wrapper script for GoAccess:
 1
 2
 3
 4
 5
 6
 7
 8
 9
10
11
12
13
14
15
16
17
18
19
20
21
22
23
24
25
26
27
28
29
30
31
32
#!/bin/bash
# Usage: $0 SITE DBDIR LOGDIR OUTDIR
set -eu
SITE=$1
DBDIR=$2
LOGDIR=$3
OUTDIR=$4
LOGFILES=()
for ext in log log.1; do
    logfile="$LOGDIR/access.$ext"
    [ -e "$logfile" ] && LOGFILES+=("$logfile")
done
if [ $ #LOGFILES[@]  -eq 0 ]; then
    echo "No log files in '$LOGDIR'"
    exit 0
fi
goaccess \
    --agent-list \
    --anonymize-ip \
    --persist \
    --restore \
    --config-file /etc/goaccess/goaccess.conf \
    --db-path "$DBDIR" \
    --log-format "COMBINED" \
    --output "$OUTDIR/$SITE.html" \
    "$ LOGFILES[@] "
This wrapper does very little. Actually, the only thing it does is to check for the existence of the two log files access.log and access.log.1, to be sure that we don't ask GoAccess to process a file that does not exist (GoAccess would not be happy about that). Save this file under /usr/local/bin/goaccess-wrapper, don't forget to make it executable:
chmod +x /usr/local/bin/goaccess-wrapper
Then, create a systemd parameterized unit file, so that we can run this wrapper as a systemd service. Save it under /etc/systemd/system/goaccess@.service:
[Unit]
Description=Update GoAccess report - %i
ConditionPathIsDirectory=/var/lib/goaccess-db/%i
ConditionPathIsDirectory=/var/log/apache2/%i
ConditionPathIsDirectory=/tmp/goaccess-reports
PartOf=goaccess.service
[Service]
Type=oneshot
User=goaccess
Group=goaccess
Nice=19
ExecStart=/usr/local/bin/goaccess-wrapper \
 %i \
 /var/lib/goaccess-db/%i \
 /var/log/apache2/%i \
 /tmp/goaccess-reports
So, what is a systemd parameterized unit? It's a service to which you can pass an argument when you enable it. The %i in the unit definition will be replaced by this argument. In our case, the argument will be the name of the site that we want to process. As you can see, we use the directive ConditionPathIsDirectory= extensively, so that if ever one of the required directories does not exist, the unit will just be skipped (and marked as such in the logs). It's a graceful way to fail. We run the wrapper as the user and group goaccess, thanks to User= and Group=. We also use Nice= to give a low priority to the process. At this point, it's already possible to test. Just make sure that you created a directory for the GoAccess database:
mkdir -p /var/lib/goaccess-db/SITE
chown goaccess:goaccess /var/lib/goaccess-db/SITE
Also make sure that the output directory exists:
mkdir /tmp/goaccess-reports
chown goaccess:goaccess /tmp/goaccess-reports
Then reload systemd and fire the unit to see if it works:
systemctl daemon-reload
systemctl start goaccess@SITE.service
journalctl   tail
And that should work already. As you can see, the argument, SITE, is passed in the systemctl start command. We just append it after the @, in the name of the unit. Now, let's create another GoAccess service file, which sole purpose is to group all the parameterized units together, so that we can start them all in one go. Note that we don't use a systemd target for that, because ultimately we want to run it once a day, and that would not be possible with a target. So instead we use a dummy oneshot service. So here it is, saved under /etc/systemd/system/goaccess.service:
[Unit]
Description=Update GoAccess reports
Requires= \
 goaccess@SITE1.service \
 goaccess@SITE2.service
[Service]
Type=oneshot
ExecStart=true
As you can see, we simply list the sites that we want to process in the Requires= directive. In this example we have two sites named SITE1 and SITE2. Let's ensure that everything is still good:
systemctl daemon-reload
systemctl start goaccess.service
journalctl   tail
Check the logs, both sites SITE1 and SITE2 should have been processed. And finally, let's create a timer, so that systemd runs goaccess.service once a day. Save it under /etc/systemd/system/goaccess.timer.
[Unit]
Description=Daily update of GoAccess reports
[Timer]
OnCalendar=daily
RandomizedDelaySec=1h
Persistent=true
[Install]
WantedBy=timers.target
Finally, enable the timer:
systemctl daemon-reload
systemctl enable --now goaccess.timer
At this point, everything should be OK. Just come back tomorrow and check the logs with something like:
journalctl   grep goaccess
Last word: if you have only one site to process, of course you can simplify, for example you can hardcode all the paths in the file goaccess.service instead of using a parameterized unit. Up to you. Daily operations So in this part, we assume that you have GoAccess all setup and running, once a day or so. Let's just go over a few things worth noting. Serve your report Up to now in this tutorial, we created the reports in /tmp/goaccess-reports, but that was just for the sake of the example. You will probably want to save your reports in a directory that is served by your web server, so that, well, you can actually look at it in your web browser, that was the point, right? So how to do that is a bit out of scope here, and I guess that if you want to monitor your website, you already have a website, so you will have no trouble serving the GoAccess HTML report. However there's an important detail to be aware of: GoAccess shows all the IP addresses of your visitors in the report. As long as the report is private it's OK, but if ever you make your GoAccess report public, then you should definitely invoke GoAccess with the option --anonymize-ip. Keep an eye on the logs In this tutorial, the reports we create, along with the GoAccess databases, will grow bigger every day, forever. It also means that the GoAccess processing time will grow a bit each day. So maybe the first thing to do is to keep an eye on the logs, to see how long it takes to GoAccess to do its job every day. Also, maybe you'd like to keep an eye on the size of the GoAccess database with:
du -sh /var/lib/goaccess-db/SITE
If your site has few visitors, I suspect it won't be a problem though. You could also be a bit pro-active in preventing this problem in the future, and for example you could break the reports into, say, monthly reports. Meaning that every month, you would create a new database in a new directory, and also start a new HTML report. This way you'd have monthly reports, and you make sure to limit the GoAccess processing time, by limiting the database size to a month. This can be achieved very easily, by including something like YEAR-MONTH in the database directory, and in the HTML report. You can handle that automatically in the wrapper script, for example:
sfx=$(date +'%Y-%m')
mkdir -p $DBDIR/$sfx
goaccess \
    --db-path $DBDIR/$sfx \
    --output "$OUTDIR/$SITE-$sfx.html" \
    ...
You get the idea. Further notes Migration from older versions With the --persist option, GoAccess keeps all the information from the logs in a database, so that it can re-use it later. In prior versions, GoAccess used the Tokyo Cabinet key-value store for that. However starting from v1.4, GoAccess dropped this dependency and now uses its own database format. As a result, the previous database can't be used anymore, you will have to remove it and restart from zero. At the moment there is no way to convert the data from the old database to the new one. If you're interested, this is discussed upstream at [#1783][bug-1783]. Another thing that changed with this new version is the name for some of the command-line options. For example, --load-from-disk was dropped in favor of --restore, and --keep-db-files became --persist. So you'll have to look at the documentation a bit, and update your script(s) accordingly. Other ways to use GoAccess It's also possible to do it completely differently. You could keep GoAccess running, pretty much like a daemon, with the --real-time-html option, and have it process the logs continuously, rather than calling it on a regular basis. It's also possible to see the GoAccess report straight in the terminal, thanks to libncurses, rather than creating a HTML report. And much more, GoAccess is packed with features. Conclusion I hope that this tutorial helped some of you folks. Feel free to drop an e-mail for comments.

Arnaud Rebillout: GoAccess 1.4, a detailed tutorial

GoAccess v1.4 was just released a few weeks ago! Let's take this chance to write a loooong tutorial. We'll go over every steps to install and operate GoAccess. This is a tutorial aimed at those who don't play sysadmin every day, and that's why it's so long, I did my best to provide thorough explanations all along, so that it's more than just a "copy-and-paste" kind of tutorial. And for those who do play sysadmin everyday: please try not to fall asleep while reading, and don't hesitate to drop me an e-mail if you spot anything inaccurate in here. Thanks! Introduction So what's GoAccess already? GoAccess is a web log analyzer, and it allows you to visualize the traffic for your website, and get to know a bit more about your visitors: how many visitors and hits, for which pages, coming from where (geolocation, operating system, web browser...), etc... It does so by parsing the access logs from your web server, be it Apache, NGINX or whatever. GoAccess gives you different options to display the statistics, and in this tutorial we'll focus on producing a HTML report. Meaning that you can see the statistics for your website straight in your web browser, under the form of a single HTML page. For an example, you can have a look at the stats of my blog here: https://goaccess.arnaudr.io. GoAccess is written in C, it has very few dependencies, it had been around for about 10 years, and it's distributed under the MIT license. Assumptions This tutorial is about installing and configuring, so I'll assume that all the commands are run as root. I won't prefix each of them with sudo. I use the Apache web server, running on a Debian system. I don't think it matters so much for this tutorial though. If you're using NGINX it's fine, you can keep reading. Also, I will just use the name SITE for the name of the website that we want to analyze with GoAccess. Just replace that with the real name of your site. I also assume the following locations for your stuff: If you have your stuff in /srv/SITE/ log,www instead, no worries, just adjust the paths accordingly, I bet you can do it. Installation The latest version of GoAccess is v1.4, and it's not yet available in the Debian repositories. So for this part, you can follow the instructions from the official GoAccess download page. Install steps are explained in details, so there's nothing left for me to say :) When this is done, let's get started with the basics. We're talking about the latest version v1.4 here, let's make sure:
$ goaccess --version
GoAccess - 1.4.
...
Now let's try to create a HTML report. I assume that you already have a website up and running. GoAccess needs to parse the access logs. These logs are optional, they might or might not be created by your web server, depending on how it's configured. Usually, these log files are named access.log, unsurprisingly. You can check if those logs exist on your system by running this command:
find /var/log -name access.log
Another important thing to know is that these logs can be in different formats. In this tutorial we'll assume that we work with the combined log format, because it seems to be the most common default. To check what kind of access logs your web server produces, you must look at the configuration for your site. For an Apache web server, you should have such a line in the file /etc/apache2/sites-enabled/SITE.conf:
CustomLog $ APACHE_LOG_DIR /SITE/access.log combined
For NGINX, it's quite similar. The configuration file would be something like /etc/nginx/sites-enabled/SITE, and the line to enable access logs would be something like:
access_log /var/log/nginx/SITE/access.log
Note that NGINX writes the access logs in the combined format by default, that's why you don't see the word combined anywhere in the line above: it's implicit. Alright, so from now on we assume that yes, you have access log files available, and yes, they are in the combined log format. If that's the case, then you can already run GoAccess and generate a report, for example for the log file /var/log/apache2/access.log
goaccess \
    --log-format COMBINED \
    --output /tmp/report.html \
    /var/log/apache2/access.log
It's possible to give GoAccess more than one log files to process, so if you have for example the file access.log.1 around, you can use it as well:
goaccess \
    --log-format COMBINED \
    --output /tmp/report.html \
    /var/log/apache2/access.log \
    /var/log/apache2/access.log.1
If GoAccess succeeds (and it should), you're on the right track! All is left to do to complete this test is to have a look at the HTML report created. It's a single HTML page, so you can easily scp it to your machine, or just move it to the document root of your site, and then open it in your web browser. Looks good? So let's move on to more interesting things. Web server configuration This part is very short, because in terms of configuration of the web server, there's very little to do. As I said above, the only thing you want from the web server is to create access log files. Then you want to be sure that GoAccess and your web server agree on the format for these files. In the part above we used the combined log format, but GoAccess supports many other common log formats out of the box, and even allows you to parse custom log formats. For more details, refer to the option --log-format in the GoAccess manual page. Another common log format is named, well, common. It even has its own Wikipedia page. But compared to combined, the common log format contains less information, it doesn't include the referrer and user-agent values, meaning that you won't have it in the GoAccess report. So at this point you should understand that, unsurprisingly, GoAccess can only tell you about what's in the access logs, no more no less. And that's all in term of web server configuration. Configuration to run GoAccess unprivileged Now we're going to create a user and group for GoAccess, so that we don't have to run it as root. The reason is that, well, for everything running unattended on your server, the less code runs as root, the better. It's good practice and common sense. In this case, GoAccess is simply a log analyzer. So it just needs to read the logs files from your web server, and there is no need to be root for that, an unprivileged user can do the job just as well, assuming it has read permissions on /var/log/apache2 or /var/log/nginx. The log files of the web server are usually part of the adm group (though it might depend on your distro, I'm not sure). This is something you can check easily with the following command:
ls -l /var/log   grep -e apache2 -e nginx
As a result you should get something like that:
drwxr-x--- 2 root adm 20480 Jul 22 00:00 /var/log/apache2/
And as you can see, the directory apache2 belongs to the group adm. It means that you don't need to be root to read the logs, instead any unprivileged user that belongs to the group adm can do it. So, let's create the goaccess user, and add it to the adm group:
adduser --system --group --no-create-home goaccess
addgroup goaccess adm
And now, let's run GoAccess unprivileged, and verify that it can still read the log files:
setpriv \
    --reuid=goaccess --regid=goaccess \
    --init-groups --inh-caps=-all \
    -- \
    goaccess \
    --log-format COMBINED \
    --output /tmp/report2.html \
    /var/log/apache2/access.log
setpriv is the command used to drop privileges. The syntax is quite verbose, it's not super friendly for tutorials, but don't be scared and read the manual page to learn what it does. In any case, this command should work, and at this point, it means that you have a goaccess user ready, and we'll use it to run GoAccess unprivileged. Integration, option A - Run GoAccess once a day, from a logrotate hook In this part we wire things together, so that GoAccess processes the log files once a day, adds the new logs to its internal database, and generates a report from all that aggregated data. The result will be a single HTML page. Introducing logrotate In order to do that, we'll use a logrotate hook. logrotate is a little tool that should already be installed on your server, and that runs once a day, and that is in charge of rotating the log files. "Rotating the logs" means moving access.log to access.log.1 and so on. With logrotate, a new log file is created every day, and log files that are too old are deleted. That's what prevents your logs from filling up your disk basically :) You can check that logrotate is indeed installed and enabled with this command (assuming that your init system is systemd):
systemctl status logrotate.timer
What's interesting for us is that logrotate allows you to run scripts before and after the rotation is performed, so it's an ideal place from where to run GoAccess. In short, we want to run GoAccess just before the logs are rotated away, in the prerotate hook. But let's do things in order. At first, we need to write a little wrapper script that will be in charge of running GoAccess with the right arguments, and that will process all of your sites. The wrapper script This wrapper is made to process more than one site, but if you have only one site it works just as well, of course. So let me just drop it on you like that, and I'll explain afterward. Here's my wrapper script:
 1
 2
 3
 4
 5
 6
 7
 8
 9
10
11
12
13
14
15
16
17
18
19
20
21
22
23
24
25
26
27
28
29
30
31
32
33
34
35
36
37
38
39
40
41
42
43
44
45
46
47
48
49
50
#!/bin/bash
# Process log files /var/www/apache2/SITE/access.log,
# only if /var/lib/goaccess-db/SITE exists.
# Create HTML reports in $1, a directory that must exist.
set -eu
OUTDIR=
LOGDIR=/var/log/apache2
DBDIR=/var/lib/goaccess-db
fail()   echo >&2 "$@"; exit 1;  
[ $# -eq 1 ]   fail "Usage: $(basename $0) OUTPUT_DIRECTORY"
OUTDIR=$1
[ -d "$OUTDIR" ]   fail "'$OUTDIR' is not a directory"
[ -d "$LOGDIR" ]   fail "'$LOGDIR' is not a directory"
[ -d "$DBDIR"  ]   fail "'$DBDIR' is not a directory"
for d in $(find "$LOGDIR" -mindepth 1 -maxdepth 1 -type d); do
    site=$(basename "$sitedir")
    dbdir=$DBDIR/$site
    logfile=$d/access.log
    outfile=$OUTDIR/$site.html
    if [ ! -d "$dbdir" ]   [ ! -e "$logfile" ]; then
        echo "  Skipping site '$site'"
        continue
    else
        echo "  Processing site '$site'"
    fi
    setpriv \
        --reuid=goaccess --regid=goaccess \
        --init-groups --inh-caps=-all \
        -- \
    goaccess \
        --agent-list \
        --anonymize-ip \
        --persist \
        --restore \
        --config-file /etc/goaccess/goaccess.conf \
        --db-path "$dbdir" \
        --log-format "COMBINED" \
        --output "$outfile" \
        "$logfile"
done
So you'd install this script at /usr/local/bin/goaccess-wrapper for example, and make it executable:
chmod +x /usr/local/bin/goaccess-wrapper
A few things to note: As is, the script makes the assumption that the logs for your site are logged in a sub-directory /var/log/apache2/SITE/. If it's not the case, adjust that in the wrapper accordingly. The name of this sub-directory is then used to find the GoAccess database directory /var/lib/goaccess-db/SITE/. This directory is expected to exist, meaning that if you don't create it yourself, the wrapper won't process this particular site. It's a simple way to control which sites are processed by this GoAccess wrapper, and which sites are not. So if you want goaccess-wrapper to process the site SITE, just create a directory with the name of this site under /var/lib/goaccess-db:
mkdir -p /var/lib/goaccess-db/SITE
chown goaccess:goaccess /var/lib/goaccess-db/SITE
Now let's create an output directory:
mkdir /tmp/goaccess-reports
chown goaccess:goaccess /tmp/goaccess-reports
And let's give a try to the wrapper script:
goaccess-wrapper /tmp/goaccess-reports
ls /tmp/goaccess-reports
Which should give you:
SITE.html
At the same time, you can check that GoAccess populated the database with a bunch of files:
ls /var/lib/goaccess-db/SITE
Setting up the logrotate prerotate hook At this point, we have the wrapper in place. Let's now add a pre-rotate hook so that goaccess-wrapper runs once a day, just before the logs are rotated away. The logrotate config file for Apache2 is located at /etc/logrotate.d/apache2, and for NGINX it's at /etc/logrotate.d/nginx. Among the many things you'll see in this file, here's what is of interest for us: In the config file, there is also this snippet:
prerotate
    if [ -d /etc/logrotate.d/httpd-prerotate ]; then \
        run-parts /etc/logrotate.d/httpd-prerotate; \
    fi; \
endscript
It indicates that scripts in the directory /etc/logrotate.d/httpd-prerotate/ will be executed before the rotation takes place. Refer to the man page run-parts(8) for more details... Putting all of that together, it means that logs from the web server are rotated once a day, and if we want to run scripts just before the rotation, we can just drop them in the httpd-prerotate directory. Simple, right? Let's first create this directory if it doesn't exist:
mkdir -p /etc/logrotate.d/httpd-prerotate/
And let's create a tiny script at /etc/logrotate.d/httpd-prerotate/goaccess:
1
2
#!/bin/sh
exec goaccess-wrapper /tmp/goaccess-reports
Don't forget to make it executable:
chmod +x /etc/logrotate.d/httpd-prerotate/goaccess
As you can see, the only thing that this script does is to invoke the wrapper with the right argument, ie. the output directory for the HTML reports that are generated. And that's all. Now you can just come back tomorrow, check the logs, and make sure that the hook was executed and succeeded. For example, this kind of command will tell you quickly if it worked:
journalctl   grep logrotate
Integration, option B - Run GoAccess once a day, from a systemd service OK so we've just seen how to use a logrotate hook. One downside with that is that we have to drop privileges in the wrapper script, because logrotate runs as root, and we don't want to run GoAccess as root. Hence the rather convoluted syntax with setpriv. Rather than embedding this kind of thing in a wrapper script, we can instead run the wrapper script from a [systemd][] service, and define which user runs the wrapper straight in the systemd service file. Introducing systemd niceties So we can create a systemd service, along with a systemd timer that fires daily. We can then set the user and group that execute the script straight in the systemd service, and there's no need for setpriv anymore. It's a bit more streamlined. We can even go a bit further, and use systemd parameterized units (also called templates), so that we have one service per site (instead of one service that process all of our sites). That will simplify the wrapper script a lot, and it also looks nicer in the logs. With this approach however, it seems that we can't really run exactly before the logs are rotated away, like we did in the section above. But that's OK. What we'll do is that we'll run once a day, no matter the time, and we'll just make sure to process both log files access.log and access.log.1 (ie. the current logs and the logs from yesterday). This way, we're sure not to miss any line from the logs. Note that GoAccess is smart enough to only consider newer entries from the log files, and discard entries that are already in the database. In other words, it's safe to parse the same log file more than once, GoAccess will do the right thing. For more details see "INCREMENTAL LOG PROCESSING" from man goaccess. systemd]: https://freedesktop.org/wiki/Software/systemd/ Implementation And here's how it all looks like. First, a little wrapper script for GoAccess:
 1
 2
 3
 4
 5
 6
 7
 8
 9
10
11
12
13
14
15
16
17
18
19
20
21
22
23
24
25
26
27
28
29
30
31
32
#!/bin/bash
# Usage: $0 SITE DBDIR LOGDIR OUTDIR
set -eu
SITE=$1
DBDIR=$2
LOGDIR=$3
OUTDIR=$4
LOGFILES=()
for ext in log log.1; do
    logfile="$LOGDIR/access.$ext"
    [ -e "$logfile" ] && LOGFILES+=("$logfile")
done
if [ $ #LOGFILES[@]  -eq 0 ]; then
    echo "No log files in '$LOGDIR'"
    exit 0
fi
goaccess \
    --agent-list \
    --anonymize-ip \
    --persist \
    --restore \
    --config-file /etc/goaccess/goaccess.conf \
    --db-path "$DBDIR" \
    --log-format "COMBINED" \
    --output "$OUTDIR/$SITE.html" \
    "$ LOGFILES[@] "
This wrapper does very little. Actually, the only thing it does is to check for the existence of the two log files access.log and access.log.1, to be sure that we don't ask GoAccess to process a file that does not exist (GoAccess would not be happy about that). Save this file under /usr/local/bin/goaccess-wrapper, don't forget to make it executable:
chmod +x /usr/local/bin/goaccess-wrapper
Then, create a systemd parameterized unit file, so that we can run this wrapper as a systemd service. Save it under /etc/systemd/system/goaccess@.service:
[Unit]
Description=Update GoAccess report - %i
ConditionPathIsDirectory=/var/lib/goaccess-db/%i
ConditionPathIsDirectory=/var/log/apache2/%i
ConditionPathIsDirectory=/tmp/goaccess-reports
PartOf=goaccess.service
[Service]
Type=oneshot
User=goaccess
Group=goaccess
Nice=19
ExecStart=/usr/local/bin/goaccess-wrapper \
 %i \
 /var/lib/goaccess-db/%i \
 /var/log/apache2/%i \
 /tmp/goaccess-reports
So, what is a systemd parameterized unit? It's a service to which you can pass an argument when you enable it. The %i in the unit definition will be replaced by this argument. In our case, the argument will be the name of the site that we want to process. As you can see, we use the directive ConditionPathIsDirectory= extensively, so that if ever one of the required directories does not exist, the unit will just be skipped (and marked as such in the logs). It's a graceful way to fail. We run the wrapper as the user and group goaccess, thanks to User= and Group=. We also use Nice= to give a low priority to the process. At this point, it's already possible to test. Just make sure that you created a directory for the GoAccess database:
mkdir -p /var/lib/goaccess-db/SITE
chown goaccess:goaccess /var/lib/goaccess-db/SITE
Also make sure that the output directory exists:
mkdir /tmp/goaccess-reports
chown goaccess:goaccess /tmp/goaccess-reports
Then reload systemd and fire the unit to see if it works:
systemctl daemon-reload
systemctl start goaccess@SITE.service
journalctl   tail
And that should work already. As you can see, the argument, SITE, is passed in the systemctl start command. We just append it after the @, in the name of the unit. Now, let's create another GoAccess service file, which sole purpose is to group all the parameterized units together, so that we can start them all in one go. Note that we don't use a systemd target for that, because ultimately we want to run it once a day, and that would not be possible with a target. So instead we use a dummy oneshot service. So here it is, saved under /etc/systemd/system/goaccess.service:
[Unit]
Description=Update GoAccess reports
Requires= \
 goaccess@SITE1.service \
 goaccess@SITE2.service
[Service]
Type=oneshot
ExecStart=true
As you can see, we simply list the sites that we want to process in the Requires= directive. In this example we have two sites named SITE1 and SITE2. Let's ensure that everything is still good:
systemctl daemon-reload
systemctl start goaccess.service
journalctl   tail
Check the logs, both sites SITE1 and SITE2 should have been processed. And finally, let's create a timer, so that systemd runs goaccess.service once a day. Save it under /etc/systemd/system/goaccess.timer.
[Unit]
Description=Daily update of GoAccess reports
[Timer]
OnCalendar=daily
RandomizedDelaySec=1h
Persistent=true
[Install]
WantedBy=timers.target
Finally, enable the timer:
systemctl daemon-reload
systemctl enable --now goaccess.timer
At this point, everything should be OK. Just come back tomorrow and check the logs with something like:
journalctl   grep goaccess
Last word: if you have only one site to process, of course you can simplify, for example you can hardcode all the paths in the file goaccess.service instead of using a parameterized unit. Up to you. Daily operations So in this part, we assume that you have GoAccess all setup and running, once a day or so. Let's just go over a few things worth noting. Serve your report Up to now in this tutorial, we created the reports in /tmp/goaccess-reports, but that was just for the sake of the example. You will probably want to save your reports in a directory that is served by your web server, so that, well, you can actually look at it in your web browser, that was the point, right? So how to do that is a bit out of scope here, and I guess that if you want to monitor your website, you already have a website, so you will have no trouble serving the GoAccess HTML report. However there's an important detail to be aware of: GoAccess shows all the IP addresses of your visitors in the report. As long as the report is private it's OK, but if ever you make your GoAccess report public, then you should definitely invoke GoAccess with the option --anonymize-ip. Keep an eye on the logs In this tutorial, the reports we create, along with the GoAccess databases, will grow bigger every day, forever. It also means that the GoAccess processing time will grow a bit each day. So maybe the first thing to do is to keep an eye on the logs, to see how long it takes to GoAccess to do its job every day. Also, maybe you'd like to keep an eye on the size of the GoAccess database with:
du -sh /var/lib/goaccess-db/SITE
If your site has few visitors, I suspect it won't be a problem though. You could also be a bit pro-active in preventing this problem in the future, and for example you could break the reports into, say, monthly reports. Meaning that every month, you would create a new database in a new directory, and also start a new HTML report. This way you'd have monthly reports, and you make sure to limit the GoAccess processing time, by limiting the database size to a month. This can be achieved very easily, by including something like YEAR-MONTH in the database directory, and in the HTML report. You can handle that automatically in the wrapper script, for example:
sfx=$(date +'%Y-%m')
mkdir -p $DBDIR/$sfx
goaccess \
    --db-path $DBDIR/$sfx \
    --output "$OUTDIR/$SITE-$sfx.html" \
    ...
You get the idea. Further notes Migration from older versions With the --persist option, GoAccess keeps all the information from the logs in a database, so that it can re-use it later. In prior versions, GoAccess used the Tokyo Cabinet key-value store for that. However starting from v1.4, GoAccess dropped this dependency and now uses its own database format. As a result, the previous database can't be used anymore, you will have to remove it and restart from zero. At the moment there is no way to convert the data from the old database to the new one. If you're interested, this is discussed upstream at [#1783][bug-1783]. Another thing that changed with this new version is the name for some of the command-line options. For example, --load-from-disk was dropped in favor of --restore, and --keep-db-files became --persist. So you'll have to look at the documentation a bit, and update your script(s) accordingly. Other ways to use GoAccess It's also possible to do it completely differently. You could keep GoAccess running, pretty much like a daemon, with the --real-time-html option, and have it process the logs continuously, rather than calling it on a regular basis. It's also possible to see the GoAccess report straight in the terminal, thanks to libncurses, rather than creating a HTML report. And much more, GoAccess is packed with features. Conclusion I hope that this tutorial helped some of you folks. Feel free to drop an e-mail for comments.

8 August 2020

Reproducible Builds: Reproducible Builds in July 2020

Welcome to the July 2020 report from the Reproducible Builds project. In these monthly reports, we round-up the things that we have been up to over the past month. As a brief refresher, the motivation behind the Reproducible Builds effort is to ensure no flaws have been introduced from the original free software source code to the pre-compiled binaries we install on our systems. (If you re interested in contributing to the project, please visit our main website.)

General news At the upcoming DebConf20 conference (now being held online), Holger Levsen will present a talk on Thursday 27th August about Reproducing Bullseye in practice , focusing on independently verifying that the binaries distributed from ftp.debian.org were made from their claimed sources. Tavis Ormandy published a blog post making the provocative claim that You don t need reproducible builds , asserting elsewhere that the many attacks that have been extensively reported in our previous reports are fantasy threat models . A number of rebuttals have been made, including one from long-time contributor Reproducible Builds contributor Bernhard Wiedemann. On our mailing list this month, Debian Developer Graham Inggs posted to our list asking for ideas why the openorienteering-mapper Debian package was failing to build on the Reproducible Builds testing framework. Chris Lamb remarked from the build logs that the package may be missing a build dependency, although Graham then used our own diffoscope tool to show that the resulting package remains unchanged with or without it. Later, Nico Tyni noticed that the build failure may be due to the relationship between the FILE C preprocessor macro and the -ffile-prefix-map GCC flag. An issue in Zephyr, a small-footprint kernel designed for use on resource-constrained systems, around .a library files not being reproducible was closed after it was noticed that a key part of their toolchain was updated that now calls --enable-deterministic-archives by default. Reproducible Builds developer kpcyrd commented on a pull request against the libsodium cryptographic library wrapper for Rust, arguing against the testing of CPU features at compile-time. He noted that:
I ve accidentally shipped broken updates to users in the past because the build system was feature-tested and the final binary assumed the instructions would be present without further runtime checks
David Kleuker also asked a question on our mailing list about using SOURCE_DATE_EPOCH with the install(1) tool from GNU coreutils. When comparing two installed packages he noticed that the filesystem birth times differed between them. Chris Lamb replied, realising that this was actually a consequence of using an outdated version of diffoscope and that a fix was in diffoscope version 146 released in May 2020. Later in July, John Scott posted asking for clarification regarding on the Javascript files on our website to add metadata for LibreJS, the browser extension that blocks non-free Javascript scripts from executing. Chris Lamb investigated the issue and realised that we could drop a number of unused Javascript files [ ][ ][ ] and added unminified versions of Bootstrap and jQuery [ ].

Development work

Website On our website this month, Chris Lamb updated the main Reproducible Builds website and documentation to drop a number of unused Javascript files [ ][ ][ ] and added unminified versions of Bootstrap and jQuery [ ]. He also fixed a number of broken URLs [ ][ ]. Gonzalo Bulnes Guilpain made a large number of grammatical improvements [ ][ ][ ][ ][ ] as well as some misspellings, case and whitespace changes too [ ][ ][ ]. Lastly, Holger Levsen updated the README file [ ], marked the Alpine Linux continuous integration tests as currently disabled [ ] and linked the Arch Linux Reproducible Status page from our projects page [ ].

diffoscope diffoscope is our in-depth and content-aware diff utility that can not only locate and diagnose reproducibility issues, it provides human-readable diffs of all kinds. In July, Chris Lamb made the following changes to diffoscope, including releasing versions 150, 151, 152, 153 & 154:
  • New features:
    • Add support for flash-optimised F2FS filesystems. (#207)
    • Don t require zipnote(1) to determine differences in a .zip file as we can use libarchive. [ ]
    • Allow --profile as a synonym for --profile=-, ie. write profiling data to standard output. [ ]
    • Increase the minimum length of the output of strings(1) to eight characters to avoid unnecessary diff noise. [ ]
    • Drop some legacy argument styles: --exclude-directory-metadata and --no-exclude-directory-metadata have been replaced with --exclude-directory-metadata= yes,no . [ ]
  • Bug fixes:
    • Pass the absolute path when extracting members from SquashFS images as we run the command with working directory in a temporary directory. (#189)
    • Correct adding a comment when we cannot extract a filesystem due to missing libguestfs module. [ ]
    • Don t crash when listing entries in archives if they don t have a listed size such as hardlinks in ISO images. (#188)
  • Output improvements:
    • Strip off the file offset prefix from xxd(1) and show bytes in groups of 4. [ ]
    • Don t emit javap not found in path if it is available in the path but it did not result in an actual difference. [ ]
    • Fix ... not available in path messages when looking for Java decompilers that used the Python class name instead of the command. [ ]
  • Logging improvements:
    • Add a bit more debugging info when launching libguestfs. [ ]
    • Reduce the --debug log noise by truncating the has_some_content messages. [ ]
    • Fix the compare_files log message when the file does not have a literal name. [ ]
  • Codebase improvements:
    • Rewrite and rename exit_if_paths_do_not_exist to not check files multiple times. [ ][ ]
    • Add an add_comment helper method; don t mess with our internal list directly. [ ]
    • Replace some simple usages of str.format with Python f-strings [ ] and make it easier to navigate to the main.py entry point [ ].
    • In the RData comparator, always explicitly return None in the failure case as we return a non-None value in the success one. [ ]
    • Tidy some imports [ ][ ][ ] and don t alias a variable when we do not use it. [ ]
    • Clarify the use of a separate NullChanges quasi-file to represent missing data in the Debian package comparator [ ] and clarify use of a null diff in order to remember an exit code. [ ]
  • Other changes:
    • Profile the launch of libguestfs filesystems. [ ]
    • Clarify and correct our contributing info. [ ][ ][ ][ ][ ][ ]
Jean-Romain Garnier also made the following changes:
  • Allow passing a file with a list of arguments via diffoscope @args.txt. (!62)
  • Improve the output of side-by-side diffs by detecting added lines better. (!64)
  • Remove offsets before instructions in objdump [ ][ ] and remove raw instructions from ELF tests [ ].

Other tools strip-nondeterminism is our tool to remove specific non-deterministic results from a completed build. It is used automatically in most Debian package builds. In July, Chris Lamb ensured that we did not install the internal handler documentation generated from Perl POD documents [ ] and fixed a trivial typo [ ]. Marc Herbert added a --verbose-level warning when the Archive::Cpio Perl module is missing. (!6) reprotest is our end-user tool to build same source code twice in widely differing environments and then checks the binaries produced by each build for any differences. This month, Vagrant Cascadian made a number of changes to support diffoscope version 153 which had removed the (deprecated) --exclude-directory-metadata and --no-exclude-directory-metadata command-line arguments, and updated the testing configuration to also test under Python version 3.8 [ ].

Distributions

Debian In June 2020, Timo R hling filed a wishlist bug against the debhelper build tool impacting the reproducibility status of hundreds of packages that use the CMake build system. This month however, Niels Thykier uploaded debhelper version 13.2 that passes the -DCMAKE_SKIP_RPATH=ON and -DBUILD_RPATH_USE_ORIGIN=ON arguments to CMake when using the (currently-experimental) Debhelper compatibility level 14. According to Niels, this change:
should fix some reproducibility issues, but may cause breakage if packages run binaries directly from the build directory.
34 reviews of Debian packages were added, 14 were updated and 20 were removed this month adding to our knowledge about identified issues. Chris Lamb added and categorised the nondeterministic_order_of_debhelper_snippets_added_by_dh_fortran_mod [ ] and gem2deb_install_mkmf_log [ ] toolchain issues. Lastly, Holger Levsen filed two more wishlist bugs against the debrebuild Debian package rebuilder tool [ ][ ].

openSUSE In openSUSE, Bernhard M. Wiedemann published his monthly Reproducible Builds status update. Bernhard also published the results of performing 12,235 verification builds of packages from openSUSE Leap version 15.2 and, as a result, created three pull requests against the openSUSE Build Result Compare Script [ ][ ][ ].

Other distributions In Arch Linux, there was a mass rebuild of old packages in an attempt to make them reproducible. This was performed because building with a previous release of the pacman package manager caused file ordering and size calculation issues when using the btrfs filesystem. A system was also implemented for Arch Linux packagers to receive notifications if/when their package becomes unreproducible, and packagers now have access to a dashboard where they can all see all their unreproducible packages (more info). Paul Spooren sent two versions of a patch for the OpenWrt embedded distribution for adding a build system revision to the packages manifest so that all external feeds can be rebuilt and verified. [ ][ ]

Upstream patches The Reproducible Builds project detects, dissects and attempts to fix as many currently-unreproducible packages as possible. We endeavour to send all of our patches upstream where appropriate. This month, we wrote a large number of these patches, including: Vagrant Cascadian also reported two issues, the first regarding a regression in u-boot boot loader reproducibility for a particular target [ ] and a non-deterministic segmentation fault in the guile-ssh test suite [ ]. Lastly, Jelle van der Waa filed a bug against the MeiliSearch search API to report that it embeds the current build date.

Testing framework We operate a large and many-featured Jenkins-based testing framework that powers tests.reproducible-builds.org. This month, Holger Levsen made the following changes:
  • Debian-related changes:
    • Tweak the rescheduling of various architecture and suite combinations. [ ][ ]
    • Fix links for 404 and not for us icons. (#959363)
    • Further work on a rebuilder prototype, for example correctly processing the sbuild exit code. [ ][ ]
    • Update the sudo configuration file to allow the node health job to work correctly. [ ]
    • Add php-horde packages back to the pkg-php-pear package set for the bullseye distribution. [ ]
    • Update the version of debrebuild. [ ]
  • System health check development:
    • Add checks for broken SSH [ ], logrotate [ ], pbuilder [ ], NetBSD [ ], unkillable processes [ ], unresponsive nodes [ ][ ][ ][ ], proxy connection failures [ ], too many installed kernels [ ], etc.
    • Automatically fix some failed systemd units. [ ]
    • Add notes explaining all the issues that hosts are experiencing [ ] and handle zipped job log files correctly [ ].
    • Separate nodes which have been automatically marked as down [ ] and show status icons for jobs with issues [ ].
  • Misc:
    • Disable all Alpine Linux jobs until they are or Alpine is fixed. [ ]
    • Perform some general upkeep of build nodes hosted by OSUOSL. [ ][ ][ ][ ]
In addition, Mattia Rizzolo updated the init_node script to suggest using sudo instead of explicit logout and logins [ ][ ] and the usual build node maintenance was performed by Holger Levsen [ ][ ][ ][ ][ ][ ], Mattia Rizzolo [ ][ ] and Vagrant Cascadian [ ][ ][ ][ ].

If you are interested in contributing to the Reproducible Builds project, please visit our Contribute page on our website. However, you can get in touch with us via:

Dirk Eddelbuettel: RVowpalWabbit 0.0.15: Some More CRAN Build Issues

Another maintenance RVowpalWabbit package update brought us to version 0.0.15 earlier today. We attempted to fix one compilation error on Solaris, and addressed a few SAN/UBSAN issues with the gcc build. As noted before, there is a newer package rvw based on the excellent GSoC 2018 and beyond work by Ivan Pavlov (mentored by James and myself) so if you are into Vowpal Wabbit from R go check it out. CRANberries provides a summary of changes to the previous version. More information is on the RVowpalWabbit page. Issues and bugreports should go to the GitHub issue tracker. If you like this or other open-source work I do, you can now sponsor me at GitHub. For the first year, GitHub will match your contributions.

This post by Dirk Eddelbuettel originated on his Thinking inside the box blog. Please report excessive re-aggregation in third-party for-profit settings.

6 August 2020

Dirk Eddelbuettel: nanotime 0.3.0: Yuge New Features!

A fresh major release of the nanotime package for working with nanosecond timestamps is hitting CRAN mirrors right now. nanotime relies on the RcppCCTZ package for (efficient) high(er) resolution time parsing and formatting up to nanosecond resolution, and the bit64 package for the actual integer64 arithmetic. Initially implemented using the S3 system, it has benefitted greatly from work by Leonardo Silvestri who rejigged internals in S4 and now added new types for periods, intervals and durations. This is what is commonly called a big fucking deal!! So a really REALLY big thank you to my coauthor Leonardo for all these contributions. With all these Yuge changes patiently chisseled in by Leonardo, it took some time since the last release and a few more things piled up. Matt Dowle corrected something we borked for integration with the lovely and irreplacable data.table. We also switched to the awesome yet minimal tinytest package by Mark van der Loo, and last but not least we added the beginnings of a proper vignette currently at nine pages but far from complete. The NEWS snippet adds full details.

Changes in version 0.3.0 (2020-08-06)
  • Use tzstr= instead of tz= in call to RcppCCTZ::parseDouble()) (Matt Dowle in #49).
  • Add new comparison operators for nanotime and charcters (Dirk in #54 fixing #52).
  • Switch from RUnit to tinytest (Dirk in #55)
  • Substantial functionality extension in with new types nanoduration, nanoival and nanoperiod (Leonardo in #58, #60, #62, #63, #65, #67, #70 fixing #47, #51, #57, #61, #64 with assistance from Dirk).
  • A new (yet still draft-ish) vignette was added describing the four core types (Leonardo and Dirk in #71).
  • A required compilation flag for Windows was added (Leonardo in #72).
  • RcppCCTZ function are called in new 'non-throwing' variants to not trigger exeception errors (Leonardo in #73).

We also have a diff to the previous version thanks to CRANberries. More details and examples are at the nanotime page; code, issue tickets etc at the GitHub repository. If you like this or other open-source work I do, you can now sponsor me at GitHub. For the first year, GitHub will match your contributions.

This post by Dirk Eddelbuettel originated on his Thinking inside the box blog. Please report excessive re-aggregation in third-party for-profit settings.

5 August 2020

Dirk Eddelbuettel: RcppCCTZ 0.2.8: Minor API Extension

A new minor release 0.2.8 of RcppCCTZ is now on CRAN. RcppCCTZ uses Rcpp to bring CCTZ to R. CCTZ is a C++ library for translating between absolute and civil times using the rules of a time zone. In fact, it is two libraries. One for dealing with civil time: human-readable dates and times, and one for converting between between absolute and civil times via time zones. And while CCTZ is made by Google(rs), it is not an official Google product. The RcppCCTZ page has a few usage examples and details. This package was the first CRAN package to use CCTZ; by now at least three others do using copies in their packages which remains less than ideal. This version adds three no throw variants of three existing functions, contributed again by Leonardo. This will be used in an upcoming nanotime release which we are finalising now.

Changes in version 0.2.8 (2020-08-04)
  • Added three new nothrow variants (for win32) needed by the expanded nanotime package (Leonardo in #37)

We also have a diff to the previous version thanks to CRANberries. More details are at the RcppCCTZ page; code, issue tickets etc at the GitHub repository. If you like this or other open-source work I do, you can now sponsor me at GitHub. For the first year, GitHub will match your contributions.

This post by Dirk Eddelbuettel originated on his Thinking inside the box blog. Please report excessive re-aggregation in third-party for-profit settings.

4 August 2020

Osamu Aoki: exim4 configuration for Desktop (better gmail support)

Since gmail rewrites "From:" address now (2020) and keep changing access limitation, it is wise not to use it as smarthost any more. (If you need to access multiple gmail addresses from mutt etc, use esmtp etc.)

---
For most of our Desktop PC running with stock exim4 and mutt, I think sending out mail is becoming a bit rough since using random smarthost causes lots of trouble due to the measures taken to prevent spams.

As mentioned in Exim4 user FAQ , /etc/hosts should have FQDN with external DNS resolvable domain name listed instead of localdomain to get the correct EHLO/HELO line. That's the first step.

The stock configuration of exim4 only allows you to use single smarthost for all your mails. I use one address for my personal use which is checked by my smartphone too. The other account is for subscribing to the mailing list. So I needed to tweak ...

Usually, mutt is smart enough to set the From address since my .muttrc has

# Set default for From: for replyes for alternates.
set reverse_name

So how can I teach exim4 to send mails depending on the mail accounts listed in the From header.

For my gmail accounts, each mail should be sent to the account specific SMTP connection matching your From header to get all the modern SPAM protection data in right state. DKIM, SPF, DMARC... (Besides, they overwrite From: header anyway if you use wrong connection.)

For my debian.org mails, mails should be sent from my shell account on people.debian.org so it is very unlikely to be blocked. Sometimes, I wasn't sure some of these debian.org mails sent through my ISP's smarthost are really getting to the intended person.

To these ends, I have created small patches to the /etc/exim4/conf.d files and reported it to Debian BTS: #869480 Support multiple smarthosts (gmail support). These patches are for the source package.

To use my configuration tweak idea, you have easier route no matter which exim version you are using. Please copy and read pertinent edited files from my github site to your installed /etc/exim4/conf.d files and get the benefits.
If you really wish to keep envelope address etc. to match From: header, please rewite agressively using the From: header using eddited rewrite/31_exim4-config_rewriting as follows:

 .ifndef NO_EAA_REWRITE_REWRITE
*@+local_domains "$ lookup $ local_part lsearch /etc/email-addresses \
$value fail " f
# identical rewriting rule for /etc/mailname
*@ETC_MAILNAME "$ lookup $ local_part lsearch /etc/email-addresses \
$value fail " f
.endif
* "$h_from:" Frs

So far its working fine for me but if you find bug, let me know.

Osamu

3 August 2020

Arnaud Rebillout: GoAccess 1.4, a detailed tutorial

GoAccess v1.4 was just released a few weeks ago! Let's take this chance to write a loooong tutorial. We'll go over every steps to install and operate GoAccess. This is a tutorial aimed at those who don't play sysadmin every day, and that's why it's so long, I did my best to provide thorough explanations all along, so that it's more than just a "copy-and-paste" kind of tutorial. And for those who do play sysadmin everyday: please try not to fall asleep while reading, and don't hesitate to drop me an e-mail if you spot anything inaccurate in here. Thanks! Introduction So what's GoAccess already? GoAccess is a web log analyzer, and it allows you to visualize the traffic for your website, and get to know a bit more about your visitors: how many visitors and hits, for which pages, coming from where (geolocation, operating system, web browser...), etc... It does so by parsing the access logs from your web server, be it Apache, NGINX or whatever. GoAccess gives you different options to display the statistics, and in this tutorial we'll focus on producing a HTML report. Meaning that you can see the statistics for your website straight in your web browser, under the form of a single HTML page. For an example, you can have a look at the stats of my blog here: http://goaccess.arnaudr.io. GoAccess is written in C, it has very few dependencies, it had been around for about 10 years, and it's distributed under the MIT license. Assumptions This tutorial is about installing and configuring, so I'll assume that all the commands are run as root. I won't prefix each of them with sudo. I use the Apache web server, running on a Debian system. I don't think it matters so much for this tutorial though. If you're using NGINX it's fine, you can keep reading. Also, I will just use the name SITE for the name of the website that we want to analyze with GoAccess. Just replace that with the real name of your site. I also assume the following locations for your stuff: If you have your stuff in /srv/SITE/ log,www instead, no worries, just adjust the paths accordingly, I bet you can do it. Installation The latest version of GoAccess is v1.4, and it's not yet available in the Debian repositories. So for this part, you can follow the instructions from the official GoAccess download page. Install steps are explained in details, so there's nothing left for me to say :) When this is done, let's get started with the basics. We're talking about the latest version v1.4 here, let's make sure:
$ goaccess --version
GoAccess - 1.4.
...
Now let's try to create a HTML report. I assume that you already have a website up and running. GoAccess needs to parse the access logs. These logs are optional, they might or might not be created by your web server, depending on how it's configured. Usually, these log files are named access.log, unsurprisingly. You can check if those logs exist on your system by running this command:
find /var/log -name access.log
Another important thing to know is that these logs can be in different formats. In this tutorial we'll assume that we work with the combined log format, because it seems to be the most common default. To check what kind of access logs your web server produces, you must look at the configuration for your site. For an Apache web server, you should have such a line in the file /etc/apache2/sites-enabled/SITE.conf:
CustomLog $ APACHE_LOG_DIR /SITE/access.log combined
For NGINX, it's quite similar. The configuration file would be something like /etc/nginx/sites-enabled/SITE, and the line to enable access logs would be something like:
access_log /var/log/nginx/SITE/access.log
Note that NGINX writes the access logs in the combined format by default, that's why you don't see the word combined anywhere in the line above: it's implicit. Alright, so from now on we assume that yes, you have access log files available, and yes, they are in the combined log format. If that's the case, then you can already run GoAccess and generate a report, for example for the log file /var/log/apache2/access.log
goaccess \
    --log-format COMBINED \
    --output /tmp/report.html \
    /var/log/apache2/access.log
It's possible to give GoAccess more than one log files to process, so if you have for example the file access.log.1 around, you can use it as well:
goaccess \
    --log-format COMBINED \
    --output /tmp/report.html \
    /var/log/apache2/access.log \
    /var/log/apache2/access.log.1
If GoAccess succeeds (and it should), you're on the right track! All is left to do to complete this test is to have a look at the HTML report created. It's a single HTML page, so you can easily scp it to your machine, or just move it to the document root of your site, and then open it in your web browser. Looks good? So let's move on to more interesting things. Web server configuration This part is very short, because in terms of configuration of the web server, there's very little to do. As I said above, the only thing you want from the web server is to create access log files. Then you want to be sure that GoAccess and your web server agree on the format for these files. In the part above we used the combined log format, but GoAccess supports many other common log formats out of the box, and even allows you to parse custom log formats. For more details, refer to the option --log-format in the GoAccess manual page. Another common log format is named, well, common. It even has its own Wikipedia page. But compared to combined, the common log format contains less information, it doesn't include the referrer and user-agent values, meaning that you won't have it in the GoAccess report. So at this point you should understand that, unsurprisingly, GoAccess can only tell you about what's in the access logs, no more no less. And that's all in term of web server configuration. Configuration to run GoAccess unprivileged Now we're going to create a user and group for GoAccess, so that we don't have to run it as root. The reason is that, well, for everything running unattended on your server, the less code runs as root, the better. It's good practice and common sense. In this case, GoAccess is simply a log analyzer. So it just needs to read the logs files from your web server, and there is no need to be root for that, an unprivileged user can do the job just as well, assuming it has read permissions on /var/log/apache2 or /var/log/nginx. The log files of the web server are usually part of the adm group (though it might depend on your distro, I'm not sure). This is something you can check easily with the following command:
ls -l /var/log   grep -e apache2 -e nginx
As a result you should get something like that:
drwxr-x--- 2 root adm 20480 Jul 22 00:00 /var/log/apache2/
And as you can see, the directory apache2 belongs to the group adm. It means that you don't need to be root to read the logs, instead any unprivileged user that belongs to the group adm can do it. So, let's create the goaccess user, and add it to the adm group:
adduser --system --group --no-create-home goaccess
addgroup goaccess adm
And now, let's run GoAccess unprivileged, and verify that it can still read the log files:
setpriv \
    --reuid=goaccess --regid=goaccess \
    --init-groups --inh-caps=-all \
    -- \
    goaccess \
    --log-format COMBINED \
    --output /tmp/report2.html \
    /var/log/apache2/access.log
setpriv is the command used to drop privileges. The syntax is quite verbose, it's not super friendly for tutorials, but don't be scared and read the manual page to learn what it does. In any case, this command should work, and at this point, it means that you have a goaccess user ready, and we'll use it to run GoAccess unprivileged. Integration, option A - Run GoAccess once a day, from a logrotate hook In this part we wire things together, so that GoAccess processes the log files once a day, adds the new logs to its internal database, and generates a report from all that aggregated data. The result will be a single HTML page. Introducing logrotate In order to do that, we'll use a logrotate hook. logrotate is a little tool that should already be installed on your server, and that runs once a day, and that is in charge of rotating the log files. "Rotating the logs" means moving access.log to access.log.1 and so on. With logrotate, a new log file is created every day, and log files that are too old are deleted. That's what prevents your logs from filling up your disk basically :) You can check that logrotate is indeed installed and enabled with this command (assuming that your init system is systemd):
systemctl status logrotate.timer
What's interesting for us is that logrotate allows you to run scripts before and after the rotation is performed, so it's an ideal place from where to run GoAccess. In short, we want to run GoAccess just before the logs are rotated away, in the prerotate hook. But let's do things in order. At first, we need to write a little wrapper script that will be in charge of running GoAccess with the right arguments, and that will process all of your sites. The wrapper script This wrapper is made to process more than one site, but if you have only one site it works just as well, of course. So let me just drop it on you like that, and I'll explain afterward. Here's my wrapper script:
 1
 2
 3
 4
 5
 6
 7
 8
 9
10
11
12
13
14
15
16
17
18
19
20
21
22
23
24
25
26
27
28
29
30
31
32
33
34
35
36
37
38
39
40
41
42
43
44
45
46
47
48
49
50
#!/bin/bash
# Process log files /var/www/apache2/SITE/access.log,
# only if /var/lib/goaccess-db/SITE exists.
# Create HTML reports in $1, a directory that must exist.
set -eu
OUTDIR=
LOGDIR=/var/log/apache2
DBDIR=/var/lib/goaccess-db
fail()   echo >&2 "$@"; exit 1;  
[ $# -eq 1 ]   fail "Usage: $(basename $0) OUTPUT_DIRECTORY"
OUTDIR=$1
[ -d "$OUTDIR" ]   fail "'$OUTDIR' is not a directory"
[ -d "$LOGDIR" ]   fail "'$LOGDIR' is not a directory"
[ -d "$DBDIR"  ]   fail "'$DBDIR' is not a directory"
for d in $(find "$LOGDIR" -mindepth 1 -maxdepth 1 -type d); do
    site=$(basename "$sitedir")
    dbdir=$DBDIR/$site
    logfile=$d/access.log
    outfile=$OUTDIR/$site.html
    if [ ! -d "$dbdir" ]   [ ! -e "$logfile" ]; then
        echo "  Skipping site '$site'"
        continue
    else
        echo "  Processing site '$site'"
    fi
    setpriv \
        --reuid=goaccess --regid=goaccess \
        --init-groups --inh-caps=-all \
        -- \
    goaccess \
        --agent-list \
        --anonymize-ip \
        --persist \
        --restore \
        --config-file /etc/goaccess/goaccess.conf \
        --db-path "$dbdir" \
        --log-format "COMBINED" \
        --output "$outfile" \
        "$logfile"
done
So you'd install this script at /usr/local/bin/goaccess-wrapper for example, and make it executable:
chmod +x /usr/local/bin/goaccess-wrapper
A few things to note: As is, the script makes the assumption that the logs for your site are logged in a sub-directory /var/log/apache2/SITE/. If it's not the case, adjust that in the wrapper accordingly. The name of this sub-directory is then used to find the GoAccess database directory /var/lib/goaccess-db/SITE/. This directory is expected to exist, meaning that if you don't create it yourself, the wrapper won't process this particular site. It's a simple way to control which sites are processed by this GoAccess wrapper, and which sites are not. So if you want goaccess-wrapper to process the site SITE, just create a directory with the name of this site under /var/lib/goaccess-db:
mkdir -p /var/lib/goaccess-db/SITE
chown goaccess:goaccess /var/lib/goaccess-db/SITE
Now let's create an output directory:
mkdir /tmp/goaccess-reports
chown goaccess:goaccess /tmp/goaccess-reports
And let's give a try to the wrapper script:
goaccess-wrapper /tmp/goaccess-reports
ls /tmp/goaccess-reports
Which should give you:
SITE.html
At the same time, you can check that GoAccess populated the database with a bunch of files:
ls /var/lib/goaccess-db/SITE
Setting up the logrotate prerotate hook At this point, we have the wrapper in place. Let's now add a pre-rotate hook so that goaccess-wrapper runs once a day, just before the logs are rotated away. The logrotate config file for Apache2 is located at /etc/logrotate.d/apache2, and for NGINX it's at /etc/logrotate.d/nginx. Among the many things you'll see in this file, here's what is of interest for us: In the config file, there is also this snippet:
prerotate
    if [ -d /etc/logrotate.d/httpd-prerotate ]; then \
        run-parts /etc/logrotate.d/httpd-prerotate; \
    fi; \
endscript
It indicates that scripts in the directory /etc/logrotate.d/httpd-prerotate/ will be executed before the rotation takes place. Refer to the man page run-parts(8) for more details... Putting all of that together, it means that logs from the web server are rotated once a day, and if we want to run scripts just before the rotation, we can just drop them in the httpd-prerotate directory. Simple, right? Let's first create this directory if it doesn't exist:
mkdir -p /etc/logrotate.d/httpd-prerotate/
And let's create a tiny script at /etc/logrotate.d/httpd-prerotate/goaccess:
1
2
#!/bin/sh
exec goaccess-wrapper /tmp/goaccess-reports
Don't forget to make it executable:
chmod +x /etc/logrotate.d/httpd-prerotate/goaccess
As you can see, the only thing that this script does is to invoke the wrapper with the right argument, ie. the output directory for the HTML reports that are generated. And that's all. Now you can just come back tomorrow, check the logs, and make sure that the hook was executed and succeeded. For example, this kind of command will tell you quickly if it worked:
journalctl   grep logrotate
Integration, option B - Run GoAccess once a day, from a systemd service OK so we've just seen how to use a logrotate hook. One downside with that is that we have to drop privileges in the wrapper script, because logrotate runs as root, and we don't want to run GoAccess as root. Hence the rather convoluted syntax with setpriv. Rather than embedding this kind of thing in a wrapper script, we can instead run the wrapper script from a [systemd][] service, and define which user runs the wrapper straight in the systemd service file. Introducing systemd niceties So we can create a systemd service, along with a systemd timer that fires daily. We can then set the user and group that execute the script straight in the systemd service, and there's no need for setpriv anymore. It's a bit more streamlined. We can even go a bit further, and use systemd parameterized units (also called templates), so that we have one service per site (instead of one service that process all of our sites). That will simplify the wrapper script a lot, and it also looks nicer in the logs. With this approach however, it seems that we can't really run exactly before the logs are rotated away, like we did in the section above. But that's OK. What we'll do is that we'll run once a day, no matter the time, and we'll just make sure to process both log files access.log and access.log.1 (ie. the current logs and the logs from yesterday). This way, we're sure not to miss any line from the logs. Note that GoAccess is smart enough to only consider newer entries from the log files, and discard entries that are already in the database. In other words, it's safe to parse the same log file more than once, GoAccess will do the right thing. For more details see "INCREMENTAL LOG PROCESSING" from man goaccess. systemd]: https://freedesktop.org/wiki/Software/systemd/ Implementation And here's how it all looks like. First, a little wrapper script for GoAccess:
 1
 2
 3
 4
 5
 6
 7
 8
 9
10
11
12
13
14
15
16
17
18
19
20
21
22
23
24
25
26
27
28
29
30
31
32
#!/bin/bash
# Usage: $0 SITE DBDIR LOGDIR OUTDIR
set -eu
SITE=$1
DBDIR=$2
LOGDIR=$3
OUTDIR=$4
LOGFILES=()
for ext in log log.1; do
    logfile="$LOGDIR/access.$ext"
    [ -e "$logfile" ] && LOGFILES+=("$logfile")
done
if [ $ #LOGFILES[@]  -eq 0 ]; then
    echo "No log files in '$LOGDIR'"
    exit 0
fi
goaccess \
    --agent-list \
    --anonymize-ip \
    --persist \
    --restore \
    --config-file /etc/goaccess/goaccess.conf \
    --db-path "$DBDIR" \
    --log-format "COMBINED" \
    --output "$OUTDIR/$SITE.html" \
    "$ LOGFILES[@] "
This wrapper does very little. Actually, the only thing it does is to check for the existence of the two log files access.log and access.log.1, to be sure that we don't ask GoAccess to process a file that does not exist (GoAccess would not be happy about that). Save this file under /usr/local/bin/goaccess-wrapper, don't forget to make it executable:
chmod +x /usr/local/bin/goaccess-wrapper
Then, create a systemd parameterized unit file, so that we can run this wrapper as a systemd service. Save it under /etc/systemd/system/goaccess@.service:
[Unit]
Description=Update GoAccess report - %i
ConditionPathIsDirectory=/var/lib/goaccess-db/%i
ConditionPathIsDirectory=/var/log/apache2/%i
ConditionPathIsDirectory=/tmp/goaccess-reports
PartOf=goaccess.service
[Service]
Type=oneshot
User=goaccess
Group=goaccess
Nice=19
ExecStart=/usr/local/bin/goaccess-wrapper \
 %i \
 /var/lib/goaccess-db/%i \
 /var/log/apache2/%i \
 /tmp/goaccess-reports
So, what is a systemd parameterized unit? It's a service to which you can pass an argument when you enable it. The %i in the unit definition will be replaced by this argument. In our case, the argument will be the name of the site that we want to process. As you can see, we use the directive ConditionPathIsDirectory= extensively, so that if ever one of the required directories does not exist, the unit will just be skipped (and marked as such in the logs). It's a graceful way to fail. We run the wrapper as the user and group goaccess, thanks to User= and Group=. We also use Nice= to give a low priority to the process. At this point, it's already possible to test. Just make sure that you created a directory for the GoAccess database:
mkdir -p /var/lib/goaccess-db/SITE
chown goaccess:goaccess /var/lib/goaccess-db/SITE
Also make sure that the output directory exists:
mkdir /tmp/goaccess-reports
chown goaccess:goaccess /tmp/goaccess-reports
Then reload systemd and fire the unit to see if it works:
systemctl daemon-reload
systemctl start goaccess@SITE.service
journalctl   tail
And that should work already. As you can see, the argument, SITE, is passed in the systemctl start command. We just append it after the @, in the name of the unit. Now, let's create another GoAccess service file, which sole purpose is to group all the parameterized units together, so that we can start them all in one go. Note that we don't use a systemd target for that, because ultimately we want to run it once a day, and that would not be possible with a target. So instead we use a dummy oneshot service. So here it is, saved under /etc/systemd/system/goaccess.service:
[Unit]
Description=Update GoAccess reports
Requires= \
 goaccess@SITE1.service \
 goaccess@SITE2.service
[Service]
Type=oneshot
ExecStart=true
As you can see, we simply list the sites that we want to process in the Requires= directive. In this example we have two sites named SITE1 and SITE2. Let's ensure that everything is still good:
systemctl daemon-reload
systemctl start goaccess.service
journalctl   tail
Check the logs, both sites SITE1 and SITE2 should have been processed. And finally, let's create a timer, so that systemd runs goaccess.service once a day. Save it under /etc/systemd/system/goaccess.timer.
[Unit]
Description=Daily update of GoAccess reports
[Timer]
OnCalendar=daily
RandomizedDelaySec=1h
Persistent=true
[Install]
WantedBy=timers.target
Finally, enable the timer:
systemctl daemon-reload
systemctl enable --now goaccess.timer
At this point, everything should be OK. Just come back tomorrow and check the logs with something like:
journalctl   grep goaccess
Last word: if you have only one site to process, of course you can simplify, for example you can hardcode all the paths in the file goaccess.service instead of using a parameterized unit. Up to you. Daily operations So in this part, we assume that you have GoAccess all setup and running, once a day or so. Let's just go over a few things worth noting. Serve your report Up to now in this tutorial, we created the reports in /tmp/goaccess-reports, but that was just for the sake of the example. You will probably want to save your reports in a directory that is served by your web server, so that, well, you can actually look at it in your web browser, that was the point, right? So how to do that is a bit out of scope here, and I guess that if you want to monitor your website, you already have a website, so you will have no trouble serving the GoAccess HTML report. However there's an important detail to be aware of: GoAccess shows all the IP addresses of your visitors in the report. As long as the report is private it's OK, but if ever you make your GoAccess report public, then you should definitely invoke GoAccess with the option --anonymize-ip. Keep an eye on the logs In this tutorial, the reports we create, along with the GoAccess databases, will grow bigger every day, forever. It also means that the GoAccess processing time will grow a bit each day. So maybe the first thing to do is to keep an eye on the logs, to see how long it takes to GoAccess to do its job every day. Also, maybe you'd like to keep an eye on the size of the GoAccess database with:
du -sh /var/lib/goaccess-db/SITE
If your site has few visitors, I suspect it won't be a problem though. You could also be a bit pro-active in preventing this problem in the future, and for example you could break the reports into, say, monthly reports. Meaning that every month, you would create a new database in a new directory, and also start a new HTML report. This way you'd have monthly reports, and you make sure to limit the GoAccess processing time, by limiting the database size to a month. This can be achieved very easily, by including something like YEAR-MONTH in the database directory, and in the HTML report. You can handle that automatically in the wrapper script, for example:
sfx=$(date +'%Y-%m')
mkdir -p $DBDIR/$sfx
goaccess \
    --db-path $DBDIR/$sfx \
    --output "$OUTDIR/$SITE-$sfx.html" \
    ...
You get the idea. Further notes Migration from older versions With the --persist option, GoAccess keeps all the information from the logs in a database, so that it can re-use it later. In prior versions, GoAccess used the Tokyo Cabinet key-value store for that. However starting from v1.4, GoAccess dropped this dependency and now uses its own database format. As a result, the previous database can't be used anymore, you will have to remove it and restart from zero. At the moment there is no way to convert the data from the old database to the new one. If you're interested, this is discussed upstream at [#1783][bug-1783]. Another thing that changed with this new version is the name for some of the command-line options. For example, --load-from-disk was dropped in favor of --restore, and --keep-db-files became --persist. So you'll have to look at the documentation a bit, and update your script(s) accordingly. Other ways to use GoAccess It's also possible to do it completely differently. You could keep GoAccess running, pretty much like a daemon, with the --real-time-html option, and have it process the logs continuously, rather than calling it on a regular basis. It's also possible to see the GoAccess report straight in the terminal, thanks to libncurses, rather than creating a HTML report. And much more, GoAccess is packed with features. Conclusion I hope that this tutorial helped some of you folks. Feel free to drop an e-mail for comments.

29 July 2020

Dirk Eddelbuettel: Installing and Running Ubuntu on a 2015-ish MacBook Air

So a few months ago kiddo one dropped an apparently fairly large cup of coffee onto her one and only trusted computer. With a few months (then) to graduation (which by now happened), and with the apparent genuis bar verdict of it s a goner a new one was ordered. As it turns out this supposedly dead one coped well enough with the coffee so that after a few weeks of drying it booted again. But give the newer one, its apparent age and whatnot, it was deemed surplus. So I poked around a little on the interwebs and conclude that yes, this could work. Fast forward a few months and I finally got hold of it, and had some time to play with it. First, a bootable usbstick was prepared, and the machine s content was really (really, and check again: really) no longer needed, I got hold of it for good. tl;dr It works just fine. It is a little heavier than I thought (and isn t air supposed to be weightless?) The ergonomics seem quite nice. The keyboard is decent. Screen-resolution on this pre-retina simple Air is so-so at 1440 pixels. But battery live seems ok and e.g. the camera is way better than what I have in my trusted Lenovo X1 or at my desktop. So just as a zoom client it may make a lot of sense; otherwise just walking around with it as a quick portable machine seems perfect (especially as my Lenovo X1 still (ahem) suffers from one broken key I really need to fix ). Below are some lightly edited notes from the installation. Initial steps were quick: maybe an hour or less? Customizing a machine takes longer than I remembered, this took a few minutes here and there quite a few times, but always incremental.

Initial Steps
  • Download of Ubuntu 20.04 LTS image: took a few moments, even on broadband, feels slower than normal (fast!) Ubuntu package updates, maybe lesser CDN or bad luck
  • Startup Disk Creator using a so-far unused 8gb usb drive
  • Plug into USB, recycle power, press Option on macOS keyboard: voila
  • After a quick hunch no to live/test only and yes to install, whole disk
  • install easy, very few questions, somehow skips wifi
  • so activate wifi manually and everythings pretty much works

Customization
  • First deal with fn and ctrl key swap. Install git and followed this github repo which worked just fine. Yay. First (manual) Linux kernel module build needed need in half a decade? Longer?
  • Fire up firefox, go to download chrome , install chrome. Sign in. Turn on syncing. Sign into Pushbullet and Momentum.
  • syncthing which is excellent. Initially via apt, later from their PPA. Spend some time remembering how to set up the mutual handshakes between devices. Now syncing desktop/server, lenovo x1 laptop, android phone and this new laptop
  • keepassx via apt and set up using Sync/ folder. Now all (encrypted) passwords synced.
  • Discovered synergy now longer really free, so after a quick search found and installed barrier (via apt) to have one keyboard/mouse from desktop reach laptop.
  • Added emacs via apt, so far empty , so config files yet
  • Added ssh via apt, need to propagate keys to github and gitlab
  • Added R via add-apt-repository --yes "ppa:marutter/rrutter4.0" and add-apt-repository --yes "ppa:c2d4u.team/c2d4u4.0+". Added littler and then RStudio
  • Added wajig (apt frontend) and byobu, both via apt
  • Created ssh key, shipped it to server and github + gitlab
  • Cloned (not-public) dotfiles repo and linked some dotfiles in
  • Cloned git repo for nord-theme for gnome terminal and installed it; also added it to RStudio via this repo
  • Emacs installed, activated dotfiles, then incrementally install a few elpa-* packages and a few M-x package-install including nord-theme, of course
  • Installed JetBrains Mono font from my own local package; activated for Gnome Terminal and Emacs
  • Install gnome-tweak-tool via apt, adjusted a few settings
  • Ran gsettings set org.gnome.desktop.wm.preferences focus-mode 'sloppy'
  • Set up camera following this useful GH repo
  • At some point also added slack and zoom, because, well, it is 2020
  • STILL TODO:
    • docker
    • bother with email setup?,
    • maybe atom/code/ ?

Next.

Previous.