Adnan Hodzic: Automagically deploy & run containerized WordPress (PHP7 FPM, Nginx, MariaDB) using Ansible + Docker on AWS
 In this blog post, I ve described what started as simple migration of WordPress blog to AWS, ended up as automation project consisting of publishing multiple Ansible roles deploying and running multiple Docker images.
If you re not interested in reading about my entire journey, cognition gains and how this process came to be, please skim down to Birth of: containerized-wordpress-project (TL;DR) section.
Migrating WordPress blog to AWS (EC2, Lightsail?)
Since I ve been sold on Amazon s AWS idea of cloud computing services for couple of years now. I ve wanted, and been trying to migrate this (WordPress) blog to AWS, but somehow it never worked out.
Moving it to EC2 instance, with its own ELB volumes, AMI, EIP, Security Group it just seemed as an overkill.
When AWS Lightsail was first released, it seemed that was an answer to all my problems.
But it wasn t, disregarding its bit restrictive/dumbed down versions of original features. Living in Amsterdam, my main problem with it was that it was only available in a single US region.
Regardless, I thought it had everything I needed for WordPress site, and as a new service, it had great potential.
Its regional limitations were also good in a sense that they made me realize one important thing. And that s once I migrate my blog to AWS, I want to be able to seamlessly move/migrate it across different EC2 s and different regions once they were available.
If done properly, it meant I could even have it moved across different clouds (I m talking to you Google Cloud).
P.S: AWS Lightsail is now available in couple of different regions across Europe. Rollout which was almost smoothless.
Fundamental problem of every migration is migration
Phase 1: Don t reinvent the wheel? When you have a WordPress site that s not self hosted. You want everything to work, but yet you really don t want to spend any time managing infrastructure it s on. And as soon as I started looking what could fit this criteria, I found that there were pre-configured, running out of box WordPress EC2 images available on AWS Marketplace, great! But when I took a look, although everything was running out of box, I wasn t happy with software stack it was all built on. Namely Ubuntu 14.04 and Apache, and all of the services were started using custom scripts. Yuck. With this setup, when it was time to upgrade (and it s already that time) you wouldn t be thinking about upgrade. You d only be thinking about another migration. Phase 2: What if I built everything myself? Installing and configuring everything manually, and then writing huge HowTo which I would follow when I needed to re-create whole stack was not an option. Same case with was scripting whole process, as overhead of changes that had to be tracked was too way too big. Being a huge Ansible fan, automating this step was a natural next step. I even found an awesome Ansible role which seemed like it s going to do everything I need. Except, I realized I needed to update all software that s deployed with it, and customize it since configuration it was deployed on wasn t as generic. So I forked it and got to work. But soon enough, I was knee deep in making and fiddling with various system changes. Something I was trying to get away in this case, and most importantly something I was trying to avoid when it was time for next update. Phase 3: Marriage made in heaven: Ansible + Docker + AWS Idea to have everything Dockerized was around from very start. However, it never made a lot of sense until I put Ansible into same picture. And it was at this point where my final idea and requirements become crystal clear. Use Ansible to configure and setup host ready for Docker ecosystem. Ecosystem consisting of multiple separate containers for each required service (WordPress + Nginx + MariaDB). Link them all together as a single service using Docker Compose. Idea was backed by thought to spend minimum to no time (and effort) on manual configuration of anything on the server. Level of attachment to this server was so low that I didn t even want to SSH to it. If there was something wrong, I could just nuke the whole thing and deploy code on a new healthy rolled out server with everything working out of box. After it was clear what needed to be done, I got to work.
Birth of: containerized-wordpress-project (TL;DR)
After a lot of work, end result is project which allows you to automagically deploy & run containerized WordPress instance which consists of 3 separate containers running:
- WordPress (PHP7 FPM)
- Nginx
- MariaDB
Once run, containerized-wordpress playbook will guide you through interactive setup of all 3 containers, after which it will run all Ansible roles created for this project. End result is that host you have never even SSH-ed to will be fully configured and running containerized WordPress instace out of box.
Most importantly, this whole process will be completed in <= 5 minutes and doesn t require any Docker or Ansible knowledge!
containerized-wordpress demo
Console output of running containerized-wordpress Ansible Playbook:

Accessing WordPress instance created from containerized-wordpress Ansible Playbook:
 Did I end up migrating to AWS in the end?
You bet. Thanks to efforts made in containerized-wordpress-project, I m happy to report my whole WordPress migration to AWS was completed in matter of minutes and that this blog is now running on Docker and on AWS!
I hope this same project will help you take a leap in your migration.
Happy hacking!



 We re coming closer to the
 Last week, we presented

 Within the next three years, more than seven billion people and businesses will be connected to the Internet. During this time of dramatic increases in access to the Internet, networks have seen an interesting proliferation of systems for digital identity management (i.e. our SPID in Italy). But what is really meant by digital identity ? All these systems are implemented in order to have the utmost certainty that the data entered by the subscriber (address, name, birth, telephone, email, etc.) is directly coincident with that of the physical person. In other words, data are certified to be identical to those of the user; there is a perfect overlap between the digital page and the authentic user certificate: an idem , that is, an identity.
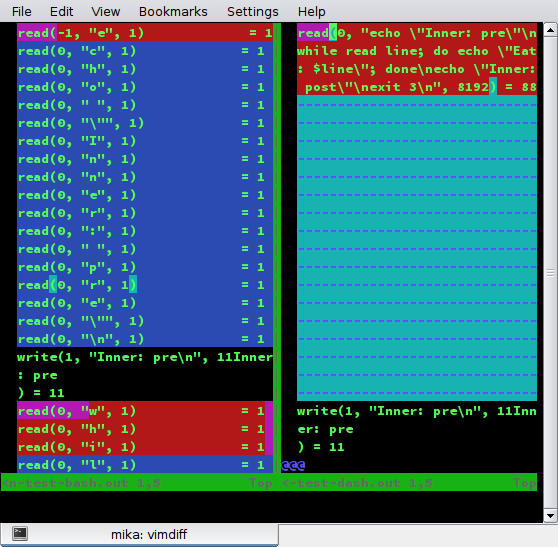 So when ssh tries to read from stdin there s nothing there anymore.
Quoting


 Do we need it?
Some people have commented on the cost of equipment and electricity. Carsten Agger recently blogged about


 Very excited about the next few weeks which will cover a number of R conferences, workshops or classes with talks, mostly around










 After the workshop on Saturday, members of the OSCAL team successfully reconstructed the SDR and antenna at the Debian info booth on Sunday and a wide range of shortwave and ham signals were detected:
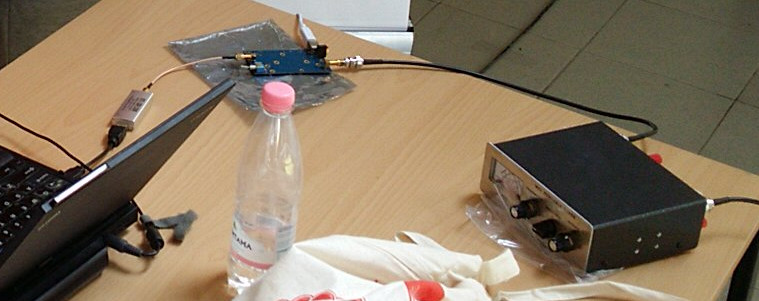
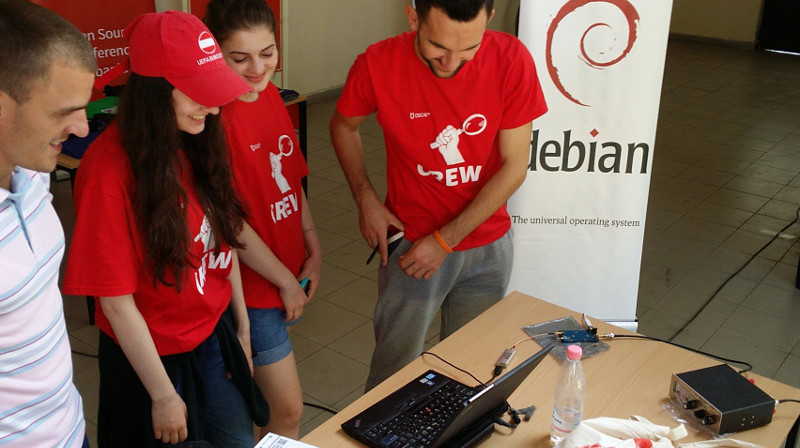 Here is a close-up look at the laptop, RTL-SDR dongle (above laptop), Ham-It-Up converter (above water bottle) and MFJ-971 ATU (on right):
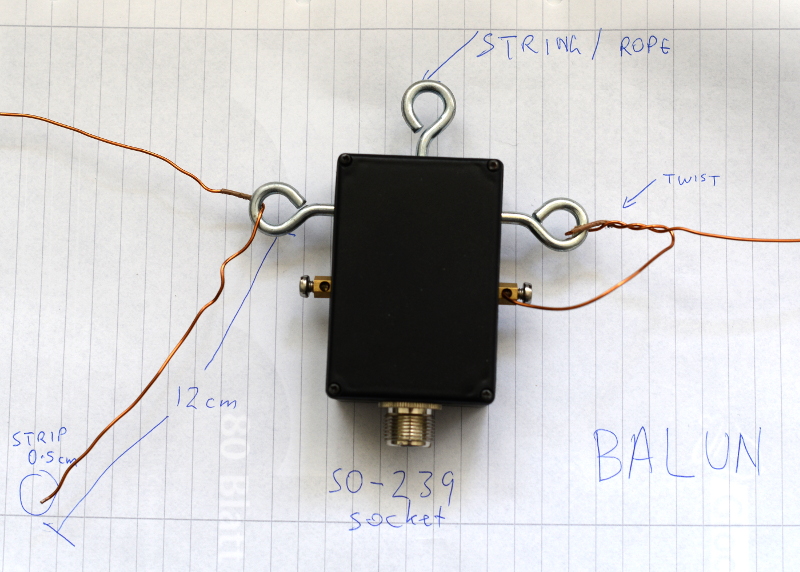
 Buying the parts
 Configuring gqrx for the up-converter and shortwave signals
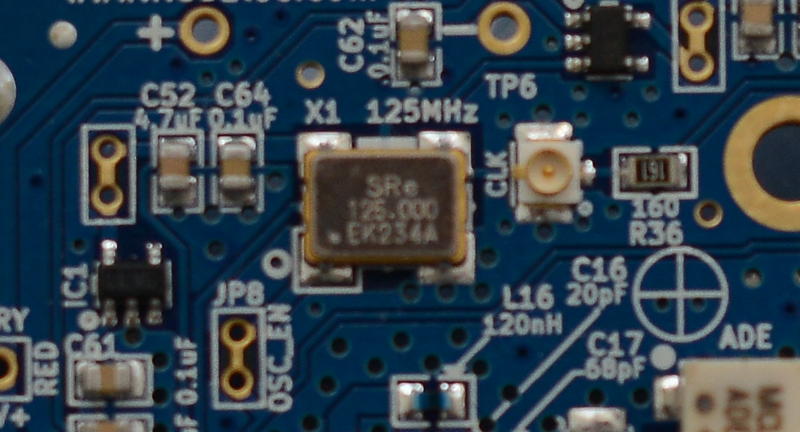
Inspect the up-converter carefully. Look for the crystal and find the frequency written on the side of it. The frequency written on the specification sheet or web site may be wrong so looking at the crystal itself is the best way to be certain. On my Ham It Up, I found a crystal with 125.000 written on it, this is 125 MHz.
 Launch gqrx, go to the File menu and select I/O devices. Change the LNB LO value to match the crystal frequency on the up-converter, with a minus sign. For my Ham It Up, I use the LNB LO value -125.000000 MHz.
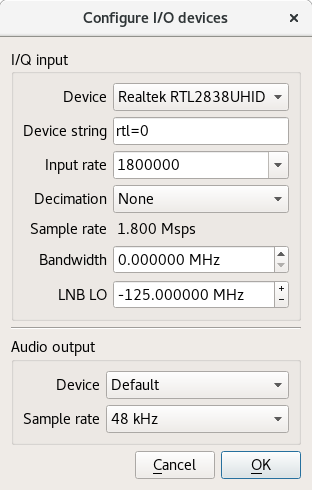 Click OK to close the I/O devices window.
On the Input Controls tab, make sure Hardware AGC is enabled.
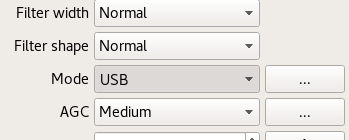
On the Receiver options tab, change the Mode value. Commercial shortwave broadcasts use AM and amateur transmission use single sideband: by convention, LSB is used for signals below 10MHz and USB is used for signals above 10MHz. To start exploring the 20 meter amateur band around 14.2 MHz, for example, use USB.
 In the top of the window, enter the frequency, for example, 14.200 000 MHz.
Now choose the FFT Settings tab and adjust the Freq zoom slider. Zoom until the width of the display is about 100 kHZ, for example, from 14.15 on the left to 14.25 on the right.
 Click the Play icon at the top left to start receiving. You may hear white noise. If you hear nothing, check the computer's volume controls, move the Gain slider (bottom right) to the maximum position and then lower the Squelch value on the Receiver options tab until you hear the white noise or a transmission.
Adjust the Antenna Tuner knobs
Now that gqrx is running, it is time to adjust the knobs on the antenna tuner (ATU). Reception improves dramatically when it is tuned correctly. Exact instructions depend on the type of ATU you have purchased, here I present instructions for the MFJ-971 that I have been using.
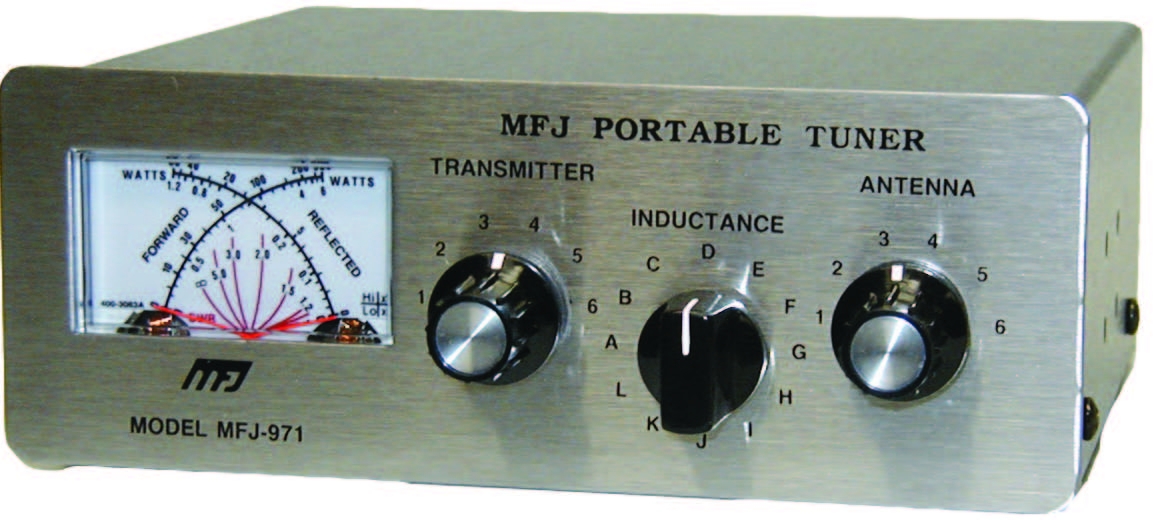 Turn the TRANSMITTER and ANTENNA knobs to the 12 o'clock position and leave them like that. Turn the INDUCTANCE knob while looking at the signals in the gqrx window. When you find the best position, the signal strength displayed on the screen will appear to increase (the animated white line should appear to move upwards and maybe some peaks will appear in the line).
When you feel you have found the best position for the INDUCTANCE knob, leave it in that position and begin turning the ANTENNA knob clockwise looking for any increase in signal strength on the chart. When you feel that is correct, begin turning the TRANSMITTER knob.
Listening to a transmission
At this point, if you are lucky, some transmissions may be visible on the gqrx screen. They will appear as darker colours in the waterfall chart. Try clicking on one of them, the vertical red line will jump to that position. For a USB transmission, try to place the vertical red line at the left hand side of the signal. Try dragging the vertical red line or changing the frequency value at the top of the screen by 100 Hz at a time until the station is tuned as well as possible.
Try and listen to the transmission and identify the station. Commercial shortwave broadcasts will usually identify themselves from time to time. Amateur transmissions will usually include a callsign spoken in the

 Like

 A laptop that was installed using the default Ubuntu 16.10 (xenial)