Search Results: "ed"

13 July 2017

Lucy Wayland: Basic Chilli Template

Amounts are to taste:
[Stage one]
Chopped red onion
Chopped garlic
Chopped fresh ginger
Chopped big red chillies (mild)
Chopped birds eye chillies (red or green, quite hot)
Chopped scotch bonnets (hot)
[Fry onion in some olive oil. When getting translucent, and rest of ingredients. May need to add some more oil. When the garlic is browning. On to stage two.]
[Stage two]
Some tins of chopped tomato
Some tomato puree
Some basil
Some thyme
Bay leaf optional
Some sliced mushroom
Some chopped capsicum pepper
Some kidney beans
Other beans optional (butter beans are nice)
Lentils optional (Pro tip: if adding lentils to adding lentils, especially red lentils, I recommend adding some garam masala as well. Lifts the flavour.)
Veggie mince optional
Pearled barley very optional
Stock (some reclaimed from swilling water around tom tims)
Water to keep topping up with if it get too sticky or dry
Dash of red wine optional
Worcester sauce optional
Any other flavouring you feel like optional (I quite often add random herbs or spices
[[Secret ingredient: a spoonful of Marmite]]
[Cook everything up together, but wait until there is enough fluid before you add the dry/sticky ingredients in.]
[Serve with carb of choice. I currently fond of using Ryvita as dipper instead of tortilla chips.]
[Also serve with a a cooler such as natural yogurt, soured cream or something else. You want more than one type of chilli in there to broaden the flavour. I use all three, plus occasionally others as well. If you are feeling masochistic you can go hotter than scotch bonnets, but I although you may get something of the same heat, I think you lose something in the flavour. BTW if you get the chance, of all the tortilla chips, I think blue corn ones are the best. Only seem to find them in health food shops. There you go. It s a Zen recipe, which is why I couldn t give you a link. You just do it until it looks right, feels right, tastes right. And with practice you get it better and better.

12 July 2017

Jose M. Calhariz: Crossgrading a minimal install of Debian 9

By testing the previous instructions for a full crosgrade I run into trouble. Here is the results of my tests to do a full crossgrade of a minimal installation of Debian inside a VM. First you need to install a 64bits kernel and boot with it. See my previous post on how to do it. Second you need to do a bootstrap of crossgrading:
 apt-get clean
 apt-get upgrade
 apt-get --download-only install dpkg:amd64 tar:amd64 apt:amd64 bash:amd64 dash:amd64 init:amd64
 dpkg --install /var/cache/apt/archives/*_amd64.deb
 dpkg --install /var/cache/apt/archives/*_amd64.deb
 dpkg --print-architecture
 dpkg --print-foreign-architectures
 apt-get --fix-broken --allow-remove-essential install
Third do a full crossgrade:
 apt-get install --allow-remove-essential $(dpkg --list   grep :i386   awk ' print $2 '   sed -e s/:i386// )
This procedure seams to be a little fragile, but worked most of the time for me.

Jose M. Calhariz: Crossgrading the kernel in Debian 9

I have a very old installation of 32bits Debian running in new hardware. Until now running a 64bits kernel was enough to use efficiently more than 4GiB of RAM. The only problem I found was the proprietary drivers from AMD/ATI and NVIDIA, that did not like this mixed environment and some problems with openafs, easilly solved with the help of the package maintainers of openafs. Crossgrading the Qemu/KVM to 64 bits did not pose a problem, so I have been running 64bits VMs for some time. But now the nouveau driver do not work with my new display adapter and I need to run tools from OpsCode not available as 32bits. So is time to do a CrossGrade. Finding some problems I can not recommend it to the inexperienced people. Is time investigate the issues and report bugreports to Debian were appropriate. If you run 32bits Debian installation you can easily install a 64bits kernel . The procedure is simple and well tested.
dpkg --add-architecture amd64
apt-get update
apt-get install linux-image-amd64:amd64
And reboot to test the new kernel. You can expect here more articles about crossgrading.

Sven Hoexter: environment variable names with dots and busybox 1.26.0 ash

In case you're for example using Alpine Linux 3.6 based docker images, and you've been passing through environment variable names with dots, you might miss them now in your actual environment. It seems that with busybox 1.26.0 the busybox ash got a lot stricter regarding validation of environment variable names and now you can no longer pass through variable names with dots in them. They just won't be there. If you've been running ash interactively you could not add them in the past, but until now you could do something like this in your Dockerfile
ENV foo.bar=baz
and later on accces a variable "foo.bar". bash still allows those invalid variable names and is way more tolerant. So to be nice to your devs, and still bump your docker image version, you can add bash and ensure you're starting your application with /bin/bash instead of /bin/sh inside of your container. Links

Reproducible builds folks: Reproducible Builds: week 115 in Stretch cycle

Here's what happened in the Reproducible Builds effort between Sunday July 2 and Saturday July 8 2017: Reproducible work in other projects Ed Maste pointed to a thread on the LLVM developer mailing list about container iteration being the main source of non-determinism in LLVM, together with discussion on how to solve this. Ignoring build path issues, container iteration order was also the main issue with rustc, which was fixed by using a fixed-order hash map for certain compiler structures. (It was unclear from the thread whether LLVM's builds are truly path-independent or rather that they haven't done comparisons between builds run under different paths.) Bugs filed Patches submitted upstream: Reviews of unreproducible packages 52 package reviews have been added, 62 have been updated and 20 have been removed in this week, adding to our knowledge about identified issues. No issue types were updated or added this week. Weekly QA work During our reproducibility testing, FTBFS bugs have been detected and reported by: diffoscope development Development continued in git with contributions from: With these changes, we are able to generate a dynamically loaded HTML diff for GCC-6 that can be displayed in a normal web browser. For more details see this mailing list post. Misc. This week's edition was written by Ximin Luo, Bernhard M. Wiedemann and Chris Lamb & reviewed by a bunch of Reproducible Builds folks on IRC & the mailing lists.

Yakking: Time - What are clocks?

System calls You can't talk about time without clocks. A standard definition of clocks is "An instrument to measure time". Strictly speaking the analogy isn't perfect, since these clocks aren't just different ways of measuring time, they measure some different notions of time, but this is a somewhat philosophical point. The interface for this in Linux are system calls with a clkid_t parameter, though not all system calls are valid for every clock. This is not an exhaustive list of system calls, since there are also older system calls for compatibility with POSIX or other UNIX standards, that offer a subset of the functionality of the above ones. System calls beginning clock_ are about getting the time or waiting, beginning timer_ are for setting periodic or one-shot timers, timerfd_ are for timers that can be put in event loops. For the sake of not introducing too many concepts at once, we're going to start with the simplest clock and work our way up. CLOCK_MONOTONIC_RAW The first clock we care about is CLOCK_MONOTONIC_RAW. This is the simplest clock. It it initialised to an arbitrary value on boot and counts up at a rate of one second per second to the best of its ability. This clock is of limited use on its own since the only clock-related system calls that work with it are clock_gettime(2) and clock_getres(2). It can be used to determine the order of events, if the time of the event was recorded and the relative time difference between when they happened, since we know that the clock increments one second per second. Example In this program below, we time how long it takes to read 4096 bytes from /dev/zero, and print the result.
#include <stdio.h> /* fopen, fread, printf */
#include <time.h> /* clock_gettime, CLOCK_MONOTONIC_RAW, struct timespec */
int main(void)  
    FILE *devzero;
    int ret;
    struct timespec start, end;
    char buf[4096];
    devzero = fopen("/dev/zero", "r");
    if (!devzero)  
        return 1;
     
    /* get start time */
    ret = clock_gettime(CLOCK_MONOTONIC_RAW, &start);
    if (ret < 0)  
        return 2;
     
    if (fread(buf, sizeof *buf, sizeof buf, devzero) != sizeof buf)  
        return 3;
     
    /* get end time */
    ret = clock_gettime(CLOCK_MONOTONIC_RAW, &end);
    if (ret < 0)  
        return 4;
     
    end.tv_nsec -= start.tv_nsec;
    if (end.tv_nsec < 0)  
        end.tv_sec--;
        end.tv_nsec += 1000000000l;
     
    end.tv_sec -= start.tv_sec;
    printf("Reading %zu bytes took %.0f.%09ld seconds\n",
           sizeof buf, (double)end.tv_sec, (long)end.tv_nsec);
    return 0;
 

You're possibly curious about the naming of the clock called MONOTONIC_RAW. In the next article we will talk about CLOCK_MONOTONIC, which may help you understand why it's named the way it is. I suggested the uses of this clock are for the sequencing of events and for calculating the relative period between them. If you can think of another use please send us a comment. If you like to get hands-on, you may want to try reimplementing the above program in your preferred programming language, or extending it to time arbitrary events.

Francois Marier: Toggling Between Pulseaudio Outputs when Docking a Laptop

In addition to selecting the right monitor after docking my ThinkPad, I wanted to set the correct sound output since I have headphones connected to my Ultra Dock. This can be done fairly easily using Pulseaudio.

Switching to a different pulseaudio output To find the device name and the output name I need to provide to pacmd, I ran pacmd list-sinks:
2 sink(s) available.
...
  * index: 1
    name: <alsa_output.pci-0000_00_1b.0.analog-stereo>
    driver: <module-alsa-card.c>
...
    ports:
        analog-output: Analog Output (priority 9900, latency offset 0 usec, available: unknown)
            properties:
        analog-output-speaker: Speakers (priority 10000, latency offset 0 usec, available: unknown)
            properties:
                device.icon_name = "audio-speakers"
From there, I extracted the soundcard name (alsa_output.pci-0000_00_1b.0.analog-stereo) and the names of the two output ports (analog-output and analog-output-speaker). To switch between the headphones and the speakers, I can therefore run the following commands:
pacmd set-sink-port alsa_output.pci-0000_00_1b.0.analog-stereo analog-output
pacmd set-sink-port alsa_output.pci-0000_00_1b.0.analog-stereo analog-output-speaker

Listening for headphone events Then I looked for the ACPI event triggered when my headphones are detected by the laptop after docking. After looking at the output of acpi_listen, I found jack/headphone HEADPHONE plug. Combining this with the above pulseaudio names, I put the following in /etc/acpi/events/thinkpad-dock-headphones:
event=jack/headphone HEADPHONE plug
action=su francois -c "pacmd set-sink-port alsa_output.pci-0000_00_1b.0.analog-stereo analog-output"
to automatically switch to the headphones when I dock my laptop.

Finding out whether or not the laptop is docked While it is possible to hook into the docking and undocking ACPI events and run scripts, there doesn't seem to be an easy way from a shell script to tell whether or not the laptop is docked. In the end, I settled on detecting the presence of USB devices. I ran lsusb twice (once docked and once undocked) and then compared the output:
lsusb  > docked 
lsusb  > undocked 
colordiff -u docked undocked 
This gave me a number of differences since I have a bunch of peripherals attached to the dock:
--- docked  2017-07-07 19:10:51.875405241 -0700
+++ undocked    2017-07-07 19:11:00.511336071 -0700
@@ -1,15 +1,6 @@
 Bus 001 Device 002: ID 8087:8000 Intel Corp. 
 Bus 001 Device 001: ID 1d6b:0002 Linux Foundation 2.0 root hub
-Bus 003 Device 081: ID 0424:5534 Standard Microsystems Corp. Hub
-Bus 003 Device 080: ID 17ef:1010 Lenovo 
 Bus 003 Device 001: ID 1d6b:0003 Linux Foundation 3.0 root hub
-Bus 002 Device 041: ID xxxx:xxxx ...
-Bus 002 Device 040: ID xxxx:xxxx ...
-Bus 002 Device 039: ID xxxx:xxxx ...
-Bus 002 Device 038: ID 17ef:100f Lenovo 
-Bus 002 Device 037: ID xxxx:xxxx ...
-Bus 002 Device 042: ID 0424:2134 Standard Microsystems Corp. Hub
-Bus 002 Device 036: ID 17ef:1010 Lenovo 
 Bus 002 Device 002: ID xxxx:xxxx ...
 Bus 002 Device 004: ID xxxx:xxxx ...
 Bus 002 Device 001: ID 1d6b:0002 Linux Foundation 2.0 root hub
I picked 17ef:1010 as it appeared to be some internal bus on the Ultra Dock (none of my USB devices were connected to Bus 003) and then ended up with the following port toggling script:
#!/bin/bash
if /usr/bin/lsusb   grep 17ef:1010 > /dev/null ; then
    # docked
    pacmd set-sink-port alsa_output.pci-0000_00_1b.0.analog-stereo analog-output
else
    # undocked
    pacmd set-sink-port alsa_output.pci-0000_00_1b.0.analog-stereo analog-output-speaker
fi

11 July 2017

Joey Hess: bonus project

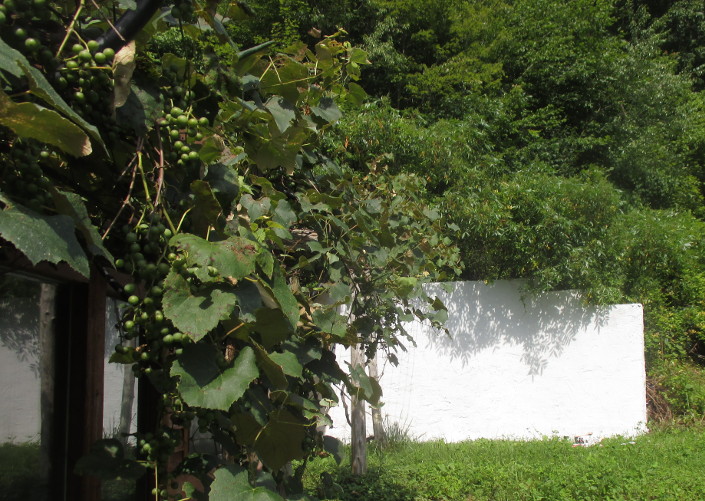
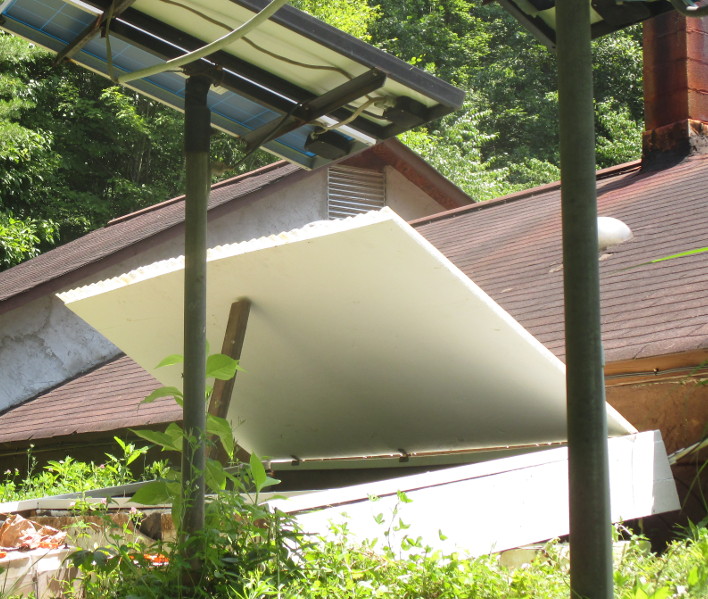
Little bonus project after the solar upgrade was replacing the battery box's rotted roof, down to the cinderblock walls. Except for a piece of plywood, used all scrap lumber for this project, and also scavenged a great set of hinges from a discarded cabinet. I hope the paint on all sides and an inch of shingle overhang will be enough to protect the plywood. Bonus bonus project to use up paint. (Argh, now I want to increase the size of the overflowing grape arbor. Once you start on this kind of stuff..) After finishing all that, it was time to think about this while enjoying this. (Followed by taking delivery of a dumptruck full of gravel -- 23 tons -- which it turns out was enough for only half of my driveway..)
Andreas Bombe: PDP-8/e Replicated Overview

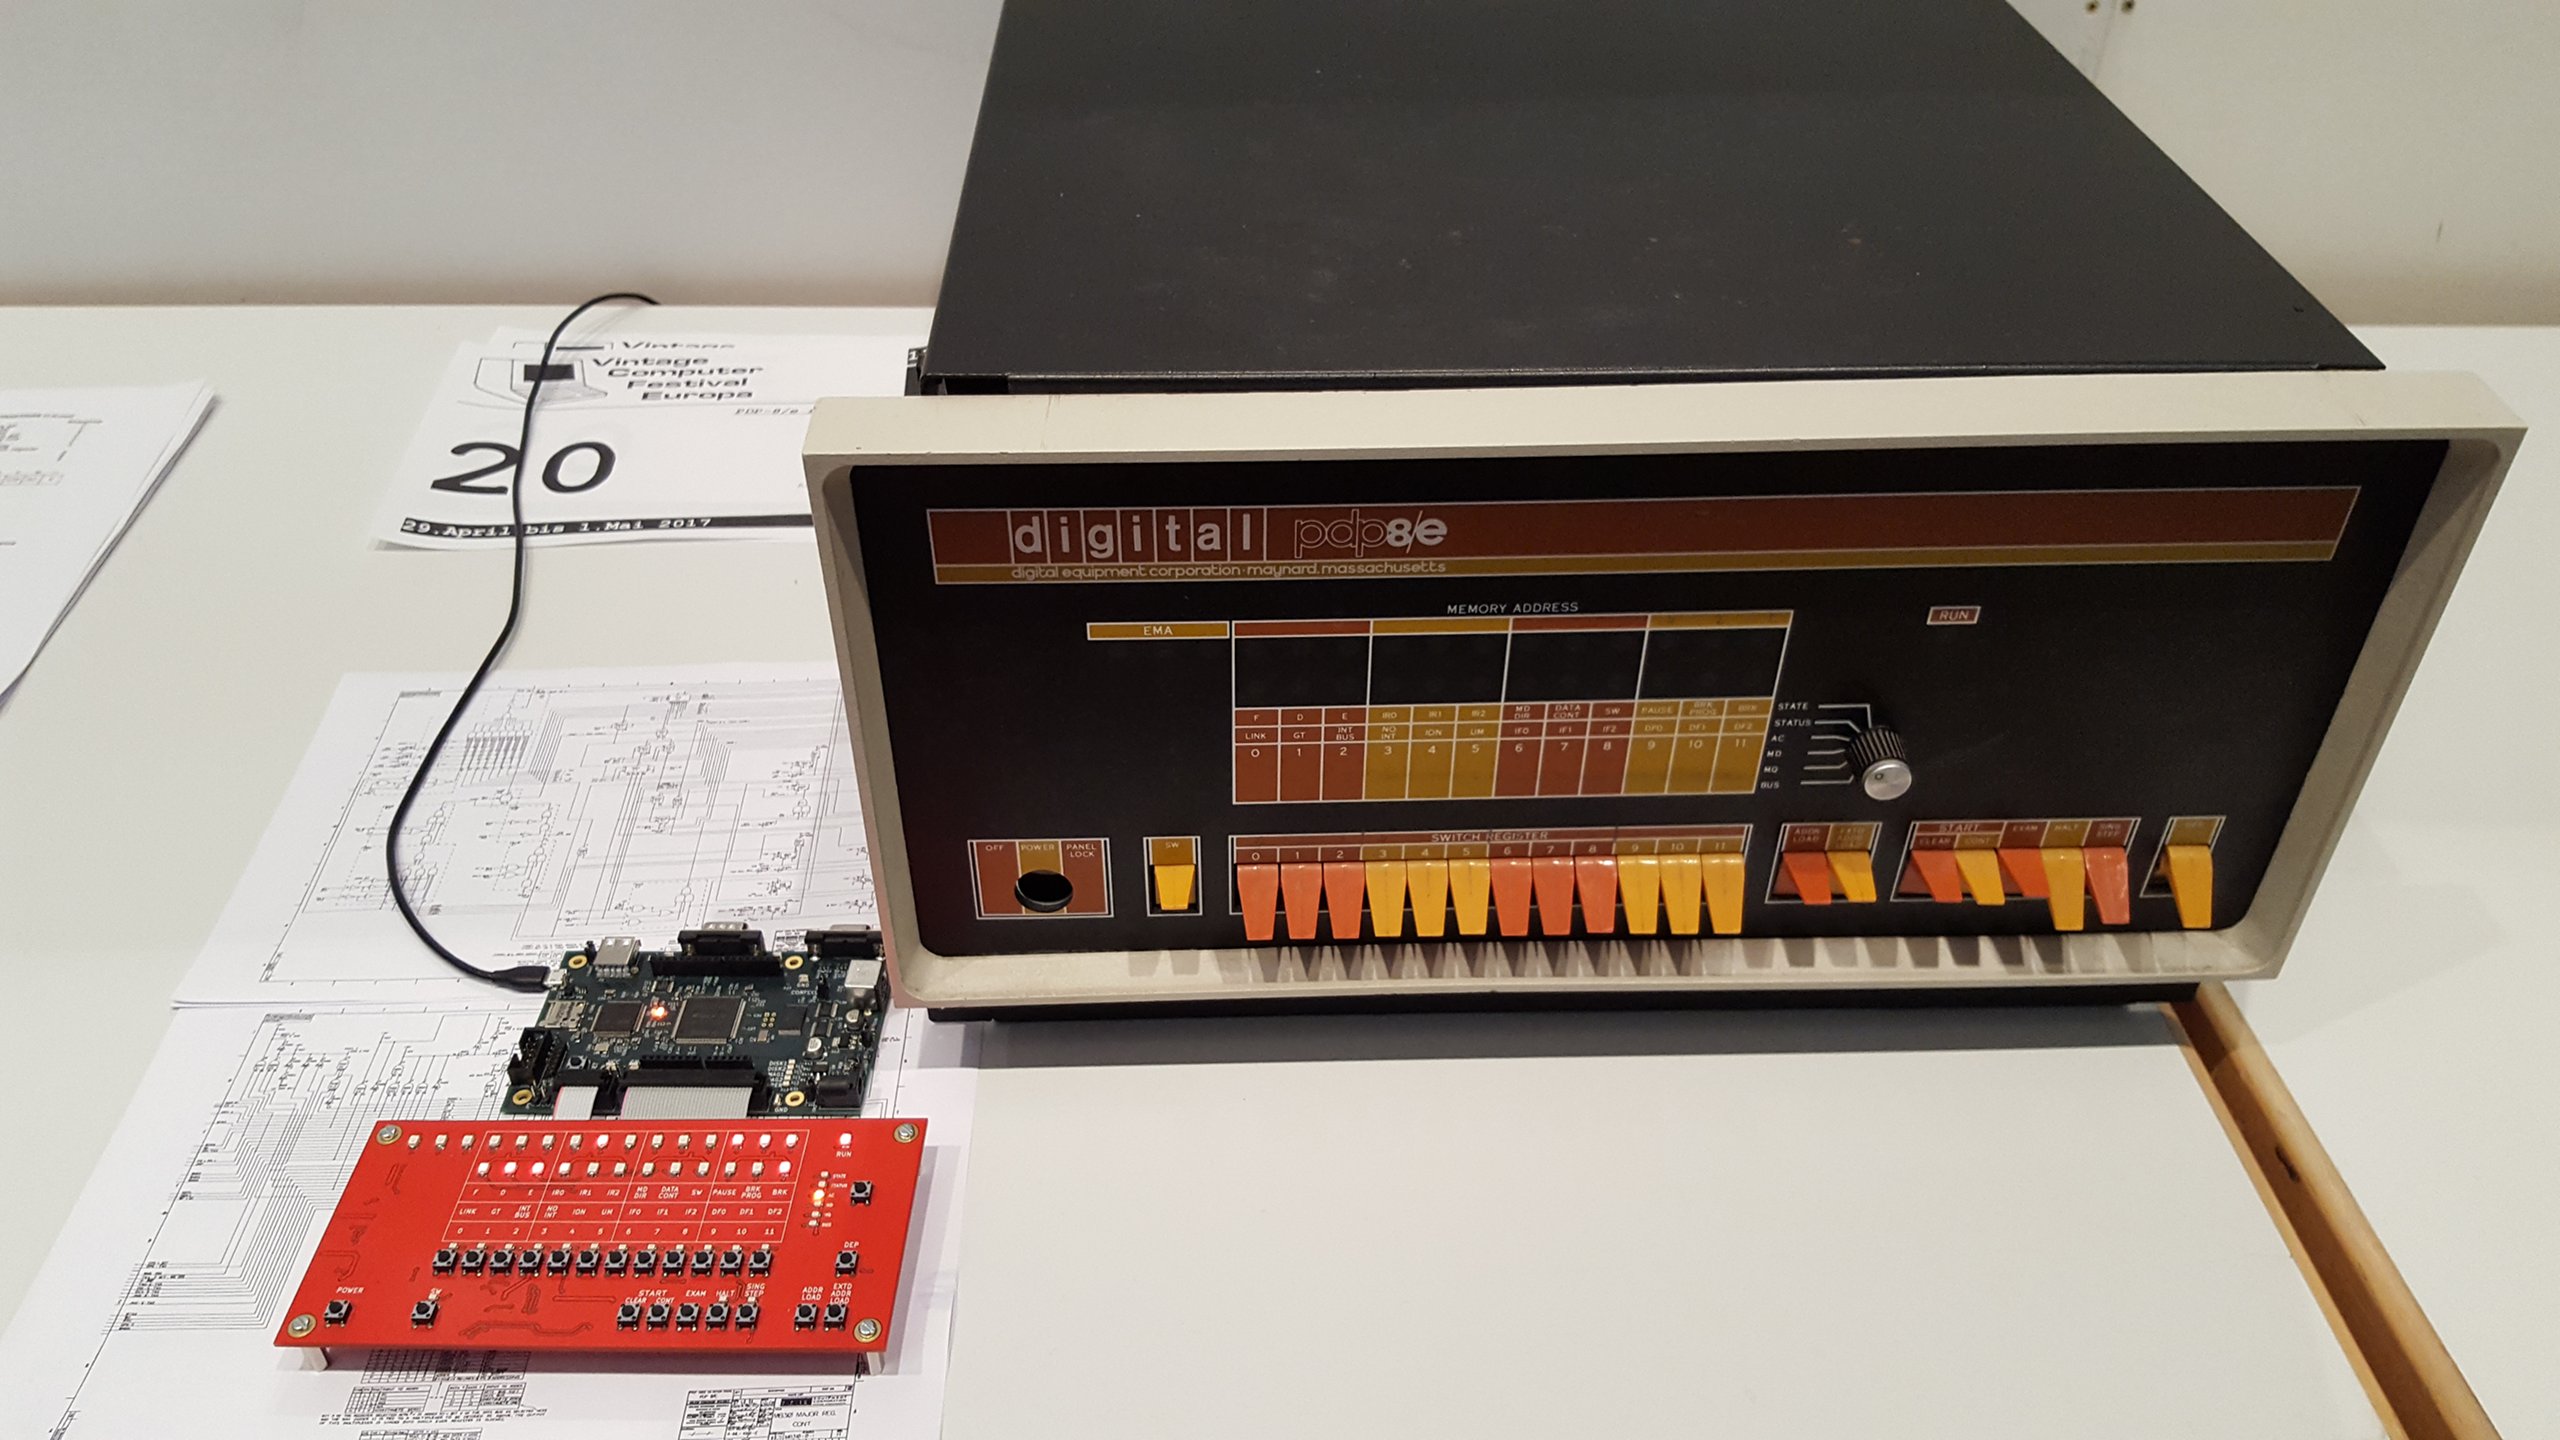
This is an overview of the hardware and internals of the PDP-8/e replica I m building.

The front panel board
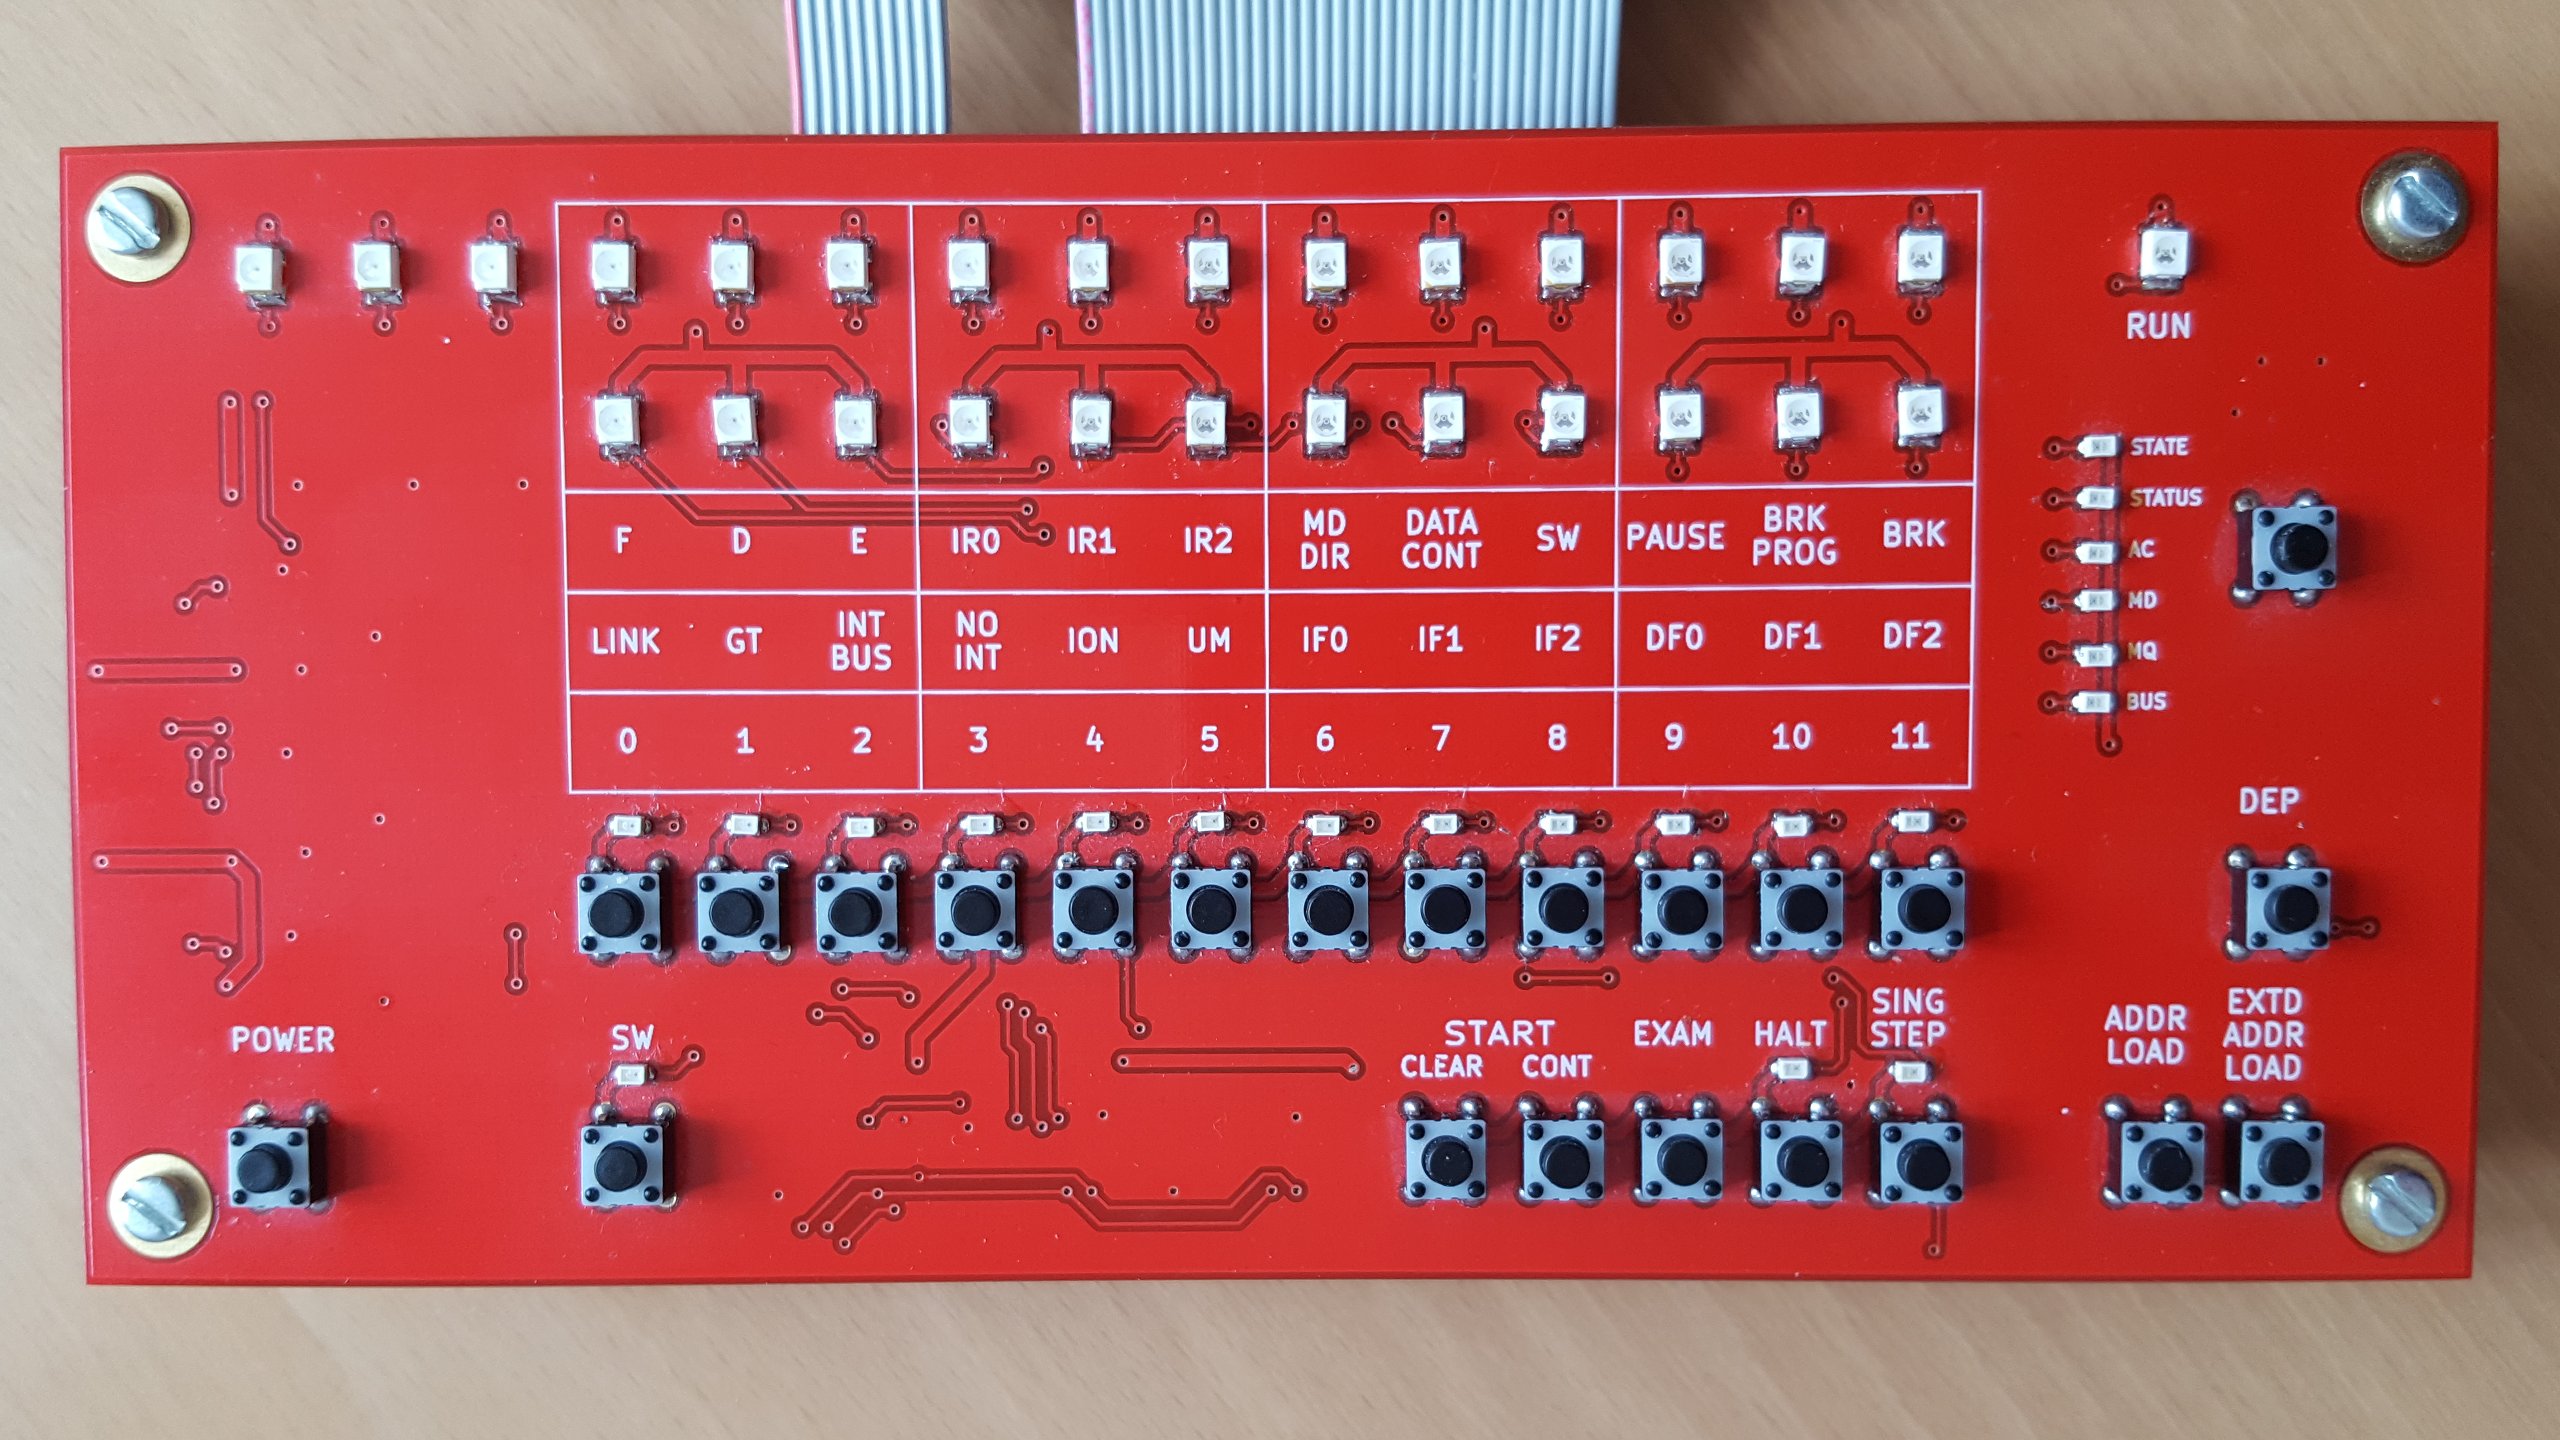
functional replica of the PDP-8/e front panel
If you know the original or remember the picture from the first post it is clear that this is a functional replica not aiming to be as pretty as those of the other projects I mentioned. I have reordered the switches into two rows to make the board more compact (which also means cheaper) without sacrificing usability. There s the two rows of display lights plus one run light the 8/e provides. The upper row is the address made up of 12 bits of memory address and 3 bits of extended memory address or field. Below are the 12 bits indicator which can show one data set out of six as selected by the user. All the switches of the original are implemented as more compact buttons1. While momentary switches are easily substituted by buttons, all buttons implementing two position switches toggle on/off with each press and they have a LED above that shows the current state. The six position rotary switch is implemented as a button cycling through all indicator displays together with six LEDs which show the active selection. Markings show the meaning of the indicator and switches as on the original, grouped in threes as the predominant numbering system for the PDPs was octal. The upper line shows the meaning for the state indicator, the middle for the status indicator and bit numbers for the rest. Note that on the PDP-8 and opposite to modern conventions, the most significant bit was numbered 0. I designed it as a pure front panel board without any PDP-8 simulation parts. The buttons and associated lights are controllable via SPI lines with a 3.3 V supply. The address and indicator lights have a separate common anode configuration with all cathodes individually available on a pin header without any resistors in the path, leaving voltage and current regulation up to the simulation board. This board is actually a few years old from a similar project where I emulated the PDP-8 in software on a microcontroller and the flexible design allowed me to reuse it unchanged.

The main board
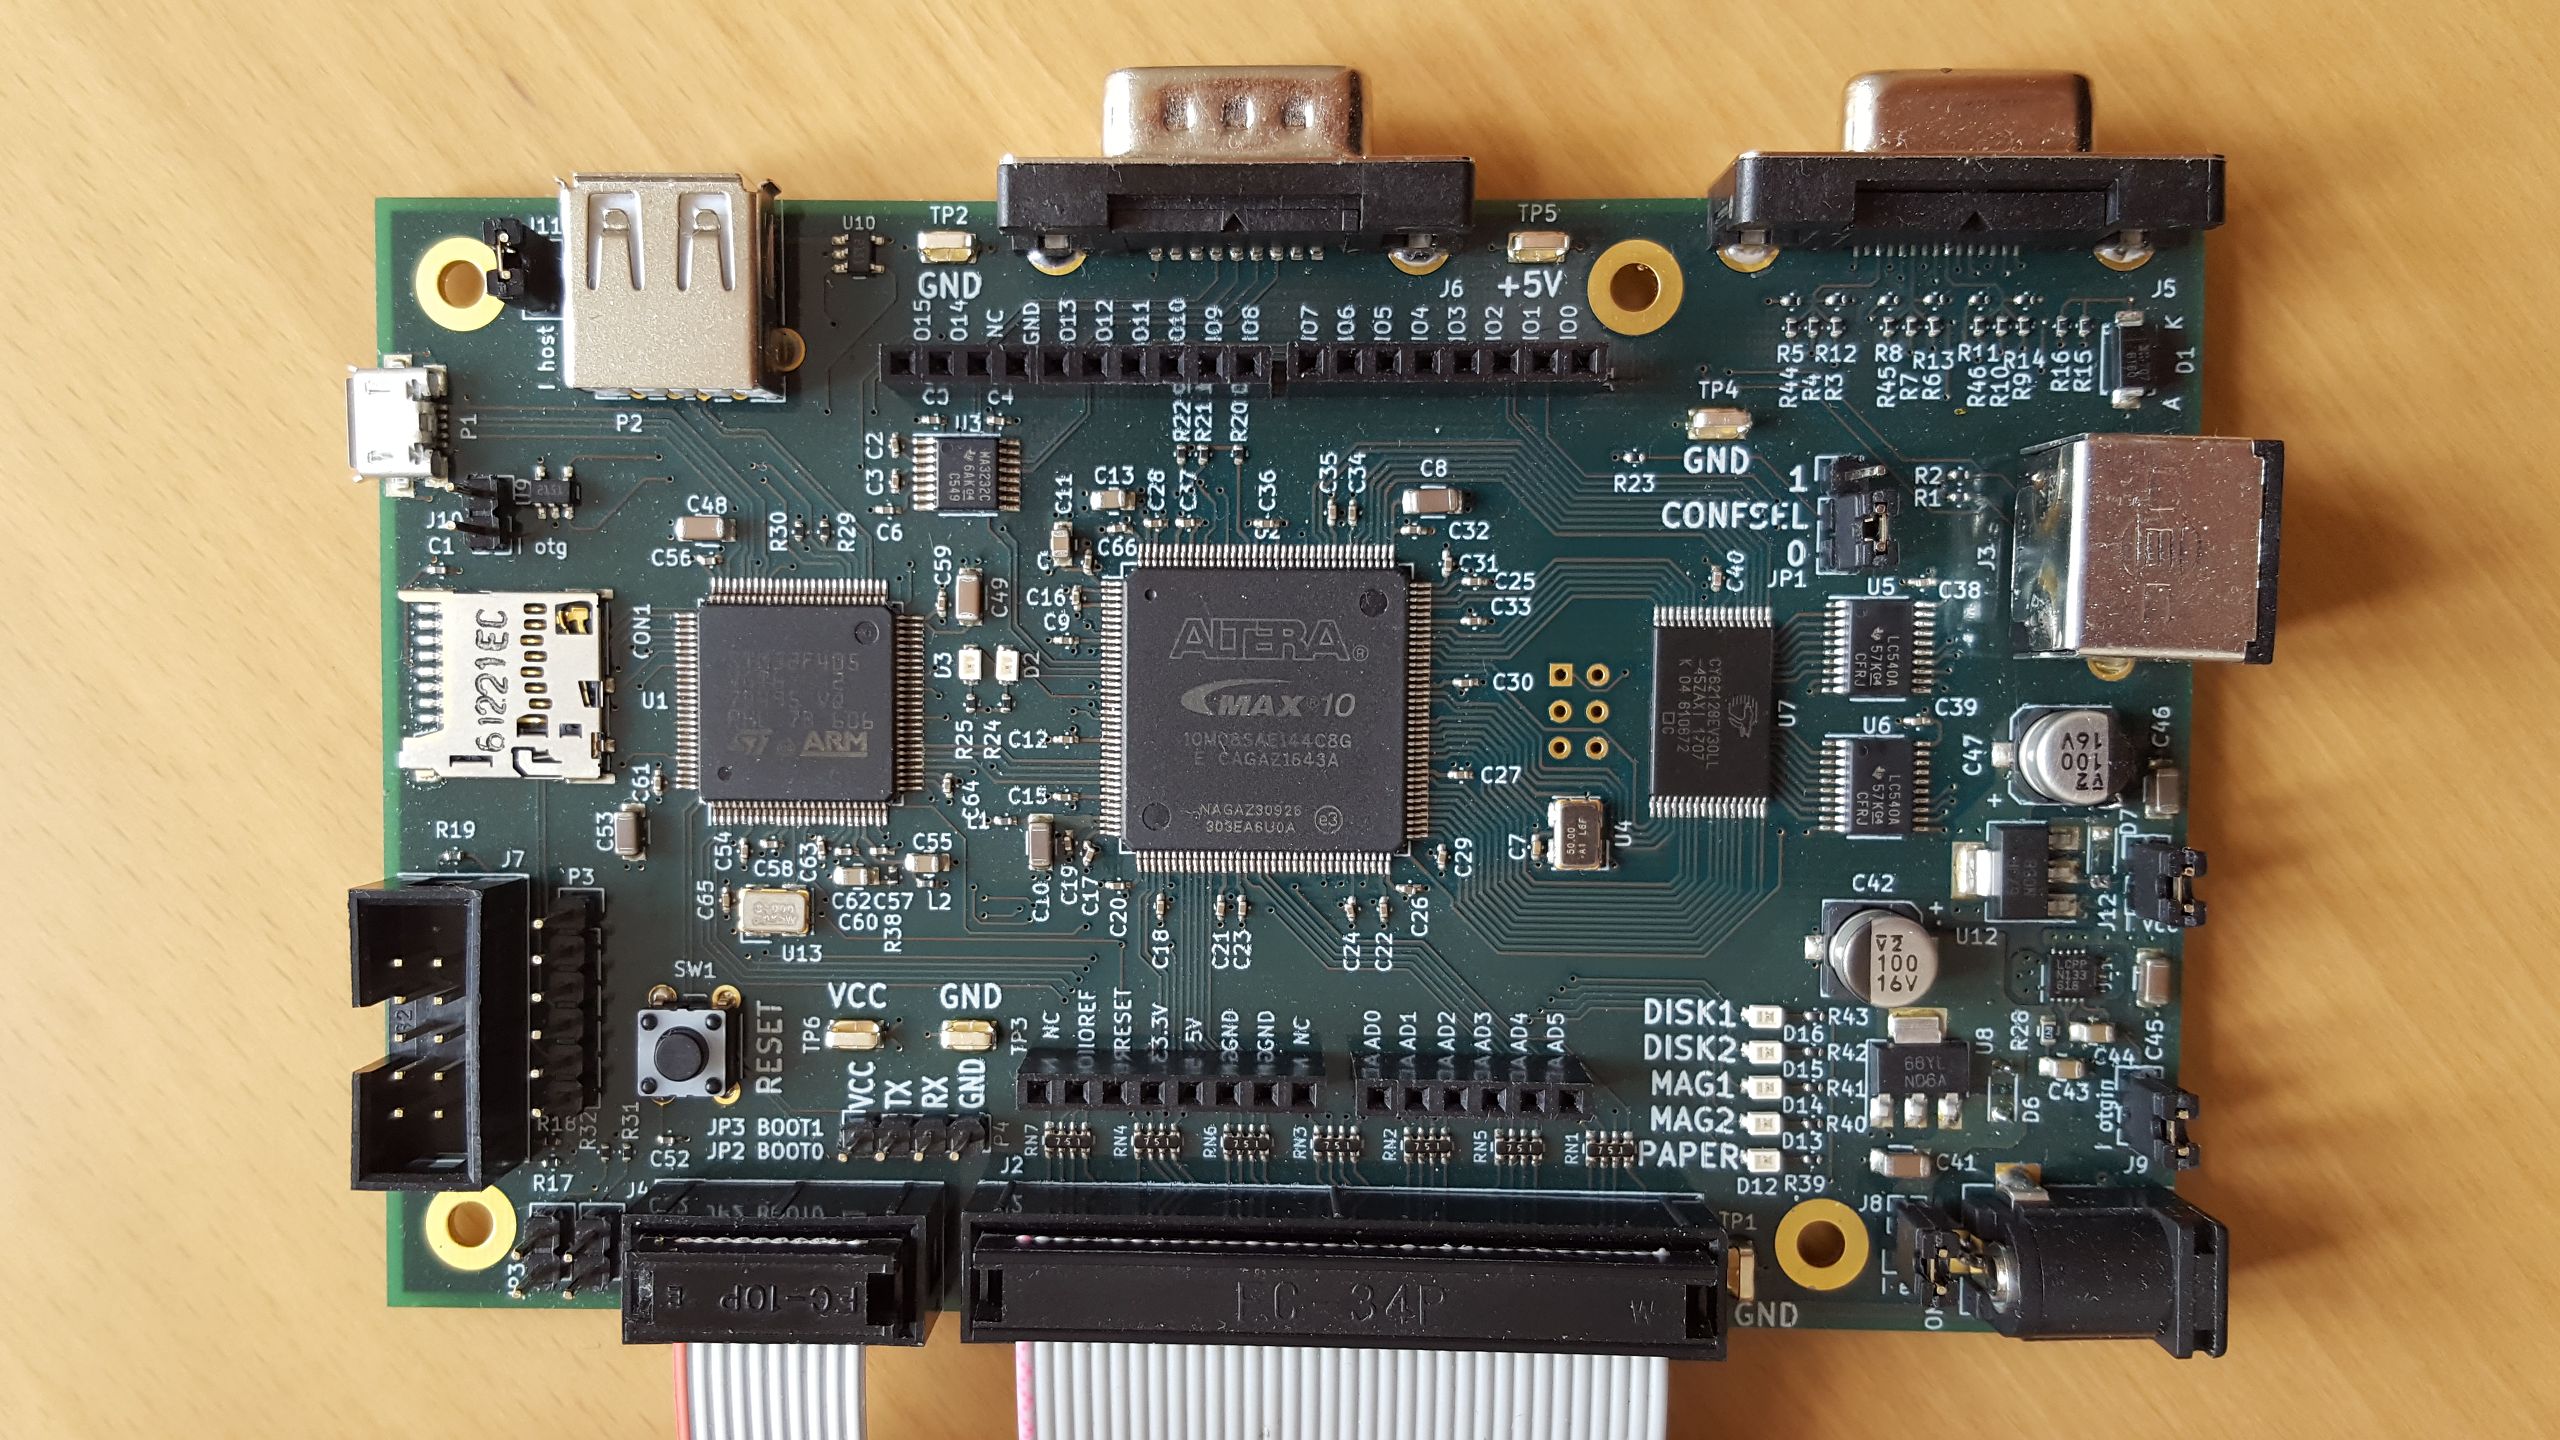
main board with CPU and peripherals of the replicated PDP-8/e
This is where the magic happens. You can see three big ICs on the board: On the left is the STM32F405 microcontroller (with ARM Cortex-M4 core), the bigger one in the middle is the Altera2 MAX 10 FPGA and finally to the right is the SRAM that is large enough to hold all the main memory of the 32 KW maximum expansion of the PDP-8/e. The two smaller chips to the right of that are just buffers that drive the front panel address LEDs, the small chip at the top left is a RS-232 level shifter. The idea behind this is that the PDP-8 and peripherals that are simple to directly implement, such as GPIO or a serial port, are fully on the FPGA. Other peripherals such as paper and magnetic tape and disks, which are after all not connected to real PDP-8 drives but disk images on a microSD, are implemented on the microcontroller interfacing with stub devices in the FPGA. Compared to implementing everything everything in the FPGA, the STM32F4 has the advantage of useful built in peripherals such as two host/device capable USB ports. 5 V tolerant I/O pins are very useful and simply not available in any FPGA. I have to admit that this board was a bit of a rush job in order to have something at all to show at the Vintage Computer Festival Europe 18.0. Given that it was my first time designing a board with a large microcontroller and the first time with an FPGA, it wasn t exactly my fastest progressing project either and I got basic functionality (front panel allows toggling in small programs and running them) working just in time. For various reasons the project hasn t progressed much since, so the following is still just plans, but plans for which the hardware was designed. Since the aim is to have a cycle accurate PDP-8/e implementation, digital I/O was always planned. Rather than defining my own header I have included Arduino R3 compatible headers (for 3.3 V compatible boards only) that have become a popular even outside the Arduino world for this purpose. The digital Arduino pins are connected directly to the FPGA and will be directly controllable by PDP-8 software. The downside of choosing the Arduino headers is that the original PDP-8 digital I/O interface is not a perfect match since it naturally has 12 lines whereas the Arduino has 15. The analog inputs are not connected to the FPGA, the documentation of the MAX10 s ADC in the EQFP package are not very encouraging. They are connected to the STM32 instead3. Another interface connected directly to the FPGA and that would be directly under PDP-8 control is a standard 9 pin RS-232 interface. RX, TX, CTS and RTS are connected and level-shifted between 3.3 V and RS-232 levels by a MAX3232. Besides the PDP-8, I also plan to implement a full video terminal on the board. The idea is that with a power supply, keyboard and monitor this board would form a complete system without the need of connecting another computer to act as a terminal. To that end, there is a VGA port attached to the FPGA with simple resistor network DACs for 9 bits color (RGB with 3 bits each). This is another spot where I left myself room to expand, for e.g. a VT220 you really only need one color in two brightness levels. Keyboards will be connected either via the PS/2 connector on the right or the USB-A host port at the top left. Last of the interface ports is the USB micro-AB port on the left, which for now I am using only for power supply. I mainly plan to use it to provide alternative or additional serial ports to the PDP-8 or to export the video terminal serial port for testing purposes. Other possible uses are access to the image files on the microSD and firmware updates. This has gotten rather long again, so I m stopping here and leave some implementation notes for another post.

  1. They are also much cheaper. Given the large number of switches, the savings are substantial. Additionaly the buttons are nicer to operate than long rows of tiny switches. [return]
  2. Or rather Intel now. At least Altera s web site, documentation and software have already been thoroughly rebranded, but the chips I got were produced prior to that. [return]
  3. That s not to say that the analog conversions on the STM32 are necessarily better than those of the MAX10 when you can t follow their guidelines, I have no comparisons. Certainly following the guidelines would have been prohibitive given how many pins usage they restrict. [return]

Rapha&#235;l Hertzog: Freexian s report about Debian Long Term Support, June 2017

A Debian LTS logoLike each month, here comes a report about the work of paid contributors to Debian LTS. Individual reports In May, about 161 work hours have been dispatched among 11 paid contributors. Their reports are available: Evolution of the situation The number of sponsored hours increased slightly with one new bronze sponsor and another silver sponsor is in the process of joining. The security tracker currently lists 49 packages with a known CVE and the dla-needed.txt file 54. The number of open issues is close to last month. Thanks to our sponsors New sponsors are in bold.

One comment Liked this article? Click here. My blog is Flattr-enabled.

10 July 2017

Steve Kemp: bind9 considered harmful

Recently there was another bind9 security update released by the Debian Security Team. I thought that was odd, so I've scanned my mailbox: So in the year to date there have been 7 months, in 3 of them nothing happened, but in 4 of them we had bind9 updates. If these trends continue we'll have another 2.5 updates before the end of the year. I don't run a nameserver. The only reason I have bind-packages on my system is for the dig utility. Rewriting a compatible version of dig in Perl should be trivial, thanks to the Net::DNS::Resolver module: These are about the only commands I ever run:
dig -t a    steve.fi +short
dig -t aaaa steve.fi +short
dig -t a    steve.fi @8.8.8.8
I should do that then. Yes.

Markus Koschany: My Free Software Activities in June 2017

Welcome to gambaru.de. Here is my monthly report that covers what I have been doing for Debian. If you re interested in Java, Games and LTS topics, this might be interesting for you. Debian Games Debian Java + Android Debian LTS This was my sixteenth month as a paid contributor and I have been paid to work 16 hours on Debian LTS, a project started by Rapha l Hertzog. In that time I did the following: Misc Thanks for reading and see you next time.

Jonathan McDowell: Going to DebConf 17

Going to DebConf17 Completely forgot to mention this earlier in the year, but delighted to say that in just under 4 weeks I ll be attending DebConf 17 in Montr al. Looking forward to seeing a bunch of fine folk there! Outbound:
2017-08-04 11:40 DUB -> 13:40 KEF WW853
2017-08-04 15:25 KEF -> 17:00 YUL WW251
Inbound:
2017-08-12 19:50 YUL -> 05:00 KEF WW252
2017-08-13 06:20 KEF -> 09:50 DUB WW852
(Image created using GIMP, fonts-dkg-handwriting and the DebConf17 Artwork.)

Kees Cook: security things in Linux v4.12

Previously: v4.11. Here s a quick summary of some of the interesting security things in last week s v4.12 release of the Linux kernel: x86 read-only and fixed-location GDT
With kernel memory base randomization, it was stil possible to figure out the per-cpu base address via the sgdt instruction, since it would reveal the per-cpu GDT location. To solve this, Thomas Garnier moved the GDT to a fixed location. And to solve the risk of an attacker targeting the GDT directly with a kernel bug, he also made it read-only. usercopy consolidation
After hardened usercopy landed, Al Viro decided to take a closer look at all the usercopy routines and then consolidated the per-architecture uaccess code into a single implementation. The per-architecture code was functionally very similar to each other, so it made sense to remove the redundancy. In the process, he uncovered a number of unhandled corner cases in various architectures (that got fixed by the consolidation), and made hardened usercopy available on all remaining architectures. ASLR entropy sysctl on PowerPC
Continuing to expand architecture support for the ASLR entropy sysctl, Michael Ellerman implemented the calculations needed for PowerPC. This lets userspace choose to crank up the entropy used for memory layouts. LSM structures read-only
James Morris used __ro_after_init to make the LSM structures read-only after boot. This removes them as a desirable target for attackers. Since the hooks are called from all kinds of places in the kernel this was a favorite method for attackers to use to hijack execution of the kernel. (A similar target used to be the system call table, but that has long since been made read-only.) KASLR enabled by default on x86
With many distros already enabling KASLR on x86 with CONFIG_RANDOMIZE_BASE and CONFIG_RANDOMIZE_MEMORY, Ingo Molnar felt the feature was mature enough to be enabled by default. Expand stack canary to 64 bits on 64-bit systems
The stack canary values used by CONFIG_CC_STACKPROTECTOR is most powerful on x86 since it is different per task. (Other architectures run with a single canary for all tasks.) While the first canary chosen on x86 (and other architectures) was a full unsigned long, the subsequent canaries chosen per-task for x86 were being truncated to 32-bits. Daniel Micay fixed this so now x86 (and future architectures that gain per-task canary support) have significantly increased entropy for stack-protector. Expanded stack/heap gap
Hugh Dickens, with input from many other folks, improved the kernel s mitigation against having the stack and heap crash into each other. This is a stop-gap measure to help defend against the Stack Clash attacks. Additional hardening needs to come from the compiler to produce stack probes when doing large stack expansions. Any Variable Length Arrays on the stack or alloca() usage needs to have machine code generated to touch each page of memory within those areas to let the kernel know that the stack is expanding, but with single-page granularity. That s it for now; please let me know if I missed anything. The v4.13 merge window is open!

2017, Kees Cook. This work is licensed under a Creative Commons Attribution-ShareAlike 3.0 License.
Creative Commons License

9 July 2017

Niels Thykier: Approaching the exclusive sub-minute build time club

For the first time in at least two years (and probably even longer), debhelper with the 10.6.2 upload broke the 1 minute milestone for build time (by mere 2 seconds look for Build needed 00:00:58, [ ] ). Sadly, the result it is not deterministic and the 10.6.3 upload needed 1m + 5s to complete on the buildds. This is not the result of any optimizations I have done in debhelper itself. Instead, it is the result of questionable use of developer time for the sake of meeting an arbitrary milestone. Basically, I made it possible to parallelize more of the debhelper build (10.6.1) and finally made it possible to run the tests in parallel (10.6.2). In 10.6.2, I also made the most of the tests run against all relevant compat levels. Previously, it would only run the tests against one compat level (either the current one or a hard-coded older version). Testing more than one compat turned out to be fairly simple given a proper test library (I wrote a Test::DH module for the occasion). Below is an example, which is the new test case that I wrote for Debian bug #866570.
$ cat t/dh_install/03-866570-dont-install-from-host.t
#!/usr/bin/perl
use strict;
use warnings;
use Test::More;
use File::Basename qw(dirname);
use lib dirname(dirname(__FILE__));
use Test::DH;
use File::Path qw(remove_tree make_path);
use Debian::Debhelper::Dh_Lib qw(!dirname);
plan(tests => 1);
each_compat_subtest  
  my ($compat) = @_;
  # #866570 - leading slashes must *not* pull things from the root FS.
  make_path('bin');
  create_empty_file('bin/grep-i-licious');
  ok(run_dh_tool('dh_install', '/bin/grep*'));
  ok(-e "debian/debhelper/bin/grep-i-licious", "#866570 [$ compat ]");
  ok(!-e "debian/debhelper/bin/grep", "#866570 [$ compat ]");
  remove_tree('debian/debhelper', 'debian/tmp');
 ;
I have cheated a bit on the implementation; while the test runs in a temporary directory, the directory is reused between compat levels (accordingly, there is a clean up step at the end of the test). If you want debhelper to maintain this exclusive (and somewhat arbitrary) property (deterministically), you are more than welcome to help me improve the Makefile.  I am not sure I can squeeze any more out of it with my (lack of) GNU make skills.
Filed under: Debhelper, Debian

Steinar H. Gunderson: Nageru 1.6.1 released

I've released version 1.6.1 of Nageru, my live video mixer. Now that Solskogen is coming up, there's been a lot of activity on the Nageru front, but hopefully everything is actually coming together now. Testing has been good, but we'll see whether it stands up to the battle-hardening of the real world or not. Hopefully I won't be needing any last-minute patches. :-) Besides the previously promised Prometheus metrics (1.6.1 ships with a rather extensive set, as well as an example Grafana dashboard) and frame queue management improvements, a surprising late addition was that of a new transcoder called Kaeru (following the naming style of Nageru itself, from the japanese verb kaeru ( ) which means roughly to replace or excahnge iKnow! claims it can also mean convert , but I haven't seen support for this anywhere else). Normally, when I do streams, I just let Nageru do its thing and send out a single 720p60 stream (occasionally 1080p), usually around 5 Mbit/sec; less than that doesn't really give good enough quality for the high-movement scenarios I'm after. But Solskogen is different in that there's a pretty diverse audience when it comes to networking conditions; even though I have a few mirrors spread around the world (and some JavaScript to automatically pick the fastest one; DNS round-robin is really quite useless here!), not all viewers can sustain such a bitrate. Thus, there's also a 480p variant with around 1 Mbit/sec or so, and it needs to come from somewhere. Traditionally, I've been using VLC for this, but streaming is really a niche thing for VLC. I've been told it will be an increased focus for 4.0 now that 3.0 is getting out the door, but over the last few years, there's been a constant trickle of little issues that have been breaking my transcoding pipeline. My solution for this was to simply never update VLC, but now that I'm up to stretch, this didn't really work anymore, and I'd been toying around with the idea of making a standalone transcoder for a while. (You'd ask why not the ffmpeg(1) command-line client? , but it's a bit too centered around files and not streams; I use it for converting to HLS for iOS devices, but it has a nasty habit of I/O blocking real work, and its HTTP server really isn't meant for production work. I could survive the latter if it supported Metacube and I could feed it into Cubemap, but it doesn't.) It turned out Nageru had already grown most of the pieces I needed; it had video decoding through FFmpeg, x264 encoding with speed control (so that it automatically picks the best preset the machine can sustain at any given time) and muxing, audio encoding, proper threading everywhere, and a usable HTTP server that could output Metacube. All that was required was to add audio decoding to the FFmpeg input, and then replace the GPU-based mixer and GUI with a very simple driver that just connects the decoders to the encoders. (This means it runs fine on a headless server with no GPU, but it also means you'll get FFmpeg's scaling, which isn't as pretty or fast as Nageru's. I think it's an okay tradeoff.) All in all, this was only about 250 lines of delta, which pales compared to the ~28000 lines of delta that are between 1.3.1 (used for last Solskogen) and 1.6.1. It only supports a rather limited set of Prometheus metrics, and it has some limitations, but it seems to be stable and deliver pretty good quality. I've denoted it experimental for now, but overall, I'm quite happy with how it turned out, and I'll be using it for Solskogen. Nageru 1.6.1 is on its way into Debian, but it depends on a new version of Movit which needs to go through the NEW queue (a soname bump), so it might be a few days. In the meantime, I'll be busy preparing for Solskogen. :-)

8 July 2017

Urvika Gola: Outreachy Progress on Lumicall

unnamedLumicall 1.13.0 is released!  Through Lumicall, you can make encrypted calls and send messages using open standards. It uses the SIP protocol to inter-operate with other apps and corporate telephone systems. During the Outreachy Internship period I worked on the following issues :-

I researched on creating a white label version of Lumicall. Few ideas on how the white label build could be used..
  1. Existing SIP providers can use white label version of Lumicall to expand their business and launch SIP client. This would provide a one stop shop for them!!
  2. New SIP clients/developers can use Lumicall white label version to get the underlying working of making encrypted phone calls using SIP protocol, it will help them to focus on other additional functionalities they would like to include.
Documentation for implementing white labelling Link 1 and Link 2 Since Lumicall is majorly used to make encrypted calls, there was a need to designate quiet times and the phone will not make an audible ringing tone during that time & if the user has multiple SIP accounts, the user can set the silent mode functionality on one of them, maybe, the Work account.
Documentation for adding silent mode feature Link 1 and Link 2 Using Lumicall, users can send SIP messages across. Just to improve the UI a little, I added a 9 patch image in the message screen. A 9 patch image is created using 9 patch tools and are saved as imagename.9.png . The image will resize itself according to the text length and font size. Documentation for 9 patch image Link 9patch You can try the new version of Lumicall here ! and know more about Lumicall on a blog by Daniel Pocock.
Looking forward to your valuable feedback !!

Daniel Silverstone: Gitano - Approaching Release - Access Control Changes

As mentioned previously I am working toward getting Gitano into Stretch. A colleague and friend of mine (Richard Maw) did a large pile of work on Lace to support what we are calling sub-defines. These let us simplify Gitano's ACL files, particularly for individual projects. In this posting, I'd like to cover what has changed with the access control support in Gitano, so if you've never used it then some of this may make little sense. Later on, I'll be looking at some better user documentation in conjunction with another friend of mine (Lars Wirzenius) who has promised to help produce a basic administration manual before Stretch is totally frozen.

Sub-defines With a more modern lace (version 1.3 or later) there is a mechanism we are calling 'sub-defines'. Previously if you wanted to write a ruleset which said something like "Allow Steve to read my repository" you needed:
define is_steve user exact steve
allow "Steve can read my repo" is_steve op_read
And, as you'd expect, if you also wanted to grant read access to Jeff then you'd need yet set of defines:
define is_jeff user exact jeff
define is_steve user exact steve
define readers anyof is_jeff is_steve
allow "Steve and Jeff can read my repo" readers op_read
This, while flexible (and still entirely acceptable) is wordy for small rulesets and so we added sub-defines to create this syntax:
allow "Steve and Jeff can read my repo" op_read [anyof [user exact jeff] [user exact steve]]
Of course, this is generally neater for simpler rules, if you wanted to add another user then it might make sense to go for:
define readers anyof [user exact jeff] [user exact steve] [user exact susan]
allow "My friends can read my repo" op_read readers
The nice thing about this sub-define syntax is that it's basically usable anywhere you'd use the name of a previously defined thing, they're compiled in much the same way, and Richard worked hard to get good error messages out from them just in case.

No more auto_user_XXX and auto_group_YYY As a result of the above being implemented, the support Gitano previously grew for automatically defining users and groups has been removed. The approach we took was pretty inflexible and risked compilation errors if a user was deleted or renamed, and so the sub-define approach is much much better. If you currently use auto_user_XXX or auto_group_YYY in your rulesets then your upgrade path isn't bumpless but it should be fairly simple:
  1. Upgrade your version of lace to 1.3
  2. Replace any auto_user_FOO with [user exact FOO] and similarly for any auto_group_BAR to [group exact BAR].
  3. You can now upgrade Gitano safely.

No more 'basic' matches Since Gitano first gained support for ACLs using Lace, we had a mechanism called 'simple match' for basic inputs such as groups, usernames, repo names, ref names, etc. Simple matches looked like user FOO or group !BAR. The match syntax grew more and more arcane as we added Lua pattern support refs ~^refs/heads/$ user /. When we wanted to add proper PCRE regex support we added a syntax of the form: user pcre ^/.+?... where pcre could be any of: exact, prefix, suffix, pattern, or pcre. We had a complex set of rules for exactly what the sigils at the start of the match string might mean in what order, and it was getting unwieldy. To simplify matters, none of the "backward compatibility" remains in Gitano. You instead MUST use the what how with match form. To make this slightly more natural to use, we have added a bunch of aliases: is for exact, starts and startswith for prefix, and ends and endswith for suffix. In addition, kind of match can be prefixed with a ! to invert it, and for natural looking rules not is an alias for !is. This means that your rulesets MUST be updated to support the more explicit syntax before you update Gitano, or else nothing will compile. Fortunately this form has been supported for a long time, so you can do this in three steps.
  1. Update your gitano-admin.git global ruleset. For example, the old form of the defines used to contain define is_gitano_ref ref ~^refs/gitano/ which can trivially be replaced with: define is_gitano_ref ref prefix refs/gitano/
  2. Update any non-zero rulesets your projects might have.
  3. You can now safely update Gitano
If you want a reference for making those changes, you can look at the Gitano skeleton ruleset which can be found at https://git.gitano.org.uk/gitano.git/tree/skel/gitano-admin/rules/ or in /usr/share/gitano if Gitano is installed on your local system. Next time, I'll likely talk about the deprecated commands which are no longer in Gitano, and how you'll need to adjust your automation to use the new commands.

6 July 2017

Urvika Gola: Speaking at Open Source Bridge 17

Recently, I and my Co speaker Pranav Jain, got a chance to speak at Open Source Bridge conference which was held in Portland, Oregon! Pranav talked about GSoC and I talked about Outreachy , together we talked about Free RTC project Lumicall.
OSB conference was much more than just a conference . More than content in the talks, it had meaning. I am referring to the amazing keynote session by Nicole Sanchez on Tech Reform. She explained wonderfully the need of the hour, i.e Diversity inclusion is not just inclusion . Focus should be on what comes after the inclusion, Growth. We also met several Debian developers and Debian mentor for Outreachy (Hoping to meet my mentors someday!! ) Thanks to OSB, I got to meet Outreachy co-ordinator Sarah Sharp! It was wonderful meeting an Outreachy-person!  We talked and exchanged ideas about the programme. and.. she clicked beautiful pictures of us delivering the talk.
Urvika Gola at Open Source BridgePicture Courtesy Sarah Sharp
The talk ended with an unexpected and very precious hand written note written by Audrey Eschright.. 20170622_114118-1 Thank you Debian for giving us a chance to speak at Open Source Bridge and to meet wonderful people in Open Source.

Joachim Breitner: The Micro Two Body Problem

Inspired by recent PhD comic Academic Travel and not-so-recent xkcd comic Movie Narrative Charts , I created the following graphics, which visualizes the travels of an academic couple over the course of 10 months (place names anonymized).
Two bodies traveling the world

Two bodies traveling the world

Next.

Previous.