
Picolibc Updates
I thought work on picolibc would slow down at some point, but I keep
finding more things that need work. I spent a few weeks working in
libm and then discovered some important memory allocation bugs in the
last week that needed attention too.
Cleaning up the Picolibc Math Library
Picolibc uses the same math library sources as newlib, which includes
code from a range of sources:
- SunPro (Sun Microsystems). This forms the bulk of the common code
for the math library, with copyright dates stretching back to 1993.
This code is designed for processors with FPUs and uses 'float' for
float functions and 'double' for double functions.
- NetBSD. This is where the complex functions came from,
with Copyright dates of 2007.
- FreeBSD. fenv support for aarch64, arm and sparc
- IBM. SPU processor support along with a number of stubs for long-double
support where long double is the same as double
- Various processor vendors have provided processor-specific code for
exceptions and a few custom functions.
- Szabolcs Nagy and Wilco Dijkstra (ARM). These two re-implemented
some of the more important functions in 2017-2018 for both float
and double using double precision arithmetic and fused multiply-add
primitives to improve performance for systems with hardware double
precision support.
The original SunPro math code had been split into two levels at some
point:
- IEEE-754 functions. These offer pure IEEE-754 semantics, including
return values and exceptions. They do not set the POSIX errno
value. These are all prefixed with __ieee754_ and can be called
directly by applications if desired.
- POSIX functions. These can offer POSIX semantics, including
setting errno and returning expected values when errno is set.
New Code Sponsored by ARM
Szabolcs Nagy and Wilco Dijkstra's work in the last few years has been
to improve the performance of some of the core math functions, which
is much appreciated. They've adopted a more modern coding style
(C99) and written faster code at the expense of a larger memory foot
print.
One interesting choice was to use double computations for the
float implementations of various functions. This makes these
functions shorter and more accurate than versions done using float
throughout. However, for machines which don't have HW double, this
pulls in soft double code which adds considerable size to the
resulting binary and slows down the computations, especially if the
platform does support HW float.
The new code also takes advantage of HW fused-multiply-add
instructions. Those offer more precision than a sequence of primitive
instructions, and so the new code can be much shorter as a result.
The method used to detect whether the target machine supported fma
operations was slightly broken on 32-bit ARM platforms, where those
with 'float' fma acceleration but without 'double' fma acceleration
would use the shorter code sequence, but with an emulated fma
operation that used the less-precise sequence of operations, leading
to significant reductions in the quality of the resulting math
functions.
I fixed the double fma detection and then also added float fma
detection along with implementations of float and double fma for ARM
and RISC-V. Now both of those platforms get fma-enhanced math
functions where available.
Errno Adventures
I'd submitted patches to newlib a while ago that aliased the regular
math library names to the __ieee754_ functions when the library was
configured to not set errno, which is pretty common for embedded
environments where a shared errno is a pain anyways.
Note the use of the word can in remark about the old POSIX wrapper
functions. That's because all of these functions are run-time
switchable between _IEEE_ and _POSIX_ mode using the _LIB_VERSION
global symbol. When left in the usual _IEEE_ mode, none of this extra
code was ever executed, so these wrapper functions never did anything
beyond what the underlying __ieee754_ functions did.
The new code by Nagy and Dijkstra changed how functions are structured
to eliminate the underlying IEEE-754 api. These new functions use tail
calls to various __math_ error reporting functions. Those can be
configured at library build time to set errno or not, centralizing
those decisions in a few functions.
The result of this combination of source material is that in the
default configuration, some library functions (those written by Nagy
and Dijkstra) would set errno and others (the old SunPro code) would
not. To disable all errno references, the library would need to be
compiled with a set of options, -D_IEEE_LIBM to disable errno in the
SunPro code and -DWANT_ERRNO=0 to disable errno in the new code. To
enable errno everywhere, you'd set -D_POSIX_MODE to make the default
value for _LIB_VERSION be _POSIX_ instead of _IEEE_.
To clean all of this up, I removed the run-time _LIB_VERSION variable
and made that compile-time. In combination with the earlier work to
alias the __ieee754_ functions to the regular POSIX names when
_IEEE_LIBM was defined this means that the old SunPro POSIX functions now
only get used when _IEEE_LIBM is
not defined, and in that case the
_LIB_VERSION tests always force use of the errno setting code. In
addition, I made the value of WANT_ERRNO depend on whether _IEEE_LIBM
was defined, so now a single definition (-D_IEEE_LIBM) causes all
of the errno handling from libm to be removed, independent of which code
is in use.
As part of this work, I added a range of errno tests for the math
functions to find places where the wrong errno value was being used.
Exceptions
As an alternative to errno, C also provides for IEEE-754 exceptions
through the fenv functions. These have some significant advantages,
including having independent bits for each exception type and having
them accumulate instead of sharing errno with a huge range of other C
library functions. Plus, they're generally implemented in hardware, so
you get exceptions for both library functions and primitive
operations.
Well, you
should get exceptions everywhere, except that the GCC soft
float libraries don't support them at all. So, errno can still be
useful if you need to know what happened in your library functions
when using soft floats.
Newlib has recently seen a spate of fenv support being added for
various architectures, so I decided that it would be a good idea to
add some tests. I added tests for both primitive operations, and then
tests for library functions to check both exceptions and errno values.
Oddly, this uncovered a range of minor mistakes in various math
functions. Lots of these were mistakes in the SunPro POSIX wrapper
functions where they modified the return values from the __ieee754_
implementations. Simply removing those value modifications fixed many
of those errors.
Fixing Memory Allocator bugs
Picolibc inherits malloc code from newlib which offers two separate
implementations, one big and fast, the other small and
slow(er). Selecting between them is done while building the library,
and as Picolibc is expected to be used on smaller systems, the small
and slow one is the default.
Contributed by someone from ARM back in 2012/2013, nano-mallocr
reminds me of the old V7 memory allocator. A linked list, sorted in
address order, holds discontiguous chunks of available
memory.
Allocation is done by searching for a large enough chunk in the
list. The first one large enough is selected, and if it is large
enough, a chunk is split off and left on the free list while the
remainder is handed to the application. When the list doesn't have any
chunk large enough, sbrk is called to get more memory.
Free operations involve walking the list and inserting the chunk in
the right location, merging the freed memory with any immediately
adjacent chunks to reduce fragmentation.
The size of each chunk is stored just before the first byte of memory
used by the application, where it remains while the memory is in use
and while on the free list. The free list is formed by pointers stored
in the active area of the chunk, so the only overhead for chunks in
use is the size field.
Something Something Padding
To deal with the vagaries of alignment, the original nano-mallocr code
would allow for there to be 'padding' between the size field and the
active memory area. The amount of padding could vary, depending on the
alignment required for a particular chunk (in the case of memalign,
that padding can be quite large). If present, nano-mallocr would
store the padding value in the location immediately before the active
area and distinguish that from a regular size field by a negative
sign.
The whole padding thing seems mysterious to me -- why would it ever be
needed when the allocator could simply create chunks that were aligned
to the required value and a multiple of that value in size. The only
use I could think of was for memalign; adding this padding field would
allow for less over-allocation to find a suitable chunk. I didn't feel
like this one (infrequent) use case was worth the extra complexity; it
certainly caused me difficulty in reading the code.
A Few Bugs
In reviewing the code, I found a couple of easy-to-fix bugs.
- calloc was not checking for overflow in multiplication. This is
something I've only heard about in the last five or six years --
multiplying the size of each element by the number of elements can
end up wrapping around to a small value which may actually succeed
and cause the program to mis-behave.
- realloc copied new_size bytes from the original location to the new
location. If the new size was larger than the old, this would read
off the end of the original allocation, potentially disclosing
information from an adjacent allocation or walk off the end of
physical memory and cause some hard fault.
Time For Testing
Once I had uncovered a few bugs in this code, I decided that it would
be good to write a few tests to exercise the API. With the tests
running on four architectures in nearly 60 variants, it seemed like
I'd be able to uncover at least a few more failures:
- Error tests. Allocating too much memory and make sure the correct
errors were returned and that nothing obviously untoward happened.
- Touch tests. Just call the allocator and validate the return
values.
- Stress test. Allocate lots of blocks, resize them and free
them. Make sure, using 'mallinfo', that the malloc arena looked
reasonable.
These new tests did find bugs. But not where I expected them. Which is
why I'm so fond of testing.
GCC Optimizations
One of my tests was to call calloc and make sure it returned a chunk
of memory that appeared to work or failed with a reasonable value. To
my surprise, on aarch64, that test never finished. It worked
elsewhere, but on that architecture it hung in the middle of calloc
itself. Which looked like this:
void * nano_calloc(malloc_size_t n, malloc_size_t elem)

    ptrdiff_t bytes;
    void * mem;
    if (__builtin_mul_overflow (n, elem, &bytes))

    RERRNO = ENOMEM;
    return NULL;

    mem = nano_malloc(bytes);
    if (mem != NULL) memset(mem, 0, bytes);
    return mem;
Note the naming here -- nano_mallocr uses nano_ prefixes in the code,
but then uses #defines to change their names to those expected in the
ABI. (No, I don't understand why either). However, GCC sees the real
names and has some idea of what these functions are supposed to do. In
particular, the pattern:
foo = malloc(n);
if (foo) memset(foo, '\0', n);
is converted into a shorter and semantically equivalent:
foo = calloc(n, 1);
Alas, GCC doesn't take into account that this optimization is occurring
inside of the implementation of calloc.
Another sequence of code looked like this:
chunk->size = foo
nano_free((char *) chunk + CHUNK_OFFSET);
Well, GCC knows that the content of memory passed to free cannot
affect the operation of the application, and so it converted this
into:
nano_free((char *) chunk + CHUNK_OFFSET);
Remember that nano_mallocr stores the size of the chunk just before
the active memory. In this case, nano_mallocr was splitting a large
chunk into two pieces, setting the size of the left-over part and
placing that on the free list. Failing to set that size value left
whatever was there before for the size and usually resulted in the
free list becoming quite corrupted.
Both of these problems can be corrected by compiling the code with a
couple of GCC command-line switches (-fno-builtin-malloc and
-fno-builtin-free).
Reworking Malloc
Having spent this much time reading through the nano_mallocr code, I
decided to just go through it and make it easier for me to read today,
hoping that other people (which includes 'future me') will also find
it a bit easier to follow. I picked a couple of things to focus on:
- All newly allocated memory should be cleared. This reduces
information disclosure between whatever code freed the memory and
whatever code is about to use the memory. Plus, it reduces the
effect of un-initialized allocations as they now consistently get
zeroed memory. Yes, this masks bugs. Yes, this goes slower. This
change is dedicated to Kees Cook, but please blame me for it not
him.
- Get rid of the 'Padding' notion. Every time I read this code it
made my brain hurt. I doubt I'll get any smarter in the future.
- Realloc could use some love, improving its efficiency in
common cases to reduce memory usage.
- Reworking linked list walking. nano_mallocr uses a singly-linked
free list and open-codes all list walking. Normally, I'd switch to
a library implementation to avoid introducing my own bugs, but in
this fairly simple case, I think it's a reasonable compromise to
open-code the list operations using some patterns I learned while
working at MIT from Bob Scheifler.
- Discover necessary values, like padding and the limits of the
memory space, from the environment rather than having them
hard-coded.
Padding
To get rid of 'Padding' in malloc, I needed to make sure that every
chunk was aligned and sized correctly. Remember that there is a header
on every allocated chunk which is stored before the active memory
which contains the size of the chunk. On 32-bit machines, that size is
4 bytes. If the machine requires allocations to be aligned on 8-byte
boundaries (as might be the case for 'double' values), we're now going
to force the alignment of the header to 8-bytes, wasting four bytes
between the size field and the active memory.
Well, the existing nano_mallocr code
also wastes those four bytes to
store the 'padding' value. Using a consistent alignment for chunk
starting addresses and chunk sizes has made the code a lot simpler and
easier to reason about while not using extra memory for normal
allocation. Except for memalign, which I'll cover in the next section.
realloc
The original nano_realloc function was as simple as possible:
mem = nano_malloc(new_size);
if (mem)
    memcpy(mem, old, MIN(old_size, new_size));
    nano_free(old);

return mem;
However, this really performs badly when the application is growing a
buffer while accumulating data. A couple of simple optimizations
occurred to me:
- If there's a free chunk just after the original location, it
could be merged to the existing block and avoid copying the data.
- If the original chunk is at the end of the heap, call sbrk() to
increase the size of the chunk.
The second one seems like the more important case; in a small system,
the buffer will probably land at the end of the heap at some point, at
which point growing it to the size of available memory becomes
quite efficient.
When shrinking the buffer, instead of allocating new space and
copying, if there's enough space being freed for a new chunk, create
one and add it to the free list.
List Walking
Walking singly-linked lists seem like one of the first things we see
when learning pointer manipulation in C:
for (element = head; element; element = element->next)
    do stuff ...
However, this becomes pretty complicated when 'do stuff' includes
removing something from the list:
prev = NULL;
for (element = head; element; element = element->next)
    ...
    if (found)
        break;
    ...
    prev = element
if (prev != NULL)
    prev->next = element->next;
else
    head = element->next;
An extra variable, and a test to figure out how to re-link the list.
Bob showed me a simpler way, which I'm sure many people are familiar
with:
for (ptr = &head; (element = *ptr); ptr = &(element->next))
    ...
    if (found)
        break;
*ptr = element->next;
Insertion is similar, as you would expect:
for (ptr = &head; (element = *ptr); ptr = &(element->next))
    if (found)
        break;
new_element->next = element;
*ptr = new_element;
In terms of memory operations, it's the same -- each 'next' pointer is
fetched exactly once and the list is re-linked by performing a single
store. In terms of reading the code, once you've seen this pattern,
getting rid of the extra variable and the conditionals around the list
update makes it shorter and less prone to errors.
In the nano_mallocr code, instead of using 'prev = NULL', it actually
used 'prev = free_list', and the test for updating the head was 'prev
== element', which really caught me unawares.
System Parameters
Any malloc implementation needs to know a couple of things about the
system it's running on:
- Address space. The maximum range of possible addresses sets the
limit on how large a block of memory might be allocated, and hence
the size of the 'size' field. Fortunately, we've got the 'size_t'
type for this, so we can just use that.
- Alignment requirements. These derive from the alignment
requirements of the basic machine types, including pointers,
integers and floating point numbers which are formed from a
combination of machine requirements (some systems will fault if
attempting to use memory with the wrong alignment) along with a
compromise between memory usage and memory system performance.
I decided to let the system tell me the alignment necessary using a
special type declaration and the 'offsetof' operation:
typedef struct
    char c;
    union
    void *p;
    double d;
    long long ll;
    size_t s;
      u;
  align_t;
#define MALLOC_ALIGN        (offsetof(align_t, u))
Because C requires struct fields to be stored in order of
declaration, the 'u' field would have to be after the 'c' field, and
would have to be assigned an offset equal to the largest alignment
necessary for any of its members. Testing on a range of machines
yields the following alignment requirements:
| Architecture |
Alignment |
| x86_64 |
8 |
| RISC-V |
8 |
| aarch64 |
8 |
| arm |
8 |
| x86 |
4 |
So, I guess I could have just used a constant value of '8' and not
worried about it, but using the compiler-provided value means that
running picolibc on older architectures might save a bit of memory at
no real cost in the code.
Now, the header containing the 'size' field can be aligned to this
value, and all allocated blocks can be allocated in units of this
value.
memalign
memalign, valloc and pvalloc all allocate memory with restrictions on
the alignment of the base address and length. You'd think these would
be simple -- allocate a large chunk, align within that chunk and
return the address. However, they also all require that the address
can be successfully passed to free. Which means that the allocator
needs to do some tricks to make it all work. Essentially, you allocate
'lots' of memory and then arrange that any bytes at the head and tail
of the allocation can be returned to the free list.
The tail part is easy; if it's large enough to form a free chunk
(which must contain the size and a 'next' pointer for the free list),
it can be split off. Otherwise, it just sits at the end of the
allocation being wasted space.
The head part is a bit tricky when it's not large enough to form a
free chunk. That's where the 'padding' business came in handy; that
can be as small as a 'size_t' value, which (on 32-bit systems) is only
four bytes.
Now that we're giving up trying to reason about 'padding', any extra
block at the start must be big enough to hold a free block, which
includes the size and a next pointer. On 32-bit systems, that's just 8
bytes which (for most of our targets) is the same as the alignment
value we're using. On 32-bit systems that can use 4-byte alignment,
and on 64-bit systems, it's possible that the alignment required by
the application for memalign and the alignment of a chunk returned by
malloc might be off by too small an amount to create a free chunk.
So, we just allocate a
lot of extra space; enough so that we can
create a block of size 'toosmall + align' at the start and create a
free chunk of memory out of that.
This works, and at least returns all of the unused memory back for
other allocations.
Sending Patches Back to Newlib
I've sent the floating point fixes upstream to newlib where they've
already landed on master. I've sent most of the malloc fixes, but I'm
not sure they really care about seeing nano_mallocr refactored. If
they do, I'll spend the time necessary to get the changes ported back
to the newlib internal APIs and merged upstream.
 KDE Apps bundle 20.08 has been released recently, and some of the packages are already updated in Debian/unstable. I have updated also all my packages to 20.08 and they are now available for x86_64, i586, and hopefully aarch64 (some issues remaining here still).
With the new release 20.08 I have also switched to versioned app repositories, so you need to update the apt sources directive. The new one is
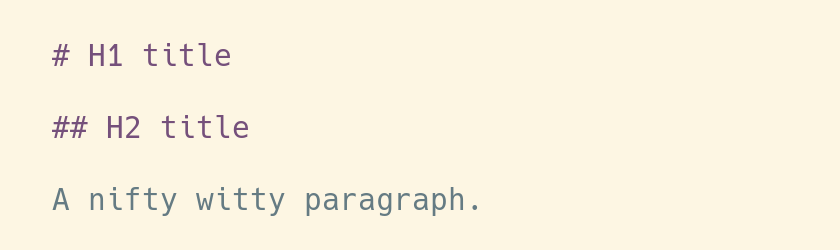 I'm mostly happy with that, except for one or two little details. I'd like to
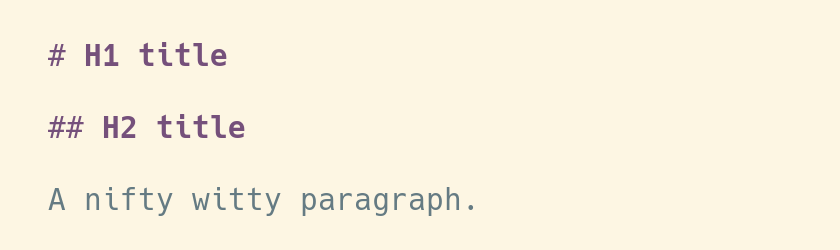
have the titles displayed in bold, for example, so that they're easier to spot
when I skim through a Markdown file. It seems like a simple thing to ask, so I
hope there can be a simple solution.
The first steps
Let's learn the basics.
In Vim world, the rules to highlight files formats are defined in the directory
 The rabbit hole
So we could stop right here, and life would be easy and good.
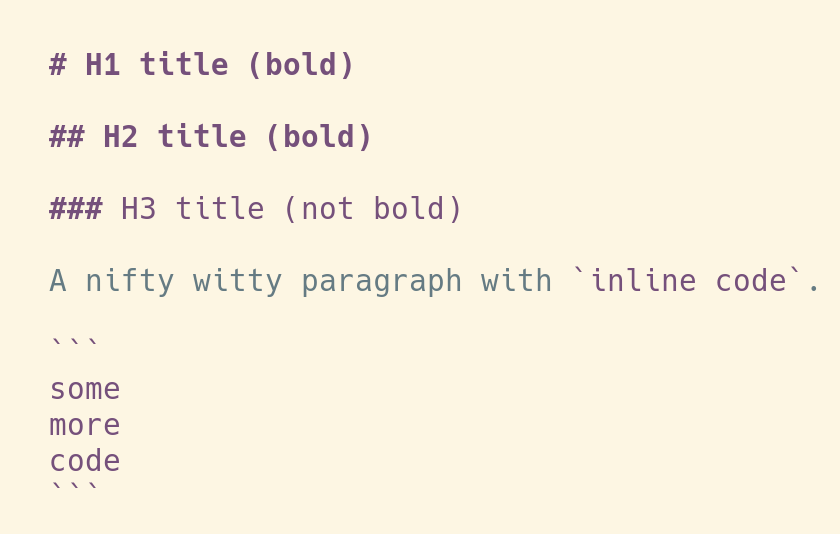
However, with this solution there's still something that is not perfect. We use
the color
 And a dark background:
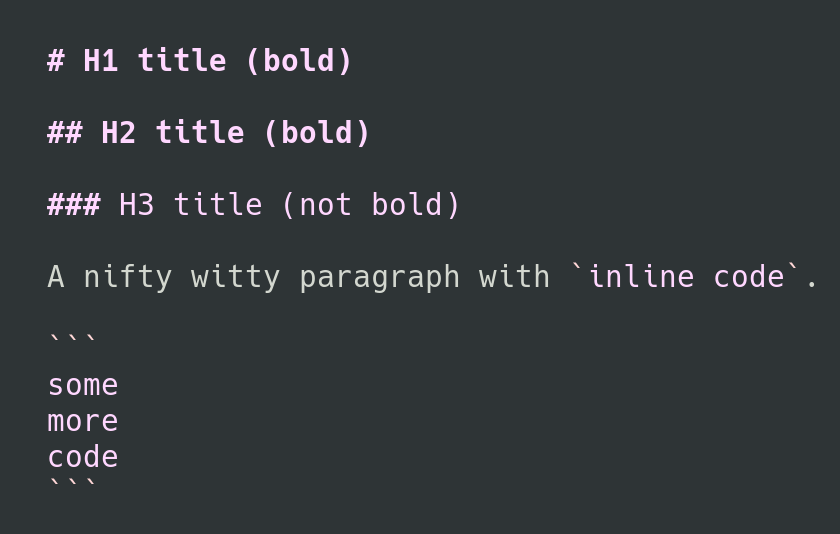 That's all, that's very little changes compared to the highlighting from the
original syntax file, and now that we understand how it's supposed to be done,
it's not much effort to achieve it.
It's just that finding the workaround to make it work for both light and dark
background took forever, and leaves the usual, unanswered question:
 Today is Debian's 27th anniversary. We recently
 Following Antonio Terceiro s
 OK, one step back. Why are we doing this? Because our hardworking
friends of the DebConf20 video team recommended so. In order to
minimize connecitvity issues from the variety of speakers throughout
the world, we were requested to pre-record the exposition part of
our talks, send them to the video team (deadline: today
2020-08-16, in case you still owe yours!), and make sure to be present
at the end of the talk for the Q&A session. Of course, for a 45 minute
talk, I prepared a 30 minute presentation, saving time for said Q&A
session.
Anyway, I used the excellent



 Welcome to gambaru.de. Here is my monthly report (+ the first week in August) that covers what I have been doing for Debian. If you re interested in Java, Games and LTS topics, this might be interesting for you.
Debian Games

 Recently, I discovered
 When I did the work described earlier in