A common programming task is to glue (or "join") items together to create a single string. For example:
>>>', '.join(['foo','bar','baz'])"foo, bar, baz"
Notice that we have three items but only two commas this can be important if the tool we passing doesn't support trailing delimiters or we simply want the result to be human-readable.
Unfortunately, this can be inconvenient in POSIX shell where we construct strings via explicit concatenation. A na ve solution of:
RESULT=""for X in foo bar baz
doRESULT="$ RESULT , $ X "done
... incorrectly returns ", foo, bar, baz". We can solve this with a (cumbersome) counter or flag to only attach the delimiter when we need it:
COUNT=0
RESULT=""for X in foo bar baz
do if["$ COUNT "= 0 ]thenRESULT="$ X "elseRESULT="$ RESULT , $ X "fiCOUNT=$((COUNT +1))done
One alternative is to use the little-known ":+" expansion modifier. Many people are familiar with ":-" for returning default values:
I had the wonderful privilege to go camping and hiking with my kids scouting group, the Pathfinders of Tantallon SDA church. The day started with a quick trip to Pugwash with one of the leaders to bring back some chairs to their school, and then we headed back out to Blomidon to meet up with the group. Click the photo below to start the slideshow.
The road trip started early to fetch some chairs click to start
The smudgy truck windows make an interesting filter
Still an hour or more away from our first stop
More funky filtering, this time with trees participating
Wentworth valley taken over the cluttered dash
We disturbed a great blue heron s breakfast at Wallace
The beach at Pugwash SDA Camp where we loaded the chairs
Trucking along past Truro
After dropping off chairs, finally approaching Blomidon
Getting very close to Blomidon
Some bikers out to enjoy the views
Interesting white berries
Interesting red berries
My first up close look at the point with my hiking buddy, Dave, on the first day
An experimental panorama. Not sure I have the knack for keeping the horizon straight.
We must bring the group out here tomorrow!
Fast ringneck snake! Hard to get a clear shot
Pre-dawn over the campground
The first blush of coming dawn
The Moon and Venus just before dawn
Evergreens surrounding our camp site, pre-dawn
Seems I m still the only one up
Half of the tents on the spacious group site
Half of the tents on the spacious group site
My daughter, the artist
My two youngest and their best friend
Some relaxing down time after breakfast
Not sure who said what, but apparently they were hilarious. :)
The smoke was a bit much for my eldest
Geoff entertaining the troops
Dave making breakfast
Dave making breakfast
Breakfast just wrapping up
Relaxing while we finish breakfast
Looks like that needs some tweaking
A bit too smoky
The whole group
The whole group
Just goofing around
Who s winning?
Enjoying the last embers of the breakfast fire before heading to Jodrey Trail
I admire this young lady s great eye for photography
She has some sweet gear
A lot of old hardwoods out here
Dave did this hike with me yesterday Excellent hiking buddy!
Words can t describe how much more stunning these views are in person
All the cameras came out
Got to get that perfect shot!
A tree clinging to the eroding ground above the sheer cliff
A lookoff on Jodrey Trail
A lookoff on Jodrey Trail
Lining up her shot
/a> A lookoff on Jodrey Trail
A lookoff on Jodrey Trail
A lookoff on Jodrey Trail
A fern with sharply serrated sturdy leaves I m not familiar with
Breaking camp at group site 404
One final chance to enjoy the view from the park entrance before heading home
The package is not in yet in unstable, but linux/4.2-1~exp1 is now reproducible! Kudos to Ben Hutchings, and most fixes are already merged upstream.
Some uploads fixed some reproducibility issues but not all of them:
#797871 on xbae by Chris Lamb: use date of the latest debian/changelog entry as build time.
reproducible.debian.net
Some bugs that prevented packages to build successfully in the remote builders have been fixed. (h01ger)
Two more amd64 build jobs have been removed from the Jenkins host in favor of six more on the new remote nodes. (h01ger)
The munin graphs currently looks fine, so more amd64 jobs will probably be added in the next week.
diffoscope development
Version 32 of diffoscope has been released on September 3rd with the following new features:
A new --fuzzy-threshold option to specify the TLSH score used as cut-off
for fuzzy matching. Specifying 0 will disable fuzzy-matching entirely.
Suggested by Jakub Wilk.
A new --new-file option to treat absent files as empty. This make diffoscope a great
tool to look at the content of an archive at once by comparing it with a non-existent
file (example).
Suggested by Jakub Wilk.
Comparisons of symlinks and devices given on the command line is now possible.
Review: Through Struggle, The Stars, by John J. Lumpkin
Series:
Human Reach #1
Publisher:
John J. Lumpkin
Copyright:
July 2011
ISBN:
1-4611-9544-6
Format:
Kindle
Pages:
429
Never let it be said that I don't read military SF. However, it can be
said that I read books and then get hellishly busy and don't review them
for months. So we'll see if I can remember this well enough to review it
properly.
In Lumpkin's future world, mankind has spread to the stars using gate
technology, colonizing multiple worlds. However, unlike most science
fiction futures of this type, it's not all about the United States, or
even the United States and Russia. The great human powers are China and
Japan, with the United States relegated to a distant third. The US mostly
maintains its independence from either, and joins the other lesser nations
and UN coalitions to try to pick up a few colonies of its own. That's the
context in which Neil and Rand join the armed services: the former as a
pilot in training, and the latter as an army grunt.
This is military SF, so of course a war breaks out. But it's a war
between Japan and China: improved starship technology and the most
sophisticated manufacturing in the world against a much larger economy
with more resources and a larger starting military. For reasons that are
not immediately clear, and become a plot point later on, the United States
president immediately takes an aggressive tone towards China and pushes
the country towards joining the war on the side of Japan.
Most of this book is told from Neil's perspective, following his military
career during the outbreak of war. His plans to become a pilot get
derailed as he gets entangled with US intelligence agents (and a bad
supervisor). The US forces are not in a good place against China,
struggling when they get into ship-to-ship combat, and Neil's ship goes on
a covert mission to attempt to complicate the war with political factors.
Meanwhile, Rand tries to help fight off a Chinese invasion of one of the
rare US colony worlds.
Through Struggle, The Stars does not move quickly. It's over 400
pages, and it's a bit surprising how little happens. What it does instead
is focus on how the military world and the war feels to Neil: the
psychological experience of wanting to serve your country but questioning
its decisions, the struggle of working with people who aren't always
competent but who you can't just make go away, the complexities of
choosing a career path when all the choices are fraught with politics that
you didn't expect to be involved in, and the sheer amount of luck and
random events involved in the progression of one's career. I found this
surprisingly engrossing despite the slow pace, mostly because of how true
to life it feels. War is not a never-ending set of battles. Life in a
military ship has moments when everything is happening far too quickly,
but other moments when not much happens for a long time. Lumpkin does a
great job of reflecting that.
Unfortunately, I thought there were two significant flaws, one of which
means I probably won't seek out further books in this series.
First, one middle portion of the book switches away from Neil to follow
Rand instead. The first part of that involves the details of fighting
orbiting ships with ground-based lasers, which was moderately interesting.
(All the technological details of space combat are interesting and
thoughtfully handled, although I'm not the sort of reader who will notice
more subtle flaws. But David Weber this isn't, thankfully.) But then it
turns into a fairly generic armed resistance story, which I found rather
boring.
It also ties into the second and more serious flaw: the villain. The
overall story is constructed such that it doesn't need a personal
villain. It's about the intersection of the military and politics, and a
war that may be ill-conceived but that is being fought anyway. That's
plenty of conflict for the story, at least in my opinion. But Lumpkin
chose to introduce a specific, named Chinese character in the villain
role, and the characterization is... well.
After he's humiliated early in the story by the protagonists, Li Xiao
develops an obsession with killing them, for his honor, and then pursues
them throughout the book in ways that are sometimes destructive to the
Chinese war efforts. It's badly unrealistic compared to the tone of
realism taken by the rest of the story. Even if someone did become this
deranged, it's bizarre that a professional military (and China's forces
are otherwise portrayed as fairly professional) would allow this. Li
reads like pure caricature, and despite being moderately competent apart
from his inexplicable (but constantly repeated) obsession, is cast in a
mustache-twirling role of personal villainy. This is weirdly out of place
in the novel, and started irritating me enough that it took me out of the
story.
Through Struggle, The Stars is the first book of a series, and does
not resolve much by the end of the novel. That plus its length makes the
story somewhat unsatisfying. I liked Neil's development, and liked him as
a character, and those who like the details of combat mixed with
front-lines speculation about politics may enjoy this. But a
badly-simplified mustache-twirling victim and some extended, uninteresting
bits mar the book enough that I probably won't seek out the sequels.
Followed by The Desert of Stars.
Rating: 6 out of 10
Just came back from a wonderful time hiking with my daughter at the finale Hike the Greenbelt event at the Backlands/McIntosh Run! This photo slideshow is from my HP snapshot camera which unfortunately has dust in the lens. But I felt it was more important to get them up soon than to get them perfect, so please click the photo below to start the slideshow. I want to thank everyone who made this event a success, and not going to name specific names as I m sure I ll miss someone important. But thanks especially to Martin, the leader of our group.
[slb_group] Marcos Zentilli explaining geology of the region. Click photo to start slideshow.
Barrens
Barrens
Barrens
Barrens
DIGITAL CAMERA
Jack Pine in Jack Pine ;)
DIGITAL CAMERA
DIGITAL CAMERA
DIGITAL CAMERA
DIGITAL CAMERA
Part of the waterway
DIGITAL CAMERA
DIGITAL CAMERA
DIGITAL CAMERA
DIGITAL CAMERA
DIGITAL CAMERA
DIGITAL CAMERA
DIGITAL CAMERA
DIGITAL CAMERA
DIGITAL CAMERA
DIGITAL CAMERA
DIGITAL CAMERA
DIGITAL CAMERA
DIGITAL CAMERA
The Asus t100 tablet is this amazing and odd little thing: it sells for under $200, yet has a full-featured Atom 64-bit CPU, 2GB RAM, 32 or 64GB SSD, etc. By default, it ships with Windows 8.1. It has a detachable keyboard, so it can be used as a tablet or a very small 10 laptop.
I have never been a fan of Windows on it. It does the trick for web browsing and email, but I d like to ssh into my machines sometimes, and I just can t bring myself to type sensitive passwords into Windows.
I decided to try installing Debian on it. After a lot of abortive starts due to the UEFI-only firmware, I got jessie installed. (The installer was fine; it was Debian Live that wouldn t boot.) I got wifi and battery status working via an upgrade to the 4.1 kernel. A little $10 Edimax USB adapter was handy to spare a bunch of copying via USB disks.
I have been using XFCE with XMonad for so many years that I am somewhat a stranger to other desktop environments. XMonad isn t really suitable for a tablet, however, so I thought I d try Gnome, especially after a fairly glowing review about its use on a tablet.
I am already disappointed after just a few minutes. There is no suspend button on the menu. Some Googling showed that holding Alt while hovering over the power off button will change it to a suspend button. And indeed it does. But uh, what? That is so common and so non-obvious. And pushing the power button does nothing. That s right, nothing. Apparently the way to enable some action when you push the power button is to type in a settings command in a terminal. There s no setting in the settings panel.
I initially ditched Gnome some years ago due to its penchant for removing features. I had hoped that this much time later, it would have passed that stage, but I m already disappointed. I was hoping for some really nice integration with the system. But my XFCE setup has a very clear When power button is pressed setting. I have no idea why Gnome doesn t.
Also, the touch screen works fine and it registers my touches, but whenever I touch anywhere, the cursor disappears. Weird, eh?
There are some things to fix yet on the tablet (sound, brightness adjustment, and making suspend reliable) but others have solved these in Ubuntu so I don t think it ll be too hard.
In the meantime, any suggestions regarding Gnome? Is it just going to annoy me? Maybe I should try KDE also. I ve heard good things about Plasma Active, but don t see it in Debian though.
Basically everybody who knows me is aware that, basically for the last two years, I have been writing a book on Operating Systems for use in my class and, of course, in any similar class. Well, long story short, as of today:
What's that in my car trunk? Lets have a closer look.
Finally, Facultad de Ingenier a finished printing the book!
So... Well, some minor data points:
If you want to derive from it or enhance future editions in any way, just clone it!.
Want to get a physical copy? Great! It will soon (a week or so) be ready at both the Faculty's and the Institute's bookstores.
But coming to UNAM is hard for you? Stay tuned. I have uploaded it to an on-demand printing service (Bubok), but its service is so dismally slow that I'll try it somewhere else. I'll keep you posted!
In the first blog in this series, we looked at how to capture audio effectively for a range of different events. While recording audio appears less complicated than video, it remains fundamental to a good recording. For some types of event, like a speech or a debate, you can have quite a bad video with poor lighting and other defects but people will still be able to watch it if the audio is good. Therefore, if you haven't already looked at the previous blog, please do so now.
As mentioned in the earlier blog, many people now have high quality equipment for recording both audio and video and a wide range of opportunities to use it, whether it is a talk at a conference, a wedding or making a Kickstarter video.
The right camera for video recording
The fundamental piece of equipment is the camera itself. You may have a DSLR camera that can record video or maybe you have a proper handheld video camera. The leading DSLR cameras, combined with a good lens, make higher quality recordings than many handheld video cameras.
Unfortunately, although you pay good money to buy a very well engineered DSLR that could easily record many hours of video, most DSLRs are crippled to record a maximum of 30 minutes in one recording. This issue and some workarounds are discussed later in this blog.
If you don't have any camera at all you need to think carefully about which type to buy. If you are only going to use it once you may want to consider renting or borrowing or asking for other people attending the event to bring whatever cameras they have to help make multiple recordings (the crowdsourcing solution). If you are a very keen photographer then you will probably have a preference for a DSLR.
Accessories
Don't just look at the cost of your camera and conclude that is all the budget you need. For professional quality video recording, you will almost certainly need some accessories. You may find they are overpriced at the retail store where you bought your camera, but you still need some of them, so have a look online.
Recording a talk at a free software event with a Nikon D800 on a very basic tripod with Rode VideoMic Pro, headphones (white cable) and external power (black cable)
If you want to capture audio with the camera and record it in the video file (discussed in more detail below), you will need to purchase a microphone that mounts on the camera. The built-in microphones on cameras are often quite bad, even on the most expensive cameras. If you are just using the built-in microphone for reference audio (to help with time synchronization when you combine different audio files with the video later) then the built-in microphone may be acceptable. Camera audio is discussed in more detail below.
If your camera has a headphone socket, get some headphones for listening to the audio.
Make sure you have multiple memory cards. Look carefully at the speed of the memory cards, slow ones are cheaper but they can't keep up with the speed of writing 1080p video. At a minimum, you should aim to buy memory cards that can handle one or two days worth of data for whatever it is you do.
A tripod is essential for most types of video. If you use a particularly heavy camera or lens or if you are outdoors and it may be windy you will need a heavier tripod for stability. For video, it is very useful to have a tripod with a handle for panning left and right but if the camera will be stationary for the whole recording then the handle is not essential.
Carrying at least one spare battery is another smart move. On one visit to the Inca Trail in Peru, we observed another member of our group hiking up and down the Andes with a brand new DSLR that they couldn't use because the battery was flat.
For extended periods of recording, batteries will not be sufficient and you will need to purchase a mains power supply (PSU). These are available for most types of DSLR and video camera. The camera vendors typically design cameras with unusual power sockets so that you can only use a very specific and heavily overpriced PSU from the same company. Don't forget a surge protector too.
There are various smartphone apps that allow you to remotely control the camera from the screen of your phone, such as the qDslrDashboard app. These often give a better preview than the screen built-in to the camera and may even allow you to use the touch screen to focus more quickly on a specific part of the picture. A regular USB cable is not suitable for this type of app, you need to buy a USB On-The-Go (OTG) cable.
Screenshot of qDslrDashboard app on a smartphone, controlling a DSLR camera
If you plan to copy the video from the camera to a computer at the event, you will need to make sure you have a fast memory card reader. The memory card readers in some laptops are quite slow and others can be quite fast so you may not need to buy an extra card reader.
Camera audio
Most cameras, including DSLRs, have a built-in microphone and a socket for connecting an external microphone.
The built-in microphones obtain very poor quality sound. For many events, it is much better to have independent microphones, such as a lapel microphone attached to a smartphone or wireless transmitter. Those solutions are described in part one of this blog series.
Nonetheless, there are still some benefits of capturing audio in the camera. The biggest benefit is the time synchronization: if you have audio recordings in other devices, you will need to align them with the video using post-production software. If the camera recorded an audio stream too, even if the quality is not very good, you can visualize the waveform on screen and use it to align the other audio recordings much more easily and precisely.
If the camera will be very close to the people speaking then it may be acceptable to use a microphone mounted on the camera. This will be convenient for post-production because the audio will be synchronized with the video. It may still not be as good as a lapel microphone though, but the quality of these camera-mounted microphones is still far higher than the built-in microphones. I've been trying the Rode VideoMic Pro, it is definitely better than recording with the built-in microphone on the camera and also better than the built-in microphone on my phone.
One problem that most people encounter is the sound of the lens autofocus mechanism being detected by the microphone. This occurs with both the built-in microphone and any other microphone you mount on the camera. A microphone mounted on top of the camera doesn't detect this noise with the same intensity as the built-in microphone but it is still present in the recordings.
If using a camera-mounted microphone to detect the audio from an audience, you may need to have an omnidirectional microphone. Many camera-mounted microphones are directional and will not detect very much sound from the sides or behind the camera.
When using any type of external microphone with the camera, it is recommend to disable automatic gain control (AGC) in the camera settings and then manually adjust the microphone sensitivity/volume level.
Use headphones
A final word on audio - most good cameras have an audio output socket. Connect headphones and wear them, to make sure you are always capturing audio. Otherwise, if the microphone's battery goes flat or if a wireless microphone goes out of range you may not notice.
Choosing a lens
The more light you get, the better. Bigger and more expensive lenses allow more light into the camera. Many of the normal lenses sold with a DSLR camera are acceptable but if it is a special occasion you may want to rent a more expensive lens for the day.
If you already have a lens, it is a very good idea to test it in conditions similar to those you expect for the event you want to record.
Recording duration limits
Most DSLR cameras with video capability impose a 30 minute maximum recording duration
This is basically the result of a friendly arrangement between movie studios and politicians to charge an extra tax on video recording technology and potentially make the movie studio bosses richer, supposedly justified by the fact that a tiny but exaggerated number of people use their cameras to record movies at the cinema. As a consequence, most DSLR manufacturers limit the duration of video recording so their product won't be subject to the tax, ensuring the retail price is lower and more attractive.
On top of this, many DSLR cameras also have a 4GB file size limit if they use the FAT filesystem. Recording 1080p video at a high frame rate may hit the file size limit in 10 minutes, well before you encounter the 30 minute maximum recording duration.
To deal with the file size issue, you can record at 720p instead of 1080p and use the frame rate 24fps.
For events longer than 30 minutes or where you really want 1080p or a higher frame rate, there are some other options you can consider:
Buy or rent a proper video camera instead of using a DSLR camera
Using multiple cameras that can stop and be restarted at different times.
Manually stopping and restarting the camera if there are breaks in the event where it is safe to do so.
Use an app to control the camera and program it to immediately restart the recording each time it stops
Extract the raw output from the camera's HDMI socket and record into some other device or computer. There are several purpose-built devices
that can be used this way with an embedded SSD for storage.
Camera settings
There are many online tutorials and demonstration videos on YouTube that will help you optimize the camera settings for video.
You may have already made recordings using the automatic mode. Adjusting some or all of the settings manually may help you create a more optimal recording. You will need to spend some time familiarizing yourself with the settings first.
The first thing to check is white balance. This tells the camera the type of lighting in the location. If you set this incorrectly then the colours will be distorted. Many cameras have the ability to automatically set the white balance.
For video, you may be able to change one or more settings that control the recording quality. These settings control the file compression ratio and image size. Typical image size settings are 720p and 1080p. Compression ratio may be controlled by a high/medium/low quality setting. Choosing the highest quality and biggest picture requires more space on the memory card and also means you reach the 4GB file size limit more quickly. A higher quality setting also implies a faster memory card is required, because the rate of megabytes per second written to the memory card is higher.
Next you need to think about the frame rate. Events that involve fast moving subjects, such as sports, typically benefit from a higher frame rate. For other events it is quite acceptable to use 24 frames per second (fps). Higher frame rates also imply bigger file size and a requirement for a faster memory card.
Once you have decided on the frame rate, the next thing to do is set the shutter speed. Use a shutter speed that is double the frame rate. For example, if using 24fps or 25fps, use a 1/50 shutter speed.
The final two settings you need to adjust are the ISO and aperture. Set these based on the lighting conditions and extent to which the subjects are moving. For example, if the setting is dark or if you are trying to record fast moving subjects like athletes, vehicles or animals, use an ISO value of 800 or higher. Once you have chosen ISO, adjust the aperture to ensure the picture is sufficiently illuminated. Aperture also has a significant impact on the depth of field.
Operating the camera: zoom and focus
Many people use zoom lenses. It is not always necessary to change the zoom while recording a video, you can use software to zoom in and out on individual parts of the picture when editing it in post-production. If you do change the zoom while recording, it may be more difficult to maintain focus.
Almost all lenses support manual focus (turning the focus ring by hand) and many support automatic focus.
When shooting photographs with a DSLR, the mirror is down and the camera can use dedicated sensors for focus and light sensing.
When shooting video, the mirror is up and the camera can not use the same focus sensors that are used in photography. Video recording uses a digital focussing algorithm based on contrast in the picture. If you take a lot of photos you are probably quite accustomed to the fast and precise autofocus for photography and you will notice that keeping a video in focus is more challenging.
As mentioned already, one of the first things you can do to keep focus simple is to avoid zooming while recording. Record in a higher resolution than you require and then zoom with software later. Some people record using 4k resolution even when they only want to produce a 720p video, as they can digitally zoom in to different parts of the 4k recording without losing detail.
If the subject is very stationary (people sitting at a desk for an interview is a typical example), you may be able to set the camera to manual focus and not change it at all while recording.
If you choose to enable autofocus while recording, any built-in camera microphone or microphone mounted on the camera is likely to detect sounds from the motorized focus system.
Ultimately, the autofocus mechanism is not accurate for all subjects and you may be unable to stop them moving around so you will need to change the focus manually while recording. It requires some practice to be able to do this quickly without overshooting the right focus. To make life more tricky, Nikon and Canon focus rings rotate in the opposite direction, so if you are proficient using one brand you may feel awkward if you ever have to use the other. A good way to practice this skill is to practice while in the car or on the train, pointing at different subjects outside the window and trying to stay in focus as you move from one subject to the next.
Make a trial run
Many events, from weddings right up to the Olympic Games opening ceremony, have a trial run the day before. One reason for that is to test the locations and settings of all the recording and broadcasting equipment.
If a trial run isn't possible for your event, you may find some similar event to practice recording and test your equipment. For example, if you are planning to record a wedding, you could try and record a Sunday mass in the same church.
Backup and duplicate the recordings before leaving the event
If you only have one copy of the recordings and the equipment is stolen or damaged you may be very disappointed. Before your event, make a plan to duplicate the raw audio and video recordings so that several people can take copies away with them. Decide in advance who will be responsible for this, ensure there will be several portable hard disks and estimate how much time it will take to prepare the copies and factor this into the schedule.
Conclusion
All the products described can be easily purchased from online retailers. You may not need every accessory that is mentioned as it depends on the type of event you record. The total cost of buying or renting the necessary accessories may be as much as the cost of the camera itself so if you are new to this you may need to think carefully about making a budget with a spreadsheet to do it correctly.
Becoming familiar with the camera controls and practicing the techniques for manual focus and zoom can take weeks or months. If you enjoy photography this can be time well spent but if you don't enjoy it then you may not want to commit the time necessary to make good quality video.
Don't rule out options like renting equipment instead of buying it or crowdsourcing, asking several participants or friends to help make recordings with their own equipment.
For many events, audio is far more indispensable than video and as emphasizing at the beginning of this article, it is recommended that you should be one hundred percent confident in your strategy for recording audio before you start planning to record video.
So we've recently spent our first week together in Helsinki, Finland.
Mostly this has been stress-free, but there are always oddities about living in new places, and moving to Europe didn't minimize them.
For the moment I'll gloss over the differences and instead document the computer problem I had. Our previous shared-desktop system had a pair of drives configured using software RAID. I pulled one of the drives to use in a smaller-cased system (smaller so it was easier to ship).
Only one drive of a pair being present make mdadm scream, via email, once per day, with reports of failure.
The output of cat /proc/mdstat looked like this:
md2 : active raid1 sdb6[0] [LVM-storage-area]
      1903576896 blocks super 1.2 2 near-copies [2/1] [_U]
md1 : active raid10 sdb5[1] [/root]
      48794112 blocks super 1.2 2 near-copies [2/1] [_U]
md0 : active raid1 sdb1[0]  [/boot]
      975296 blocks super 1.2 2 near-copies [2/1] [_U]
See the "_" there? That's the missing drive. I couldn't remove the drive as it wasn't present on-disk, so this failed:
Similarly removing all "detached" drives failed, so the only thing to do was to mess around re-creating the arrays with a single drive:
lvchange -a n shelob-vol
mdadm --stop /dev/md2
mdadm --create /dev/md2 --level=1 --raid-devices=1 /dev/sdb6 --force
..
I did that on the LVM-storage area, and the /boot partition, but "/" is still to be updated. I'll use knoppix/similar to do it next week. That'll give me a "RAID" system which won't alert every day.
Thanks to the joys of re-creation the UUIDs of the devices changed, so /etc/mdadm/mdadm.conf needed updating. I realized that too late, when grub failed to show the menu, because it didn't find it's own UUID. Handy recipe for the future:
set prefix=(md/0)/grub/
insmod linux
linux (md/0)/vmlinuz-3.16.0-0.bpo.4-amd64 root=/dev/md1
initrd (md/0)//boot/initrd.img-3.16.0-0.bpo.4-amd64
boot
Yesterday at the local LUG (@Gruppo Linux Como ) somebody commented on the mix of old and new in my cloth-wrapped emergency electronics kit (you know, the kind of things you carry around with a microcontroller board http://espruino.com and a few components in case you suddenly have an idea for a project :-) ).
Anyway, there was a bit of conversation on how this looked like a grandmother-ish thing, especially since it was in the same bag with a knitted WIP sock, and I mentioned the Japanese #furoshiki revival and how I believe that good old things are good, and good new things are good, and why not use them both?
Somebody else, who may or not be @Davide De Prisco asked me to let him have the links I mentioned, which include:
Whether it is a technical talk at a conference, a political rally or a budget-conscious wedding, many people now have most of the technology they need to record it and post-process the recording themselves.
For most events, audio is an essential part of the recording. There are exceptions: if you take many short clips from a wedding and mix them together you could leave out the audio and just dub the couple's favourite song over it all. For a video of a conference presentation, though, the the speaker's voice is essential.
These days, it is relatively easy to get extremely high quality audio using a lapel microphone attached to a smartphone. Lets have a closer look at the details.
Using a lavalier / lapel microphone
Full wireless microphone kits with microphone, transmitter and receiver are usually $US500 or more.
The lavalier / lapel microphone by itself, however, is relatively cheap, under $US100.
The lapel microphone is usually an omnidirectional microphone that will pick up the voices of everybody within a couple of meters of the person wearing it. It is useful for a speaker at an event, some types of interviews where the participants are at a table together and it may be suitable for a wedding, although you may want to remember to remove it from clothing during the photos.
There are two key features you need when using such a microphone with a smartphone:
TRRS connector (this is the type of socket most phones and many laptops have today)
Microphone impedance should be at least 1k (that is one kilo Ohm) or the phone may not recognize when it is connected
Many leading microphone vendors have released lapel mics with these two features aimed specifically at smartphone users. I have personally been testing the Rode smartLav+
Choice of phone
There are almost 10,000 varieties of smartphone just running Android, as well as iPhones, Blackberries and others. It is not practical for most people to test them all and compare audio recording quality.
It is probably best to test the phone you have and ask some friends if you can make test recordings with their phones too for comparison. You may not hear any difference but if one of the phones has a poor recording quality you will hopefully notice that and exclude it from further consideration.
A particularly important issue is being able to disable AGC in the phone. Android has a standard API for disabling AGC but not all phones or Android variations respect this instruction.
I have personally had positive experiences recording audio with a Samsung Galaxy Note III.
Choice of recording app
Most Android distributions have at least one pre-installed sound recording app. Look more closely and you will find not all apps are the same. For example, some of the apps have aggressive compression settings that compromise recording quality. Others don't work when you turn off the screen of your phone and put it in your pocket. I've even tried a few that were crashing intermittently.
The app I found most successful so far has been Diktofon, which is available on both F-Droid and Google Play. Diktofon has been designed not just for recording, but it also has some specific features for transcribing audio (currently only supporting Estonian) and organizing and indexing the text. I haven't used those features myself but they don't appear to cause any inconvenience for people who simply want to use it as a stable recording app.
As the app is completely free software, you can modify the source code if necessary. I recently contributed patches enabling 48kHz recording and disabling AGC. At the moment, the version with these fixes has just been released and appears in F-Droid but not yet uploaded to Google Play. The fixes are in version 0.9.83 and you need to go into the settings to make sure AGC is disabled and set the 48kHz sample rate.
Whatever app you choose, the following settings are recommended:
16 bit or greater sample size
48kHz sample rate
Disable AGC
WAV file format
Whatever app you choose, test it thoroughly with your phone and microphone. Make sure it works even when you turn off the screen and put it in your pocket while wearing the lapel mic for an hour. Observe the battery usage.
Gotchas
Now lets say you are recording a wedding and the groom has that smartphone in his pocket and the mic on his collar somewhere. What is the probability that some telemarketer calls just as the couple are exchanging vows? What is the impact on the recording?
Maybe some apps will automatically put the phone in silent mode when recording. More likely, you need to remember this yourself. These are things that are well worth testing though.
Also keep in mind the need to have sufficient storage space and to check whether the app you use is writing to your SD card or internal memory. The battery is another consideration.
In a large event where smartphones are being used instead of wireless microphones, possibly for many talks in parallel, install a monitoring app like Ganglia on the phones to detect and alert if any phone has weak wifi signal, low battery or a lack of memory.
Live broadcasts and streaming
Some time ago I tested RTP multicasting from Lumicall on Android. This type of app would enable a complete wireless microphone setup with live streaming to the internet at a fraction of the cost of a traditional wireless microphone kit. This type of live broadcast could also be done with WebRTC on the Firefox app.
Conclusion
If you research the topic thoroughly and spend some time practicing and testing your equipment, you can make great audio recordings with a smartphone and an inexpensive lapel microphone.
In subsequent blogs, I'll look at tips for recording video and doing post-production with free software.
Back in 2010 when I needed an ADSL2 router in the US I bought a Netgear DGN3500. It did what I wanted out of the box and being based on a MIPS AR9 (ARX100) it seemed likely OpenWRT support might happen. Long story short I managed to overwrite u-boot (the bootloader) while flashing a test image I d built. I ended up buying a new router (same model) to get my internet connection back ASAP and never getting around to fully fixing the broken one. Until yesterday. Below is how I fixed it; both for my own future reference and in case it s of use any any other unfortunate soul.
The device has clear points for serial and JTAG and it was easy enough (even with my basic soldering skills) to put a proper header on. The tricky bit is that the flash is connected via SPI, so it s not just a matter of attaching JTAG, doing a scan and reflashing from the JTAG tool. I ended up doing RAM initialisation, then copying a RAM copy of u-boot in and then using that to reflash. There may well have been a better way, but this worked for me. For reference the failure mode I saw was an infinitely repeating:
ROM VER: 1.1.3
CFG 05
My JTAG device is a Bus Pirate v3b which is much better than the parallel port JTAG device I built the first time I wanted to do something similar. I put the latest firmware (6.1) on it.
All of this was done from my laptop, which runs Debian testing (stretch). I used the OpenOCD 0.9.0-1+b1 package from there.
Daniel Schwierzeck has some OpenOCD scripts which include a target definition for the ARX100. I added a board definition for the DGN3500 (I ve also send Daniel a patch to add this to his repo).
I tied all of this together with an openocd.cfg that contained:
I was then able to power on the router and type dgn3500_ramboot into the OpenOCD session. This fetched my RAM copy of u-boot from dgn3500_ram/u-boot.bin, copied it into the router s memory and started it running. From there I had a u-boot environment with access to the flash commands and was able to restore the original Netgear image (and once I was sure that was working ok I subsequently upgraded to the Barrier Breaker OpenWRT image).
After asking the Norwegian Broadcasting Company (NRK)
why
they can broadcast and stream H.264 video without an agreement with
the MPEG LA, I was wiser, but still confused. So I asked MPEG LA
if their understanding matched that of NRK. As far as I can tell, it
does not.
I started by asking for more information about the various
licensing classes and what exactly is covered by the "Internet
Broadcast AVC Video" class that NRK pointed me at to explain why NRK
did not need a license for streaming H.264 video:
According to
a
MPEG LA press release dated 2010-02-02, there is no charge when
using MPEG AVC/H.264 according to the terms of "Internet Broadcast AVC
Video". I am trying to understand exactly what the terms of "Internet
Broadcast AVC Video" is, and wondered if you could help me. What
exactly is covered by these terms, and what is not?
The only source of more information I have been able to find is a
PDF named
AVC
Patent Portfolio License Briefing, which states this about the
fees:
Where End User pays for AVC Video
Subscription (not limited by title) 100,000 or fewer
subscribers/yr = no royalty; > 100,000 to 250,000 subscribers/yr =
$25,000; >250,000 to 500,000 subscribers/yr = $50,000; >500,000 to
1M subscribers/yr = $75,000; >1M subscribers/yr = $100,000
Title-by-Title - 12 minutes or less = no royalty; >12 minutes in
length = lower of (a) 2% or (b) $0.02 per title
Where remuneration is from other sources
Free Television - (a) one-time $2,500 per transmission encoder or
(b) annual fee starting at $2,500 for > 100,000 HH rising to
maximum $10,000 for >1,000,000 HH
Internet Broadcast AVC Video (not title-by-title, not subscription)
no royalty for life of the AVC Patent Portfolio License
Am I correct in assuming that the four categories listed is the
categories used when selecting licensing terms, and that "Internet
Broadcast AVC Video" is the category for things that do not fall into
one of the other three categories? Can you point me to a good source
explaining what is ment by "title-by-title" and "Free Television" in
the license terms for AVC/H.264?
Will a web service providing H.264 encoded video content in a
"video on demand" fashing similar to Youtube and Vimeo, where no
subscription is required and no payment is required from end users to
get access to the videos, fall under the terms of the "Internet
Broadcast AVC Video", ie no royalty for life of the AVC Patent
Portfolio license? Does it matter if some users are subscribed to get
access to personalized services?
Note, this request and all answers will be published on the
Internet.
The answer came quickly from Benjamin J. Myers, Licensing Associate
with the MPEG LA:
Thank you for your message and for your interest in MPEG LA. We
appreciate hearing from you and I will be happy to assist you.
As you are aware, MPEG LA offers our AVC Patent Portfolio License
which provides coverage under patents that are essential for use of
the AVC/H.264 Standard (MPEG-4 Part 10). Specifically, coverage is
provided for end products and video content that make use of AVC/H.264
technology. Accordingly, the party offering such end products and
video to End Users concludes the AVC License and is responsible for
paying the applicable royalties.
Regarding Internet Broadcast AVC Video, the AVC License generally
defines such content to be video that is distributed to End Users over
the Internet free-of-charge. Therefore, if a party offers a service
which allows users to upload AVC/H.264 video to its website, and such
AVC Video is delivered to End Users for free, then such video would
receive coverage under the sublicense for Internet Broadcast AVC
Video, which is not subject to any royalties for the life of the AVC
License. This would also apply in the scenario where a user creates a
free online account in order to receive a customized offering of free
AVC Video content. In other words, as long as the End User is given
access to or views AVC Video content at no cost to the End User, then
no royalties would be payable under our AVC License.
On the other hand, if End Users pay for access to AVC Video for a
specific period of time (e.g., one month, one year, etc.), then such
video would constitute Subscription AVC Video. In cases where AVC
Video is delivered to End Users on a pay-per-view basis, then such
content would constitute Title-by-Title AVC Video. If a party offers
Subscription or Title-by-Title AVC Video to End Users, then they would
be responsible for paying the applicable royalties you noted below.
Finally, in the case where AVC Video is distributed for free
through an "over-the-air, satellite and/or cable transmission", then
such content would constitute Free Television AVC Video and would be
subject to the applicable royalties.
For your reference, I have attached
a
.pdf copy of the AVC License. You will find the relevant
sublicense information regarding AVC Video in Sections 2.2 through
2.5, and the corresponding royalties in Section 3.1.2 through 3.1.4.
You will also find the definitions of Title-by-Title AVC Video,
Subscription AVC Video, Free Television AVC Video, and Internet
Broadcast AVC Video in Section 1 of the License. Please note that the
electronic copy is provided for informational purposes only and cannot
be used for execution.
I hope the above information is helpful. If you have additional
questions or need further assistance with the AVC License, please feel
free to contact me directly.
Having a fresh copy of the license text was useful, and knowing
that the definition of Title-by-Title required payment per title made
me aware that my earlier understanding of that phrase had been wrong.
But I still had a few questions:
I have a small followup question. Would it be possible for me to get
a license with MPEG LA even if there are no royalties to be paid? The
reason I ask, is that some video related products have a copyright
clause limiting their use without a license with MPEG LA. The clauses
typically look similar to this:
This product is licensed under the AVC patent portfolio license for
the personal and non-commercial use of a consumer to (a) encode
video in compliance with the AVC standard ("AVC video") and/or (b)
decode AVC video that was encoded by a consumer engaged in a
personal and non-commercial activity and/or AVC video that was
obtained from a video provider licensed to provide AVC video. No
license is granted or shall be implied for any other use. additional
information may be obtained from MPEG LA L.L.C.
It is unclear to me if this clause mean that I need to enter into
an agreement with MPEG LA to use the product in question, even if
there are no royalties to be paid to MPEG LA. I suspect it will
differ depending on the jurisdiction, and mine is Norway. What is
MPEG LAs view on this?
According to the answer, MPEG LA believe those using such tools for
non-personal or commercial use need a license with them:
With regard to the Notice to Customers, I would like to begin by
clarifying that the Notice from Section 7.1 of the AVC License
reads:
THIS PRODUCT IS LICENSED UNDER THE AVC PATENT PORTFOLIO LICENSE FOR
THE PERSONAL USE OF A CONSUMER OR OTHER USES IN WHICH IT DOES NOT
RECEIVE REMUNERATION TO (i) ENCODE VIDEO IN COMPLIANCE WITH THE AVC
STANDARD ("AVC VIDEO") AND/OR (ii) DECODE AVC VIDEO THAT WAS ENCODED
BY A CONSUMER ENGAGED IN A PERSONAL ACTIVITY AND/OR WAS OBTAINED FROM
A VIDEO PROVIDER LICENSED TO PROVIDE AVC VIDEO. NO LICENSE IS GRANTED
OR SHALL BE IMPLIED FOR ANY OTHER USE. ADDITIONAL INFORMATION MAY BE
OBTAINED FROM MPEG LA, L.L.C. SEE HTTP://WWW.MPEGLA.COM
The Notice to Customers is intended to inform End Users of the
personal usage rights (for example, to watch video content) included
with the product they purchased, and to encourage any party using the
product for commercial purposes to contact MPEG LA in order to become
licensed for such use (for example, when they use an AVC Product to
deliver Title-by-Title, Subscription, Free Television or Internet
Broadcast AVC Video to End Users, or to re-Sell a third party's AVC
Product as their own branded AVC Product).
Therefore, if a party is to be licensed for its use of an AVC
Product to Sell AVC Video on a Title-by-Title, Subscription, Free
Television or Internet Broadcast basis, that party would need to
conclude the AVC License, even in the case where no royalties were
payable under the License. On the other hand, if that party (either a
Consumer or business customer) simply uses an AVC Product for their
own internal purposes and not for the commercial purposes referenced
above, then such use would be included in the royalty paid for the AVC
Products by the licensed supplier.
Finally, I note that our AVC License provides worldwide coverage in
countries that have AVC Patent Portfolio Patents, including
Norway.
I hope this clarification is helpful. If I may be of any further
assistance, just let me know.
The mentioning of Norwegian patents made me a bit confused, so I
asked for more information:
But one minor question at the end. If I understand you correctly,
you state in the quote above that there are patents in the AVC Patent
Portfolio that are valid in Norway. This make me believe I read the
list available from <URL:
http://www.mpegla.com/main/programs/AVC/Pages/PatentList.aspx
> incorrectly, as I believed the "NO" prefix in front of patents
were Norwegian patents, and the only one I could find under Mitsubishi
Electric Corporation expired in 2012. Which patents are you referring
to that are relevant for Norway?
Again, the quick answer explained how to read the list of patents
in that list:
Your understanding is correct that the last AVC Patent Portfolio
Patent in Norway expired on 21 October 2012. Therefore, where AVC
Video is both made and Sold in Norway after that date, then no
royalties would be payable for such AVC Video under the AVC License.
With that said, our AVC License provides historic coverage for AVC
Products and AVC Video that may have been manufactured or Sold before
the last Norwegian AVC patent expired. I would also like to clarify
that coverage is provided for the country of manufacture and the
country of Sale that has active AVC Patent Portfolio Patents.
Therefore, if a party offers AVC Products or AVC Video for Sale in
a country with active AVC Patent Portfolio Patents (for example,
Sweden, Denmark, Finland, etc.), then that party would still need
coverage under the AVC License even if such products or video are
initially made in a country without active AVC Patent Portfolio
Patents (for example, Norway). Similarly, a party would need to
conclude the AVC License if they make AVC Products or AVC Video in a
country with active AVC Patent Portfolio Patents, but eventually Sell
such AVC Products or AVC Video in a country without active AVC Patent
Portfolio Patents.
As far as I understand it, MPEG LA believe anyone using Adobe
Premiere and other video related software with a H.264 distribution
license need a license agreement with MPEG LA to use such tools for
anything non-private or commercial, while it is OK to set up a
Youtube-like service as long as no-one pays to get access to the
content. I still have no clear idea how this applies to Norway, where
none of the patents MPEG LA is licensing are valid. Will the
copyright terms take precedence or can those terms be ignored because
the patents are not valid in Norway?
This is one of my regular walking routes, from home to Five Island Lake and back. It s about 15 km. I usually walk too briskly to capture the many visual delights of this route. Today on the trip out, I stopped and took several photos to share with you.
[slb_group] An early morning walk up the BLT bike trail to Five Island Lake (pictured here) and back. Click to start the slideshow.
The walk starts from our subdivision. It s cool and clear when I leave.
Saskatoon berries
Saskatoon berries
Saskatoon berries
Dew on leaves
Dew on leaves
Pitcher plants
Something s attacking this alder. Maybe woolly aphids?
Wild strawberries
Wild strawberry
Wild strawberry
Wild strawberry
Wild strawberries
Daisy
Daisy
Vetch
Vetch
Water lily
Water lily
Sensitive fern
Squirrel!
Cranberry Lake
Cranberry Lake
[/slb_group]
What happened about the reproducible
builds effort this week:
Toolchain fixes
Norbert Preining uploaded texinfo/6.0.0.dfsg.1-2 which makes texinfo indices reproducible. Original patch by Chris Lamb.
Lunar submitted recently rebased patches to make the file order of files inside .deb stable.
akira filled #789843 to make tex4ht stop printing timestamps in its HTML output by default.
Dhole wrote a patch for xutils-dev to prevent timestamps when creating gzip compresed files.
Reiner Herrmann sent a follow-up patch for wheel to use UTC as timezone when outputing timestamps.
Mattia Rizzolo started a discussion regarding the failure to build from source of subversion when -Wdate-time is added to CPPFLAGS which happens when asking dpkg-buildflags to use the reproducible profile. SWIG errors out because it doesn't recognize the aforementioned flag.
Trying to get the .buildinfo specification to more definitive state, Lunar started a discussion on storing the checksums of the binary package used in dpkg status database.
akira discovered while proposing a fix for simgrid that CMake internal command to create tarballs would record a timestamp in the gzip header. A way to prevent it is to use the GZIP environment variable to ask gzip not to store timestamps, but this will soon become unsupported. It's up for discussion if the best place to fix the problem would be to fix it for all CMake users at once.
Infrastructure-related work
Andreas Henriksson did a delayed NMU upload of pbuilder which adds minimal support for build profiles and includes several fixes from Mattia Rizzolo affecting reproducibility tests.
Neils Thykier uploaded lintian which both raises the severity of package-contains-timestamped-gzip and avoids false positives for this tag (thanks to Tomasz Buchert).
Petter Reinholdtsen filled #789761 suggesting that how-can-i-help should prompt its users about fixing reproducibility issues.
Packages fixed
The following packages became reproducible due to changes in their
build dependencies:
autorun4linuxcd,
libwildmagic,
lifelines,
plexus-i18n,
texlive-base,
texlive-extra,
texlive-lang.
The following packages became reproducible after getting fixed:
Patches submitted which have not made their way to the archive yet:
#789648 on apt-dater by Dhole: allow the build date to be set externally and set it to the time of the latest debian/changelog entry.
#789715 on simgrid by akira: fix doxygen and patch CMakeLists.txt to give GZIP=-n for tar.
#789728 on aegisub by Juan Picca: get rid of __DATE__ and __TIME__ macros.
#789747 on dipy by Juan Picca: set documentation date for Sphinx.
#789748 on jansson by Juan Picca: set documentation date for Sphinx.
#789799 on tmexpand by Chris Lamb: remove timestamps, hostname and username from the build output.
#789804 on libevocosm by Chris Lamb: removes generated files which include extra information about the build environment.
#789963 on qrfcview by Dhole: removes the timestamps from the the generated PNG icon.
#789965 on xtel by Dhole: removes extra timestamps from compressed files by gzip and from the PNG icon.
#790010 on simbody by akira: set HTML_TIMESTAMP=NO in Doxygen configuration.
#790023 on stx-btree by akira: pass HTML_TIMESTAMP=NO to Doxygen.
#790034 on siscone by akira: removes $datetime from footer.html used by Doxygen.
#790035 on thepeg by akira: set HTML_TIMESTAMP=NO in Doxygen configuration.
#790072 on libxray-spacegroup-perl by Chris Lamb: set $Storable::canonical = 1 to make space_groups.db.PL output deterministic.
#790074 on visp by akira: set HTML_TIMESTAMP=NO in Doxygen configuration.
#790081 on wfmath by akira: set HTML_TIMESTAMP=NO in Doxygen configuration.
#790082 on wreport by akira: set HTML_TIMESTAMP=NO in Doxygen configuration.
#790088 on yudit by Chris Lamb: removes timestamps from the build system by passing a static comment.
#790122 on clblas by akira: set HTML_TIMESTAMP=NO in Doxygen configuration.
#790133 on dcmtk by akira: set HTML_TIMESTAMP=NO in Doxygen configuration.
#790139 on glfw3 by akira: patch for Doxygen timestamps further improved by James Cowgill by removing $datetime from the footer.
#790228 on gtkspellmm by akira: set HTML_TIMESTAMP=NO in Doxygen configuration.
#790232 on ucblogo by Reiner Herrmann: set LC_ALL to C before sorting.
#790235 on basemap by Juan Picca: set documentation date for Sphinx.
#790258 on guymager by Reiner Herrmann: use the date from the latest debian/changelog as build date
#790309 on pelican by Chris Lamb: removes useless (and unreproducible) tests.
debbindiff development
debbindiff/23 includes a few bugfixes by Helmut Grohne that result in a significant speedup (especially on larger files). It used to exhibit the quadratic time string concatenation antipattern.
Version 24 was released on June 23rd in a hurry to fix an undefined variable introduced in the previous version. (Reiner Herrmann)
debbindiff now has a test suite! It is written using the PyTest framework (thanks Isis Lovecruft for the suggestion). The current focus has been on the comparators, and we are now at 93% of code coverage for these modules.
Several problems were identified and fixed in the process: paths appearing in output of javap, readelf, objdump, zipinfo, unsqusahfs; useless MD5 checksum and last modified date in javap output; bad handling of charsets in PO files; the destination path for gzip compressed files not ending in .gz; only metadata of cpio archives were actually compared. stat output was further trimmed to make directory comparison more useful.
Having the test suite enabled a refactoring of how comparators were written, switching from a forest of differences to a single tree. This helped removing dust from the oldest parts of the code.
Together with some other small changes, version 25 was released on June 27th. A follow up release was made the next day to fix a hole in the test suite and the resulting unidentified leftover from the comparator refactoring. (Lunar)
Documentation update
Ximin Luo improved code examples for some proposed environment variables for reference timestamps. Dhole added an example on how to fix timestamps C pre-processor macros by adding a way to set the build date externally. akira documented her fix for tex4ht timestamps.
Package reviews
94 obsolete
reviews have
been removed, 330 added and 153 updated this week.
Hats off for Chris West (Faux) who investigated many fail to build from source issues and reported the relevant bugs.
Slight improvements were made to the scripts for editing the review database, edit-notes and clean-notes. (Mattia Rizzolo)
Meetings
A meeting was held on June 23rd. Minutes are available.
The next meeting will happen on Tuesday 2015-07-07 at 17:00 UTC.
Misc.
The Linux Foundation announced that it was funding the work of Lunar and h01ger on reproducible builds in Debian and other distributions. This was further relayed in a Bits from Debian blog post.
Here s a photo journal of a walk I just completed around the Pot Lake loop of the Bluff Wilderness Hiking Trail. Hope you enjoy it!
I was dissatisfied with my initial post, so have reduced the size to improve load time, changed the gallery software and have rewritten many of the captions.
[slb_group] Click this photo to start the slideshow.
The Bluff Wilderness Hiking Trail is a series of four loops. Today I ll tackle only the first in order to get as many pictures as possible, and because when hiking solo, I prefer to stay on the more heavily traveled part. In late summer, I ll probably do all four loops with my friend Ryan again. Meanwhile, I ll stay in shape coming out here when I can for shorter walks.
The trail starts here.
Right away, even before heading between the marker stones, there s a pretty view of Cranberry Lake off to the right.
Pink lady slippers have been plentiful this year!
All along the trail, you can find hundreds, if not thousands of these.
Boardwalks provide dry passage across the boggy bits.
The pitcher plants are thriving, too.
The vines with tiny, round leaves are wintergreen. Tasty!
I ve not seen anything larger than a deer out here.
Roots and rocks are a recurring theme.
Many feet beating down on the first loop have packed the earth hard and have exposed more roots than you ll see deeper into the trail system where fewer hikers travel.
Step carefully.
Sheep laurel is an eye-catcher.
To me, they look like little, pink jewels.
Yellow markers clearly mark the Pot Lake loop.
At crucial junctures there are some signs to point you the right way.
If you re looking only at your feet, you may see black circles marked with arrows on some of the rocks, also pointing the way.
The vegetation varies from scraggly and clinging to the rocks, to lush and green.
The path is wet in parts. Nothing impassible, though.
On the first loop in particular, and even within only the first kilometre, there are some pretty stunning views of the lake.
Very quickly, you ll find yourself perched up top on the rocks.
On this stretch, you need to hop a bit from one rock to the next.
Just as quickly as you ascended, you descend back down to the lake again.
A good place to stop and have a snack.
The start of the first loop, itself.
I chide myself for not having discovered this trail until about 2007, even though we moved out here in 2005. It s a treasure we re indebted to the WRWEO for preserving.
Leave some comments in the box, if you like.
You ll find these maps along the way to track your progress.
Remember to follow proper trail etiquette.
A particularly steep climb!
Despite the best trail maintenance efforts, water still goes where it wants!
Good to have boots.
Another steep climb.
This tree is chattering at me. Raising quite a racket. What s in the hole?
I patiently wait with my camera to get a good shot of the tree s occupants.
Mother woodpecker, feeding her babies!
As the feeding continues, the chirping intensifies!
Up on top of a big rock with a view over the lake is another favourite stopping place for a snack.
The view at my snack break rock. I never get tired of it.
There are some pretty big boulders.
Next time I ll bring a friend to stand under it for scale.
Another terrific view.
A stream just before the first portage.
This portage connects Cranberry Lake with Pot Lake.
The portage is clearly marked.
The Pot Lake end of the portage.
One of several upturned trees, with the roots now forming a wall along one side of the trail.
The spiral of the roots mimics the spiral split in this boulder which you can walk all of the way into until you reach the centre.
Rocks and trees and trees and rocks
White pine catkins.
Suddenly the close forest opens up into a wide view all around.
My favourite stunted tamarack, clinging to the rocks.
Last year s cones. This year s aren t out yet on this tree.
I love the tamarack s delicate new needles.
These blueberries have a head start. Can t wait until it s time to harvest them.
Nearly at the top of the Pot Lake loop. This is Pot Lake, itself.
I was struck by this one little blighted berry, showing a blush of distress-induced colour amongst the green ones.
Another view, nearly at the top.
A sign beneath the map: Rare Plant Species: Mountain Sandwort Arenaria groenlandica. Use caution and stay on designated trails. Avoid disturbing habitat.
Finally, the top. A map to mark your progress.
Apparently the Mountain Sandwort, right at the base of the sign.
The mountain sandwort is a pretty, delicate little thing.
After passing the sign, the view from the top over Cranberry Lake, indeed both lakes, is a reward worth climbing all of the way up to see.
Some other hiker has left a cairn.
The descent is not too steep at first.
The approach down to the back side of Pot Lake from the top is marked by exposed bedrock and scrubby plants.
Finally back to some cover, which is welcome on hotter days. A ferny fairyland.
It s not all abrupt ups and downs. Here s an easy, winding stretch of trail.
Cinnamon ferns.
Ambling along.
Rounding the end of Pot Lake.
Not very long after reaching the lake, the path climbs several metres up above it.
There are some nice, rootless bits on this side of the loop, giving your ankles and knees a break.
This guy seemed extremely agitated to see me.
A new tamarack cone!
Did I mention I like tamaracks?
The steep descent back to Cranberry Lake again.
Finally back where the loop starts.
Recently, I've been fighting with the never ending issue of timezones. I never
thought I would have plunged into this rabbit hole, but hacking on OpenStack
and Gnocchi I felt into that trap easily is, thanks to Python.
Why you really, really, should never ever deal with timezones
To get a glimpse of the complexity of timezones, I recommend that you watch
Tom Scott's video on the subject. It's fun and it
summarizes remarkably well the nightmare that timezones are and why you should
stop thinking that you're smart.
The importance of timezones in applications
Once you've heard what Tom says, I think it gets pretty clear that a timestamp
without any timezone attached does not give any useful information. It should
be considered irrelevant and useless. Without the necessary context given by
the timezone, you cannot infer what point in time your application is really
referring to.
That means your application should never handle timestamps with no timezone
information. It should try to guess or raises an error if no timezone is
provided in any input.
Of course, you can infer that having no timezone information means UTC. This
sounds very handy, but can also be dangerous in certain applications or
language such as Python, as we'll see.
Indeed, in certain applications, converting timestamps to UTC and losing the
timezone information is a terrible idea. Imagine that a user create a recurring
event every Wednesday at 10:00 in its local timezone, say CET. If you convert
that to UTC, the event will end up being stored as every Wednesday at 09:00.
Now imagine that the CET timezone switches from UTC+01:00 to UTC+02:00: your
application will compute that the event starts at 11:00 CET every Wednesday.
Which is wrong, because as the user told you, the event starts at 10:00 CET,
whatever the definition of CET is. Not at 11:00 CET. So CET means CET, not
necessarily UTC+1.
As for endpoints like REST API, a thing I daily deal with, all timestamps
should include a timezone information. It's nearly impossible to know what
timezone the timestamps are in otherwise: UTC? Server local? User local? No way
to know.
Python design & defect
Python comes with a timestamp object named datetime.datetime. It can store
date and time precise to the microsecond, and is qualified of timezone "aware"
or "unaware", whether it embeds a timezone information or not.
To build such an object based on the current time, one can use
datetime.datetime.utcnow() to retrieve the date and time for the UTC
timezone, and datetime.datetime.now() to retrieve the date and time for the
current timezone, whatever it is.
As you can notice, none of these results contains timezone information. Indeed,
Python datetime API always returns unaware datetime objects, which is very
unfortunate. Indeed, as soon as you get one of this object, there is no way to
know what the timezone is, therefore these objects are pretty "useless" on
their own.
Armin Ronacher proposes that an application always consider that the unaware datetime objects from Python are considered as UTC.
As we just saw, that statement cannot be considered true for objects returned
by datetime.datetime.now(), so I would not advise doing so. datetime
objects with no timezone should be considered as a "bug" in the application.
Recommendations
My recommendation list comes down to:
Always use aware datetime object, i.e. with timezone information. That
makes sure you can compare them directly (aware and unaware datetime
objects are not comparable) and will return them correctly to users.
Leverage pytz to have timezone objects.
Use ISO 8601 as input and output
string format. Use datetime.datetime.isoformat() to return timestamps as string formatted
using that format, which includes the timezone information.
If you need to parse strings containing ISO 8601 formatted timestamp, you can
rely on the iso8601, which returns
timestamps with correct timezone information. This makes timestamps directly
comparable:
If you need to store those timestamps, the same rule should apply. If you rely
on MongoDB, it assumes that all the timestamp are in UTC,
so be careful when storing them you will have to normalize the timestamp to
UTC.
For MySQL, nothing is assumed, it's up to the application
to insert them in a timezone that makes sense to it. Obviously, if you have
multiple applications accessing the same database with different data sources,
this can end up being a nightmare.
PostgreSQL has a
special data type that is recommended
called timestamp with timezone, and which can store the timezone associated,
and do all the computation for you. That's the recommended way to store them
obviously. That does not mean you should not use UTC in most cases; that just
means you are sure that the timestamp are stored in UTC since it's written in
the database, and you check if any other application inserted timestamps with
different timezone.
OpenStack status
As a side note, I've improved OpenStack situation recently by changing the
oslo.utils.timeutils
module to deprecate some useless and dangerous functions. I've also added
support for returning timezone aware objects when using the
oslo_utils.timeutils.utcnow() function. It's not possible to make it a
default unfortunately for backward compatibility reason, but it's there
nevertheless, and it's advised to use it. Thanks to my colleague
Victor for the help!
Have a nice day, whatever your timezone is!
The recent AWS introduction of the Elastic File System gives you an automatic grow-and-shrink capability as an NFS mount, an exciting option that takes away the previous overhead in creating shared block file systems for EC2 instances.
However it should be noted that the same auto-management of capacity is not true in the EC2 instance s Elastic Block Store (EBS) block storage disks; sizing (and resizing) is left to the customer. With current 2015 EBS, one cannot simply increase the size of an EBS Volume as the storage becomes full; (as at June 2015) an EBS volume, once created, has fixed size. For many applications, that lack of resize function on its local EBS disks is not a problem; many server instances come into existence for a brief period, process some data and then get Terminated, so long term managment is not needed.
However for a long term data store on an instance (instead of S3, which I would recommend looking closely at from a durability and pricing fit), and where I want to harness the capacity to grow (or shrink) disk for my data, then I will need to leverage some slightly more advanced disk management. And just to make life interesting, I wish to do all this while the data is live and in-use, if possible.
Enter: Logical Volume Management, or LVM. It s been around for a long, long time: LVM 2 made a debut around 2002-2003 (2.00.09 was Mar 2004) and LVM 1 was many years before that so it s pretty mature now. It s a powerful layer that sits between your raw storage block devices (as seen by the operating system), and the partitions and file systems you would normally put on them.
In this post, I ll walk through the process of getting set up with LVM on Debian in the AWS EC2 environment, and how you d do some basic maintenance to add and remove (where possible) storage with minimal interruption.
Getting Started
First a little prep work for a new Debian instance with LVM.
As I d like to give the instance its own ability to manage its storage, I ll want to provision an IAM Role for EC2 Instances for this host. In the AWS console, visit IAM, Roles, and I ll create a new Role I ll name EC2-MyServer (or similar), and at this point I ll skip giving it any actual privileges (later we ll update this). As at this date, we can only associate an instance role/profile at instance launch time.
Now I launch a base image Debian EC2 instance launched with this IAM Role/Profile; the root file system is an EBS Volume. I am going to put data that I ll be managing on a separate disk from the root file system.
First, I need to get the LVM utilities installed. It s a simple package to install: the lvm2 package. From my EC2 instance I need to get root privileges (sudo -i) and run:
apt update && apt install lvm2
After a few moments, the package is installed. I ll choose a location that I want my data to live in, such as /opt/. I want a separate disk for this task for a number of reasons:
Root EBS volumes cannot currently be encrypted using Amazon s Encrypted EBS Volumes at this point in time. If I want to also use AWS encryption option, it ll have to be on a non-root disk. Note that instance-size restrictions also exist for EBS Encrypted Volumes.
It s possibly not worth make a snapshot of the Operating System at the same time as the user content data I am saving. The OS install (except the /etc/ folder) can almost entirely be recreated from a fresh install. so why snapshot that as well (unless that s your strategy for preserving /etc, /home, etc).
The type of EBS volume that you require may be different for different data: today (Apr 2015) there is a choice of Magnetic, General Purpose 2 (GP2) SSD, and Provisioned IO/s (PIOPS) SSD, each with different costs; and depending on our volume, we may want to select one for our root volume (operating system), and something else for our data storage.
I may want to use EBS snapshots to clone the disk to another host, without the base OS bundled in with the data I am cloning.
I will create this extra volume in the AWS console and present it to this host. I ll start by using a web browser (we ll use CLI later) with the EC2 console.
The first piece of information we need to know is where my EC2 instance is running. Specifically, the AWS Region and Availability Zone (AZ). EBS Volumes only exist within the one designated AZ. If I accidentally make the volume(s) in the wrong AZ, then I won t be able to connect them to my instance. It s not a huge issue, as I would just delete the volume and try again.
I navigate to the Instances panel of the EC2 Console, and find my instance in the list:
A (redacted) list of instance from the EC2 console.
Here I can see I have located an instance and it s running in US-East-1A: that s AZ A in Region US-East-1. I can also grab this with a wget from my running Debian instance by asking the MetaData server:
The returned text is simply: us-east-1a .
Time to navigate to Elastic Block Store , choose Volumes and click Create :
Creating a volume in AWS EC2: ensure the AZ is the same as your instance
You ll see I selected that I wanted AWS to encrypt this and as noted above, at this time that doesn t include the t2 family. However, you have an option of using encryption with LVM where the customer looks after the encryption key see LUKS.
What s nice is that I can do both have AWS Encrypted Volumes, and then use encryption on top of this, but I have to manage my own keys with LUKS, and should I lose them, then I can keep all the cyphertext!
I deselected this for my example (with a t2.micro), and continue; I could see the new volume in the list as creating , and then shortly afterwards as available . Time to attach it: select the disk, and either right-click and choose Attach , or from the menu at the top of the list, chose Actions -> Attach (both do the same thing).
Attaching a volume to an instance: you ll be prompted for the compatible instances in the same AZ.
At this point in time your EC2 instance will now notice a new disk; you can confirm this with dmesg tail , and you ll see something like:
[1994151.231815] xvdg: unknown partition table
(Note the time-stamp in square brackets will be different).
Previously at this juncture you would format the entire disk with your favourite file system, mount it in the desired location, and be done. But we re adding in LVM here between this raw device, and the filesystem we are yet to make .
Marking the block device for LVM
Our first operation with LVM is to put a marker on the volume to indicate it s being use for LVM so that when we scan the block device, we know what it s for. It s a really simple command:
pvcreate /dev/xvdg
The device name above (/dev/xvdg) should correspond to the one we saw from the dmesg output above. The output of the above is rather straight forward:
Physical volume "/dev/xvdg" successfully created
Checking our EBS Volume
We can check on the EBS volume which LVM sees as a Physical Volume using the pvs command.
Here we see the entire disk is currently unused.
Creating our First Volume Group
Next step, we need to make an initial LVM Volume Group which will use our Physical volume (xvdg). The Volume Group will then contain one (or more) Logical Volumes that we ll format and use. Again, a simple command to create a volume group by giving it its first physical device that it will use:
# vgcreate  OptVG /dev/xvdg
  Volume group "OptVG" successfully created
And likewise we can check our set of Volume Groups with vgs :
The Attribute flags here indicate this is writable, resizable, and allocating extents in normal mode. Lets proceed to make our (first) Logical Volume in this Volume Group:
# lvcreate -n OptLV -L 4.9G OptVG
  Rounding up size to full physical extent 4.90 GiB
  Logical volume "OptLV" created
You ll note that I have created our Logical Volume as almost the same size as the entire Volume Group (which is currently one disk) but I left some space unused: the reason for this comes down to keeping some space available for any jobs that LVM may want to use on the disk and this will be used later when we want to move data between raw disk devices.
If I wanted to use LVM for Snapshots, then I d want to leave more space free (unallocated) again.
We can check on our Logical Volume:
The attribytes indicating that the Logical Volume is writeable, is allocating its data to the disk in inherit mode (ie, as the Volume Group is doing), and that it is active. At this stage you may also discover we have a device /dev/OptVG/OptLV, and this is what we re going to format and mount. But before we do, we should review what file system we ll use.
Filesystems
Popular Linux file systems
Name
Shrink
Grow
Journal
Max File Sz
Max Vol Sz
btrfs
Y
Y
N
16 EB
16 EB
ext3
Y off-line
Y
Y
2 TB
32 TB
ext4
Y off-line
Y
Y
16 TB
1 EB
xfs
N
Y
Y
8 EB
8 EB
zfs*
N
Y
Y
16 EB
256 ZB
For more details see Wikipedia comparison. Note that ZFS requires 3rd party kernel module of FUSE layer, so I ll discount that here. BTRFS only went stable with Linux kernel 3.10, so with Debian Jessie that s a possibility; but for tried and trusted, I ll use ext4.
The selection of ext4 also means that I ll only be able to shrink this file system off-line (unmounted).
I ll make the filesystem:
# mkfs.ext4 /dev/OptVG/OptLV
mke2fs 1.42.12 (29-Aug-2014)
Creating filesystem with 1285120 4k blocks and 321280 inodes
Filesystem UUID: 4f831d17-2b80-495f-8113-580bd74389dd
Superblock backups stored on blocks:
  32768, 98304, 163840, 229376, 294912, 819200, 884736
Allocating group tables: done
Writing inode tables: done
Creating journal (32768 blocks): done
Writing superblocks and filesystem accounting information: done
And now mount this volume and check it out:
# mount /dev/OptVG/OptLV /opt/
# df -HT /opt
Filesystem  Type  Size  Used Avail Use% Mounted on
/dev/mapper/OptVG-OptLV ext4  5.1G  11M  4.8G  1% /opt
Lastly, we want this to be mounted next time we reboot, so edit /etc/fstab and add the line:
/dev/OptVG/OptLV /opt ext4 noatime,nodiratime 0 0
With this in place, we can now start using this disk. I selected here not to update the filesystem every time I access a file or folder updates get logged as normal but access time is just ignored.
Time to expand
After some time, our 5 GB /opt/ disk is rather full, and we need to make it bigger, but we wish to do so without any downtime. Amazon EBS doesn t support resizing volumes, so our strategy is to add a new larger volume, and remove the older one that no longer suits us; LVM and ext4 s online resize ability will allow us to do this transparently.
For this example, we ll decide that we want a 10 GB volume. It can be a different type of EBS volume to our original we re going to online-migrate all our data from one to the other.
As when we created the original 5 GB EBS volume above, create a new one in the same AZ and attach it to the host (perhaps a /dev/xvdh this time). We can check the new volume is visible with dmesg again:
[1999786.341602] xvdh: unknown partition table
And now we initalise this as a Physical volume for LVM:
# pvcreate /dev/xvdh
  Physical volume "/dev/xvdh" successfully created
And then add this disk to our existing OptVG Volume Group:
# vgextend OptVG /dev/xvdh
  Volume group "OptVG" successfully extended
We can now review our Volume group with vgs, and see our physical volumes with pvs:
There are now 2 Physical Volumes we have a 4.9 GB filesystem taking up space, so 10.09 GB of unallocated space in the VG.
Now its time to stop using the /dev/xvgd volume for any new requests:
# pvchange -x n /dev/xvdg
  Physical volume "/dev/xvdg" changed
  1 physical volume changed / 0 physical volumes not changed
At this time, our existing data is on the old disk, and our new data is on the new one. Its now that I d recommend running GNU screen (or similar) so you can detach from this shell session and reconnect, as the process of migrating the existing data can take some time (hours for large volumes):
During the move, checking the Monitoring tab in the AWS EC2 Console for the two volumes should show one with a large data Read metric, and one with a large data Write metric clearly data should be flowing off the old disk, and on to the new.
A note on disk throughput
The above move was a pretty small, and empty volume. Larger disks will take longer, naturally, so getting some speed out of the process maybe key. There s a few things we can do to tweak this:
EBS Optimised: a launch-time option that reserves network throughput from certain instance types back to the EBS service within the AZ. Depending on the size of the instance this is 500 MB/sec up to 4GB/sec. Note that for the c4 family of instances, EBS Optimised is on by default.
Size of GP2 disk: the larger the disk, the longer it can sustain high IO throughput but read this for details.
Size and speed of PIOPs disk: if consistent high IO is required, then moving to Provisioned IO disk may be useful. Looking at the (2 weeks) history of Cloudwatch logs for the old volume will give me some idea of the duty cycle of the disk IO.
Back to the move
Upon completion I can see that the disk in use is the new disk and not the old one, using pvs again:
So all 5 GB is now unused (compare to above, where only 96 MB was PFree). With that disk not containing data, I can tell LVM to remove the disk from the Volume Group:
# vgreduce OptVG /dev/xvdg
  Removed "/dev/xvdg" from volume group "OptVG"
Then I cleanly wipe the labels from the volume:
# pvremove /dev/xvdg
  Labels on physical volume "/dev/xvdg" successfully wiped
If I really want to clean the disk, I could choose to use shred(1) on the disk to overwrite with random data. This can take a lng time
Now the disk is completely unused and disassociated from the VG, I can return to the AWS EC2 Console, and detach the disk:
Detach an EBS volume from an EC2 instance
Wait for a few seconds, and the disk is then shown as available ; I then chose to delete the disk in the EC2 console (and stop paying for it).
Back to the Logical Volume it s still 4.9 GB, so I add 4.5 GB to it:
# lvresize -L +4.5G /dev/OptVG/OptLV
  Size of logical volume OptVG/OptLV changed from 4.90 GiB (1255 extents) to 9.40 GiB (2407 extents).
  Logical volume OptLV successfully resized
We now have 0.6GB free space on the physical volume (pvs confirms this).
Finally, its time to expand out ext4 file system:
# resize2fs /dev/OptVG/OptLV
resize2fs 1.42.12 (29-Aug-2014)
Filesystem at /dev/OptVG/OptLV is mounted on /opt; on-line resizing required
old_desc_blocks = 1, new_desc_blocks = 1
The filesystem on /dev/OptVG/OptLV is now 2464768 (4k) blocks long.
And with df we can now see:
# df -HT /opt/
Filesystem  Type  Size  Used Avail Use% Mounted on
/dev/mapper/OptVG-OptLV ext4  9.9G  12M  9.4G  1% /opt
Automating this
The IAM Role I made at the beginning of this post is now going to be useful. I ll start by adding an IAM Policy to the Role to permit me to List Volumes, Create Volumes, Attach Volumes and Detach Volumes to my instance-id. Lets start with creating a volume, with a policy like this:
This policy puts some restrictions on the volumes that this instance can create: only within the given Availability Zone (matching our instance), only GP2 SSD (no PIOPs volumes), and size no more than 250 GB. I ll add another policy to permit this instance role to tag volumes in this AZ that don t yet have a tag called InstanceId:
Now that I can create (and then tag) volumes, this becomes a simple procedure as to what else I can do to this volume. Deleting and creating snapshots of this volume are two obvious options, and the corresponding policy:
Of course it would be lovely if I could use a variable inside the policy condition instead of the literal string of the instance ID, but that s not currently possible.
Clearly some of the more important actions I want to take are to attach and detach a volume to my instance:
Now with this in place, we can start to fire up the AWS CLI we spoke of. We ll let the CLI inherit its credentials form the IAM Instance Role and the polices we just defined.
and at this stage, the above manipulation of the raw block device with LVM can begin. Likewise you can then use the CLI to detach and destroy any unwanted volumes if you are migrating off old block devices.
I've had some 8GB USB keys made, with the Debian swirl and text. By
buying a reasonable number, I've got what I think is a good price for
nice high-quality keys (metal body with a solid loop for attaching to
a keyring). I'm now selling these for 7 pounds each, and I'm planning
on bringing some to DebConf 15 too, where they'll be 10 EUR.
They're selling faster than I expected - if you're interested in
buying one (or several!), please let
me know. If there's enough demand, I may order more.
This was my sixth month working on Debian LTS. I was assigned 10.5
hours
by Freexian's
Debian LTS initiative. This was less than in previous months,
but I was still able to work on several packages.
dpkg
This update was almost ready to release at the end of April. I had
to rebuild from the upstream tarball as released by Guillem, then
uploaded and issued
DLA 220-1.
tiff
This update was also almost ready to release. I hoped to get some
users to test it, but didn't get any response. I uploaded and
issued
DLA 221-1.
ruby1.8
Ruby 1.8 had a single CVE to fix. It was already fixed in wheezy
against a similar upstream version, so it took little time to apply
that patch. Ruby has an extensive test suite that reassured me
this wouldn't cause a regression. I uploaded and issued
DLA 224-1.
p7zip
p7zip allows arbitrary file overwrite via symlinks
(CVE-2015-1038)
when extracting a carefully constructed archive, and this bug is not fixed
upstream. This sort of bug has been identified and fixed previously
in similar tools such as GNU tar, so I looked
at how
that handles links and tried to apply a similar change in p7zip.
This was somewhat complicated by the code style (C++ with COM-style
interfaces and NIH containers), but not too hard. I came up with a
patch that seems to work for the versions in Debian, and have
attached it to the upstream bug report for review.
linux-2.6
I reviewed the patches for Linux 2.6.32.66 - many of which were my
own backports - and then integrated this update into the SVN branch.
I will probably upload a new version soon, whether or not there's a
high severity issue, just to avoid piling up a large number of
changes in one update.
 A common programming task is to glue (or "join") items together to create a single string. For example:
 I had the wonderful privilege to go camping and hiking with my kids scouting group, the Pathfinders of Tantallon SDA church. The day started with a quick trip to Pugwash with one of the leaders to bring back some chairs to their school, and then we headed back out to Blomidon to meet up with the group. Click the photo below to start the slideshow.


 What happened in the


 Basically everybody who knows me is aware that, basically for the last two years, I have been writing a book on Operating Systems for use in my class and, of course, in any similar class. Well, long story short, as of today:
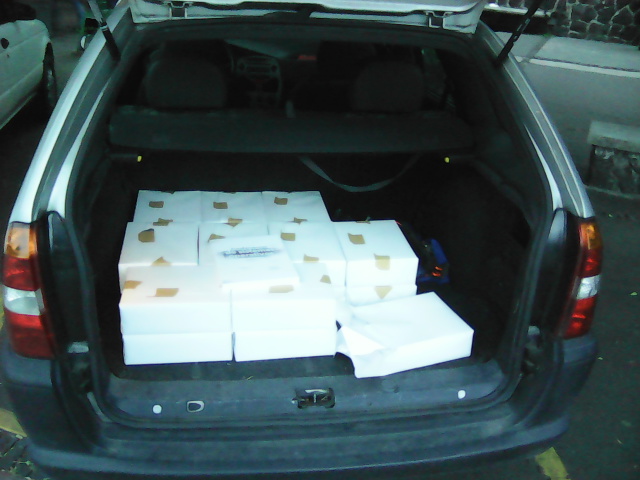 What's that in my car trunk? Lets have a closer look.
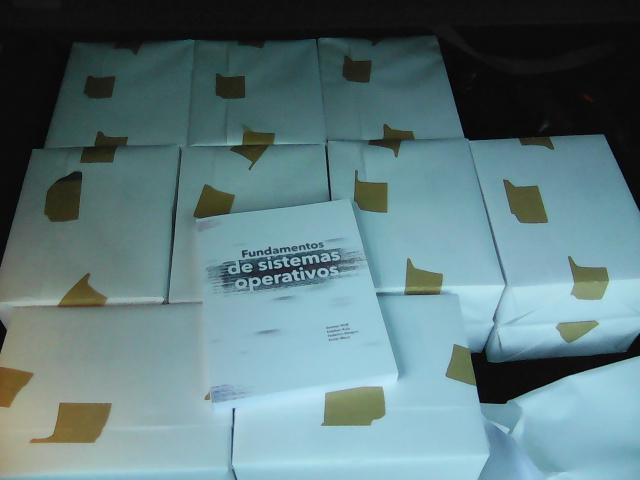 Finally, Facultad de Ingenier a finished printing the book!
So... Well, some minor data points:
Finally, Facultad de Ingenier a finished printing the book!
So... Well, some minor data points:

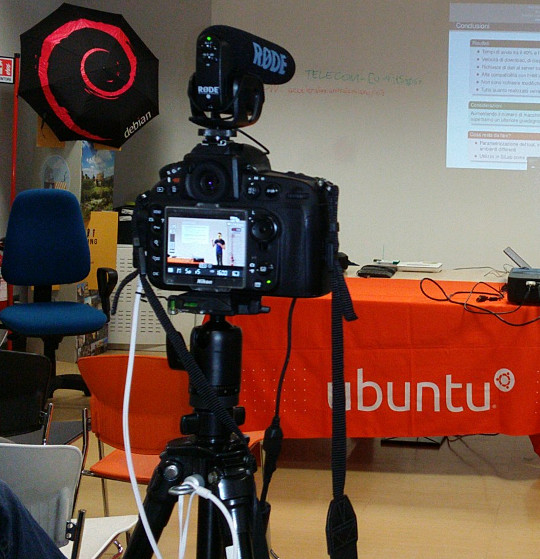
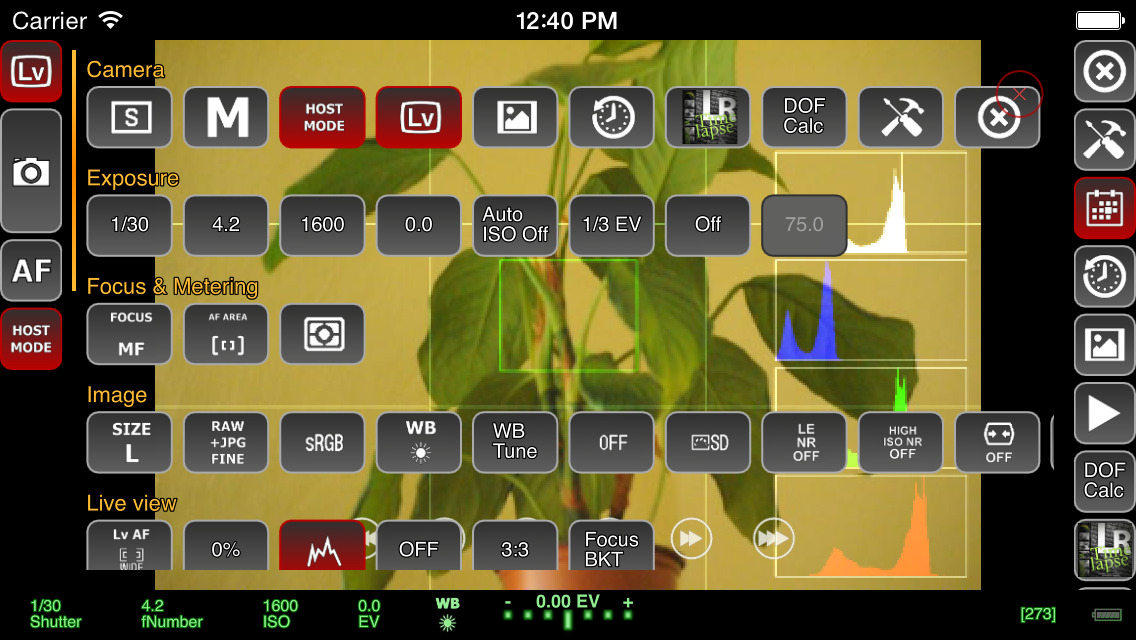
 So we've recently spent our first week together in Helsinki, Finland.
Mostly this has been stress-free, but there are always oddities about living in new places, and moving to Europe didn't minimize them.
For the moment I'll gloss over the differences and instead document the computer problem I had. Our previous shared-desktop system had a pair of drives configured using software RAID. I pulled one of the drives to use in a smaller-cased system (smaller so it was easier to ship).
Only one drive of a pair being present make mdadm scream, via email, once per day, with reports of failure.
The output of cat /proc/mdstat looked like this:
So we've recently spent our first week together in Helsinki, Finland.
Mostly this has been stress-free, but there are always oddities about living in new places, and moving to Europe didn't minimize them.
For the moment I'll gloss over the differences and instead document the computer problem I had. Our previous shared-desktop system had a pair of drives configured using software RAID. I pulled one of the drives to use in a smaller-cased system (smaller so it was easier to ship).
Only one drive of a pair being present make mdadm scream, via email, once per day, with reports of failure.
The output of cat /proc/mdstat looked like this:


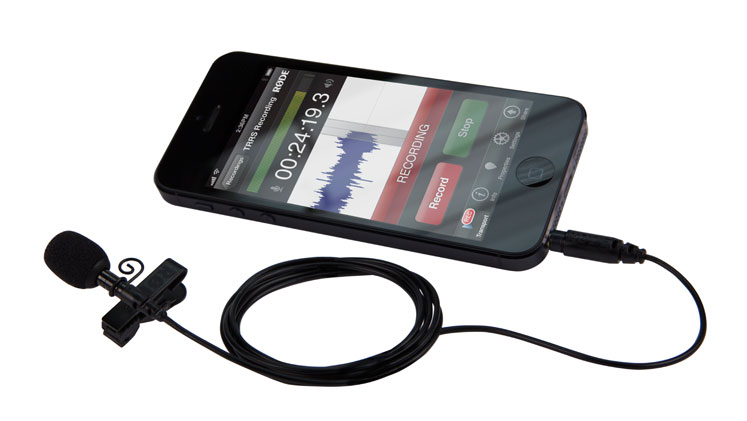 Full wireless microphone kits with microphone, transmitter and receiver are usually $US500 or more.
The
Full wireless microphone kits with microphone, transmitter and receiver are usually $US500 or more.
The  Back in 2010 when I needed an ADSL2 router in the US I bought a

 Recently, I've been fighting with the never ending issue of timezones. I never
thought I would have plunged into this rabbit hole, but hacking on OpenStack
and Gnocchi I felt into that trap easily is, thanks to Python.
Why you really, really, should never ever deal with timezones
To get a glimpse of the complexity of timezones, I recommend that you watch
Recently, I've been fighting with the never ending issue of timezones. I never
thought I would have plunged into this rabbit hole, but hacking on OpenStack
and Gnocchi I felt into that trap easily is, thanks to Python.
Why you really, really, should never ever deal with timezones
To get a glimpse of the complexity of timezones, I recommend that you watch


 The recent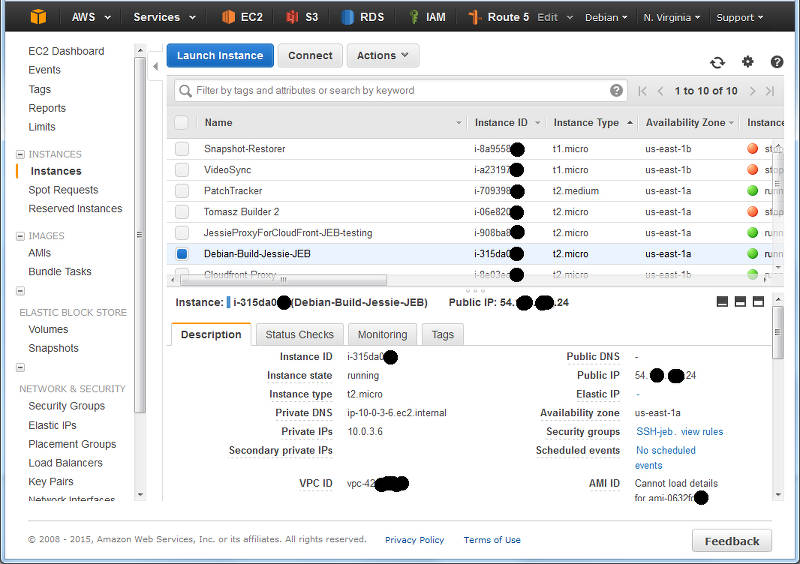
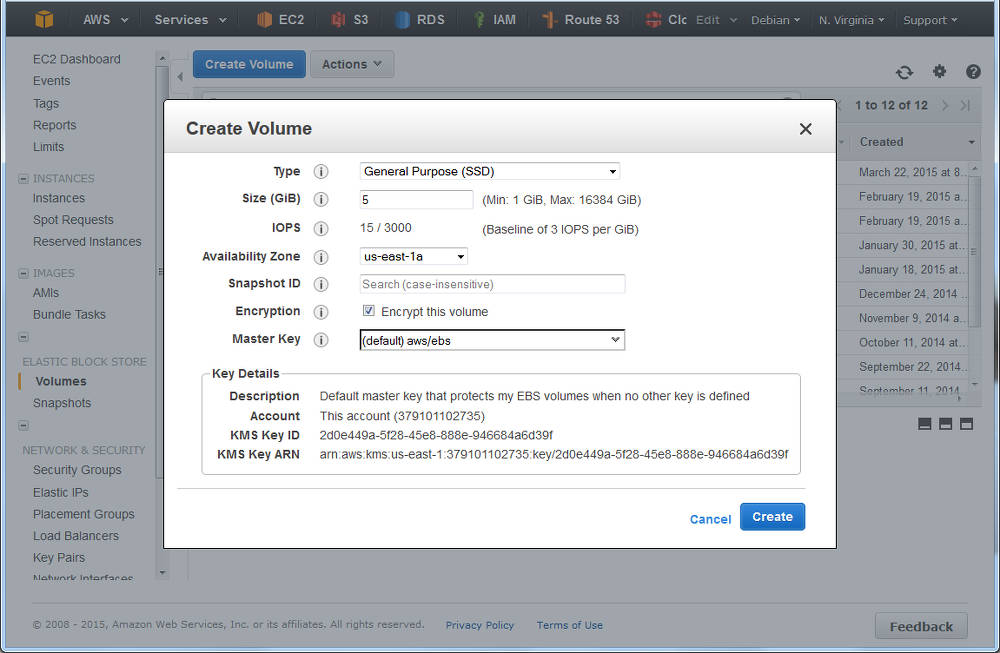
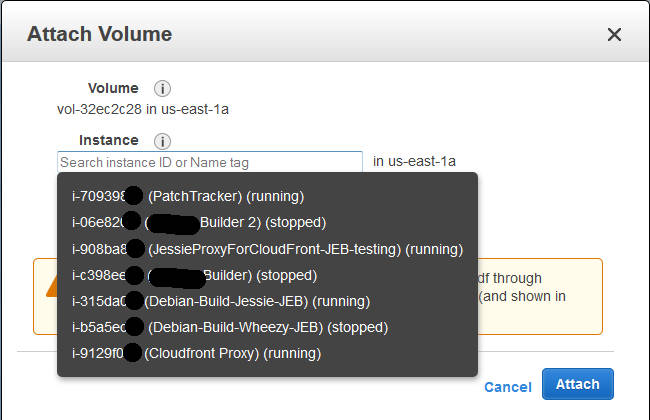
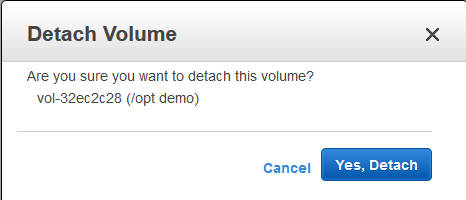
 I've had some 8GB USB keys made, with the Debian swirl and text. By
buying a reasonable number, I've got what I think is a good price for
nice high-quality keys (metal body with a solid loop for attaching to
a keyring). I'm now selling these for 7 pounds each, and I'm planning
on bringing some to DebConf 15 too, where they'll be 10 EUR.
I've had some 8GB USB keys made, with the Debian swirl and text. By
buying a reasonable number, I've got what I think is a good price for
nice high-quality keys (metal body with a solid loop for attaching to
a keyring). I'm now selling these for 7 pounds each, and I'm planning
on bringing some to DebConf 15 too, where they'll be 10 EUR.
 This was my sixth month working on Debian LTS. I was assigned 10.5
hours
by
This was my sixth month working on Debian LTS. I was assigned 10.5
hours
by 


