Search Results: "tach"

4 January 2026

Valhalla's Things: And now for something completely different

Posted on January 4, 2026
Tags: topic:walking
Warning
mention of bodies being bodies and minds being minds, and not in the perfectly working sense.

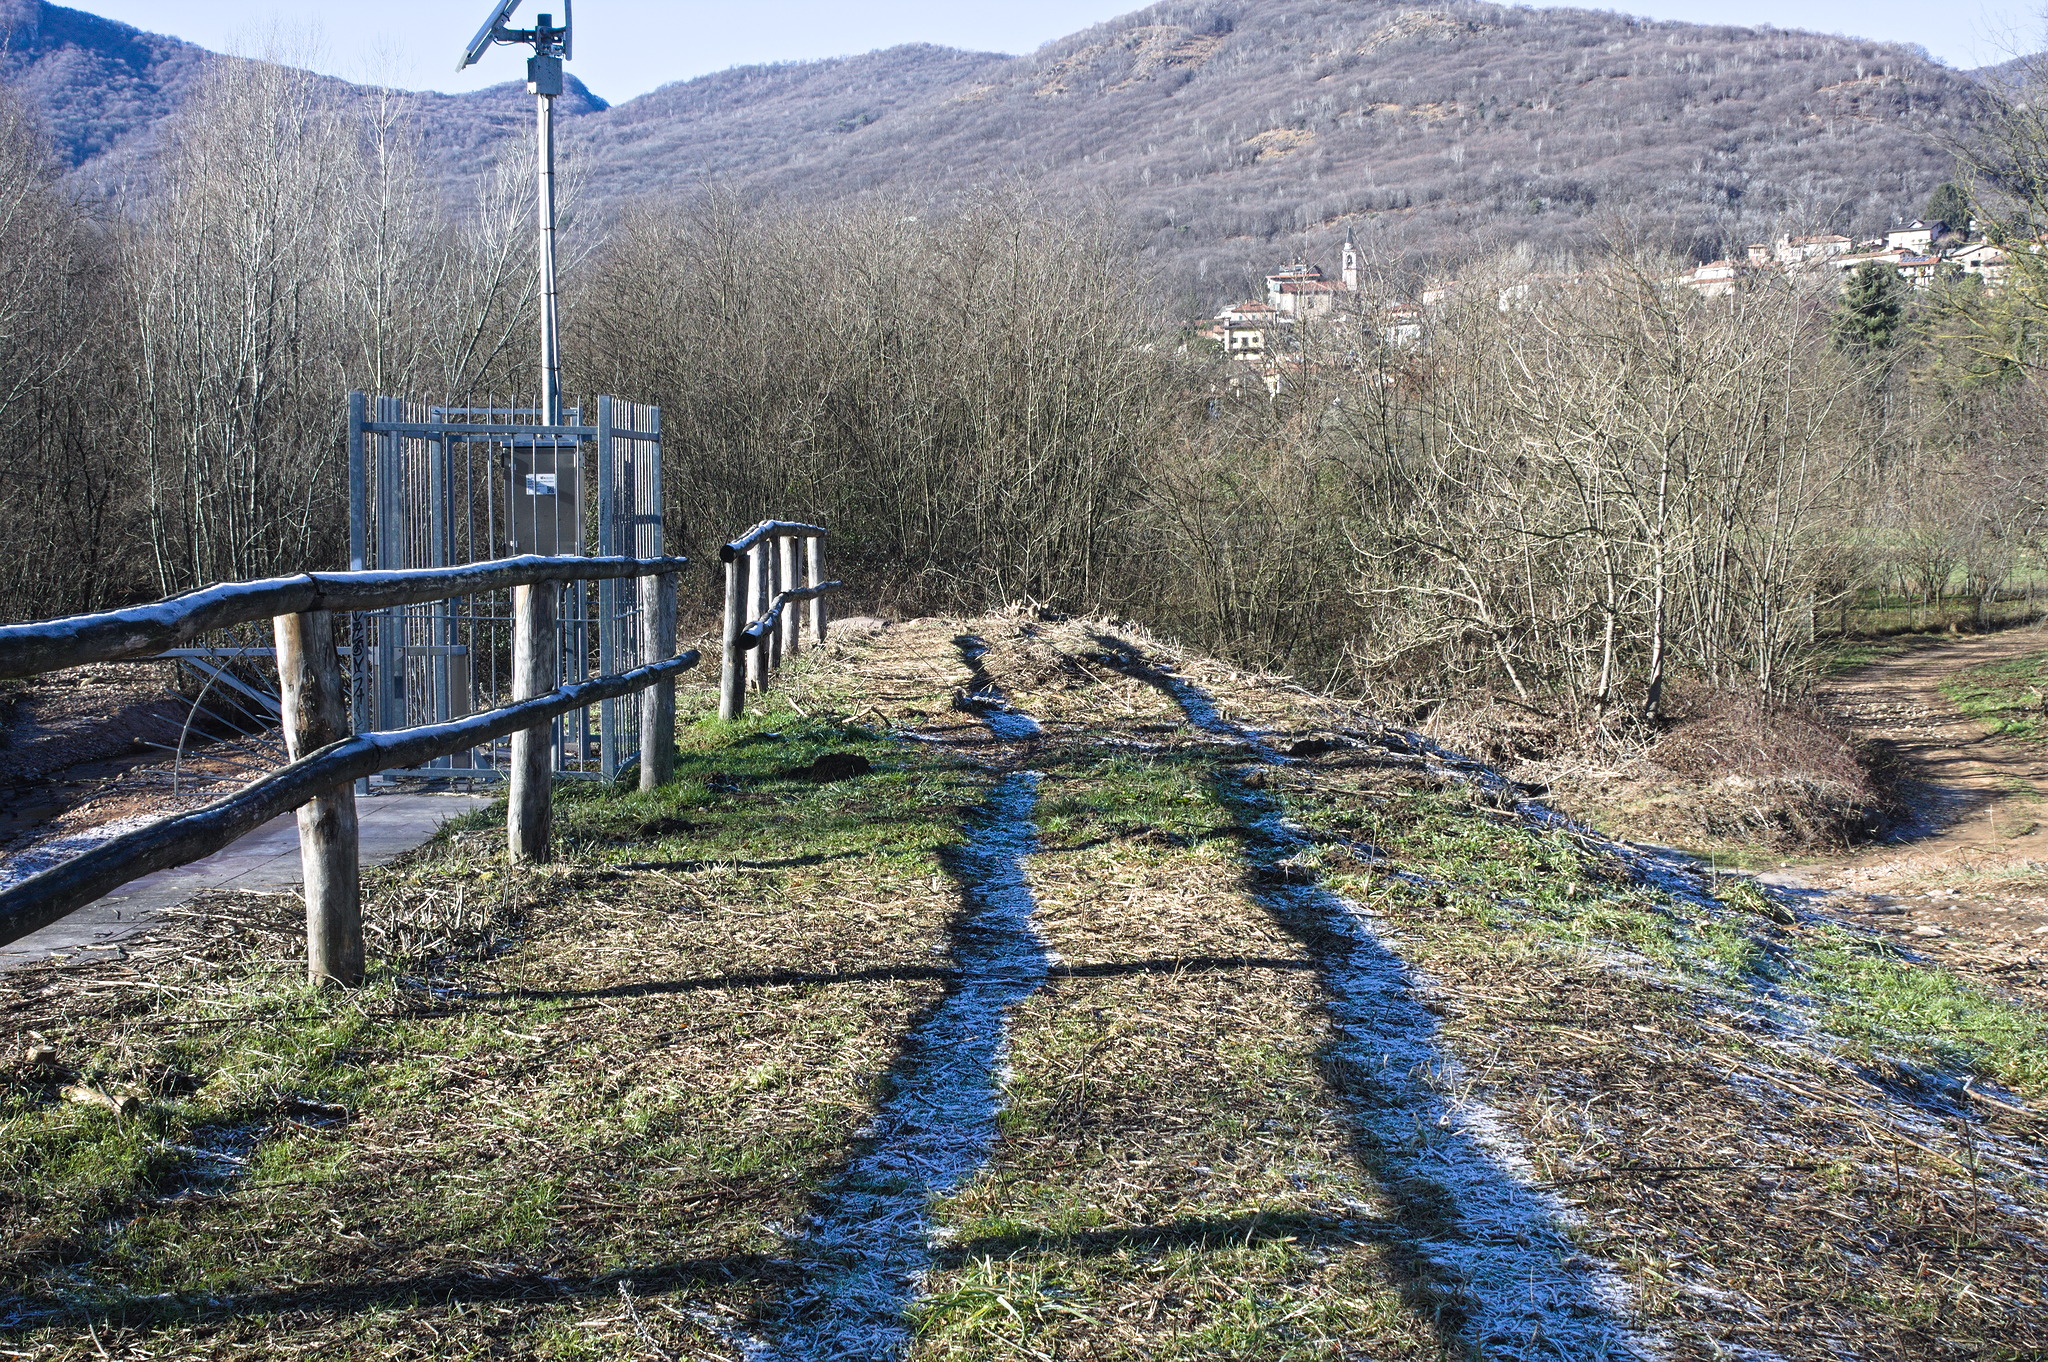
One side of Porto Ceresio along the lake: there is a small strip of houses, and the hills behind them are covered in woods. A boat is parked around the middle of the picture. A lot of the youtube channels I follow tend to involve somebody making things, so of course one of the videos my SO and I watched a few days ago was about walking around San Francisco Bay, and that recalled my desire to go to places by foot. Now, for health-related reasons doing it properly would be problematic, and thus I ve never trained for that, but during this Christmas holiday-heavy time I suggested my very patient SO the next best thing: instead of our usual 1.5 hours uphill walk in the woods, a 2 hours and a bit mostly flat walk on paved streets, plus some train, to a nearby town: Porto Ceresio, on the Italian side of Lake Lugano. I started to prepare for it on the day before, by deciding it was a good time to upgrade my PinePhone, and wait, I m still on Trixie? I could try Forky, what could possibly go wrong? And well, the phone was no longer able to boot, and reinstalling from the latest weekly had a system where the on-screen keyboard didn t appear, and I didn t want to bother finding out why, so re-installed another time from the 13.0 image, and between that, and distracting myself with widelands while waiting for the downloads and uploads and reboots etc., well, all of the afternoon and the best part of the evening disappeared. So, in a hurry, between the evening and the next morning I prepared a nice healthy lunch, full of all the important nutrients such as sugar, salt, mercury and arsenic. Tuna (mercury) soboro (sugar and salt) on rice and since I was in a hurry I didn t prepare any vegetables, but used pickles (more salt) and shio kombu (arsenic and various heavy metals, sugar and salt). Plus a green tea mochi for dessert, in case we felt low on sugar. :D Then on the day of the walk we woke up a bit later than usual, and then my body decided it was a good day for my belly to not exactly hurt, but not not-hurt either, and there I took an executive decision to wear a corset, because if something feels like it wants to burst open, wrapping it in a steel reinforced cage will make it stop. (I m not joking. It does. At least in those specific circumstances.) This was followed by hurrying through the things I had to do before leaving the house, having a brief anxiety attack and feeling feverish (it wasn t fever), and finally being able to leave the house just half an hour late. A stream running on rocks with the woods to both sides. And then, 10 minutes after we had left, realizing that I had written down the password for the train website, since it was no longer saved on the phone, but i had forgotten the bit of paper at home. We could have gone back to take it, but decided not to bother, as we could also hopefully buy paper-ish tickets at the train station (we could). Later on, I also realized I had also forgotten my GPS tracker, so I have no record of where we went exactly (but it s not hard to recognize it on a map) nor on what the temperature was. It s a shame, but by that point it was way too late to go back. Anyway, that probably was when Murphy felt we had paid our respects, and from then on everything went lovingly well! Routing had been done on the OpenStreetMap website, with OSRM, and it looked pretty easy to follow, but we also had access to an Android phone, so we used OSMAnd to check that we were still on track. It tried to lead us to the Statale (i.e. most important and most trafficked road) a few times, but we ignored it, and after a few turns and a few changes of the precise destination point we managed to get it to cooperate. At one point a helpful person asked us if we needed help, having seen us looking at the phone, and gave us indication for the next fork (that way to Cuasso al Piano, that way to Porto Ceresio), but it was pretty easy, since the way was clearly marked also for cars. Then we started to notice red and white markings on poles and other places, and on the next fork there was a signpost for hiking routes with our destination and we decided to follow it instead of the sign for cars. I knew that from our starting point to or destination there was also a hiking route, uphill both ways :) , through the hills, about 5 or 6 hours instead of two, but the sign was pointing downhill and we were past the point where we would expect too long of a detour. A wide and flat unpaved track passing through a flat grassy area with trees to the sides and rolling hills in the background. And indeed, after a short while the paved road ended, but the path continued on a wide and flat track, and was a welcome detour through what looked like water works to prevent flood damage from a stream. In a warmer season, with longer grass and ticks maybe the fact that I was wearing a long skirt may have been an issue, but in winter it was just fine. And soon afterwards, we were in Porto Ceresio. I think I have been there as a child, but I had no memory of it. On the other hand, it was about as I expected: a tiny town with a lakeside street full of houses built in the early 1900s when the area was an important tourism destination, with older buildings a bit higher up on the hills (because streams in this area will flood). And of course, getting there by foot rather than by train we also saw the parts where real people live (but not work: that s cross-border commuters country). Dried winter grass with two strips of frost, exactly under the shade of a fence. Soon after arriving in Porto Ceresio we stopped to eat our lunch on a bench at the lakeside; up to then we had been pretty comfortable in the clothing we had decided to wear: there was plenty of frost on the ground, in the shade, but the sun was warm and the temperatures were cleanly above freezing. Removing the gloves to eat, however, resulted in quite cold hands, and we didn t want to stay still for longer than strictly necessary. So we spent another hour and a bit walking around Porto Ceresio like proper tourists and taking pictures. There was an exhibition of nativity scenes all around the streets, but to get a map one had to go to either facebook or instagram, or wait for the opening hours of an office that were later than the train we planned to get to go back home, so we only saw maybe half of them, as we walked around: some were quite nice, some were nativity scenes, and some showed that the school children must have had some fun making them. three gnome adjacent creatures made of branches of evergreen trees, with a pointy hat made of moss, big white moustaches and red Christmas tree balls at the end of the hat and as a nose. They are wrapped in LED strings, and the lake can be seen in the background. Another Christmas decoration were groups of creatures made of evergreen branches that dotted the sidewalks around the lake: I took pictures of the first couple of groups, and then after seeing a few more something clicked in my brain, and I noticed that they were wrapped in green LED strings, like chains, and they had a red ball that was supposed to be the nose, but could just be around the mouth area, and suddenly I felt the need to play a certain chord to release them, but sadly I didn t have a weaponized guitar on me :D A bench in the shape of an open book, half of the pages folded in a reversed U to make the seat and half of the pages standing straight to form the backrest. It has the title page and beginning of the Constitution of the Italian Republic. Another thing that we noticed were some benches in the shape of books, with book quotations on them; most were on reading-related topics, but the one with the Constitution felt worth taking a picture of, especially these days. And then, our train was waiting at the station, and we had to go back home for the afternoon; it was a nice outing, if a bit brief, and we agreed to do it again, possibly with a bit of a detour to make the walk a bit longer. And then maybe one day we ll train to do the whole 5-6 hour thing through the hills.



31 December 2025

Sergio Cipriano: Zero-Code Instrumentation of an Envoy TCP Proxy using eBPF

Zero-Code Instrumentation of an Envoy TCP Proxy using eBPF I recently had to debug an Envoy Network Load Balancer, and the options Envoy provides just weren't enough. We were seeing a small number of HTTP 499 errors caused by latency somewhere in our cloud, but it wasn't clear what the bottleneck was. As a result, each team had to set up additional instrumentation to catch latency spikes and figure out what was going on. My team is responsible for the LBaaS product (Load Balancer as a Service) and, of course, we are the first suspects when this kind of problem appear. Before going for the current solution, I read a lot of Envoy's documentation. It is possible to enable access logs for Envoy, but they don't provide the information required for this debug. This is an example of the output:
[2025-12-08T20:44:49.918Z] "- - -" 0 - 78 223 1 - "-" "-" "-" "-" "172.18.0.2:8080"
I won't go into detail about the line above, since it's not possible to trace the request using access logs alone. Envoy also has OpenTelemetry tracing, which is perfect for understanding sources of latency. Unfortunatly, it is only available for Application Load Balancers. Most of the HTTP 499 were happening every 10 minutes, so we managed to get some of the requests with tcpdump, Wireshark and using http headers to filter the requests. This approach helped us reproduce and track down the problem, but it wasn't a great solution. We clearly needed better tools to catch this kind of issue the next time it happened. Therefore, I decided to try out OpenTelemetry eBPF Instrumentation, also referred to as OBI. I saw the announcement of Grafana Beyla before it was renamed to OBI, but I didn't have the time or a strong reason to try it out until now. Even then, I really liked the idea, and the possibility of using eBPF to solve this instrumentation problem had been in the back of my mind. OBI promises zero-code automatic instrumentation for Linux services using eBPF, so I put together a minimal setup to see how well it works.

Reproducible setup I used the following tools: Setting up a TCP Proxy with Envoy was straightforward:
static_resources:
  listeners:
  - name: go_server_listener
    address:
      socket_address:
        address: 0.0.0.0
        port_value: 8000
    filter_chains:
    - filters:
      - name: envoy.filters.network.tcp_proxy
        typed_config:
          "@type": type.googleapis.com/envoy.extensions.filters.network.tcp_proxy.v3.TcpProxy
          stat_prefix: go_server_tcp
          cluster: go_server_cluster
  clusters:
  - name: go_server_cluster
    connect_timeout: 1s
    type: LOGICAL_DNS
    load_assignment:
      cluster_name: go_server_cluster
      endpoints:
      - lb_endpoints:
        - endpoint:
            address:
              socket_address:
                address: target-backend
                port_value: 8080
This is the simplest Envoy TCP proxy configuration: a listener on port 8000 forwarding traffic to a backend running on port 8080. For the backend, I used a basic Go HTTP server:
package main

import (
    "fmt"
    "net/http"
)

func main()  
    http.Handle("/", http.FileServer(http.Dir(".")))

    server := http.Server Addr: ":8080" 

    fmt.Println("Starting server on :8080")
    panic(server.ListenAndServe())
 
Finally, I wrapped everything together with Docker Compose:
services:
  autoinstrumenter:
    image: otel/ebpf-instrument:main
    pid: "service:envoy"
    privileged: true
    environment:
      OTEL_EBPF_TRACE_PRINTER: text
      OTEL_EBPF_OPEN_PORT: 8000

  envoy:
    image: envoyproxy/envoy:v1.33-latest
    ports:
      - 8000:8000
    volumes:
      - ./envoy.yaml:/etc/envoy/envoy.yaml 
    depends_on:
      - target-backend
  
  target-backend:
    image: golang:1.22-alpine
    command: go run /app/backend.go
    volumes:
      - ./backend.go:/app/backend.go:ro
    expose:
      - 8080
OBI should output traces to the standard output similar to this when a HTTP request is made to Envoy:
2025-12-08 20:44:49.12884449 (305.572 s[305.572 s]) HTTPClient 200 GET /(/) [172.18.0.3 as envoy:36832]->[172.18.0.2 as localhost:8080] contentLen:78B responseLen:0B svc=[envoy generic] traceparent=[00-529458a2be271956134872668dc5ee47-6dba451ec8935e3e[06c7f817e6a5dae2]-01]
2025-12-08 20:44:49.12884449 (1.260901ms[366.65 s]) HTTP 200 GET /(/) [172.18.0.1 as 172.18.0.1:36282]->[172.18.0.3 as envoy:8000] contentLen:78B responseLen:223B svc=[envoy generic] traceparent=[00-529458a2be271956134872668dc5ee47-06c7f817e6a5dae2[0000000000000000]-01]
This is exactly what we needed, with zero-code. The above trace shows:
  • 2025-12-08 20:44:49.12884449: time of the trace.
  • (1.260901ms[366.65 s]): total response time for the request, with the actual internal execution time of the request (not counting the request enqueuing time).
  • HTTP 200 GET /: protocol, response code, HTTP method, and URL path.
  • [172.18.0.1 as 172.18.0.1:36282]->[172.18.0.3 as envoy:8000]: source and destination host:port. The initial request originates from my machine through the gateway (172.18.0.1), hits the Envoy (172.23.0.3), the proxy then forwards it to the backend application (172.23.0.2).
  • contentLen:78B: HTTP Content-Length. I used curl and the default request size for it is 78B.
  • responseLen:223B: Size of the response body.
  • svc=[envoy generic]: traced service.
  • traceparent: ids to trace the parent request. We can see that the Envoy makes a request to the target and this request has the other one as parent.
Let's add one more Envoy to show that it's also possible to track multiple services.
  envoy1:
    image: envoyproxy/envoy:v1.33-latest
    ports:
      - 9000:9000
    volumes:
      - ./envoy1.yaml:/etc/envoy/envoy.yaml
    depends_on:
      - envoy
The new Envoy will listen on port 9000 and forward the request to the other Envoy listening on port 8000. Now we just need to change OBI open port variable to look at a range:
OTEL_EBPF_OPEN_PORT: 8000-9000
And change the pid field of the autoinstrumenter service to use the host's PID namespace inside the container:
pid: host
This is the output I got after one curl:
2025-12-09 12:28:05.12912285 (2.202041ms[1.524713ms]) HTTP 200 GET /(/) [172.19.0.1 as 172.19.0.1:59030]->[172.19.0.5 as envoy:9000] contentLen:78B responseLen:223B svc=[envoy generic] traceparent=[00-69977bee0c2964b8fe53cdd16f8a9d19-856c9f700e73bf0d[0000000000000000]-01]
2025-12-09 12:28:05.12912285 (1.389336ms[1.389336ms]) HTTPClient 200 GET /(/) [172.19.0.5 as envoy:59806]->[172.19.0.4 as localhost:8000] contentLen:78B responseLen:0B svc=[envoy generic] traceparent=[00-69977bee0c2964b8fe53cdd16f8a9d19-caa7f1ad1c68fa77[856c9f700e73bf0d]-01]
2025-12-09 12:28:05.12912285 (1.5431ms[848.574 s]) HTTP 200 GET /(/) [172.19.0.5 as 172.19.0.5:59806]->[172.19.0.4 as envoy:8000] contentLen:78B responseLen:223B svc=[envoy generic] traceparent=[00-69977bee0c2964b8fe53cdd16f8a9d19-cbca9d64d3d26b40[caa7f1ad1c68fa77]-01]
2025-12-09 12:28:05.12912285 (690.217 s[690.217 s]) HTTPClient 200 GET /(/) [172.19.0.4 as envoy:34256]->[172.19.0.3 as localhost:8080] contentLen:78B responseLen:0B svc=[envoy generic] traceparent=[00-69977bee0c2964b8fe53cdd16f8a9d19-5502f7760ed77b5b[cbca9d64d3d26b40]-01]
2025-12-09 12:28:05.12912285 (267.9 s[238.737 s]) HTTP 200 GET /(/) [172.19.0.4 as 172.19.0.4:34256]->[172.19.0.3 as backend:8080] contentLen:0B responseLen:0B svc=[backend go] traceparent=[00-69977bee0c2964b8fe53cdd16f8a9d19-ac05c7ebe26f2530[5502f7760ed77b5b]-01]
Each log line represents a span belonging to the same trace (69977bee0c2964b8fe53cdd16f8a9d19). For readability, I ordered the spans by their traceparent relationship, showing the request's path as it moves through the system: from the client-facing Envoy, through the internal Envoy hop, and finally to the Go backend. You can see both server-side (HTTP) and client-side (HTTPClient) spans at each hop, along with per-span latency, source and destination addresses, and response sizes, making it easy to pinpoint where time is spent along the request chain. The log lines are helpful, but we need better ways to visualize the traces and the metrics generated by OBI. I'll share another setup that more closely reflects what we actually use.

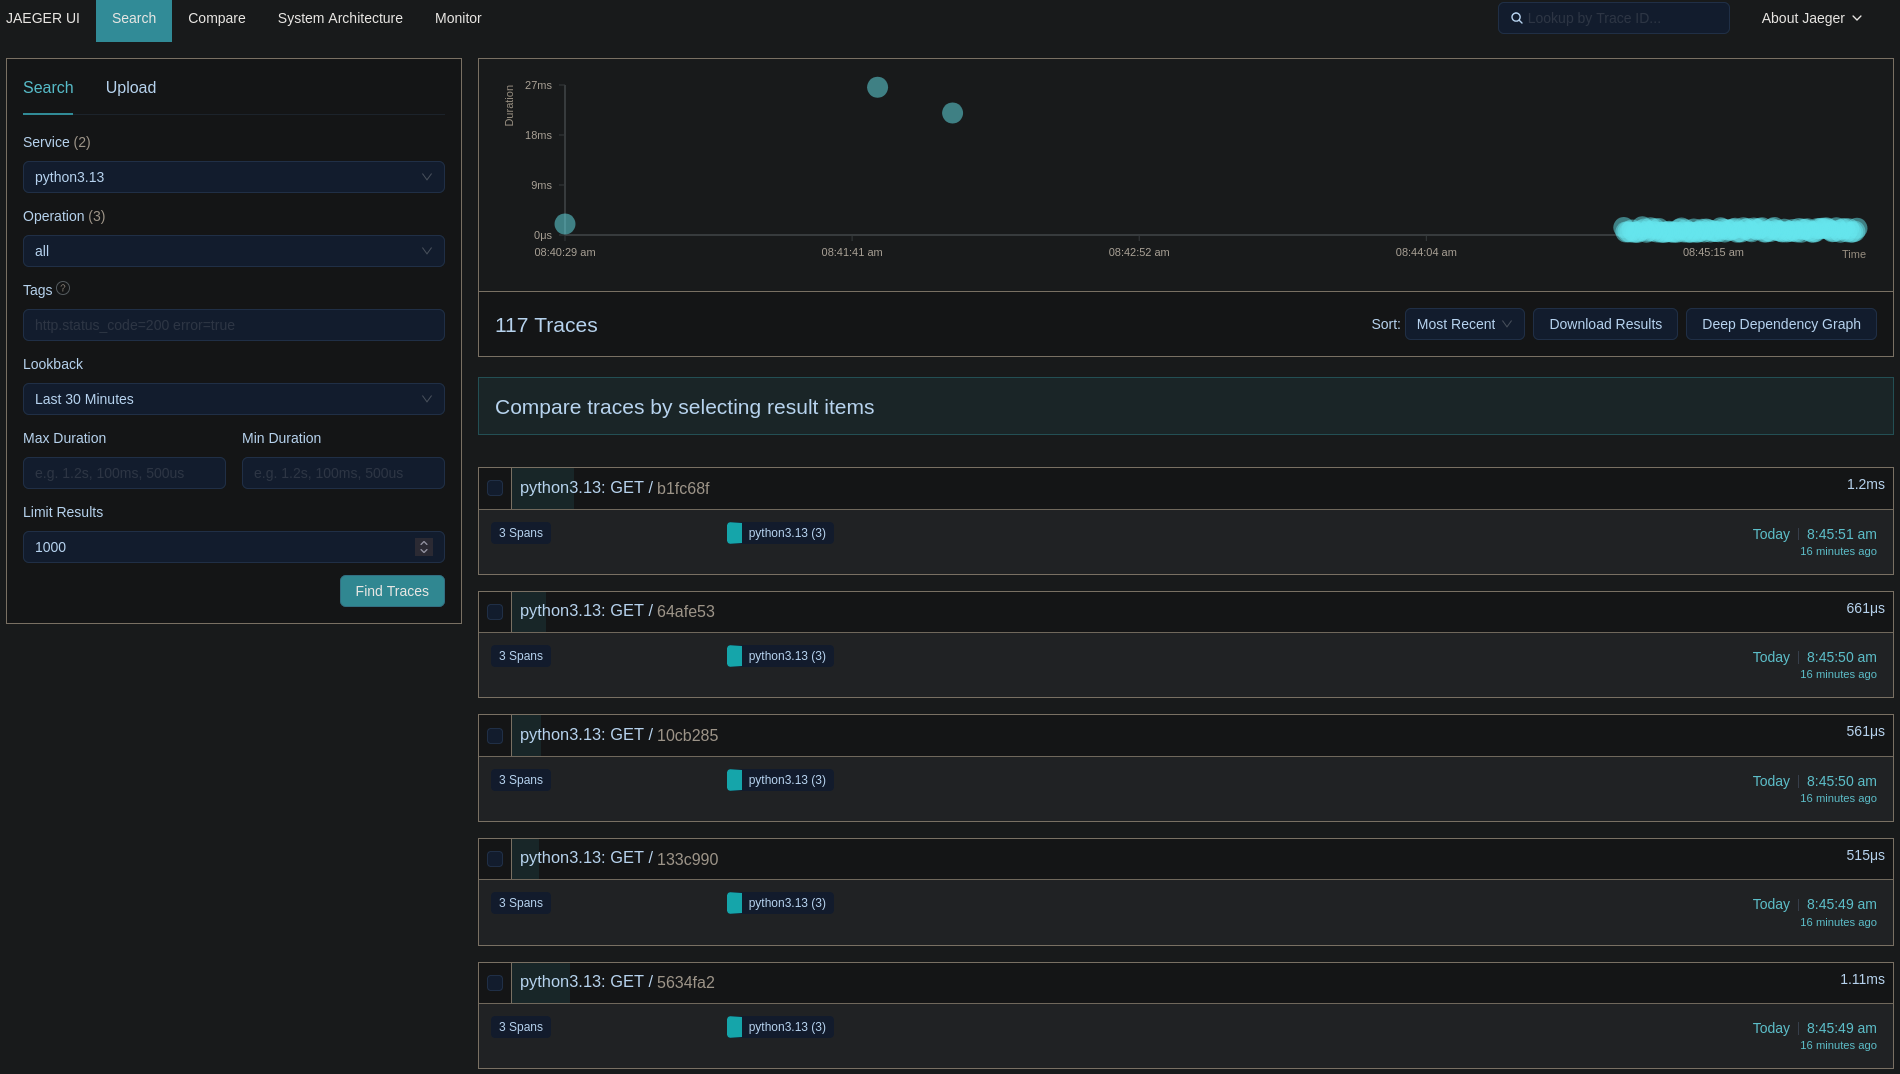
Production setup I'll be using the following tools this time: The goal of this setup is to mirror an environment similar to what I used in production. This time, I've omitted the load balancer and shifted the emphasis to observability instead. setup diagram I will run three HTTP servers on port 8080: two inside Incus containers and one on the host machine. The OBI process will export metrics and traces to an OpenTelemetry Collector, which will forward traces to Jaeger and expose a metrics endpoint for Prometheus to scrape. Grafana will also be added to visualize the collected metrics using dashboards. The aim of this approach is to instrument only one of the HTTP servers while ignoring the others. This simulates an environment with hundreds of Incus containers, where the objective is to debug a single container without being overwhelmed by excessive and irrelevant telemetry data from the rest of the system. OBI can filter metrics and traces based on attribute values, but I was not able to filter by process PID. This is where the OBI Collector comes into play, it allows me to use a processor to filter telemetry data by the PID of the process being instrumented. These are the steps to reproduce this setup:
  1. Create the incus containers.
$ incus launch images:debian/trixie server01
Launching server01
$ incus launch images:debian/trixie server02
Launching server02
  1. Start the HTTP server on each container.
$ apt install python3 --update -y
$ tee /etc/systemd/system/server.service > /dev/null <<'EOF'
[Unit]
Description=Python HTTP server
After=network.target
[Service]
User=root
Group=root
Type=simple
ExecStart=/usr/bin/python3 -m http.server 8080
Restart=always
StandardOutput=journal
StandardError=journal
[Install]
WantedBy=multi-user.target
EOF
$ systemctl start server.service
  1. Start the HTTP server on the host.
$ python3 -m http.server 8080
  1. Start the Docker compose.
services:
  autoinstrumenter:
    image: otel/ebpf-instrument:main
    pid: host
    privileged: true
    environment:
      OTEL_EBPF_CONFIG_PATH: /etc/obi/obi.yml 
    volumes:
      - ./obi.yml:/etc/obi/obi.yml

  otel-collector:
    image: otel/opentelemetry-collector-contrib:0.98.0
    command: ["--config=/etc/otel-collector-config.yml"]
    volumes:
      - ./otel-collector-config.yml:/etc/otel-collector-config.yml
    ports:
      - "4318:4318" # Otel Receiver
      - "8889:8889" # Prometheus Scrape
    depends_on:
      - autoinstrumenter
      - jaeger
      - prometheus

  prometheus:
    image: prom/prometheus
    volumes:
      - ./prometheus.yml:/etc/prometheus/prometheus.yml
    ports:
      - "9090:9090" # Prometheus UI

  grafana:
    image: grafana/grafana
    restart: always
    environment:
      - GF_SECURITY_ADMIN_USER=admin
      - GF_SECURITY_ADMIN_PASSWORD=RandomString123!
    volumes:
      - ./grafana-ds.yml:/etc/grafana/provisioning/datasources/datasource.yml
    ports:
      - "3000:3000" # Grafana UI

  jaeger:
    image: jaegertracing/all-in-one
    container_name: jaeger
    ports:
      - "16686:16686" # Jaeger UI
      - "4317:4317"  # Jaeger OTLP/gRPC Collector
Here's what the configuration files look like:
  • obi.yml:
log_level: INFO
trace_printer: text

discovery:
  instrument:
    - open_ports: 8080

otel_metrics_export:
  endpoint: http://otel-collector:4318
otel_traces_export:
  endpoint: http://otel-collector:4318
  • prometheus.yml:
global:
  scrape_interval: 5s

scrape_configs:
  - job_name: 'otel-collector'
    static_configs:
      - targets: ['otel-collector:8889']
  • grafana-ds.yml:
apiVersion: 1

datasources:
  - name: Prometheus
    type: prometheus
    access: proxy
    url: http://prometheus:9090
    isDefault: true
  • otel-collector-config.yml:
receivers:
  otlp:
    protocols:
      http:
        endpoint: otel-collector:4318

exporters:
  otlp/jaeger:
    endpoint: jaeger:4317
    tls:
      insecure: true

  prometheus:
    endpoint: 0.0.0.0:8889
    namespace: default

service:
  pipelines:
    traces:
      receivers: [otlp]
      exporters: [otlp/jaeger]

    metrics:
      receivers: [otlp] 
      exporters: [prometheus]
We're almost there, the OpenTelemetry Collector is just missing a processor. To create the processor filter, we can look at the OBI logs to find the PID of the HTTP server being instrumented:
autoinstrumenter-1    time=2025-12-30T19:57:17.593Z level=INFO msg="instrumenting process" component=discover.traceAttacher cmd=/usr/bin/python3.13 pid=297514 ino=460310 type=python service=""
autoinstrumenter-1    time=2025-12-30T19:57:18.320Z level=INFO msg="instrumenting process" component=discover.traceAttacher cmd=/usr/bin/python3.13 pid=310288 ino=722998 type=python service=""
autoinstrumenter-1    time=2025-12-30T19:57:18.512Z level=INFO msg="instrumenting process" component=discover.traceAttacher cmd=/usr/bin/python3.13 pid=315183 ino=2888480 type=python service=""
Which can also be obtained using standard GNU/Linux utilities:
$ cat /sys/fs/cgroup/lxc.payload.server01/system.slice/server.service/cgroup.procs 
297514
$ cat /sys/fs/cgroup/lxc.payload.server02/system.slice/server.service/cgroup.procs 
310288
$ ps -aux   grep http.server
USER         PID %CPU %MEM    VSZ   RSS TTY      STAT START   TIME COMMAND
1000000   297514  0.0  0.1  32120 14856 ?        Ss   16:03   0:00 /usr/bin/python3 -m http.server 8080
1000000   310288  0.0  0.1  32120 10616 ?        Ss   16:09   0:00 /usr/bin/python3 -m http.server 8080
cipriano  315183  0.0  0.1 103476 11480 pts/3    S+   16:17   0:00 python -m http.server 8080
If we search for the PID in the OpenTelemetry Collector endpoint where Prometheus metrics are exposed, we can find the attribute values to filter on.
$ curl http://localhost:8889/metrics   rg 297514
default_target_info host_id="148f400ad3ea",host_name="148f400ad3ea",instance="148f400ad3ea:297514",job="python3.13",os_type="linux",service_instance_id="148f400ad3ea:297514",service_name="python3.13",telemetry_sdk_language="python",telemetry_sdk_name="opentelemetry-ebpf-instrumentation",telemetry_sdk_version="main"  1
Now we just need to add the processor to the collector configuration:
processors: # <--- NEW BLOCK
  filter/host_id:
    traces:
      span:
        - 'resource.attributes["service.instance.id"] == "148f400ad3ea:297514"'

service:
  pipelines:
    traces:
      receivers: [otlp]
      processors: [filter/host_id] # <--- NEW LINE
      exporters: [otlp/jaeger]

    metrics:
      receivers: [otlp] 
      processors:  # <--- NEW BLOCK
        - filter/host_id
      exporters: [prometheus]
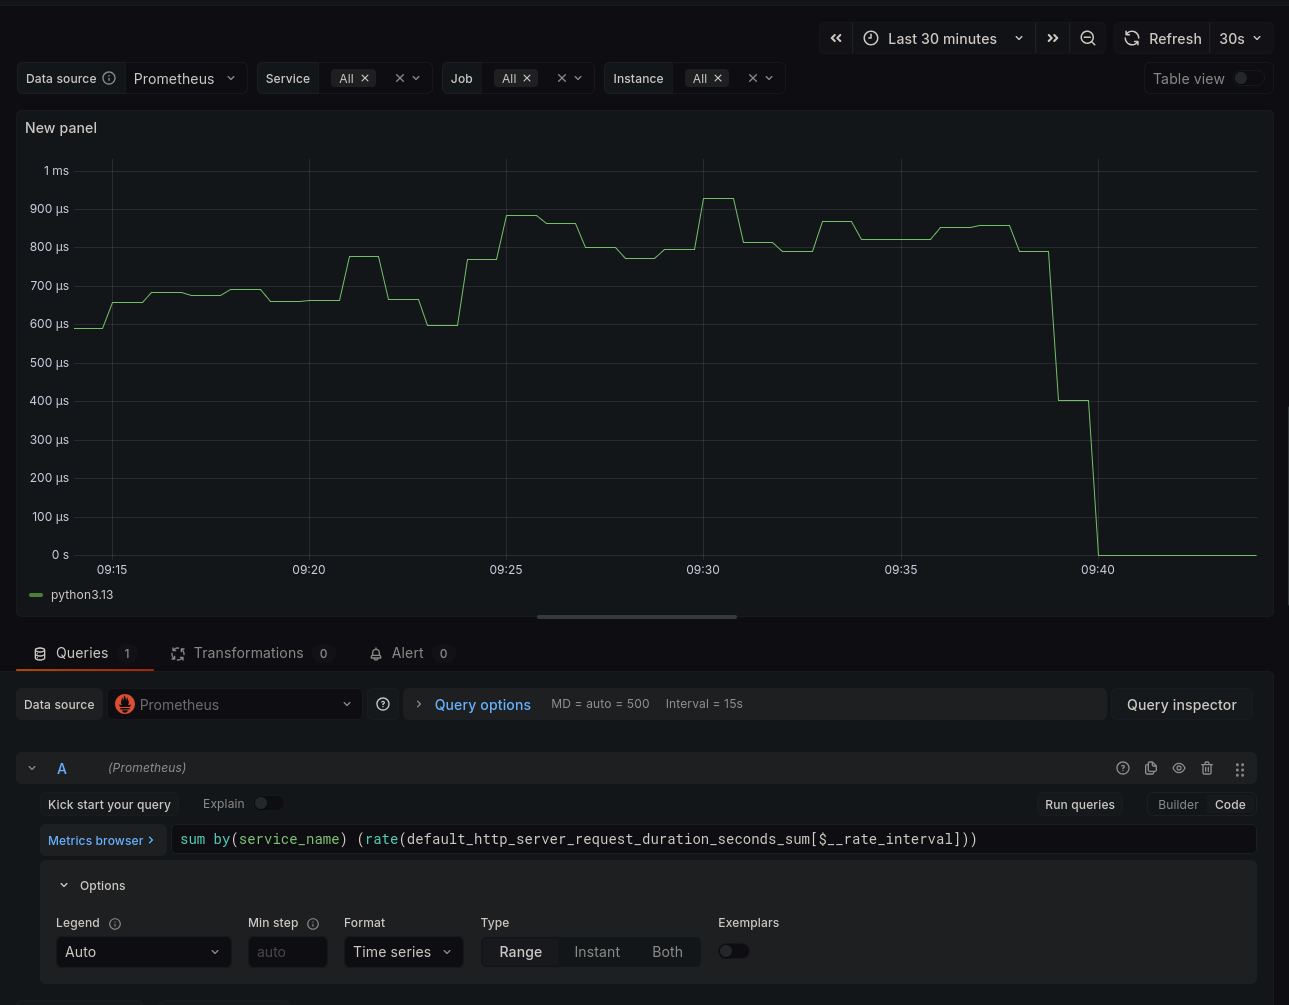
That's it! The processor will handle the filtering for us, and we'll only see traces and metrics from the HTTP server running in the server01 container. Below are some screenshots from Jaeger and Grafana: jaeger search will all traces one jaeger trace grafana request duration panel

Closing Notes I am still amazed at how powerful OBI can be. For those curious about the debug, we found out that a service responsible for the network orchestration of the Envoy containers was running netplan apply every 10 minutes because of a bug. Netplan apply causes interfaces to go down temporarily and this made the latency go above 500ms which caused the 499s.

28 December 2025

Balasankar 'Balu' C: Granting Namespace-Specific Access in GKE Clusters

Heyo, In production Kubernetes environments, access control becomes critical when multiple services share the same cluster. I recently faced this exact scenario: a GKE cluster hosting multiple services across different namespaces, where a new team needed access to maintain and debug their service-but only their service. The requirement was straightforward yet specific: grant external users the ability to exec into pods, view logs, and forward ports, but restrict this access to a single namespace within a single GKE cluster. No access to other clusters in the Google Cloud project, and no access to other namespaces.

The Solution Achieving this granular access control requires combining Google Cloud IAM with Kubernetes RBAC (Role-Based Access Control). Here s how to implement it:

Step 1: Tag Your GKE Cluster First, apply a unique tag to your GKE cluster. This tag will serve as the identifier for IAM policies.

Step 2: Grant IAM Access via Tags Add an IAM policy binding that grants users access to resources with your specific tag. The Kubernetes Engine Viewer role (roles/container.viewer) provides sufficient base permissions without granting excessive access.

Step 3: Create a Kubernetes ClusterRole Define a ClusterRole that specifies the exact permissions needed:
apiVersion: rbac.authorization.k8s.io/v1
kind: ClusterRole
metadata:
  name: custom-access-role
rules:
  - apiGroups: [""]
    resources: ["pods", "pods/exec", "pods/attach", "pods/portforward", "pods/log"]
    verbs: ["get", "list", "watch", "create"]
Note: While you could use a namespace-scoped Role, a ClusterRole offers better reusability if you need similar permissions for other namespaces later.

Step 4: Bind the Role to Users Create a RoleBinding to connect the role to specific users and namespaces:
apiVersion: rbac.authorization.k8s.io/v1
kind: RoleBinding
metadata:
  name: custom-rolebinding
  namespace: my-namespace
subjects:
  - kind: User
    name: myuser@gmail.com
    apiGroup: rbac.authorization.k8s.io
roleRef:
  kind: ClusterRole
  name: custom-access-role
  apiGroup: rbac.authorization.k8s.io
Apply both configurations using kubectl apply -f <filename>.

How It Works This approach creates a two-layer security model:
  • GCP IAM controls which clusters users can access using resource tags
  • Kubernetes RBAC controls what users can do within the cluster and limits their scope to specific namespaces
The result is a secure, maintainable solution that grants teams the access they need without compromising the security of other services in your cluster.

22 December 2025

Fran ois Marier: LXC setup on Debian forky

Similar to what I wrote for Ubuntu 18.04, here is how to setup an LXC container on Debian forky.

Installing the required packages Start by installing the necessary packages on the host:
apt install lxc libvirt-clients debootstrap

Network setup Ensure the veth kernel module is loaded by adding the following to /etc/modules-load.d/lxc-local.conf:
veth
and then loading it manually for now:
modprobe veth
Enable IPv4 forwarding by putting this in /etc/sysctl.d/lxc-local.conf:
net.ipv4.ip_forward=1
and applying it:
sysctl -p /etc/sysctl.d/lxc-local.conf
Restart the LXC network bridge:
systemctl restart lxc-net.service
Ensure that container traffic is not blocked by the host firewall, for example by adding the following to /etc/network/iptables.up.rules:
-A FORWARD -d 10.0.3.0/24 -m conntrack --ctstate RELATED,ESTABLISHED -j ACCEPT
-A FORWARD -s 10.0.3.0/24 -j ACCEPT
-A INPUT -d 224.0.0.251 -s 10.0.3.1 -j ACCEPT
-A INPUT -d 239.255.255.250 -s 10.0.3.1 -j ACCEPT
-A INPUT -d 10.0.3.255 -s 10.0.3.1 -j ACCEPT
-A INPUT -d 10.0.3.1 -s 10.0.3.0/24 -j ACCEPT
and applying the rules:
iptables-apply

Creating a container To see all available images, run:
lxc-create -n foo --template=download -- --list
and then create a Debian forky container using:
lxc-create -n forky -t download -- -d debian -r forky -a amd64
Start and stop the container like this:
lxc-start -n forky
lxc-stop -n forky

Connecting to the container Attach to the running container's console:
lxc-attach -n forky
Inside the container, you can change the root password by typing:
passwd
and install some essential packages:
apt install openssh-server vim
To find the container's IP address (for example, so that you can ssh to it from the host):
lxc-ls --fancy

6 December 2025

Taavi V n nen: How to import a new Wikipedia language edition (in hard mode)

I created the latest Wikipedia language edition, the Toki Pona Wikipedia, last month. Unlike most other wikis which start their lives in the Wikimedia Incubator before the full wiki is created, in this case the community had been using a completely external MediaWiki site to build the wiki before it was approved as a "proper" Wikipedia wiki,1 and now that external wiki needed to be imported to the newly created Wikimedia-hosted wiki. (As far as I'm aware, the last and previously only time an external wiki has been imported to a Wikimedia project was in 2013 when Wikitravel was forked as Wikivoyage.) Creating a Wikimedia wiki these days is actually pretty straightforward, at least when compared to what it used to be like a couple of years ago. Today the process mostly involves using a script to generate two configuration changes, one to add the basic configuration for a wiki to operate and an another to add the wiki to the list of all wikis that exist, and then running a script to create the wiki database in between of deploying those two configuration changes. And then you wait half an hour while the script to tell all Wikidata client wikis about the new wiki runs on one wiki at a time. The primary technical challenge in importing a third-party wiki is that there's no SUL making sure that a single username maps to the same account on both wikis. This means that the usual strategy of using the functionality I wrote in CentralAuth to manually create local accounts can't be used as is, and so we needed to come up with a new way of matching everyone's contributions to their existing Wikimedia accounts. (Side note: While the user-facing interface tries to present a single "global" user account that can be used on all public Wikimedia wikis, in reality the account management layer in CentralAuth is mostly just a glue layer to link together individual "local" accounts on each wiki that the user has ever visited. These local accounts have independent user ID numbers for example I am user #35938993 on the English Wikipedia but #4 on the new Toki Pona Wikipedia and are what most of MediaWiki code interacts with except for a few features specifically designed with cross-wiki usage in mind. This distinction is also still very much present and visible in the various administrative and anti-abuse workflows.) The approach we ended up choosing was to re-write the dump file before importing, so that a hypothetical account called $Name would be turned $Name~wikipesija.org after the import.2 We also created empty user accounts that would take ownership of the edits to be imported so that we could use the standard account management tools on them later on. MediaWiki supports importing contributions without a local account to attribute them to, but it doesn't seem to be possible to convert an imported actor3 to a regular user later on which we wanted to keep as a possibility, even with the minor downside of creating a few hundred users that'll likely never get touched again later. We also made specific decisions to add the username suffix to everyone, not to just those names that'd conflicted with existing SUL accounts, and to deal with renaming users that wanted their contributions linked to an existing SUL account only after the import. This both reduced complexity and thus risk from the import phase, which already had much more unknowns compared to the rest of the process, but also were much better options ethically as well: suffixing all names meant we would not imply that those people chose to be Wikimedians with those specific usernames (when in reality it was us choosing to import those edits to the Wikimedia universe), and doing renames using the standard MediaWiki account management tooling meant that it produced the normal public log entries that all other MediaWiki administrative actions create. With all of the edits imported, the only major thing remaining was doing those merges I mentioned earlier to attribute imported edits to people's existing SUL accounts. Thankfully, the local account -based system makes it actually pretty simple. Usually CentralAuth prevents renaming individual local accounts that are attached to a global account, but that check can be bypassed with a maintenance script or a privileged enough account. Renaming the user automatically detached it from the previous global account, after which an another maintenance script could be used to attach the user to the correct global account.

  1. That external site was a fork of a fork of the original Toki Pona Wikipedia that was closed in 2005. And because cool URIs don't change, we made the the URLs that the old Wikipedia was using work again. Try it: https://art-tokipona.wikipedia.org.
  2. wikipesija.org was the domain where the old third-party wiki was hosted on, and ~ was used as a separator character in usernames during the SUL finalization in the early 2010s so using it here felt appropriate as well.
  3. An actor is a MediaWiki term and a database table referring to anything that can do edits or logged actions. Usually an actor is a user account or an IP address, but an imported user name in a specific format can also be represented as an actor.

27 November 2025

Russell Coker: PineTime Band

I ve had a Pine Time for just over 2 years [1]. About a year ago I had a band break and replaced it from a spare PineTime and now I just had another break. Having the band only last one year isn t that great, but it s fortunate that the break only affects the inner layer of plastic so there is no risk of the watch suddenly falling off and being broken or lost. The Pine64 web site has a page about this with bad options, one broken link and a few Amazon items that are have ridiculous postage [2]. I started writing this post while using the band from a Colmi P80 [3]. I bought one for a relative who wanted the metal band and the way the Aliexpress seller does it is to sell the package with the plastic band and include the metal band in the package so I had a spare band. It fits quite well and none of the reported problems of the PineTime having insufficient space between the spring bar and the watch. The Colmi band in question is described as rose gold but is more like pinkish beige and doesn t match the style of the black PineTime. I ordered a couple of cheap bands from AliExpress which cost $9.77 and $13.55 including postage while the ones that Pine64 recommend have over $15 postage from Amazon! The 20mm Silicone Magnetic Buckle Watch Strap Band For Huawei GT2 Smart Watch Connected Bracelet Black Watchband Man [4] cost $13.55 including postage. It has a magnetic unfold mechanism which I find a bit annoying and it doesn t allow easily changing the length. I don t think I ll choose that again. But it basically works and is comfortable. The 20mm Metal Strap for Huawei Watch GT2 3 Quick Release Stainless Steel Watch Band for Samsung Galaxy Watch Bracelet [5] cost $9.77 including postage. I found this unreasonably difficult to put on and not particularly comfortable. But opinion will vary on that, it is cheap and will appeal to some people s style. Conclusion There are claims that getting a replacement band for a PineTime is difficult. My experience is that every band with a 20mm attachment works as long as it s designed for a square watch, some of the bands are designed to partly go around a round face and wouldn t fit. I expect that some bands won t fit, but I don t think that it s enough of a problem to be worried about buying a random band from AliExpress. The incidence of bands not fitting will probably be lower than the incidence of other AliExpress products not doing quite what you want (while meeting the legal criteria of doing what they are claimed to do) and not being used. I m now wearing the PineTime with the Magnetic Buckle Watch Strap Band and plan to wear it for the next year or so.

21 November 2025

Daniel Kahn Gillmor: Transferring Signal on Android

Transferring a Signal account between two Android devices I spent far too much time recently trying to get a Signal Private Messenger account to transfer from one device to another. What I eventually found worked was a very finicky path to enable functioning "Wi-Fi Direct", which I go into below. I also offer some troubleshooting and recovery-from-failure guidance. All of this blogpost uses "original device" to refer to the Android pocket supercomputer that already has Signal installed and set up, and "new device" to mean the Android device that doesn't yet have Signal on it.

Why Transfer? Signal Private Messenger is designed with the expectation that the user has a "primary device", which is either an iPhone or an Android pocket supercomputer. If you have an existing Signal account, and try to change your primary device by backing up and restoring from backup, it looks to me like Signal will cause your long-term identity keys to be changed. This in turn causes your peers to see a message like "Your safety number with Alice has changed." These warning messages are the same messages that they would get if an adversary were to take over your account. So it's a good idea to minimize them when there isn't an account takeover false alarms train people to ignore real alarms. You can avoid "safety number changed" warnings by using signal's "account transfer" process during setup, at least if you're transferring between two Android devices. However, my experience was that the transfer between two Android devices was very difficult to get to happen at all. I ran into many errors trying to do this, until I finally found a path that worked.

Dealing with Failure After each failed attempt at a transfer, my original device's Signal installation would need to be re-registered. Having set a PIN meant that i could re-register the device without needing to receive a text message or phone call. Set a PIN before you transfer! Also, after a failure, you need to re-link any "linked device" (i.e. any Signal Desktop or iPad installation). If any message came in during the aborted transfer, the linked device won't get a copy of that message. Finally, after a failed transfer, i recommend completely uninstalling Signal from the new device, and starting over with a fresh install on the new device.

Permissions My understanding is that Signal on Android uses Wi-Fi Direct to accomplish the transfer. But to use Wi-Fi Direct, Signal needs to have the right permissions. On each device:
  • Entirely stop the Signal app
  • Go to Settings Apps Signal Permissions
  • Ensure that the following permissions are all enabled whenever the app is running:
  • Location
  • Nearby Devices
  • Network

Preparing for Wi-Fi Direct The transfer process depends on "Wi-Fi Direct", which is a bit of a disaster on its own. I found that if i couldn't get Wi-Fi Direct to work between the two devices, then the Signal transfer was guaranteed to fail. So, for clearer debugging, i first tried to establish a Wi-Fi Direct link on Android, without Signal being involved at all. Setting up a Wi-Fi Direct connection directly failed, multiple times, until i found the following combination of steps, to be done on each device:
  • Turn off Bluetooth
  • Ensure Wi-Fi is enabled
  • Disconnect from any Wi-Fi network you are connected to (go to the "Internet" or "Wi-Fi" settings page, long-press on the currently connected network, and choose "Disconnect"). If your device knows how to connect to multiple local Wi-Fi networks, disconnct from each of them in turn until you are in a stable state where Wi-Fi is enabled, but no network is connected.
  • Close to the bottom of the "Inteernet" or "Wi-Fi" settings page, choose "Network Preferences" and then "Wi-Fi Direct"
  • if there are any entries listed under "Remembered groups", tap them and choose to "Forget this group"
  • If there are Peer devices that say "Invited", tap them and choose to "Cancel invitation"
I found that this configuration is the most likely to enable a successful Wi-Fi Direct connection, where clicking "invite" on one device would pop up an alert on the other asking to accept the connection, and result in a "Connected" state between the two devices.

Actually Transferring Start with both devices fully powered up and physically close to one another (on the same desk should be fine). On the new device:
  • Reboot the device, and log into the profile you want to use
  • Enable Internet access via Wi-Fi.
  • Remove any old version of Signal.
  • Install Signal, but DO NOT OPEN IT!
  • Set up the permissions for the Signal app as described above
  • Open Signal, and choose "restore or transfer" -- you still need to be connected to the network at this point.
  • The new device should display a QR code.
On the original device:
  • Reboot the device, and log into the profile that has the Signal account you're looking to transfer
  • Enable Internet access via Wi-Fi, using the same network that the old device is using.
  • Make sure the permissions for Signal are set up as described above
  • Open Signal, and tap the camera button
  • Point the camera at the new device's QR code
Now tap the "continue" choices on both devices until they both display a message that they are searching for each other. You might see the location indicator (a green dot) turn on during this process. If you see an immediate warning of failure on either device, you probably don't have the permissions set up right. You might see an alert (a "toast") on one of the devices that the other one is trying to connect. You should click OK on that alert. In my experience, both devices are likely to get stuck "searching" for each other. Wait for both devices to show Signal's warning that the search has timed out. At this point, leave Signal open on both devices, and go through all the steps described above to prepare for Wi-Fi Direct. Your Internet access will be disabled. Now, tap "Try again" in Signal on both devices, pressing the buttons within a few seconds of each other. You should see another alert that one device is trying to connect to the other. Press OK there. At this point, the transfer should start happening! The old device will indicate what percentag has been transferred, and the new device will indicate how many messages hav been transferred. When this is all done, re-connect to Wi-Fi on the new device.

Temporal gap for Linked Devices Note that during this process, if new messages are arriving, they will be queuing up for you. When you reconnect to wi-fi, the queued messages will flow to your new device. But the process of transferring automatically unlinks any linked devices. So if you want to keep your instance of Signal Desktop with as short a gap as possible, you should re-link that installation promptly after the transfer completes.

Clean-up After all this is done successfully, you probably want to go into the Permissions settings and turn off the Location and Nearby Devices permissions for Signal on both devices. I recommend also going into Wi-Fi Direct and removing any connected devices and forgetting any existing connections.

Conclusion This is an abysmally clunky user experience, and I'm glad I don't have to do it often. It would have been much simpler to make a backup and restore from it, but I didn't want to freak out my contacts with a safety number change. By contrast, when i wanted extend a DeltaChat account across two devices, the transfer was prompt and entirely painless -- i just had to make sure the devices were on the same network, and then scanned a QR code from one to the other. And there was no temporal gap for any other deviees. And i could use Delta on both devices simultaneously until i was convinced that it would work on the new device -- Delta doesn't have the concept of a primary account. I wish Signal made it that easy! Until it's that easy, i hope the processes described here are useful to someone.

26 October 2025

Russ Allbery: Review: Ancestral Night

Review: Ancestral Night, by Elizabeth Bear
Series: White Space #1
Publisher: Saga Press
Copyright: 2019
ISBN: 1-5344-0300-0
Format: Kindle
Pages: 501
Ancestral Night is a far-future space opera novel and the first of a series. It shares a universe with Bear's earier Jacob's Ladder trilogy, and there is a passing reference to the events of Grail that would be a spoiler if you put the pieces together, but it's easy to miss. You do not need to read the earlier series to read this book (although it's a good series and you might enjoy it). Halmey Dz is a member of the vast interstellar federation called the Synarche, which has put an end to war and other large-scale anti-social behavior through a process called rightminding. Every person has a neural implant that can serve as supplemental memory, off-load some thought processes, and, crucially, regulate neurotransmitters and hormones to help people stay on an even keel. It works, mostly. One could argue Halmey is an exception. Raised in a clade that took rightminding to an extreme of suppression of individual personality into a sort of hive mind, she became involved with a terrorist during her legally mandated time outside of her all-consuming family before she could make an adult decision to stay with them (essentially a rumspringa). The result was a tragedy that Halmey doesn't like to think about, one that's left deep emotional scars. But Halmey herself would argue she's not an exception: She's put her history behind her, found partners that she trusts, and is a well-adjusted member of the Synarche.
Eventually, I realized that I was wasting my time, and if I wanted to hide from humanity in a bottle, I was better off making it a titanium one with a warp drive and a couple of carefully selected companions.
Halmey does salvage: finding ships lost in white space and retrieving them. One of her partners is Connla, a pilot originally from a somewhat atavistic world called Spartacus. The other is their salvage tug.
The boat didn't have a name. He wasn't deemed significant enough to need a name by the authorities and registries that govern such things. He had a registration number 657-2929-04, Human/Terra and he had a class, salvage tug, but he didn't have a name. Officially. We called him Singer. If Singer had an opinion on the issue, he'd never registered it but he never complained. Singer was the shipmind as well as the ship or at least, he inhabited the ship's virtual spaces the same way we inhabited the physical ones but my partner Connla and I didn't own him. You can't own a sentience in civilized space.
As Ancestral Night opens, the three of them are investigating a tip of a white space anomoly well off the beaten path. They thought it might be a lost ship that failed a transition. What they find instead is a dead Ativahika and a mysterious ship equipped with artificial gravity. The Ativahikas are a presumed sentient race of living ships that are on the most alien outskirts of the Synarche confederation. They don't communicate, at least so far as Halmey is aware. She also wasn't aware they died, but this one is thoroughly dead, next to an apparently abandoned ship of unknown origin with a piece of technology beyond the capabilities of the Synarche. The three salvagers get very little time to absorb this scene before they are attacked by pirates. I have always liked Bear's science fiction better than her fantasy, and this is no exception. This was great stuff. Halmey is a talkative, opinionated infodumper, which is a great first-person protagonist to have in a fictional universe this rich with delightful corners. There are some Big Dumb Object vibes (one of my favorite parts of salvage stories), solid character work, a mysterious past that has some satisfying heft once it's revealed, and a whole lot more moral philosophy than I was expecting from the setup. All of it is woven together with experienced skill, unsurprising given Bear's long and prolific career. And it's full of delightful world-building bits: Halmey's afthands (a surgical adaptation for zero gravity work) and grumpiness at the sheer amount of gravity she has to deal with over the course of this book, the Culture-style ship names, and a faster-than-light travel system that of course won't pass physics muster but provides a satisfying quantity of hooky bits for plot to attach to. The backbone of this book is an ancient artifact mystery crossed with a murder investigation. Who killed the Ativahika? Where did the gravity generator come from? Those are good questions with interesting answers. But the heart of the book is a philosophical conflict: What are the boundaries between identity and society? How much power should society have to reshape who we are? If you deny parts of yourself to fit in with society, is this necessarily a form of oppression? I wrote a couple of paragraphs of elaboration, and then deleted them; on further thought, I don't want to give any more details about what Bear is doing in this book. I will only say that I was not expecting this level of thoughtfulness about a notoriously complex and tricky philosophical topic in a full-throated adventure science fiction novel. I think some people may find the ending strange and disappointing. I loved it, and weeks after finishing this book I'm still thinking about it. Ancestral Night has some pacing problems. There is a long stretch in the middle of the book that felt repetitive and strained, where Bear holds the reader at a high level of alert and dread for long enough that I found it enervating. There are also a few political cheap shots where Bear picks the weakest form of an opposing argument instead of the strongest. (Some of the cheap shots are rather satisfying, though.) The dramatic arc of the book is... odd, in a way that I think was entirely intentional given how well it works with the thematic message, but which is also unsettling. You may not get the catharsis that you're expecting. But all of this serves a purpose, and I thought that purpose was interesting. Ancestral Night is one of those books that I liked more a week after I finished it than I did when I finished it.
Epiphanies are wonderful. I m really grateful that our brains do so much processing outside the line of sight of our consciousnesses. Can you imagine how downright boring thinking would be if you had to go through all that stuff line by line?
Also, for once, I think Bear hit on exactly the right level of description rather than leaving me trying to piece together clues and hope I understood the plot. It helps that Halmey loves to explain things, so there are a lot of miniature infodumps, but I found them interesting and a satisfying throwback to an earlier style of science fiction that focused more on world-building than on interpersonal drama. There is drama, but most of it is internal, and I thought the balance was about right. This is solid, well-crafted work and a good addition to the genre. I am looking forward to the rest of the series. Followed by Machine, which shifts to a different protagonist. Rating: 8 out of 10

19 October 2025

Otto Kek l inen: Could the XZ backdoor have been detected with better Git and Debian packaging practices?

Featured image of post Could the XZ backdoor have been detected with better Git and Debian packaging practices?The discovery of a backdoor in XZ Utils in the spring of 2024 shocked the open source community, raising critical questions about software supply chain security. This post explores whether better Debian packaging practices could have detected this threat, offering a guide to auditing packages and suggesting future improvements. The XZ backdoor in versions 5.6.0/5.6.1 made its way briefly into many major Linux distributions such as Debian and Fedora, but luckily didn t reach that many actual users, as the backdoored releases were quickly removed thanks to the heroic diligence of Andres Freund. We are all extremely lucky that he detected a half a second performance regression in SSH, cared enough to trace it down, discovered malicious code in the XZ library loaded by SSH, and reported promtly to various security teams for quick coordinated actions. This episode makes software engineers pondering the following questions: As a Debian Developer, I decided to audit the xz package in Debian, share my methodology and findings in this post, and also suggest some improvements on how the software supply-chain security could be tightened in Debian specifically. Note that the scope here is only to inspect how Debian imports software from its upstreams, and how they are distributed to Debian s users. This excludes the whole story of how to assess if an upstream project is following software development security best practices. This post doesn t discuss how to operate an individual computer running Debian to ensure it remains untampered as there are plenty of guides on that already.
Downloading Debian and upstream source packages Let s start by working backwards from what the Debian package repositories offer for download. As auditing binaries is extremely complicated, we skip that, and assume the Debian build hosts are trustworthy and reliably building binaries from the source packages, and the focus should be on auditing the source code packages. As with everything in Debian, there are multiple tools and ways to do the same thing, but in this post only one (and hopefully the best) way to do something is presented for brevity. The first step is to download the latest version and some past versions of the package from the Debian archive, which is easiest done with debsnap. The following command will download all Debian source packages of xz-utils from Debian release 5.2.4-1 onwards:
$ debsnap --verbose --first 5.2.4-1 xz-utils
Getting json https://snapshot.debian.org/mr/package/xz-utils/
...
Getting dsc file xz-utils_5.2.4-1.dsc: https://snapshot.debian.org/file/a98271e4291bed8df795ce04d9dc8e4ce959462d
Getting file xz-utils_5.2.4.orig.tar.xz.asc: https://snapshot.debian.org/file/59ccbfb2405abe510999afef4b374cad30c09275
Getting file xz-utils_5.2.4-1.debian.tar.xz: https://snapshot.debian.org/file/667c14fd9409ca54c397b07d2d70140d6297393f
source-xz-utils/xz-utils_5.2.4-1.dsc:
Good signature found
validating xz-utils_5.2.4.orig.tar.xz
validating xz-utils_5.2.4.orig.tar.xz.asc
validating xz-utils_5.2.4-1.debian.tar.xz
All files validated successfully.
Once debsnap completes there will be a subfolder source-<package name> with the following types of files:
  • *.orig.tar.xz: source code from upstream
  • *.orig.tar.xz.asc: detached signature (if upstream signs their releases)
  • *.debian.tar.xz: Debian packaging source, i.e. the debian/ subdirectory contents
  • *.dsc: Debian source control file, including signature by Debian Developer/Maintainer
Example:
$ ls -1 source-xz-utils/
...
xz-utils_5.6.4.orig.tar.xz
xz-utils_5.6.4.orig.tar.xz.asc
xz-utils_5.6.4-1.debian.tar.xz
xz-utils_5.6.4-1.dsc
xz-utils_5.8.0.orig.tar.xz
xz-utils_5.8.0.orig.tar.xz.asc
xz-utils_5.8.0-1.debian.tar.xz
xz-utils_5.8.0-1.dsc
xz-utils_5.8.1.orig.tar.xz
xz-utils_5.8.1.orig.tar.xz.asc
xz-utils_5.8.1-1.1.debian.tar.xz
xz-utils_5.8.1-1.1.dsc
xz-utils_5.8.1-1.debian.tar.xz
xz-utils_5.8.1-1.dsc
xz-utils_5.8.1-2.debian.tar.xz
xz-utils_5.8.1-2.dsc

Verifying authenticity of upstream and Debian sources using OpenPGP signatures As seen in the output of debsnap, it already automatically verifies that the downloaded files match the OpenPGP signatures. To have full clarity on what files were authenticated with what keys, we should verify the Debian packagers signature with:
$ gpg --verify --auto-key-retrieve --keyserver hkps://keyring.debian.org xz-utils_5.8.1-2.dsc
gpg: Signature made Fri Oct 3 22:04:44 2025 UTC
gpg: using RSA key 57892E705233051337F6FDD105641F175712FA5B
gpg: requesting key 05641F175712FA5B from hkps://keyring.debian.org
gpg: key 7B96E8162A8CF5D1: public key "Sebastian Andrzej Siewior" imported
gpg: Total number processed: 1
gpg: imported: 1
gpg: Good signature from "Sebastian Andrzej Siewior" [unknown]
gpg: aka "Sebastian Andrzej Siewior <bigeasy@linutronix.de>" [unknown]
gpg: aka "Sebastian Andrzej Siewior <sebastian@breakpoint.cc>" [unknown]
gpg: WARNING: This key is not certified with a trusted signature!
gpg: There is no indication that the signature belongs to the owner.
Primary key fingerprint: 6425 4695 FFF0 AA44 66CC 19E6 7B96 E816 2A8C F5D1
Subkey fingerprint: 5789 2E70 5233 0513 37F6 FDD1 0564 1F17 5712 FA5B
The upstream tarball signature (if available) can be verified with:
$ gpg --verify --auto-key-retrieve xz-utils_5.8.1.orig.tar.xz.asc
gpg: assuming signed data in 'xz-utils_5.8.1.orig.tar.xz'
gpg: Signature made Thu Apr 3 11:38:23 2025 UTC
gpg: using RSA key 3690C240CE51B4670D30AD1C38EE757D69184620
gpg: key 38EE757D69184620: public key "Lasse Collin <lasse.collin@tukaani.org>" imported
gpg: Total number processed: 1
gpg: imported: 1
gpg: Good signature from "Lasse Collin <lasse.collin@tukaani.org>" [unknown]
gpg: WARNING: This key is not certified with a trusted signature!
gpg: There is no indication that the signature belongs to the owner.
Primary key fingerprint: 3690 C240 CE51 B467 0D30 AD1C 38EE 757D 6918 4620
Note that this only proves that there is a key that created a valid signature for this content. The authenticity of the keys themselves need to be validated separately before trusting they in fact are the keys of these people. That can be done by checking e.g. the upstream website for what key fingerprints they published, or the Debian keyring for Debian Developers and Maintainers, or by relying on the OpenPGP web-of-trust .

Verifying authenticity of upstream sources by comparing checksums In case the upstream in question does not publish release signatures, the second best way to verify the authenticity of the sources used in Debian is to download the sources directly from upstream and compare that the sha256 checksums match. This should be done using the debian/watch file inside the Debian packaging, which defines where the upstream source is downloaded from. Continuing on the example situation above, we can unpack the latest Debian sources, enter and then run uscan to download:
$ tar xvf xz-utils_5.8.1-2.debian.tar.xz
...
debian/rules
debian/source/format
debian/source.lintian-overrides
debian/symbols
debian/tests/control
debian/tests/testsuite
debian/upstream/signing-key.asc
debian/watch
...
$ uscan --download-current-version --destdir /tmp
Newest version of xz-utils on remote site is 5.8.1, specified download version is 5.8.1
gpgv: Signature made Thu Apr 3 11:38:23 2025 UTC
gpgv: using RSA key 3690C240CE51B4670D30AD1C38EE757D69184620
gpgv: Good signature from "Lasse Collin <lasse.collin@tukaani.org>"
Successfully symlinked /tmp/xz-5.8.1.tar.xz to /tmp/xz-utils_5.8.1.orig.tar.xz.
The original files downloaded from upstream are now in /tmp along with the files renamed to follow Debian conventions. Using everything downloaded so far the sha256 checksums can be compared across the files and also to what the .dsc file advertised:
$ ls -1 /tmp/
xz-5.8.1.tar.xz
xz-5.8.1.tar.xz.sig
xz-utils_5.8.1.orig.tar.xz
xz-utils_5.8.1.orig.tar.xz.asc
$ sha256sum xz-utils_5.8.1.orig.tar.xz /tmp/xz-5.8.1.tar.xz
0b54f79df85912504de0b14aec7971e3f964491af1812d83447005807513cd9e xz-utils_5.8.1.orig.tar.xz
0b54f79df85912504de0b14aec7971e3f964491af1812d83447005807513cd9e /tmp/xz-5.8.1.tar.xz
$ grep -A 3 Sha256 xz-utils_5.8.1-2.dsc
Checksums-Sha256:
0b54f79df85912504de0b14aec7971e3f964491af1812d83447005807513cd9e 1461872 xz-utils_5.8.1.orig.tar.xz
4138f4ceca1aa7fd2085fb15a23f6d495d27bca6d3c49c429a8520ea622c27ae 833 xz-utils_5.8.1.orig.tar.xz.asc
3ed458da17e4023ec45b2c398480ed4fe6a7bfc1d108675ec837b5ca9a4b5ccb 24648 xz-utils_5.8.1-2.debian.tar.xz
In the example above the checksum 0b54f79df85... is the same across the files, so it is a match.

Repackaged upstream sources can t be verified as easily Note that uscan may in rare cases repackage some upstream sources, for example to exclude files that don t adhere to Debian s copyright and licensing requirements. Those files and paths would be listed under the Files-Excluded section in the debian/copyright file. There are also other situations where the file that represents the upstream sources in Debian isn t bit-by-bit the same as what upstream published. If checksums don t match, an experienced Debian Developer should review all package settings (e.g. debian/source/options) to see if there was a valid and intentional reason for divergence.

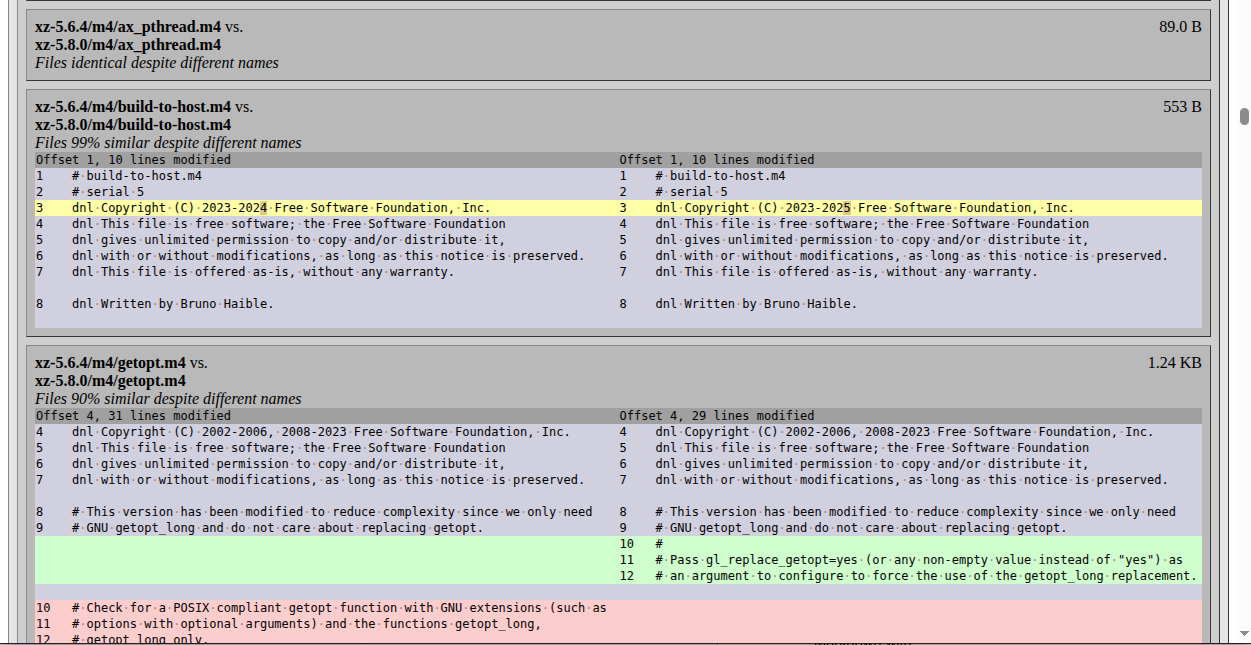
Reviewing changes between two source packages using diffoscope Diffoscope is an incredibly capable and handy tool to compare arbitrary files. For example, to view a report in HTML format of the differences between two XZ releases, run:
diffoscope --html-dir xz-utils-5.6.4_vs_5.8.0 xz-utils_5.6.4.orig.tar.xz xz-utils_5.8.0.orig.tar.xz
browse xz-utils-5.6.4_vs_5.8.0/index.html
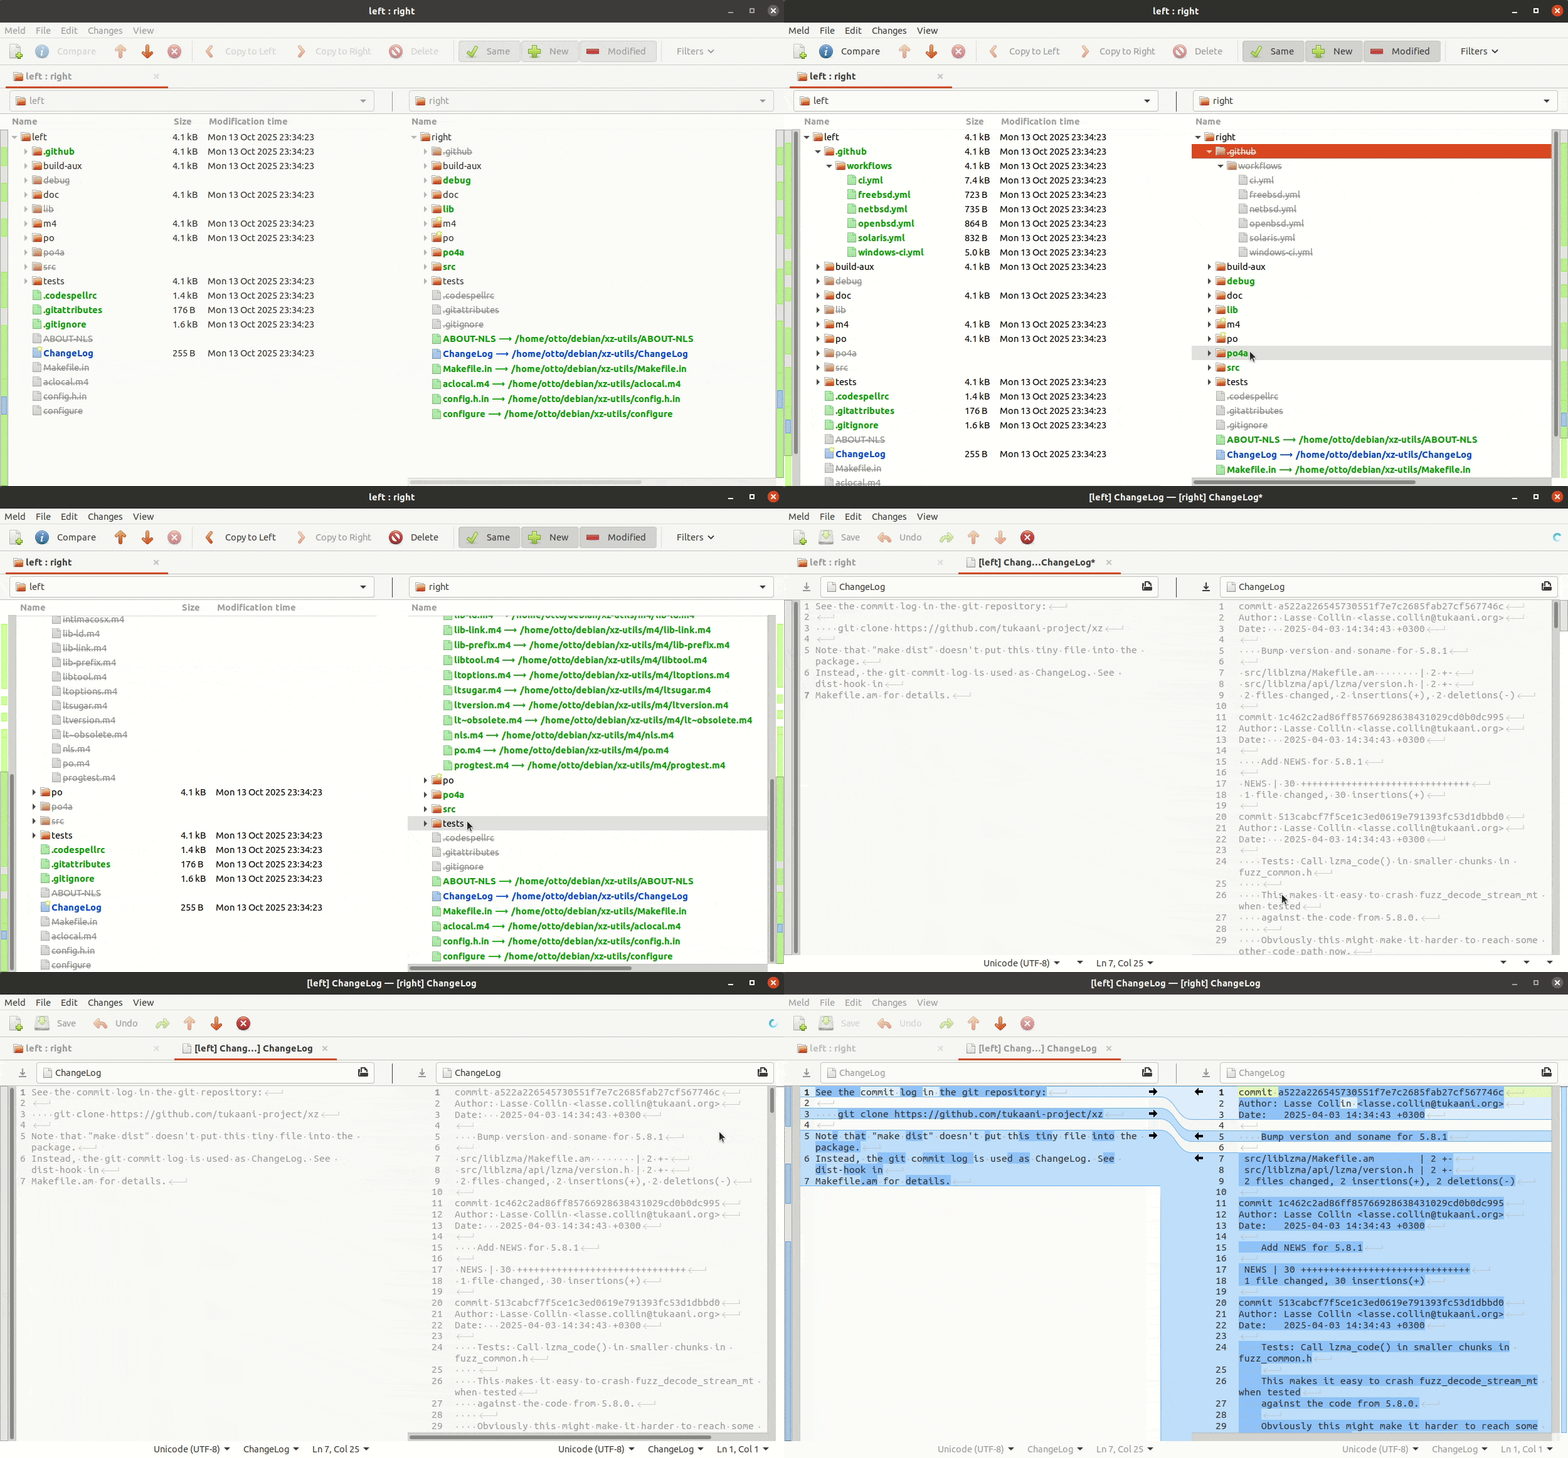
Inspecting diffoscope output of differences between two XZ Utils releases If the changes are extensive, and you want to use a LLM to help spot potential security issues, generate the report of both the upstream and Debian packaging differences in Markdown with:
diffoscope --markdown diffoscope-debian.md xz-utils_5.6.4-1.debian.tar.xz xz-utils_5.8.1-2.debian.tar.xz
diffoscope --markdown diffoscope.md xz-utils_5.6.4.orig.tar.xz xz-utils_5.8.0.orig.tar.xz
The Markdown files created above can then be passed to your favorite LLM, along with a prompt such as:
Based on the attached diffoscope output for a new Debian package version compared with the previous one, list all suspicious changes that might have introduced a backdoor, followed by other potential security issues. If there are none, list a short summary of changes as the conclusion.

Reviewing Debian source packages in version control As of today only 93% of all Debian source packages are tracked in git on Debian s GitLab instance at salsa.debian.org. Some key packages such as Coreutils and Bash are not using version control at all, as their maintainers apparently don t see value in using git for Debian packaging, and the Debian Policy does not require it. Thus, the only reliable and consistent way to audit changes in Debian packages is to compare the full versions from the archive as shown above. However, for packages that are hosted on Salsa, one can view the git history to gain additional insight into what exactly changed, when and why. For packages that are using version control, their location can be found in the Git-Vcs header in the debian/control file. For xz-utils the location is salsa.debian.org/debian/xz-utils. Note that the Debian policy does not state anything about how Salsa should be used, or what git repository layout or development practices to follow. In practice most packages follow the DEP-14 proposal, and use git-buildpackage as the tool for managing changes and pushing and pulling them between upstream and salsa.debian.org. To get the XZ Utils source, run:
$ gbp clone https://salsa.debian.org/debian/xz-utils.git
gbp:info: Cloning from 'https://salsa.debian.org/debian/xz-utils.git'
At the time of writing this post the git history shows:
$ git log --graph --oneline
* bb787585 (HEAD -> debian/unstable, origin/debian/unstable, origin/HEAD) Prepare 5.8.1-2
* 4b769547 d: Remove the symlinks from -dev package.
* a39f3428 Correct the nocheck build profile
* 1b806b8d Import Debian changes 5.8.1-1.1
* b1cad34b Prepare 5.8.1-1
* a8646015 Import 5.8.1
* 2808ec2d Update upstream source from tag 'upstream/5.8.1'
 \
  * fa1e8796 (origin/upstream/v5.8, upstream/v5.8) New upstream version 5.8.1
  * a522a226 Bump version and soname for 5.8.1
  * 1c462c2a Add NEWS for 5.8.1
  * 513cabcf Tests: Call lzma_code() in smaller chunks in fuzz_common.h
  * 48440e24 Tests: Add a fuzzing target for the multithreaded .xz decoder
  * 0c80045a liblzma: mt dec: Fix lack of parallelization in single-shot decoding
  * 81880488 liblzma: mt dec: Don't modify thr->in_size in the worker thread
  * d5a2ffe4 liblzma: mt dec: Don't free the input buffer too early (CVE-2025-31115)
  * c0c83596 liblzma: mt dec: Simplify by removing the THR_STOP state
  * 831b55b9 liblzma: mt dec: Fix a comment
  * b9d168ee liblzma: Add assertions to lzma_bufcpy()
  * c8e0a489 DOS: Update Makefile to fix the build
  * 307c02ed sysdefs.h: Avoid <stdalign.h> even with C11 compilers
  * 7ce38b31 Update THANKS
  * 688e51bd Translations: Update the Croatian translation
*   a6b54dde Prepare 5.8.0-1.
*   77d9470f Add 5.8 symbols.
*   9268eb66 Import 5.8.0
*   6f85ef4f Update upstream source from tag 'upstream/5.8.0'
 \ \
  *   afba662b New upstream version 5.8.0
   /
  * 173fb5c6 doc/SHA256SUMS: Add 5.8.0
  * db9258e8 Bump version and soname for 5.8.0
  * bfb752a3 Add NEWS for 5.8.0
  * 6ccbb904 Translations: Run "make -C po update-po"
  * 891a5f05 Translations: Run po4a/update-po
  * 4f52e738 Translations: Partially fix overtranslation in Serbian man pages
  * ff5d9447 liblzma: Count the extra bytes in LZMA/LZMA2 decoder memory usage
  * 943b012d liblzma: Use SSE2 intrinsics instead of memcpy() in dict_repeat()
This shows both the changes on the debian/unstable branch as well as the intermediate upstream import branch, and the actual real upstream development branch. See my Debian source packages in git explainer for details of what these branches are used for. To only view changes on the Debian branch, run git log --graph --oneline --first-parent or git log --graph --oneline -- debian. The Debian branch should only have changes inside the debian/ subdirectory, which is easy to check with:
$ git diff --stat upstream/v5.8
debian/README.source   16 +++
debian/autogen.sh   32 +++++
debian/changelog   949 ++++++++++++++++++++++++++
...
debian/upstream/signing-key.asc   52 +++++++++
debian/watch   4 +
debian/xz-utils.README.Debian   47 ++++++++
debian/xz-utils.docs   6 +
debian/xz-utils.install   28 +++++
debian/xz-utils.postinst   19 +++
debian/xz-utils.prerm   10 ++
debian/xzdec.docs   6 +
debian/xzdec.install   4 +
33 files changed, 2014 insertions(+)
All the files outside the debian/ directory originate from upstream, and for example running git blame on them should show only upstream commits:
$ git blame CMakeLists.txt
22af94128 (Lasse Collin 2024-02-12 17:09:10 +0200 1) # SPDX-License-Identifier: 0BSD
22af94128 (Lasse Collin 2024-02-12 17:09:10 +0200 2)
7e3493d40 (Lasse Collin 2020-02-24 23:38:16 +0200 3) ###############
7e3493d40 (Lasse Collin 2020-02-24 23:38:16 +0200 4) #
426bdc709 (Lasse Collin 2024-02-17 21:45:07 +0200 5) # CMake support for building XZ Utils
If the upstream in question signs commits or tags, they can be verified with e.g.:
$ git verify-tag v5.6.2
gpg: Signature made Wed 29 May 2024 09:39:42 AM PDT
gpg: using RSA key 3690C240CE51B4670D30AD1C38EE757D69184620
gpg: issuer "lasse.collin@tukaani.org"
gpg: Good signature from "Lasse Collin <lasse.collin@tukaani.org>" [expired]
gpg: Note: This key has expired!
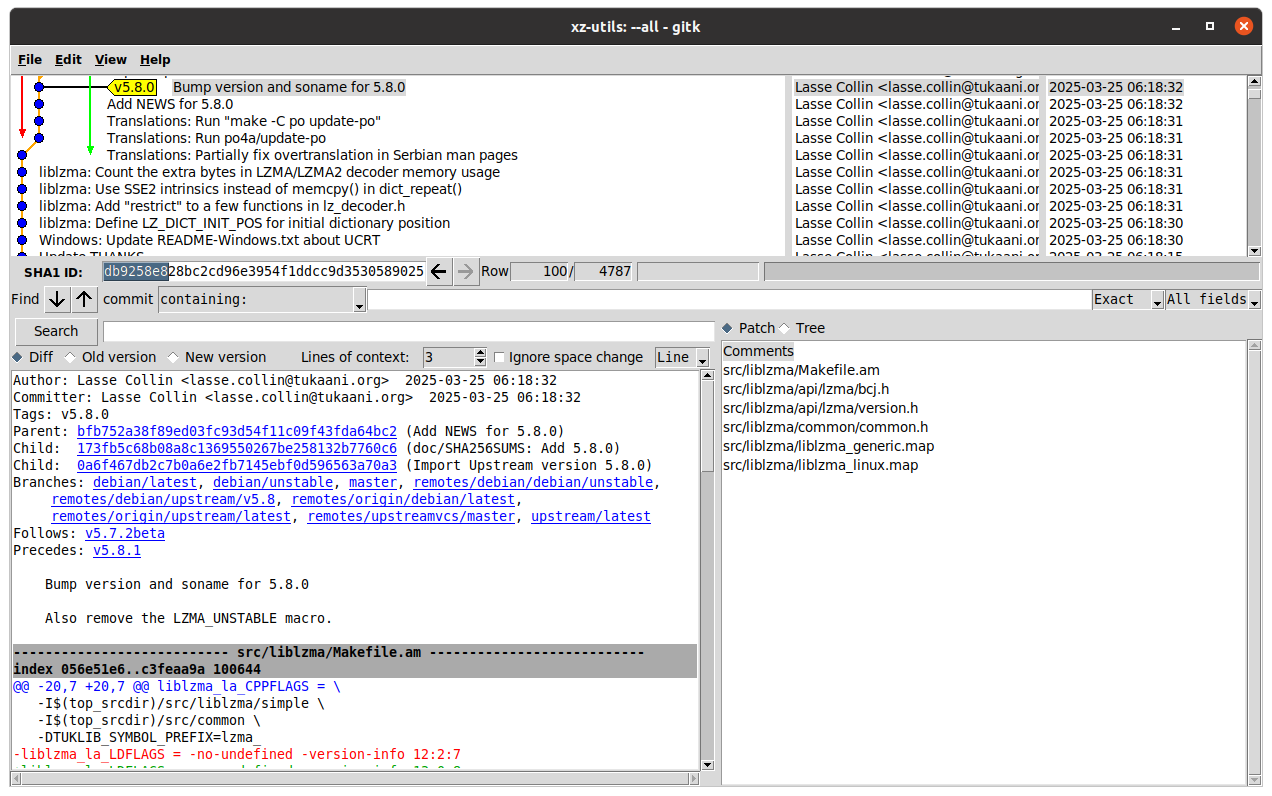
The main benefit of reviewing changes in git is the ability to see detailed information about each individual change, instead of just staring at a massive list of changes without any explanations. In this example, to view all the upstream commits since the previous import to Debian, one would view the commit range from afba662b New upstream version 5.8.0 to fa1e8796 New upstream version 5.8.1 with git log --reverse -p afba662b...fa1e8796. However, a far superior way to review changes would be to browse this range using a visual git history viewer, such as gitk. Either way, looking at one code change at a time and reading the git commit message makes the review much easier. Browsing git history in gitk --all

Comparing Debian source packages to git contents As stated in the beginning of the previous section, and worth repeating, there is no guarantee that the contents in the Debian packaging git repository matches what was actually uploaded to Debian. While the tag2upload project in Debian is getting more and more popular, Debian is still far from having any system to enforce that the git repository would be in sync with the Debian archive contents. To detect such differences we can run diff across the Debian source packages downloaded with debsnap earlier (path source-xz-utils/xz-utils_5.8.1-2.debian) and the git repository cloned in the previous section (path xz-utils):
diff
$ diff -u source-xz-utils/xz-utils_5.8.1-2.debian/ xz-utils/debian/
diff -u source-xz-utils/xz-utils_5.8.1-2.debian/changelog xz-utils/debian/changelog
--- debsnap/source-xz-utils/xz-utils_5.8.1-2.debian/changelog 2025-10-03 09:32:16.000000000 -0700
+++ xz-utils/debian/changelog 2025-10-12 12:18:04.623054758 -0700
@@ -5,7 +5,7 @@
 * Remove the symlinks from -dev, pointing to the lib package.
 (Closes: #1109354)

- -- Sebastian Andrzej Siewior <sebastian@breakpoint.cc> Fri, 03 Oct 2025 18:32:16 +0200
+ -- Sebastian Andrzej Siewior <sebastian@breakpoint.cc> Fri, 03 Oct 2025 18:36:59 +0200
In the case above diff revealed that the timestamp in the changelog in the version uploaded to Debian is different from what was committed to git. This is not malicious, just a mistake by the maintainer who probably didn t run gbp tag immediately after upload, but instead some dch command and ended up with having a different timestamps in the git compared to what was actually uploaded to Debian.

Creating syntetic Debian packaging git repositories If no Debian packaging git repository exists, or if it is lagging behind what was uploaded to Debian s archive, one can use git-buildpackage s import-dscs feature to create synthetic git commits based on the files downloaded by debsnap, ensuring the git contents fully matches what was uploaded to the archive. To import a single version there is gbp import-dsc (no s at the end), of which an example invocation would be:
$ gbp import-dsc --verbose ../source-xz-utils/xz-utils_5.8.1-2.dsc
Version '5.8.1-2' imported under '/home/otto/debian/xz-utils-2025-09-29'
Example commit history from a repository with commits added with gbp import-dsc:
$ git log --graph --oneline
* 86aed07b (HEAD -> debian/unstable, tag: debian/5.8.1-2, origin/debian/unstable) Import Debian changes 5.8.1-2
* f111d93b (tag: debian/5.8.1-1.1) Import Debian changes 5.8.1-1.1
* 1106e19b (tag: debian/5.8.1-1) Import Debian changes 5.8.1-1
 \
  * 08edbe38 (tag: upstream/5.8.1, origin/upstream/v5.8, upstream/v5.8) Import Upstream version 5.8.1
   \
    * a522a226 (tag: v5.8.1) Bump version and soname for 5.8.1
    * 1c462c2a Add NEWS for 5.8.1
    * 513cabcf Tests: Call lzma_code() in smaller chunks in fuzz_common.h
An online example repository with only a few missing uploads added using gbp import-dsc can be viewed at salsa.debian.org/otto/xz-utils-2025-09-29/-/network/debian%2Funstable An example repository that was fully crafted using gbp import-dscs can be viewed at salsa.debian.org/otto/xz-utils-gbp-import-dscs-debsnap-generated/-/network/debian%2Flatest. There exists also dgit, which in a similar way creates a synthetic git history to allow viewing the Debian archive contents via git tools. However, its focus is on producing new package versions, so fetching a package with dgit that has not had the history recorded in dgit earlier will only show the latest versions:
$ dgit clone xz-utils
canonical suite name for unstable is sid
starting new git history
last upload to archive: NO git hash
downloading http://ftp.debian.org/debian//pool/main/x/xz-utils/xz-utils_5.8.1.orig.tar.xz...
downloading http://ftp.debian.org/debian//pool/main/x/xz-utils/xz-utils_5.8.1.orig.tar.xz.asc...
downloading http://ftp.debian.org/debian//pool/main/x/xz-utils/xz-utils_5.8.1-2.debian.tar.xz...
dpkg-source: info: extracting xz-utils in unpacked
dpkg-source: info: unpacking xz-utils_5.8.1.orig.tar.xz
dpkg-source: info: unpacking xz-utils_5.8.1-2.debian.tar.xz
synthesised git commit from .dsc 5.8.1-2
HEAD is now at f9bcaf7 xz-utils (5.8.1-2) unstable; urgency=medium
dgit ok: ready for work in xz-utils
$ dgit/sid   git log --graph --oneline
* f9bcaf7 xz-utils (5.8.1-2) unstable; urgency=medium 9 days ago (HEAD -> dgit/sid, dgit/dgit/sid)
 \
  * 11d3a62 Import xz-utils_5.8.1-2.debian.tar.xz 9 days ago
* 15dcd95 Import xz-utils_5.8.1.orig.tar.xz 6 months ago
Unlike git-buildpackage managed git repositories, the dgit managed repositories cannot incorporate the upstream git history and are thus less useful for auditing the full software supply-chain in git.

Comparing upstream source packages to git contents Equally important to the note in the beginning of the previous section, one must also keep in mind that the upstream release source packages, often called release tarballs, are not guaranteed to have the exact same contents as the upstream git repository. Projects might strip out test data or extra development files from their release tarballs to avoid shipping unnecessary files to users, or projects might add documentation files or versioning information into the tarball that isn t stored in git. While a small minority, there are also upstreams that don t use git at all, so the plain files in a release tarball is still the lowest common denominator for all open source software projects, and exporting and importing source code needs to interface with it. In the case of XZ, the release tarball has additional version info and also a sizeable amount of pregenerated compiler configuration files. Detecting and comparing differences between git contents and tarballs can of course be done manually by running diff across an unpacked tarball and a checked out git repository. If using git-buildpackage, the difference between the git contents and tarball contents can be made visible directly in the import commit. In this XZ example, consider this git history:
* b1cad34b Prepare 5.8.1-1
* a8646015 Import 5.8.1
* 2808ec2d Update upstream source from tag 'upstream/5.8.1'
 \
  * fa1e8796 (debian/upstream/v5.8, upstream/v5.8) New upstream version 5.8.1
  * a522a226 (tag: v5.8.1) Bump version and soname for 5.8.1
  * 1c462c2a Add NEWS for 5.8.1
The commit a522a226 was the upstream release commit, which upstream also tagged v5.8.1. The merge commit 2808ec2d applied the new upstream import branch contents on the Debian branch. Between these is the special commit fa1e8796 New upstream version 5.8.1 tagged upstream/v5.8. This commit and tag exists only in the Debian packaging repository, and they show what is the contents imported into Debian. This is generated automatically by git-buildpackage when running git import-orig --uscan for Debian packages with the correct settings in debian/gbp.conf. By viewing this commit one can see exactly how the upstream release tarball differs from the upstream git contents (if at all). In the case of XZ, the difference is substantial, and shown below in full as it is very interesting:
$ git show --stat fa1e8796
commit fa1e8796dabd91a0f667b9e90f9841825225413a
(debian/upstream/v5.8, upstream/v5.8)
Author: Sebastian Andrzej Siewior <sebastian@breakpoint.cc>
Date: Thu Apr 3 22:58:39 2025 +0200
New upstream version 5.8.1
.codespellrc   30 -
.gitattributes   8 -
.github/workflows/ci.yml   163 -
.github/workflows/freebsd.yml   32 -
.github/workflows/netbsd.yml   32 -
.github/workflows/openbsd.yml   35 -
.github/workflows/solaris.yml   32 -
.github/workflows/windows-ci.yml   124 -
.gitignore   113 -
ABOUT-NLS   1 +
ChangeLog   17392 +++++++++++++++++++++
Makefile.in   1097 +++++++
aclocal.m4   1353 ++++++++
build-aux/ci_build.bash   286 --
build-aux/compile   351 ++
build-aux/config.guess   1815 ++++++++++
build-aux/config.rpath   751 +++++
build-aux/config.sub   2354 +++++++++++++
build-aux/depcomp   792 +++++
build-aux/install-sh   541 +++
build-aux/ltmain.sh   11524 ++++++++++++++++++++++
build-aux/missing   236 ++
build-aux/test-driver   160 +
config.h.in   634 ++++
configure   26434 ++++++++++++++++++++++
debug/Makefile.in   756 +++++
doc/SHA256SUMS   236 --
doc/man/txt/lzmainfo.txt   36 +
doc/man/txt/xz.txt   1708 ++++++++++
doc/man/txt/xzdec.txt   76 +
doc/man/txt/xzdiff.txt   39 +
doc/man/txt/xzgrep.txt   70 +
doc/man/txt/xzless.txt   36 +
doc/man/txt/xzmore.txt   31 +
lib/Makefile.in   623 ++++
m4/.gitignore   40 -
m4/build-to-host.m4   274 ++
m4/gettext.m4   392 +++
m4/host-cpu-c-abi.m4   529 +++
m4/iconv.m4   324 ++
m4/intlmacosx.m4   71 +
m4/lib-ld.m4   170 +
m4/lib-link.m4   815 +++++
m4/lib-prefix.m4   334 ++
m4/libtool.m4   8488 +++++++++++++++++++++
m4/ltoptions.m4   467 +++
m4/ltsugar.m4   124 +
m4/ltversion.m4   24 +
m4/lt~obsolete.m4   99 +
m4/nls.m4   33 +
m4/po.m4   456 +++
m4/progtest.m4   92 +
po/.gitignore   31 -
po/Makefile.in.in   517 +++
po/Rules-quot   66 +
po/boldquot.sed   21 +
po/ca.gmo   Bin 0 -> 15587 bytes
po/cs.gmo   Bin 0 -> 7983 bytes
po/da.gmo   Bin 0 -> 9040 bytes
po/de.gmo   Bin 0 -> 29882 bytes
po/en@boldquot.header   35 +
po/en@quot.header   32 +
po/eo.gmo   Bin 0 -> 15060 bytes
po/es.gmo   Bin 0 -> 29228 bytes
po/fi.gmo   Bin 0 -> 28225 bytes
po/fr.gmo   Bin 0 -> 10232 bytes
To be able to easily inspect exactly what changed in the release tarball compared to git release tag contents, the best tool for the job is Meld, invoked via git difftool --dir-diff fa1e8796^..fa1e8796. Meld invoked by git difftool --dir-diff afba662b..fa1e8796 to show differences between git release tag and release tarball contents To compare changes across the new and old upstream tarball, one would need to compare commits afba662b New upstream version 5.8.0 and fa1e8796 New upstream version 5.8.1 by running git difftool --dir-diff afba662b..fa1e8796. Meld invoked by git difftool --dir-diff afba662b..fa1e8796 to show differences between to upstream release tarball contents With all the above tips you can now go and try to audit your own favorite package in Debian and see if it is identical with upstream, and if not, how it differs.
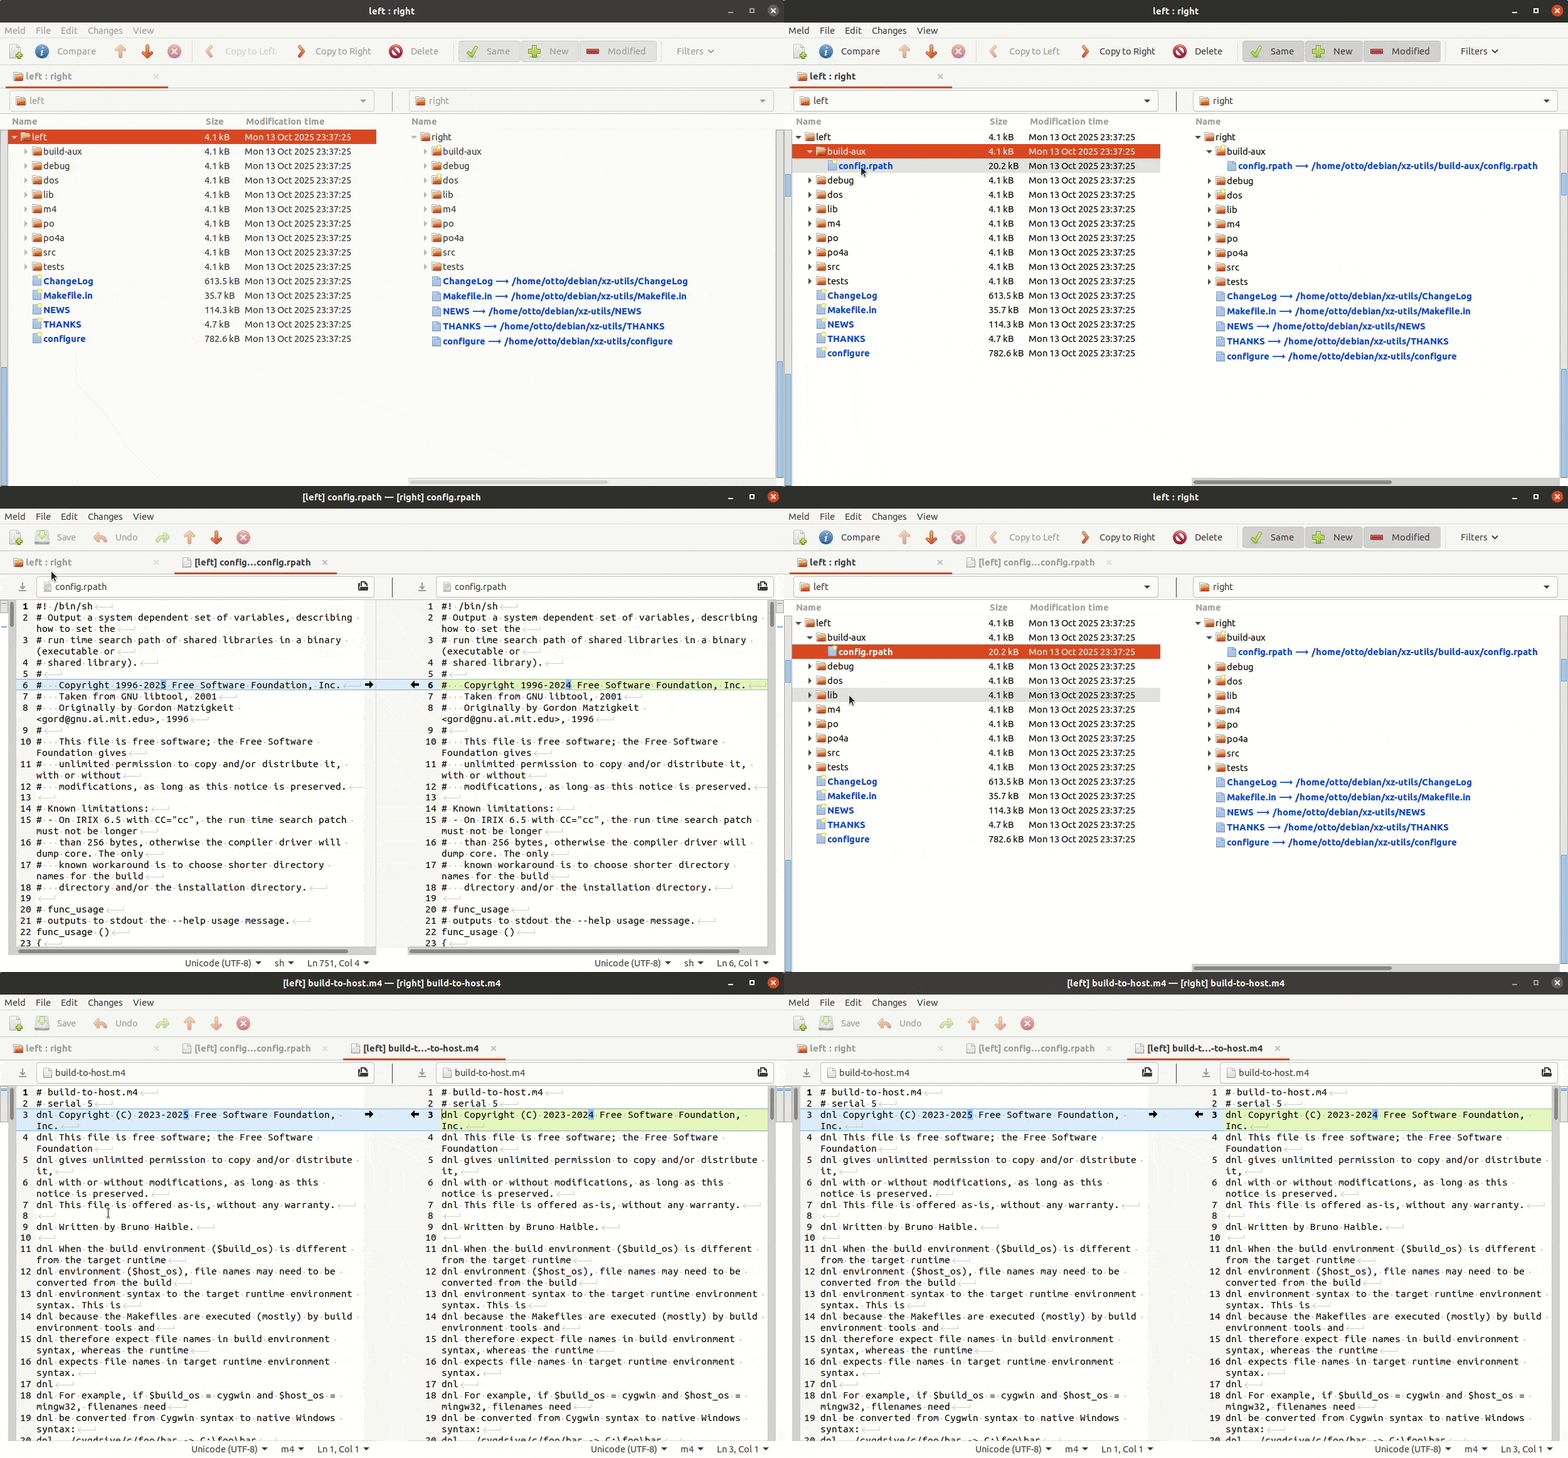
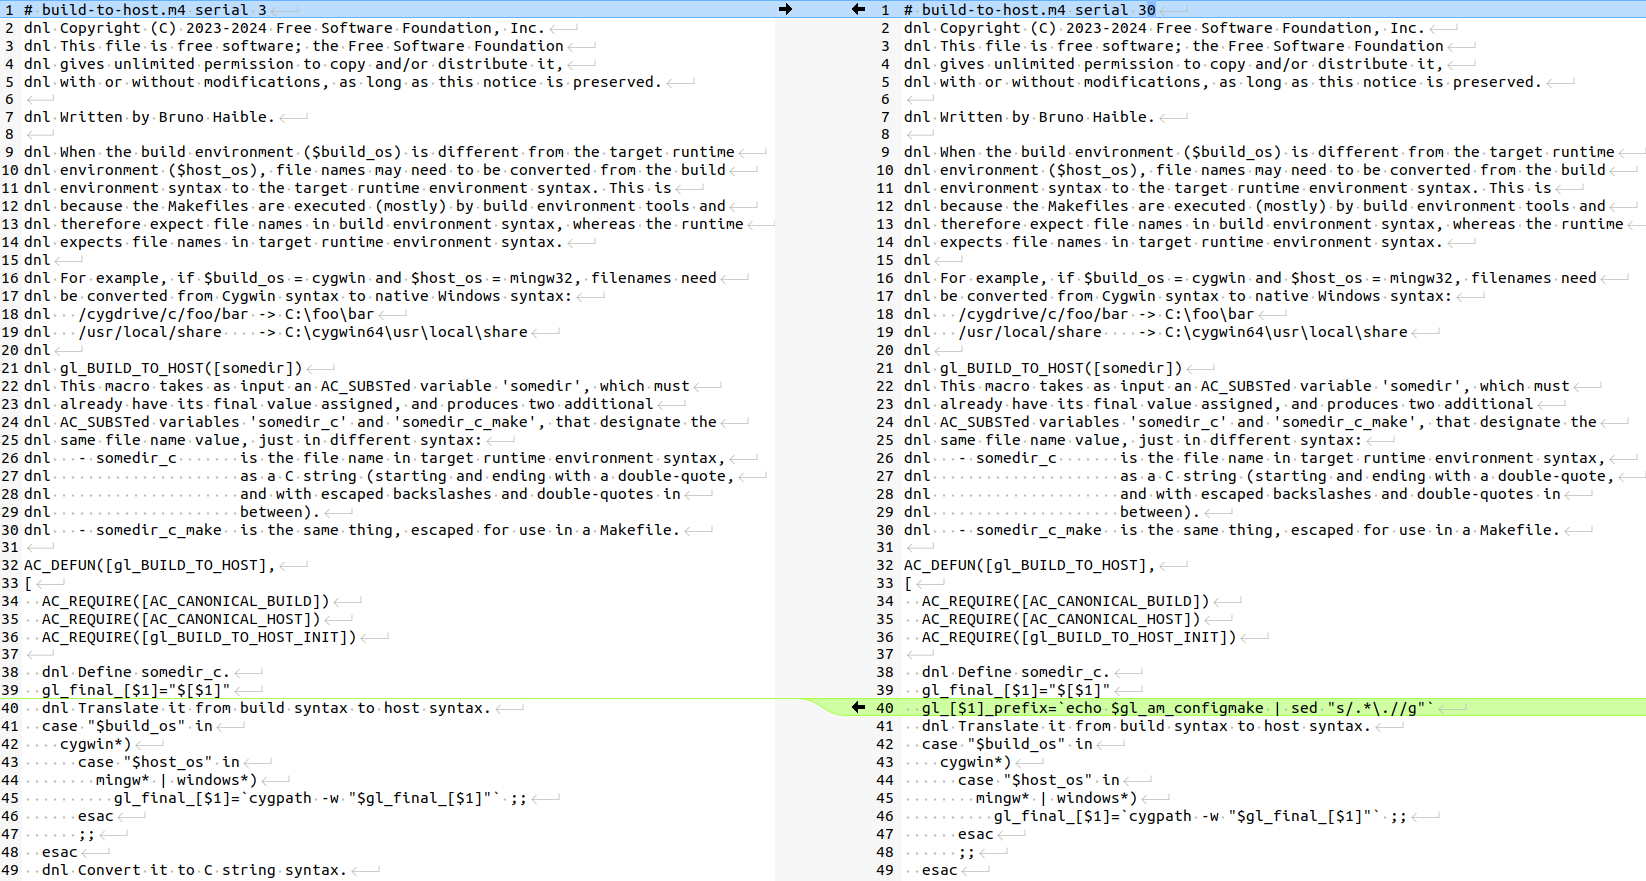
Should the XZ backdoor have been detected using these tools? The famous XZ Utils backdoor (CVE-2024-3094) consisted of two parts: the actual backdoor inside two binary blobs masqueraded as a test files (tests/files/bad-3-corrupt_lzma2.xz, tests/files/good-large_compressed.lzma), and a small modification in the build scripts (m4/build-to-host.m4) to extract the backdoor and plant it into the built binary. The build script was not tracked in version control, but generated with GNU Autotools at release time and only shipped as additional files in the release tarball. The entire reason for me to write this post was to ponder if a diligent engineer using git-buildpackage best practices could have reasonably spotted this while importing the new upstream release into Debian. The short answer is no . The malicious actor here clearly anticipated all the typical ways anyone might inspect both git commits, and release tarball contents, and masqueraded the changes very well and over a long timespan. First of all, XZ has for legitimate reasons for several carefully crafted .xz files as test data to help catch regressions in the decompression code path. The test files are shipped in the release so users can run the test suite and validate that the binary is built correctly and xz works properly. Debian famously runs massive amounts of testing in its CI and autopkgtest system across tens of thousands of packages to uphold high quality despite frequent upgrades of the build toolchain and while supporting more CPU architectures than any other distro. Test data is useful and should stay. When git-buildpackage is used correctly, the upstream commits are visible in the Debian packaging for easy review, but the commit cf44e4b that introduced the test files does not deviate enough from regular sloppy coding practices to really stand out. It is unfortunately very common for git commit to lack a message body explaining why the change was done, and to not be properly atomic with test code and test data together in the same commit, and for commits to be pushed directly to mainline without using code reviews (the commit was not part of any PR in this case). Only another upstream developer could have spotted that this change is not on par to what the project expects, and that the test code was never added, only test data, and thus that this commit was not just a sloppy one but potentially malicious. Secondly, the fact that a new Autotools file appeared (m4/build-to-host.m4) in the XZ Utils 5.6.0 is not suspicious. This is perfectly normal for Autotools. In fact, starting from XZ Utils version 5.8.1 it is now shipping a m4/build-to-host.m4 file that it actually uses now. Spotting that there is anything fishy is practically impossible by simply reading the code, as Autotools files are full custom m4 syntax interwoven with shell script, and there are plenty of backticks ( ) that spawn subshells and evals that execute variable contents further, which is just normal for Autotools. Russ Cox s XZ post explains how exactly the Autotools code fetched the actual backdoor from the test files and injected it into the build. Inspecting the m4/build-to-host.m4 changes in Meld launched via git difftool There is only one tiny thing that maybe a very experienced Autotools user could potentially have noticed: the serial 30 in the version header is way too high. In theory one could also have noticed this Autotools file deviates from what other packages in Debian ship with the same filename, such as e.g. the serial 3, serial 5a or 5b versions. That would however require and an insane amount extra checking work, and is not something we should plan to start doing. A much simpler solution would be to simply strongly recommend all open source projects to stop using Autotools to eventually get rid of it entirely.

Not detectable with reasonable effort While planting backdoors is evil, it is hard not to feel some respect to the level of skill and dedication of the people behind this. I ve been involved in a bunch of security breach investigations during my IT career, and never have I seen anything this well executed. If it hadn t slowed down SSH by ~500 milliseconds and been discovered due to that, it would most likely have stayed undetected for months or years. Hiding backdoors in closed source software is relatively trivial, but hiding backdoors in plain sight in a popular open source project requires some unusual amount of expertise and creativity as shown above.

Is the software supply-chain in Debian easy to audit? While maintaining a Debian package source using git-buildpackage can make the package history a lot easier to inspect, most packages have incomplete configurations in their debian/gbp.conf, and thus their package development histories are not always correctly constructed or uniform and easy to compare. The Debian Policy does not mandate git usage at all, and there are many important packages that are not using git at all. Additionally the Debian Policy also allows for non-maintainers to upload new versions to Debian without committing anything in git even for packages where the original maintainer wanted to use git. Uploads that bypass git unfortunately happen surpisingly often. Because of the situation, I am afraid that we could have multiple similar backdoors lurking that simply haven t been detected yet. More audits, that hopefully also get published openly, would be welcome! More people auditing the contents of the Debian archives would probably also help surface what tools and policies Debian might be missing to make the work easier, and thus help improve the security of Debian s users, and improve trust in Debian.

Is Debian currently missing some software that could help detect similar things? To my knowledge there is currently no system in place as part of Debian s QA or security infrastructure to verify that the upstream source packages in Debian are actually from upstream. I ve come across a lot of packages where the debian/watch or other configs are incorrect and even cases where maintainers have manually created upstream tarballs as it was easier than configuring automation to work. It is obvious that for those packages the source tarball now in Debian is not at all the same as upstream. I am not aware of any malicious cases though (if I was, I would report them of course). I am also aware of packages in the Debian repository that are misconfigured to be of type 1.0 (native) packages, mixing the upstream files and debian/ contents and having patches applied, while they actually should be configured as 3.0 (quilt), and not hide what is the true upstream sources. Debian should extend the QA tools to scan for such things. If I find a sponsor, I might build it myself as my next major contribution to Debian. In addition to better tooling for finding mismatches in the source code, Debian could also have better tooling for tracking in built binaries what their source files were, but solutions like Fraunhofer-AISEC s supply-graph or Sony s ESSTRA are not practical yet. Julien Malka s post about NixOS discusses the role of reproducible builds, which may help in some cases across all distros.

Or, is Debian missing some policies or practices to mitigate this? Perhaps more importantly than more security scanning, the Debian Developer community should switch the general mindset from anyone is free to do anything to valuing having more shared workflows. The ability to audit anything is severely hampered by the fact that there are so many ways to do the same thing, and distinguishing what is a normal deviation from a malicious deviation is too hard, as the normal can basically be almost anything. Also, as there is no documented and recommended default workflow, both those who are old and new to Debian packaging might never learn any one optimal workflow, and end up doing many steps in the packaging process in a way that kind of works, but is actually wrong or unnecessary, causing process deviations that look malicious, but turn out to just be a result of not fully understanding what would have been the right way to do something. In the long run, once individual developers workflows are more aligned, doing code reviews will become a lot easier and smoother as the excess noise of workflow differences diminishes and reviews will feel much more productive to all participants. Debian fostering a culture of code reviews would allow us to slowly move from the current practice of mainly solo packaging work towards true collaboration forming around those code reviews. I have been promoting increased use of Merge Requests in Debian already for some time, for example by proposing DEP-18: Encourage Continuous Integration and Merge Request based Collaboration for Debian packages. If you are involved in Debian development, please give a thumbs up in dep-team/deps!21 if you want me to continue promoting it.

Can we trust open source software? Yes and I would argue that we can only trust open source software. There is no way to audit closed source software, and anyone using e.g. Windows or MacOS just have to trust the vendor s word when they say they have no intentional or accidental backdoors in their software. Or, when the news gets out that the systems of a closed source vendor was compromised, like Crowdstrike some weeks ago, we can t audit anything, and time after time we simply need to take their word when they say they have properly cleaned up their code base. In theory, a vendor could give some kind of contractual or financial guarantee to its customer that there are no preventable security issues, but in practice that never happens. I am not aware of a single case of e.g. Microsoft or Oracle would have paid damages to their customers after a security flaw was found in their software. In theory you could also pay a vendor more to have them focus more effort in security, but since there is no way to verify what they did, or to get compensation when they didn t, any increased fees are likely just pocketed as increased profit. Open source is clearly better overall. You can, if you are an individual with the time and skills, audit every step in the supply-chain, or you could as an organization make investments in open source security improvements and actually verify what changes were made and how security improved. If your organisation is using Debian (or derivatives, such as Ubuntu) and you are interested in sponsoring my work to improve Debian, please reach out.

22 September 2025

Vincent Bernat: Akvorado release 2.0

Akvorado 2.0 was released today! Akvorado collects network flows with IPFIX and sFlow. It enriches flows and stores them in a ClickHouse database. Users can browse the data through a web console. This release introduces an important architectural change and other smaller improvements. Let s dive in!
$ git diff --shortstat v1.11.5
 493 files changed, 25015 insertions(+), 21135 deletions(-)

New outlet service The major change in Akvorado 2.0 is splitting the inlet service into two parts: the inlet and the outlet. Previously, the inlet handled all flow processing: receiving, decoding, and enrichment. Flows were then sent to Kafka for storage in ClickHouse:
Akvorado flow processing before the change: flows are received and processed by the inlet, sent to Kafka and stored in ClickHouse
Akvorado flow processing before the introduction of the outlet service
Network flows reach the inlet service using UDP, an unreliable protocol. The inlet must process them fast enough to avoid losing packets. To handle a high number of flows, the inlet spawns several sets of workers to receive flows, fetch metadata, and assemble enriched flows for Kafka. Many configuration options existed for scaling, which increased complexity for users. The code needed to avoid blocking at any cost, making the processing pipeline complex and sometimes unreliable, particularly the BMP receiver.1 Adding new features became difficult without making the problem worse.2 In Akvorado 2.0, the inlet receives flows and pushes them to Kafka without decoding them. The new outlet service handles the remaining tasks:
Akvorado flow processing after the change: flows are received by the inlet, sent to Kafka, processed by the outlet and inserted in ClickHouse
Akvorado flow processing after the introduction of the outlet service
This change goes beyond a simple split:3 the outlet now reads flows from Kafka and pushes them to ClickHouse, two tasks that Akvorado did not handle before. Flows are heavily batched to increase efficiency and reduce the load on ClickHouse using ch-go, a low-level Go client for ClickHouse. When batches are too small, asynchronous inserts are used (e20645). The number of outlet workers scales dynamically (e5a625) based on the target batch size and latency (50,000 flows and 5 seconds by default). This new architecture also allows us to simplify and optimize the code. The outlet fetches metadata synchronously (e20645). The BMP component becomes simpler by removing cooperative multitasking (3b9486). Reusing the same RawFlow object to decode protobuf-encoded flows from Kafka reduces pressure on the garbage collector (8b580f). The effect on Akvorado s overall performance was somewhat uncertain, but a user reported 35% lower CPU usage after migrating from the previous version, plus resolution of the long-standing BMP component issue.

Other changes This new version includes many miscellaneous changes, such as completion for source and destination ports (f92d2e), and automatic restart of the orchestrator service (0f72ff) when configuration changes to avoid a common pitfall for newcomers. Let s focus on some key areas for this release: observability, documentation, CI, Docker, Go, and JavaScript.

Observability Akvorado exposes metrics to provide visibility into the processing pipeline and help troubleshoot issues. These are available through Prometheus HTTP metrics endpoints, such as /api/v0/inlet/metrics. With the introduction of the outlet, many metrics moved. Some were also renamed (4c0b15) to match Prometheus best practices. Kafka consumer lag was added as a new metric (e3a778). If you do not have your own observability stack, the Docker Compose setup shipped with Akvorado provides one. You can enable it by activating the profiles introduced for this purpose (529a8f). The prometheus profile ships Prometheus to store metrics and Alloy to collect them (2b3c46, f81299, and 8eb7cd). Redis and Kafka metrics are collected through the exporter bundled with Alloy (560113). Other metrics are exposed using Prometheus metrics endpoints and are automatically fetched by Alloy with the help of some Docker labels, similar to what is done to configure Traefik. cAdvisor was also added (83d855) to provide some container-related metrics. The loki profile ships Loki to store logs (45c684). While Alloy can collect and ship logs to Loki, its parsing abilities are limited: I could not find a way to preserve all metadata associated with structured logs produced by many applications, including Akvorado. Vector replaces Alloy (95e201) and features a domain-specific language, VRL, to transform logs. Annoyingly, Vector currently cannot retrieve Docker logs from before it was started. Finally, the grafana profile ships Grafana, but the shipped dashboards are broken. This is planned for a future version.

Documentation The Docker Compose setup provided by Akvorado makes it easy to get the web interface up and running quickly. However, Akvorado requires a few mandatory steps to be functional. It ships with comprehensive documentation, including a chapter about troubleshooting problems. I hoped this documentation would reduce the support burden. It is difficult to know if it works. Happy users rarely report their success, while some users open discussions asking for help without reading much of the documentation. In this release, the documentation was significantly improved.
$ git diff --shortstat v1.11.5 -- console/data/docs
 10 files changed, 1873 insertions(+), 1203 deletions(-)
The documentation was updated (fc1028) to match Akvorado s new architecture. The troubleshooting section was rewritten (17a272). Instructions on how to improve ClickHouse performance when upgrading from versions earlier than 1.10.0 was added (5f1e9a). An LLM proofread the entire content (06e3f3). Developer-focused documentation was also improved (548bbb, e41bae, and 871fc5). From a usability perspective, table of content sections are now collapsable (c142e5). Admonitions help draw user attention to important points (8ac894).
Admonition in Akvorado documentation to ask a user not to open an issue or start a discussion before reading the documentation
Example of use of admonitions in Akvorado's documentation

Continuous integration This release includes efforts to speed up continuous integration on GitHub. Coverage and race tests run in parallel (6af216 and fa9e48). The Docker image builds during the tests but gets tagged only after they succeed (8b0dce).
GitHub workflow for CI with many jobs, some of them running in parallel, some not
GitHub workflow to test and build Akvorado
End-to-end tests (883e19) ensure the shipped Docker Compose setup works as expected. Hurl runs tests on various HTTP endpoints, particularly to verify metrics (42679b and 169fa9). For example:
## Test inlet has received NetFlow flows
GET http://127.0.0.1:8080/prometheus/api/v1/query
[Query]
query: sum(akvorado_inlet_flow_input_udp_packets_total job="akvorado-inlet",listener=":2055" )
HTTP 200
[Captures]
inlet_receivedflows: jsonpath "$.data.result[0].value[1]" toInt
[Asserts]
variable "inlet_receivedflows" > 10
## Test inlet has sent them to Kafka
GET http://127.0.0.1:8080/prometheus/api/v1/query
[Query]
query: sum(akvorado_inlet_kafka_sent_messages_total job="akvorado-inlet" )
HTTP 200
[Captures]
inlet_sentflows: jsonpath "$.data.result[0].value[1]" toInt
[Asserts]
variable "inlet_sentflows" >=   inlet_receivedflows  

Docker Akvorado ships with a comprehensive Docker Compose setup to help users get started quickly. It ensures a consistent deployment, eliminating many configuration-related issues. It also serves as a living documentation of the complete architecture. This release brings some small enhancements around Docker: Previously, many Docker images were pulled from the Bitnami Containers library. However, VMWare acquired Bitnami in 2019 and Broadcom acquired VMWare in 2023. As a result, Bitnami images were deprecated in less than a month. This was not really a surprise4. Previous versions of Akvorado had already started moving away from them. In this release, the Apache project s Kafka image replaces the Bitnami one (1eb382). Thanks to the switch to KRaft mode, Zookeeper is no longer needed (0a2ea1, 8a49ca, and f65d20). Akvorado s Docker images were previously compiled with Nix. However, building AArch64 images on x86-64 is slow because it relies on QEMU userland emulation. The updated Dockerfile uses multi-stage and multi-platform builds: one stage builds the JavaScript part on the host platform, one stage builds the Go part cross-compiled on the host platform, and the final stage assembles the image on top of a slim distroless image (268e95 and d526ca).
# This is a simplified version
FROM --platform=$BUILDPLATFORM node:20-alpine AS build-js
RUN apk add --no-cache make
WORKDIR /build
COPY console/frontend console/frontend
COPY Makefile .
RUN make console/data/frontend
FROM --platform=$BUILDPLATFORM golang:alpine AS build-go
RUN apk add --no-cache make curl zip
WORKDIR /build
COPY . .
COPY --from=build-js /build/console/data/frontend console/data/frontend
RUN go mod download
RUN make all-indep
ARG TARGETOS TARGETARCH TARGETVARIANT VERSION
RUN make
FROM gcr.io/distroless/static:latest
COPY --from=build-go /build/bin/akvorado /usr/local/bin/akvorado
ENTRYPOINT [ "/usr/local/bin/akvorado" ]
When building for multiple platforms with --platform linux/amd64,linux/arm64,linux/arm/v7, the build steps until the highlighted line execute only once for all platforms. This significantly speeds up the build. Akvorado now ships Docker images for these platforms: linux/amd64, linux/amd64/v3, linux/arm64, and linux/arm/v7. When requesting ghcr.io/akvorado/akvorado, Docker selects the best image for the current CPU. On x86-64, there are two choices. If your CPU is recent enough, Docker downloads linux/amd64/v3. This version contains additional optimizations and should run faster than the linux/amd64 version. It would be interesting to ship an image for linux/arm64/v8.2, but Docker does not support the same mechanism for AArch64 yet (792808).

Go This release includes many changes related to Go but not visible to the users.

Toolchain In the past, Akvorado supported the two latest Go versions, preventing immediate use of the latest enhancements. The goal was to allow users of stable distributions to use Go versions shipped with their distribution to compile Akvorado. However, this became frustrating when interesting features, like go tool, were released. Akvorado 2.0 requires Go 1.25 (77306d) but can be compiled with older toolchains by automatically downloading a newer one (94fb1c).5 Users can still override GOTOOLCHAIN to revert this decision. The recommended toolchain updates weekly through CI to ensure we get the latest minor release (5b11ec). This change also simplifies updates to newer versions: only go.mod needs updating. Thanks to this change, Akvorado now uses wg.Go() (77306d) and I have started converting some unit tests to the new test/synctest package (bd787e, 7016d8, and 159085).

Testing When testing equality, I use a helper function Diff() to display the differences when it fails:
got := input.Keys()
expected := []int 1, 2, 3 
if diff := helpers.Diff(got, expected); diff != ""  
    t.Fatalf("Keys() (-got, +want):\n%s", diff)
 
This function uses kylelemons/godebug. This package is no longer maintained and has some shortcomings: for example, by default, it does not compare struct private fields, which may cause unexpectedly successful tests. I replaced it with google/go-cmp, which is stricter and has better output (e2f1df).

Another package for Kafka Another change is the switch from Sarama to franz-go to interact with Kafka (756e4a and 2d26c5). The main motivation for this change is to get a better concurrency model. Sarama heavily relies on channels and it is difficult to understand the lifecycle of an object handed to this package. franz-go uses a more modern approach with callbacks6 that is both more performant and easier to understand. It also ships with a package to spawn fake Kafka broker clusters, which is more convenient than the mocking functions provided by Sarama.

Improved routing table for BMP To store its routing table, the BMP component used kentik/patricia, an implementation of a patricia tree focused on reducing garbage collection pressure. gaissmai/bart is a more recent alternative using an adaptation of [Donald Knuth s ART algorithm][] that promises better performance and delivers it: 90% faster lookups and 27% faster insertions (92ee2e and fdb65c). Unlike kentik/patricia, gaissmai/bart does not help efficiently store values attached to each prefix. I adapted the same approach as kentik/patricia to store route lists for each prefix: store a 32-bit index for each prefix, and use it to build a 64-bit index for looking up routes in a map. This leverages Go s efficient map structure. gaissmai/bart also supports a lockless routing table version, but this is not simple because we would need to extend this to the map storing the routes and to the interning mechanism. I also attempted to use Go s new unique package to replace the intern package included in Akvorado, but performance was worse.7

Miscellaneous Previous versions of Akvorado were using a custom Protobuf encoder for performance and flexibility. With the introduction of the outlet service, Akvorado only needs a simple static schema, so this code was removed. However, it is possible to enhance performance with planetscale/vtprotobuf (e49a74, and 8b580f). Moreover, the dependency on protoc, a C++ program, was somewhat annoying. Therefore, Akvorado now uses buf, written in Go, to convert a Protobuf schema into Go code (f4c879). Another small optimization to reduce the size of the Akvorado binary by 10 MB was to compress the static assets embedded in Akvorado in a ZIP file. It includes the ASN database, as well as the SVG images for the documentation. A small layer of code makes this change transparent (b1d638 and e69b91).

JavaScript Recently, two large supply-chain attacks hit the JavaScript ecosystem: one affecting the popular packages chalk and debug and another impacting the popular package @ctrl/tinycolor. These attacks also exist in other ecosystems, but JavaScript is a prime target due to heavy use of small third-party dependencies. The previous version of Akvorado relied on 653 dependencies. npm-run-all was removed (3424e8, 132 dependencies). patch-package was removed (625805 and e85ff0, 69 dependencies) by moving missing TypeScript definitions to env.d.ts. eslint was replaced with oxlint, a linter written in Rust (97fd8c, 125 dependencies, including the plugins). I switched from npm to Pnpm, an alternative package manager (fce383). Pnpm does not run install scripts by default8 and prevents installing packages that are too recent. It is also significantly faster.9 Node.js does not ship Pnpm but it ships Corepack, which allows us to use Pnpm without installing it. Pnpm can also list licenses used by each dependency, removing the need for license-compliance (a35ca8, 42 dependencies). For additional speed improvements, beyond switching to Pnpm and Oxlint, Vite was replaced with its faster Rolldown version (463827). After these changes, Akvorado only pulls 225 dependencies.

Next steps I would like to land three features in the next version of Akvorado:
  • Add Grafana dashboards to complete the observability stack. See issue #1906 for details.
  • Integrate OVH s Grafana plugin by providing a stable API for such integrations. Akvorado s web console would still be useful for browsing results, but if you want to build and share dashboards, you should switch to Grafana. See issue #1895.
  • Move some work currently done in ClickHouse (custom dictionaries, GeoIP and IP enrichment) back into the outlet service. This should give more flexibility for adding features like the one requested in issue #1030. See issue #2006.

I started working on splitting the inlet into two parts more than one year ago. I found more motivation in recent months, partly thanks to Claude Code, which I used as a rubber duck. Almost none of the produced code was kept:10 it is like an intern who does not learn.

  1. Many attempts were made to make the BMP component both performant and not blocking. See for example PR #254, PR #255, and PR #278. Despite these efforts, this component remained problematic for most users. See issue #1461 as an example.
  2. Some features have been pushed to ClickHouse to avoid the processing cost in the inlet. See for example PR #1059.
  3. This is the biggest commit:
    $ git show --shortstat ac68c5970e2c   tail -1
    231 files changed, 6474 insertions(+), 3877 deletions(-)
    
  4. Broadcom is known for its user-hostile moves. Look at what happened with VMWare.
  5. As a Debian developer, I dislike these mechanisms that circumvent the distribution package manager. The final straw came when Go 1.25 spent one month in the Debian NEW queue, an arbitrary mechanism I don t like at all.
  6. In the early years of Go, channels were heavily promoted. Sarama was designed during this period. A few years later, a more nuanced approach emerged. See notably Go channels are bad and you should feel bad.
  7. This should be investigated further, but my theory is that the intern package uses 32-bit integers, while unique uses 64-bit pointers. See commit 74e5ac.
  8. This is also possible with npm. See commit dab2f7.
  9. An even faster alternative is Bun, but it is less available.
  10. The exceptions are part of the code for the admonition blocks, the code for collapsing the table of content, and part of the documentation.

17 September 2025

John Goerzen: Installing and Using Debian With My Decades-Old Genuine DEC vt510 Serial Terminal

Six years ago, I was inspired to buy a DEC serial terminal. Since then, my collection has grown to include several DEC models, an IBM 3151, a Wyse WY-55, a Televideo 990, and a few others. When you are running a terminal program on Linux or MacOS, what you are really running is a terminal emulator. In almost all cases, the terminal emulator is emulating one of the DEC terminals in the vt100 through vt520 line, which themselves use a command set based on an ANSI standard. In short, you spend all day using a program designed to pretend to be the exact kind of physical machine I m using for this experiment! I have long used my terminals connected to a Raspberry Pi 4, but due to the difficulty of entering a root filesystem encryption password using a serial console on a Raspberry Pi, I am switching to an x86 Mini PC (with a N100 CPU). While I have used a terminal with the Pi, I ve never before used it as a serial console all the way from early boot, and I have never installed Debian using the terminal to run the installer. A serial terminal gives you a login prompt. A serial console gives you access to kernel messages, the initrd environment, and sometimes even the bootloader. This might be fun, I thought. I selected one of my vt510 terminals for this. It is one of my newer ones, having been built in 1993. But it has a key feature: I can remap Ctrl to be at the caps lock position, something I do on every other system I use anyhow. I could have easily selected an older one from the 1980s. A DEC vt510 terminal showing the Debian installer Kernel configuration To enable a serial console for Linux, you need to pass a parameter on the kernel command line. See the kernel documentaiton for more. I very frequently see instructions that are incomplete; they particularly omit flow control, which is most definitely needed for these real serial terminals. I run my terminal at 57600 bps, so the parameter I need is console=ttyS0,57600n8r. The r means to use hardware flow control (ttyS0 corresponds to the first serial port on the system; use ttyS1 or something else as appropriate for your situation). While booting the Debian installer, according to Debian s instructions, it may be useful to also add TERM=vt102 (the installer doesn t support the vt510 terminal type directly). The TERM parameter should not be specified on a running system after instlalation. Booting the Debian installer When you start the Debian installer, to get it into serial mode, you have a couple of options:
  1. You can use a traditional display and keyboard just long enough to input the kernel parameters described above
  2. You can edit the bootloader configuration on the installer s filesystem prior to booting from it
Option 1 is pretty easy. Option 2 is hard mode, but not that bad. On x86, the Debian installer boots in at least two different ways: it uses GRUB if you re booting under UEFI (which is most systems these days), or ISOLINUX if you are booting from the BIOS. If using GRUB, the file to edit on the installer image is boot/grub/grub.cfg. Near the top, add these lines:
serial --unit=0 --speed=57600 --word=8 --parity=no --stop=1
terminal_input console serial
terminal_output console serial
Unit 0 corresponds to ttyS0 as above. GRUB s serial command does not support flow control. If your terminal gets corrupted during the GRUB stage, you may need to configure it to a slower speed. Then, find the linux line under the Install menuentry. Edit it to insert console=ttyS0,57600n8r TERM=vt102 right after the vga=788. Save, unmount, and boot. You should see the GRUB screen displayed on your serial terminal. Select the Install option and the installer begins. If you are using BIOS boot, I m sure you can do something similar with the files in the isolinux directory, but haven t researched it. Now, you can install Debian like usual! Configuring the System I was pleasantly surprised to find that Debian s installer took care of many, but not all, of the things I want to do in order to make the system work nicely with a serial terminal. You can perform these steps from a chroot under the installer environment before a reboot, or later in the running system. First, while Debian does set up a getty (the program that displays the login prompt) on the serial console by default, it doesn t enable hardware flow control. So let s do that. Configuring the System: agetty with systemd Run systemctl edit serial-getty@ttyS0.service. This opens an editor that lets you customize the systemd configuration for a given service without having to edit the file directly. All you really need to do is modify the agetty command, so we just override it. At the top, in the designated area, write:
[Service]
ExecStart=
ExecStart=-/sbin/agetty --wait-cr -8 -h -L=always %I 57600 vt510
The empty ExecStart= line is necessary to tell systemd to remove the existing ExecStart command (otherwise, it will logically contain two ExecStart lines, which is an error). These arguments say: The systemd documentation refers to this page about serial consoles, which gives more background. However, I think it is better to use the systemctl edit method described here, rather than just copying the config file, since this lets things like new configurations with new Debian versions take effect. Configuring the System: Kernel and GRUB Your next stop is the /etc/default/grub file. Debian s installer automatically makes some changes here. There are three lines you want to change. First, near the top, edit GRUB_CMDLINE_LINUX_DEFAULT and add console=tty0 console=ttyS0,57600n8r. By specifying console twice, you allow output to go both to the standard display and to the serial console. By specifying the serial console last, you make it be the preferred one for things like entering the root filesystem password. Next, towards the bottom, make sure these two lines look like this:
GRUB_TERMINAL="console serial"
GRUB_SERIAL_COMMAND="serial --unit=0 --speed=57600 --word=8 --parity=no --stop=1"
Finally, near the top, you may want to raise the GRUB_TIMEOUT to somewhere around 10 to 20 seconds since things may be a bit slower than you re used to. Save the file and run update-grub. Now, GRUB will display on both your standard display and the serial console. You can edit the boot command from either. If you have a VGA or HDMI monitor attached, for instance, and need to not use the serial console, you can just edit the Linux command line in GRUB and remove the reference to ttyS0 for one boot. Easy! That s it. You now have a system that is fully operational from a serial terminal. My original article from 2019 has some additional hints, including on how to convert from UTF-8 for these terminals. Update 2025-09-17: It is also useful to set up proper locales. To do this, first edit /etc/locale.gen. Make sure to add, or uncomment:
en_US ISO-8859-1
en_US.IBM437 IBM437
en_US.UTF-8 UTF-8 
Then run locale-gen. Normally, your LANG will be set to en_us.UTF-8, which will select the appropriate encoding. Plain en_US will select ISO-8859-1, which you need for the vt510. Then, add something like this to your ~/.bashrc:
if [  tty  = "/dev/ttyS0" -o "$TERM" = "vt510" ]; then
        stty -iutf8
        # might add ixon ixoff
        export LANG=en_US
        export MANOPT="-E ascii"
        stty rows 25
fi
if [ "$TERM" = "screen" -o "$TERM" = "vt100" ]; then
    export LANG=en_US.utf8
fi
Finally, in my ~/.screenrc, I have this. It lets screen convert between UTF-8 and ISO-8859-1:
defencoding UTF-8
startup_message off
vbell off
termcapinfo * XC=B%, -,
maptimeout 5
bindkey -k ku stuff ^[OA
bindkey -k kd stuff ^[OB
bindkey -k kr stuff ^[OC
bindkey -k kl stuff ^[OD

3 September 2025

Enrico Zini: CAdES signatures on Debian

CAdES is a digital signature standard that is used and sometimes mandated, by the Italian Public Administration. To be able to do my job, I own a Carta Nazionale dei Servizi (CNS) with which I can generate legally binding signatures. Now comes the problem of finding a software to do it. Infocamere Firma4NG InfoCamere are distributing a software called Firma4NG, with a Linux option, which, I'm pleased to say, seems to work just fine. Autofirma AutoFirma is a Java software for digital signatures distributed by the Spanish government, which has a Linux version. It is licensed as GPL-2+ EUPL-1.1, and the source seems to be here. While my Spanish is decent I lack jargon for this specific field, and I didn't manage to make it work with my CNS. Autogram Andrej Shadura pointed me to Autogram, a Slovakian software for digital signatures, licensed under the EUPL-1.2. The interface is still only in Slovakian, so tried it but I didn't go very far in trying to make it work. OpenSSL In trixie, openssl is almost, but not quite, able to do it. Here's as far as I've got. Install opensc
apt install opensc
Test if you can access the smart card with:
pkcs11-tool --list-objects [-l]
You can find other pkcs11-tool examples here Set up a pkcs11 provider for openssl
apt install pkcs11-provider
Edit /etc/ssl/openssl.cnf:
[pkcs11_sect]
module = /usr/lib/x86_64-linux-gnu/ossl-modules/pkcs11.so
pkcs11-module-path = /usr/lib/x86_64-linux-gnu/pkcs11/opensc-pkcs11.so
default_algorithms = ALL
activate = 1
Test with openssl list -providers You can check if openssl can see keys on the card:
openssl pkey -in 'pkcs11:id=%01' -pubin -pubout -text
See PKCS11 URI documentation here. Install the PKCS11 engine for openssl
apt install libengine-pkcs11-openssl
It looks like providers replaced engines, and this would not be needed, but I couldn't find a way to convince openssl to work without this. Sign a document
openssl cms -nodetach -binary -cades -outform DER -in filename -out filename.p7m -sign -signer 'pkcs11:id=%01' -keyform engine -engine pkcs11
It verifies correctly using the Austrian verification system. All the Italian verification systems I tried, however, complain that, although the signature is valid, the certificate is emitted by an unqualified CA and the certificate revocation information cannot be found. PAdES When signing PDF files, the PAdES standard is sometimes accepted. LibreOffice is able to generate PAdES signatures using the "File / Digital signatures " menu, and provided the smart card is in the reader it is able to use it. Both LibreOffice and Okular can verify that the signature is indeed there. However, when trying to validate the signature using Italian validators, I get the same complaints about unqualified CAs and missing revocation information. Wall of shame Dike GoSign Infocert (now Tinexta) used to distribute a software called "Dike GoSign" that worked on Ubuntu, which I used on a completely isolated VM, and it was awful but it worked. I had to regenerate the VM for it, and discovered that the version they distribute now will refuse to work unless one signs in online with a Tinexta account. From the same company that asks you to install their own root certifiactes to use their digital signature system. Gross. Dropped. Aruba Sign Aruba used to distribute a software called Aruba Sign, which also worked on Ubuntu. Ubuntu support has been discontinued, and they now only offer support for Windows or Mac. Yuck. Dropped.

29 August 2025

Noah Meyerhans: Determining Network Online Status of Dualstack Cloud VMs

When a Debian cloud VM boots, it typically runs cloud-init at various points in the boot process. Each invocation can perform certain operations based on the host s static configuration passed by the user, typically either through a well known link-local network service or an attached iso9660 drive image. Some of the cloud-init steps execute before the network comes up, and others at a couple of different points after the network is up. I recently encountered an unexpected issue when configuring a dualstack (uses both IPv6 and legacy IPv4 networking) VM to use a custom apt server accessible only via IPv6. VM provisioning failed because it was unable to access the server in question, yet when I logged in to investigate, it was able to access the server without any problem. The boot had apparently gone smoothly right up until cloud-init s Package Update Upgrade Install module called apt-get update, which failed and broke subsequent provisioning steps. The errors reported by apt-get indicated that there was no route to the service in question, which more accurately probably meant that there was not yet a route to the service. But there was shortly after, when I investigated. This was surprising because the apt-get invocations occur in a cloud-init sequence that s explicitly ordered after the network is configured according to systemd-networkd-wait-online. Investigation eventually led to similar issues encountered in other environments reported in Debian bug #1111791, systemd: network-online.target reached before IPv6 address is ready . The issue described in that bug is identical to mine, but the bug is tagged wontfix. The behavior is considered correct.

Why the default behavior is the correct one While it s a bit counterintuitive, the systemd-networkd behavior is correct, and it s also not something we d want to override in the cloud images. Without explicit configuration, systemd can t accurately infer the intended network configuration of a given system. If a system is IPv6-only, systemd-networkd-wait-online will introduce unexpected delays in the boot process if it waits for IPv4, and vice-versa. If it assumes dualstack, things are even worse because it would block for a long time (approximately two minutes) in any single stack network before failing, leaving the host in degraded state. So the most reasonable default behavior is to block until any protocol is configured. For these same reasons, we can t change the systemd-networkd-wait-online configuration in our cloud images. All of the cloud environments we support offer both single stack and dual stack networking, so we preserve systemd s default behavior. What s causing problems here is that IPv6 takes significantly longer to configure due to its more complex router solicitation + router advertisement + DHCPv6 setup process. So in this particular case, where I ve got a dualstack VM that needs to access a v6-only apt server during the provisioning process, I need to find some mechanism to override systemd s default behavior and wait for IPv6 connectivity specifically.

What won t work Cloud-init offers the ability to write out arbitrary files during provisioning. So writing a drop-in for systemd-networkd-wait-online.service is trivial. Unfortunately, this doesn t give us everything we actually need. We still need to invoke systemctl daemon-reload to get systemd to actually apply the changes after we ve written them, and of course we need to do that before the service actually runs. Cloud-init provides a bootcmd module that lets us run shell commands very early in the boot process , but it runs too early: it runs before we ve written out our configuration files. Similarly, it provides a runcmd module, but scripts there are towards the end of the boot process, far too late to be useful. Instead of using the bootcmd facility, to simply reload systemd s config, it seemed possible that we could both write the config and trigger the reload, similar to the following:
 bootcmd:
- mkdir -p /etc/systemd/system/systemd-networkd-wait-online.service.d
- echo "[Service]" > /etc/systemd/system/systemd-networkd-wait-online.service.d/10-netplan.conf
- echo "ExecStart=" >> /etc/systemd/system/systemd-networkd-wait-online.service.d/10-netplan.conf
- echo "ExecStart=/usr/lib/systemd/systemd-networkd-wait-online --operational-state=routable --any --ipv6" >> /etc/systemd/system/systemd-networkd-wait-online.service.d/10-netplan.conf
- systemctl daemon-reload
But even that runs too late, as we can see in the logs that systemd-networkd-wait-online.service has completed before bootcmd is executed:
root@sid-tmp2:~# journalctl --no-pager -l -u systemd-networkd-wait-online.service
Aug 29 17:02:12 sid-tmp2 systemd[1]: Starting systemd-networkd-wait-online.service - Wait for Network to be Configured...
Aug 29 17:02:13 sid-tmp2 systemd[1]: Finished systemd-networkd-wait-online.service - Wait for Network to be Configured
.
root@sid-tmp2:~# grep -F 'config-bootcmd ran' /var/log/cloud-init.log
2025-08-29 17:02:14,766 - handlers.py[DEBUG]: finish: init-network/config-bootcmd: SUCCESS: config-bootcmd ran successfully and took 0.467 seconds
At this point, it s looking like there are few options left!

What eventually worked I ended up identifying two solutions to the issue, both of which involve getting some other component of the provisioning process to run systemd-networkd-wait-online.

Solution 1 The first involves getting apt-get itself to wait for IPv6 configuration. The apt.conf configuration interface allows the definition of an APT::Update::Pre-Invoke hook that s executed just before apt s update operation. By writing the following to a file in /etc/apt/apt.conf.d/, we re able to ensure that we have IPv6 connectivity before apt-get tries accessing the network. This cloud-config snippet accomplishes that:
 - path: /etc/apt/apt.conf.d/99-wait-for-ipv6
content:  
APT::Update::Pre-Invoke   "/usr/lib/systemd/systemd-networkd-wait-online --operational-state=routable --any --ipv6";  
This is safe to leave in place after provisioning, because the delay will be negligible once IPv6 connectivity is established. It s only during address configuration that it ll block for a noticeable amount of time, but that s what we want. This solution isn t entirely correct, though, because it s only apt-get that s actually affected by it. Other service that start after the system is ostensibly online might only see IPv4 connectivity when they start. This seems acceptable at the moment, though.

Solution 2 The second solution is to simply invoke systemd-networkd-wait-online directly from a cloud-init bootcmd. Similar to the first solution, it s not exactly correct because the host has already reached network-online.target, but it does block enough of cloud-init that package installation happens only after it completes. The cloud-config snippet for this is
bootcmd:
- [/usr/lib/systemd/systemd-networkd-wait-online, --operational-state=routable, --any, --ipv6]
In either case, we still want to write out a snippet to configure systemd-networkd-wait-online to wait for IPv6 connectivity for future reboots. Even though cloud-init won t necessarily run in those cases, and many cloud VMs never reboot at all, it does complete the solution. Additionally, it solves the problem for any derivative images that may be created based on the running VM s state. (At least if we can be certain that instances of those derivative images will never run in an IPv4-only network!)
write_files:
- path: /run/systemd/system/systemd-networkd-wait-online.service.d/99-ipv6-wait.conf
content:  
[Service]
ExecStart=
ExecStart=/lib/systemd/systemd-networkd-wait-online --any --operational-state=routable --ipv6

How to properly solve it One possible improvement would be for cloud-init to support a configuration key allowing the admin to specify the required protocols. Based on the presence of this key, cloud-init could reconfigure systemd-networkd-wait-online.service accordingly. Alternatively it could set the appropriate RequiredFamilyForOnline= value in the generated .network file. cloud-init supports multiple network configuration backends, so each of those would need to be updated. If using the systemd-networkd configuration renderer, this should be straightforward, but Debian uses the netplan renderer, so that tool might also need to be taught to pass such a configuration along to systemd-networkd.

28 August 2025

Valhalla's Things: 1840s Underwear

Posted on August 28, 2025
Tags: madeof:atoms, craft:sewing, FreeSoftWear
A woman wearing a knee-length shift with very short pleated sleeves and drawers that are a bit longer than needed to be ankle-length. The shift is too wide at the top, had to have a pleat taken in the center front, but the sleeves are still falling down. She is also wearing a black long sleeved t-shirt and leggings under said underwear, for decency. A bit more than a year ago, I had been thinking about making myself a cartridge pleated skirt. For a number of reasons, one of which is the historybounding potential, I ve been thinking pre-crinoline, so somewhere around the 1840s, and that s a completely new era for me, which means: new underwear. Also, the 1840s are pre-sewing machine, and I was already in a position where I had more chances to handsew than to machine sew, so I decided to embrace the slowness and sew 100% by hand, not even using the machine for straight seams. A woman turning fast enough that her petticoat extends a considerable distance from the body. The petticoat is white with a pattern of cording from the hem to just below hip level, with a decreasing number of rows of cording going up. If I remember correctly, I started with the corded petticoat, looking around the internet for instructions, and then designing my own based on the practicality of using modern wide fabric from my stash (and specifically some DITTE from costumers favourite source of dirty cheap cotton IKEA). Around the same time I had also acquired a sashiko kit, and I used the Japanese technique for sewing running stitches pushing the needle with a thimble that covers the base of the middle finger, and I can confirm that for this kind of things it s great! I ve since worn the petticoat a few times for casual / historyBounding / folkwearBounding reasons, during the summer, and I can confirm it s comfortable to use; I guess that during the winter it could be nice to add a flannel layer below it. The technical drawing and pattern for drawers from the book: each leg is cut out of a rectangle of fabric folded along the length, the leg is tapered equally, while the front is tapered more than the back, and comes to a point below the top of the original rectangle. Then I proceeded with the base layers: I had been browsing through The workwoman's guide and that provided plenty of examples, and I selected the basic ankle-length drawers from page 53 and the alternative shift on page 47. As for fabric, I had (and still have) a significant lack of underwear linen in my stash, but I had plenty of cotton voile that I had not used in a while: not very historically accurate for plain underwear, but quite suitable for a wearable mockup. Working with a 1830s source had an interesting aspect: other of the usual, mildly annoying, imperial units, it also used a lot a few obsolete units, especially nails, that my qalc, my usual calculator and converter, doesn t support. Not a big deal, because GNU units came to the rescue, and that one knows a lot of obscure and niche units, and it s quite easy to add those that are missing1 Working on this project also made me freshly aware of something I had already noticed: converting instructions for machine sewing garments into instructions for hand sewing them is usually straightforward, but the reverse is not always true. Starting from machine stitching, you can usually convert straight stitches into backstitches (or running backstitches), zigzag and overlocking into overcasting and get good results. In some cases you may want to use specialist hand stitches that don t really have a machine equivalent, such as buttonhole stitches instead of simply overcasting the buttonhole, but that s it. Starting from hand stitching, instead, there are a number of techniques that could be converted to machine stitching, but involve a lot of visible topstitching that wasn t there in the original instructions, or at times are almost impossible to do by machine, if they involve whipstitching together finished panels on seams that are subject to strong tension. Anyway, halfway through working with the petticoat I cut both the petticoat and the drawers at the same time, for efficiency in fabric use, and then started sewing the drawers. the top third or so of the drawers, showing a deep waistband that is closed with just one button at the top, and the front opening with finished edges that continue through the whole crotch, with just the overlap of fabric to provide coverage. The book only provided measurements for one size (moderate), and my fabric was a bit too narrow to make them that size (not that I have any idea what hip circumference a person of moderate size was supposed to have), so the result is just wide enough to be comfortably worn, but I think that when I ll make another pair I ll try to make them a bit wider. On the other hand they are a bit too long, but I think that I ll fix it by adding a tuck or two. Not a big deal, anyway. The same woman as in the opening image from the back, the shift droops significantly in the center back, and the shoulder straps have fallen down on the top of the arms. The shift gave me a bit more issues: I used the recommended gusset size, and ended up with a shift that was way too wide at the top, so I had to take a box pleat in the center front and back, which changed the look and wear of the garment. I have adjusted the instructions to make gussets wider, and in the future I ll make another shift following those. Even with the pleat, the narrow shoulder straps are set quite far to the sides, and they tend to droop, and I suspect that this is to be expected from the way this garment is made. The fact that there are buttonholes on the shoulder straps to attach to the corset straps and prevent the issue is probably a hint that this behaviour was to be expected. The technical drawing of the shift from the book, showing a the top of the body, two trapezoidal shoulder straps, the pleated sleeves and a ruffle on the front edge. I ve also updated the instructions so that they shoulder straps are a bit wider, to look more like the ones in the drawing from the book. Making a corset suitable for the time period is something that I will probably do, but not in the immediate future, but even just wearing the shift under a later midbust corset with no shoulder strap helps. I m also not sure what the point of the bosom gores is, as they don t really give more room to the bust where it s needed, but to the high bust where it s counterproductive. I also couldn t find images of original examples made from this pattern to see if they were actually used, so in my next make I may just skip them. Sleeve detail, showing box pleats that are about 2 cm wide and a few mm distance from each other all along the circumference, neatly sewn into the shoulder strap on one side and the band at the other side. On the other hand, I m really happy with how cute the short sleeves look, and if2 I ll ever make the other cut of shift from the same book, with the front flaps, I ll definitely use these pleated sleeves rather than the straight ones that were also used at the time. As usual, all of the patterns have been published on my website under a Free license:




  1. My ~/.units file currently contains definitions for beardseconds, bananas and the more conventional Nm and NeL (linear mass density of fibres).
  2. yeah, right. when.

20 August 2025

Sven Hoexter: Istio: Connect via a VirtualService to External IP Addresses

Rant - I've a theory about istio: It feels like a software designed by people who hate the IT industry and wanted revenge. So they wrote a software with so many odd points of traffic interception (e.g. SNI based traffic re-routing) that's completely impossible to debug. If you roll that out into an average company you completely halt the IT operations for something like a year. On topic: I've two endpoints (IP addresses serving HTTPS on a none standard port) outside of kubernetes, and I need some rudimentary balancing of traffic. Since istio is already here one can levarage that, combining the resource kinds ServiceEntry, DestinationRule and VirtualService to publish a service name within the istio mesh. Since we do not have host names and DNS for those endpoint IP addresses we need to rely on istio itself to intercept the DNS traffic and deliver a virtual IP address to access the service. The sample given here leverages the exportTo configuration to make the service name only available in the same namespace. If you need broader access remove or adjust that. As usual in kubernetes you can resolve the name also as FQDN, e.g. acme-service.mynamespace.svc.cluster.local.
---
apiVersion: networking.istio.io/v1beta1
kind: ServiceEntry
metadata:
  name: acme-service
spec:
  hosts:
    - acme-service
  ports:
    - number: 12345
      name: acmeglue
      protocol: HTTPS
  resolution: STATIC
  location: MESH_EXTERNAL
  # limit the availability to the namespace this resource is applied to
  # if you need cross namespace access remove all the  exportTo s in here
  exportTo:
    - "."
  # use  endpoints:  in this setup,  addreses:  did not work
  endpoints:
    # region1
    - address: 192.168.0.1
      ports:
        acmeglue: 12345
    # region2
     - address: 10.60.48.50
       ports:
        acmeglue: 12345
---
apiVersion: networking.istio.io/v1beta1
kind: DestinationRule
metadata:
  name: acme-service
spec:
  host: acme-service
  # limit the availability to the namespace this resource is applied to
  exportTo:
    - "."
  trafficPolicy:
    loadBalancer:
      simple: LEAST_REQUEST
    connectionPool:
      tcp:
        tcpKeepalive:
          # We have GCP service attachments involved with a 20m idle timeout
          # https://cloud.google.com/vpc/docs/about-vpc-hosted-services#nat-subnets-other
          time: 600s
---
apiVersion: networking.istio.io/v1beta1
kind: VirtualService
metadata:
  name: acme-service
spec:
  hosts:
    - acme-service
  # limit the availability to the namespace this resource is applied to
  exportTo:
    - "."
  http:
  - route:
    - destination:
        host: acme-service
    retries:
      attempts: 2
      perTryTimeout: 2s
      retryOn: connect-failure,5xx
---
# Demo Deployment, istio configuration is the important part
apiVersion: apps/v1
kind: Deployment
metadata:
  name: foobar
  labels:
    app: foobar
spec:
  replicas: 1
  selector:
    matchLabels:
      app: foobar
  template:
    metadata:
      labels:
        app: foobar
        # enable istio sidecar
        sidecar.istio.io/inject: "true"
      annotations:
        # Enable DNS capture and interception, IP resolved will be in 240.240/16
        # If you use network policies you've to allow egress to this range.
        proxy.istio.io/config:  
          proxyMetadata:
            ISTIO_META_DNS_CAPTURE: "true"
    spec:
      containers:
      - name: nginx
        image: nginx:latest
        ports:
        - containerPort: 80
Now we can exec into the deployed pod, do something like curl -vk https://acme-service:12345, and it will talk to one of the endpoints defined in the ServiceEntry via an IP address out of the 240.240/16 Class E network. Documentation
https://istio.io/latest/docs/reference/config/networking/virtual-service/
https://istio.io/latest/docs/reference/config/networking/service-entry/#ServiceEntry-Resolution
https://istio.io/latest/docs/reference/config/networking/destination-rule/#LoadBalancerSettings-SimpleLB
https://istio.io/latest/docs/ops/configuration/traffic-management/dns-proxy/#sidecar-mode

16 August 2025

Bits from Debian: Debian turns 32!

Alt 32th Debian Day by Daniel Lenharo On August 16, 1993, Ian Murdock announced the Debian Project to the world. Three decades (and a bit) later, Debian is still going strong, built by a worldwide community of developers, contributors, and users who believe in a free, universal operating system. Over the years, Debian has powered servers, desktops, tiny embedded devices, and huge supercomputers. We have gathered at DebConfs, squashed countless bugs, shared late-night hacking sessions, and helped keep millions of systems secure. Debian Day is a great excuse to get together, whether it is a local meetup, an online event, a bug squashing party, a team sprint or just coffee with fellow Debianites. Check out the Debian Day wiki to see if there is a celebration near you or to add your own. Here is to 32 years of collaboration, code, and community, and to all the amazing people who make Debian what it is. Happy Debian Day!

10 August 2025

C.J. Collier: Upgrading Proxmox 7 to 8

Some variant of the following[1] worked for me. The first line is the start of a for loop that runs on each node in my cluster a command using ssh. The argument -t is passed to attach a controlling terminal to STDIN, STDERR and STDOUT of this session, since there will not be an intervening shell to do it for us. The argument to ssh is a workflow of bash commands. They upgrade the 7.x system to the most recent packages on the repository. We then update the sources.list entries for the system to point at bookworm sources instead of bullseye. The package cache is updated and the proxmox-ve package is installed. Packages which are installed are upgraded to the versions from bookworm, and the installer concludes. Dear reader, you might be surprised how many times I saw the word perl scroll by during the manual, serial scrolling of this install. It took hours. There were a few prompts, so stand by the keyboard! [1]

gpg: key 1140AF8F639E0C39: public key "Proxmox Bookworm Release Key " imported
# have your ssh agent keychain running and a key loaded that's installed at 
# ~root/.ssh/authorized_keys on each node 
apt-get install -y keychain
eval $(keychain --eval)
ssh-add ~/.ssh/id_rsa
# Replace the IP address prefix (100.64.79.) and  suffixes (64, 121-128)
# with the actual IPs of your cluster nodes.  Or use hostnames :-)
for o in 64 121 122 123 124 125 126 127 128 ; do   ssh -t root@100.64.79.$o '
  sed -i -e s/bullseye/bookworm/g /etc/apt/sources.list $(compgen -G "/etc/apt/sources.listd.d/*.list") \
  && echo "deb [signed-by=/usr/share/keyrings/proxmox-release.gpg] http://download.proxmox.com/debian/pve bookworm pve-no-subscription" \
      dd of=/etc/apt/sources.list.d/proxmox-release.list status=none \
  && echo "deb [signed-by=/usr/share/keyrings/proxmox-release.gpg] http://download.proxmox.com/debian/ceph-quincy bookworm main no-subscription" \
      dd of=/etc/apt/sources.list.d/ceph.list status=none \
  && proxmox_keyid="0xf4e136c67cdce41ae6de6fc81140af8f639e0c39" \
  && curl "https://keyserver.ubuntu.com/pks/lookup?op=get&search=$ proxmox_keyid " \
      gpg --dearmor -o /usr/share/keyrings/proxmox-release.gpg  \
  && apt-get -y -qq update \
  && apt-get -y -qq install proxmox-ve \
  && apt-get -y -qq full-upgrade \
  && echo "$(hostname) upgraded"'; done

4 August 2025

Freexian Collaborators: Secure boot signing with Debusine (by Colin Watson)

Debusine aims to be an integrated solution to build, distribute and maintain a Debian-based distribution. At Debconf 25, we talked about using it to pre-test uploads to Debian unstable, and also touched on how Freexian is using it to help maintain the Debian LTS and ELTS projects. When Debian 10 (buster) moved to ELTS status in 2024, this came with a new difficulty that hadn t existed for earlier releases. Debian 10 added UEFI Secure Boot support, meaning that there are now signed variants of the boot loader and Linux kernel packages. Debian has a system where certain packages are configured as needing to be signed, and those packages include a template for a source package along with the unsigned objects themselves. The signing service generates detached signatures for all those objects, and then uses the template to build a source package that it uploads back to the archive for building in the usual way. Once buster moved to ELTS, it could no longer rely on Debian s signing service for all this. Freexian operates parallel infrastructure for the archive, and now needed to operate a parallel signing service as well. By early 2024 we were already planning to move ELTS infrastructure towards Debusine, and so it made sense to build a signing service there as well. Separately, we were able to obtain a Microsoft signature for Freexian s shim build, allowing us to chain this into the trust path for most deployed x86 machines. Freexian can help other organizations running Debian derivatives through the same process, and can provide secure signing infrastructure to the standards required for UEFI Secure Boot.

Prior art We considered both code-signing (Debian s current implementation) and lp-signing (Ubuntu s current implementation) as prior art. Neither was quite suitable for various reasons.
  • code-signing relies on polling a configured URL for each archive to fetch a GPG-signed list of signing requests, which would have been awkward for us to set up, and it assumes that unsigned packages are sufficiently trusted for it to be able to run dpkg -x and dpkg-source -b on them outside any containment. dpkg -x has had the occasional security vulnerability, so this seemed unwise for a service that might need to deal with signing packages for multiple customers.
  • lp-signing is a microservice accepting authenticated requests, and is careful to avoid needing to manipulate packages itself. However, this relies on a different and incompatible mechanism for indicating that packages should be signed, which wasn t something we wanted to introduce in ELTS.

Workers Debusine already had an established system of external workers that run tasks under various kinds of containment. This seems like a good fit: after all, what s a request to sign a package but a particular kind of task? But there are some problems here: workers can run essentially arbitrary code (such as build scripts in source packages), and even though that s under containment, we don t want to give such machines access to highly-sensitive data such as private keys. Fortunately, we d already introduced the idea of different kinds of workers a few months beforehand, in order to be able to run privileged server tasks that have direct access to the Debusine database. We built on that and added signing workers , which are much like external workers except that they only run signing tasks, no other types of tasks run on them, and they have access to a private database with information about the keys managed by their Debusine instance. (Django s support for multiple databases made this quite easy to arrange: we were able to keep everything in the same codebase.)

Key management It s obviously bad practice to store private key material in the clear, but at the same time the signing workers are essentially oracles that will return signatures on request while ensuring that the rest of Debusine has no access to private key material, so they need to be able to get hold of it themselves. Hardware security modules (HSMs) are designed for this kind of thing, but they can be inconvenient to manage when large numbers of keys are involved. Some keys are more valuable than others. If the signing key used for an experimental archive leaks, the harm is unlikely to be particularly serious; but if the ELTS signing key leaks, many customers will be affected. To match this, we implemented two key protection arrangements for the time being: one suitable for low-value keys encrypts the key in software with a configured key and stores the public key and ciphertext in the database, while one suitable for high-value keys stores keys as PKCS #11 URIs that can be set up manually by an instance administrator. We packaged some YubiHSM tools to make this easier for our sysadmins. The signing worker calls back to the Debusine server to check whether a given work request is authorized to use a given signing key. All operations related to private keys also produce an audit log entry in the private signing database, so we can track down any misuse.

Tasks Getting Debusine to do anything new usually requires figuring out how to model the operation as a task. In this case, that was complicated by wanting to run as little code as possible on the signing workers: in particular, we didn t want to do all the complicated package manipulations there. The approach we landed on was a chain of three tasks:
  • ExtractForSigning runs on a normal external worker. It takes the result of a package build and picks out the individual files from it that need to be signed, storing them as separate artifacts.
  • Sign runs on a signing worker, and (of course) makes the actual signatures, storing them as artifacts.
  • AssembleSignedSource runs on a normal external worker. It takes the signed artifacts and produces a source package containing them, based on the template found in the unsigned binary package.

Workflows Of course, we don t want people to have to create all those tasks directly and figure out how to connect everything together for themselves, and that s what workflows are good at. The make_signed_source workflow does all the heavy lifting of creating the right tasks with the right input data and making them depend on each other in the right ways, including fanning out multiple copies of all this if there are multiple architectures or multiple template packages involved. Since you probably don t want to stop at just having the signed source packages, it also kicks off builds to produce signed binary packages. Even this is too low-level for most people to use directly, so we wrapped it all up in our debian_pipeline workflow, which just needs to be given a few options to enable signing support (and those options can be locked down by workspace owners).

What s next? In most cases this work has been enough to allow ELTS to carry on issuing kernel security updates without too much disruption, which was the main goal; but there are other uses for a signing system. We included OpenPGP support from early on, which allows Debusine to sign its own builds, and we ll soon be extending that to sign APT repositories hosted by Debusine. The current key protection arrangements could use some work. Supporting automatically-generated software-encrypted keys and manually-generated keys in an HSM is fine as far as it goes, but it would be good to be able to have the best of both worlds by being able to automatically generate keys protected by an HSM. This needs some care, as HSMs often have quite small limits on the number of objects they can store at any one time, and the usual workaround is to export keys from the HSM under wrap (encrypted by a key known only to the HSM) so that they can be imported only when needed. We have a general idea of how to do this, but doing it efficiently will need care. We d be very interested in hearing from organizations that need this sort of thing, especially for Debian derivatives. Debusine provides lots of other features that can help you. Please get in touch with us at sales@freexian.com if any of this sounds useful to you.

31 July 2025

Michael Ablassmeier: libvirt - incremental backups for raw devices

Skimming through the latest libvirt releases, to my surprise, i found that latest versions (>= v10.10.0) have added support for the QCOW data-file setting. Usually the incremental backup feature using bitmaps was limited to qcow2 based images, as there was no way to store the bitmaps persistently within raw devices. This basically ruled out proper incremental backups for direct attached luns, etc. In the past, there were some discussions how to implement this, mostly by using a separate metadata qcow image, holding the bitmap information persistently. These approaches have been discussed again lately and required features were implemented In order to be able to use the feature, you need to configure the virtual machines and its disks in a special way: Lets assume you have a virtual machine that uses a raw device /tmp/datafile.raw 1) Create an qcow image (same size as the raw image):
 # point the data-file to a temporary file, as create will overwrite whatever it finds here
 qemu-img create -f qcow2 /tmp/metadata.qcow2 -o data_file=/tmp/TEMPFILE,data_file_raw=true ..
 rm -f /tmp/TEMPFILE
2) Now use the amend option to point the qcow image to the right raw device using the data-file option:
 qemu-img amend /tmp/metadata.qcow2 -o data_file=/tmp/datafile.raw,data_file_raw=true
3) Reconfigure the virtual machine configuration to look like this:
    <disk type='file' device='disk'>
      <driver name='qemu' type='qcow2' cache='none' io='native' discard='unmap'/>
      <source file='/tmp/metadata.qcow2'>
        <dataStore type='file'>
          <format type='raw'/>
          <source file='/tmp/datafile.raw'/>
        </dataStore>
      </source>
      <target dev='vda' bus='virtio'/>
    </disk>
Now its possible to create persistent checkpoints:
 virsh checkpoint-create-as vm6 --name test --diskspec vda,bitmap=test
 Domain checkpoint test created
and the persistent bitmap will be stored within the metadata image:
 qemu-img info  /tmp/tmp.16TRBzeeQn/vm6-sda.qcow2
 [..]
    bitmaps:
        [0]:
            flags:
                [0]: auto
            name: test
            granularity: 65536
Hoooray. Added support for this in virtnbdbackup v2.33

29 July 2025

Christoph Berg: The Debian Conference 2025 in Brest

It's Sunday and I'm now sitting in the train from Brest to Paris where I will be changing to Germany, on the way back from the annual Debian conference. A full week of presentations, discussions, talks and socializing is laying behind me and my head is still spinning from the intensity.

Pollito and the gang of DebConf mascots wearing their conference badgesPollito and the gang of DebConf mascots wearing their conference badges (photo: Christoph Berg)
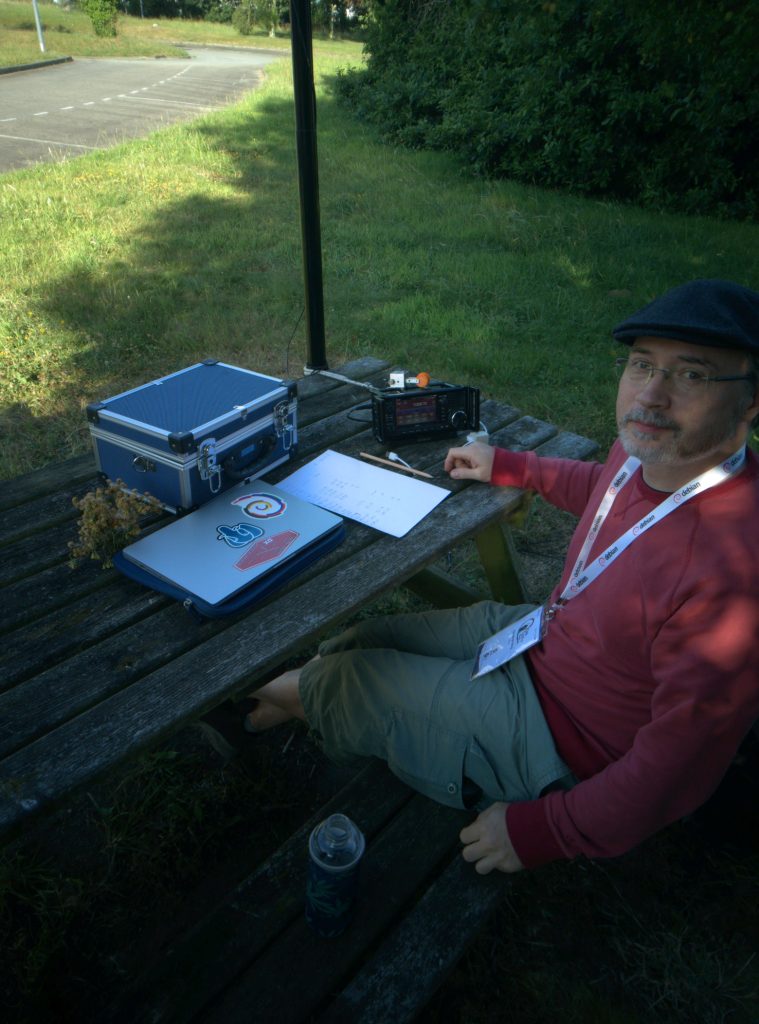
Sunday, July 13th It started last Sunday with traveling to the conference. I got on the Eurostar in Duisburg and we left on time, but even before reaching Cologne, the train was already one hour delayed for external reasons, collecting yet another hour between Aachen and Liege for its own technical problems. "The train driver is working on trying to fix the problem." My original schedule had well over two hours for changing train stations in Paris, but being that late, I missed the connection to Brest in Montparnasse. At least in the end, the total delay was only one hour when finally arriving at the destination. Due to the French julliet quatorze fireworks approaching, buses in Brest were rerouted, but I managed to catch the right bus to the conference venue, already meeting a few Debian people on the way. The conference was hosted at the IMT Atlantique Brest campus, giving the event a nice university touch. I arrived shortly after 10 in the evening and after settling down a bit, got on one of the "magic" buses for transportation to the camping site where half of the attendees where stationed. I shared a mobile home with three other Debianites, where I got a small room for myself. Monday, July 14th Next morning, we took the bus back to the venue with a small breakfast and the opening session where Enrico Zini invited me to come to his and Nicolas Dandrimont's session about Debian community governance and curation, which I gladly did. Many ideas about conflict moderation and community steering were floated around. I hope some of that can be put into effect to make flamewars on the mailing lists less heated and more directed. After that, I attended Olly Betts' "Stemming with Snowball" session, which is the stemmer used also in PostgreSQL. Text search is one of the areas in PostgreSQL that I never really looked closely at, including the integration into the postgresql-common package, so it was nice to get more information about that. In preparation for the conference, a few of us Ham radio operators in Debian had decided to bring some radio gear to DebConf this year in order to perhaps spark more interest for our hobby among the fellow geeks. In the afternoon after the talks, I found a quieter spot just outside of the main hall and set up a shortwave antenna by attaching a 10m mast to one of the park benches there. The 40m band was still pretty much closed, but I could work a few stations from England, just across the channel from Bretagne, answering questions from interested passing-by Debian people between the contacts. Over time, the band opened and more European stations got into the log.
F/DF7CB in Brest (photo: Evangelos Ribeiro Tzaras)

Tuesday, July 15th Tuesday started with Helmut Grohne's session about "Reviving (un)schroot". The schroot program has been Debian's standard way of managing build chroots for a long time, but it is more and more being regarded as obsolete with all kinds of newer containerization and virtualization technologies taking over. Since many bits of Debian infrastructure depend on schroot, and its user interface is still very useful, Helmut reimplemented it using Linux namespaces and the "unshare" systemcall. I had already worked with him at the Hamburg Minidebconf to replace the apt.postgresql.org buildd machinery with the new system, but we were not quite there yet (network isolation is nice, but we still sometimes need proper networking), so it was nice to see the effort is still progressing and I will give his new scripts a try when I'm back home. Next, Stefano Rivera and Colin Watson presented Debusine, a new package repository and workflow management system. It looks very promising for anyone running their own repository, so perhaps yet another bit of apt.postgresql.org infrastructure to replace in the future. After that, I went to the Debian LTS BoF session by Santiago Ruano Rinc n and Bastien Roucari s - Debian releases plus LTS is what we are covering with apt.postgresql.org. Then there were bits from the DPL (Debian Project Leader), and a session moderated by Stefano Rivera interesting to me as a member of the Debian Technical Committee on the future structure of the packages required for cross-building in Debian, a topic which had been brought to TC a while ago. I am happy that we could resolve the issue without having to issue a formal TC ruling as the involved parties (kernel, glibc, gcc and the cross-build people) found a promising way forward themselves. DebConf is really a good way to get such issues unstuck. Ten years ago at the 2015 Heidelberg DebConf, Enrico had given a seminal "Semi-serious stand-up comedy" talk, drawing parallels between the Debian Open Source community and the BDSM community - "People doing things consensually together". (Back then, the talk was announced as "probably unsuitable for people of all ages".) With his unique presentation style and witty insights, the session made a lasting impression on everyone attending. Now, ten years later (and he and many in the audience being ten years older), he gave an updated version of it. We are now looking forward to the sequel in 2035. The evening closed with the famous DebConf tradition of the Cheese & Wine party in a old fort next to the coast, just below the conference venue. Even when he's a fellow Debian Developer, Ham and also TC member, I had never met Paul Tagliamonte in person before, but we spent most of the evening together geeking out on all things Debian and Ham radio.
The northern coast of Ushant (photo: Christoph Berg)
Wednesday, July 16th Wednesday already marked the end of the first half of the week, the day of the day trips. I had chosen to go to Ouessant island (Ushant in English) which marks the Western end of French mainland and hosts one of the lighthouses yielding the way into the English channel. The ferry trip included surprisingly big waves which left some participants seasick, but everyone recovered fast. After around one and a half hours we arrived, picked up the bicycles, and spent the rest of the day roaming the island. The weather forecast was originally very cloudy and 18 C, but over noon this turned into sunny and warm, so many got an unplanned sunburn. I enjoyed the trip very much - it made up for not having time visiting the city during the week. After returning, we spent the rest of the evening playing DebConf's standard game, Mao (spoiler alert: don't follow the link if you ever intend to play).
Having a nice day (photo: Christoph Berg)
Thursday, July 17th The next day started with the traditional "Meet the Technical Committee" session. This year, we trimmed the usual slide deck down to remove the boring boilerplate parts, so after a very short introduction to the work of the committee by our chairman Matthew Vernon, we opened up the discussion with the audience, with seven (out of 8) TC members on stage. I think the format worked very well, with good input from attendees. Next up was "Don't fear the TPM" by Jonathan McDowell. A common misconception in the Free Software community is that the TPM is evil DRM hardware working against the user, but while it could be used in theory that way, the necessary TPM attestations seem to impossible to attain in practice, so that wouldn't happen anyway. Instead, it is a crypto coprocessor present in almost all modern computers that can be used to hold keys, for example to be used for SSH. It will also be interesting to research if we can make use of it for holding the Transparent Data Encryption keys for CYBERTEC's PostgreSQL Enterprise Edition. Aigars Mahinovs then directed everyone in place for the DebConf group picture, and Lucas Nussbaum started a discussion about archive-wide QA tasks in Debian, an area where I did a lot of work in the past and that still interests me. Antonio Terceiro and Paul Gevers followed up with techniques to track archive-wide rebuilding and testing of packages and in turn filing a lot of bugs to track the problems. The evening ended with the conference dinner, again in the fort close by the coast. DebConf is good for meeting new people, and I incidentally ran into another Chris, who happened to be one of the original maintainers of pgaccess, the pre-predecessor of today's pgadmin. I admit still missing this PostgreSQL frontend for its simplicity and ability to easily edit table data, but it disappeared around 2004. Friday, July 18th On Friday, I participated in discussion sessions around contributors.debian.org (PostgreSQL is planning to set up something similar) and the New Member process which I had helped to run and reform a decade or two ago. Agathe Porte (also a Ham radio operator, like so many others at the conference I had no idea of) then shared her work on rust-rewriting the slower parts of Lintian, the Debian package linter. Craig Small talked about "Free as in Bytes", the evolution of the Linux procps free command. Over the time and many kernel versions, the summary numbers printed became better and better, but there will probably never be a version that suits all use cases alike. Later over dinner, Craig (who is also a TC member) and I shared our experiences with these numbers and customers (not) understanding them. He pointed out that for PostgreSQL and looking at used memory in the presence of large shared memory buffers, USS (unique set size) and PSS (proportional set size) should be more realistic numbers than the standard RSS (resident set size) that the top utility is showing by default. Antonio Terceiro and Paul Gevers again joined to lead a session, now on ci.debian.net and autopkgtest, the test driver used for running tests on packages after then have been installed on a system. The PostgreSQL packages are heavily using this to make sure no regressions creep in even after builds have successfully completed and test re-runs are rescheduled periodically. The day ended with Bdale Garbee's electronics team BoF and Paul Tagliamonte and me setting up the radio station in the courtyard, again answering countless questions about ionospheric conditions and operating practice. Saturday, July 19th Saturday was the last conference day. In the first session, Nikos Tsipinakis and Federico Vaga from CERN announced that the LHC will be moving to Debian for the accelerator's frontend computers in their next "long shutdown" maintenance period in the next year. CentOS broke compatibility too often, and Debian trixie together with the extended LTS support will cover the time until the next long shutdown window in 2035, until when the computers should have all been replaced with newer processors covering higher x86_64 baseline versions. The audience was very delighted to hear that Debian is now also being used in this prestige project. Ben Hutchings then presented new Linux kernel features. Particularly interesting for me was the support for atomic writes spanning more than one filesystem block. When configured correctly, this would mean PostgreSQL didn't have to record full-page images in the WAL anymore, increasing throughput and performance. After that, the Debian ftp team discussed ways to improve review of new packages in the archive, and which of their processes could be relaxed with new US laws around Open Source and cryptography algorithms export. Emmanuel Arias led a session on Salsa CI, Debian's Gitlab instance and standard CI pipeline. (I think it's too slow, but the runners are not under their control.) Julian Klode then presented new features in APT, Debian's package manager. I like the new display format (and a tiny bit of that is also from me sending in wishlist bugs). In the last round of sessions this week, I then led the Ham radio BoF with an introduction into the hobby and how Debian can be used. Bdale mentioned that the sBitx family of SDR radios is natively running Debian, so stock packages can be used from the radio's touch display. We also briefly discussed his involvement in ARDC and the possibility to get grants from them for Ham radio projects. Finally, DebConf wrapped up with everyone gathering in the main auditorium and cheering the organizers for making the conference possible and passing Pollito, the DebConf mascot, to the next organizer team.
Pollito on stage (photo: Christoph Berg)
Sunday, July 20th Zoom back to the train: I made it through the Paris metro and I'm now on the Eurostar back to Germany. It has been an intense week with all the conference sessions and meeting all the people I had not seen so long. There are a lot of new ideas to follow up on both for my Debian and PostgreSQL work. Next year's DebConf will take place in Santa Fe, Argentina. I haven't yet decided if I will be going, but I can recommend the experience to everyone! The post The Debian Conference 2025 in Brest appeared first on CYBERTEC PostgreSQL Services & Support.

Next.

Previous.