Search Results: "tach"

29 July 2017

Norbert Preining: Gaming: The Long Dark

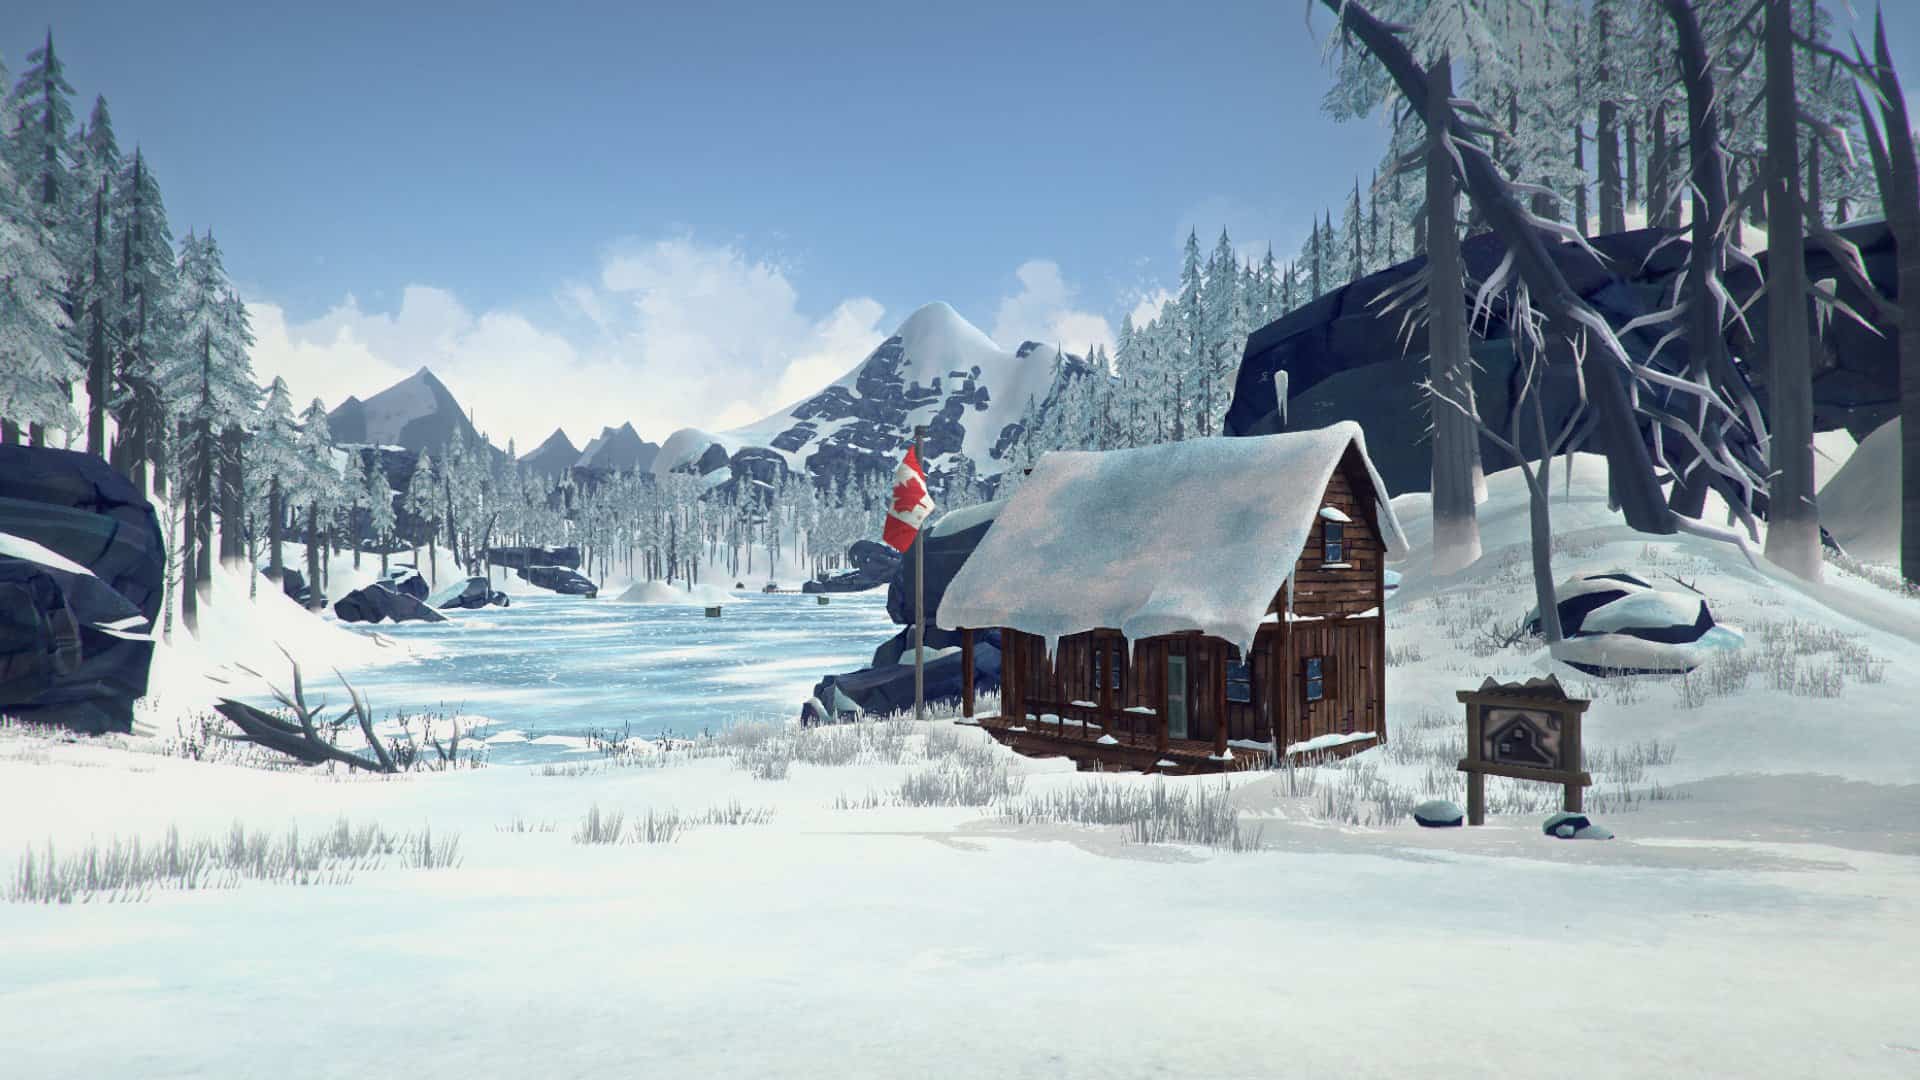
I normally don t play survival games or walking simulators, but The Long Dark by Hinterland Games, which I purchased back then when it was still in early access on Steam, took me into new realms. You are tossed out into the Canadian wilderness with hardly anything, and your only aim is to survive, find shelter, food, craft tools, hunt for food, explore. And while everything by now is Sandbox mode, on August 1st the first episode of Story mode is released. Best time to get the game! You will be greeted with some icy nights, but also with great vistas, relaxed evenings at a fire place, you will try to survive on moldy food and rotten energy bars, but also feast on the fireside while reading a good book. A real treat this game! Sandbox mode features five different areas to explore. Each one is large enough to spend weeks (in game time) wandering around. The easiest area to start with is Mystery Lake, with plenty of shelter (several huts) and abundance of resources. And just in case you are getting bored, all the areas are connected via tunnels or caves and one can wander of into the neighboring places. My home in Mystery Lake was always the Camp Office, the usual suspect. Nice views, fishing huts nearby to get fresh fish, lots of space. After managing to get from your starting place (which is arbitrary as far as I see) to one of the shelters, one starts collecting food, wood, savaging every accessible place for tools, weapons, burning material. And soon the backpack becomes to heavy, and one needs to store stuff and decide what to take. This is a very well done part of the game. The backpack is not limited by number of items, but you are limited in weight you can carry. That includes clothes (which can get quite heavy) and all the items in your backpack. In addition, the longer the day and the more tired you become, the less weight you can carry. And if the backpack starts getting too heavy you crawl to a very slow movement. There are many influences of the outside world on the player s condition: temperature, the wetness of your clothes, hunger, thirst, exhaustion, but also infections and bruises, all need to be taken care of, otherwise the end is coming faster than one wishes for. I have only two things to complain: First, if one walks outside, or runs outside, the own body temperature does not rise. This is unrealistically and should have been taken into account. The other thing is the difficulty: I have played weeks in game time in the easiest level, without any problem. But the moment I switched to the second level of difficulty (of 5!), I not even manage it for 2(!) days. Wolves, starvation, thirst, any of those kills me within an instant. I don t want to know how the hardest level feels, but it has a certain steep step here. The game takes a very realistic view onto the weather: Every day is different, sunny, foggy, blizzard, windy, often changing very quickly. It is wise to plan one s activities according to the weather, as it is very unforgiving. With beautifully crafted landscapes, loads of areas to explore, your own pride to survive for at least a few weeks, and lots of tools to find and craft and try out, this games, even while it is still in Sandbox mode, is a real feat. My absolute favorite since I have finished the Talos Principle and Portal series, absolutely recommendable!

20 July 2017

Benjamin Mako Hill: Testing Our Theories About Eternal September

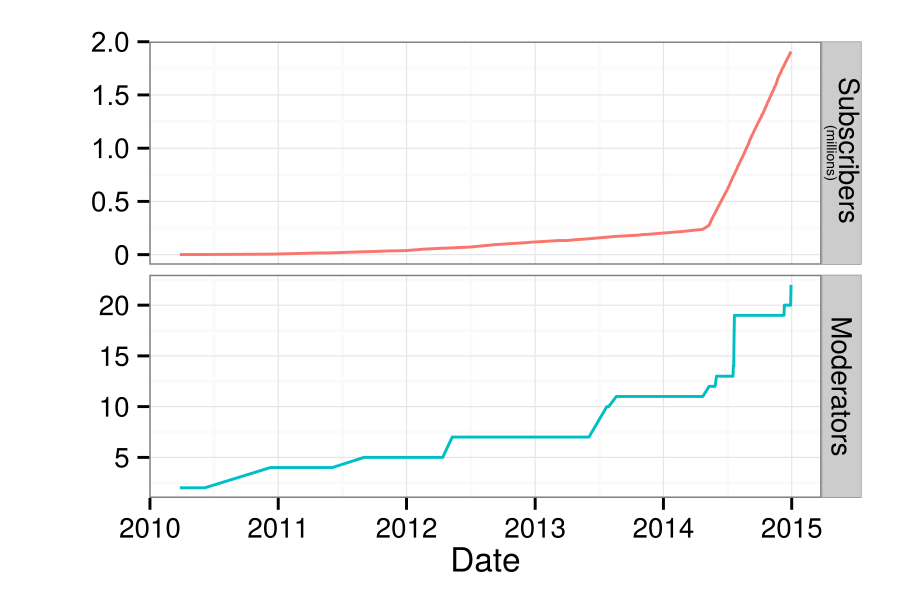
Graph of subscribers and moderators over time in /r/NoSleep. The image is taken from our 2016 CHI paper.
Last year at CHI 2016, my research group published a qualitative study examining the effects of a large influx of newcomers to the /r/nosleep online community in Reddit. Our study began with the observation that most research on sustained waves of newcomers focuses on the destructive effect of newcomers and frequently invokes Usenet s infamous Eternal September. Our qualitative study argued that the /r/nosleep community managed its surge of newcomers gracefully through strategic preparation by moderators, technological systems to reign in on norm violations, and a shared sense of protecting the community s immersive environment among participants. We are thrilled that, less a year after the publication of our study, Zhiyuan Jerry Lin and a group of researchers at Stanford have published a quantitative test of our study s findings! Lin analyzed 45 million comments and upvote patterns from 10 Reddit communities that a massive inundation of newcomers like the one we studied on /r/nosleep. Lin s group found that these communities retained their quality despite a slight dip in its initial growth period. Our team discussed doing a quantitative study like Lin s at some length and our paper ends with a lament that our findings merely reflected, propositions for testing in future work. Lin s study provides exactly such a test! Lin et al. s results suggest that our qualitative findings generalize and that sustained influx of newcomers need not doom a community to a descent into an Eternal September. Through strong moderation and the use of a voting system, the subreddits analyzed by Lin appear to retain their identities despite the surge of new users. There are always limits to research projects work quantitative and qualitative. We think the Lin s paper compliments ours beautifully, we are excited that Lin built on our work, and we re thrilled that our propositions seem to have held up! This blog post was written with Charlie Kiene. Our paper about /r/nosleep, written with Charlie Kiene and Andr s Monroy-Hern ndez, was published in the Proceedings of CHI 2016 and is released as open access. Lin s paper was published in the Proceedings of ICWSM 2017 and is also available online.

12 July 2017

Francois Marier: Toggling Between Pulseaudio Outputs when Docking a Laptop

In addition to selecting the right monitor after docking my ThinkPad, I wanted to set the correct sound output since I have headphones connected to my Ultra Dock. This can be done fairly easily using Pulseaudio.

Switching to a different pulseaudio output To find the device name and the output name I need to provide to pacmd, I ran pacmd list-sinks:
2 sink(s) available.
...
  * index: 1
    name: <alsa_output.pci-0000_00_1b.0.analog-stereo>
    driver: <module-alsa-card.c>
...
    ports:
        analog-output: Analog Output (priority 9900, latency offset 0 usec, available: unknown)
            properties:
        analog-output-speaker: Speakers (priority 10000, latency offset 0 usec, available: unknown)
            properties:
                device.icon_name = "audio-speakers"
From there, I extracted the soundcard name (alsa_output.pci-0000_00_1b.0.analog-stereo) and the names of the two output ports (analog-output and analog-output-speaker). To switch between the headphones and the speakers, I can therefore run the following commands:
pacmd set-sink-port alsa_output.pci-0000_00_1b.0.analog-stereo analog-output
pacmd set-sink-port alsa_output.pci-0000_00_1b.0.analog-stereo analog-output-speaker

Listening for headphone events Then I looked for the ACPI event triggered when my headphones are detected by the laptop after docking. After looking at the output of acpi_listen, I found jack/headphone HEADPHONE plug. Combining this with the above pulseaudio names, I put the following in /etc/acpi/events/thinkpad-dock-headphones:
event=jack/headphone HEADPHONE plug
action=su francois -c "pacmd set-sink-port alsa_output.pci-0000_00_1b.0.analog-stereo analog-output"
to automatically switch to the headphones when I dock my laptop.

Finding out whether or not the laptop is docked While it is possible to hook into the docking and undocking ACPI events and run scripts, there doesn't seem to be an easy way from a shell script to tell whether or not the laptop is docked. In the end, I settled on detecting the presence of USB devices. I ran lsusb twice (once docked and once undocked) and then compared the output:
lsusb  > docked 
lsusb  > undocked 
colordiff -u docked undocked 
This gave me a number of differences since I have a bunch of peripherals attached to the dock:
--- docked  2017-07-07 19:10:51.875405241 -0700
+++ undocked    2017-07-07 19:11:00.511336071 -0700
@@ -1,15 +1,6 @@
 Bus 001 Device 002: ID 8087:8000 Intel Corp. 
 Bus 001 Device 001: ID 1d6b:0002 Linux Foundation 2.0 root hub
-Bus 003 Device 081: ID 0424:5534 Standard Microsystems Corp. Hub
-Bus 003 Device 080: ID 17ef:1010 Lenovo 
 Bus 003 Device 001: ID 1d6b:0003 Linux Foundation 3.0 root hub
-Bus 002 Device 041: ID xxxx:xxxx ...
-Bus 002 Device 040: ID xxxx:xxxx ...
-Bus 002 Device 039: ID xxxx:xxxx ...
-Bus 002 Device 038: ID 17ef:100f Lenovo 
-Bus 002 Device 037: ID xxxx:xxxx ...
-Bus 002 Device 042: ID 0424:2134 Standard Microsystems Corp. Hub
-Bus 002 Device 036: ID 17ef:1010 Lenovo 
 Bus 002 Device 002: ID xxxx:xxxx ...
 Bus 002 Device 004: ID xxxx:xxxx ...
 Bus 002 Device 001: ID 1d6b:0002 Linux Foundation 2.0 root hub
I picked 17ef:1010 as it appeared to be some internal bus on the Ultra Dock (none of my USB devices were connected to Bus 003) and then ended up with the following port toggling script:
#!/bin/bash
if /usr/bin/lsusb   grep 17ef:1010 > /dev/null ; then
    # docked
    pacmd set-sink-port alsa_output.pci-0000_00_1b.0.analog-stereo analog-output
else
    # undocked
    pacmd set-sink-port alsa_output.pci-0000_00_1b.0.analog-stereo analog-output-speaker
fi

11 July 2017

Andreas Bombe: PDP-8/e Replicated Overview

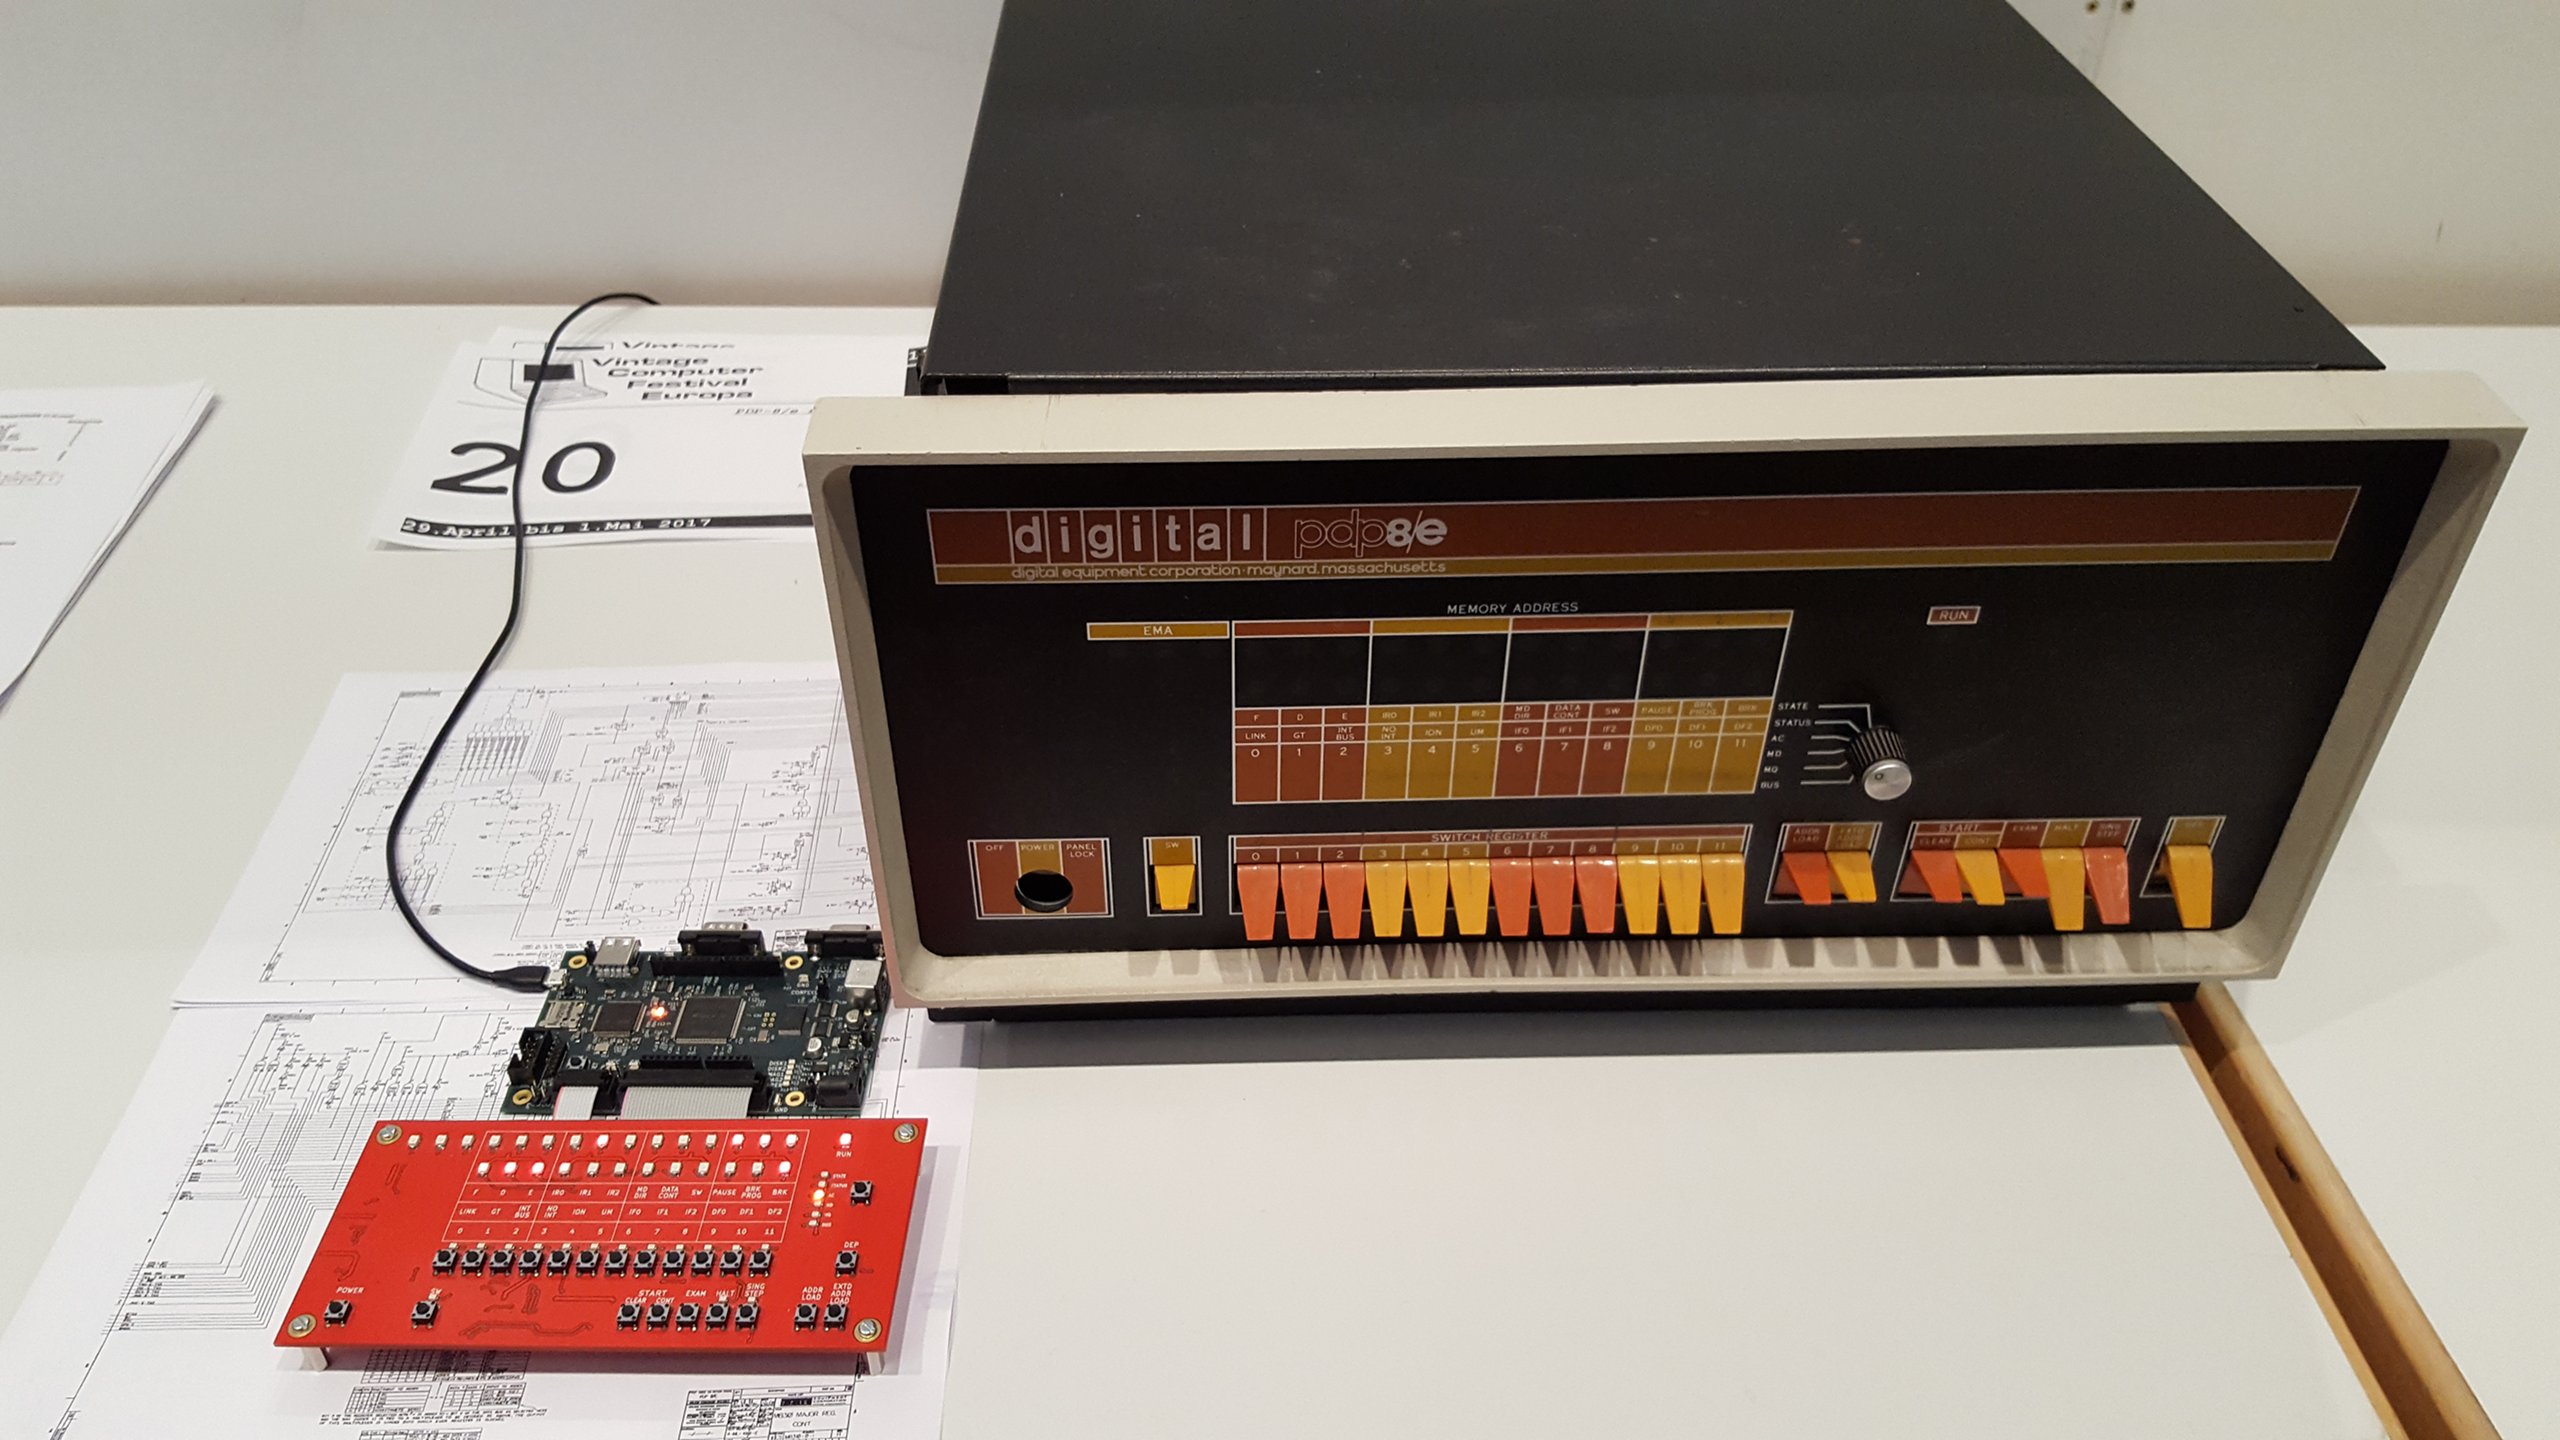
This is an overview of the hardware and internals of the PDP-8/e replica I m building.

The front panel board
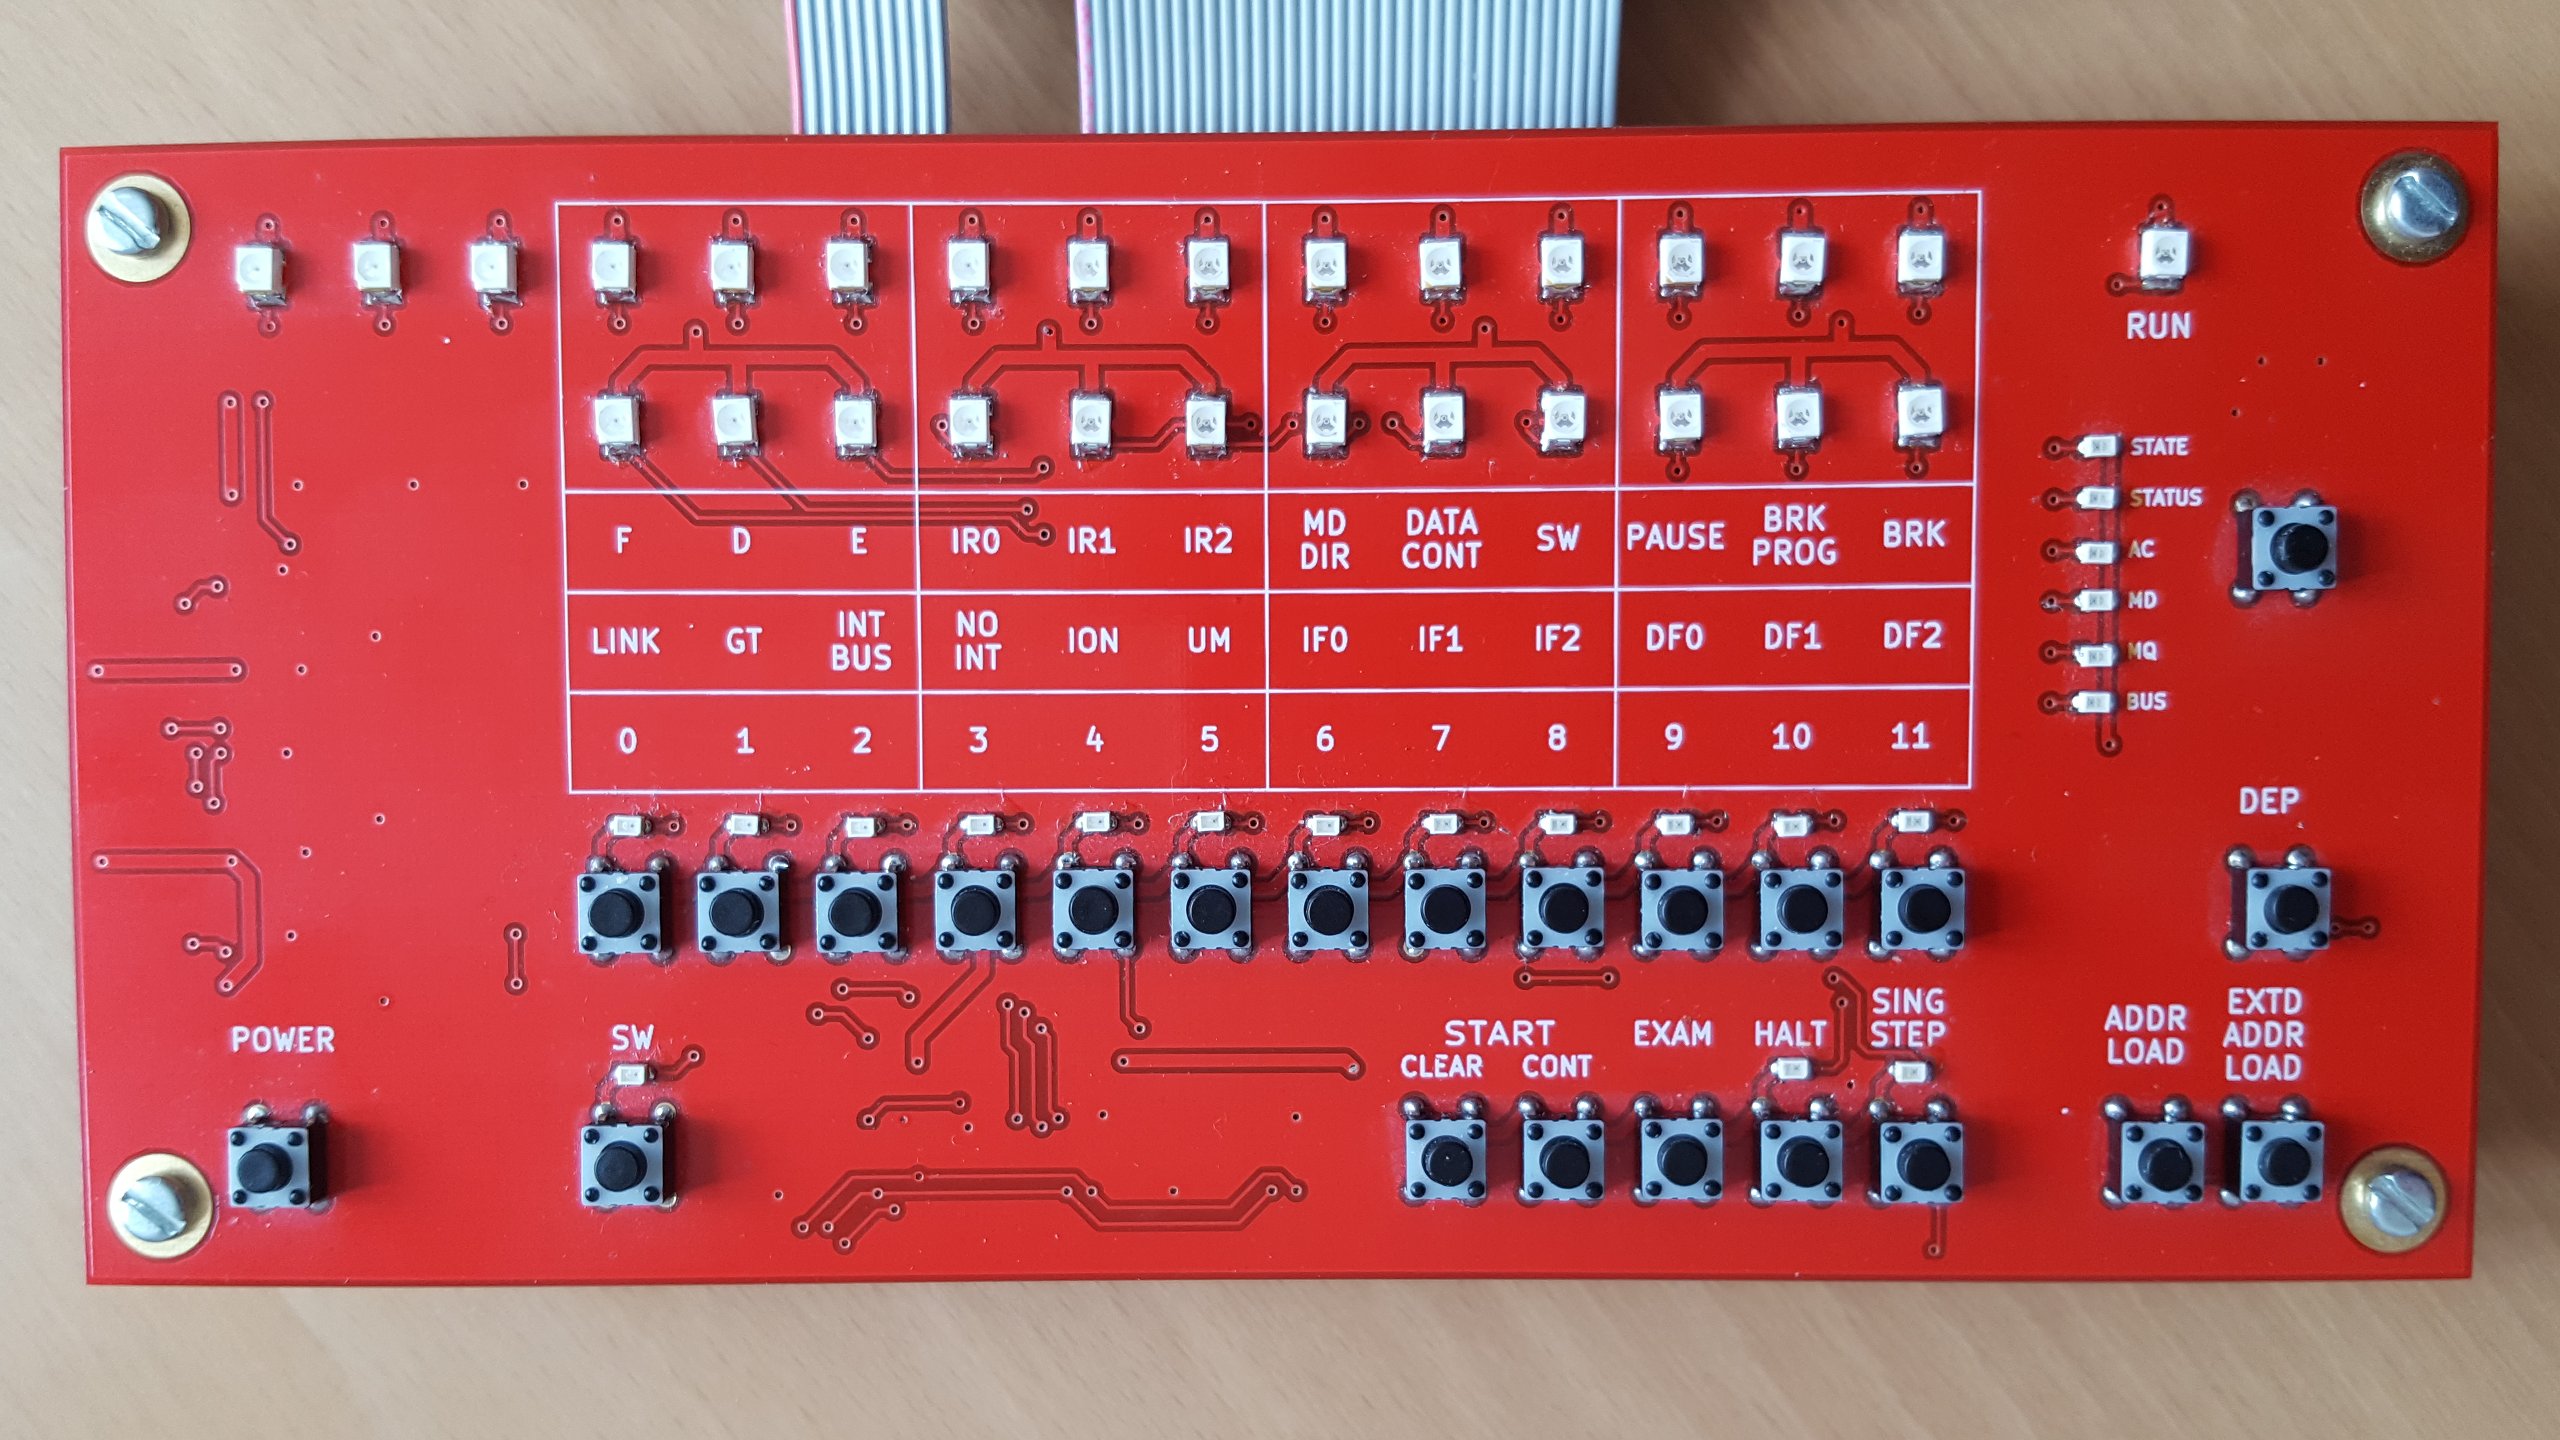
functional replica of the PDP-8/e front panel
If you know the original or remember the picture from the first post it is clear that this is a functional replica not aiming to be as pretty as those of the other projects I mentioned. I have reordered the switches into two rows to make the board more compact (which also means cheaper) without sacrificing usability. There s the two rows of display lights plus one run light the 8/e provides. The upper row is the address made up of 12 bits of memory address and 3 bits of extended memory address or field. Below are the 12 bits indicator which can show one data set out of six as selected by the user. All the switches of the original are implemented as more compact buttons1. While momentary switches are easily substituted by buttons, all buttons implementing two position switches toggle on/off with each press and they have a LED above that shows the current state. The six position rotary switch is implemented as a button cycling through all indicator displays together with six LEDs which show the active selection. Markings show the meaning of the indicator and switches as on the original, grouped in threes as the predominant numbering system for the PDPs was octal. The upper line shows the meaning for the state indicator, the middle for the status indicator and bit numbers for the rest. Note that on the PDP-8 and opposite to modern conventions, the most significant bit was numbered 0. I designed it as a pure front panel board without any PDP-8 simulation parts. The buttons and associated lights are controllable via SPI lines with a 3.3 V supply. The address and indicator lights have a separate common anode configuration with all cathodes individually available on a pin header without any resistors in the path, leaving voltage and current regulation up to the simulation board. This board is actually a few years old from a similar project where I emulated the PDP-8 in software on a microcontroller and the flexible design allowed me to reuse it unchanged.

The main board
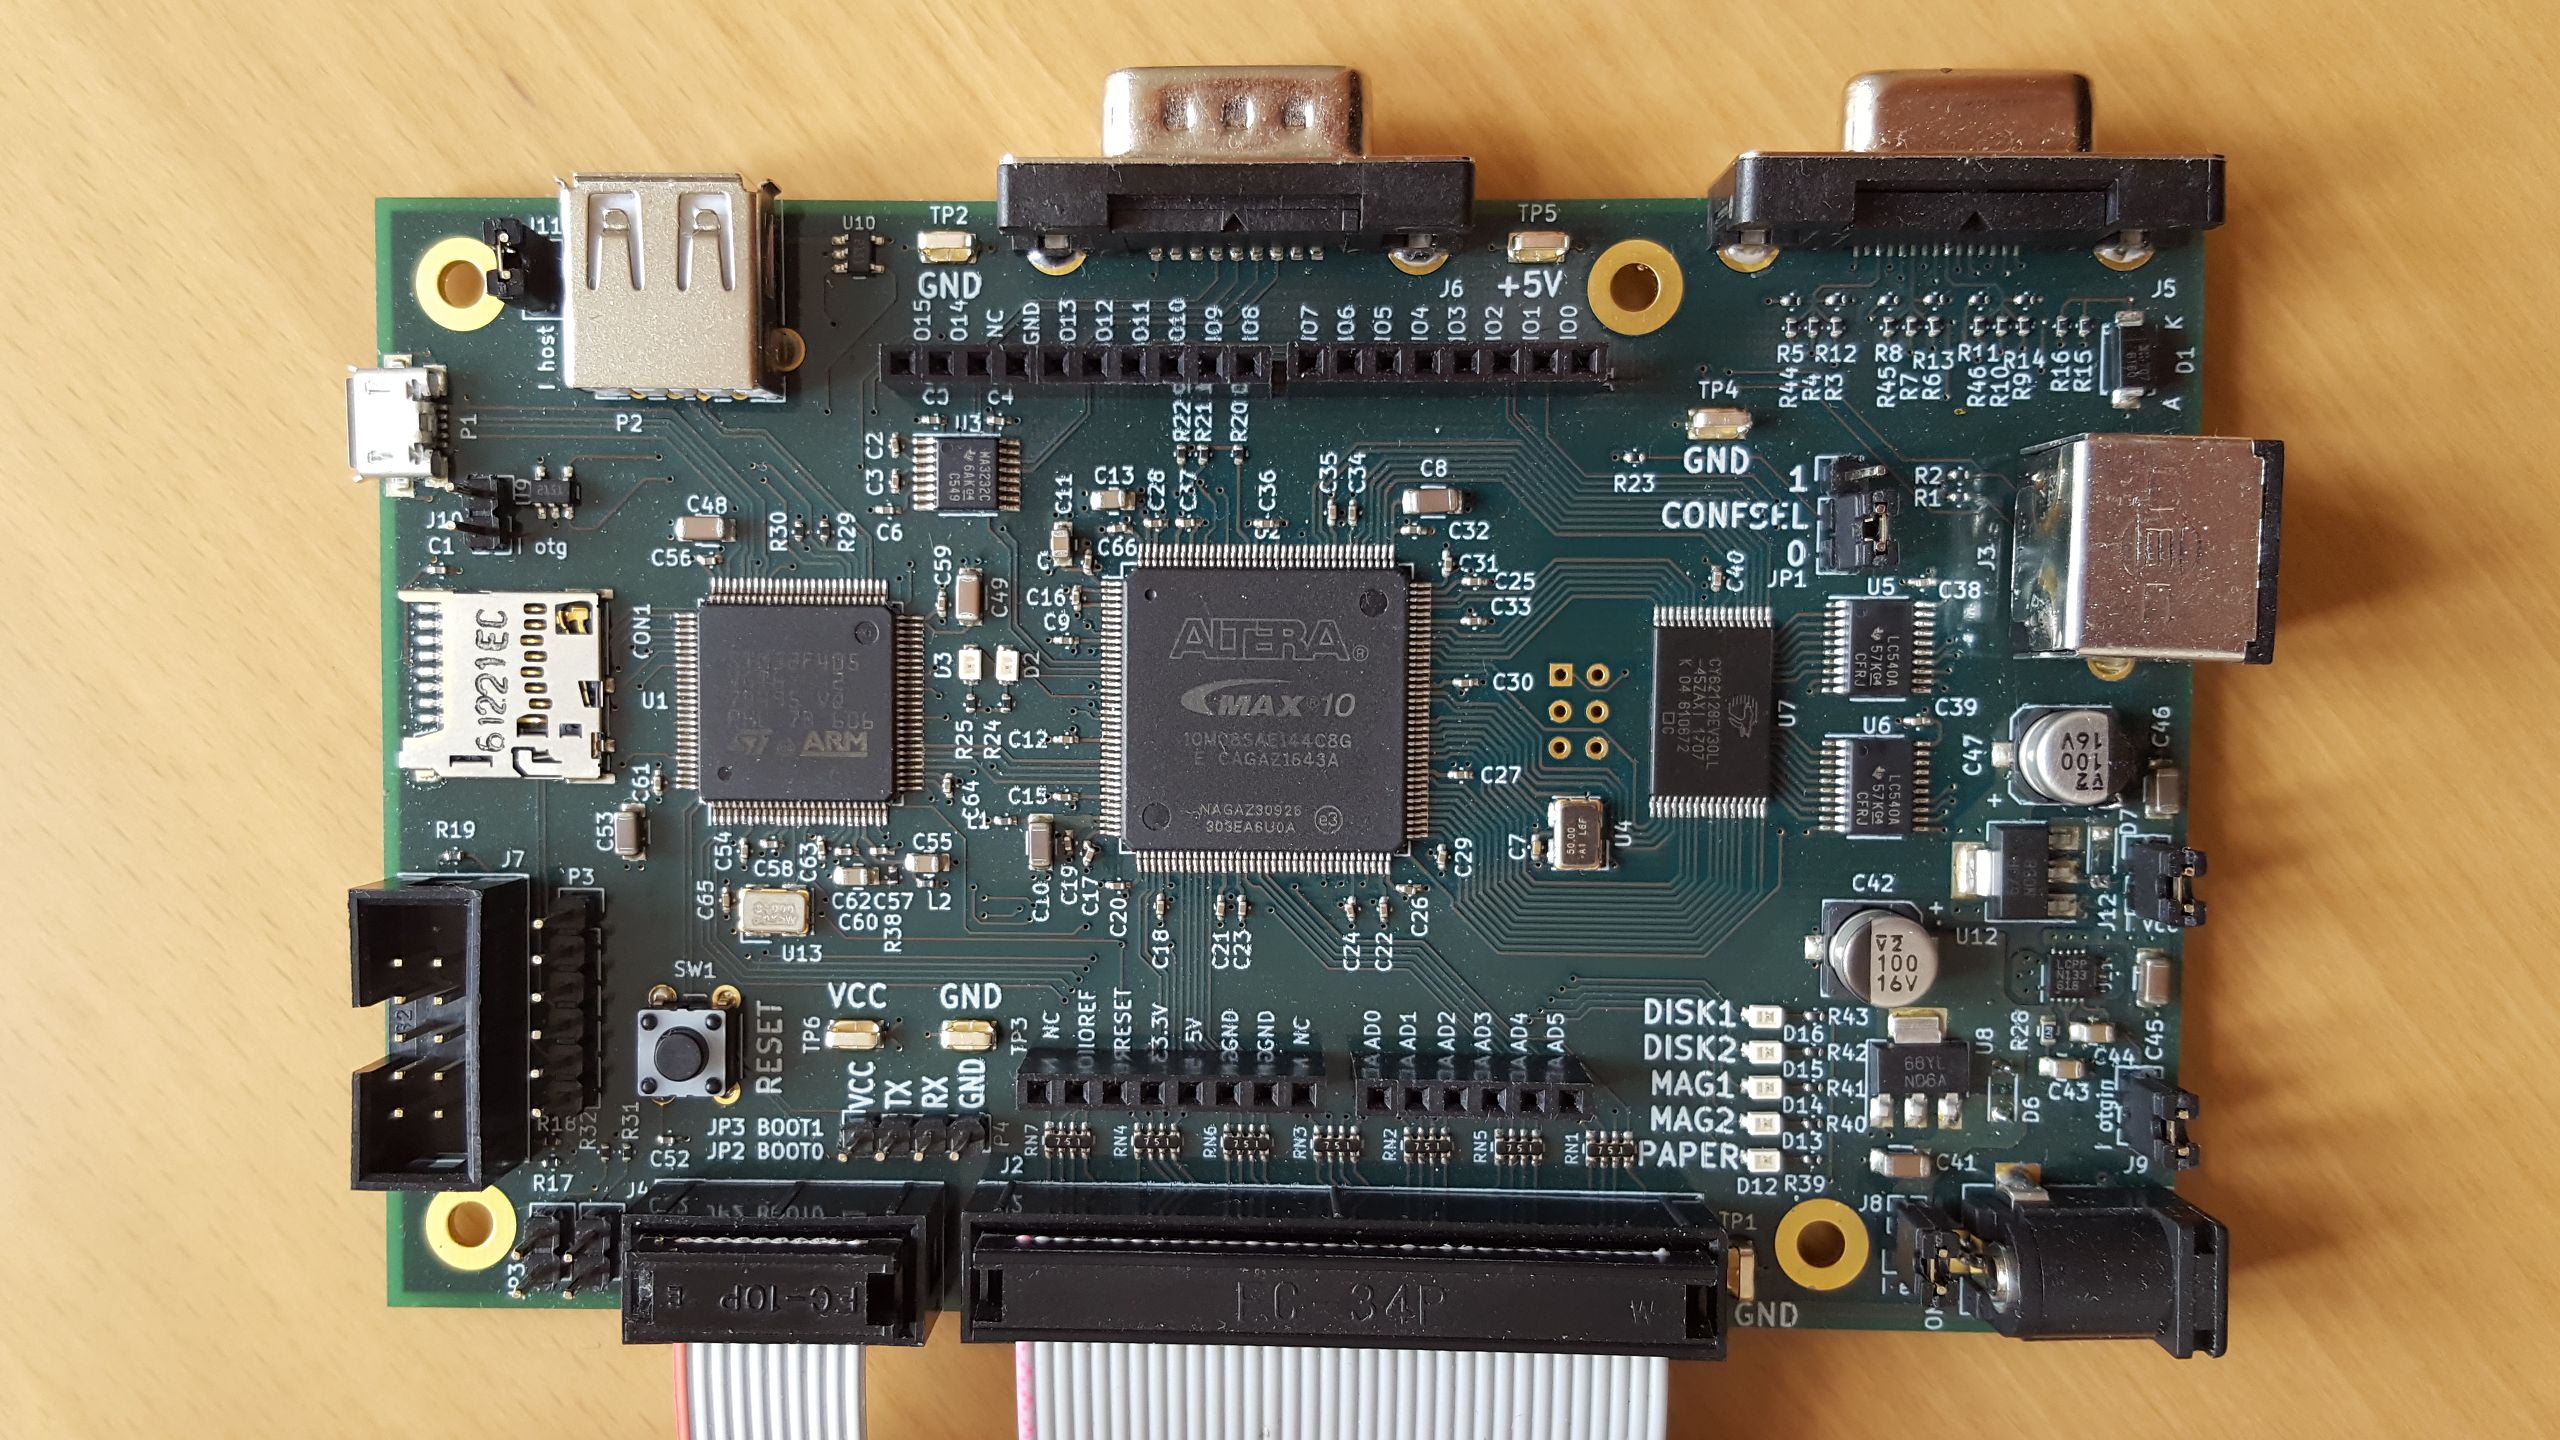
main board with CPU and peripherals of the replicated PDP-8/e
This is where the magic happens. You can see three big ICs on the board: On the left is the STM32F405 microcontroller (with ARM Cortex-M4 core), the bigger one in the middle is the Altera2 MAX 10 FPGA and finally to the right is the SRAM that is large enough to hold all the main memory of the 32 KW maximum expansion of the PDP-8/e. The two smaller chips to the right of that are just buffers that drive the front panel address LEDs, the small chip at the top left is a RS-232 level shifter. The idea behind this is that the PDP-8 and peripherals that are simple to directly implement, such as GPIO or a serial port, are fully on the FPGA. Other peripherals such as paper and magnetic tape and disks, which are after all not connected to real PDP-8 drives but disk images on a microSD, are implemented on the microcontroller interfacing with stub devices in the FPGA. Compared to implementing everything everything in the FPGA, the STM32F4 has the advantage of useful built in peripherals such as two host/device capable USB ports. 5 V tolerant I/O pins are very useful and simply not available in any FPGA. I have to admit that this board was a bit of a rush job in order to have something at all to show at the Vintage Computer Festival Europe 18.0. Given that it was my first time designing a board with a large microcontroller and the first time with an FPGA, it wasn t exactly my fastest progressing project either and I got basic functionality (front panel allows toggling in small programs and running them) working just in time. For various reasons the project hasn t progressed much since, so the following is still just plans, but plans for which the hardware was designed. Since the aim is to have a cycle accurate PDP-8/e implementation, digital I/O was always planned. Rather than defining my own header I have included Arduino R3 compatible headers (for 3.3 V compatible boards only) that have become a popular even outside the Arduino world for this purpose. The digital Arduino pins are connected directly to the FPGA and will be directly controllable by PDP-8 software. The downside of choosing the Arduino headers is that the original PDP-8 digital I/O interface is not a perfect match since it naturally has 12 lines whereas the Arduino has 15. The analog inputs are not connected to the FPGA, the documentation of the MAX10 s ADC in the EQFP package are not very encouraging. They are connected to the STM32 instead3. Another interface connected directly to the FPGA and that would be directly under PDP-8 control is a standard 9 pin RS-232 interface. RX, TX, CTS and RTS are connected and level-shifted between 3.3 V and RS-232 levels by a MAX3232. Besides the PDP-8, I also plan to implement a full video terminal on the board. The idea is that with a power supply, keyboard and monitor this board would form a complete system without the need of connecting another computer to act as a terminal. To that end, there is a VGA port attached to the FPGA with simple resistor network DACs for 9 bits color (RGB with 3 bits each). This is another spot where I left myself room to expand, for e.g. a VT220 you really only need one color in two brightness levels. Keyboards will be connected either via the PS/2 connector on the right or the USB-A host port at the top left. Last of the interface ports is the USB micro-AB port on the left, which for now I am using only for power supply. I mainly plan to use it to provide alternative or additional serial ports to the PDP-8 or to export the video terminal serial port for testing purposes. Other possible uses are access to the image files on the microSD and firmware updates. This has gotten rather long again, so I m stopping here and leave some implementation notes for another post.

  1. They are also much cheaper. Given the large number of switches, the savings are substantial. Additionaly the buttons are nicer to operate than long rows of tiny switches. [return]
  2. Or rather Intel now. At least Altera s web site, documentation and software have already been thoroughly rebranded, but the chips I got were produced prior to that. [return]
  3. That s not to say that the analog conversions on the STM32 are necessarily better than those of the MAX10 when you can t follow their guidelines, I have no comparisons. Certainly following the guidelines would have been prohibitive given how many pins usage they restrict. [return]

8 July 2017

Urvika Gola: Outreachy Progress on Lumicall

unnamedLumicall 1.13.0 is released!  Through Lumicall, you can make encrypted calls and send messages using open standards. It uses the SIP protocol to inter-operate with other apps and corporate telephone systems. During the Outreachy Internship period I worked on the following issues :-

I researched on creating a white label version of Lumicall. Few ideas on how the white label build could be used..
  1. Existing SIP providers can use white label version of Lumicall to expand their business and launch SIP client. This would provide a one stop shop for them!!
  2. New SIP clients/developers can use Lumicall white label version to get the underlying working of making encrypted phone calls using SIP protocol, it will help them to focus on other additional functionalities they would like to include.
Documentation for implementing white labelling Link 1 and Link 2 Since Lumicall is majorly used to make encrypted calls, there was a need to designate quiet times and the phone will not make an audible ringing tone during that time & if the user has multiple SIP accounts, the user can set the silent mode functionality on one of them, maybe, the Work account.
Documentation for adding silent mode feature Link 1 and Link 2 Using Lumicall, users can send SIP messages across. Just to improve the UI a little, I added a 9 patch image in the message screen. A 9 patch image is created using 9 patch tools and are saved as imagename.9.png . The image will resize itself according to the text length and font size. Documentation for 9 patch image Link 9patch You can try the new version of Lumicall here ! and know more about Lumicall on a blog by Daniel Pocock.
Looking forward to your valuable feedback !!

6 July 2017

Urvika Gola: Speaking at Open Source Bridge 17

Recently, I and my Co speaker Pranav Jain, got a chance to speak at Open Source Bridge conference which was held in Portland, Oregon! Pranav talked about GSoC and I talked about Outreachy , together we talked about Free RTC project Lumicall.
OSB conference was much more than just a conference . More than content in the talks, it had meaning. I am referring to the amazing keynote session by Nicole Sanchez on Tech Reform. She explained wonderfully the need of the hour, i.e Diversity inclusion is not just inclusion . Focus should be on what comes after the inclusion, Growth. We also met several Debian developers and Debian mentor for Outreachy (Hoping to meet my mentors someday!! ) Thanks to OSB, I got to meet Outreachy co-ordinator Sarah Sharp! It was wonderful meeting an Outreachy-person!  We talked and exchanged ideas about the programme. and.. she clicked beautiful pictures of us delivering the talk.
Urvika Gola at Open Source BridgePicture Courtesy Sarah Sharp
The talk ended with an unexpected and very precious hand written note written by Audrey Eschright.. 20170622_114118-1 Thank you Debian for giving us a chance to speak at Open Source Bridge and to meet wonderful people in Open Source.

4 July 2017

Foteini Tsiami: Internationalization, part two

Now that sch-scripts has been renamed to ltsp-manager and translated to English, it was time to set up a proper project site for it in launchpad: http://www.launchpad.net/ltsp-manager The following subpages were created for LTSP Manager there: We currently have an initial version of LTSP Manager running in Debian Stretch; although more testing and more bug reports will be needed before we start the localization phase. Attaching a first screenshot!

27 June 2017

Benjamin Mako Hill: Learning to Code in One s Own Language

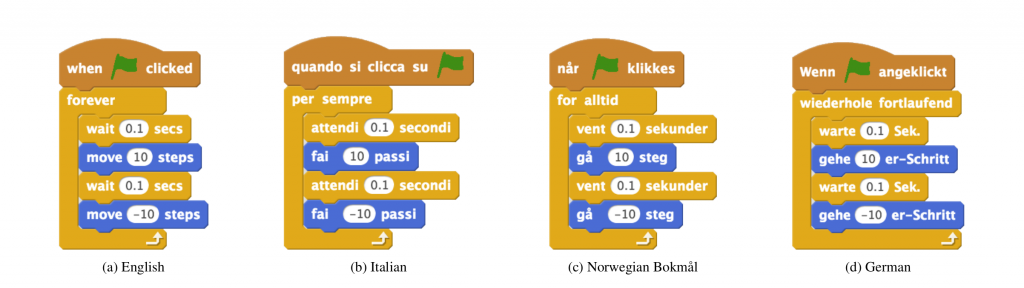
I recently published a paper with Sayamindu Dasgupta that provides evidence in support of the idea that kids can learn to code more quickly when they are programming in their own language. Millions of young people from around the world are learning to code. Often, during their learning experiences, these youth are using visual block-based programming languages like Scratch, App Inventor, and Code.org Studio. In block-based programming languages, coders manipulate visual, snap-together blocks that represent code constructs instead of textual symbols and commands that are found in more traditional programming languages. The textual symbols used in nearly all non-block-based programming languages are drawn from English consider if statements and for loops for common examples. Keywords in block-based languages, on the other hand, are often translated into different human languages. For example, depending on the language preference of the user, an identical set of computing instructions in Scratch can be represented in many different human languages:
Examples of a short piece of Scratch code shown in four different human languages: English, Italian, Norwegian Bokm l, and German.
Although my research with Sayamindu Dasgupta focuses on learning, both Sayamindu and I worked on local language technologies before coming back to academia. As a result, we were both interested in how the increasing translation of programming languages might be making it easier for non-English speaking kids to learn to code. After all, a large body of education research has shown that early-stage education is more effective when instruction is in the language that the learner speaks at home. Based on this research, we hypothesized that children learning to code with block-based programming languages translated to their mother-tongues will have better learning outcomes than children using the blocks in English. We sought to test this hypothesis in Scratch, an informal learning community built around a block-based programming language. We were helped by the fact that Scratch is translated into many languages and has a large number of learners from around the world. To measure learning, we built on some of our our own previous work and looked at learners cumulative block repertoires similar to a code vocabulary. By observing a learner s cumulative block repertoire over time, we can measure how quickly their code vocabulary is growing. Using this data, we compared the rate of growth of cumulative block repertoire between learners from non-English speaking countries using Scratch in English to learners from the same countries using Scratch in their local language. To identify non-English speakers, we considered Scratch users who reported themselves as coming from five primarily non-English speaking countries: Portugal, Italy, Brazil, Germany, and Norway. We chose these five countries because they each have one very widely spoken language that is not English and because Scratch is almost fully translated into that language. Even after controlling for a number of factors like social engagement on the Scratch website, user productivity, and time spent on projects, we found that learners from these countries who use Scratch in their local language have a higher rate of cumulative block repertoire growth than their counterparts using Scratch in English. This faster growth was despite having a lower initial block repertoire. The graph below visualizes our results for two prototypical learners who start with the same initial block repertoire: one learner who uses the English interface, and a second learner who uses their native language.
Summary of the results of our model for two prototypical individuals.
Our results are in line with what theories of education have to say about learning in one s own language. Our findings also represent good news for designers of block-based programming languages who have spent considerable amounts of effort in making their programming languages translatable. It s also good news for the volunteers who have spent many hours translating blocks and user interfaces. Although we find support for our hypothesis, we should stress that our findings are both limited and incomplete. For example, because we focus on estimating the differences between Scratch learners, our comparisons are between kids who all managed to successfully use Scratch. Before Scratch was translated, kids with little working knowledge of English or the Latin script might not have been able to use Scratch at all. Because of translation, many of these children are now able to learn to code.
This blog post and the work that it describes is a collaborative project with Sayamindu Dasgupta. Sayamindu also published a very similar version of the blog post in several places. Our paper is open access and you can read it here. The paper was published in the proceedings of the ACM Learning @ Scale Conference. We also recently gave a talk about this work at the International Communication Association s annual conference. We received support and feedback from members of the Scratch team at MIT (especially Mitch Resnick and Natalie Rusk), as well as from Nathan TeBlunthuis at the University of Washington. Financial support came from the US National Science Foundation.

23 June 2017

Elena 'valhalla' Grandi: On brokeness, the live installer and being nice to people

On brokeness, the live installer and being nice to people

This morning I've read this blog.einval.com/2017/06/22#tro.

I understand that somebody on the internet will always be trolling, but I just wanted to point out:

* that the installer in the old live images has been broken (for international users) for years
* that nobody cared enough to fix it, not even the people affected by it (the issue was reported as known in various forums, but for a long time nobody even opened an issue to let the *developers* know).

Compare this with the current situation, with people doing multiple tests as the (quite big number of) images were being built, and a fix released soon after for the issues found.

I'd say that this situation is great, and that instead of trolling around we should thank the people involved in this release for their great job.

21 June 2017

Joey Hess: DIY professional grade solar panel installation

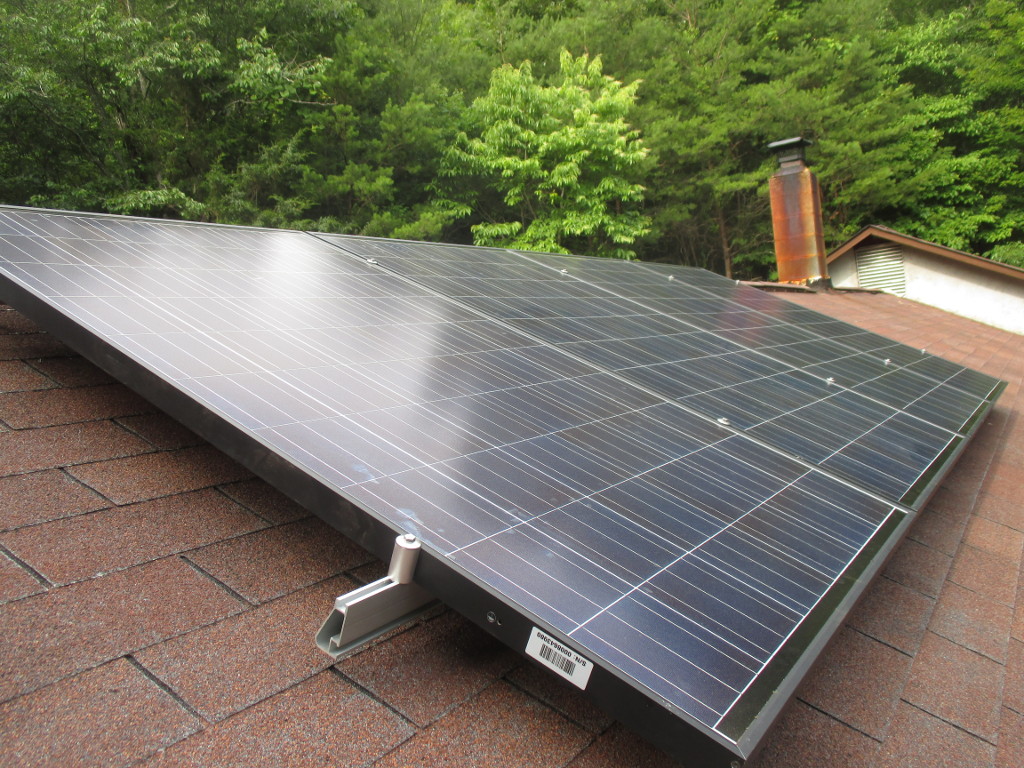
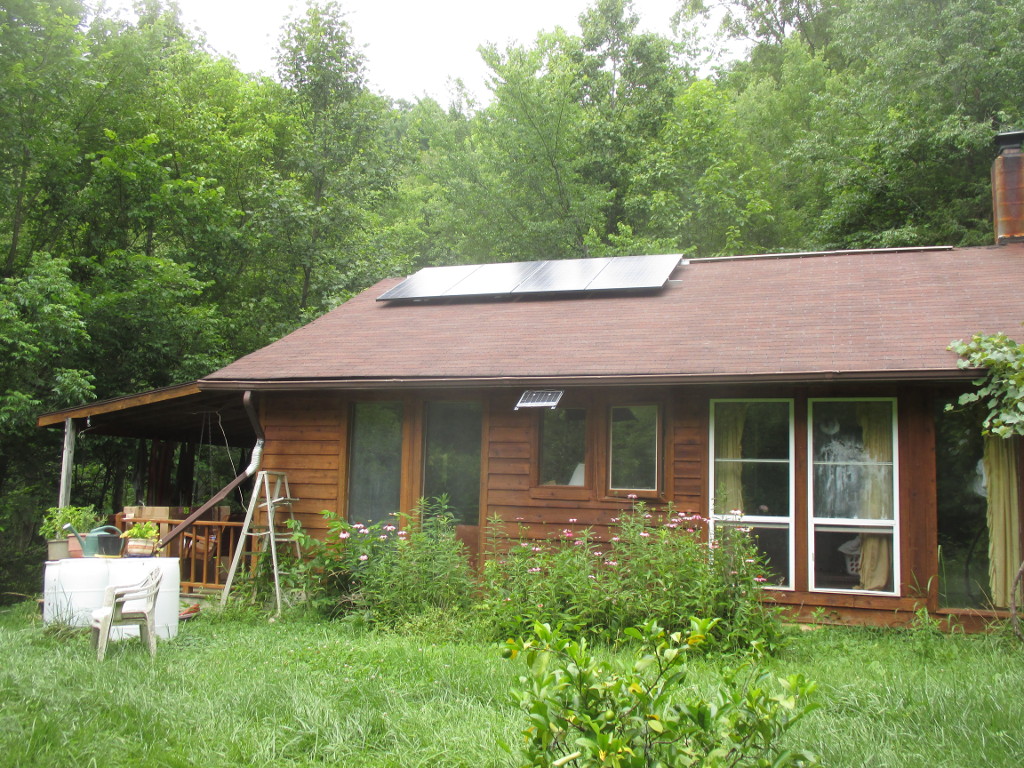
I've installed 1 kilowatt of solar panels on my roof, using professional grade eqipment. The four panels are Astronergy 260 watt panels, and they're mounted on IronRidge XR100 rails. Did it all myself, without help. house with 4 solar panels on roof I had three goals for this install:
  1. Cheap but sturdy. Total cost will be under $2500. It would probably cost at least twice as much to get a professional install, and the pros might not even want to do such a small install.
  2. Learn the roof mount system. I want to be able to add more panels, remove panels when working on the roof, and understand everything.
  3. Make every day a sunny day. With my current solar panels, I get around 10x as much power on a sunny day as a cloudy day, and I have plenty of power on sunny days. So 10x the PV capacity should be a good amount of power all the time.
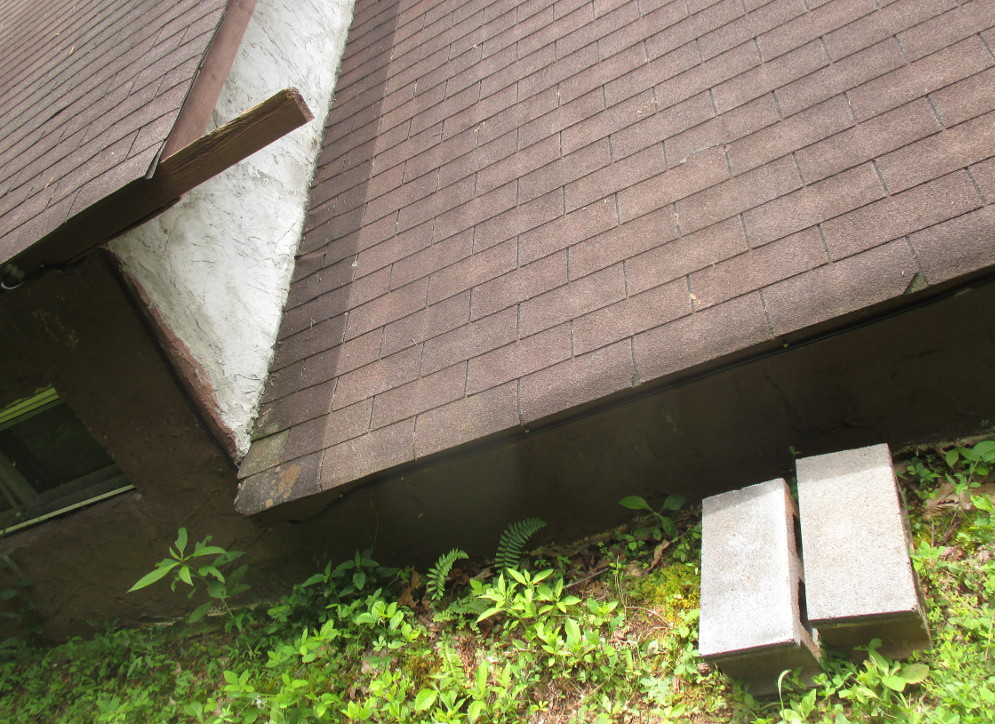
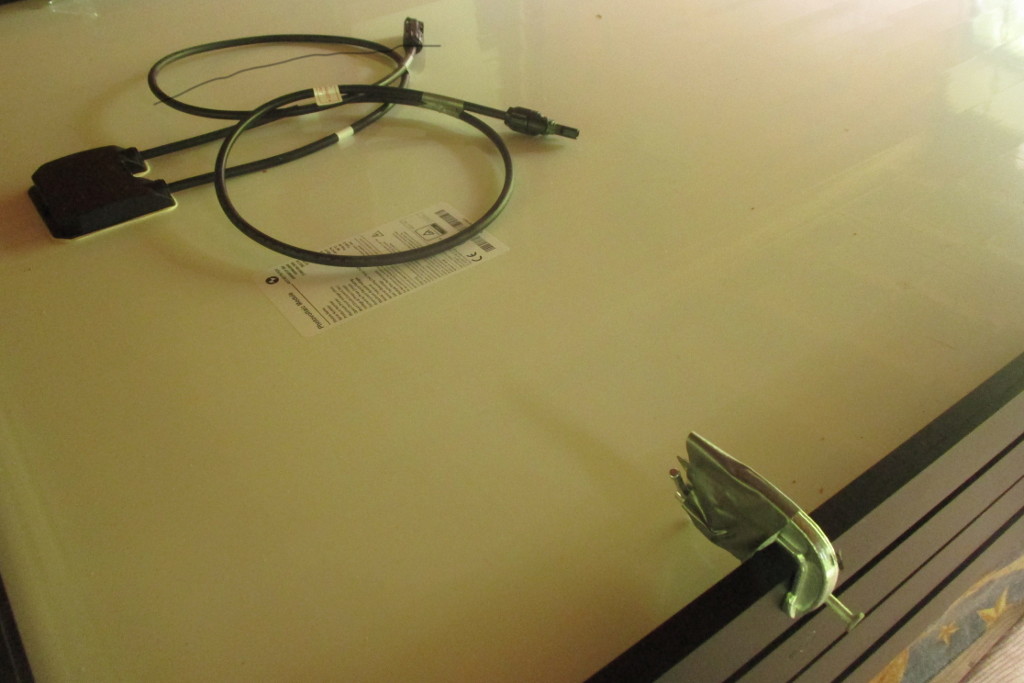
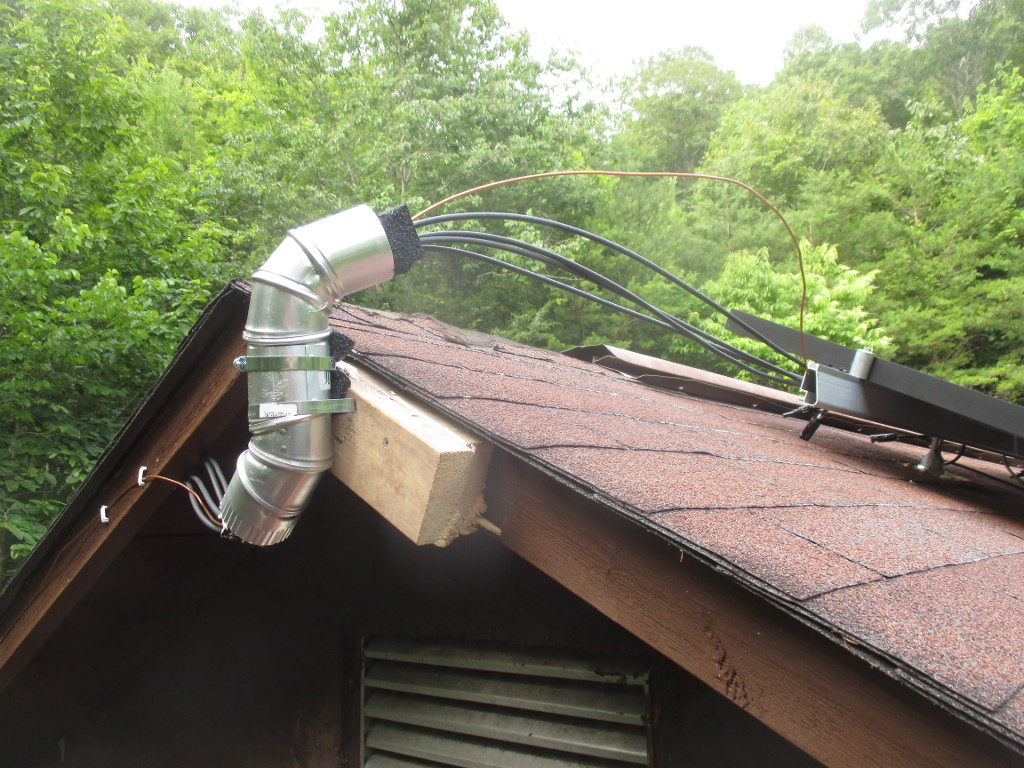
My main concerns were, would I be able to find the rafters when installing the rails, and would the 5x3 foot panels be too unweildly to get up on the roof by myself. I was able to find the rafters, without needing a stud finder, after I removed the roof's vent caps, which exposed the rafters. The shingles were on straight enough that I could follow the lines down and drilled into the rafter on the first try every time. And I got the rails on spaced well and straight, although I could have spaced the FlashFeet out better (oops). My drill ran out of juice half-way, and I had to hack it to recharge on solar power, but that's another story. Between the learning curve, a lot of careful measurement, not the greatest shoes for roofing, and waiting for recharging, it took two days to get the 8 FlashFeet installed and the rails mounted. Taking a break from that and swimming in the river, I realized I should have been wearing my water shoes on the roof all along. Super soft and nubbly, they make me feel like a gecko up there! After recovering from an (unrelated) achilles tendon strain, I got the panels installed today. Turns out they're not hard to handle on the roof by myself. Getting them up a ladder to the roof by yourself would normally be another story, but my house has a 2 foot step up from the back retaining wall to the roof, and even has a handy grip beam as you step up. roof next to the ground with a couple of cinderblock steps The last gotcha, which I luckily anticipated, is that panels will slide down off the rails before you can get them bolted down. This is where a second pair of hands would have been most useful. But, I macguyvered a solution, attaching temporary clamps before bringing a panel up, that stopped it sliding down while I was attaching it. clamp temporarily attached to side of panel I also finished the outside wiring today. Including the one hack of this install so far. Since the local hardware store didn't have a suitable conduit to bring the cables off the roof, I cobbled one together from pipe, with foam inserts to prevent chafing. some pipe with 5 wires running through it, attached to the side of the roof While I have 1 kilowatt of power on my roof now, I won't be able to use it until next week. After ordering the upgrade, I realized that my old PWM charge controller would be able to handle less than half the power, and to get even that I would have needed to mount the fuse box near the top of the roof and run down a large and expensive low-voltage high-amperage cable, around OO AWG size. Instead, I'll be upgrading to a MPPT controller, and running a single 150 volt cable to it. Then, since the MPPT controller can only handle 1 kilowatt when it's converting to 24 volts, not 12 volts, I'm gonna have to convert the entire house over from 12V DC to 24V DC, including changing all the light fixtures and rewiring the battery bank...

Vincent Bernat: IPv4 route lookup on Linux

TL;DR: With its implementation of IPv4 routing tables using LPC-tries, Linux offers good lookup performance (50 ns for a full view) and low memory usage (64 MiB for a full view).
During the lifetime of an IPv4 datagram inside the Linux kernel, one important step is the route lookup for the destination address through the fib_lookup() function. From essential information about the datagram (source and destination IP addresses, interfaces, firewall mark, ), this function should quickly provide a decision. Some possible options are: Since 2.6.39, Linux stores routes into a compressed prefix tree (commit 3630b7c050d9). In the past, a route cache was maintained but it has been removed1 in Linux 3.6.

Route lookup in a trie Looking up a route in a routing table is to find the most specific prefix matching the requested destination. Let s assume the following routing table:
$ ip route show scope global table 100
default via 203.0.113.5 dev out2
192.0.2.0/25
        nexthop via 203.0.113.7  dev out3 weight 1
        nexthop via 203.0.113.9  dev out4 weight 1
192.0.2.47 via 203.0.113.3 dev out1
192.0.2.48 via 203.0.113.3 dev out1
192.0.2.49 via 203.0.113.3 dev out1
192.0.2.50 via 203.0.113.3 dev out1
Here are some examples of lookups and the associated results:
Destination IP Next hop
192.0.2.49 203.0.113.3 via out1
192.0.2.50 203.0.113.3 via out1
192.0.2.51 203.0.113.7 via out3 or 203.0.113.9 via out4 (ECMP)
192.0.2.200 203.0.113.5 via out2
A common structure for route lookup is the trie, a tree structure where each node has its parent as prefix.

Lookup with a simple trie The following trie encodes the previous routing table: Simple routing trie For each node, the prefix is known by its path from the root node and the prefix length is the current depth. A lookup in such a trie is quite simple: at each step, fetch the nth bit of the IP address, where n is the current depth. If it is 0, continue with the first child. Otherwise, continue with the second. If a child is missing, backtrack until a routing entry is found. For example, when looking for 192.0.2.50, we will find the result in the corresponding leaf (at depth 32). However for 192.0.2.51, we will reach 192.0.2.50/31 but there is no second child. Therefore, we backtrack until the 192.0.2.0/25 routing entry. Adding and removing routes is quite easy. From a performance point of view, the lookup is done in constant time relative to the number of routes (due to maximum depth being capped to 32). Quagga is an example of routing software still using this simple approach.

Lookup with a path-compressed trie In the previous example, most nodes only have one child. This leads to a lot of unneeded bitwise comparisons and memory is also wasted on many nodes. To overcome this problem, we can use path compression: each node with only one child is removed (except if it also contains a routing entry). Each remaining node gets a new property telling how many input bits should be skipped. Such a trie is also known as a Patricia trie or a radix tree. Here is the path-compressed version of the previous trie: Patricia trie Since some bits have been ignored, on a match, a final check is executed to ensure all bits from the found entry are matching the input IP address. If not, we must act as if the entry wasn t found (and backtrack to find a matching prefix). The following figure shows two IP addresses matching the same leaf: Lookup in a Patricia trie The reduction on the average depth of the tree compensates the necessity to handle those false positives. The insertion and deletion of a routing entry is still easy enough. Many routing systems are using Patricia trees:

Lookup with a level-compressed trie In addition to path compression, level compression2 detects parts of the trie that are densily populated and replace them with a single node and an associated vector of 2k children. This node will handle k input bits instead of just one. For example, here is a level-compressed version our previous trie: Level-compressed trie Such a trie is called LC-trie or LPC-trie and offers higher lookup performances compared to a radix tree. An heuristic is used to decide how many bits a node should handle. On Linux, if the ratio of non-empty children to all children would be above 50% when the node handles an additional bit, the node gets this additional bit. On the other hand, if the current ratio is below 25%, the node loses the responsibility of one bit. Those values are not tunable. Insertion and deletion becomes more complex but lookup times are also improved.

Implementation in Linux The implementation for IPv4 in Linux exists since 2.6.13 (commit 19baf839ff4a) and is enabled by default since 2.6.39 (commit 3630b7c050d9). Here is the representation of our example routing table in memory3: Memory representation of a trie There are several structures involved: The trie can be retrieved through /proc/net/fib_trie:
$ cat /proc/net/fib_trie
Id 100:
  +-- 0.0.0.0/0 2 0 2
      -- 0.0.0.0
        /0 universe UNICAST
     +-- 192.0.2.0/26 2 0 1
         -- 192.0.2.0
           /25 universe UNICAST
         -- 192.0.2.47
           /32 universe UNICAST
        +-- 192.0.2.48/30 2 0 1
            -- 192.0.2.48
              /32 universe UNICAST
            -- 192.0.2.49
              /32 universe UNICAST
            -- 192.0.2.50
              /32 universe UNICAST
[...]
For internal nodes, the numbers after the prefix are:
  1. the number of bits handled by the node,
  2. the number of full children (they only handle one bit),
  3. the number of empty children.
Moreover, if the kernel was compiled with CONFIG_IP_FIB_TRIE_STATS, some interesting statistics are available in /proc/net/fib_triestat4:
$ cat /proc/net/fib_triestat
Basic info: size of leaf: 48 bytes, size of tnode: 40 bytes.
Id 100:
        Aver depth:     2.33
        Max depth:      3
        Leaves:         6
        Prefixes:       6
        Internal nodes: 3
          2: 3
        Pointers: 12
Null ptrs: 4
Total size: 1  kB
[...]
When a routing table is very dense, a node can handle many bits. For example, a densily populated routing table with 1 million entries packed in a /12 can have one internal node handling 20 bits. In this case, route lookup is essentially reduced to a lookup in a vector. The following graph shows the number of internal nodes used relative to the number of routes for different scenarios (routes extracted from an Internet full view, /32 routes spreaded over 4 different subnets with various densities). When routes are densily packed, the number of internal nodes are quite limited. Internal nodes and null pointers

Performance So how performant is a route lookup? The maximum depth stays low (about 6 for a full view), so a lookup should be quite fast. With the help of a small kernel module, we can accurately benchmark5 the fib_lookup() function: Maximum depth and lookup time The lookup time is loosely tied to the maximum depth. When the routing table is densily populated, the maximum depth is low and the lookup times are fast. When forwarding at 10 Gbps, the time budget for a packet would be about 50 ns. Since this is also the time needed for the route lookup alone in some cases, we wouldn t be able to forward at line rate with only one core. Nonetheless, the results are pretty good and they are expected to scale linearly with the number of cores. The measurements are done with a Linux kernel 4.11 from Debian unstable. I have gathered performance metrics accross kernel versions in Performance progression of IPv4 route lookup on Linux . Another interesting figure is the time it takes to insert all those routes into the kernel. Linux is also quite efficient in this area since you can insert 2 million routes in less than 10 seconds: Insertion time

Memory usage The memory usage is available directly in /proc/net/fib_triestat. The statistic provided doesn t account for the fib_info structures, but you should only have a handful of them (one for each possible next-hop). As you can see on the graph below, the memory use is linear with the number of routes inserted, whatever the shape of the routes is. Memory usage The results are quite good. With only 256 MiB, about 2 million routes can be stored!

Routing rules Unless configured without CONFIG_IP_MULTIPLE_TABLES, Linux supports several routing tables and has a system of configurable rules to select the table to use. These rules can be configured with ip rule. By default, there are three of them:
$ ip rule show
0:      from all lookup local
32766:  from all lookup main
32767:  from all lookup default
Linux will first lookup for a match in the local table. If it doesn t find one, it will lookup in the main table and at last resort, the default table.

Builtin tables The local table contains routes for local delivery:
$ ip route show table local
broadcast 127.0.0.0 dev lo proto kernel scope link src 127.0.0.1
local 127.0.0.0/8 dev lo proto kernel scope host src 127.0.0.1
local 127.0.0.1 dev lo proto kernel scope host src 127.0.0.1
broadcast 127.255.255.255 dev lo proto kernel scope link src 127.0.0.1
broadcast 192.168.117.0 dev eno1 proto kernel scope link src 192.168.117.55
local 192.168.117.55 dev eno1 proto kernel scope host src 192.168.117.55
broadcast 192.168.117.63 dev eno1 proto kernel scope link src 192.168.117.55
This table is populated automatically by the kernel when addresses are configured. Let s look at the three last lines. When the IP address 192.168.117.55 was configured on the eno1 interface, the kernel automatically added the appropriate routes:
  • a route for 192.168.117.55 for local unicast delivery to the IP address,
  • a route for 192.168.117.255 for broadcast delivery to the broadcast address,
  • a route for 192.168.117.0 for broadcast delivery to the network address.
When 127.0.0.1 was configured on the loopback interface, the same kind of routes were added to the local table. However, a loopback address receives a special treatment and the kernel also adds the whole subnet to the local table. As a result, you can ping any IP in 127.0.0.0/8:
$ ping -c1 127.42.42.42
PING 127.42.42.42 (127.42.42.42) 56(84) bytes of data.
64 bytes from 127.42.42.42: icmp_seq=1 ttl=64 time=0.039 ms
--- 127.42.42.42 ping statistics ---
1 packets transmitted, 1 received, 0% packet loss, time 0ms
rtt min/avg/max/mdev = 0.039/0.039/0.039/0.000 ms
The main table usually contains all the other routes:
$ ip route show table main
default via 192.168.117.1 dev eno1 proto static metric 100
192.168.117.0/26 dev eno1 proto kernel scope link src 192.168.117.55 metric 100
The default route has been configured by some DHCP daemon. The connected route (scope link) has been automatically added by the kernel (proto kernel) when configuring an IP address on the eno1 interface. The default table is empty and has little use. It has been kept when the current incarnation of advanced routing has been introduced in Linux 2.1.68 after a first tentative using classes in Linux 2.1.156.

Performance Since Linux 4.1 (commit 0ddcf43d5d4a), when the set of rules is left unmodified, the main and local tables are merged and the lookup is done with this single table (and the default table if not empty). Moreover, since Linux 3.0 (commit f4530fa574df), without specific rules, there is no performance hit when enabling the support for multiple routing tables. However, as soon as you add new rules, some CPU cycles will be spent for each datagram to evaluate them. Here is a couple of graphs demonstrating the impact of routing rules on lookup times: Routing rules impact on performance For some reason, the relation is linear when the number of rules is between 1 and 100 but the slope increases noticeably past this threshold. The second graph highlights the negative impact of the first rule (about 30 ns). A common use of rules is to create virtual routers: interfaces are segregated into domains and when a datagram enters through an interface from domain A, it should use routing table A:
# ip rule add iif vlan457 table 10
# ip rule add iif vlan457 blackhole
# ip rule add iif vlan458 table 20
# ip rule add iif vlan458 blackhole
The blackhole rules may be removed if you are sure there is a default route in each routing table. For example, we add a blackhole default with a high metric to not override a regular default route:
# ip route add blackhole default metric 9999 table 10
# ip route add blackhole default metric 9999 table 20
# ip rule add iif vlan457 table 10
# ip rule add iif vlan458 table 20
To reduce the impact on performance when many interface-specific rules are used, interfaces can be attached to VRF instances and a single rule can be used to select the appropriate table:
# ip link add vrf-A type vrf table 10
# ip link set dev vrf-A up
# ip link add vrf-B type vrf table 20
# ip link set dev vrf-B up
# ip link set dev vlan457 master vrf-A
# ip link set dev vlan458 master vrf-B
# ip rule show
0:      from all lookup local
1000:   from all lookup [l3mdev-table]
32766:  from all lookup main
32767:  from all lookup default
The special l3mdev-table rule was automatically added when configuring the first VRF interface. This rule will select the routing table associated to the VRF owning the input (or output) interface. VRF was introduced in Linux 4.3 (commit 193125dbd8eb), the performance was greatly enhanced in Linux 4.8 (commit 7889681f4a6c) and the special routing rule was also introduced in Linux 4.8 (commit 96c63fa7393d, commit 1aa6c4f6b8cd). You can find more details about it in the kernel documentation.

Conclusion The takeaways from this article are:
  • route lookup times hardly increase with the number of routes,
  • densily packed /32 routes lead to amazingly fast route lookups,
  • memory use is low (128 MiB par million routes),
  • no optimization is done on routing rules.

  1. The routing cache was subject to reasonably easy to launch denial of service attacks. It was also believed to not be efficient for high volume sites like Google but I have first-hand experience it was not the case for moderately high volume sites.
  2. IP-address lookup using LC-tries , IEEE Journal on Selected Areas in Communications, 17(6):1083-1092, June 1999.
  3. For internal nodes, the key_vector structure is embedded into a tnode structure. This structure contains information rarely used during lookup, notably the reference to the parent that is usually not needed for backtracking as Linux keeps the nearest candidate in a variable.
  4. One leaf can contain several routes (struct fib_alias is a list). The number of prefixes can therefore be greater than the number of leaves. The system also keeps statistics about the distribution of the internal nodes relative to the number of bits they handle. In our example, all the three internal nodes are handling 2 bits.
  5. The measurements are done in a virtual machine with one vCPU. The host is an Intel Core i5-4670K running at 3.7 GHz during the experiment (CPU governor was set to performance). The benchmark is single-threaded. It runs a warm-up phase, then executes about 100,000 timed iterations and keeps the median. Timings of individual runs are computed from the TSC.
  6. Fun fact: the documentation of this first tentative of more flexible routing is still available in today s kernel tree and explains the usage of the default class .

20 June 2017

Steve McIntyre: So, Stretch happened...

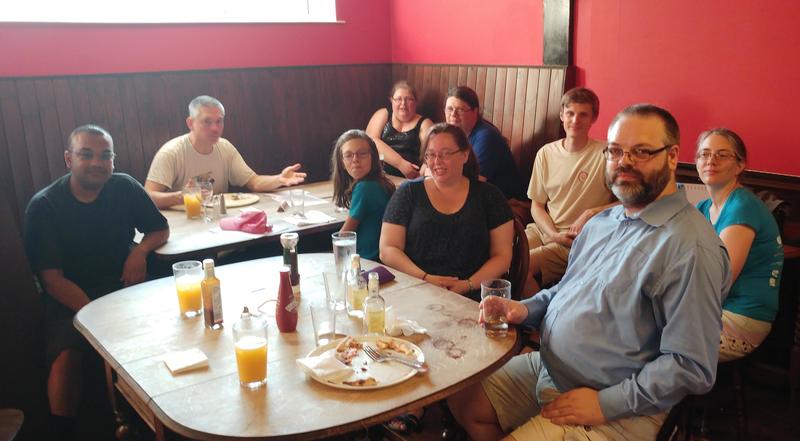
Things mostly went very well, and we've released Debian 9 this weekend past. Many many people worked together to make this possible, and I'd like to extend my own thanks to all of them. As a project, we decided to dedicate Stretch to our late founder Ian Murdock. He did much of the early work to get Debian going, and inspired many more to help him. I had the good fortune to meet up with Ian years ago at a meetup attached to a Usenix conference, and I remember clearly he was a genuinely nice guy with good ideas. We'll miss him. For my part in the release process, again I was responsible for producing our official installation and live images. Release day itself went OK, but as is typical the process ran late into Saturday night / early Sunday morning. We made and tested lots of different images, although numbers were down from previous releases as we've stopped making the full CD sets now. Sunday was the day for the release party in Cambridge. As is traditional, a group of us met up at a local hostelry for some revelry! We hid inside the pub to escape from the ridiculouly hot weather we're having at the moment. Party Due to a combination of the lack of sleep and the heat, I nearly forgot to even take any photos - apologies to the extra folks who'd been around earlier whom I missed with the camera... :-(
19 June 2017

Shirish Agarwal: Seizures, Vigo and bi-pedal motion

Dear all, an update is in order. While talking to physiotherapist couple of days before, came to know the correct term to what was I experiencing. I had experienced convulsive seizure , spasms being a part of it. Reading the wikipedia entry and the associated links/entries it seems I am and was very very lucky. The hospital or any hospital is a very bad bad place. I have seen all horror movies which people say are disturbing but have never been disturbed as much as I was in hospital. I couldn t help but hear people s screams and saw so many cases which turned critical. At times it was not easy to remain positive but dunno from where there was a will to live which pushed me and is still pushing me. One of the things that was painful for a long time were the almost constant stream of injections that were injected in me. It was almost an afterthought that the nurse put a Vigo in me. Similar to the Vigo injected in me. While the above medical device is similar, mine had a cross, the needle was much shorter and is injected into the vein. After that all injections are injected into that including common liquid which is salt,water and something commonly given to patients to stabilize first. I am not remembering the name atm. I also had a urine bag which was attached to my penis in a non-invasive manner. Both my grandfather and grandma used to cry when things went wrong while I didn t feel any pain but when the urine bag was disattached and attached again, so seems things have improved there. I was also very conscious of getting bed sores as both my grandpa and grandma had them when in hospital. As I had no strength I had to beg. plead do everything to make sure that every few hours I was turned from one side to other. I also had an air bag which is supposed to alleviate or relief this condition. Constant physiotherapy every day for a while slowly increased my strength and slowly both the vigo and feeding tube put inside my throat was removed. I have no remembrance as to when they had put the feeding tube as it was all rubber and felt bad when it came out. Further physiotherapy helped me crawl till the top of the bed, the bed was around 6 feet in length and and more than enough so I could turn both sides without falling over. Few days later I found I could also sit up using my legs as a lever and that gave confidence to the doctors to remove the air bed so I could crawl more easily. Couple of more days later I stood on my feet for the first time and it was like I had lead legs. Each step was painful but the sense and feeling of independence won over whatever pain was there. I had to endure wet wipes from nurses and ward boys in place of a shower everyday and while they were respectful always it felt humiliating. The first time I had a bath after 2 weeks or something, every part of my body cried and I felt like a weakling. I had thought I wouldn t be able to do justice to the physiotherapy session which was soon after but after the session was back to feeling normal. For a while I was doing the penguin waddle which while painful was also had humor in it. I did think of shooting the penguin waddle but decided against it as I was half-naked most of the time ( the hospital clothes never fit me properly) Cut to today and I was able to climb up and down the stairs on my own and circled my own block, slowly but was able to do it on my own by myself. While I always had a sense of wonderment for bi-pedal motion as well as all other means of transport, found much more respect of walking. I live near a fast food eating joint so I see lot of youngsters posing in different ways with their legs to show interest to their mates. And this I know happens both on the conscious and sub-conscious levels. To be able to see and discern that also put a sense of wonder in nature s creations. All in all, I m probabl6y around 40% independent and still 60% interdependent. I know I have to be patient with myself and those around me and explain to others what I m going through. For e.g. I still tend to spill things and still can t touch-type much. So, the road is long, I can only pray and hope best wishes for anybody who is my condition and do pray that nobody goes through what I went through, especiallly not children. I am also hoping that things like DxtER and range of non-invasive treatments make their way into India and the developing world at large. Anybody who is overweight and is either disgusted or doesn t like the gym route, would recommend doing sessions with a physiotherapist that you can trust. You have to trust that her judgement will push you a bit more and not more that the gains you make are toppled over. I still get dizziness spells while doing therapy but will to break it as I know dizziness doesn t help me. I hope my writings give strength and understanding to either somebody who is going through it, or relatives or/and caregivers so they know the mental status of the person who s going through it. Till later and sorry it became so long. Update I forgot to share this inspirational story from my city which I shared with a friend days ago. Add to that, she is from my city. What it doesn t share is that Triund is a magical place. I had visited once with a friend who had elf ears (he had put on elf ears) and it is kind of place which alchemist talks about, a place where imagination does turn wild and there is magic in the air.
Filed under: Miscellenous Tagged: #air bag, #bed sores, #convulsive epileptic seizure, #crawling, #horror, #humiliation, #nakedness, #penguin waddle, #physiotherapy, #planet-debian, #spilling things, #urine bag, #Vigo medical device

18 June 2017

Bits from Debian: Debian 9.0 Stretch has been released!

Alt Stretch has been released Let yourself be embraced by the purple rubber toy octopus! We're happy to announce the release of Debian 9.0, codenamed Stretch. Want to install it? Choose your favourite installation media among Blu-ray Discs, DVDs, CDs and USB sticks. Then read the installation manual. Already a happy Debian user and you only want to upgrade? You can easily upgrade from your current Debian 8 Jessie installation, please read the release notes. Do you want to celebrate the release? Share the banner from this blog in your blog or your website!

Jonathan Carter: AIMS Desktop 2017.1 is available!

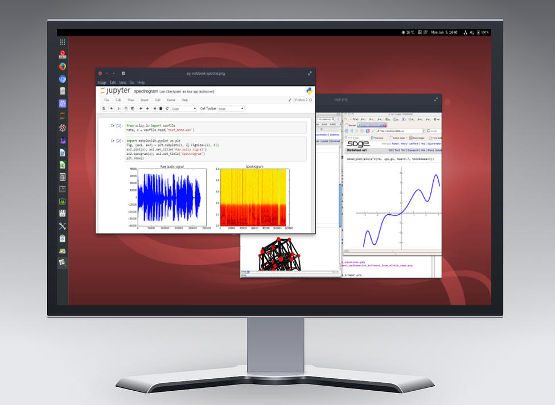
Back at DebConf 15 in Germany, I gave a talk on on AIMS Desktop (which was then based on Ubuntu), and our intentions and rationale for wanting to move it over to being Debian based. Today, alongside the Debian 9 release, we release AIMS Desktop 2017.1, the first AIMS Desktop released based on Debian. For Debian 10, we d like to get the last remaining AIMS Desktop packages into Debian so that it could be a Debian pure blend.

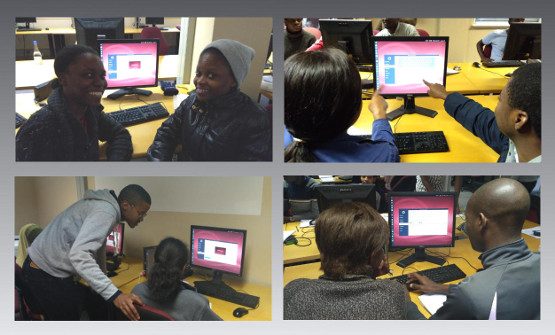
Students trying out a release candidate at AIMS South Africa

It s tailored to the needs of students, lecturers and researchers at the African Institute for Mathemetical Sciences, we re releasing it to the public in the hope that it could be useful for other tertiary education users with an interest in maths and science software. If you run a mirror at your university, it would also be great if you could host a copy. we added an rsync location on the downloads page which you could use to keep it up to date.

17 June 2017

Jonathan Carter: AIMS Desktop 2017.1 is available!

Back at DebConf 15 in Germany, I gave a talk on on AIMS Desktop (which was then based on Ubuntu), and our intentions and rationale for wanting to move it over to being Debian based. Today, alongside the Debian 9 release, we release AIMS Desktop 2017.1, the first AIMS Desktop released based on Debian. For Debian 10, we d like to get the last remaining AIMS Desktop packages into Debian so that it could be a Debian pure blend.

Students trying out a release candidate at AIMS South Africa

It s tailored to the needs of students, lecturers and researchers at the African Institute for Mathemetical Sciences, we re releasing it to the public in the hope that it could be useful for other tertiary education users with an interest in maths and science software. If you run a mirror at your university, it would also be great if you could host a copy. we added an rsync location on the downloads page which you could use to keep it up to date.

16 June 2017

Elena 'valhalla' Grandi: Travel piecepack v0.1

Travel piecepack v0.1

Immagine/fotosocial.gl-como.it/photos/valha

A www.piecepack.org/ set of generic board game pieces is nice to have around in case of a sudden spontaneous need of gaming, but carrying my full set www.trueelena.org/fantastic/fe takes some room, and is not going to fit in my daily bag.

I've been thinking for a while that an half-size set could be useful, and between yesterday and today I've actually managed to do the first version.

It's (2d) printed on both sides of a single sheet of heavy paper, laminated and then cut, comes with both the basic suites and the playing card expansion and fits in a mint tin divided by origami boxes.

It's just version 0.1 because there are a few issues: first of all I'm not happy with the manual way I used to draw the page: ideally it would have been programmatically generated from the same svg files as the 3d piecepack (with the ability to generate other expansions), but apparently reading paths from an svg and writing it in another svg is not supported in an easy way by the libraries I could find, and looking for it was starting to take much more time than just doing it by hand.

I also still have to assemble the dice; in the picture above I'm just using the ones from the 3d-printed set, but they are a bit too big and only four of them fit in the mint tin. I already have the faces printed, so this is going to be fixed in the next few days.

Source files are available in the same git repository as the 3d-printable piecepack git.trueelena.org/cgit.cgi/3d/, with the big limitation mentioned above; updates will also be pushed there, just don't hold your breath for it :)

14 June 2017

Sjoerd Simons: Debian armhf VM on arm64 server

At Collabora one of the many things we do is build Debian derivatives/overlays for customers on a variety of architectures including 32 bit and 64 bit ARM systems. And just as Debian does, our OBS system builds on native systems rather than emulators. Luckily with the advent of ARM server systems some years ago building natively for those systems has been a lot less painful than it used to be. For 32 bit ARM we've been relying on Calxeda blade servers, however Calxeda unfortunately tanked ages ago and the hardware is starting to show its age (though luckily Debian Stretch does support it properly, so at least the software is still fresh). On the 64 bit ARM side, we're running on Gigabyte MP30-AR1 based servers which can run 32 bit arm code (As opposed to e.g. ThunderX based servers which can only run 64 bit code). As such running armhf VMs on them to act as build slaves seems a good choice, but setting that up is a bit more involved than it might appear. The first pitfall is that there is no standard bootloader or boot firmware available in Debian to boot on the "virt" machine emulated by qemu (I didn't want to use an emulation of a real machine). That also means there is nothing to pick the kernel inside the guest at boot nor something which can e.g. have the guest network boot, which means direct kernel booting needs to be used. The second pitfall was that the current Debian Stretch armhf kernel isn't built with support for the generic PCI host controller which the qemu virtual machine exposes, which means no storage and no network shows up in the guest. Hopefully that will get solved soonish (Debian bug 864726) and can be in a Stretch update, until then a custom kernel package is required using the patch attach to the bug report is required but I won't go into that any further in this post. So on the happy assumption that we have a kernel that works, the challenge left is to nicely manage direct kernel loading. Or more specifically, how ensure the hosts boots the kernel the guest has installed via the standard apt tools without having to copy kernels around between guest/host, which essentially comes down to exposing /boot from the guest to the host. The solution we picked is to use qemu's 9pfs support to share a folder from the host and use that as /boot of the guest. For the 9p folder the "mapped" security mode seems needed as the "none" mode seems to get confused by dpkg (Debian bug 864718). As we're using libvirt as our virtual machine manager the remainder of how to glue it all together will be mostly specific to that. First step is to install the system, mostly as normal. One can directly boot into the vmlinuz and initrd.gz provided by normal Stretch armhf netboot installer (downloaded into e.g /tmp). The setup overall is straight-forward with a few small tweaks: Apart from those tweaks the resulting example command is similar to the one that can be found in the virt-install man-page:
virt-install --name armhf-vm --arch armv7l --memory 512 \
  --disk /srv/armhf-vm.img,bus=virtio
  --filesystem /srv/armhf-vm-boot,virtio-boot,mode=mapped \
  --boot=kernel=/tmp/vmlinuz,initrd=/tmp/initrd.gz,kernel_args="console=ttyAMA0,root=/dev/vda1"

Run through the install as you'd normally would. Towards the end the installer will likely complain it can't figure out how to install a bootloader, which is fine. Just before ending the install/reboot, switch to the shell and copy the /boot/vmlinuz and /boot/initrd.img from the target system to the host in some fashion (e.g. chroot into /target and use scp from the installed system). This is required as the installer doesn't support 9p, but to boot the system an initramfs will be needed with the modules needed to mount the root fs, which is provided by the installed initramfs :). Once that's all moved around, the installer can be finished. Next, booting the installed system. For that adjust the libvirt config (e.g. using virsh edit and tuning the xml) to use the kernel and initramfs copied from the installer rather then the installer ones. Spool up the VM again and it should happily boot into a freshly installed Debian system. To finalize on the guest side /boot should be moved onto the shared 9pfs, the fstab entry for the new /boot should look something like:
virtio-boot /boot  9p trans=virtio,version=9p2000.L,x-systemd.automount 0 0

With that setup, it's just a matter of shuffling the files in /boot around to the new filesystem and the guest is done (make sure vmlinuz/initrd.img stay symlinks). Kernel upgrades will work as normal and visible to the host. Now on the host side there is one extra hoop to jump through, as the guest uses the 9p mapped security model symlinks in the guest will be normal files on the host containing the symlink target. To resolve that one, we've used libvirt's qemu hook support to setup a proper symlink before the guest is started. Below is the script we ended up using as an example (/etc/libvirt/hooks/qemu):
vm=$1
action=$2
bootdir=/srv/$ vm -boot
if [ $ action  != "prepare" ] ; then
  exit 0
fi
if [ ! -d $ bootdir  ] ; then
  exit 0
fi
ln -sf $(basename $(cat $ bootdir /vmlinuz))  $ bootdir /virtio-vmlinuz
ln -sf $(basename $(cat $ bootdir /initrd.img))  $ bootdir /virtio-initrd.img

With that in place, we can simply point the libvirt definition to use /srv/$ vm -boot/virtio- vmlinuz,initrd.img as the kernel/initramfs for the machine and it'll automatically get the latest kernel/initramfs as installed by the guest when the VM is started. Just one final rough edge remains, when doing reboot from the VM libvirt leaves qemu to handle that rather than restarting qemu. This unfortunately means a reboot won't pick up a new kernel if any, for now we've solved this by configuring libvirt to stop the VM on reboot instead. As we typically only reboot VMs on kernel (security) upgrades, while a bit tedious, this avoid rebooting with an older kernel/initramfs than intended.

11 June 2017

Benjamin Mako Hill: The Wikipedia Adventure

I recently finished a paper that presents a novel social computing system called the Wikipedia Adventure. The system was a gamified tutorial for new Wikipedia editors. Working with the tutorial creators, we conducted both a survey of its users and a randomized field experiment testing its effectiveness in encouraging subsequent contributions. We found that although users loved it, it did not affect subsequent participation rates.
Start screen for the Wikipedia Adventure.
A major concern that many online communities face is how to attract and retain new contributors. Despite it s success, Wikipedia is no different. In fact, researchers have shown that after experiencing a massive initial surge in activity, the number of active editors on Wikipedia has been in slow decline since 2007.
The number of active, registered editors ( 5 edits per month) to Wikipedia over time. From Halfaker, Geiger, and Morgan 2012.
Research has attributed a large part of this decline to the hostile environment that newcomers experience when begin contributing. New editors often attempt to make contributions which are subsequently reverted by more experienced editors for not following Wikipedia s increasingly long list of rules and guidelines for effective participation. This problem has led many researchers and Wikipedians to wonder how to more effectively onboard newcomers to the community. How do you ensure that new editors Wikipedia quickly gain the knowledge they need in order to make contributions that are in line with community norms? To this end, Jake Orlowitz and Jonathan Morgan from the Wikimedia Foundation worked with a team of Wikipedians to create a structured, interactive tutorial called The Wikipedia Adventure. The idea behind this system was that new editors would be invited to use it shortly after creating a new account on Wikipedia, and it would provide a step-by-step overview of the basics of editing.

The Wikipedia Adventure was designed to address issues that new editors frequently encountered while learning how to contribute to Wikipedia. It is structured into different missions that guide users through various aspects of participation on Wikipedia, including how to communicate with other editors, how to cite sources, and how to ensure that edits present a neutral point of view. The sequence of the missions gives newbies an overview of what they need to know instead of having to figure everything out themselves. Additionally, the theme and tone of the tutorial sought to engage new users, rather than just redirecting them to the troves of policy pages. Those who play the tutorial receive automated badges on their user page for every mission they complete. This signals to veteran editors that the user is acting in good-faith by attempting to learn the norms of Wikipedia.

An example of a badge that a user receives after demonstrating the skills to communicate with other users on Wikipedia.
Once the system was built, we were interested in knowing whether people enjoyed using it and found it helpful. So we conducted a survey asking editors who played the Wikipedia Adventure a number of questions about its design and educational effectiveness. Overall, we found that users had a very favorable opinion of the system and found it useful.
Survey responses about how users felt about TWA.
Survey responses about what users learned through TWA.
We were heartened by these results. We d sought to build an orientation system that was engaging and educational, and our survey responses suggested that we succeeded on that front. This led us to ask the question could an intervention like the Wikipedia Adventure help reverse the trend of a declining editor base on Wikipedia? In particular, would exposing new editors to the Wikipedia Adventure lead them to make more contributions to the community? To find out, we conducted a field experiment on a population of new editors on Wikipedia. We identified 1,967 newly created accounts that passed a basic test of making good-faith edits. We then randomly invited 1,751 of these users via their talk page to play the Wikipedia Adventure. The rest were sent no invitation. Out of those who were invited, 386 completed at least some portion of the tutorial. We were interested in knowing whether those we invited to play the tutorial (our treatment group) and those we didn t (our control group) contributed differently in the first six months after they created accounts on Wikipedia. Specifically, we wanted to know whether there was a difference in the total number of edits they made to Wikipedia, the number of edits they made to talk pages, and the average quality of their edits as measured by content persistence. We conducted two kinds of analyses on our dataset. First, we estimated the effect of inviting users to play the Wikipedia Adventure on our three outcomes of interest. Second, we estimated the effect of playing the Wikipedia Adventure, conditional on having been invited to do so, on those same outcomes. To our surprise, we found that in both cases there were no significant effects on any of the outcomes of interest. Being invited to play the Wikipedia Adventure therefore had no effect on new users volume of participation either on Wikipedia in general, or on talk pages specifically, nor did it have any effect on the average quality of edits made by the users in our study. Despite the very positive feedback that the system received in the survey evaluation stage, it did not produce a significant change in newcomer contribution behavior. We concluded that the system by itself could not reverse the trend of newcomer attrition on Wikipedia. Why would a system that was received so positively ultimately produce no aggregate effect on newcomer participation? We ve identified a few possible reasons. One is that perhaps a tutorial by itself would not be sufficient to counter hostile behavior that newcomers might experience from experienced editors. Indeed, the friendly, welcoming tone of the Wikipedia Adventure might contrast with strongly worded messages that new editors receive from veteran editors or bots. Another explanation might be that users enjoyed playing the Wikipedia Adventure, but did not enjoy editing Wikipedia. After all, the two activities draw on different kinds of motivations. Finally, the system required new users to choose to play the tutorial. Maybe people who chose to play would have gone on to edit in similar ways without the tutorial. Ultimately, this work shows us the importance of testing systems outside of lab studies. The Wikipedia Adventure was built by community members to address known gaps in the onboarding process, and our survey showed that users responded well to its design. While it would have been easy to declare victory at that stage, the field deployment study painted a different picture. Systems like the Wikipedia Adventure may inform the design of future orientation systems. That said, more profound changes to the interface or modes of interaction between editors might also be needed to increase contributions from newcomers.

This blog post, and the open access paper that it describes, is a collaborative project with Sneha Narayan, Jake Orlowitz, Jonathan Morgan, and Aaron Shaw. Financial support came from the US National Science Foundation (grants IIS-1617129 and IIS-1617468), Northwestern University, and the University of Washington. We also published all the data and code necessary to reproduce our analysis in a repository in the Harvard Dataverse. Sneha posted the material in this blog post over on the Community Data Science Collective Blog.

7 June 2017

Petter Reinholdtsen: Idea for storing trusted timestamps in a Noark 5 archive

This is a copy of an email I posted to the nikita-noark mailing list. Please follow up there if you would like to discuss this topic. The background is that we are making a free software archive system based on the Norwegian Noark 5 standard for government archives. I've been wondering a bit lately how trusted timestamps could be stored in Noark 5. Trusted timestamps can be used to verify that some information (document/file/checksum/metadata) have not been changed since a specific time in the past. This is useful to verify the integrity of the documents in the archive. Then it occured to me, perhaps the trusted timestamps could be stored as dokument variants (ie dokumentobjekt referered to from dokumentbeskrivelse) with the filename set to the hash it is stamping? Given a "dokumentbeskrivelse" with an associated "dokumentobjekt", a new dokumentobjekt is associated with "dokumentbeskrivelse" with the same attributes as the stamped dokumentobjekt except these attributes: This assume a service following IETF RFC 3161 is used, which specifiy the given MIME type for replies and the .tsr file ending for the content of such trusted timestamp. As far as I can tell from the Noark 5 specifications, it is OK to have several variants/renderings of a dokument attached to a given dokumentbeskrivelse objekt. It might be stretching it a bit to make some of these variants represent crypto-signatures useful for verifying the document integrity instead of representing the dokument itself. Using the source of the service in formatDetaljer allow several timestamping services to be used. This is useful to spread the risk of key compromise over several organisations. It would only be a problem to trust the timestamps if all of the organisations are compromised. The following oneliner on Linux can be used to generate the tsr file. $input is the path to the file to checksum, and $sha256 is the SHA-256 checksum of the file (ie the ".tsr" value mentioned above).
openssl ts -query -data "$inputfile" -cert -sha256 -no_nonce \
    curl -s -H "Content-Type: application/timestamp-query" \
      --data-binary "@-" http://zeitstempel.dfn.de > $sha256.tsr
To verify the timestamp, you first need to download the public key of the trusted timestamp service, for example using this command:
wget -O ca-cert.txt \
  https://pki.pca.dfn.de/global-services-ca/pub/cacert/chain.txt
Note, the public key should be stored alongside the timestamps in the archive to make sure it is also available 100 years from now. It is probably a good idea to standardise how and were to store such public keys, to make it easier to find for those trying to verify documents 100 or 1000 years from now. :) The verification itself is a simple openssl command:
openssl ts -verify -data $inputfile -in $sha256.tsr \
  -CAfile ca-cert.txt -text
Is there any reason this approach would not work? Is it somehow against the Noark 5 specification?

Next.

Previous.