Search Results: "turbo"

20 July 2016

Daniel Stender: Theano in Debian: maintenance, BLAS and CUDA

I'm glad to announce that we have the current release of Theano (0.8.2) in Debian unstable now, it's on its way into the testing branch and the Debian derivatives, heading for Debian 9. The Debian package is maintained in behalf of the Debian Science Team. We have a binary package with the modules in the Python 2.7 import path (python-theano), if you want or need to stick to that branch a little longer (as a matter of fact, in the current popcon stats it's the most installed package), and a package running on the default Python 3 version (python3-theano). The comprehensive documentation is available for offline usage in another binary package (theano-doc). Although Theano builds its extensions on run time and therefore all binary packages contain the same code, the source package generates arch specific packages1 for the reason that the exhaustive test suite could run over all the architectures to detect if there are problems somewhere (#824116). what's this? In a nutshell, Theano is a computer algebra system (CAS) and expression compiler, which is implemented in Python as a library. It is named after a Classical Greek female mathematician and it's developed at the LISA lab (located at MILA, the Montreal Institute for Learning Algorithms) at the Universit de Montr al. Theano tightly integrates multi-dimensional arrays (N-dimensional, ND-array) from NumPy (numpy.ndarray), which are broadly used in Scientific Python for the representation of numeric data. It features a declarative Python based language with symbolic operations for the functional definition of mathematical expressions, which allows to create functions that compute values for them. Internally the expressions are represented as directed graphs with nodes for variables and operations. The internal compiler then optimizes those graphs for stability and speed and then generates high-performance native machine code to evaluate resp. compute these mathematical expressions2. One of the main features of Theano is that it's capable to compute also on GPU processors (graphical processor unit), like on custom graphic cards (e.g. the developers are using a GeForce GTX Titan X for benchmarks). Today's GPUs became very powerful parallel floating point devices which can be employed also for scientific computations instead of 3D video games3. The acronym "GPGPU" (general purpose graphical processor unit) refers to special cards like NVIDIA's Tesla4, which could be used alike (more on that below). Thus, Theano is a high-performance number cruncher with an own computing engine which could be used for large-scale scientific computations. If you haven't came across Theano as a Pythonistic professional mathematician, it's also one of the most prevalent frameworks for implementing deep learning applications (training multi-layered, "deep" artificial neural networks, DNN) around5, and has been developed with a focus on machine learning from the ground up. There are several higher level user interfaces build in the top of Theano (for DNN, Keras, Lasagne, Blocks, and others, or for Python probalistic programming, PyMC3). I'll seek for some of them also becoming available in Debian, too. helper scripts Both binary packages ship three convenience scripts, theano-cache, theano-test, and theano-nose. Instead of them being copied into /usr/bin, which would result into a binaries-have-conflict violation, the scripts are to be found in /usr/share/python-theano (python3-theano respectively), so that both module packages of Theano can be installed at the same time. The scripts could be run directly from these folders, e.g. do $ python /usr/share/python-theano/theano-nose to achieve that. If you're going to heavy use them, you could add the directory of the flavour you prefer (Python 2 or Python 3) to the $PATH environment variable manually by either typing e.g. $ export PATH=/usr/share/python-theano:$PATH on the prompt, or save that line into ~/.bashrc. Manpages aren't available for these little helper scripts6, but you could always get info on what they do and which arguments they accept by invoking them with the -h (for theano-nose) resp. help flag (for theano-cache). running the tests On some occasions you might want to run the testsuite of the installed library, like to check over if everything runs fine on your GPU hardware. There are two different ways to run the tests (anyway you need to have python ,3 -nose installed). One is, you could launch the test suite by doing $ python -c 'import theano; theano.test() (or the same with python3 to test the other flavour), that's the same what the helper script theano-test does. However, by doing it that way some particular tests might fail by raising errors also for the group of known failures. Known failures are excluded from being errors if you run the tests by theano-nose, which is a wrapper around nosetests, so this might be always the better choice. You can run this convenience script with the option --theano on the installed library, or from the source package root, which you could pull by $ sudo apt-get source theano (there you have also the option to use bin/theano-nose). The script accept options for nosetests, so you might run it with -v to increase verbosity. For the tests the configuration switch config.device must be set to cpu. This will also include the GPU tests when a proper accessible device is detected, so that's a little misleading in the sense of it doesn't mean "run everything on the CPU". You're on the safe side if you run it always like this: $ THEANO_FLAGS=device=cpu theano-nose, if you've set config.device to gpu in your ~/.theanorc. Depending on the available hardware and the used BLAS implementation (see below) it could take quite a long time to run the whole test suite through, on the Core-i5 in my laptop that takes around an hour even excluded the GPU related tests (which perform pretty fast, though). Theano features a couple of switches to manipulate the default configuration for optimization and compilation. There is a rivalry between optimization and compilation costs against performance of the test suite, and it turned out the test suite performs a quicker with lesser graph optimization. There are two different switches available to control config.optimizer, the fast_run toggles maximal optimization, while fast_compile runs only a minimal set of graph optimization features. These settings are used by the general mode switches for config.mode, which is either FAST_RUN by default, or FAST_COMPILE. The default mode FAST_RUN (optimizer=fast_run, linker=cvm) needs around 72 minutes on my lower mid-level machine (on un-optimized BLAS). To set mode=FAST_COMPILE (optimizer=fast_compile, linker=py) brings some boost for the performance of the test suite because it runs the whole suite in 46 minutes. The downside of that is that C code compilation is disabled in this mode by using the linker py, and also the GPU related tests are not included. I've played around with using the optimizer fast_compile with some of the other linkers (c py and cvm, and their versions without garbage collection) as alternative to FAST_COMPILE with minimal optimization but also machine code compilation incl. GPU testing. But to my experience, fast_compile without another than the linker py results in some new errors and failures of some tests on amd64, and this might the case also on other architectures, too. By the way, another useful feature is DebugMode for config.mode, which verifies the correctness of all optimizations and compares the C to Python results. If you want to have detailed info on the configuration settings of Theano, do $ python -c 'import theano; print theano.config' less, and check out the chapter config in the library documentation in the documentation. cache maintenance Theano isn't a JIT (just-in-time) compiler like Numba, which generates native machine code in the memory and executes it immediately, but it saves the generated native machine code into compiledirs. The reason for doing it that way is quite practical like the docs explain, the persistent cache on disk makes it possible to avoid generating code for the same operation, and to avoid compiling again when different operations generate the same code. The compiledirs by default are located within $(HOME)/.theano/. After some time the folder becomes quite large, and might look something like this:
$ ls ~/.theano
compiledir_Linux-4.5--amd64-x86_64-with-debian-stretch-sid--2.7.11+-64
compiledir_Linux-4.5--amd64-x86_64-with-debian-stretch-sid--2.7.12-64
compiledir_Linux-4.5--amd64-x86_64-with-debian-stretch-sid--2.7.12rc1-64
compiledir_Linux-4.5--amd64-x86_64-with-debian-stretch-sid--3.5.1+-64
compiledir_Linux-4.5--amd64-x86_64-with-debian-stretch-sid--3.5.2-64
compiledir_Linux-4.5--amd64-x86_64-with-debian-stretch-sid--3.5.2rc1-64
If the used Python version changed like in this example you might to want to purge obsolete cache. For working with the cache resp. the compiledirs, the helper theano-cache comes in handy. If you invoke it without any arguments the current cache location is put out like ~/.theano/compiledir_Linux-4.5--amd64-x86_64-with-debian-stretch-sid--2.7.12-64 (the script is run from /usr/share/python-theano). So, the compiledirs for the old Python versions in this example (11+ and 12rc1) can be removed to free the space they occupy. All compiledirs resp. cache directories meaning the whole cache could be erased by $ theano-cache basecompiledir purge, the effect is the same as by performing $ rm -rf ~/.theano. You might want to do that e.g. if you're using different hardware, like when you got yourself another graphics card. Or habitual from time to time when the compiledirs fill up so much that it slows down processing with the harddisk being very busy all the time, if you don't have an SSD drive available. For example, the disk space of build chroots carrying (mainly) the tests completely compiled through on default Python 2 and Python 3 consumes around 1.3 GB (see here). BLAS implementations Theano needs a level 3 implementation of BLAS (Basic Linear Algebra Subprograms) for operations between vectors (one-dimensional mathematical objects) and matrices (two-dimensional objects) carried out on the CPU. NumPy is already build on BLAS and pulls the standard implementation (libblas3, soure package: lapack), but Theano links directly to it instead of using NumPy as intermediate layer to reduce the computational overhead. For this, Theano needs development headers and the binary packages pull libblas-dev by default, if any other development package of another BLAS implementation (like OpenBLAS or ATLAS) isn't already installed, or pulled with them (providing the virtual package libblas.so). The linker flags could be manipulated directly through the configuration switch config.blas.ldflags, which is by default set to -L/usr/lib -lblas -lblas. By the way, if you set it to an empty value, Theano falls back to using BLAS through NumPy, if you want to have that for some reason. On Debian, there is a very convenient way to switch between BLAS implementations by the alternatives mechanism. If you have several alternative implementations installed at the same time, you can switch from one to another easily by just doing:
$ sudo update-alternatives --config libblas.so
There are 3 choices for the alternative libblas.so (providing /usr/lib/libblas.so).
  Selection    Path                                  Priority   Status
------------------------------------------------------------
* 0            /usr/lib/openblas-base/libblas.so      40        auto mode
  1            /usr/lib/atlas-base/atlas/libblas.so   35        manual mode
  2            /usr/lib/libblas/libblas.so            10        manual mode
  3            /usr/lib/openblas-base/libblas.so      40        manual mode
Press <enter> to keep the current choice[*], or type selection number:
The implementations are performing differently on different hardware, so you might want to take the time to compare which one does it best on your processor (the other packages are libatlas-base-dev and libopenblas-dev), and choose that to optimize your system. If you want to squeeze out all which is in there for carrying out Theano's computations on the CPU, another option is to compile an optimized version of a BLAS library especially for your processor. I'm going to write another blog posting on this issue. The binary packages of Theano ship the script check_blas.py to check over how well a BLAS implementation performs with it, and if everything works right. That script is located in the misc subfolder of the library, you could locate it by doing $ dpkg -L python-theano grep check_blas (or for the package python3-theano accordingly), and run it with the Python interpreter. By default the scripts puts out a lot of info like a huge perfomance comparison reference table, the current setting of blas.ldflags, the compiledir, the setting of floatX, OS information, the GCC version, the current NumPy config towards BLAS, NumPy location and version, if Theano linked directly or has used the NumPy binding, and finally and most important, the execution time. If just the execution time for quick perfomance comparisons is needed this script could be invoked with -q. Theano on CUDA The function compiler of Theano works with alternative backends to carry out the computations, like the ones for graphics cards. Currently, there are two different backends for GPU processing available, one docks onto NVIDIA's CUDA (Compute Unified Device Architecture) technology7, and another one for libgpuarray, which is also developed by the Theano developers in parallel. The libgpuarray library is an interesting alternative for Theano, it's a GPU tensor (multi-dimensional mathematical object) array written in C with Python bindings based on Cython, which has the advantage of running also on OpenCL8. OpenCL, unlike CUDA9, is full free software, vendor neutral and overcomes the limitation of the CUDA toolkit being only available for amd64 and the ppc64el port (see here). I've opened an ITP on libgpuarray and we'll see if and how this works out. Another reason for it would be great to have it available is that it looks like CUDA currently runs into problems with GCC 610. More on that, soon. Here's a litle checklist for setting up your CUDA device so that you don't have to experience something like this:
$ THEANO_FLAGS=device=gpu,floatX=float32 python ./cat_dog_classifier.py 
WARNING (theano.sandbox.cuda): CUDA is installed, but device gpu is not available (error: Unable to get the number of gpus available: no CUDA-capable device is detected)
hardware check For running Theano on CUDA you need an NVIDIA graphics card which is capable of doing that. You can recheck if your device is supported by CUDA here. When the hardware isn't too old (CUDA support started with GeForce 8 and Quadro X series) or too strange I think it isn't working only in exceptional cases. You can check your model and if the device is present in the system on the bare hardware level by doing this:
$ lspci   grep -i nvidia
04:00.0 3D controller: NVIDIA Corporation GM108M [GeForce 940M] (rev a2)
If a line like this doesn't get returned, your device most probably is broken, or not properly connected (ouch). If rev ff appears at the end of the line that means the device is off meaning powered down. This might be happening if you have a laptop with Optimus graphics hardware, and the related drivers have switched off the unoccupied device to safe energy11. kernel module Running CUDA applications requires the proprietary NVIDIA driver kernel module to be loaded into the kernel and working. If you haven't already installed it for another purpose, the NVIDIA driver and the CUDA toolkit are both in the non-free section of the Debian archive, which is not enabled by default. To get non-free packages you have to add non-free (and it's better to do so, also contrib) to your package source in /etc/apt/sources.list, which might then look like this:
deb http://httpredir.debian.org/debian/ testing main contrib non-free
After doing that, perform $ apt-cache update to update the package lists, and there you go with the non-free packages. The headers of the running kernel are needed to compile modules, you can get them together with the NVIDIA kernel module package by running:
$ sudo apt-get install linux-headers-$(uname -r) nvidia-kernel-dkms build-essential
DKMS will then build the NVIDIA module for the kernel and does some other things on the system. When the installation has finished, it's generally advised to reboot the system completely. troubleshooting If you have problems with the CUDA device, it's advised to verify if the following things concerning the NVIDIA driver resp. kernel module are in order: blacklist nouveau Check if the default Nouveau kernel module driver (which blocks the NVIDIA module) for some reason still gets loaded by doing $ lsmod grep nouveau. If nothing gets returned, that's right. If it's still in the kernel, just add blacklist nouveau to /etc/modprobe.d/blacklist.conf, and update the booting ramdisk with sudo update-initramfs -u afterwards. Then reboot once more, this shouldn't be the case then anymore. rebuild kernel module To fix it when the module haven't been properly compiled for some reason you could trigger a rebuild of the NVIDIA kernel module with $ sudo dpkg-reconfigure nvidia-kernel-dkms. When you're about to send your hardware in to repair because everything looks all right but the device just isn't working, that really could help (own experience). After the rebuild of the module or modules (if you have a few kernel packages installed) has completed, you could recheck if the module really is available by running:
$ sudo modinfo nvidia-current
filename:       /lib/modules/4.4.0-1-amd64/updates/dkms/nvidia-current.ko
alias:          char-major-195-*
version:        352.79
supported:      external
license:        NVIDIA
alias:          pci:v000010DEd00000E00sv*sd*bc04sc80i00*
alias:          pci:v000010DEd*sv*sd*bc03sc02i00*
alias:          pci:v000010DEd*sv*sd*bc03sc00i00*
depends:        drm
vermagic:       4.4.0-1-amd64 SMP mod_unload modversions 
parm:           NVreg_Mobile:int
It should be something similiar to this when everything is all right. reload kernel module When there are problems with the GPU, maybe the kernel module isn't properly loaded. You could recheck if the module has been properly loaded by doing
$ lsmod   grep nvidia
nvidia_uvm             73728  0
nvidia               8540160  1 nvidia_uvm
drm                   356352  7 i915,drm_kms_helper,nvidia
The kernel module could be loaded resp. reloaded with $ sudo nvidia-modprobe (that tool is from the package nvidia-modprobe). unsupported graphics card Be sure that you graphics cards is supported by the current driver kernel module. If you have bought new hardware, that's quite possible to come out being a problem. You can get the version of the current NVIDIA driver with:
$ cat /proc/driver/nvidia/version 
NVRM version: NVIDIA UNIX x86_64 Kernel Module 352.79  Wed Jan 13 16:17:53 PST 2016
GCC version:  gcc version 5.3.1 20160528 (Debian 5.3.1-21)
Then, google the version number like nvidia 352.79, this should get you onto an official driver download page like this. There, check for what's to be found under "Supported Products". I you're stuck with that there are two options, to wait until the driver in Debian got updated, or replace it with the latest driver package from NVIDIA. That's possible to do, but something more for experienced users. occupied graphics card The CUDA driver cannot work while the graphical interface is busy like by processing the graphical display of your X.Org server. Which kernel driver actually is used to process the desktop could be examined by this command:12
$ grep '(II).*([0-9]):' /var/log/Xorg.0.log
[    37.700] (II) intel(0): Using Kernel Mode Setting driver: i915, version 1.6.0 20150522
[    37.700] (II) intel(0): SNA compiled: xserver-xorg-video-intel 2:2.99.917-2 (Vincent Cheng <vcheng@debian.org>)
 ... 
[    39.808] (II) intel(0): switch to mode 1920x1080@60.0 on eDP1 using pipe 0, position (0, 0), rotation normal, reflection none
[    39.810] (II) intel(0): Setting screen physical size to 508 x 285
[    67.576] (II) intel(0): EDID vendor "CMN", prod id 5941
[    67.576] (II) intel(0): Printing DDC gathered Modelines:
[    67.576] (II) intel(0): Modeline "1920x1080"x0.0  152.84  1920 1968 2000 2250  1080 1083 1088 1132 -hsync -vsync (67.9 kHz eP)
This example shows that the rendering of the desktop is performed by the graphical device of the Intel CPU, which is just like it's needed for running CUDA applications on your NVIDIA graphics card, if you don't have another one. nvidia-cuda-toolkit With the Debian package of the CUDA toolkit everything pretty much runs out of the box for Theano. Just install it with apt-get, and you're ready to go, the CUDA backend is the default one. Pycuda is also a suggested dependency of the binary packages, it could be pulled together with the CUDA toolkit. The up-to-date CUDA release 7.5 is of course available, with that you have Maxwell architecture support so that you can run Theano on e.g. a GeForce GTX Titan X with 6,2 TFLOPS on single precision13 at an affordable price. CUDA 814 is around the corner with support for the new Pascal architecture15. Like the GeForce GTX 1080 high-end gaming graphics card already has 8,23 TFLOPS16. When it comes to professional GPGPU hardware like the Tesla P100 there is much more computational power available, scalable by multiplication of cores resp. cards up to genuine little supercomputers which fit on a desk, like the DGX-117. Theano can use multiple GPUs for calculations to work with highly scaled hardware, I'll write another blog post on this issue. Theano on the GPU It's not difficult to run Theano on the GPU. Only single precision floating point numbers (float32) are supported on the GPU, but that is sufficient for deep learning applications. Theano uses double precision floats (float64) by default, so you have to set the configuration variable config.floatX to float32, like written on above, either with the THEANO_FLAGS environment variable or better in your .theanorc file, if you're going to use the GPU a lot. Switching to the GPU actually happens with the config.device configuration variable, which must be set to either gpu or gpu0, gpu1 etc., to choose a particular one if multiple devices are available. Here's is a little test script check1.py, it's taken from the docs and slightly altered. You can run that script either with python or python3 (there was a single test failure on the Python 3 package, so the Python 2 library might be a little more stable currently). For comparison, here's an example on how it perfoms on my hardware, one time on the CPU, one more time on the GPU:
$ THEANO_FLAGS=floatX=float32 python ./check1.py 
[Elemwise exp,no_inplace (<TensorType(float32, vector)>)]
Looping 1000 times took 4.481719 seconds
Result is [ 1.23178029  1.61879337  1.52278066 ...,  2.20771813  2.29967761
  1.62323284]
Used the cpu
$ THEANO_FLAGS=floatX=float32,device=gpu python ./check1.py 
Using gpu device 0: GeForce 940M (CNMeM is disabled, cuDNN not available)
[GpuElemwise exp,no_inplace (<CudaNdarrayType(float32, vector)>), HostFromGpu(GpuElemwise exp,no_inplace .0)]
Looping 1000 times took 1.164906 seconds
Result is [ 1.23178029  1.61879349  1.52278066 ...,  2.20771813  2.29967761
  1.62323296]
Used the gpu
If you got a result like this you're ready to go with Theano on Debian, training computer vision classifiers or whatever you want to do with it. I'll write more on for what Theano could be used, soon.

  1. Some ports are disabled because they are currently not supported by Theano. There are NotImplementedErrors and other errors in the tests on the numpy.ndarray object being not aligned. The developers commented on that, see here. And on some ports the build flags -m32 resp. -m64 of Theano aren't supported by g++, the build flags can't be manipulated easily.
  2. Theano Development Team: "Theano: a Python framework for fast computation of mathematical expressions"
  3. Marc Couture: "Today's high-powered GPUs: strong for graphics and for maths". In: RTC magazine June 2015, pp. 22 25
  4. Ogier Maitre: "Understanding NVIDIA GPGPU hardware". In: Tsutsui/Collet (eds.): Massively parallel evolutionary computation on GPGPUs. Berlin, Heidelberg: Springer 2013, pp. 15-34
  5. Geoffrey French: "Deep learing tutorial: advanved techniques". PyData London 2016 presentation
  6. Like the description of the Lintian tag binary-without-manpage says, that's not needed for them being in /usr/share.
  7. Tom. R. Halfhill: "Parallel processing with CUDA: Nvidia's high-performance computing platform uses massive multithreading". In: Microprocessor Report January 28, 2008
  8. Faber et.al: "Parallelwelten: GPU-Programmierung mit OpenCL". In: C't 26/2014, pp. 160-165
  9. For comparison, see: Valentine Sinitsyn: "Feel the taste of GPU programming". In: Linux Voice February 2015, pp. 106-109
  10. https://lists.debian.org/debian-devel/2016/07/msg00004.html
  11. If Optimus (hybrid) graphics hardware is present (like commonly today on PC laptops), Debian launches the X-server on the graphics processing unit of the CPU, which is ideal for CUDA. The problem with Optimus actually is the graphics processing on the dedicated GPU. If you are using Bumblebee, the Python interpreter which you want to run Theano on has be to be started with the launcher primusrun, because Bumblebee powers the GPU down with the tool bbswitch every time it isn't used, and I think also the kernel module of the driver is dynamically loaded.
  12. Thorsten Leemhuis: "Treiberreviere. Probleme mit Grafiktreibern f r Linux l sen": In: C't Nr.2/2013, pp. 156-161
  13. Martin Fischer: "4K-Rakete: Die schnellste Single-GPU-Grafikkarte der Welt". In C't 13/2015, pp. 60-61
  14. http://www.heise.de/developer/meldung/Nvidia-CUDA-8-bringt-Optimierungen-fuer-die-Pascal-Architektur-3164254.html
  15. Martin Fischer: "All In: Nvidia enth llt die GPU-Architektur 'Pascal'". In: C't 9/2016, pp. 30-31
  16. Martin Fischer: "Turbo-Pascal: High-End-Grafikkarte f r Spieler: GeForce GTX 1080". In: C't 13/2016, pp. 100-103
  17. http://www.golem.de/news/dgx-1-nvidias-supercomputerchen-mit-8x-tesla-p100-1604-120155.html

29 May 2016

Iustin Pop: Mind versus body: time perception

Mind versus body: time perception Since mid-April I'm playing a new game. It's really awesome, and I learned some surprising things. The game Zwift is quite different from the games I'm usually playing. While it does have all or most of the elements of a game, more precisely an MMO, the main point of the game if physical exercise (in the real world). The in-game performance if the result of the (again, real-world) power output. Playing the game is more or less like many other games: very nice graphics, varied terrain (or not), interaction, or better said competition, with other players, online leader boards, races, gear "upgrade" (only cosmetic AFAIK), etc. The game more or less progresses like usual, but the fact that the main driver is body changes, to my surprise, the time component of the game. For me, with a normal game let's say one of Bioware's Dragon Age games, or one of CD Red's Witcher games a short gaming session is 2-3 hours, a reasonable session 6-8 hours, and longer ones are for "marathon" gaming sessions. Playing a good game for one hour feels like you've been cheated one barely starts and has to stop. On Zwift, things are different. A short session is 20-30 minutes, but this already feels good. A good one is more than one hour, and for me, the longest rides I had were three hours. A three hour session, if done at or near Functional Threshold Power (see here for another article about it), leaves me spent. I just had today such a long ride (at around 85% FTP) and it took me an hour afterwards (and eating) to recover. The interesting part is that, body exertion aside, the brain sees a 3 hour Zwift equivalent to an 8-10 hour gaming session. Both are tiring, and the perception of passed time is the same (long). Same with shorter sessions: if I do a 40 minutes ride, it feels subjectively as rewarding as a 2-3 hour normal gaming session. I wonder what mechanism is that influences this perception. Is it just effort level? But there's no real effort (as in increased heart rate) for computer games. Is it the fact that so much blood is needed for the muscles when cycling that the brain gets comparatively little, so it enters slow-speed mode (hey, who pressed the Turbo button)? In any case, using Zwift results in a much more efficient use of my time when I'm playing just to decompress/relax. Another interesting difference is how much importance a good night sleep has on body performance. With computer games, it makes a difference, but not a huge one, and it usually goes away a couple of hours in the game, at least subjectively. With cycling, a bad night results in persistent lower performance all around (for me at least), and one that you easily feel (e.g. for max 5-second average power). And the last thing I learned, although this shouldn't be a surprise: my FTP is way lower than it's supposed to be (according to the internet). I guess the hundreds of hours I put into pure computer games didn't do anything to my fitness, to my "surprise". I'm curious to see, if I can keep this going on, how things will look like in ~6 months or so.

27 April 2016

Stig Sandbeck Mathisen: Using LLDP on Linux. What's on the other side?

On any given server, or workstation, knowing what is at the other end of the network cable is often very useful. There s a protocol for that: LLDP. This is a link layer protocol, so it is not routed. Each end transmits information about itself periodically. You can typically see the type of equipment, the server or switch name, and the network port name of the other end, although there are lots of other bits of information available, too. This is often used between switches and routers in a server centre, but it is useful to enable on server hardware as well. There are a few different packages available. I ve looked at a few of them available for the RedHat OS family (Red Hat Enterprise Linux, CentOS, ) as well as the Debian OS family (Debian, Ubuntu, ) (Updated 2016-04-29, added more recent information about lldpd, and gathered the switch output at the end.)

ladvd A simple daemon, with no configuration needed. This runs as a privilege-separated daemon, and has a command line control utility. You invoke it with a list of interfaces as command line arguments to restrict the interfaces it should use. ladvd is not available on RedHat, but is available on Debian. Install the ladvd package, and run ladvdc to query the daemon for information.
root@turbotape:~# ladvdc
Capability Codes:
    r - Repeater, B - Bridge, H - Host, R - Router, S - Switch,
    W - WLAN Access Point, C - DOCSIS Device, T - Telephone, O - Other
Device ID        Local Intf Proto Hold-time Capability Port ID
office1-switch23 eno1       LLDP  98        B          42
Even better, it has output that can be parsed for scripting:
root@turbotape:~# ladvdc -b eno1
INTERFACE_0='eno1'
HOSTNAME_0='office1-switch23'
PORTNAME_0='42'
PORTDESCR_0='42'
PROTOCOL_0='LLDP'
ADDR_INET4_0=''
ADDR_INET6_0=''
ADDR_802_0='00:11:22:33:44:55
VLAN_ID_0=''
CAPABILITIES_0='B'
TTL_0='120'
HOLDTIME_0='103'
my new favourite :)

lldpd Another package is lldpd , which is also simple to configure and use. lldpd is not available on RedHat, but it is present on Debian. It features a command line interface, lldpcli , which can show output with different level of detail, and on different formats, as well as configure the running daemon.
root@turbotape:~# lldpcli show neighbors
-------------------------------------------------------------------------------
LLDP neighbors:
-------------------------------------------------------------------------------
Interface:    eno1, via: LLDP, RID: 1, Time: 0 day, 00:00:59
  Chassis:
    ChassisID:    mac 00:11:22:33:44:55
    SysName:      office1-switch23
    SysDescr:     ProCurve J9280A Switch 2510G-48, revision Y.11.12, ROM N.10.02 (/sw/code/build/cod(cod11))
    Capability:   Bridge, on
  Port:
    PortID:       local 42
    PortDescr:    42
-------------------------------------------------------------------------------
Among the output formats are json , which is easy to re-use elsewhere.
root@turbotape:~# lldpcli -f json show neighbors
 
  "lldp":  
    "interface":  
      "eno1":  
        "chassis":  
          "office1-switch23":  
            "descr": "ProCurve J9280A Switch 2510G-48, revision Y.11.12, ROM N.10.02 (/sw/code/build/cod(cod11))",
            "id":  
              "type": "mac",
              "value": "00:11:22:33:44:55"
             ,
            "capability":  
              "type": "Bridge",
              "enabled": true
             
           
         ,
        "via": "LLDP",
        "rid": "1",
        "age": "0 day, 00:53:23",
        "port":  
          "descr": "42",
          "id":  
            "type": "local",
            "value": "42"


lldpad A much more featureful LLDP daemon, available for both the Debian and RedHat OS families. This has lots of features, but is less trivial to set up.

Configure lldp for each interface
#!/bin/sh
find /sys/class/net/ -maxdepth 1 -name 'en*'  
    while read device; do
        basename "$device"
    done  
    while read interface; do
         
            lldptool set-lldp -i "$interface" adminStatus=rxtx
            for item in sysName portDesc sysDesc sysCap mngAddr; do
                lldptool set-tlv -i "$interface" -V "$item" enableTx=yes  
                    sed -e "s/^/$item /"
            done
           
            sed -e "s/^/$interface /"
    done

Show LLDP neighbor information
#!/bin/sh
find /sys/class/net/ -maxdepth 1 -name 'en*'  
    while read device; do
        basename "$device"
    done  
    while read interface; do
        printf "%s\n" "$interface"
        ethtool $interface   grep -q 'Link detected: yes'    
            echo "  down"
            echo
            continue
         
        lldptool get-tlv -n -i "$interface"   sed -e "s/^/  /"
        echo
    done
[...]
enp3s0f0
  Chassis ID TLV
    MAC: 01:23:45:67:89:ab
  Port ID TLV
    Local: 588
  Time to Live TLV
    120
  System Name TLV
    site3-row2-rack1
  System Description TLV
    Juniper Networks, Inc. ex2200-48t-4g , version 12.3R12.4 Build date: 2016-01-20 05:03:06 UTC
  System Capabilities TLV
    System capabilities:  Bridge, Router
    Enabled capabilities: Bridge, Router
  Management Address TLV
    IPv4: 10.21.0.40
    Ifindex: 36
    OID: $
  Port Description TLV
    some important server, port 4
  MAC/PHY Configuration Status TLV
    Auto-negotiation supported and enabled
    PMD auto-negotiation capabilities: 0x0001
    MAU type: Unknown [0x0000]
  Link Aggregation TLV
    Aggregation capable
    Currently aggregated
    Aggregated Port ID: 600
  Maximum Frame Size TLV
    9216
  Port VLAN ID TLV
    PVID: 2000
  VLAN Name TLV
    VID 2000: Name bumblebee
  VLAN Name TLV
    VID 2001: Name stumblebee
  VLAN Name TLV
    VID 2002: Name fumblebee
  LLDP-MED Capabilities TLV
    Device Type:  netcon
    Capabilities: LLDP-MED, Network Policy, Location Identification, Extended Power via MDI-PSE
  End of LLDPDU TLV
enp3s0f1
[...]

on the switch side On the switch, it is a bit easier to see what s connected to each interface:

office switch On the switch side, this system looks like:
office1-switch23# show lldp info remote-device
 LLDP Remote Devices Information
  LocalPort   ChassisId                 PortId PortDescr SysName
  --------- + ------------------------- ------ --------- ----------------------
  [...]
  42          22 33 44 55 66 77         eno1   Intel ... turbotape.example.com
  [...]
office1-switch23# show lldp info remote-device 42
 LLDP Remote Device Information Detail
  Local Port   : 42
  ChassisType  : mac-address
  ChassisId    : 00 11 22 33 33 55
  PortType     : interface-name
  PortId       : eno1
  SysName      : turbotape.example.com
  System Descr : Debian GNU/Linux testing (stretch) Linux 4.5.0-1-amd64 #1...
  PortDescr    : Intel Corporation Ethernet Connection I217-LM
  System Capabilities Supported  : bridge, router
  System Capabilities Enabled    : bridge, router
  Remote Management Address
     Type    : ipv4
     Address : 192.0.2.93
     Type    : ipv6
     Address : 20 01 0d b8 00 00 00 00 00 00 00 00 00 00 00 01
     Type    : all802
     Address : 22 33 44 55 66 77

datacenter switch
ssm@site3-row2-rack1> show lldp neighbors
Local Interface    Parent Interface    Chassis Id          Port info          System Name
[...]
ge-0/0/38.0        ae1.0               01:23:45:67:89:58   Interface   2 as enp3s0f0 server.example.com
ge-1/0/38.0        ae1.0               01:23:45:67:89:58   Interface   3 as enp3s0f1 server.example.com
[...]
ssm@site3-row2-rack1> show lldp neighbors interface ge-0/0/38
LLDP Neighbor Information:
Local Information:
Index: 157 Time to live: 120 Time mark: Fri Apr 29 13:00:19 2016 Age: 24 secs
Local Interface    : ge-0/0/38.0
Parent Interface   : ae1.0
Local Port ID      : 588
Ageout Count       : 0
Neighbour Information:
Chassis type       : Mac address
Chassis ID         : 01:23:45:67:89:58
Port type          : Mac address
Port ID            : 01:23:45:67:89:58
Port description   : Interface   2 as enp3s0f0
System name        : server.example.com
System Description : Linux server.example.com 3.10.0-327.13.1.el7.x86_64 #1 SMP Thu Mar 4
System capabilities
        Supported  : Station Only
        Enabled    : Station Only
Management Info
        Type              : IPv6
        Address           : 2001:0db8:0000:0000:0000:dead:beef:cafe
        Port ID           : 2
        Subtype           : 2
        Interface Subtype : ifIndex(2)
        OID               : 1.3.6.1.2.1.31.1.1.1.1.2

23 November 2015

Thomas Goirand: OpenStack Liberty and Debian

Long over due post It s been a long time I haven t written here. And lots of things happened in the OpenStack planet. As a full time employee with the mission to package OpenStack in Debian, it feels like it is kind of my duty to tell everyone about what s going on. Liberty is out, uploaded to Debian Since my last post, OpenStack Liberty, the 12th release of OpenStack, was released. In late August, Debian was the first platform which included Liberty, as I proudly outran both RDO and Canonical. So I was the first to make the announcement that Liberty passed most of the Tempest tests with the beta 3 release of Liberty (the Beta 3 is always kind of the first pre-release, as this is when feature freeze happens). Though I never made the announcement that Liberty final was uploaded to Debian, it was done just a single day after the official release. Before the release, all of Liberty was living in Debian Experimental. Following the upload of the final packages in Experimental, I uploaded all of it to Sid. This represented 102 packages, so it took me about 3 days to do it all. Tokyo summit I had the pleasure to be in Tokyo for the Mitaka summit. I was very pleased with the cross-project sessions during the first day. Lots of these sessions were very interesting for me. In fact, I wish I could have attended them all, but of course, I can t split myself in 3 to follow all of the 3 tracks. Then there was the 2 sessions about Debian packaging on upstream OpenStack infra. The goal is to setup the OpenStack upstream infrastructure to allow packaging using Gerrit, and gating each git commit using the usual tools: building the package and checking there s no FTBFS, running checks like lintian, piuparts and such. I knew already the overview of what was needed to make it happen. What I didn t know was the implementation details, which I hoped we could figure out during the 1:30 slot. Unfortunately, this didn t happen as I expected, and we discussed more general things than I wished. I was told that just reading the docs from the infra team was enough, but in reality, it was not. What currently needs to happen is building a Debian based image, using disk-image-builder, which would include the usual tools to build packages: git-buildpackage, sbuild, and so on. I m still stuck at this stage, which would be trivial if I knew a bit more about how upstream infra works, since I already know how to setup all of that on a local machine. I ve been told by Monty Tailor that he would help. Though he s always a very busy man, and to date, he still didn t find enough time to give me a hand. Nobody replied to my request for help in the openstack-dev list either. Hopefully, with a bit of insistence, someone will help. Keystone migration to Testing (aka: Debian Stretch) blocked by python-repoze.who Absolutely all of OpenStack Liberty, as of today, has migrated to Stretch. All? No. Keystone is blocked by a chain of dependency. Keystone depends on python-pysaml2, itself blocked by python-repoze.who. The later, I upgraded it to version 2.2. Though python-repoze.what depends on version <= 1.9, which is blocking the migration. Since python-repoze.who-plugins, python-repoze.what and python-repoze.what-plugins aren t used by any package anymore, I asked for them to be removed from Debian (see #805407). Until this request is processed by the FTP masters, Keystone, which is the most important piece of OpenStack (it does the authentication) will be blocked for migration to Stretch. New OpenStack server packages available On my presentation at Debconf 15, I quickly introduced new services which were released upstream. I have since packaged them all: Congress, unfortunately, was not accepted to Sid yet, because of some licensing issues, especially with the doc of python-pulp. I will correct this (remove the non-free files) and reattempt an upload. I hope to make them all available in jessie-backports (see below). For the previous release of OpenStack (ie: Kilo), I skipped the uploads of services which I thought were not really critical (like Ironic, Designate and more). But from the feedback of users, they would really like to have them all available. So this time, I will upload them all to the official jessie-backports repository. Keystone v3 support For those who don t know about it, Keystone API v3 means that, on top of the users and tenant, there s a new entity called a domain . All of the Liberty is now coming with Keystone v3 support. This includes the automated Keystone catalog registration done using debconf for all *-api packages. As much as I could tell by running tempest on my CI, everything still works pretty well. In fact, Liberty is, to my experience, the first release of OpenStack to support Keystone API v3. Uploading Liberty to jessie-backports I have rebuilt all of Liberty for jessie-backports on my laptop using sbuild. This is more than 150 packages (166 packages currently). It took me about 3 days to rebuild them all, including unit tests run at build time. As soon as #805407 is closed by the FTP masters, all what s remaining will be available in Stretch (mostly Keystone), and the upload will be possible. As there will be a lot of NEW packages (from the point of view of backports), I do expect that the approval will take some time. Also, I have to warn the original maintainers of the packages that I don t maintain (for example, those maintained within the DPMT), that because of the big number of packages, I will not be able to process the usual communication to tell that I m uploading to backports. However, here s the list of package. If you see one that you maintain, and that you wish to upload the backport by yourself, please let me know. Here s the list of packages, hopefully, exhaustive, that I will upload to jessie-backports, and that I don t maintain myself: alabaster contextlib2 kazoo python-cachetools python-cffi python-cliff python-crank python-ddt python-docker python-eventlet python-git python-gitdb python-hypothesis python-ldap3 python-mock python-mysqldb python-pathlib python-repoze.who python-setuptools python-smmap python-unicodecsv python-urllib3 requests routes ryu sphinx sqlalchemy turbogears2 unittest2 zzzeeksphinx. More than ever, I wish I could just upload these to a PPA^W Bikeshed, to minimize the disruption for both the backports FTP masters, other maintainers, and our OpenStack users. Hopefully, Bikesheds will be available soon. I am sorry to give that much approval work to the backports FTP masters, however, using the latest stable system with the latest release, is what most OpenStack users really want to do. All other major distributions have specific repositories too (ie: RDO for CentOS / Red Hat, and cloud archive for Ubuntu), and stable-backports is currently the only place where I can upload support for the Stable release. Debian listed as supported distribution on openstack.org Good news! If you go at http://www.openstack.org/marketplace/distros/ you will see a list of supported distributions. I am proud to be able to tell that, after 6 months of lobbying from my side, Debian is also listed there. The process of having Debian there included talking with folks from the OpenStack foundation, and having Bdale to sign an agreement so that the Debian logo could be reproduced on openstack.org. Thanks to Bdale Garbee, Neil McGovern, Jonathan Brice, and Danny Carreno, without who this wouldn t have happen.

30 August 2015

Antonio Terceiro: DebConf15, testing debian packages, and packaging the free software web

This is my August update, and by the far the coolest thing in it is Debconf. Debconf15 I don t get tired of saying it is the best conference I ever attended. First it s a mix of meeting both new people and old friends, having the chance to chat with people whose work you admire but never had a chance to meet before. Second, it s always quality time: an informal environment, interesting and constructive presentations and discussions. This year the venue was again very nice. Another thing that was very nice was having so many kids and families. This was no coincidence, since this was the first DebConf in which there was organized childcare. As the community gets older, this a very good way of keeping those who start having kids from being alienated from the community. Of course, not being a parent yet I have no idea how actually hard is to bring small kids to a conference like DebConf. ;-) I presented two talks: There was also the now traditional Ruby BoF, where discussed the state and future of the Ruby ecosystem in Debian; and an in promptu Ruby packaging workshop where we introduced the basics of packaging in general, and Ruby packaging specifically. Besides shak, I was able to hack on a few cool things during DebConf: Miscellaneous updates

6 July 2015

Matthew Garrett: Anti Evil Maid 2 Turbo Edition

The Evil Maid attack has been discussed for some time - in short, it's the idea that most security mechanisms on your laptop can be subverted if an attacker is able to gain physical access to your system (for instance, by pretending to be the maid in a hotel). Most disk encryption systems will fall prey to the attacker replacing the initial boot code of your system with something that records and then exfiltrates your decryption passphrase the next time you type it, at which point the attacker can simply steal your laptop the next day and get hold of all your data.

There are a couple of ways to protect against this, and they both involve the TPM. Trusted Platform Modules are small cryptographic devices on the system motherboard[1]. They have a bunch of Platform Configuration Registers (PCRs) that are cleared on power cycle but otherwise have slightly strange write semantics - attempting to write a new value to a PCR will append the new value to the existing value, take the SHA-1 of that and then store this SHA-1 in the register. During a normal boot, each stage of the boot process will take a SHA-1 of the next stage of the boot process and push that into the TPM, a process called "measurement". Each component is measured into a separate PCR - PCR0 contains the SHA-1 of the firmware itself, PCR1 contains the SHA-1 of the firmware configuration, PCR2 contains the SHA-1 of any option ROMs, PCR5 contains the SHA-1 of the bootloader and so on.

If any component is modified, the previous component will come up with a different measurement and the PCR value will be different, Because you can't directly modify PCR values[2], this modified code will only be able to set the PCR back to the "correct" value if it's able to generate a sequence of writes that will hash back to that value. SHA-1 isn't yet sufficiently broken for that to be practical, so we can probably ignore that. The neat bit here is that you can then use the TPM to encrypt small quantities of data[3] and ask it to only decrypt that data if the PCR values match. If you change the PCR values (by modifying the firmware, bootloader, kernel and so on), the TPM will refuse to decrypt the material.

Bitlocker uses this to encrypt the disk encryption key with the TPM. If the boot process has been tampered with, the TPM will refuse to hand over the key and your disk remains encrypted. This is an effective technical mechanism for protecting against people taking images of your hard drive, but it does have one fairly significant issue - in the default mode, your disk is decrypted automatically. You can add a password, but the obvious attack is then to modify the boot process such that a fake password prompt is presented and the malware exfiltrates the data. The TPM won't hand over the secret, so the malware flashes up a message saying that the system must be rebooted in order to finish installing updates, removes itself and leaves anyone except the most paranoid of users with the impression that nothing bad just happened. It's an improvement over the state of the art, but it's not a perfect one.

Joanna Rutkowska came up with the idea of Anti Evil Maid. This can take two slightly different forms. In both, a secret phrase is generated and encrypted with the TPM. In the first form, this is then stored on a USB stick. If the user suspects that their system has been tampered with, they boot from the USB stick. If the PCR values are good, the secret will be successfully decrypted and printed on the screen. The user verifies that the secret phrase is correct and reboots, satisfied that their system hasn't been tampered with. The downside to this approach is that most boots will not perform this verification, and so you rely on the user being able to make a reasonable judgement about whether it's necessary on a specific boot.

The second approach is to do this on every boot. The obvious problem here is that in this case an attacker simply boots your system, copies down the secret, modifies your system and simply prints the correct secret. To avoid this, the TPM can have a password set. If the user fails to enter the correct password, the TPM will refuse to decrypt the data. This can be attacked in a similar way to Bitlocker, but can be avoided with sufficient training: if the system reboots without the user seeing the secret, the user must assume that their system has been compromised and that an attacker now has a copy of their TPM password.

This isn't entirely great from a usability perspective. I think I've come up with something slightly nicer, and certainly more Web 2.0[4]. Anti Evil Maid relies on having a static secret because expecting a user to remember a dynamic one is pretty unreasonable. But most security conscious people rely on dynamic secret generation daily - it's the basis of most two factor authentication systems. TOTP is an algorithm that takes a seed, the time of day and some reasonably clever calculations and comes up with (usually) a six digit number. The secret is known by the device that you're authenticating against, and also by some other device that you possess (typically a phone). You type in the value that your phone gives you, the remote site confirms that it's the value it expected and you've just proven that you possess the secret. Because the secret depends on the time of day, someone copying that value won't be able to use it later.

But instead of using your phone to identify yourself to a remote computer, we can use the same technique to ensure that your computer possesses the same secret as your phone. If the PCR states are valid, the computer will be able to decrypt the TOTP secret and calculate the current value. This can then be printed on the screen and the user can compare it against their phone. If the values match, the PCR values are valid. If not, the system has been compromised. Because the value changes over time, merely booting your computer gives your attacker nothing - printing an old value won't fool the user[5]. This allows verification to be a normal part of every boot, without forcing the user to type in an additional password.

I've written a prototype implementation of this and uploaded it here. Do pay attention to the list of limitations - without a bootloader that measures your kernel and initrd, you're still open to compromise. Adding TPM support to grub is on my list of things to do. There are also various potential issues like an attacker being able to use external DMA-capable devices to obtain the secret, especially since most Linux distributions still ship kernels that don't enable the IOMMU by default. And, of course, if your firmware is inherently untrustworthy there's multiple ways it can subvert this all. So treat this very much like a research project rather than something you can depend on right now. There's a fair amount of work to do to turn this into a meaningful improvement in security.

[1] I wrote about them in more detail here, including a discussion of whether they can be used for general purpose DRM (answer: not really)

[2] In theory, anyway. In practice, TPMs are embedded devices running their own firmware, so who knows what bugs they're hiding.

[3] On the order of 128 bytes or so. If you want to encrypt larger things with a TPM, the usual way to do it is to generate an AES key, encrypt your material with that and then encrypt the AES key with the TPM.

[4] Is that even a thing these days? What do we say instead?

[5] Assuming that the user is sufficiently diligent in checking the value, anyway

comment count unavailable comments

17 May 2015

Lunar: Reproducible builds: week 3 in Stretch cycle

What happened about the reproducible builds effort for this week: Toolchain fixes Tomasz Buchert submitted a patch to fix the currently overzealous package-contains-timestamped-gzip warning. Daniel Kahn Gillmor identified #588746 as a source of unreproducibility for packages using python-support. Packages fixed The following 57 packages became reproducible due to changes in their build dependencies: antlr-maven-plugin, aspectj-maven-plugin, build-helper-maven-plugin, clirr-maven-plugin, clojure-maven-plugin, cobertura-maven-plugin, coinor-ipopt, disruptor, doxia-maven-plugin, exec-maven-plugin, gcc-arm-none-eabi, greekocr4gamera, haskell-swish, jarjar-maven-plugin, javacc-maven-plugin, jetty8, latexml, libcgi-application-perl, libnet-ssleay-perl, libtest-yaml-valid-perl, libwiki-toolkit-perl, libwww-csrf-perl, mate-menu, maven-antrun-extended-plugin, maven-antrun-plugin, maven-archiver, maven-bundle-plugin, maven-clean-plugin, maven-compiler-plugin, maven-ear-plugin, maven-install-plugin, maven-invoker-plugin, maven-jar-plugin, maven-javadoc-plugin, maven-processor-plugin, maven-project-info-reports-plugin, maven-replacer-plugin, maven-resources-plugin, maven-shade-plugin, maven-site-plugin, maven-source-plugin, maven-stapler-plugin, modello-maven-plugin1.4, modello-maven-plugin, munge-maven-plugin, ocaml-bitstring, ocr4gamera, plexus-maven-plugin, properties-maven-plugin, ruby-magic, ruby-mocha, sisu-maven-plugin, syncache, vdk2, wvstreams, xml-maven-plugin, xmlbeans-maven-plugin. The following packages became reproducible after getting fixed: Some uploads fixed some reproducibility issues but not all of them: Ben Hutchings also improved and merged several changes submitted by Lunar to linux. Currently untested because in contrib: reproducible.debian.net
Thanks to the reproducible-build team for running a buildd from hell. gregor herrmann
Mattia Rizzolo modified the script added last week to reschedule a package from Alioth, a reason can now be optionally specified. Holger Levsen splitted the package sets page so each set now has its own page. He also added new sets for Java packages, Haskell packages, Ruby packages, debian-installer packages, Go packages, and OCaml packages. Reiner Herrmann added locales-all to the set of packages installed in the build environment as its needed to properly identify variations due to the current locale. Holger Levsen improved the scheduling so new uploads get tested sooner. He also changed the .json output that is used by tracker.debian.org to lists FTBFS issues again but only for issues unrelated to the toolchain or our test setup. Amongst many other small fixes and additions, the graph colors should now be more friendly to red-colorblind people. The fix for pbuilder given in #677666 by Tim Landscheidt is now used. This fixed several FTBFS for OCaml packages. Work on rebuilding with different CPU has continued, a kvm-on-kvm build host has been set been set up for this purpose. debbindiff development Version 19 of debbindiff included a fix for a regression when handling info files. Version 20 fixes a bug when diffing files with many differences toward a last line with no newlines. It also now uses the proper encoding when writing the text output to a pipe, and detects info files better. Documentation update Thanks to Santiago Vila, the unneeded -depth option used with find when fixing mtimes has been removed from the examples. Package reviews 113 obsolete reviews have been removed this week while 77 has been added.

26 May 2014

Clint Adams: Before the tweet in Grand Cayman

Jebediah boarded the airplane. It was a Bombardier CRJ900 with two turbofan jet engines. Run by SPARK, a subset of Ada. He sat down in his assigned seat and listened to the purser inform him that he was free to use his phone door-to-door on all Delta Connection flights. As long as the Airplane Mode was switched on. Jebediah knew that this was why Delta owned 49% of Virgin Atlantic. On the plane ride, a woman in too much makeup asked Jebediah to get the man next to him so she could borrow his copy of the Economist. The man said she could keep it and that it was old. He had stubby little fingers. She was foreign. At Terminal 2, they passed by Kids on the Fly, an exhibit of the Chicago Children's Museum at Chicago O'Hare International Airport. A play area. Jebediah thought of Dennis. The Blue Line of the Chicago Transit Authority was disrupted by weekend construction, so they had to take a small detour through Wicker Park. Wicker Park is a neighborhood. In Chicago. Jebediah looked at Glazed & Infused Doughnuts. He wondered if they made doughnuts there. Because of the meeting, he knocked someone off a Divvy bike and pedaled it to the Loop. The Berghoff was opened in 1898 by Herman Joseph Berghoff. Once he got to the Berghoff, he got a table for seven on the west wall. He eyed the electrical outlet and groaned. He had brought 3 cigarette lighter adapters with him, but nothing to plug into an AC outlet. How would he charge his device? An older gentleman came in. And greeted him. Hello, I'm Detective Chief Inspector Detweiler. Did you bring the evidence? Said the man. Jebediah coughed and said that he had to go downstairs. He went downstairs and looked at the doors. He breathed a sigh of relief. Seeing the word washroom in print reminded him of his home state of Canada. Back at the table he opened a bag, glared angrily at a cigarette lighter adapter, and pulled out a Palm m125. Running Palm OS 4.0. He noticed a third person at the table. It was the ghost of Bob Ross. , said the ghost of Bob Ross. It was good for him to communicate telepathically with Sarah Palin. This has eight megabytes of RAM, Jebediah informed the newcomer. Bob Ross's ghost right-clicked on his face and rated him one star. Jebediah looked angrily at the AC outlet and fidgeted with two of his cigarette lighter adapters. DCI Detweiler said, I had a Handspring Visor Deluxe, and pulled out a Samsung Galaxy Tab 3 8.0 eight-inch Android-based tablet computer running the Android 4.2.2 Jelly Bean operating system by Google. This also has eight megabytes of RAM, he continued. As you requested, I brought the video of your nemesis at the Robie House. Jebediah stared at the tablet. He could see a compressed video file, compressed with NetBSD compression and GNU encryption. It was on the tablet. Some bridges you just don't cross, he hissed. Meanwhile, in Gloucestershire, someone who looked suspiciously like Bobby Rainsbury opened up a MacBook Air and typed in a three-digit passcode. Across the street a wall safe slid out of the wall. And dropped onto someone's head. She closed the laptop. And went to Dumfries. Not far from the fallen safe, a group of men held a discussion. FBI: Why are we here on this junket? CIA: Where are we? DIA: We're here. JIA: This is confusing. NSA: I have to get back to that place in Germany where I don't work. ATF: We're talking about giant robots here, people. EPA: Huh? Part 2 AUD:USD 1.0645 donuts:dozen 12 Gold $1318.60 Giant robot spiders fought each other in a supermarket parking lot. Detective Seabiscuit sucked on a throat lozenge. Who are you again? he asked the toll-booth operator. I said my name is Rogery Sterling, replied the toll-booth operator. Rajry what? I said my name is Rogery Sterling, replied the toll-booth operator. Again. Where am I? Look, I'm telling you that that murder you're investigating was caused by software bugs in the software. Are we on a boat? Look at the diagram. This agency paid money to introduce, quite deliberately, weaknesses in the security of this library, through this company here, and this company here. Library, oh no. I have overdue fees. And they're running a PR campaign to increase use of this library. Saying that the competing options are inferior. But don't worry, they're trying to undermine those too. Detective Seabiscuit wasn't listening. He had just remembered that he needed to stop by the Robie House.

31 December 2013

Chris Lamb: 2013: Selected highlights

January https://chris-lamb.co.uk/wp-content/2013/highlights/01.jpg Entered monthly 10km races in Regent's Park, reducing my time from 55:07 in January 4th to 43:28 on December 1st. February https://chris-lamb.co.uk/wp-content/2013/highlights/02.jpg Entered the Hell of Ashdown cyclosportive in sub-zero conditions for over 100 miles & 7,500 ft of elevation (actual photo). March https://chris-lamb.co.uk/wp-content/2013/highlights/03.jpg 
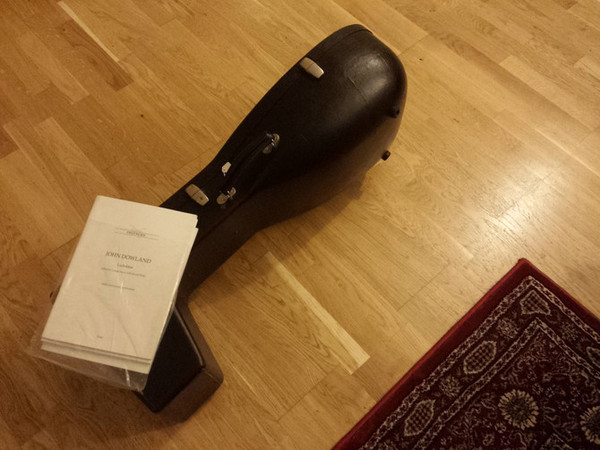
Had my lute returned after it was damaged. April https://chris-lamb.co.uk/wp-content/2013/highlights/04.jpg 
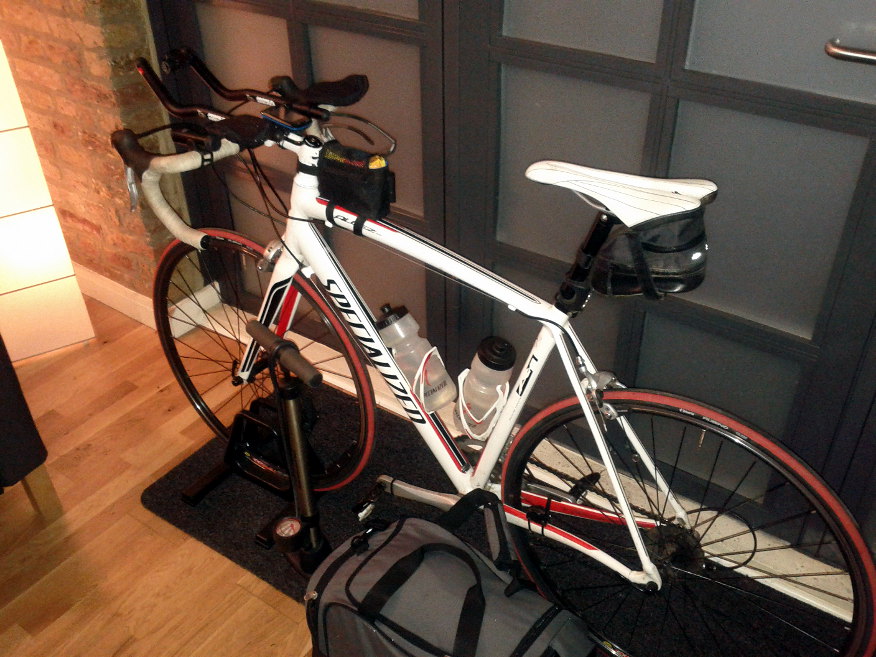
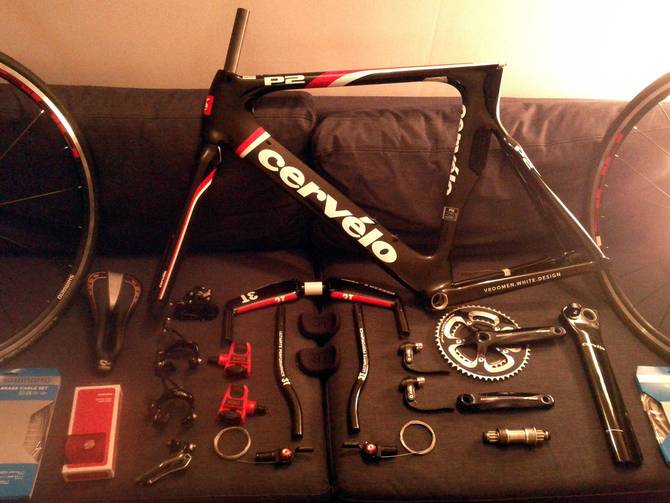
Had a time-trial bike built and raced my first triathlon, duathlon and aquathlon. May https://chris-lamb.co.uk/wp-content/2013/highlights/05.jpg 
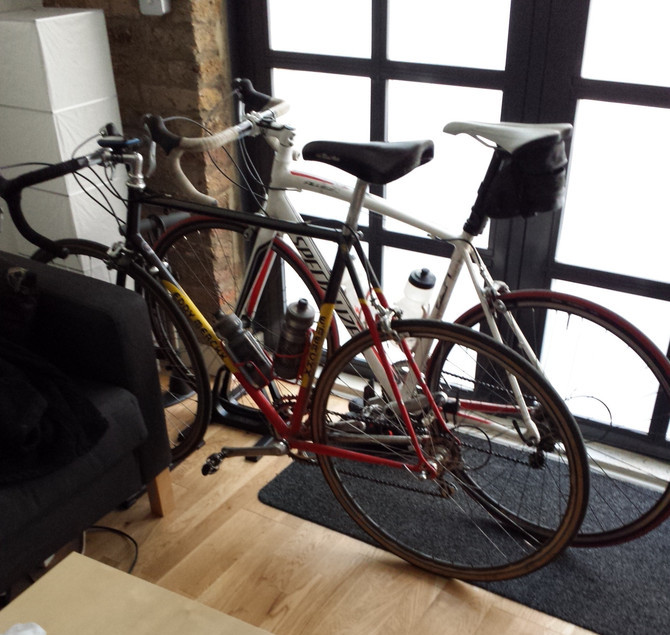
More biking, including a long ride with my brother. Also performed on the viola da gamba in Bach's St John Passion with Belsize Baroque. June https://chris-lamb.co.uk/wp-content/2013/highlights/06.jpg 
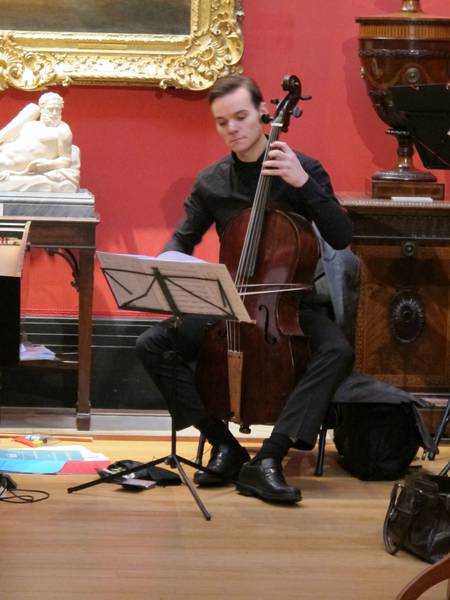
Two big concerts: Monn's Cello concerto in G minor with the Zadok Baroque Orchestra followed by the Blackfriars Quartet performing Shostakovich's String Quartet No. 8. July https://chris-lamb.co.uk/wp-content/2013/highlights/07.jpg 
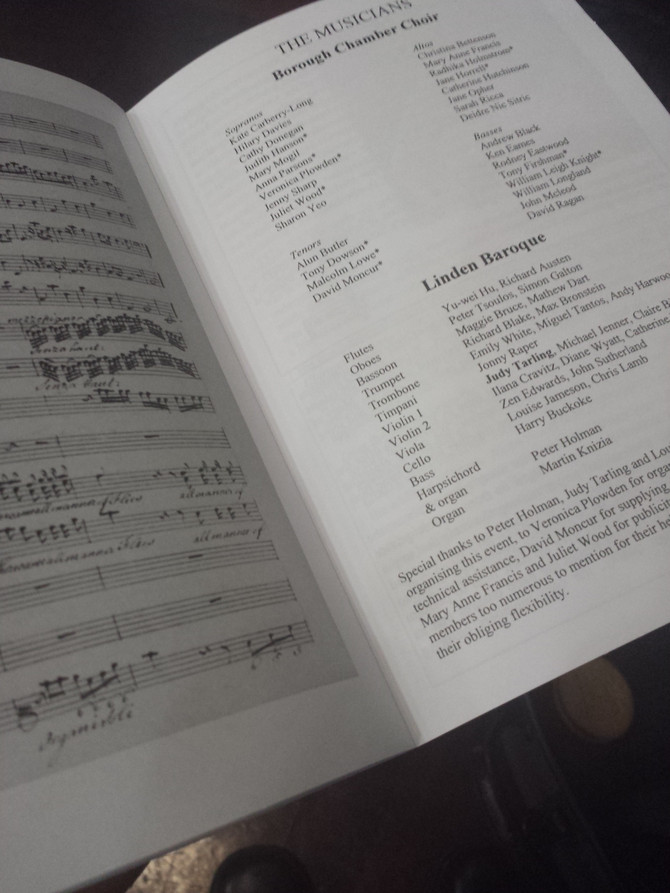
Amongst more triathlon preperation, I performed in a Linden Baroque concert of Handel's Israel in Egypt. August https://chris-lamb.co.uk/wp-content/2013/highlights/08.jpg Raced my biggest event of the year a "Half-Ironman" triathlon hitting my time goal. September https://chris-lamb.co.uk/wp-content/2013/highlights/09.jpg 
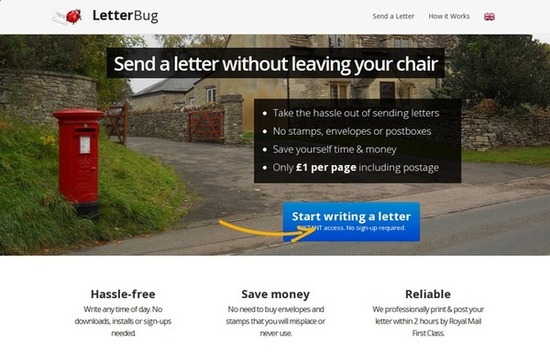
Whilst procrastinating about writing some letters, I created a small service to send letters without a printer. October https://chris-lamb.co.uk/wp-content/2013/highlights/10.jpg 
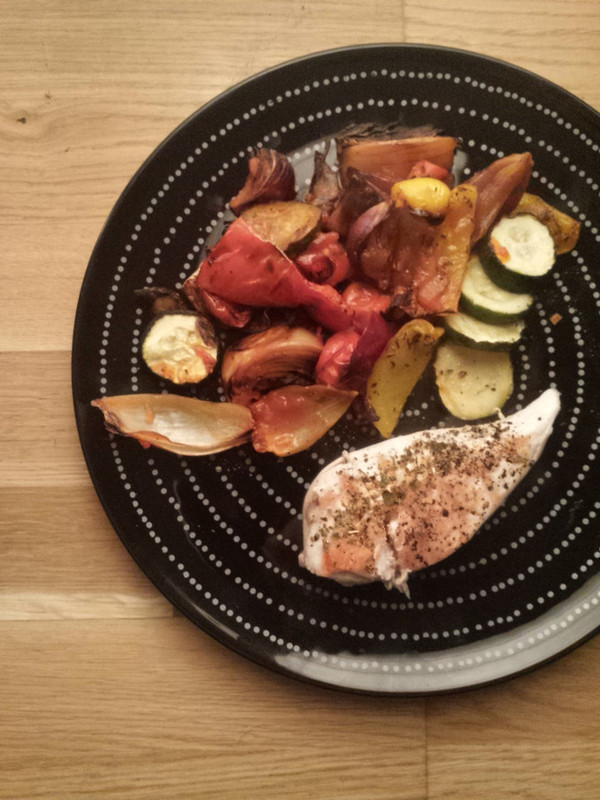
Started cooking a little more adventurously. November https://chris-lamb.co.uk/wp-content/2013/highlights/11.jpg Performed Geminiani's arrangement of Corelli's La Folia in the Fitzwilliam Museum with Le Petit Orchestre. December https://chris-lamb.co.uk/wp-content/2013/highlights/12.jpg 
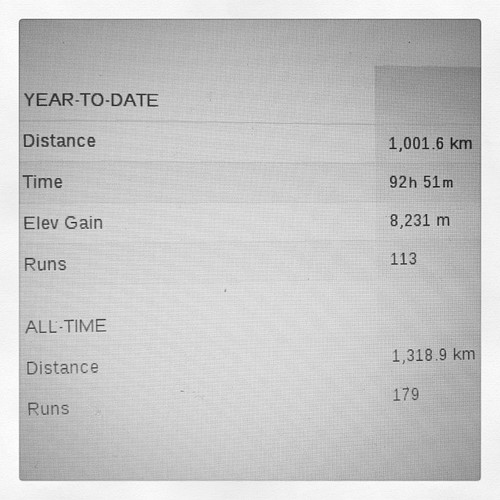
Ramped up my running volume so I could go over 1000km for the year. (Strava profile)

10 December 2013

Kees Cook: live patching the kernel

A nice set of recent posts have done a great job detailing the remaining ways that a root user can get at kernel memory. Part of this is driven by the ideas behind UEFI Secure Boot, but they come from the same goal: making sure that the root user cannot directly subvert the running kernel. My perspective on this is toward making sure that an attacker who has gained access and then gained root privileges can t continue to elevate their access and install invisible kernel rootkits. An outline for possible attack vectors is spelled out by Matthew Gerrett s continuing useful kernel lockdown patch series. The set of attacks was examined by Tyler Borland in Bypassing modules_disabled security . His post describes each vector in detail, and he ultimately chooses MSR writing as the way to write kernel memory (and shows an example of how to re-enable module loading). One thing not mentioned is that many distros have MSR access as a module, and it s rarely loaded. If modules_disabled is already set, an attacker won t be able to load the MSR module to begin with. However, the other general-purpose vector, kexec, is still available. To prove out this method, Matthew wrote a proof-of-concept for changing kernel memory via kexec. Chrome OS is several steps ahead here, since it has hibernation disabled, MSR writing disabled, kexec disabled, modules verified, root filesystem read-only and verified, kernel verified, and firmware verified. But since not all my machines are Chrome OS, I wanted to look at some additional protections against kexec on general-purpose distro kernels that have CONFIG_KEXEC enabled, especially those without UEFI Secure Boot and Matthew s lockdown patch series. My goal was to disable kexec without needing to rebuild my entire kernel. For future kernels, I have proposed adding /proc/sys/kernel/kexec_disabled, a partner to the existing modules_disabled, that will one-way toggle kexec off. For existing kernels, things got more ugly. What options do I have for patching a running kernel? First I looked back at what I d done in the past with fixing vulnerabilities with systemtap. This ends up being a rather heavy-duty way to go about things, since you need all the distro kernel debug symbols, etc. It does work, but has a significant problem: since it uses kprobes, a root user can just turn off the probes, reverting the changes. So that s not going to work. Next I looked at ksplice. The original upstream has gone away, but there is still some work being done by Jiri Slaby. However, even with his updates which fixed various build problems, there were still more, even when building a 3.2 kernel (Ubuntu 12.04 LTS). So that s out too, which is too bad, since ksplice does exactly what I want: modifies the running kernel s functions via a module. So, finally, I decided to just do it by hand, and wrote a friendly kernel rootkit. Instead of dealing with flipping page table permissions on the normally-unwritable kernel code memory, I borrowed from PaX s KERNEXEC feature, and just turn off write protect checking on the CPU briefly to make the changes. The return values for functions on x86_64 are stored in RAX, so I just need to stuff the kexec_load syscall with mov -1, %rax; ret (-1 is EPERM):
#define pr_fmt(fmt) KBUILD_MODNAME ": " fmt
#include <linux/init.h>
#include <linux/module.h>
#include <linux/slab.h>
static unsigned long long_target;
static char *target;
module_param_named(syscall, long_target, ulong, 0644);
MODULE_PARM_DESC(syscall, "Address of syscall");
/* mov $-1, %rax; ret */
unsigned const char bytes[] =   0x48, 0xc7, 0xc0, 0xff, 0xff, 0xff, 0xff,
                                0xc3  ;
unsigned char *orig;
/* Borrowed from PaX KERNEXEC */
static inline void disable_wp(void)
 
        unsigned long cr0;
        preempt_disable();
        barrier();
        cr0 = read_cr0();
        cr0 &= ~X86_CR0_WP;
        write_cr0(cr0);
 
static inline void enable_wp(void)
 
        unsigned long cr0;
        cr0 = read_cr0();
        cr0  = X86_CR0_WP;
        write_cr0(cr0);
        barrier();
        preempt_enable_no_resched();
 
static int __init syscall_eperm_init(void)
 
        int i;
        target = (char *)long_target;
        if (target == NULL)
                return -EINVAL;
        /* save original */
        orig = kmalloc(sizeof(bytes), GFP_KERNEL);
        if (!orig)
                return -ENOMEM;
        for (i = 0; i < sizeof(bytes); i++)  
                orig[i] = target[i];
         
        pr_info("writing %lu bytes at %p\n", sizeof(bytes), target);
        disable_wp();
        for (i = 0; i < sizeof(bytes); i++)  
                target[i] = bytes[i];
         
        enable_wp();
        return 0;
 
module_init(syscall_eperm_init);
static void __exit syscall_eperm_exit(void)
 
        int i;
        pr_info("restoring %lu bytes at %p\n", sizeof(bytes), target);
        disable_wp();
        for (i = 0; i < sizeof(bytes); i++)  
                target[i] = orig[i];
         
        enable_wp();
        kfree(orig);
 
module_exit(syscall_eperm_exit);
MODULE_LICENSE("GPL");
MODULE_AUTHOR("Kees Cook <kees@outflux.net>");
MODULE_DESCRIPTION("makes target syscall always return EPERM");
If I didn t want to leave an obvious indication that the kernel had been manipulated, the module could be changed to: And with this in place, it s just a matter of loading it with the address of sys_kexec_load (found via /proc/kallsyms) before I disable module loading via modprobe. Here s my upstart script:
# modules-disable - disable modules after rc scripts are done
#
description "disable loading modules"
start on stopped module-init-tools and stopped rc
task
script
        cd /root/modules/syscall_eperm
        make clean
        make
        insmod ./syscall_eperm.ko \
                syscall=0x$(egrep ' T sys_kexec_load$' /proc/kallsyms   cut -d" " -f1)
        modprobe disable
end script
And now I m safe from kexec before I have a kernel that contains /proc/sys/kernel/kexec_disabled.

2013, Kees Cook. This work is licensed under a Creative Commons Attribution-ShareAlike 3.0 License.
Creative Commons License

17 September 2013

Craig Small: jqGrid in TurboGears2 Admin Screens

I wanted to use the jqGrid for my admin pages as I liked that look and it matches some of the other screens outside the admin controller. The admin controller, or rather the CrudRestController out of tgext.crud, has a way of exporting results in json format. So surely its a matter of changing the TableBase to use jqGrid in the admin controller and we re done? Well, no. First you need to adjust the jsonReader options so that it lines up to the field names that the controller sends and this was one of the first (or last snags). The json output looks like:
 
  "value_list":  
    "total": 20,
    "items_per_page": 7,
    "page": 1,
    "entries": [(lots of entries)...]
   
 
Now this is a little odd because of the top-level dictionary that is being used here. Most of the examples have everything that is inside the value_list being returned. In fact adjusting the controller to return only those items in the value_list values works. To look inside this structure we need to adjust the jsonReader options. jqGrid documentation uses the format toptier>subtier for the XML reader so that was the intial attempt. It was also an intial fail, it doesn t work and you get your very familiar empty grid. The trick is close to this format, but slightly different for json. You change the options to toptier.subtier . In other words change the greater than symbol to a full stop for json access. The jqGridWidget now has the following options (amongst others):
options =  
  'datatype': 'json',
  'jsonReader':  
    'repeatitems': False,
    'root': 'value_list.entries',
    'total': 'value_list.total',
    'page': 'value_list.page',
   
 
There might be a way of saying all entries sit under value_list inside jqGrid, but I couldn t find it. Those options given above do give a working jqGrid on the admin screens.

12 August 2013

Chris Lamb: Cotswold Classic Middle Distance triathlon

https://chris-lamb.co.uk/wp-content/2013/cotswold_course.jpg 
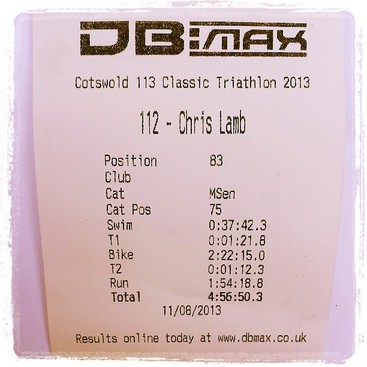
Since becoming interested in triathlon in October of last year, my goal in 2013 was not to just finish a "70.3" (or "Half-Ironman"), but to complete one in under 5 hours. At the time, each discipline was woefully inadequate; I had not swum in over a decade, my cycling was average and I had only begun running again after years away from exercise. The somewhat arbitrary target time would dictate my training. For example, the high proportion of time spent on the bike combined with the injury-sensitive nature of running meant that cycling would have a highest return on investment of the three disciplines. Despite that, I would need to take the run seriously but carefully - I decided to enter a series of monthly 10K races where I could steadily reduce my times over the year. Races themselves formed a crucial part of my preparation and a carefully balanced race calendar was surprisingly important, balancing upcoming milestones that would provide an achievable goal as well as uncovering weaknesses in enough time so they could be worked on. Whilst I did post about my first triathlon, I felt no compulsion with the interleaving five or six races as I was evaluating them in the context of the 70.3 rather than as races in their own right.
Swim
Distance
1900m
Time
37:42
Whilst this wasn't my worst open water swim, it was certainly not my best. The first 500m was straightforward, but I lost my form over the next 500m and I overcompensated with excessive kick. My calves responded by cramping badly two or three times after that, losing both momentum and time. Curiously, whenever I could identify my speed relative to my effort (for example, by some underwater reeds) I could use that as feedback and my rotation (etc.) would temporarily return. Pool swimming always has markers of this kind, whilst a murky lake does not. In conclusion, my lack of open water training outside of races held me back more than I expected.
Bike https://chris-lamb.co.uk/wp-content/2013/cotswold_bike.jpg
Distance
52 miles
Time
2:22 (21.9 mph average)
I had thoroughly absorbed the advice that you should prepare for your primary race so that it feels like another day at the office. On this criterion, the bike leg was almost perfect. My nutrition strategy energy drink every 5 minutes, gel every 30 minutes worked fine until mile 35 where I felt like I had taken on too much fluid (and no time to take a bathroom break). I had a temporary hiccup with my rear derailleur but my "tame" 52/34 12x28 gearing was vindicated on the climbs, although in retrospect that might mostly be schadenfreude. Tens of hours acclimatising to a time trial bike was rewarded by being able to spend the entire leg in "aero" position (ignoring 90-degree turns or serious gradients), improving efficiency.
Run https://chris-lamb.co.uk/wp-content/2013/cotswold_run.jpg
Distance
13.1 miles (21km)
Time
1:54:18 (5:25/km)
I had prepared a chart which provided the pace I required based on the race time at the start of the run. I would then only need to monitor my run pace instead of repeatedly extrapolating a finish time as even basic arithmetic can become impossible when fatigued. This strategy was chosen as I was too risk-adverse to aim for a faster time than strictly required; the downside of missing the target from aiming too high and "blowing up" outweighed going a few minutes faster overall. Despite that, I ran half-marathon personal best. Unfortunately, due to pressing the wrong watch button after the swim, the chart was worthless unless I could assume the race started exactly at 6:30AM. With no other option I decided to trust that with some padding, but the uncertainly it added was unsettling. Adding to that feeling, my left hip started to twinge at 7K, something it has never done before. My plan was to get to 16K, take a caffeine gel and then keep ratcheting up the pace until the finish. In my long run training I could speed up to a 4:10/km pace but after 5 hours of racing and being reasonably sure I was going to reach my goal, the best I could summon was 4:45/km. My form completely shot, I crossed the finish line and got into a fetal position in the shade behind a tent, scaring the race organisers for a few minutes.
Overall
Total time
4:56:50
Writing this the day after the race, I am still a little unsure of how I feel. I am obviously extremely content that I reached my goal but given the volume and detail of preparation it was not a huge surprise to me on race day that I did so. This combined with the "real" work and progress being achieved throughout the training seems to have robbed the event of some element of triumph it could have had, but that in itself was somewhat expected. Where next? I had always dismissed the consensus view of needing to take a decent break after the season has ended but now I am looking forward to putting triathlon-specific training on hold for a while and explore other things. I highly doubt this will be my last triathlon though. https://chris-lamb.co.uk/wp-content/2013/cotswold_result.jpg (Full results)

20 June 2013

Craig Small: jqplot in Turbogears

I ve been working on the Rosenberg jqPlot GraphsNMS graphs slowly migrating them from using rrdtool graph and using jqplot. While there have been many false-starts and re-works, I now have a working set of graphs, two of which are shown on the page. The graphs look a lot slicker and I have also simplified the admin screens. I found I kept having to type the same thing in over and over for the rrdgraphs and have narrowed down the type of graphs to approximately 5. They re certainly not bulletproof and need more testing but they re a good start. The graphs are based upon the ToscaWidgets2 series of widgets that then provide a nice handle for the jqPlot code. My graphs even have some hand-coded Javascript to give nice units on the Y axis.

15 May 2013

Craig Small: itools is back

My last post I said that I had to remove my internet query tools due to some bugs that were a concern. Some of the code was hard to maintain and probably had holes and I had noticed that it looped at times. I m happy to say that I have restored some of those tools now, still located at http://enc.com.au/itools This code is completely re-written in Python using the TurboGears toolkit which means it is a lot cleaner in how it works and how it looks. Some of the lookup tables use a database rather than an array for ease of updating and querying. The downside is the backends will take time. It currently only does nslookup queries and whois only works for IPv4 addresses. The domain name queries will be a while off as these are the most complicated to handle. To give you an idea, all IPv4 and IPv6 address information comes from 5 sources with two formats while domain names come from over 200 sources with about 40 formats. This means the information from Regional Internet Registries will be done first.

12 April 2013

Craig Small: Pie Charts in TurboGears

You might of looked at Ralph Bean s tutorial on graphs and thought, that s nice but I d like something different. The great thing about ToscaWidgets using the jqPlot library is that pretty much anything you can do in jqPlot, you can do in ToscaWidgets and by extension in TurboGears. You want different graph types? jqPlot has heaps! My little application needed a Pie Chart to display the overall status of attributes. There are 6 states an attribute can be in: Up, Alert, Down, Testing, Admin Down and Unknown. The Pie Chart would show them all with some sort of colour representing the status. For this example I ve used hard-coded data but you would normally extract it from the database using a TurboGears model and possibly some bucket sorting code. I ve divided my code into widget specific, which is found in myapp/widgets/attribute.py and the controller code found unsurprisingly at myapp/controllers/attribute.py Also note that some versions of ToscaWidgets have a bug which means any jqPlot widget won t work, version 2.0.4 has the fix for issue 80 that explains briefly the bug. The widget code looks like this:
from tw2.jqplugins.jqplot import JQPlotWidget
from tw2.jqplugins.jqplot.base import pieRenderer_js
import tw2.core as twc
 
class AttributeStatusPie(JQPlotWidget):
  """
  Pie Chart of the Attributes' Status """
  id = 'attribute-status-pie'
  resources = JQPlotWidget.resources + [
  pieRenderer_js,
  ]
 
  options =  
  'seriesColors': [ "#468847", "#F89406", "#B94A48", "#999999", "#3887AD", "#222222"], 
  'seriesDefaults' :  
  'renderer': twc.js_symbol('$.jqplot.PieRenderer'),
   ,
  'legend':  
  'show': True, 
  'location': 'e',
   ,
   
Some important things to note are: Next the controller needs to be defined:
from myapp.widgets.attribute import AttributeStatusPie
 
@expose('myapp.templates.widget')
  def statuspie(self):
  data = [[
  ['Up', 20], ['Alert', 7], ['Down', 12], ['Admin Down', 3], ['Testing', 1], ['Unknown', 4],
  ]]
  pie = AttributeStatusPie(data=data)
  return dict(w=pie)
And that is about it, we now have a controller path attributes/statuspie which shows us the pie chart.
My template is basically a bare template with a $ w.display n in it to just show the widget for testing.
Pie Chart in Turbogears

Pie Chart in Turbogears

6 April 2013

Chris Lamb: Thames Turbo Sprint Triathlon 2013 Race 1

/wp-content/2013/hampton_wick_pool.jpg /wp-content/2013/bike_tt_01.jpg 
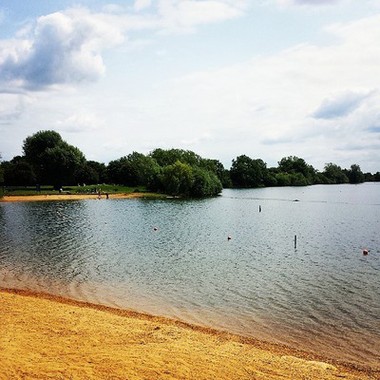
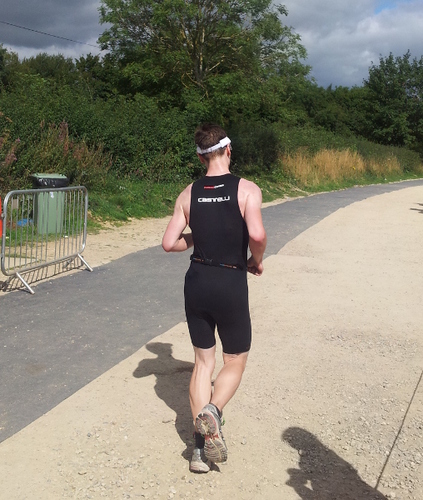
On Monday I took part in my first triathlon, a "sprint" distance race organised by
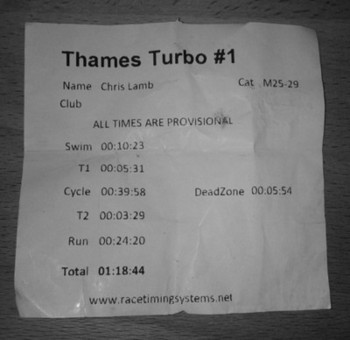
 Thames Turbo Triathlon Club.
Swim
Distance
428m (+ pool exit chute)
Time
10:23 (2:26/100m)
I was glad to be given a low race number as it would reduce the time standing around 0 C in swimming gear. The 28 C heated pool was a welcome relief and I was quickly on my way, although perhaps overcooking it in the first half. Overall, I was quite pleased with my swim time as I had cut it by well over 50% during March; there are perhaps 1-2 minutes of fairly easy gains still to be made as well.
T1 (time: 5:32) Due to the cold temperature and forecast for snow, the race director insisted that competitors added extra layers covering their arms and torso on the bike. An additional "free" 5 minutes was also granted for T1 in order that clothing was not skipped in expense of time. I eventually wore a long-sleeve base layer, tights, a short-sleeved jersey, arm warmers and two pairs of gloves.
Bike
Distance
13.8 miles (+ mounting/demounting chutes)
Time
39:59 (19.5 mph)
I overtook 10-15 riders in the first half of the bike leg, a couple of them even seeking me out to later to congratulate me on looking so fast. I was thus more than a little disappointed when I discovered my final bike split as I was hoping for at least a sub-39 minute time. Analysing my GPS later I can see my average speed was over 1.5mph slower in the second half, yet I cannot recall being limited by fatigue or headwind in the last 6 miles. I was either overly reliant on other riders to "reel in" during the first half (but had run out of people to catch in the latter stage) or I simply was not giving 100%.
T2 (time: 3:30) Leaving T2 I failed to start both my GPS and stopwatch correctly so I do not have splits of my time. I also did not pick up my running gloves resulting in distractingly cold hands in Bushy Park.
Run
Distance
5k
Time
24:21 (4:52/km)
Throughout the first kilometer my legs were extremely sluggish and I simply could not get them to do what I wanted - typical triathlon "brick legs". I did not know it at the time but I was also running up a slight but extended incline. I struggled to get to the 1k marker and briefly stopped to mentally regroup. I joined another runner a few moments later and we ran the rest of the 5k at a fairly easy pace. It's clear that the lack of serious brick workouts compromised my run time, as well as my inability to dial down the pace once it was clearly too optimistic. Knowing the elevation profile of the run should have adjusted my expectations too, leading to a better overall time.
Overall
Total time
1:18:44
Position
127/261
Position male
109/202
Position 25-29 male
16/25
Despite finishing just to the left of the overall bell curve, it is difficult avoid feeling disappointed with my time as it was hindered by well-documented and avoidable errors. The sub-optimal pacing throughout meant I still had something left "in the tank" at the end, adding to a general feeling of under-achieving on the way home. Preperation was also less than ideal - two days before the race I had twinged my back in a 70-mile reconnaissance ride (!) by overusing my clip-on bars although this only affected me mentally in the race. I additionally ate too much before and during the race in retrospect. Nevertheless, there must be some value in learning these lessons first-hand and and early on. /wp-content/2013/tt_1_times.jpg (Full results)

24 January 2013

Craig Small: Bootstrap The hidden gem in Turbogears

I ve been trying to tidy up my Mako templates within my Turbogears 2 project. As part of that I was looking at some of them that are quickstarted including one which is the About page. What was curious was there was all this CSS work all done already for you, including icons. Digging further I found out that one of the many projects Turbogears takes in, is Bootstrap. It s website describes Bootstrap as Sleek, intuitive, and powerful front-end framework for faster and easier web development. but what it means to me is a bunch of guys who understand HTML and CSS way better than me have made it easy for me to build a decent web application. While the framework won t suit everyone s tastes, it makes a lot of the formatting decisions so much easier. The thing is, in all the Turbogears documentation I have read I ve not heard it mentioned. Not sure why, its pretty awesome (not SQLAlchemy awesome but not many things are).

17 January 2013

Craig Small: Pre-selecting ToscaWidgets jqgrid values in TurboGears

My Turbogears project has recently reached an important milestone; one of the back-end processes now runs pretty much continuously and the plugins it use (or at least the ones I can see) are also working. That means I can turn to the front-end which displays the data the back-end collected. For some of the data I am using a ToscaWidgets (or TW2) widget called a jqGridWidget which is a very nice jquery device that separates the presentation and data using a json query. I ve mentioned previously about how to get a jqGridWidget working but left the pre-filtering out until now. This meant that my grid showed all the items in the database, not just the ones I wanted to see, but it was a start. Now this widget displays things called Attributes which are basically children of another model called Hosts. Basically, Attributes are things you want to check or track about a Host. My widget used to show all Attributes but often on a Host screen, I want to see its hosts only. So, this is how I got my widget to behave; I m not sure this is THE CORRECT way of doing it, but it does work. First, in the Hosts controller you need to create the widget and pass along the host_id that the controller has obtained. I was not able to use the sub-classing trick you see in some TW2 documentation but actually make a widget instance.
class HostsController(BaseController):
    # other stuff here
    class por2(portlets.Portlet):
        title = 'Host Attributes'
        widget = AttributeGrid()
        widget.host_id = host_id
Next, the prepare() method in the Widget needs to get hold of the host_id and put it into the postData list. I needed to do it before calling super() because the options become one long string in the sub-class.
class AttributeGrid(jqgrid.jqGridWidget):
    def prepare(self, **kw):
        if self.host_id is not None:
            self.options['postData'] =  'hostid': self.host_id 
        super(AttributeGrid, self).prepare()
This means the jqgrid when it asks for its JSON data will include the hostid parameter as well. We need that method to see the host ID so we can filter the database access. Finally in the JSON method for the Attribute we pick up and filter on the hostid.
    @expose('json')
    @validate(validators= 'hostid':validators.Int() )
    def jqsumdata(self, hostid=0, page=1, rows=1, *args, **kw):
        conditions = []
        if hostid &gt; 0:
            conditions.append(model.Attribute.host_id == hostid)
        attributes =model.DBSession.query(model.Attribute).filter(and_(*conditions))
From there you run through the attributes variable and build your JSON reply.

22 October 2012

Craig Small: jqGridWidget in Turbogears

Turbogears 2 uses Toscawidgets 2 for a series of very clever widgets and base objects that you can use in your projects. One I have been playing with is the jqGridWidget which uses jquery to display a grid. The idea with jquery is creating a grid or other object and then using javascript to call back to the webserver to obtain the data which usually comes from a database using the very excellent SQLAlchemy framework. I found it a bit fiddly to get going and it is unforgiving, you get one thing wrong and you end up with an empty grid but when it works, it works very well.
from tw2.jqplugins.jqgrid import jqGridWidget
from tw2.jqplugins.jqgrid.base import word_wrap_css
 
class ItemsWidget(jqGridWidget):
    def prepare(self):
        self.resources.append(word_wrap_css)
        super(ItemsWidget, self).prepare()
    options =  
            'pager': 'item-list-pager2',
            'url': '/items/jqgrid',
            'datatype': 'json',
            'colNames': ['Date', 'Type', 'Area', 'Description'],
The code above is a snippet of the widget I use to make the graph. This is the visual side of the graph and shows just the graph with nothing in it. You need the datatype and url lines in the options which tell the code the url to get the data. I have an items controller and within it there is a jqgrid method. Note the number of columns I have, the data sent by the jqgrid method has to match this. Deep inside the items controller is a jqgrid method. The idea is to return some rows of data back to the grid in the exact way the grid expects it otherwise you get, yep more empty grids.
   @expose('json')
    def jqgrid(self, page=1, rows=30, sidx=1, soid='asc', _search='false',
            searchOper=u'', searchField=u'', searchString=u'', **kw):
 
        qry = DBSession.query(Item)
        qry = qry.filter()
        qry = qry.order_by()
        result_count = qry.count()
        rows = int(rows)
 
        offset = (int(page)-1) * rows
        qry = qry.offset(offset).limit(rows)
 
        records = [ 'id': rw.id,
           'cell': [ rw.created.strftime('%d %b %H:%M:%S'), rw.item_type.display_name), rw.display_name, rw.text()]  for rw in qry]
        total = int(math.ceil(result_count / float(rows)))
        return dict(page=int(page), total=total, records=result_count, rows=records)
The four items in the value for the cell in the dictionary must equal the number defined for the colNames. I found it was useful to have firebug looking at my gets and another widget based upon SQLAjqGridWidget which is a lot simpler to setup but much less flexible too.

Next.

Previous.