
LED Fireworks. Or, parent helpers go overboard
My friend, Mike Ward, and I help out at our kids school by teaching
5th and 6th graders programming in conjunction with a Lego class. For
several years, I was teaching Logo on ancient Apple II machines. The
teacher had a great curriculum and the kids learned a lot, but
this year we decided to switch things around and try them out on
Arduinos.
This spring, the kids are building a Lego display centered around
a birthday party theme for the star elephant at the Oregon Zoo
(Packy), who turned 50 last weekend. In a moment of fun, I suggested
that perhaps we should have some fireworks, along with the presents
and birthday cake. How hard could it be to wire up a couple of LEDs to
an Arduino to make something that looked like fireworks?
Selecting parts.
Mike and I sat down to order some parts from Digikey. We found these
nice, cheap,
LED drivers from Sharp.
Then we found a selection of
LEDs from Cree
along with current-programming resistors (12.7k ) to drive the LEDs at
20mA, and some bypass caps (0.1 F) to keep the parts happy.
The LED drivers are simple shift registers, with separate clock and
data. They have both input and output pins, so you can daisy chain
them and drive as many as you like from a single pair of CPU pins. We
figured 160 LEDs would be plenty, so we ordered 10 chips.
The LED drivers came in a through-hole, DIP package; it seemed like
we d be able to just stuff them into a breadboard and quickly wire
things up.
Prototyping the design
The LED driver chips turn out to use a much finer pitch package than
the usual 0.1 spacing. There s no way we could stuff them into a
breadboard and quickly wire things up. Obviously, a bit more care
while ordering would have uncovered this, but my experience with
through-hole parts is limited to parts from the mid 1970s
I soldered extension wires onto one chip to test the circuit, and
managed to get one chip talking to an Arduino. Here s a short movie of
that in action:
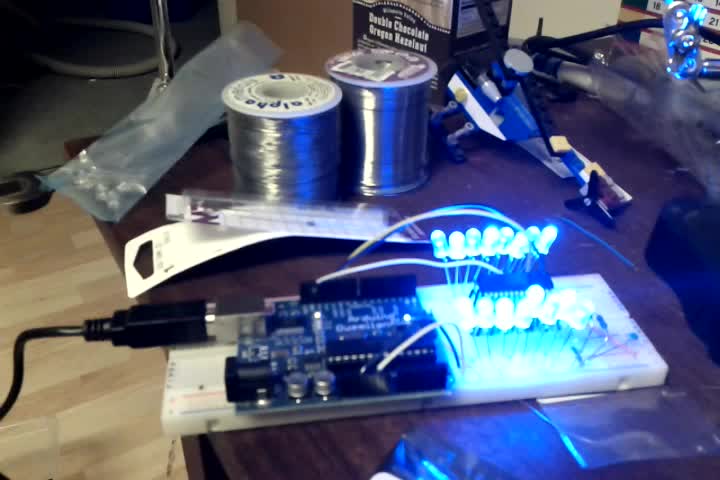
You can see the LED driver chip sitting on a set of extension leads
plugged into the breadboard. It s hooked to the SPI port on the
Arduino board, with the clock set as fast as it will go. If you
watch the video, you can see that the LEDs actually vary in
brightness. They re actually being pulse-width modulated. Clocked at
2MHz, there s enough bandwidth in the SPI bus to drive 160 LEDs with
127 discrete pulse widths at nearly 100Hz (100 * 127 * 160 = 2032000).
Is bread boarding practical?
With the chip propped up on its extension wires, and the LEDs plugged
in, the whole setup was not surprisingly fragile. Getting five
of these chips wired up and running for the length of the Lego show
(one day at school and two days at the zoo) seemed unlikely. So, we
decided to build some custom circuit boards.
Using the GEDA tools to make circuit boards
My business partner, Bdale Garbee, and I build rocketry electronics
through
Altus Metrum. He s the hardware guy
and I spend my weekends writing firmware for various
micro-controllers. Of course, I use free software tools for the
firmware, and Bdale uses the free
gEDA tools
for the hardware. I ve gotten vaguely familiar with those by helping
Bdale review circuit diagrams and PC board layout over the years. So I
figured I d be able to learn a bit more about them and come up with
some designs.
I decided to stick two LED drivers on each board. As the chips can
drive each LED with up to 50mA of current, each board could
potentially consume 1.6A at 5V. Sticking a linear regulator on each
board capable of supplying that much current would have required a
hefty heat sink. Instead, I decided to stick a mini USB connector on
the board and use some cheap USB power supplies.
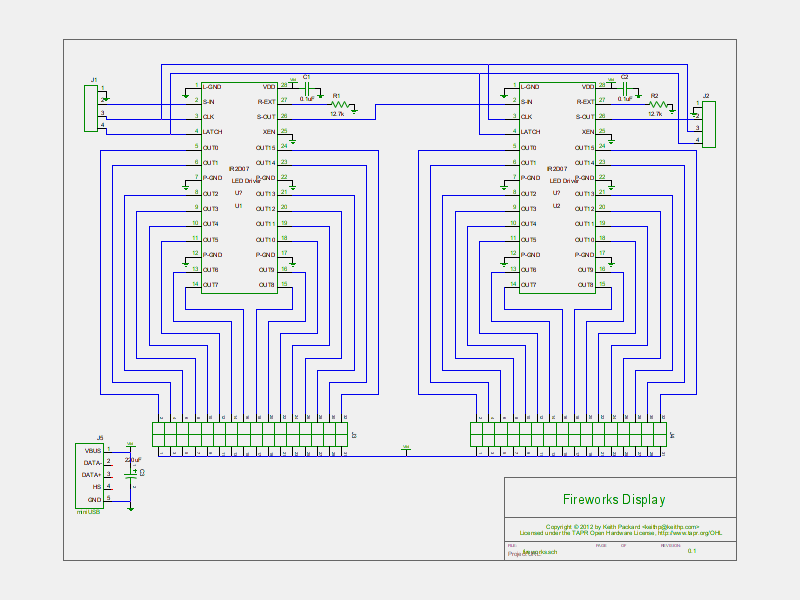
Of course, there wasn t a pre-packaged schematic symbol or footprint
for the LED driver, so I first had to construct those. But, with
symbols for all of the parts I used available, I drew this circuit:
Wiring up 32 LEDs
It s really easy to draw wires showing 32 LEDs hooked up to each
board. Actually selecting connectors that can be easily hooked up took
a bit more time. The idea of crimping individual two-pin connectors
for 160 LEDs didn t seem like fun, plus individual connectors were
going to cost a small fortune (the best option I found would have cost
about $0.40 per LED). Bdale suggested using ribbon cable with a
crimp-on connector crimp a connector across the whole cable and
then split out two-wire sets for each LED. I d still have to
individually solder each LED to the wire, but on the board end, all
I d have to do is crimp the connector on to the cable.
Designing the circuit boards
The gEDA tools separate schematic design and PCB layout into two
separate tools; the schematic program, gschem, exports a netlist and
set of components which the schematic program, PCB, can import. This
sounded a bit clunky to me, as you have to re-export and re-import the
schematic data into the PCB each time you make changes, but it seems
to work reasonably well in practice.
The first time the schematic data is imported to the PCB tool, all of
the component footprints are simply stacked on top of one
another. With those moved to sensible locations, the tool will show
rats for each netlist.
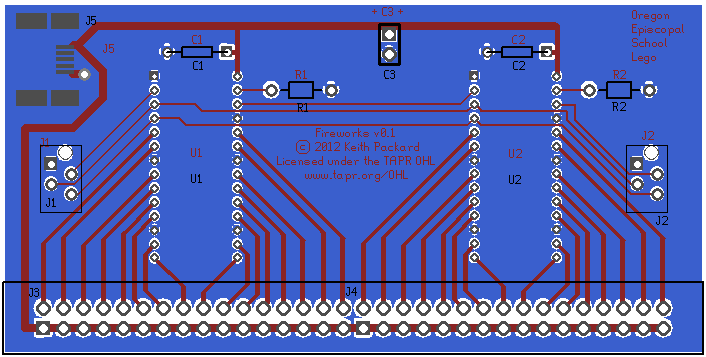
Having drawn the schematic with symbols that strongly resembled the
actual components, it was pretty easy to work through the rats one at
a time by painting copper on the board. I d noticed that all of the
signals could easily be routed on one side of the board, so I flooded
the back side with a ground plane to keep things quiet.
The final circuit board design looks like this:
Circuit boards.
All Altus Metrum products are manufactured by Advanced Circuits, and
we ve been quite happy with them. They offer a cheap and fast
prototyping service through their
barebonespcb.com site. These boards are two
layers with no silk screen or solder mask.
I uploaded my design and in a couple of days I got back some shiny
circuit boards:
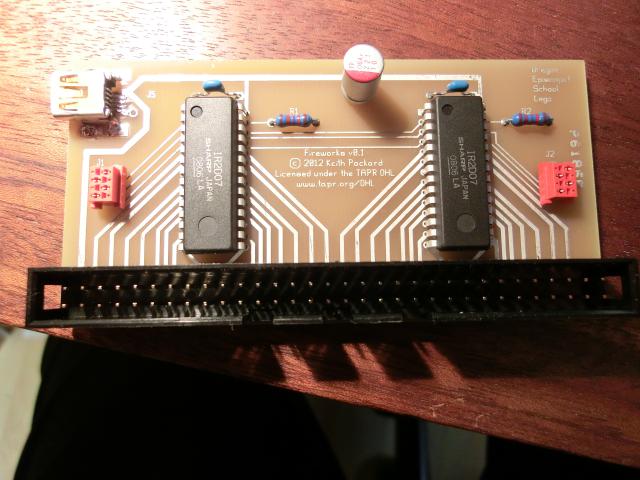
The footprint I designed for the LED drivers turned out to have a very
small gap between the pads for each pin and the ground plane. This
lead to a couple of shorted pins in the five boards, which were pretty
easy to diagnose as the LED driven by that pin would be stuck on.
Here s another picture with the ribbon cable connected and an LED lit
up:
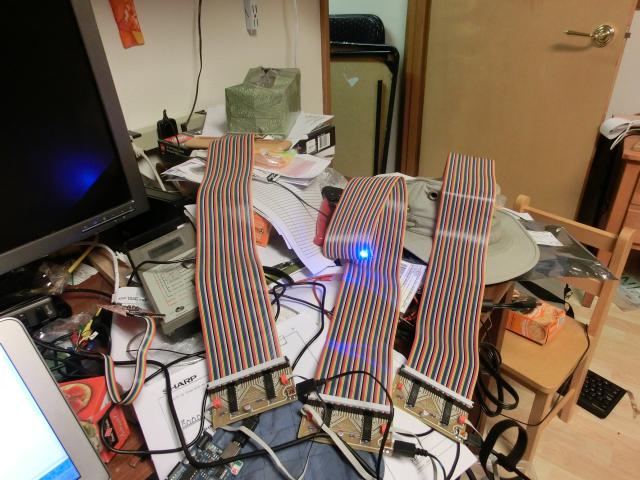
Mounting the LEDs
I started by writing
a small nickle program to
simulate the trajectory of a ballistic fireworks shell followed by an
explosion at apogee and subsequent ballistic tracks for the resulting
pieces. I made the initial conditions of the launch somewhat random,
and Mike and I sat and watched that draw things until we saw a couple
that looked good . The output from that was a series of X/Y locations
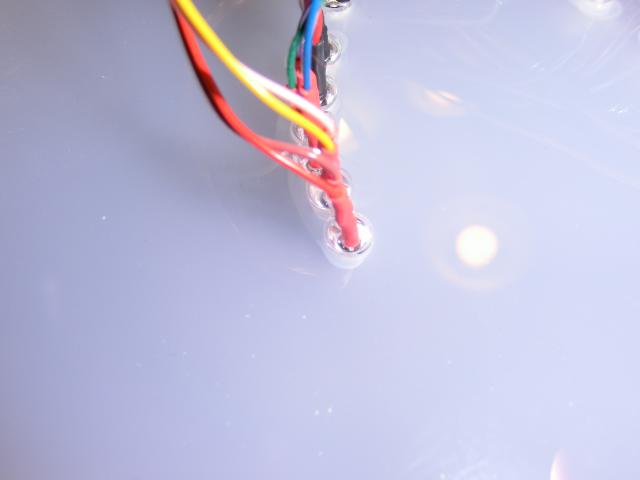
spaced uniformly in time. Mike used those to drill holes in a piece of
acrylic from TAP plastics. He glued the LEDs into that with some white
glue (so that we have a chance of getting them back out):
A custom maple box?
I spent last weekend visiting my father for his birthday. Meanwhile,
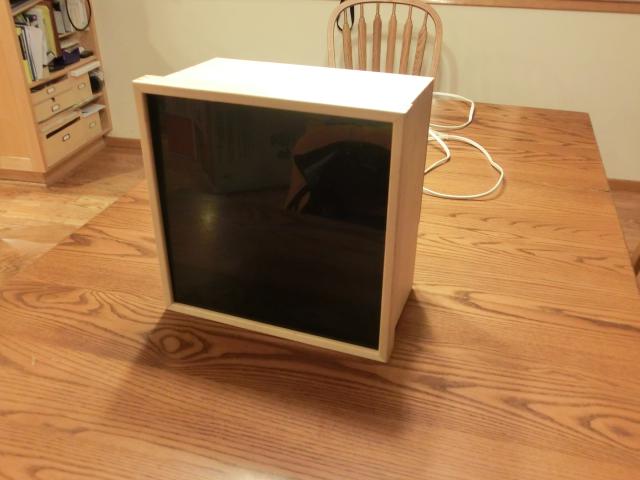
Mike was busy back home building a case for the project. I got home
and found that he had fabricated a solid maple case. It s beautiful,
and holds all of the LEDs, boards, wires and a couple of 4-outlet USB
power supplies.
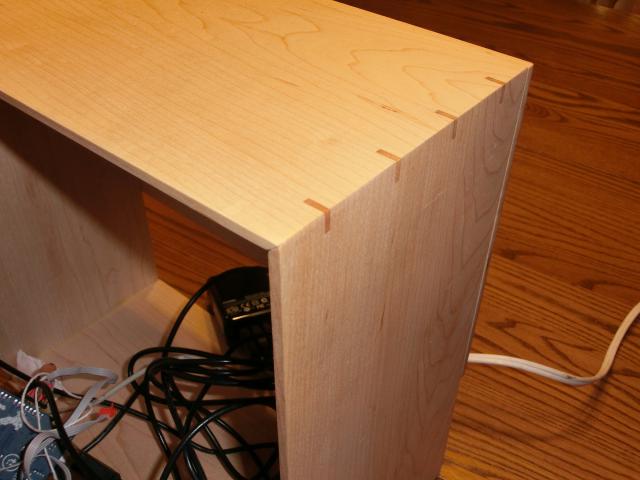
Here s a picture of the joint he made in the box corners:
The finished product
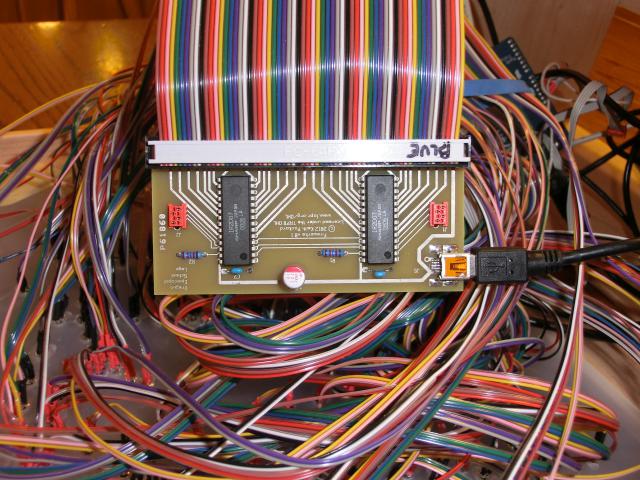
Here s the inside of the box:
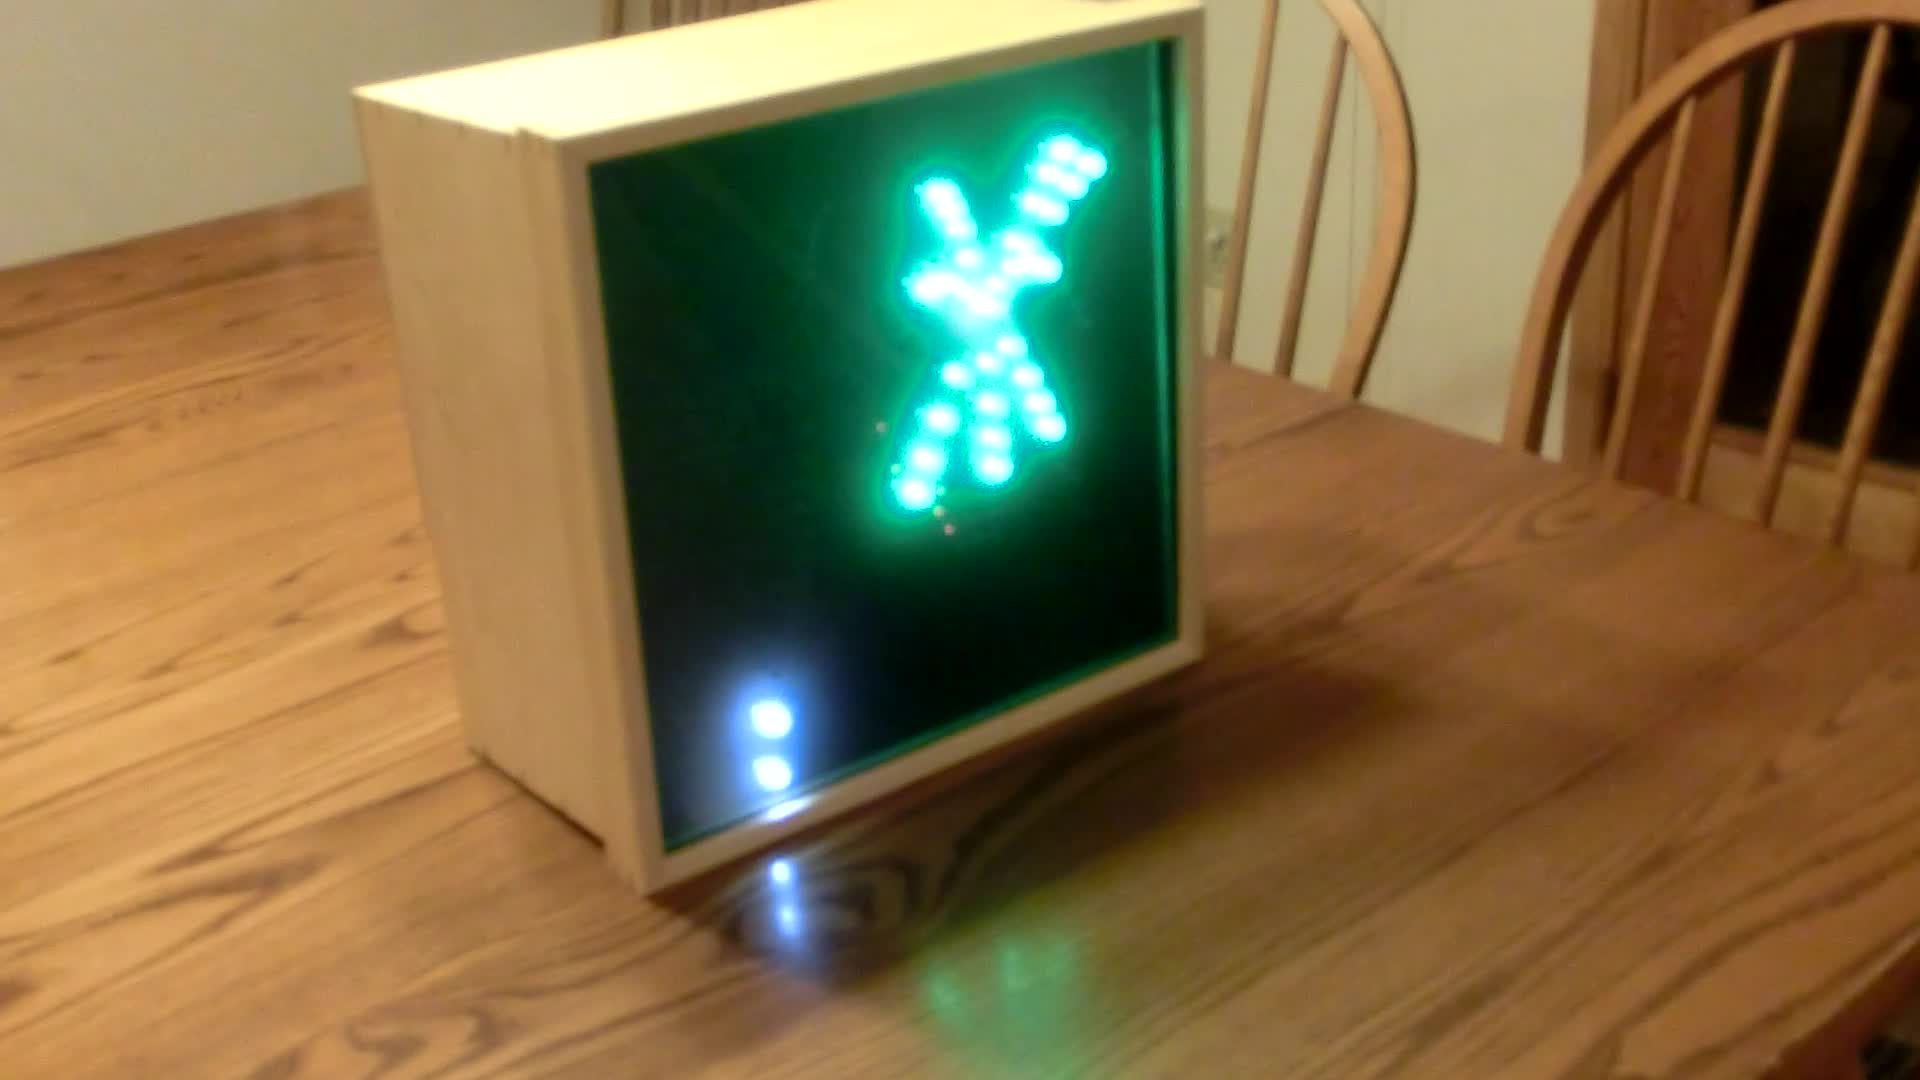
And here s a movie of the whole thing in action. It s missing 8 white
LEDs; I hadn t ordered enough from Digikey.
Downloading schematics and PCB artwork
The hardware design is licensed under the
TAPR Open Hardware License. It s all stored
in git (of course):
git://keithp.com/git/hw/fireworks
All of the symbols I created are also available through git:
git://keithp.com/git/hw/keithp
Things I d do differently
One of the frustrating things about moving atoms around instead of
just bits is that once you ve got a physical artifact, it s really
expensive to change it. There are a couple of minor things I would
change if I were going to build more of these:
- Add mounting holes. Not having any way to mount the boards means
that they re flopping around inside the cabinet. We ll probably
find a way to tie them down somehow, but a couple of holes in the
boards would have made that really easy.
- Increase the gap between the pin pads and the ground plane. The
narrow space provided ample opportunity for solder bridges. I ve
increased that spacing in the git repository version of the
boards.
- Used a variable resistor for LED current control. With a fixed
value, it s very difficult to adjust the relative brightness of the
LEDs. Even though we used LEDs from the same series, the different
colors have different apparent brightness.
- Used surface mount passives. We had bought through-hole parts when
the plan was to build these on a breadboard, but soldering
through-hole parts onto the board is more work than using surface
mount parts. 0805 (or even 1206) parts are plenty large to solder
by hand and are faster to deal with than having to fold leads,
insert them into holes, flip the boards over, solder them down and
trim the leads.
- Perhaps we went a bit overboard on this project
Things that worked well
There were a couple of things that went better than I had expected:
- The gEDA tools aren t that hard to use. Constructing the circuit
board really was a simple matter of painting with copper. If you
can drive inkscape, you can make circuit boards.
- Advanced Circuits bare-bones PCB service. It was really cool to
upload the output files from gEDA and have actual boards arrive in
the mail a couple of days later.
- Building the boards. I really didn t expect all of the components
to just fit in the boards; I figured I d mess up the footprints
or drill sizes and end up kludging something onto the
boards. Bdale did catch a small drill size on the LED driver pins,
which I bumped up a bit, but other than that, all of the parts
slipped in and soldered easily. Each board took about 10 minutes to
put together.
 Julien Cristau reported Debian bug
#670000 on Sunday April 22th, against libgtkada.
This bug is indeed part of a MBF for packages that are "marked as
Multi-Arch: same, but contain files in arch-independent paths with
arch-specific contents"
(doh, these multi-arch things are sometimes giving me headaches!)
Bug #660000 was reported as of February 15th: 2 months and 7 days
for 10,000 bugs. As expected, QA work and release preparation do
trigger an increase in bug report rate and we're now again quite close
from the "10,000 bugs in two months mark".
I forgot to report that bug #666666 has been reported in the meantime.
This time by one of the top bug reporters in Debian, namely Lucas
Nussbaum, during one of his archive-wide package rebuilds, against
psimedia.
Next step will be bug #680000, targeted in June 2012. With this rate,
bug #700000 should be reported around mid-November 2012 and Kartik
Mistry would win the Bug #700000
prediction contest".
In the meantime, Launchpad will have reached bug #1000000 (the highest
bug number is currently #986849....which will be no longer true by the
time you read this). The rate in LP is currently about 20,000 bugs per
month. I wonder how many of these are closed as I feel
like this is humanly impossible to process that many bug reports.
 Work on my bathroom continues. I had expected it to be complete on Friday but it lookse like the new completion date will be Tuesday or Wednesday.
It will be very nice to have a working shower, and a toilet I don't need to "flush" with a bucket.
The only interesting thing I've been doing is planning on a kernel to support long-term for some poor unfortunate souls who cannot use Debian-based kernels.
I know building, supporting, and maintaining a kernel will be a pain. But at the moment it looks like a valid thing to be suggesting.
Otherwise life goes on. I've been hit by the DIY bug, largely as the result of seeing all the bathroom work going on, and figuring I was going to live with dust/mess anyway - so I've erected some more book-shelves, and ordered a pair of ceiling fans.
The only other thing to report is that I've started deleting emails. (shock!)
I look after a few machines for myself, friends and so on. Each one will send me automated emails at times. I've got them going back years - but no longer:


 Just a short update for those who are wondering what is Kannada Dictionary bot, it is
a small Jabber chat bot written in Python which pulls out meaning for given English or Kannada
word from


 S more days, s more patches:
Hacked out a few over the last few days, this time, to some good eats. I m making a habit of this tv-hack-time thing.
 I've just read and enjoyed
 I came across this article today and really found it noteworthy:


 I did sort of commit to at least trying to add support for Android string resource to
 Earlier today, Conrad Sanderson released another bug-fix version 3.0.2 for
the still fairly recent 3.0.0 version of his excellent


 Just for reference,