co2mon.nz currently uses monitors based on Oliver Seiler s open source design which I am personally building. This post describes my exploration of how to achieve production of a CO2 monitor that could enable the growth of co2mon.nz.
Goals
Primarily I want to design a CO2 monitor which allows the majority of the production process to be outsourced. In particular, the PCB should be able to be assembled in an automated fashion (PCBA).
As a secondary goal, I d like to improve the aesthetics of the monitor while retaining the unique feature of displaying clear visual indication of the current ventilation level through coloured lights.
Overall, I ll consider the project successfull if I can achieve a visually attractive CO2 monitor which takes me less than 10 minutes per monitor to assemble/box/ship and whose production cost has the potential to be lower than the current model.
PCB
Schematic
The existing CO2 monitor design provides a solid foundation but relies upon the ESP32 Devkit board, which is intended for evaluation purposes and is not well suited to automated assembly. Replacing this devkit board with the underlying ESP32 module is the major change needed to enable PCBA production, which then also requires moving the supporting electronics from the devkit board directly onto the primary PCB.
The basic ESP32 chipset used in the devkit boards is no longer available as a discrete module suitable for placement directly onto a PCB which means the board will also have to be updated to use a more modern variant of the ESP32 chipset which is in active production such as the ESP32-S3. The ESP32-S3-WROOM1-N4 module is a very close match to the original devkit and will be suitable for this project.
In addition to the change of ESP module, I made the following other changes to the components in use:
Added an additional temperature/humidity sensor (SHT30). The current monitors take temperature/humidity measurements from the SCD40 chipset. These are primarily intended to help in the calculation of CO2 levels and rely on an offset being subtracted to account for the heat generated by the electronic components themselves. I ve found their accuracy to OK, but not perfect. SHT30 is a cheap part, so its addition to hopefully provide improved temperature/humidity measurement is an easy choice.
Swapped to USB-C instead of USB-B for the power connector. USB-C is much more common than USB-B and is also smaller and not as tall off the board which provides more flexibility in the case design.
With major components selected the key task is to draw the schematic diagram describing how they electrically connect to each other, which includes all the supporting electronics (e.g. resistors, capacitors, etc) needed.
I started out trying to use the EasyEDA/OSHWLab ecosystem thinking the tight integration with JLCPCB s assembly services would be a benefit, but the web interface was too clunky and limiting and I quickly got frustrated. KiCad proved to be a much more pleasant and capable tool for the job.
The reference design in the ESP32 datasheet (p28) and USB-C power supply examples from blnlabs were particularly helpful alongside the KiCad documentation and the example of the existing monitor in completing this step (click the image to enlarge).
Layout
The next step is to physically lay out where each component from the schematic will sit on the PCB itself. Obviously this requires first determining the overall size, shape and outline of the board and needs to occur in iteration with the intended design of the overall monitor, including the case, to ensure components like switches and USB sockets line up correctly.
In addition to the requirements around the look and function of the case, the components themselves also have considerations that must be taken into account, including:
For best WiFi reception, the ESP32 antenna should be at the top of the monitor and should not have PCB underneath it, or for a specified distance either side of it.
The SHT30 temperature sensor should be as far from any heat generating components (e.g. the ESP32, BME680 and SCD40 modules) as possible and also considering that any generated heat will rise, as low on the monitor as possible.
The sensors measuring the air (SCD40, BME680 and SHT30) must have good exposure to the air outside the case.
Taking all of these factors into account I ended up with a square PCB containing a cutout in the top right so that the ESP32 antenna can sit within the overall square outline while still meeting its design requirements. The SCD40 and BME680 sit in the top left corner, near the edges for good airflow and far away from the SHT30 temperature sensor in the bottom left corner. The LEDs I placed in a horizontal row across the center of the board, the LCD in the bottom right, a push button on the right-hand side and the USB-C socket in the center at the bottom.
Once the components are placed, the next big task is to route the traces (aka wires) between the components on the board such that all the required electrical connections are made without any unintended connections (aka shorts) being created. This is a fun constraint solving/optimisation challenge and takes on an almost artistic aspect with other PCB designers often having strong opinions on which layout is best. The majority of the traces and routing for this board were able to be placed on the top layer of the PCB, but I also made use of the back layer for a few traces to help avoid conflicts and deal with places where different traces needed to cross each other. It s easy to see how this step would be much more challenging and time consuming on a larger and more complex PCB design.
The final touches were to add some debugging breakouts for the serial and JTAG ports on the ESP32-S3 and a logo and various other helpful text on the silkscreen layer that will be printed on the PCB so it looks nice.
Production
For assembly of the PCB, I went with JLCPCB based out of China. The trickiest part of the process was component selection and ensuring that the parts I had planned in the schematic were available. JLCPCB in conjunction with lcsc.com provides a basic and extended part library. If you use only basic parts you get quicker and cheaper assembly, while using extended parts bumps your order into a longer process with a small fee charged for each component on the board.
Initially I spent a lot of time selecting components (particularly LEDs and switches) that were in the basic library before realising that the ESP32 modules are only available in the extended library! I think the lesson is that unless you re building the most trivial PCB with only passive components you will almost certainly end up in the advanced assembly process anyway, so trying to stay within the basic parts library is not worth the time.
Unfortunately the SCD40 sensor, the most crucial part of the monitor, is not stocked at all by JLCPCB/LCSC! To work around this JLCPCB will maintain a personal component library for you when you ship components to them to for use in future orders. Given the extra logistical time and hassle of having to do this, combined with having a number of SCD40 components already on hand I decided to have the boards assembled without this component populated for the initial prototype run. This also had the benefit of lowering the risk if something went wrong as the cost of the SCD40 is greater than the cost of the PCB and all the other components combined!
I found the kicad-jlcpcb-tools plugin for KiCad invaluable for keeping track of what part from lcsc.com I was planning to use for each component and generating the necessary output files for JLCPCB. The plugin allows you to store these mappings in your actual schematic which is very handy. The search interface it provides is fairly clunky and I found it was often easier to search for the part I needed on lcsc.com and then just copy the part number across into the plugin s search box rather than trying to search by name or component type.
The LCD screen is the remaining component which is not easily assembled onto the PCB directly, but as you ll see next, this actually turned out to be OK as integrating the screen directly into the case makes the final assembly process smoother.
The final surprise in the assembly process was the concept of edge rails, additional PCB material that is needed on either side of the board to help with feeding it through the assembly machine in the correct position. These can be added automatically by JLCPCB and have to be snapped off after the completed boards are received. I hadn t heard about these before and I was a little worried that they d interfere or get in the way of either the antenna cut-out at the top of the board, or the switch on the right hand side as it overhangs the edge so it can sit flush with the case.
In the end there was no issue with the edge rails. The switch was placed hanging over them without issue and snapping them off once the boards arrived was a trivial 30s job using a vice to hold the edge rail and then gently tipping the board over until it snapped off - the interface between the board and the rails while solid looking has obviously been scored or perforated in some way during the production process so the edge breaks cleanly and smoothly. Magic!
The process was amazingly quick with the completed PCBs (picture above) arriving within 7 days of the order being placed and looking amazing.
Case
Design
I mocked up a very simple prototype of the case in FreeCAD during the PCB design process to help position and align the placement of the screen, switch and USB socket on the PCB as all three of these components interface directly with the edges of the case. Initially this design was similar to the current monitor design where the PCB (with lights and screen attached) sits in the bottom of the case, which has walls containing grilles for airflow and then a separate transparent perspex is screwed onto the top to complete the enclosure.
As part of the aesthetic improvements for the new monitor I wanted to move away from a transparent front panel to something opaque but still translucent enough to allow the colour of the lights to show through. Without a transparent front panel the LCD also needs to be mounted directly into the case itself.
The first few prototype iterations followed the design of the original CO2 monitor with a flat front panel that attaches to the rest of the case containing the PCB, but the new requirement to also attach the LCD to the front panel proved to make this unworkable. To stay in place the LCD has to be pushed onto mounting poles containing a catch mechanism which requires a moderate amount of force and applying that force to the LCD board when it is already connected to the PCB is essentially impossible.
As a result I ended up completely flipping the design such that the front panel is a single piece of plastic that also encompasses the walls of the case and contains appropriate mounting stakes for both the screen and the main PCB.
Getting to this design hugely simplified the assembly process. Starting with an empty case lying face down on a bench, the LCD screen is pushed onto the mounting poles and sits flush with the cover of the case - easily achieved without the main PCB yet in place.
Next, the main PCB is gently lowered into the case facing downwards and sits on the mounting pole in each corner with the pins for the LCD just protruding through the appropriate holes in the PCB ready to be quickly soldered into place (this took significant iteration and tuning of dimensions/positioning to achieve!).
Finally, a back panel can be attached which holds the PCB in place and uses cantilever snap joints to click on to the rest of the case.
Overall the design is a huge improvement over the previous case which required screws and spacers to position the PCB and cover relative to the rest of the case, with the spacers and screws being particularly fiddly to work with.
The major concern I had with the new design was that the mount to attach the monitor to the wall has moved from being attached to the main case and components directly to needing to be on the removable back panel - if the clips holding this panel to the case fail the core part of the monitor will fall off the wall which would not be good. To guard against this I ve doubled the size and number of clips at the top of the case (which bears the weight) and the result seems very robust in my testing. To completely assemble a monitor, including the soldering step takes me about 2-3 minutes individually, and would be even quicker if working in batches.
Production
Given the number of design/testing iterations required to fine tune the case I chose not to outsource case production for now and used my 3D printer to produce them. I ve successfully used JLCPCB s 3D printing service for the previous case design, so I m confident that getting sufficient cases printed from JLCPCB or another supplier will not be an issue now that the design is finalised.
I tried a variety of filament colours, but settled on a transparent filament which once combined in the necessary layers to form the case is not actually transparent like perspex is, but provides a nice translucent medium which achieves the goal of having the light colour visible without exposing all of the circuit board detail. There s room for future improvement in the positioning of the LEDs on the circuit board to provide a more even distribution of light across the case but overall I really like the way the completed monitor ends up looking.
Evaluation
Building this monitor has been a really fun project, both in seeing something progress from an idea, to plans on a screen to a nice physical thing on my wall, but also in learning and developing a bunch of new skills in PCB design, assembly and 3D design.
The goal of having a CO2 monitor which I can outsource the vast majority of production of is as close to being met as I think is possible without undertaking the final proof of placing a large order. I ve satisfied myself that each step is feasible and that the final assembly process is quick, easy and well below the level of effort and time it was taking me to produce the original monitors.
Cost wise it s also a huge win, primarily in terms of the time taken, but also in the raw components - currently the five prototypes I ordered and built are on par with the component cost of the original CO2 monitor, but this will drop further with larger orders due to price breaks and amortisation of the setup and shipping expenses across more monitors.
This project has also given me a much better appreciation for how much I m only just scratching the surface of the potential complexities and challenges in producing a hardware product of this type.
I m reasonably confident I could successfully produce a few hundred and maybe even a few thousand monitors using this approach, but it s also clear that getting beyond that point is and would be a whole further level of effort and learning.
Hardware is hard work. That s not news to anyone, including me, but there is something to be said for experiencing the process first hand to make the reality of what s required real.
The PCB and case designs are both shared and can be found at https://github.com/co2monnz/co2monitor-pcb and https://github.com/co2monnz/cad, feedback and suggestions welcome!
While travel these days is much reduced I still end up in Dublin regularly enough (though less so now I m not working directly with folk there), and have the occasional US trip. Given that I live and work in the UK, and thus get paid in GBP ( ), this leads to the question of what to do about USD ($) and EUR ( ) transaction. USD turns out to be easy; I still have a US account from when I lived there and keeping it active has, so far, not proved to be a problem.
EUR is tricker. In an ideal world I d find a fee-free account that would allow normal Eurozone transfers and provide me with a suitable debit + credit card for use while travelling. I ve found options with a fee, but I don t have enough Euro transactions to make it worthwhile.
A friend pointed me at the HSBC Global Money debit card, which claims no fees for currency conversions from and competitive rates. As I already have an account with HSBC it was easy to sign up to try it out. And, having recently been on trip to CenterParcs, I had the perfect opportunity to compare it to my (and my wife s) existing cards to see how the rates played out. In particular I ve always meant to figure out if the cards that don t charge a loading rate end up with the same exchange rate as the cards that do have a separate per transaction charge.
So, armed with the HSBC Global Money card, a Monzo debit card, a Nationwide debit card, and a co-operative debit card, we engage on a week of eating out in the interests of data!
The results will probably shock no one who s properly looked into this themselves. All the cards were on the VISA network, they all ended up at around 1 1.15. According to Xe that was roughly the mid-market rate for the week I was away, so it seems like trusting VISA to do the currency conversion is a reasonable thing to do. The problem comes with the range of charges:
Card
Exchange rate
Charge %
Co-Op
1.15
2.65%
HSBC
1.15
0.00%
Monzo
1.15
0.00%
Nationwide
1.15
2.99%
This matches what Nationwide claims for its foreign transaction fees, though Co-Op claims 2.75% and the numbers looked more like 2.65% on the small transactions we incurred.
So, the HSBC Global Money card is definitely a decent option. However Monzo is just a good, and has the advantage that it s a normal current account rather than something slightly different you have to funnel money into. Both are let down by the fact you need to use an app to check your balance etc - Monzo seems to only have extremely basic web access to any of their accounts and HSBC don t expose the Global Money account at all via web banking, only the phone app.
Finally, what I really want is to be able to do this with a credit card, especially for things like online purchases or staying at hotels. My current credit card suffers from a per-transaction charge, but while looking up the Nationwide debit charge %age to confirm it matched what I saw I discovered that Nationwide credit cards do not charge a fee. So I think I ll be investigating that for my next trip.
After holding the domain copyninja.info for almost 15 years, I finally let it
expire and bought a new domain, copyninja.in. With this move, I also bid
goodbye to my VPS, which I had been using for over 12 years on DigitalOcean.
This particular VPS was initially set up with Debian Wheezy (7) and had been
upgraded over the years to successive Debian versions and finally was running
Debian Bullseye (11).
The main reason for the move was that the .info domain was becoming more
expensive every year, and the VPS, which I had upgraded to the $10 USD range,
cost around $12 USD per month with GST included. Since I wasn't really using the
VPS anymore and had recently even broken my DNS and mail server settings, I
decided it was the right time to reduce this additional cost.
Now I have a cheaper .in domain, and the VPS is on a minimal configuration at
DigitalOcean, costing $5 USD per month (which becomes almost $7 USD with GST).
Currently, I only run a blog and mail server on this VPS. I will assess if I
really need to keep running the mail server for some more time. If not, I will
move the blog to a hosting service like GitHub Pages and completely get rid of
the VPS.
My email address has now changed, and the new mail can be obtained from this
link <http://scr.im/newcopyninj>. I have updated my GPG key and added the new
email as the new UID. I still need to revoke the old domain UID. The key has
already been updated in the Debian Keyring.
Arkady Martine is the author of the wonderful Teixcalaan duology, a political space opera. Rose/House is a
standalone science fiction novella in an entirely different subgenre.
Basit Deniau was a legendary architect whose trademark was infusing his
houses with artificial intelligences. A house AI is common in this future
setting, but what Deniau did was another kind of genius. He has been dead
for a year when this story opens. The carbon of his body has been
compressed into diamond and displayed on a plinth deep inside his final
creation. Rose House.
Dr. Selene Gisil was his student. It was not a comfortable relationship.
She is now the only person permitted entry into Rose House, allowed to
examine its interior architecture and the archive of Deniau's work that is
stored there. Once per year, she may enter for precisely one week. No
one else in the world is permitted to enter, ever.
Selene went in the first time she was allowed. She lasted three days
before fleeing.
There is a law in the United States, the Federal Artificial Intelligence
Surveillance Act, that sets some requirements for the behavior of
artificial intelligences. One of its requirements is a duty-of-care
notification: an artificial intelligence must report the presence of a
dead body to the nearest law enforcement agency. Rose House's call to the
China Lake Police Precinct to report the presence of a dead body in the
sealed house follows the requirements of the law to the letter.
"Cause of death," said Maritza.
I'm a piece of architecture, Detective. How should I know how
humans are like to die?
After that the line went to the dull hang-up tone, and Rose House
would not take her return calls. Not even once.
Rose/House has some of the structure of a locked-room mystery.
Someone is dead, but no one at the scene can get inside the house to see
who. Selene is the only person who can enter, but she was in Turkey at
the time of the killing and has an air-tight alibi. How could someone be
in the house at all? And how did they die?
It also has some of the structure of a police procedural. First one and
then the other detective of the tiny local precinct are pulled into the
investigation, starting, as one might expect, by calling Selene Gisil.
But I'm not sure I would describe this novella as following either of
those genres. By the end of the story, we do learn some of the things one
might expect to learn from a detective novel, but that never felt like the
true thrust of the story. If you want a detailed explanation of what
happened, or the pleasure of trying to guess the murderer before the story
tells you, this may not be the novella for you.
Instead, Martine was aiming for disturbing eeriness. This is not quite
horror nothing explicitly horrific happens, although a couple of scenes
are disturbing but Rose House is deeply unsettling. The best character
of the story is Maritza, the detective initially assigned to the case, who
is trying to ignore the weirdness and do her job. The way she approaches
that task leads to some fascinating interactions with Rose House that I
thought were the best parts of the story.
This story was not really my thing, even though I love stories about
sentient buildings and there are moments in this story where Rose House is
delightfully nonhuman in exactly the way that I enjoy. The story is told
in a way that requires the reader to piece together the details of the
conclusion themselves, and I prefer more explicit explanation in stories
that start with a puzzle. It's also a bit too close to horror for me,
specifically in the way that the characters (Selene most notably) have
disturbing and oddly intense emotional reactions to environments that are
only partly described. But I read this a few weeks ago and I'm still
thinking about it, so it clearly is doing something right.
If you like horror, or at least half-explained eeriness, it's likely you
will enjoy this more than I did. This portrayal of AI is an intriguing
one, and I'd enjoy reading more about it in a story focused on character
and plot rather than atmosphere.
Rating: 6 out of 10
A problem with a lot of the purchase of peripherals is that they don t match the needs of the users and often get thrown away long before they wear out.
At many companies when a new employee starts they are given a laptop (expensive corporate asset), a cheap headset for video calls, and optionally a keyboard and mouse for people who don t like the laptop keyboard and/or touchpad.
When an employee leaves the company their laptop can be assigned to someone else if it isn t too old. Headsets and mice often show signs of wear if they have been used for a year or two and while keyboards often have a long service life they will be dirty after a couple of years and they are cheap to replace. So every time someone leaves and returns all company hardware there will be a headset and mouse owned by the company that ends up as e-waste and sometimes a keyboard too. Often people leave and just keep the headset, mouse, and keyboard expecting that no-one at their former employer will demand them back this is a reward for dishonesty.
Buying the keyboards, mice, and headsets in bulk allegedly makes it easy to support them, but supporting such devices isn t difficult and the IT staff end up fielding complaints because the devices they issue don t match the preferences of the workers. These devices have the worst ratio of value to complaints of anything a typical company supports.
I believe that the best solution to all these problems is to not buy those items for employees but to instead give them a sum of money sufficient to buy cheap items in each category (EG $60 for keyboard, mouse, and headset) and let them buy whichever they choose. If they want something more expensive (Bose headset, split keyboard, or gamer mouse) them they can spend their own money to do so (and claim a tax deduction). Then when people leave the company they can take those items with them and save the company the expense of waste disposal while also not rewarding dishonesty. An additional benefit for the company is that it can reduce the issues of complying with disability legislation, anyone who already owns such hardware can just keep the money.
The current situation is bad for morale, a waste of time for IT workers, and contributes to the waste problem.
Related posts:
IT Asset Management In my last full-time position I managed the asset tracking...
Furious Heaven is the middle book of a trilogy and a direct sequel
to Unconquerable Sun. Don't start here.
I also had some trouble remembering what happened in the previous book
(grumble recaps mutter), and there are a lot of threads, so I would try to
minimize the time between books unless you have a good memory for plot
details.
This is installment two of gender-swapped Alexander the Great in space.
When we last left Sun and her Companions, Elliott had established the
major players in this interstellar balance of power and set off some
opening skirmishes, but the real battles were yet to come. Sun was trying
to build her reputation and power base while carefully staying on the good
side of Queen-Marshal Eirene, her mother and the person credited with
saving the Republic of Chaonia from foreign dominance. The best parts of
the first book weren't Sun herself but wily Persephone, one of her
Companions, whose viewpoint chapters told a more human-level story of
finding her place inside a close-knit pre-existing friendship group.
Furious Heaven turns that all on its head. The details are
spoilers (insofar as a plot closely tracking the life of Alexander the
Great can contain spoilers), but the best parts of the second book are the
chapters about or around Sun.
What I find most impressive about this series so far is Elliott's ability
to write Sun as charismatic in a way that I can believe as a reader. That
was hit and miss at the start of the series, got better towards the end of
Unconquerable Sun, and was wholly effective here. From me, that's
high but perhaps unreliable praise; I typically find people others
describe as charismatic to be some combination of disturbing,
uncomfortable, dangerous, or obviously fake. This is a rare case of
intentionally-written fictional charisma that worked for me.
Elliott does not do this by toning down Sun's ambition. Sun, even more
than her mother, is explicitly trying to gather power and bend the
universe (and the people in it) to her will. She treats people as
resources, even those she's the closest to, and she's ruthless in pursuit
of her goals. But she's also honorable, straightforward, and generous to
the people around her. She doesn't lie about her intentions; she follows
a strict moral code of her own, keeps her friends' secrets, listens
sincerely to their advice, and has the sort of battlefield charisma where
she refuses to ask anyone else to take risks she personally wouldn't take.
And her use of symbolism and spectacle isn't just superficial; she finds
the points of connection between the symbols and her values so that she
can sincerely believe in what she's doing.
I am fascinated by how Elliott shapes the story around her charisma.
Writing an Alexander analogue is difficult; one has to write a tactical
genius with the kind of magnetic attraction that enabled him to lead an
army across the known world, and make this believable to the reader.
Elliott gives Sun good propaganda outlets and makes her astonishingly
decisive (and, of course, uses the power of the author to ensure those
decisions are good ones), but she also shows how Sun is constantly
absorbing information and updating her assumptions to lay the groundwork
for those split-second decisions. Sun uses her Companions like a
foundation and a recovery platform, leaning on them and relying on them to
gather her breath and flesh out her understanding, and then leaping from
them towards her next goal. Elliott writes her as thinking just a tiny
bit faster than the reader, taking actions I was starting to expect but
slightly before I had put together my expectation. It's a subtle but
difficult tightrope to walk as the writer, and it was incredibly effective
for me.
The downside of Furious Heaven is that, despite kicking the action
into a much higher gear, this book sprawls. There are five viewpoint
characters (Persephone and the Phene Empire character Apama from the first
book, plus two new ones), as well as a few interlude chapters from yet
more viewpoints. Apama's thread, which felt like a minor subplot of the
first book, starts paying off in this book by showing the internal
political details of Sun's enemy. That already means the reader has to
track two largely separate and important stories. Add on a Persephone
side plot about her family and a new plot thread about other political
factions and it's a bit too much. Elliott does a good job avoiding reader
confusion, but she still loses narrative momentum and reader interest due
to the sheer scope.
Persephone's thread in particular was a bit disappointing after being the
highlight of the previous book. She spends a lot of her emotional energy
on tedious and annoying sniping at Jade, which accomplishes little other
than making them both seem immature and out of step with the significance
of what's going on elsewhere.
This is also a middle book of a trilogy, and it shows. It provides a
satisfying increase in intensity and gets the true plot of the trilogy
well underway, but nothing is resolved and a lot of new questions and plot
threads are raised. I had similar problems with Cold Fire, the middle book of the other Kate Elliott trilogy I've
read, and this book is 200 pages longer. Elliott loves world-building and
huge, complex plots; I have a soft spot for them too, but they mean the
story is full of stuff, and it's hard to maintain the same level of reader
interest across all the complications and viewpoints.
That said, I truly love the world-building. Elliott gives her world
historical layers, with multiple levels of lost technology, lost history,
and fallen empires, and backs it up with enough set pieces and fragments
of invented history that I was enthralled. There are at least five major
factions with different histories, cultures, and approaches to technology,
and although they all share a history, they interpret that history in
fascinatingly different ways. This world feels both lived in and full of
important mysteries.
Elliott also has a knack for backing the ambitions of her characters with
symbolism that defines the shape of that ambition. The title comes from a
(translated) verse of an in-universe song called the Hymn of Leaving,
which is sung at funerals and is about the flight on generation ships from
the now-lost Celestial Empire, the founding myth of this region of space:
Crossing the ocean of stars we leave our home behind us.
We are the spears cast at the furious heaven
And we will burn one by one into ashes
As with the last sparks we vanish.
This memory we carry to our own death which awaits us
And from which none of us will return.
Do not forget. Goodbye forever.
This is not great poetry, but it explains so much about the psychology of
the characters. Sun repeatedly describes herself and her allies as spears
cast at the furious heaven. Her mother's life mission was to make Chaonia
a respected independent power. Hers is much more than that, reaching back
into myth for stories of impossible leaps into space, burning brightly
against the hostile power of the universe itself.
A question about a series like this is why one should want to read about a
gender-swapped Alexander the Great in space, rather than just reading
about Alexander himself. One good (and sufficient) answer is that both
the gender swap and the space parts are inherently interesting. But the
other place that Elliott uses the science fiction background is to give
Sun motives beyond sheer personal ambition.
At a critical moment in the story, just like Alexander, Sun takes a detour
to consult an Oracle. Because this is a science fiction novel, it's a
great SF set piece involving a mysterious AI. But also because this is a
science fiction story, Sun doesn't only ask about her personal ambitions.
I won't spoil the exact questions; I think the moment is better not
knowing what she'll ask. But they're science fiction questions, reader
questions, the kinds of things Elliott has been building curiosity about
for a book and a half by the time we reach that scene. Half the fun of
reading a good epic space opera is learning the mysteries hidden in the
layers of world-building. Aligning the goals of the protagonist with the
goals of the reader is a simple storytelling trick, but oh, so effective.
Structurally, this is not that great of a book. There's a lot of build-up
and only some payoff, and there were several bits I found grating. But I
am thoroughly invested in this universe now. The third book can't come
soon enough.
Followed by Lady Chaos, which is still being written at the time of
this review.
Rating: 7 out of 10
My old Thinkpad X220 has been slowly dying1 and as much as it makes me
sad, it is also showing its age in terms of computational power. As such, I've
pre-ordered a Framework 13 (the AMD version) and plan to retire my X220 when I
get it.
One thing I will miss from that laptop is the keyboard. At work, I dock it (on
the amazing Thinkpad dock), which lets me use the keyboard while working on a
larger monitor.
I could probably replicate this setup with the Framework, but I'm not a fan of
trackpads. So I built a keyboard. A nice one. One with a trackpoint.
If you follow Debian Planet, you may have seen the Tex Shinobi when Jonathan
Dowland featured it on his blog back in January. It is a Tenkeyless
board (saving me precious space at work) and is everything you would want from
a old-school Thinkpad keyboard replacement.
Since I had no previous experience with "Cherry MX"-style keyboard
switches2, I decided to go full-bore and buy the "DIY" model that
came unpopulated.
To know what model of switches I wanted, I bought a nice switch
tester and played with it for a few days. After having thoroughly
annoyed my SO (turns out 35 different switches on a little board is an
incredible fidget toy), I decided to go with the Gateron Aliaz 70g.
They are silent tactile switches, similar to the classic Cherry MX Browns, but
with a much nicer sound profile and a much stronger actuation force (55g VS
70g). The end result is somewhat "stiff" keyboard that has a nice "THOCC",
while still being relatively silent: perfect for a shared office.
The only thing left to do on this keyboard is to replace the three soldered
switches that came pre-installed for the mouse buttons. They are Cherry MX Red
low-profile switches and are genuinely terrible3. I will be swapping
them for Gateron KS-33 low-profile Blue switches when I get the ones I
ordered online.
Overall, I am very satisfied with this keyboard and I look forward using it
daily when schools starts again in September.
The power button sometimes does not work at all (for minutes?) and the
laptop has been shutting down randomly (not a heat issue) more and more
often...
I am blessed with an IBM M keyboard at home and am in love with those
clicky, very loud buckling springs.
Not only are they linear switches (weird choice for mouse buttons),
but they are very inconsistent. All three switches feel different and make
different sounds.
Introduction
The ZRAM module in the Linux kernel creates a memory-backed block device that
stores its content in a compressed format. It offers users the choice of
compression algorithms such as lz4, zstd, or lzo. These algorithms differ in
compression ratio and speed, with zstd providing the best compression but being
slower, while lz4 offers higher speed but lower compression.
Using ZRAM as Swap
One interesting use case for ZRAM is utilizing it as swap space in the system.
There are two utilities available for configuring ZRAM as swap: zram-tools and
systemd-zram-generator. However, Debian Bullseye lacks systemd-zram-generator,
making zram-tools the only option for Bullseye users. While it's possible to use
systemd-zram-generator by self-compiling or via cargo, I preferred using tools
available in the distribution repository due to my restricted environment.
Installation
The installation process is straightforward. Simply execute the following command:
apt-getinstallzram-tools
Configuration
The configuration involves modifying a simple shell script file
/etc/default/zramswap sourced by the /usr/bin/zramswap script. Here's an
example of the configuration I used:
# Compression algorithm selection# Speed: lz4 > zstd > lzo# Compression: zstd > lzo > lz4# This is not inclusive of all the algorithms available in the latest kernels# See /sys/block/zram0/comp_algorithm (when the zram module is loaded) to check# the currently set and available algorithms for your kernel [1]# [1] https://github.com/torvalds/linux/blob/master/Documentation/blockdev/zram.txt#L86ALGO=zstd
# Specifies the amount of RAM that should be used for zram# based on a percentage of the total available memory# This takes precedence and overrides SIZE belowPERCENT=30# Specifies a static amount of RAM that should be used for# the ZRAM devices, measured in MiB# SIZE=256000# Specifies the priority for the swap devices, see swapon(2)# for more details. A higher number indicates higher priority# This should probably be higher than hdd/ssd swaps.# PRIORITY=100
I chose zstd as the compression algorithm for its superior compression
capabilities. Additionally, I reserved 30% of memory as the size of the zram
device. After modifying the configuration, restart the zramswap.service to
activate the swap:
systemctlrestartzramswap.service
Using systemd-zram-generator
For Debian Bookworm users, an alternative option is systemd-zram-generator.
Although zram-tools is still available in Debian Bookworm,
systemd-zram-generator offers a more integrated solution within the systemd
ecosystem. Below is an example of the translated configuration for
systemd-zram-generator, located at /etc/systemd/zram-generator.conf:
# This config file enables a /dev/zram0 swap device with the following
# properties:
# * size: 50% of available RAM or 4GiB, whichever is less
# * compression-algorithm: kernel default
#
# This device's properties can be modified by adding options under the
# [zram0] section below. For example, to set a fixed size of 2GiB, set
#  zram-size = 2GiB .
[zram0]
zram-size = ceil(ram * 30/100)
compression-algorithm = zstd
swap-priority = 100
fs-type = swap
After making the necessary changes, reload systemd and start the systemd-zram-setup@zram0.service:
The systemd-zram-generator creates the zram device by loading the kernel
module and then creates a systemd.swap unit to mount the zram device as swap.
In this case, the swap file is called zram0.swap.
Checking Compression and Details
To verify the effectiveness of the swap configuration, you can use the zramctl
command, which is part of the util-linux package. Alternatively, the
zramswap utility provided by zram-tools can be used to obtain the same
output.
During my testing with synthetic memory load created using stress-ngvm
class I found that I can reach upto 40% compression ratio.
Memory Overcommit
Another use case I was looking for is allowing the launching of applications
that require more memory than what is available in the system. By default, the
Linux kernel attempts to estimate the amount of free memory left on the system
when user space requests more memory (vm.overcommit_memory=0). However, you
can change this behavior by modifying the sysctl value for
vm.overcommit_memory to 1.
To demonstrate this, I ran a test using stress-ng to request more memory than
the system had available. As expected, the Linux kernel refused to allocate
memory, and the stress-ng process could not proceed.
By setting vm.overcommit_memory=1, Linux will allocate memory in a more relaxed
manner, assuming an infinite amount of memory is available.
Conclusion
ZRAM provides disks that allow for very fast I/O, and compression allows for a
significant amount of memory savings. ZRAM is not restricted to just swap usage;
it can be used as a normal block device with different file systems.
Using ZRAM as swap is beneficial because, unlike disk-based swap, it is faster,
and compression ensures that we use a smaller amount of RAM itself as swap
space.
Additionally, adjusting the memory overcommit settings can be beneficial for
scenarios that require launching memory-intensive applications.
Note: When running stress tests or allocating excessive memory, be cautious
about the actual memory capacity of your system to prevent out-of-memory (OOM)
situations.
Feel free to explore the capabilities of ZRAM and optimize your system's memory
management. Happy computing!
Armadillo is a powerful
and expressive C++ template library for linear algebra and scientific
computing. It aims towards a good balance between speed and ease of use,
has a syntax deliberately close to Matlab, and is useful for algorithm
development directly in C++, or quick conversion of research code into
production environments. RcppArmadillo
integrates this library with the R environment and language and is
widely used by (currently) 1079 other packages on CRAN, downloaded 29.6 million
times (per the partial logs from the cloud mirrors of CRAN), and the CSDA paper) (preprint
/ vignette) by Conrad and myself has been cited 543 times according
to Google Scholar.
This release brings bugfix upstream release 12.4.1 made by Conrad at
the end of last week. As usual, I prepared the usual release candidate,
tested on the over 1000 reverse depends (which sadly takes a long time
on old hardware), found no issues and sent it to CRAN. Where it got
tested again and was by a stroke of bad luck upheld for two unrelated
issue (one package fell over one of its other dependencies changing a
data representation, another fell afoul of a tightened test on total
test time) so this awaited the usual email handshake with the CRAN
maintainers and the weekend got in the way. The release also contains
a PR kindly provided by Mikael Jagan for an upcoming change in package
Matrix.
As a bugfix release, the set of changes is fairly small.
Changes
in RcppArmadillo version 0.12.4.1.0 (2023-06-17)
Upgraded to Armadillo release 12.4.1 (Cortisol Profusion
Redux)
fix bug in SpMat::shed_cols()
functions such as .is_finite() and
find_nonfinite() will now emit a runtime warning when
compiled in fast math mode; such compilation mode disables detection of
non-finite values
Accommodate upcoming change in package Matrix (Mikael Jagan in #417
addressing #415)
After an upgrade of my PC's mainboard BIOS the boot would take a minute or more to complete and sometimes the lightdm login screen would sit there but not accept keyboard input for another minute or so. Then the keyboard got enabled and I could log in normally. Everything worked fine after that bootup struggle completed. This was fully reproducible and persisted across reboots. Weird.
The kernel dmesg log showed entries that looked suspicious:
Googleing these error -110 and error -71 is a bit hard. Now why the USB driver does not give useful error messages instead of archaic errno-style numbers escapes me. This is not the 80s anymore.
The wisdom of the crowd says error -110 is something around "the USB port power supply was exceeded" [source].
Now lsusb -tv shows device 1-7 ... to be my USB keyboard. I somehow doubt that wants more power than the hub is willing to provide.
The Archlinux BBS Forums recommend to piece together information from drivers/usb/host/ohci.h and (updated from their piece which is from 2012) /tools/include/uapi/asm-generic/errno.h. This is why some people then consider -110 to mean "Connection timed out". Nah, not likely either.
Reading through the kernel source around drivers/usb/host did not enlighten me either. To the contrary. Uuugly. There seems to be no comprehensive list what these error codes mean. And the numbers are assigned to errors conditions quite arbitrarily. And - of course - there is no documentation. "It was hard to do, so it should be hard to understand as well."
Luckily some of the random musings I read through contained some curious advice: power cycle the host. So I did and that did not make the error go away. Other people insisted on removing cables out of wall sockets, unplugging everything and conducting esoteric rituals. That made it dawn on me, the mainboard of course nicely powers the USB in "off" state, too. So switching the power supply off (yes, these have a separate switch, go find yours), waiting a bit for capacitors to drain and switching things back on and ... the errors were gone, the system booted within seconds again.
So the takeaway message: If you get random error messages like
on devices that previously worked fine ... completely remove power from the host, the hubs and the USB devices. So they forget they saw each other on the bus before. And when they see each other after that blackout, they will happily go through negotiating protocol details with each other again successfully.
As some of you may know, the Debian project released v12, bookworm to stable on the 10th of this month. I haven t had a reason to try it yet, but I m downloading it now. My first thought is that it s much larger than I expected. The normal sized version used to fit on a CD-ROM disk, so around 650MB. The netinst has until now been even smaller, with the most recent versions being about 256MB if I recall correctly. The netinst, now with proprietary firmware, weighs in over 700MB:
It looks like 738.0MB!
The system I m installing is for a piece of software I m crafting for use by Remote Online Notaries. I m building a disk image for the notary s side of the connection. The notary will have a yubikey-style PGP card which they will use as a digital seal similar to the one required to perform notarial acts for the state of washington. I ll leave some ramblings on the blog as I go through the process of implementation. Here s a link to whet your appetite!
https://app.leg.wa.gov/wac/default.aspx?cite=308-30-020
Another quick update to the still somewhat new package spdl is now om CRAN, and will go to Debian soon
too. The key focus of spdl is to offer the
exact same interface to logging from both R and C++ by relying
on spdlog via my RcppSpdlog
package. Usage examples are shown on the RcppSpdlog docs
page.
This release add support for the wrappers init() and
log() wrapping the existing setup() function
but requiring only the level argument. This requires version 0.0.13 of
RcppSpdlog
which was released to CRAN
yesterday.
The short NEWS entry follows.
Changes in spdl
version 0.0.5 (2023-06-18)
Add simple aliases init() and log()
wrapping setup() but requiring only the logging level
argument
Version 0.0.13 of RcppSpdlog is now
on CRAN and will be soon be
uploaded to Debian too. RcppSpdlog
bundles spdlog, a
wonderful header-only C++ logging library with all the bells and
whistles you would want that was written by Gabi Melman, and also includes fmt by Victor Zverovich. You can learn
more at the package
documention site.
This release adds a small (but handy) accessor generalisation:
Instead of calling setup() with two arguments for a label
and the logging level we now only require the desired level. We also
cleaned up one implementation detail for the stopwatch
feature added in January, and simplified the default C++ compilation
standard setting.
The NEWS entry for this release follows.
Changes in
RcppSpdlog version 0.0.13 (2023-06-17)
Minor tweak to stopwatch setup avoids pulling in
fmt
No longer set a C++ compilation standard as the default choices
by R are sufficient for the package
Add convenience wrapper log_init omitting first
argument to log_setup while preserving the interface from
the latter
Add convenience setup wrappers init and
log to API header file spdl.h
A few days ago, I released a major update on blag, my blog-aware
static-site generator, which introduces a few backwards-incompatible changes
and many improvements over the old version.
Good-looking default theme
The old bare-bones default theme has been replaced with a good-looking one,
based on the one used on this blog:
It comes with a light- and dark theme that switches automatically based on the
browser setting, as well as fitting light- and dark syntax highlighting themes
for code blocks.
Improved quickstart
The blag quickstart command has been improved. Additionally to generating the
configuration, it now also populates the working directory with the
templates-, static- and content directories, containing the updated
default theme and a few content pages to get you started.
No internal fallback templates anymore
Related to the changes in quickstart, the internal fallback template has been
removed, and blag now completely relies on the templates in the local
templates directory. This makes it more transparent for the user what is
happening while simplifying blag s internal logic.
However, this is a backwards incompatible change! In the case of a missing
template, the user will be warned with a hint on how to obtain the missing
template.
Index and archive are now separate
Previously, the front-page would always show the archive of all articles.
This is not very useful when your blog contains more than a few dozen articles.
With blag 2.0, the previous archive has been split into index and
archive, where index is the front-page showing only the most recent 15
articles by default and linking to the archive which shows all articles.
There s also two corresponding templates in the templates directory.
Miscellaneous
Various dependencies have been updated.
blag s documentation has been migrated from Sphinx to MkDocs,
which is a bit more lightweight and easier to maintain
A packaging issue has been fixed, where the tests/conftest.py was
missing in the source distribution
This is the third post in a series about data archiving to removable media (optical discs and hard drives). In the first, I explained the difference between backing up and archiving, established goals for the project, and said I d evaluate git-annex and dar. The second post evaluated git-annex, and now it s time to look at dar. The series will conclude with a post comparing git-annex with dar.
What is dar?
I could open with the same thing I did with git-annex, just changing the name of the program: [dar] is a fantastic and versatile program that does well, it s one of those things that can do so much that it s a bit hard to describe. It is, fundamentally, an archiver like tar or zip (makes one file representing a bunch of other files), but it goes far beyond that. dar s homepage lays out a comprehensive list of features, which I will try to summarize here.
Dar itself is both a library (with C++ and Python bindings) for interacting with data, and a CLI tool (dar itself).
Alongside this, there is an ecosystem of tools around dar, including GUIs for multiple platforms, backup scripts, and FUSE implementations.
Dar is like tar in that it can read and write files sequentially if desired. Dar archives can be streamed, just like tar archives. But dar takes it further; if you have dar_slave on the remote end, random access is possible over ssh (dramatically speeding up certain operations).
Dar is like zip in that a dar archive contains a central directory (called a catalog) which permits random access to the contents of an archive. In other words, you don t have to read an entire archive to extract just one file (assuming the archive is on disk or something that itself permits random access). Also, dar can compress each file individually, rather than the tar approach of compressing the archive as a whole. This increases archive performance (dar knows not to try to compress already-compressed data), boosts restore resilience (corruption of one part of an archive doesn t invalidate the entire rest of it), and boosts restore performance (permitting random access).
Dar can split an archive into multiple pieces called slices, and it can even split member files among the slices. The catalog contains information allowing you to know which slice(s) a given file is saved in.
The catalog can also be saved off in a file of its own (dar calls this an isolated catalog ). Isolated catalogs record just metadata about files archived.
dar_manager can assemble a database by reading archives or isolated catalogs, letting you know where files are stored and facilitating restores using the minimal number of discs.
Dar supports differential/incremental backups, which record changes since the last backup. These backups record not just additions, but also deletions. dar can optionally use rsync-style binary deltas to minimize the space needed to record changes. Dar does not suffer from GNU tar s data loss bug with incrementals.
Dar can slice and dice archives like Perl does strings. The usage notes page shows how you can merge archives, create decremental archives (where the full backup always reflects the current state of the system, and incrementals go backwards in time instead of forwards), etc. You can change the compression algorithm on an existing archive, re-slice it, etc.
Dar is extremely careful about preserving all metadata: hard links, sparse files, symlinks, timestamps (including subsecond resolution), EAs, POSIX ACLs, resource forks on Mac, detecting files being modified while being read, etc. It makes a nice way to copy directories, sort of similar to rsync -avxHAXS.
So to tie this together for this project, I will set up a 400MB slice size (to mimic what I did with git-annex), and see how dar saves the data and restores it.
Isolated cataloges aren t strictly necessary for this, but by using them (and/or dar_manager), we can build up a database of files and locations and thus directly compare dar to git-annex location tracking.
Walkthrough: Creating the first archive
As with the git-annex walkthrough, I ll set some variables to make it easy to remember:
$SOURCEDIR is the directory being backed up
$DRIVE is the directory for backups to be stored in. Since dar can split by a specified size, I don t need to make separate filesystems to simulate the separate drive experience as I did with git-annex.
$CATDIR will hold isolated catalogs
$DARDB points to the dar_manager database
OK, we can run the backup immediately. No special setup is needed. dar supports both short-form (single-character) parameters and long-form ones. Since the parameters probably aren t familiar to everyone, I will use the long-form ones in these examples.
Here s how we create our initial full backup. I ll explain the parameters below:
$ dar \

  --verbose \

  --create $DRIVE/bak1 \

  --on-fly-isolate $CATDIR/bak1 \

  --slice 400M \

  --min-digits 2 \

  --pause \

  --fs-root $SOURCEDIR
Let s look at each of these parameters:
verbose does what you expect
create selects the operation mode (like tar -c) and gives the archive basename
on-fly-isolate says to write an isolated catalog as well, right while making the archive. You can always create an isolated catalog later (which is fast, since it only needs to read the last bits of the last slice) but it s more convenient to do it now, so we do. We give the base name for the isolated catalog also.
slice 400M says to split the archive, and create slices 400MB each.
min-digits 2 pertains to naming files. Without it, dar would create files named bak1.dar.1, bak1.dar.2, bak1.dar.10, etc. dar works fine with this, but it can be annoying in ls. This is just convenience for humans.
pause tells dar to pause after writing each slice. This would let us swap drives, burn discs, etc. I do this for demonstration purposes only; it isn t strictly necessary in this situation. For a more powerful option, dar also supports execute, which can run commands after each slice.
fs-root gives the path to actually back up.
This same command could have been written with short options as:
$ dar -v -c $DRIVE/bak1 -@ $CATDIR/bak1 -s 400M -9 2 -p -R $SOURCEDIR
What does it look like while running? Here s an excerpt:
...

Adding file to archive: /acrypt/no-backup/jgoerzen/testdata/[redacted]

Finished writing to file 1, ready to continue ?  [return = YES   Esc = NO]

...

Writing down archive contents...

Closing the escape layer...

Writing down the first archive terminator...

Writing down archive trailer...

Writing down the second archive terminator...

Closing archive low layer...

Archive is closed.
--------------------------------------------
581 inode(s) saved
including 0 hard link(s) treated
0 inode(s) changed at the moment of the backup and could not be saved properly
0 byte(s) have been wasted in the archive to resave changing files
0 inode(s) with only metadata changed
0 inode(s) not saved (no inode/file change)
0 inode(s) failed to be saved (filesystem error)
0 inode(s) ignored (excluded by filters)
0 inode(s) recorded as deleted from reference backup
--------------------------------------------
Total number of inode(s) considered: 581
--------------------------------------------
EA saved for 0 inode(s)
FSA saved for 581 inode(s)
--------------------------------------------
Making room in memory (releasing memory used by archive of reference)...
Now performing on-fly isolation...
...
That was easy! Let s look at the contents of the backup directory:
$ ls -lh $DRIVE

total 3.7G

-rw-r--r-- 1 jgoerzen jgoerzen 400M Jun 16 19:27 bak1.01.dar

-rw-r--r-- 1 jgoerzen jgoerzen 400M Jun 16 19:27 bak1.02.dar

-rw-r--r-- 1 jgoerzen jgoerzen 400M Jun 16 19:27 bak1.03.dar

-rw-r--r-- 1 jgoerzen jgoerzen 400M Jun 16 19:27 bak1.04.dar

-rw-r--r-- 1 jgoerzen jgoerzen 400M Jun 16 19:28 bak1.05.dar

-rw-r--r-- 1 jgoerzen jgoerzen 400M Jun 16 19:28 bak1.06.dar

-rw-r--r-- 1 jgoerzen jgoerzen 400M Jun 16 19:28 bak1.07.dar

-rw-r--r-- 1 jgoerzen jgoerzen 400M Jun 16 19:28 bak1.08.dar

-rw-r--r-- 1 jgoerzen jgoerzen 400M Jun 16 19:29 bak1.09.dar

-rw-r--r-- 1 jgoerzen jgoerzen 156M Jun 16 19:33 bak1.10.dar
And the isolated catalog:
$ ls -lh $CATDIR

total 37K

-rw-r--r-- 1 jgoerzen jgoerzen 35K Jun 16 19:33 bak1.1.dar
The isolated catalog is stored compressed automatically.
Well this was easy. With one command, we archived the entire data set, split into 400MB chunks, and wrote out the catalog data.
Walkthrough: Inspecting the saved archive
Can dar tell us which slice contains a given file? Sure:
$ dar --list $DRIVE/bak1 --list-format=slicing   less

Slice(s) [Data ][D][ EA  ][FSA][Compr][S] Permission  Filemane

--------+--------------------------------+----------+-----------------------------

...

1        [Saved][ ]       [-L-][   0%][X] -rwxr--r-- [redacted]

1-2      [Saved][ ]       [-L-][   0%][X] -rwxr--r-- [redacted]

2        [Saved][ ]       [-L-][   0%][X] -rwxr--r-- [redacted]

...
This illustrates the transition from slice 1 to slice 2. The first file was stored entirely in slice 1; the second stored partially in slice 1 and partially in slice 2, and third solely in slice 2. We can get other kinds of information as well.
$ dar --list $DRIVE/bak1   less

[Data ][D][ EA  ][FSA][Compr][S]  Permission   User    Group   Size               Date                      filename

--------------------------------+------------+-------+-------+---------+-------------------------------+------------

[Saved][ ]       [-L-][   0%][X]  -rwxr--r--   jgoerzen jgoerzen        24 Mio  Mon Mar  5 07:58:09 2018        [redacted]

[Saved][ ]       [-L-][   0%][X]  -rwxr--r--   jgoerzen jgoerzen        16 Mio  Mon Mar  5 07:58:09 2018        [redacted]

[Saved][ ]       [-L-][   0%][X]  -rwxr--r--   jgoerzen jgoerzen        22 Mio  Mon Mar  5 07:58:09 2018        [redacted]
These are the same files I was looking at before. Here we see they are 24MB, 16MB, and 22MB in size, and some additional metadata. Even more is available in the XML list format.
Walkthrough: updates
As with git-annex, I ve made some changes in the source directory: moved a file, added another, and deleted one. Let s create an incremental backup now:
$ dar \

  --verbose \

  --create $DRIVE/bak2 \

  --on-fly-isolate $CATDIR/bak2 \

  --ref $CATDIR/bak1 \

  --slice 400M \

  --min-digits 2 \

  --pause \

  --fs-root $SOURCEDIR
This command is very similar to the earlier one. Instead of writing an archive and catalog named bak1, we write one named bak2. What s new here is --ref $CATDIR/bak1. That says, make an incremental based on an archive of reference. All that is needed from that archive of reference is the detached catalog. --ref $DRIVE/bak1 would have worked equally well here.
Here s what I did to the $SOURCEDIR:
Renamed a file to file01-unchanged
Deleted a file
Copied /bin/cp to a file named cp
Let s see if dar s command output matches this:
...

Adding file to archive: /acrypt/no-backup/jgoerzen/testdata/file01-unchanged

Saving Filesystem Specific Attributes for /acrypt/no-backup/jgoerzen/testdata/file01-unchanged

Adding file to archive: /acrypt/no-backup/jgoerzen/testdata/cp

Saving Filesystem Specific Attributes for /acrypt/no-backup/jgoerzen/testdata/cp

Adding folder to archive: [redacted]

Saving Filesystem Specific Attributes for [redacted]

Adding reference to files that have been destroyed since reference backup...

...

 --------------------------------------------

 3 inode(s) saved

   including 0 hard link(s) treated

 0 inode(s) changed at the moment of the backup and could not be saved properly

 0 byte(s) have been wasted in the archive to resave changing files

 0 inode(s) with only metadata changed

 578 inode(s) not saved (no inode/file change)

 0 inode(s) failed to be saved (filesystem error)

 0 inode(s) ignored (excluded by filters)

 2 inode(s) recorded as deleted from reference backup

 --------------------------------------------

 Total number of inode(s) considered: 583

 --------------------------------------------

 EA saved for 0 inode(s)

 FSA saved for 3 inode(s)

 --------------------------------------------

...
Yes, it does. The rename is recorded as a deletion and an addition, since dar doesn t directly track renames. So the rename plus the deletion account for the two deletions. The rename plus the addition of cp count as 2 of the 3 inodes saved; the third is the modified directory from which files were deleted and moved out.
Let s see the files that were created:
$ ls -lh $DRIVE/bak2*

-rw-r--r-- 1 jgoerzen jgoerzen 18M Jun 16 19:52 /acrypt/no-backup/jgoerzen/dar-testing/drive/bak2.01.dar

$ ls -lh $CATDIR/bak2*

-rw-r--r-- 1 jgoerzen jgoerzen 22K Jun 16 19:52 /acrypt/no-backup/jgoerzen/dar-testing/cat/bak2.1.dar
What does list look like now?
Slice(s) [Data ][D][ EA  ][FSA][Compr][S] Permission  Filemane

--------+--------------------------------+----------+-----------------------------

         [     ][ ]       [---][-----][X] -rwxr--r-- [redacted]

1        [Saved][ ]       [-L-][   0%][X] -rwxr--r-- file01-unchanged

...

         [--- REMOVED ENTRY ----][redacted]

         [--- REMOVED ENTRY ----][redacted]
Here I show an example of:
A file that was not changed from the initial backup. Its presence was simply noted, but because we re doing an incremental, the data wasn t saved.
A file that is saved in this incremental, on slice 1.
The two deleted files
Walkthrough: dar_manager
As we ve seen above, the two archives (or their detached catalog) give us a complete picture of what files were present at the time of the creation of each archive, and what files were stored in a given archive. We can certainly continue working in that way. We can also use dar_manager to build a comprehensive database of these archives, to be able to find what media is necessary to restore each given file. Or, with dar_manager s when parameter, we can restore files as of a particular date.
Let s try it out. First, we create our database:
$ dar_manager --create $DARDB

$ dar_manager --base $DARDB --add $DRIVE/bak1

Auto detecting min-digits to be 2

$ dar_manager --base $DARDB --add $DRIVE/bak2

Auto detecting min-digits to be 2
Here we created the database, and added our two catalogs to it. (Again, we could have as easily used $CATDIR/bak1; either the archive or its isolated catalog will work here.) It s important to add the catalogs in order.
Let s do some quick experimentation with dar_manager:
$ dar_manager -v --base $DARDB --list

Decompressing and loading database to memory...
dar path         :

dar options      :

database version : 6

compression used : gzip

compression level: 9
archive #        path           basename

------------+--------------+---------------

        1       /acrypt/no-backup/jgoerzen/dar-testing/drive    bak1

        2       /acrypt/no-backup/jgoerzen/dar-testing/drive    bak2
$ dar_manager --base $DARDB --stat

  archive #      most recent/total data    most recent/total EA

--------------+-------------------------+-----------------------

             1 580/581                        0/0

             2 3/3                            0/0
The list option shows the correlation between dar_manager archive number (1, 2) with filenames (bak1, bak2). It is coincidence here that 1/bak1 and 2/bak2 correlate; that s not necessarily the case. Most dar_manager commands operate on archive number, while dar commands operate on archive path/basename.
Now let s see just what files are saved in archive #2, the incremental:
$ dar_manager --base $DARDB --used 2

[ Saved ][       ]  [redacted]

[ Saved ][       ]  file01-unchanged

[ Saved ][       ]  cp
Now we can also where a file is stored. Here s one that was saved in the full backup and unmodified in the incremental:
$ dar_manager --base $DARDB --file [redacted]

        1       Fri Jun 16 19:15:12 2023  saved                                 absent

        2       Fri Jun 16 19:15:12 2023  present                               absent
(The absent at the end refers to extended attributes that the file didn t have)
Similarly, for files that were added or removed, they ll be listed only at the appropriate place.
Walkthrough: Restoration
I m not going to repeat the author s full restoration with dar page, but here are some quick examples.
A simple way of doing everything is using incrementals for the whole series. To do that, you d have bak1 be full, bak2 based on bak1, bak3 based on bak2, bak4 based on bak3, etc. To restore from such a series, you have two options:
Use dar to simply extract each archive in order. It will handle deletions, renames, etc. along the way.
Use dar_manager with the backup database to do manage the process. It may be somewhat more efficient, as it won t bother to restore files that will later be modified or deleted.
If you get fancy for instance, bak2 is based on bak1, bak3 on bak2, bak4 on bak1 then you would want to use dar_manager to ensure a consistent restore is completed. Either way, the process is nearly identical. Also, I figure, to make things easy, you can save a copy of the entire set of isolated catalogs before you finalize each disc/drive. They re so small, and this would let someone with just the most recent disc build a dar_manager database without having to go through all the other discs.
Anyhow, let s do a restore using just dar. I ll make a $RESTOREDIR and do it that way.
$ dar \

  --verbose \

  --extract $DRIVE/bak1 \

  --fs-root $RESTOREDIR \

  --no-warn \

  --execute "echo Ready for slice %n.  Press Enter; read foo"
This execute lets us see how dar works; this is an illustration of the power it has (above pause); it s a snippet interpreted by /bin/sh with %n being one of the dar placeholders. If memory serves, it s not strictly necessary, as dar will prompt you for slices it needs if they re not mounted. Anyhow, you ll see it first reading the last slice, which contains the catalog, then reading from the beginning.
Here we go:
Auto detecting min-digits to be 2

Opening archive bak1 ...

Opening the archive using the multi-slice abstraction layer...

Ready for slice 10. Press Enter

...

Loading catalogue into memory...

Locating archive contents...

Reading archive contents...

File ownership will not be restored du to the lack of privilege, you can disable this message by asking not to restore file ownership [return = YES   Esc = NO]

Continuing...

Restoring file's data: [redacted]

Restoring file's FSA: [redacted]

Ready for slice 1. Press Enter

...

Ready for slice 2. Press Enter

...

 --------------------------------------------

 581 inode(s) restored

    including 0 hard link(s)

 0 inode(s) not restored (not saved in archive)

 0 inode(s) not restored (overwriting policy decision)

 0 inode(s) ignored (excluded by filters)

 0 inode(s) failed to restore (filesystem error)

 0 inode(s) deleted

 --------------------------------------------

 Total number of inode(s) considered: 581

 --------------------------------------------

 EA restored for 0 inode(s)

 FSA restored for 0 inode(s)

 --------------------------------------------
The warning is because I m not doing the extraction as root, which limits dar s ability to fully restore ownership data.
OK, now the incremental:
$ dar \

  --verbose \

  --extract $DRIVE/bak2 \

  --fs-root $RESTOREDIR \

  --no-warn \

  --execute "echo Ready for slice %n.  Press Enter; read foo"

...

Ready for slice 1. Press Enter

...

Restoring file's data: /acrypt/no-backup/jgoerzen/dar-testing/restore/file01-unchanged

Restoring file's FSA: /acrypt/no-backup/jgoerzen/dar-testing/restore/file01-unchanged

Restoring file's data: /acrypt/no-backup/jgoerzen/dar-testing/restore/cp

Restoring file's FSA: /acrypt/no-backup/jgoerzen/dar-testing/restore/cp

Restoring file's data: /acrypt/no-backup/jgoerzen/dar-testing/restore/[redacted directory]

Removing file (reason is file recorded as removed in archive): [redacted file]

Removing file (reason is file recorded as removed in archive): [redacted file]
This all looks right! Now how about we compare the restore to the original source directory?
$ diff -durN $SOURCEDIR $RESTOREDIR
No changes perfect.
We could instead do this restore via a single dar_manager command, though annoyingly, we d have to pass all top-level files/directories to dar_manager restore. But still, it s one command, and basically automates and optimizes the dar restores shown above.
Conclusions
Dar makes it extremely easy to just Do The Right Thing when making archives. One command makes a backup. It saves things in simple files. You can make an isolated catalog if you want, and it too is saved in a simple file. You can query what is in the files and where. You can restore from all or part of the files. You can simply play the backups forward, in order, to achieve a full and consistent restore. Or you can load data about them into dar_manager for an optimized restore.
A bit of scripting will be necessary to make incrementals; finding the most recent backup or catalog. If backup files are named with care for instance, by date then this should be a pretty easy task.
I haven t touched on resiliency yet. dar comes with tools for recovering archives that have had portions corrupted or lost. It can also rebuild the catalog if it is corrupted or lost. It adds tape marks (or escape sequences ) to the archive along with the data stream. So every entry in the catalog is actually stored in the archive twice: once alongside the file data, and once at the end in the collected catalog. This allows dar to scan a corrupted file for the tape marks and reconstruct whatever is still intact, even if the catalog is lost. dar also integrates with tools like sha256sum and par2 to simplify archive integrity testing and restoration.
This balances against the need to use a tool (dar, optionally with a GUI frontend) to restore files. I ll discuss that more in the next post.
In my recent post about data archiving to removable media, I laid out the difference between backing up and archiving, and also said I d evaluate git-annex and dar. This post evaluates git-annex. The next will look at dar, and then I ll make a comparison post.
What is git-annex?
git-annex is a fantastic and versatile program that does well, it s one of those things that can do so much that it s a bit hard to describe. Its homepage says:
git-annex allows managing large files with git, without storing the file contents in git. It can sync, backup, and archive your data, offline and online. Checksums and encryption keep your data safe and secure. Bring the power and distributed nature of git to bear on your large files with git-annex.
I think the particularly interesting features of git-annex aren t actually included in that list. Among the features of git-annex that make it shine for this purpose, its location tracking is key. git-annex can know exactly which device has which file at which version at all times. Combined with its preferred content settings, this lets you very easily say things like:
I want exactly 1 copy of every file to exist within the set #1 of backup drives. Here s a drive in that set; copy to it whatever needs to be copied to satisfy that requirement.
Now I have another set of backup drives. Periodically I will swap sets offsite. Copy whatever is needed to this drive in the second set, making sure that there is 1 copy of every file within this set as well, regardless of what s in the first set.
Here s a directory I want to use to track the status of everything else. I don t want any copies at all here.
git-annex can be set to allow a configurable amount of free space to remain on a device, and it will fill it up with whatever copies are necessary up until it hits that limit. Very convenient!
git-annex will store files in a folder structure that mirrors the origin folder structure, in plain files just as they were. This maximizes the ability for a future person to access the content, since it is all viewable without any special tool at all. Of course, for things like optical media, git-annex will essentially be creating what amounts to incrementals. To obtain a consistent copy of the original tree, you would still need to use git-annex to process (export) the archives.
git-annex challenges
In my prior post, I related some challenges with git-annex. The biggest of them quite poor performance of the directory special remote when dealing with many files has been resolved by Joey, git-annex s author! That dramatically improves the git-annex use scenario here! The fixing commit is in the source tree but not yet in a release.
git-annex no doubt may still have performance challenges with repositories in the 100,000+-range, but in that order of magnitude it now looks usable. I m not sure about 1,000,000-file repositories (I haven t tested); there is a page about scalability.
A few other more minor challenges remain:
git-annex doesn t really preserve POSIX attributes; for instance, permissions, symlink destinations, and timestamps are all not preserved. Of these, timestamps are the most important for my particular use case.
If your data set to archive contains Git repositories itself, these will not be included.
I worked around the timestamp issue by using the mtree-netbsd package in Debian. mtree writes out a summary of files and metadata in a tree, and can restore them. To save:
mtree -c -R nlink,uid,gid,mode -p /PATH/TO/REPO -X <(echo './.git') > /tmp/spec
And, after restoration, the timestamps can be applied with:
mtree -t -U -e < /tmp/spec
Walkthrough: initial setup
To use git-annex in this way, we have to do some setup. My general approach is this:
There is a source of data that lives outside git-annex. I'll call this $SOURCEDIR.
I'm going to name the directories holding my data $REPONAME.
There will be a "coordination" git-annex repo. It will hold metadata only, and no data. This will let us track where things live. I'll call it $METAREPO.
There will be drives. For this example, I'll call their mountpoints $DRIVE01 and $DRIVE02. For easy demonstration purposes, I used a ZFS dataset with a refquota set (to observe the size handling), but I could have as easily used a LVM volume, btrfs dataset, loopback filesystem, or USB drive. For optical discs, this would be a staging area or a UDF filesystem.
Let's get started! I've set all these shell variables appropriately for this example, and REPONAME to "testdata". We'll begin by setting up the metadata-only tracking repo.
$ REPONAME=testdata

$ mkdir "$METAREPO"

$ cd "$METAREPO"

$ git init

$ git config annex.thin true
There is a sort of complicated topic of how git-annex stores files in a repo, which varies depending on whether the data for the file is present in a given repo, and whether the file is locked or unlocked. Basically, the options I use here cause git-annex to mostly use hard links instead of symlinks or pointer files, for maximum compatibility with non-POSIX filesystems such as NTFS and UDF, which might be used on these devices. thin is part of that.
Let's continue:
$ git annex init 'local hub'

init local hub ok

(recording state in git...)

$ git annex wanted . "include=* and exclude=$REPONAME/*"

wanted . ok

(recording state in git...)
In a bit, we are going to import the source data under the directory named $REPONAME (here, testdata). The wanted command says: in this repository (represented by the bare dot), the files we want are matched by the rule that says eveyrthing except what's under $REPONAME. In other words, we don't want to make an unnecessary copy here.
Because I expect to use an mtree file as documented above, and it is not under $REPONAME/, it will be included. Let's just add it and tweak some things.
$ touch mtree

$ git annex add mtree

add mtree

ok

(recording state in git...)

$ git annex sync

git-annex sync will change default behavior to operate on --content in a future version of git-annex. Recommend you explicitly use --no-content (or -g) to prepare for that change. (Or you can configure annex.synccontent)

commit

[main (root-commit) 6044742] git-annex in local hub

 1 file changed, 1 insertion(+)

 create mode 120000 mtree

ok

$ ls -l

total 9

lrwxrwxrwx 1 jgoerzen jgoerzen 178 Jun 15 22:31 mtree -> .git/annex/objects/pX/ZJ/...
OK! We've added a file, and it got transformed into a symlink. That's the thing I said we were going to avoid, so:
 git annex adjust --unlock-present

adjust

Switched to branch 'adjusted/main(unlockpresent)'

ok

$ ls -l

total 1

-rw-r--r-- 2 jgoerzen jgoerzen 0 Jun 15 22:31 mtree
You'll notice it transformed into a hard link (nlinks=2) file. Great! Now let's import the source data. For that, we'll use the directory special remote.
$ git annex initremote source type=directory  directory=$SOURCEDIR importtree=yes \

   encryption=none

initremote source ok

(recording state in git...)

$ git annex enableremote source directory=$SOURCEDIR

enableremote source ok

(recording state in git...)

$ git config remote.source.annex-readonly true

$ git config annex.securehashesonly true

$ git config annex.genmetadata true

$ git config annex.diskreserve 100M

$ git config remote.source.annex-tracking-branch main:$REPONAME
OK, so here we created a new remote named "source". We enabled it, and set some configuration. Most notably, that last line causes files from "source" to be imported under $REPONAME/ as we wanted earlier. Now we're ready to scan the source.
$ git annex sync
At this point, you'll see git-annex computing a hash for every file in the source directory.
I can verify with du that my metadata-only repo only uses 14MB of disk space, while my source is around 4GB.
Now we can see what git-annex thinks about file locations:
$ git-annex whereis   less

whereis mtree (1 copy)

        8aed01c5-da30-46c0-8357-1e8a94f67ed6 -- local hub [here]

ok

whereis testdata/[redacted] (0 copies)

  The following untrusted locations may also have copies:

        9e48387e-b096-400a-8555-a3caf5b70a64 -- [source]

failed

... many more lines ...
So remember we said we wanted mtree, but nothing under testdata, under this repo? That's exactly what we got. git-annex knows that the files under testdata can be found under the "source" special remote, but aren't in any git-annex repo -- yet. Now we'll start adding them.
Walkthrough: removable drives
I've set up two 500MB filesystems to represent removable drives. We'll see how git-annex works with them.
$ cd $DRIVE01

$ df -h .

Filesystem                     Size  Used Avail Use% Mounted on

acrypt/no-backup/annexdrive01  500M  1.0M  499M   1% /acrypt/no-backup/annexdrive01

$ git clone $METAREPO

Cloning into 'testdata'...

done.

$ cd $REPONAME

$ git config annex.thin true

$ git annex init "test drive #1"

$ git annex adjust --hide-missing --unlock

adjust

Switched to branch 'adjusted/main(hidemissing-unlocked)'

ok

$ git annex sync
OK, that's the initial setup. Now let's enable the source remote and configure it the same way we did before:
$ git annex enableremote source directory=$SOURCEDIR

enableremote source ok

(recording state in git...)

$ git config remote.source.annex-readonly true

$ git config remote.source.annex-tracking-branch main:$REPONAME

$ git config annex.securehashesonly true

$ git config annex.genmetadata true

$ git config annex.diskreserve 100M
Now, we'll add the drive to a group called "driveset01" and configure what we want on it:
$ git annex group . driveset01

$ git annex wanted . '(not copies=driveset01:1)'
What this does is say: first of all, this drive is in a group named driveset01. Then, this drive wants any files for which there isn't already at least one copy in driveset01.
Now let's load up some files!
$ git annex sync --content
As the messages fly by from here, you'll see it mentioning that it got mtree, and then various files from "source" -- until, that is, the filesystem had less than 100MB free, at which point it complained of no space for the rest. Exactly like we wanted!
Now, we need to teach $METAREPO about $DRIVE01.
$ cd $METAREPO

$ git remote add drive01 $DRIVE01/$REPONAME

$ git annex sync drive01

git-annex sync will change default behavior to operate on --content in a future version of git-annex. Recommend you explicitly use --no-content (or -g) to prepare for that change. (Or you can configure annex.synccontent)

commit

On branch adjusted/main(unlockpresent)

nothing to commit, working tree clean

ok

merge synced/main (Merging into main...)

Updating d1d9e53..817befc

Fast-forward

(Merging into adjusted branch...)

Updating 7ccc20b..861aa60

Fast-forward

ok

pull drive01

remote: Enumerating objects: 214, done.

remote: Counting objects: 100% (214/214), done.

remote: Compressing objects: 100% (95/95), done.

remote: Total 110 (delta 6), reused 0 (delta 0), pack-reused 0

Receiving objects: 100% (110/110), 13.01 KiB   1.44 MiB/s, done.

Resolving deltas: 100% (6/6), completed with 6 local objects.

From /acrypt/no-backup/annexdrive01/testdata

 * [new branch]      adjusted/main(hidemissing-unlocked) -> drive01/adjusted/main(hidemissing-unlocked)

 * [new branch]      adjusted/main(unlockpresent)        -> drive01/adjusted/main(unlockpresent)

 * [new branch]      git-annex                           -> drive01/git-annex

 * [new branch]      main                                -> drive01/main

 * [new branch]      synced/main                         -> drive01/synced/main

ok
OK! This step is important, because drive01 and drive02 (which we'll set up shortly) won't necessarily be able to reach each other directly, due to not being plugged in simultaneously. Our $METAREPO, however, will know all about where every file is, so that the "wanted" settings can be correctly resolved. Let's see what things look like now:
$ git annex whereis   less

whereis mtree (2 copies)

        8aed01c5-da30-46c0-8357-1e8a94f67ed6 -- local hub [here]

        b46fc85c-c68e-4093-a66e-19dc99a7d5e7 -- test drive #1 [drive01]

ok

whereis testdata/[redacted] (1 copy)

        b46fc85c-c68e-4093-a66e-19dc99a7d5e7 -- test drive #1 [drive01]
The following untrusted locations may also have copies:
9e48387e-b096-400a-8555-a3caf5b70a64 -- [source]
ok
If I scroll down a bit, I'll see the files past the 400MB mark that didn't make it onto drive01. Let's add another example drive!
Walkthrough: Adding a second drive
The steps for $DRIVE02 are the same as we did before, just with drive02 instead of drive01, so I'll omit listing it all a second time. Now look at this excerpt from whereis:
whereis testdata/[redacted] (1 copy)
b46fc85c-c68e-4093-a66e-19dc99a7d5e7 -- test drive #1 [drive01]
  The following untrusted locations may also have copies:

        9e48387e-b096-400a-8555-a3caf5b70a64 -- [source]

ok
whereis testdata/[redacted] (1 copy)
c4540343-e3b5-4148-af46-3f612adda506 -- test drive #2 [drive02]
  The following untrusted locations may also have copies:

        9e48387e-b096-400a-8555-a3caf5b70a64 -- [source]

ok
Look at that! Some files on drive01, some on drive02, some neither place. Perfect!
Walkthrough: Updates
So I've made some changes in the source directory: moved a file, added another, and deleted one. All of these were copied to drive01 above. How do we handle this?
First, we update the metadata repo:
$ cd $METAREPO

$ git annex sync

$ git annex dropunused all
OK, this has scanned $SOURCEDIR and noted changes. Let's see what whereis says:
$ git annex whereis   less

...

whereis testdata/cp (0 copies)

  The following untrusted locations may also have copies:

        9e48387e-b096-400a-8555-a3caf5b70a64 -- [source]

failed

whereis testdata/file01-unchanged (1 copy)

        b46fc85c-c68e-4093-a66e-19dc99a7d5e7 -- test drive #1 [drive01]
The following untrusted locations may also have copies:
9e48387e-b096-400a-8555-a3caf5b70a64 -- [source]
ok
So this looks right. The file I added was a copy of /bin/cp. I moved another file to one named file01-unchanged. Notice that it realized this was a rename and that the data still exists on drive01.
Well, let's update drive01.
$ cd $DRIVE01/$REPONAME

$ git annex sync --content
Looking at the testdata/ directory now, I see that file01-unchanged has been renamed, the deleted file is gone, but cp isn't yet here -- probably due to space issues; as it's new, it's undefined whether it or some other file would fill up free space. Let's work along a few more commands.
$ git annex get --auto

$ git annex drop --auto

$ git annex dropunused all
And now, let's make sure metarepo is updated with its state.
$ cd $METAREPO

$ git annex sync
We could do the same for drive02. This is how we would proceed with every update.
Walkthrough: Restoration
Now, we have bare files at reasonable locations in drive01 and drive02. But, to generate a consistent restore, we need to be able to actually do an export. Otherwise, we may have files with old names, duplicate files, etc. Let's assume that we lost our source and metadata repos and have to restore from scratch. We'll make a new $RESTOREDIR. We'll begin with drive01 since we used it most recently.
$ mv $METAREPO $METAREPO.disabled

$ mv $SOURCEDIR $SOURCEDIR.disabled

$ git clone $DRIVE01/$REPONAME $RESTOREDIR

$ cd $RESTOREDIR

$ git config annex.thin true

$ git annex init "restore"

$ git annex adjust --hide-missing --unlock
Now, we need to connect the drive01 and pull the files from it.
$ git remote add drive01 $DRIVE01/$REPONAME

$ git annex sync --content
Now, repeat with drive02:
$ git remote add drive02 $DRIVE02/$REPONAME

$ git annex sync --content
Now we've got all our content back! Here's what whereis looks like:
whereis testdata/file01-unchanged (3 copies)

        3d663d0f-1a69-4943-8eb1-f4fe22dc4349 -- restore [here]

        9e48387e-b096-400a-8555-a3caf5b70a64 -- source

        b46fc85c-c68e-4093-a66e-19dc99a7d5e7 -- test drive #1 [origin]

ok

...
I was a little surprised that drive01 didn't seem to know what was on drive02. Perhaps that could have been remedied by adding more remotes there? I'm not entirely sure; I'd thought would have been able to do that automatically.
Conclusions
I think I have demonstrated two things:
First, git-annex is indeed an extremely powerful tool. I have only scratched the surface here. The location tracking is a neat feature, and being able to just access the data as plain files if all else fails is nice for future users.
Secondly, it is also a complex tool and difficult to get right for this purpose (I think much easier for some other purposes). For someone that doesn't live and breathe git-annex, it can be hard to get right. In fact, I'm not entirely sure I got it right here. Why didn't drive02 know what files were on drive01 and vice-versa? I don't know, and that reflects some kind of misunderstanding on my part about how metadata is synced; perhaps more care needs to be taken in restore, or done in a different order, than I proposed. I initially tried to do a restore by using git annex export to a directory special remote with exporttree=yes, but I couldn't ever get it to actually do anything, and I don't know why.
These two cut against each other. On the one hand, the raw accessibility of the data to someone with no computer skills is unmatched. On the other hand, I'm not certain I have the skill to always prepare the discs properly, or to do a proper consistent restore.
Posted on June 16, 2023
Update 2023-06-17: I had missed an N in the formulas, they have been updated, and since I was editing this I ve added the haskell bit.
I ve just realized that I m not anywhere close to finishing the shawl I m knitting, so I ve done the perfectly logical and rational thing and started a new one.
This one is using some yarn from the stash, so its size is limited by the available yarn, and I wanted to estimate how long it may be, so I weighted the ball of yarn at the beginning and then again after knitting 10 and 20 rows.
It s a top-down crescent, with 6 increases every two rows (but these calculations should work for any uniform top-down shawl with a regular number of increases), so each block of 10 rows should use an approximately fixed weight of yarn more than the previous block of 10 rows.
So, let w0 be the weight of the first block of rows, wr the (average) difference between two consecutive blocks and wT the total weight of the shawl. Then the weight used by block i should be wi = w0 + wri and the total weight of the shawl should be:
$$w_T = \sum_ i=0 ^ N w_i = N w_0 + w_r \frac N ( N + 1) 2 $$
where N is the number of blocks in the whole shawl.
This gives:
N2 + (1 + 2 w0/wr) N 2 * wT/wr = 0
and the only positive solution will be:
$$N = - 1/2 - w_0/w_r + \sqrt(1/4 + w_0^2/w_r^2 - w_0/w_r + 2 w_T/w_r)$$
or, in a few lines of python that can be easily copypasted (changing the values in ws and w_T, of course):
let ws = [2, 4, 6]
let w_T = 200
let w_0 = head ws
let w_r = ( sum (map (\(x,y) -> y-x) (zip ws (drop 1 ws))) ) / (fromIntegral (length ws - 1))
-1/2 - w_0 / w_r + sqrt (1/4 + (w_0/w_r)**2 - w_0/w_r + 2 * w_T / w_r)
Which right now (using the actual measured values) tells me I will have about 135 rows in my shawl, but I d really want to do a few more blocks of 10 rows and have more datapoints before I trust the numbers I ve put in.
Which means that this shawl will also take forever.
Posted on June 16, 2023
I ve just realized that I m not anywhere close to finishing the shawl I m knitting, so I ve done the perfectly logical and rational thing and started a new one.
This one is using some yarn from the stash, so its size is limited by the available yarn, and I wanted to estimate how long it may be, so I weighted the ball of yarn at the beginning and then again after knitting 10 and 20 rows.
It s a top-down crescent, with 6 increases every two rows (but these calculations should work for any uniform top-down shawl with a regular number of increases), so each block of 10 rows should use an aproximately fixed weight of yarn more than the previous block of 10 rows.
So, let w0 be the weight of the first block of rows, wr the (average) difference between two consecutive blocks and wT the total weight of the shawl. Then the weight used by block i should be wi = w0 + wri and the total weight of the shawl should be:
$$w_T = \sum_ i=0 ^ N w_i = w_0 + w_r \frac N ( N + 1) 2 $$
where N is the number of blocks in the whole shawl.
This gives:
N2 + N + 2/Wr (w0wT)
and the only positive solution will be:
$$N = \frac -1 - \sqrt(1 - \frac 8 w_r (w_0 - w_T)) 2 $$
or, in a few lines of python that can be easily copypasted (changing the values in ws and w_T, of course):
Which right now (using the actual measured values) tells me I will have about 140 rows in my shawl, but I d really want to do a few more blocks of 10 rows and have more datapoints before I trust the numbers I ve put in.
Which means that this shawl will also take forever.
Ayisha
After a long time I saw a movie that I enjoyed wholeheartedly. And it unexpectedly touched my heart. The name of the movie is Ayisha. The first frame of the movie itself sets the pace where we see Ayisha (Manju Warrier) who decides to help out a gang as lot of women were being hassled. So she agrees to hoodwink cops and help launder some money. Then she is shown to work as a maid for an elite Arab family. To portray a Muslim character in these polarized times really shows guts especially when the othering of the Muslim has been happening 24 7. In fact, just few days back I was shocked to learn that Muslim homes were being marked as Jews homes had been marked in the 1930 s. Not just homes but also businesses too. And after few days in a total hypocritical fashion one of the judges says that you cannot push people to buy or not buy from a shop. This is after systemically doing the whole hate campaign for almost 2 weeks. What value the judge s statements are after 2 weeks ??? The poison has already seeped in But I m drifting from the topic/movie.
The real fun of the movie is the beautiful relationship that happens between Ayisha and Mama, she is the biggest maternal figure in the house and in fact, her command is what goes in the house. The house or palace which is the perfect description is shown as being opulent but not as rich as both Mama and Ayisha are, spiritually and emotionally both giving and sharing of each other. Almost a mother daughter relationship, although with others she is shown as having a bit of an iron hand. Halfway through the movie we come to know that Ayisha was also a dramatist and an actress having worked in early Malayalam movies. I do not want to go through all the ups and downs as that is the beauty of the movie and it needs to be seen for that aspect. I am always sort of in two worlds where should I promote a book or series or movie or not because most of the time it is the unexpected that works. When we have expectation it doesn t. Avatar, the Way of the Water is an exception, not many movies I can recall like that where I had expectations and still the movie surpassed it. So maybe go with no expectations at all
Manju Warrier
Manju Warrier should actually be called Manju Warrior as she chose to be with the survivor rather than the sexism that is prevalent in the Malayalam film industry which actually is more or less a mirror of Bollywood and society as whole. Thesethreelinks should give enough background knowledge as to what has been happening although I m sure my Malayalam friends would more than add to that knowledge whatever may be missing. In quite a few movies, the women are making inroads without significant male strength. Especially Manju s movies have no male lead for the last few movies. Whether that is deliberate part on Manju or an obstacle being put in front of her. Anyone knows that having a male lead and a female lead enriches the value of a movie quite a bit. This doesn t mean one is better than the other but having both enriches the end product, as simple as that. This is sadly not happening. Having POSH training and having an ICC is something that each organization should look forward for. It s kind of mandatory need of hour, especially when we have young people all around us. I am hopeful that people who are from Kerala would shed some more background light on what has been happening.
Books
I haven t yet submitted an application for Debconf. But my idea is irrespective of whether or not I m there, I do hope we can have a library where people can donate books and people can take away books as well. A kind of circular marketplace/library where just somebody notes what books are available. Even if 100 odd people are coming to Debconf that easily means 100 books of various languages. That in itself would be interesting and to see what people are reading, wanting to discuss etc. We could even have readings. IIRC, in 2016 we had a children s area, maybe we could do some readings from some books to children which fuels their imagination. Even people like me who are deaf would be willing to look at excerpts and be charmed by them. For instance, in all my forays of fantasy literature except for Babylon Steel I haven t read one book that has a female lead character and I have read probably around 100 odd fantasy books till date. Not a lot but still to my mind, is a big gap as far as literature is concerned. How would more women write fantasy if they don t have heroes to look forward to :(. Or maybe I may be missing some authors and characters that others know and I do not. Do others feel the same or this question hasn t even been asked ??? Dunno. Please let me know.
Debutsav
So apparently Debutsav is happening 2 days from now. While I did come to know about it few days back I had to think whether I want to apply for this or apply for Debconf as I physically, emotionally can t do justice to both even though they are a few months apart. I wish all the best for the attendees as well as presenters sharing all the projects and hopefully somebody shares at least some of the projects that are presented there so we may know what new projects or softwares to follow or whatever. Till later.
Over the last month I ve performed some market research to better understand the potential for co2mon.nz and to help me decide whether the product I ve built has a fit with the market or not. The key conclusions I ve drawn from this work are:
Air quality is acknowledged as important, but monitoring it is not an urgent or pressing problem for most people.
Most of the value is seen in the hardware rather than the software service.
Keep reading to hear more about the results that lead to those conclusions.
Survey
The first piece of research I undertook was a survey covering three topics: views on indoor air quality, how respondents currently monitor indoor air quality and the desired features, including price, for a CO2 monitor.
The survey was distributed to my extended personal network via social media, email and word of mouth. I offered respondents the opportunity to win a year of free monitoring as an incentive and received just under 70 responses overall - the lucky winner of that prize was Sam H of Auckland whose shiny new CO2 monitor will be in the mail shortly.
Views on indoor air quality
Nearly all respondents strongly agreed that clean, fresh indoor air is important for avoiding sickness and enabling our best work, learning and general cognitive performance, with not a single negative response.
25% of respondents indicated they did not have a good understanding of the quality of the indoor air they were breathing versus 43% who indicated they had a good understanding of their indoor air quality.
Nearly 70% of respondents agreed (and greater than 40% strongly agreed) that real-time monitoring is beneficial and worth investing time and money in providing, with a similar distribution of responses agreeing it should be required in all shared indoor spaces.
Current ventilation monitoring approaches
For the home setting, using our senses was the most common method of understanding air quality, and only 6% of respondents were unhappy with their ability to monitor ventilation at home.
At work, trusting the owner of the building to monitor ventilation was the most common method, although using our senses and some personally collected data also featured for 20% of respondents. While the majority of respondents saw some room for improvement here, less than 20% of respondents were unsatisfied with the ability to monitor ventilation at work.
In shared public spaces using our senses and trusting the owner were equally popular with very little use of any data reported. The majority of respondents (40%) were unsatisfied with this situation with 34% seeing some room for improvement and very few being satisfied overall.
CO2 monitoring product features
A screen and WiFi were both strongly supported features with less than 10% of respondents seeing them as irrelevant and a large majority of answers skewing towards essential.
Coloured lights providing a quick indication were not viewed as important by 13% of respondents and while the majority of answers were towards essential there was also a large (22%) set of respondents who were indifferent to this feature.
The ability to access measurements and reports via a web interface was very mixed. Around 20% of respondents reported the feature as irrelevant, 20% essential with the majority seeing it as useful but mot essential.
Almost all respondents strongly indicated that additional air quality metrics beyond CO2 were important to collect.
Respondents mostly indicated the proposed prices are too high (64%), with essentially no responses suggesting they were too low and the balance (43%) in the middle. Only 5% of respondents indicated a preference for a rental option over a straight purchase.
Advertising
In parallel with the survey, I worked with my cousin who runs a marketing agency, The Asset, to place some Facebook ads aiming to systematically evaluate what combination of images and text would draw the best response. It s been an interesting process - despite working for Google for 15 years, I know relatively little about the day to day practice of online advertising!
I think we re about 50% of the way through that process of systematically building a funnel of traffic, it s been a steep learning curve and its clear there s significantly more thought and time that would need to be invested into this were it to be the primary driver of sales for a business. It s interested to see how what resonates or doesn t resonate with the audience is often completely different to what I expect, confirming the importance of having a process to evaluate and tweak how the advertising runs.
After just under 2 weeks of advertising with a daily budget in the $20 - $30 range, my ads have had just under 17k impressions by 10k distinct people resulting in 76 visits to the co2mon.nz website, and zero sales. The ads themselves received 233 clicks, so there s clearly a lot of room for further improvement and revision of the ad text itself to present a more compelling message. Unfortunately the most common response and feedback to the ads themselves has been comments arguing that CO2 is wonderful, climate change is invented and all our problems would be solved if we had more CO2 everywhere. Tedious to deal with, but also useful reminder about awareness and interest in the problem to contrast with the results from the survey of my extended personal network!
Feedback from other conversations
In addition to the survey and advertising I ve had conversations with some local air conditioning and ventilation businesses as well as a commercial building management firm - all providing similar feedback to the results from the survey - acknowledgement that air quality is important and relatively immaturely measured currently, but low urgency or pain to change or remedy that situation.
Another interesting point that s come up in conversations with various small business owners is what to do if or when the monitoring shows a ventilation problem? The obvious answer of opening the windows more does not seem to be particularly well received. Without a compelling solution to offer to the potential problem that the monitoring might reveal I often sense a reluctance from people to invest too much time and money in something which may create a problem in a space they don t currently see as urgent.
Conclusions
The responses are interesting and surprising to me a in a few ways (no interest in rental, favouring web interface over app), but at the end of the day lead to the two conclusions described above:
Air quality is acknowledged as important, but monitoring it is not an urgent or pressing problem for most people.
At home and work the majority of people are OK with relying on their senses or trusting someone else to maintain ventilation. They wouldn t object to improvements, but the feedback is that ventilation monitoring is not a problem people are actively looking to solve.
The number of people who do see this as an urgent enough problem to invest money into solving is low - even within the biased sample of my extended network. There is a stronger set of evidence for the problem being seen as more urgent by the users of shared public spaces - but I ve not been able to find any evidence that the owners and managers of those spaces feel the same urgency or duty of care towards their users to invest in this space.
Most of the opportunity is in the hardware rather than the software service.
This signal comes through in the feedback on the pricing (preferring outright purchase vs rental), but it s also been directly expressed in the free-form comments and other conversations I ve had and the the relative importance given to the physical product features over the web/app interfaces in the survey results.
Wrap Up
I m glad I finally spent the time doing this research, particularly the survey, these are good lessons to learn, even if I should have taken the time to learn them a year ago - so I can write that reminder (do your research before building a product) down as a key outcome of this process too!
Stay tuned for more details on the other work I ve been doing recently on the hardware side of co2mon.nz and what these results mean for my overall plans. As always, I d love to hear from you if these results give you ideas or questions you d like to discuss.
 co2mon.nz currently uses monitors based on Oliver Seiler s open source design which I am personally building. This post describes my exploration of how to achieve production of a CO2 monitor that could enable the growth of co2mon.nz.
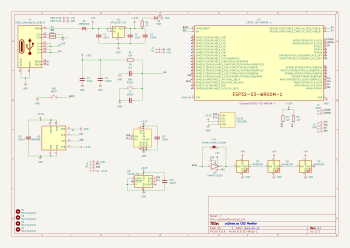 I started out trying to use the EasyEDA/OSHWLab ecosystem thinking the tight integration with JLCPCB s assembly services would be a benefit, but the web interface was too clunky and limiting and I quickly got frustrated. KiCad proved to be a much more pleasant and capable tool for the job.
The reference design in the ESP32 datasheet (p28) and USB-C power supply examples from blnlabs were particularly helpful alongside the KiCad documentation and the example of the existing monitor in completing this step (click the image to enlarge).
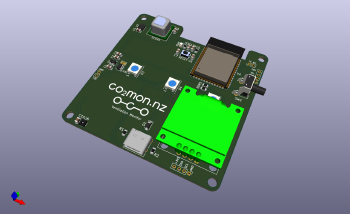 Taking all of these factors into account I ended up with a square PCB containing a cutout in the top right so that the ESP32 antenna can sit within the overall square outline while still meeting its design requirements. The SCD40 and BME680 sit in the top left corner, near the edges for good airflow and far away from the SHT30 temperature sensor in the bottom left corner. The LEDs I placed in a horizontal row across the center of the board, the LCD in the bottom right, a push button on the right-hand side and the USB-C socket in the center at the bottom.
Once the components are placed, the next big task is to route the traces (aka wires) between the components on the board such that all the required electrical connections are made without any unintended connections (aka shorts) being created. This is a fun constraint solving/optimisation challenge and takes on an almost artistic aspect with other PCB designers often having strong opinions on which layout is best. The majority of the traces and routing for this board were able to be placed on the top layer of the PCB, but I also made use of the back layer for a few traces to help avoid conflicts and deal with places where different traces needed to cross each other. It s easy to see how this step would be much more challenging and time consuming on a larger and more complex PCB design.
The final touches were to add some debugging breakouts for the serial and JTAG ports on the ESP32-S3 and a logo and various other helpful text on the silkscreen layer that will be printed on the PCB so it looks nice.
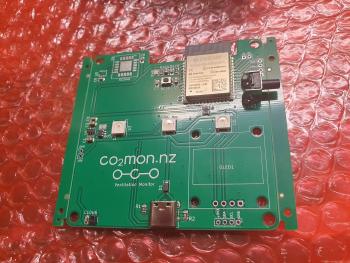 The final surprise in the assembly process was the concept of edge rails, additional PCB material that is needed on either side of the board to help with feeding it through the assembly machine in the correct position. These can be added automatically by JLCPCB and have to be snapped off after the completed boards are received. I hadn t heard about these before and I was a little worried that they d interfere or get in the way of either the antenna cut-out at the top of the board, or the switch on the right hand side as it overhangs the edge so it can sit flush with the case.
In the end there was no issue with the edge rails. The switch was placed hanging over them without issue and snapping them off once the boards arrived was a trivial 30s job using a vice to hold the edge rail and then gently tipping the board over until it snapped off - the interface between the board and the rails while solid looking has obviously been scored or perforated in some way during the production process so the edge breaks cleanly and smoothly. Magic!
The process was amazingly quick with the completed PCBs (picture above) arriving within 7 days of the order being placed and looking amazing.
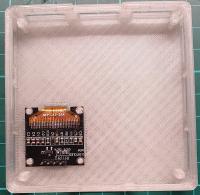 As a result I ended up completely flipping the design such that the front panel is a single piece of plastic that also encompasses the walls of the case and contains appropriate mounting stakes for both the screen and the main PCB.
Getting to this design hugely simplified the assembly process. Starting with an empty case lying face down on a bench, the LCD screen is pushed onto the mounting poles and sits flush with the cover of the case - easily achieved without the main PCB yet in place.
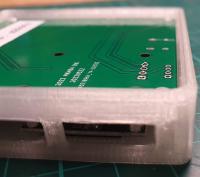 Next, the main PCB is gently lowered into the case facing downwards and sits on the mounting pole in each corner with the pins for the LCD just protruding through the appropriate holes in the PCB ready to be quickly soldered into place (this took significant iteration and tuning of dimensions/positioning to achieve!).
Finally, a back panel can be attached which holds the PCB in place and uses cantilever snap joints to click on to the rest of the case.
Overall the design is a huge improvement over the previous case which required screws and spacers to position the PCB and cover relative to the rest of the case, with the spacers and screws being particularly fiddly to work with.
The major concern I had with the new design was that the mount to attach the monitor to the wall has moved from being attached to the main case and components directly to needing to be on the removable back panel - if the clips holding this panel to the case fail the core part of the monitor will fall off the wall which would not be good. To guard against this I ve doubled the size and number of clips at the top of the case (which bears the weight) and the result seems very robust in my testing. To completely assemble a monitor, including the soldering step takes me about 2-3 minutes individually, and would be even quicker if working in batches.
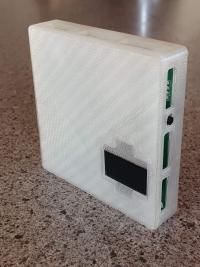 I tried a variety of filament colours, but settled on a transparent filament which once combined in the necessary layers to form the case is not actually transparent like perspex is, but provides a nice translucent medium which achieves the goal of having the light colour visible without exposing all of the circuit board detail. There s room for future improvement in the positioning of the LEDs on the circuit board to provide a more even distribution of light across the case but overall I really like the way the completed monitor ends up looking.
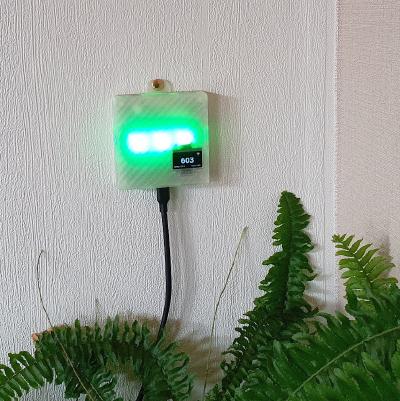 The goal of having a CO2 monitor which I can outsource the vast majority of production of is as close to being met as I think is possible without undertaking the final proof of placing a large order. I ve satisfied myself that each step is feasible and that the final assembly process is quick, easy and well below the level of effort and time it was taking me to produce the original monitors.
Cost wise it s also a huge win, primarily in terms of the time taken, but also in the raw components - currently the five prototypes I ordered and built are on par with the component cost of the original CO2 monitor, but this will drop further with larger orders due to price breaks and amortisation of the setup and shipping expenses across more monitors.
This project has also given me a much better appreciation for how much I m only just scratching the surface of the potential complexities and challenges in producing a hardware product of this type.
I m reasonably confident I could successfully produce a few hundred and maybe even a few thousand monitors using this approach, but it s also clear that getting beyond that point is and would be a whole further level of effort and learning.
Hardware is hard work. That s not news to anyone, including me, but there is something to be said for experiencing the process first hand to make the reality of what s required real.
The PCB and case designs are both shared and can be found at https://github.com/co2monnz/co2monitor-pcb and https://github.com/co2monnz/cad, feedback and suggestions welcome!

 Taking all of these factors into account I ended up with a square PCB containing a cutout in the top right so that the ESP32 antenna can sit within the overall square outline while still meeting its design requirements. The SCD40 and BME680 sit in the top left corner, near the edges for good airflow and far away from the SHT30 temperature sensor in the bottom left corner. The LEDs I placed in a horizontal row across the center of the board, the LCD in the bottom right, a push button on the right-hand side and the USB-C socket in the center at the bottom.
Once the components are placed, the next big task is to route the traces (aka wires) between the components on the board such that all the required electrical connections are made without any unintended connections (aka shorts) being created. This is a fun constraint solving/optimisation challenge and takes on an almost artistic aspect with other PCB designers often having strong opinions on which layout is best. The majority of the traces and routing for this board were able to be placed on the top layer of the PCB, but I also made use of the back layer for a few traces to help avoid conflicts and deal with places where different traces needed to cross each other. It s easy to see how this step would be much more challenging and time consuming on a larger and more complex PCB design.
The final touches were to add some debugging breakouts for the serial and JTAG ports on the ESP32-S3 and a logo and various other helpful text on the silkscreen layer that will be printed on the PCB so it looks nice.


 I tried a variety of filament colours, but settled on a transparent filament which once combined in the necessary layers to form the case is not actually transparent like perspex is, but provides a nice translucent medium which achieves the goal of having the light colour visible without exposing all of the circuit board detail. There s room for future improvement in the positioning of the LEDs on the circuit board to provide a more even distribution of light across the case but overall I really like the way the completed monitor ends up looking.

 While travel these days is much reduced I still end up in Dublin regularly enough (though less so now I m not working directly with folk there), and have the occasional US trip. Given that I live and work in the UK, and thus get paid in GBP ( ), this leads to the question of what to do about USD ($) and EUR ( ) transaction. USD turns out to be easy; I still have a US account from when I lived there and keeping it active has, so far, not proved to be a problem.
EUR is tricker. In an ideal world I d find a fee-free account that would allow normal Eurozone transfers and provide me with a suitable debit + credit card for use while travelling. I ve found options with a fee, but I don t have enough Euro transactions to make it worthwhile.
A friend pointed me at the
 After holding the domain copyninja.info for almost 15 years, I finally let it
expire and bought a new domain, copyninja.in. With this move, I also bid
goodbye to my VPS, which I had been using for over 12 years on DigitalOcean.
This particular VPS was initially set up with Debian Wheezy (7) and had been
upgraded over the years to successive Debian versions and finally was running
Debian Bullseye (11).
The main reason for the move was that the .info domain was becoming more
expensive every year, and the VPS, which I had upgraded to the $10 USD range,
cost around $12 USD per month with GST included. Since I wasn't really using the
VPS anymore and had recently even broken my DNS and mail server settings, I
decided it was the right time to reduce this additional cost.
Now I have a cheaper .in domain, and the VPS is on a minimal configuration at
DigitalOcean, costing $5 USD per month (which becomes almost $7 USD with GST).
Currently, I only run a blog and mail server on this VPS. I will assess if I
really need to keep running the mail server for some more time. If not, I will
move the blog to a hosting service like GitHub Pages and completely get rid of
the VPS.
My email address has now changed, and the new mail can be obtained from this
link <http://scr.im/newcopyninj>. I have updated my GPG key and added the new
email as the new UID. I still need to revoke the old domain UID. The key has
already been updated in the Debian Keyring.
 My old Thinkpad X220 has been slowly dying
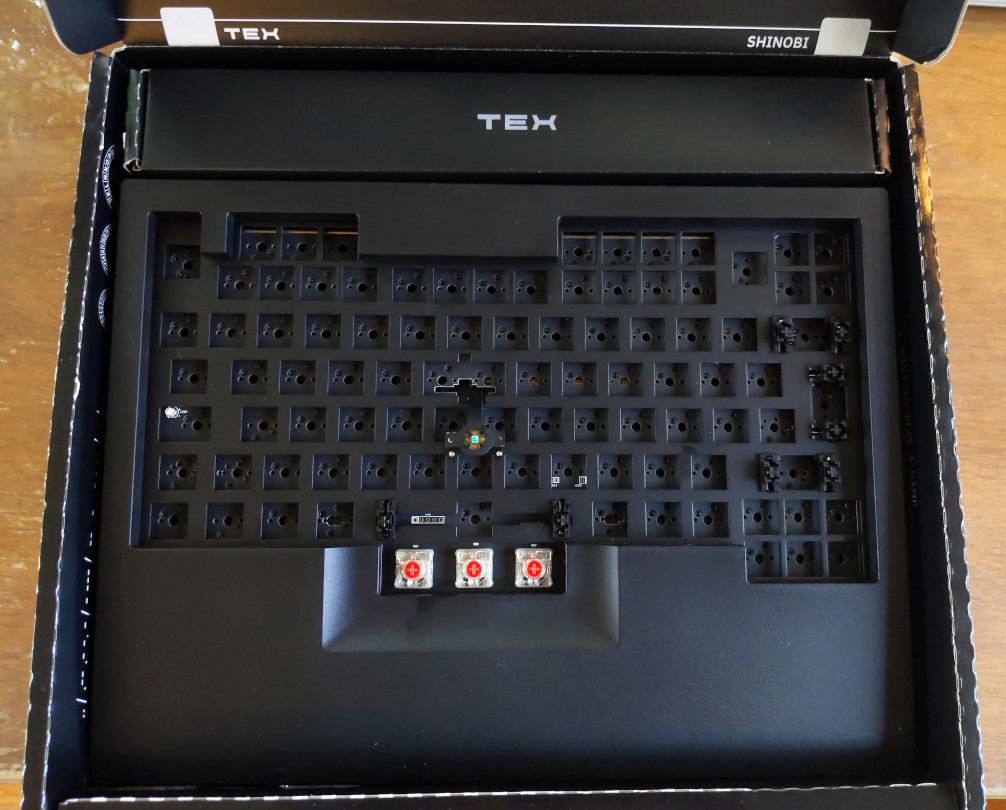 If you follow Debian Planet, you may have seen the Tex Shinobi when Jonathan
Dowland
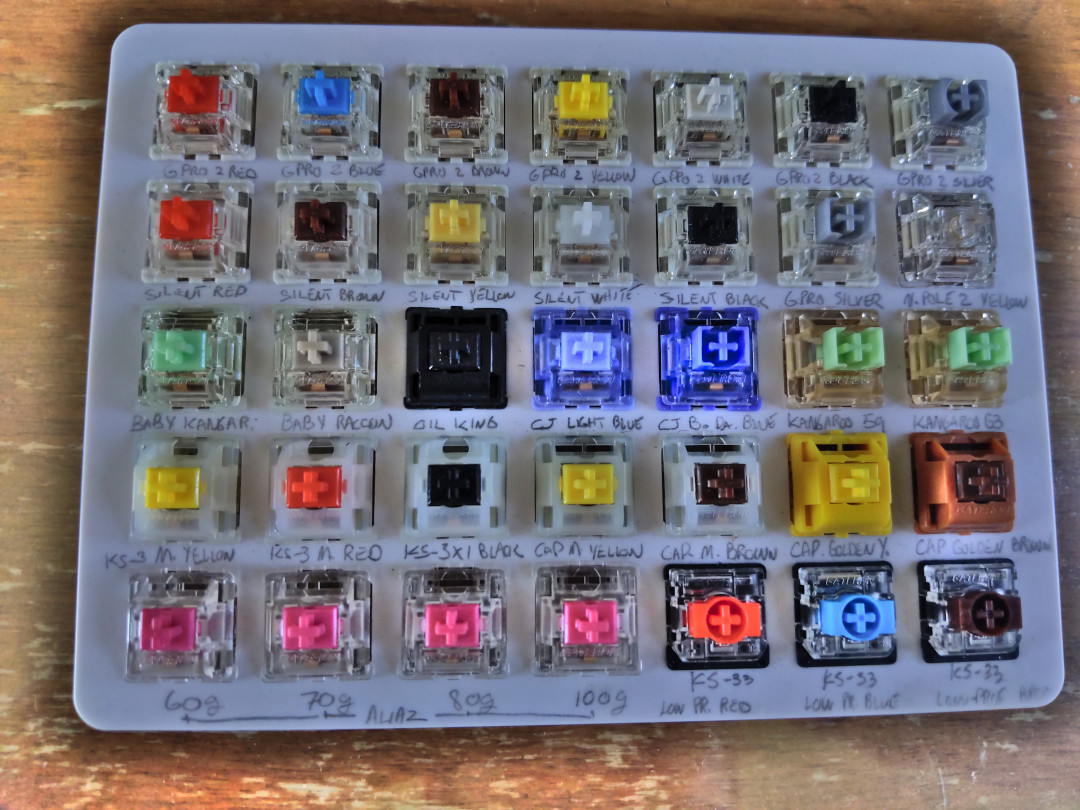 To know what model of switches I wanted, I bought a
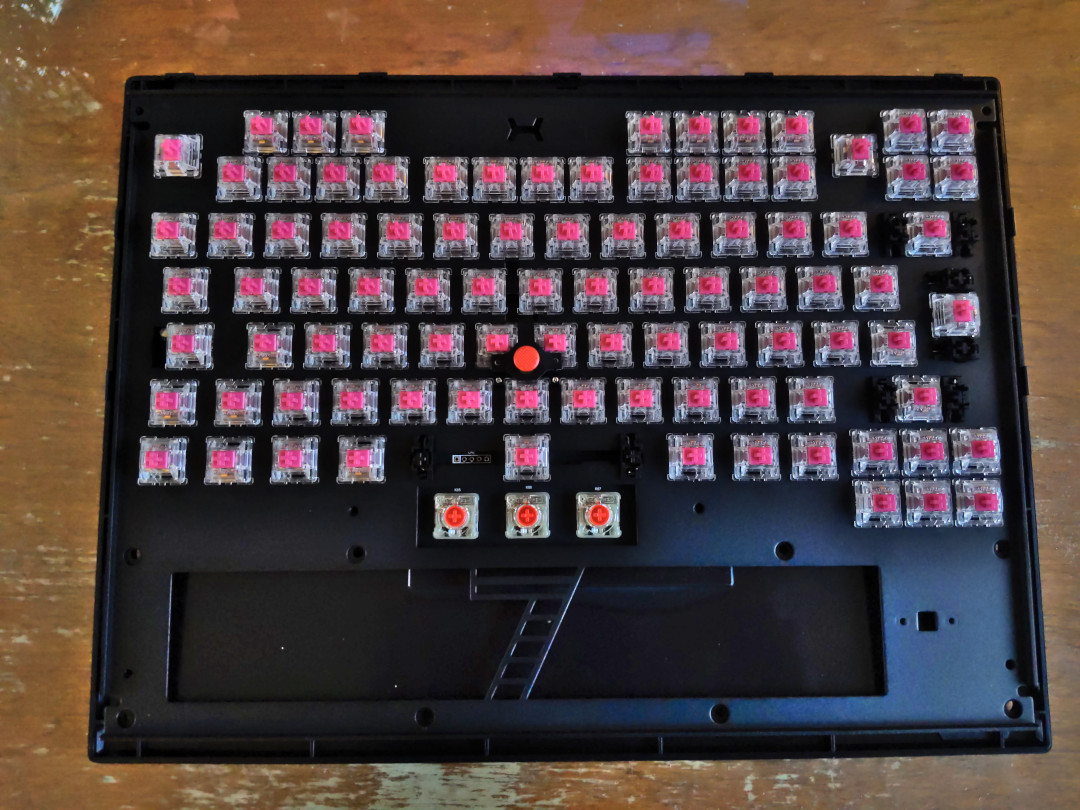 The only thing left to do on this keyboard is to replace the three soldered
switches that came pre-installed for the mouse buttons. They are Cherry MX Red
low-profile switches and are genuinely terrible
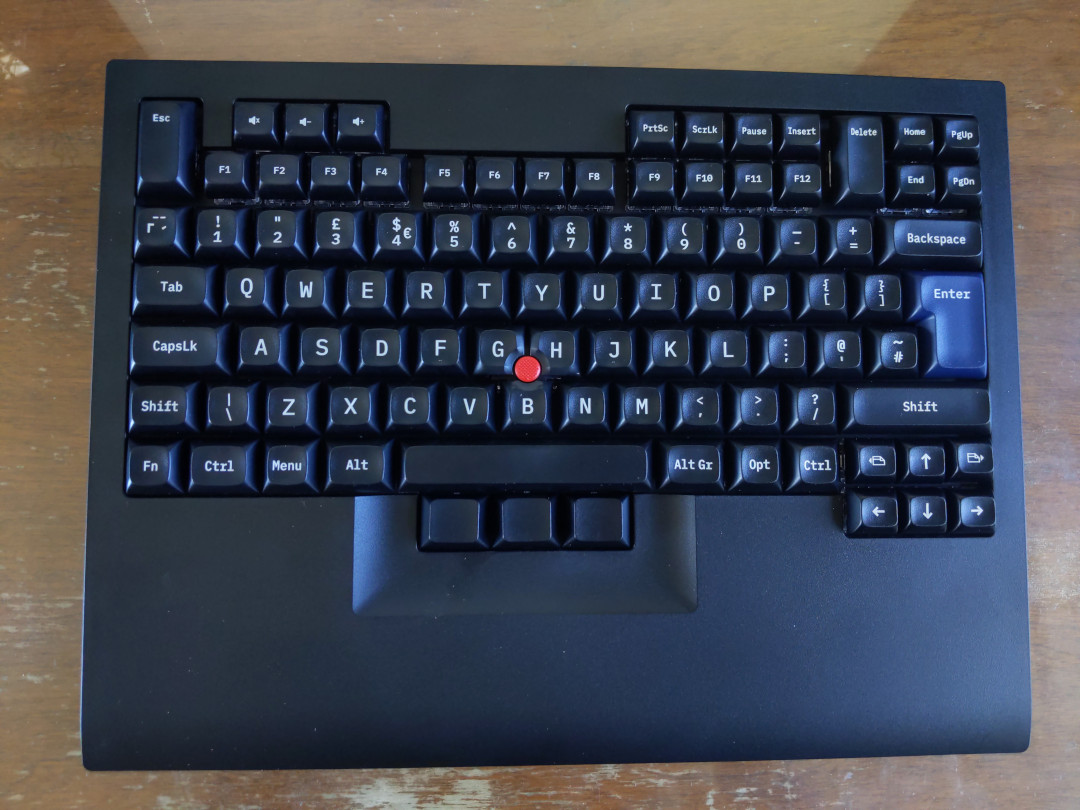 Overall, I am very satisfied with this keyboard and I look forward using it
daily when schools starts again in September.


 After an upgrade of my PC's mainboard BIOS the boot would take a minute or more to complete and sometimes the lightdm login screen would sit there but not accept keyboard input for another minute or so. Then the keyboard got enabled and I could log in normally. Everything worked fine after that bootup struggle completed. This was fully reproducible and persisted across reboots. Weird.
The kernel
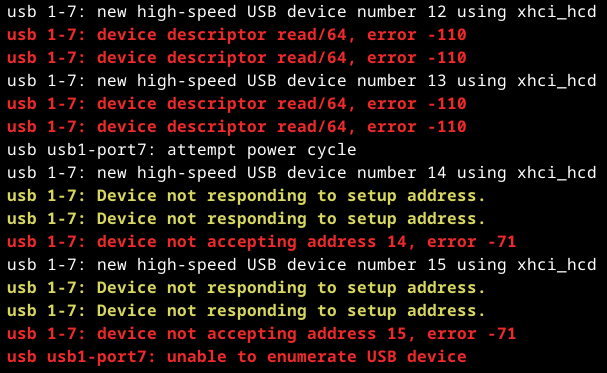 Googleing these
 The wisdom of the crowd says
 As some of you may know, the Debian project released v12, bookworm to stable on the 10th of this month. I haven t had a reason to try it yet, but I m downloading it now. My first thought is that it s much larger than I expected. The normal sized version used to fit on a CD-ROM disk, so around 650MB. The netinst has until now been even smaller, with the most recent versions being about 256MB if I recall correctly. The netinst, now with proprietary firmware, weighs in over 700MB:
 A few days ago, I released a major update on
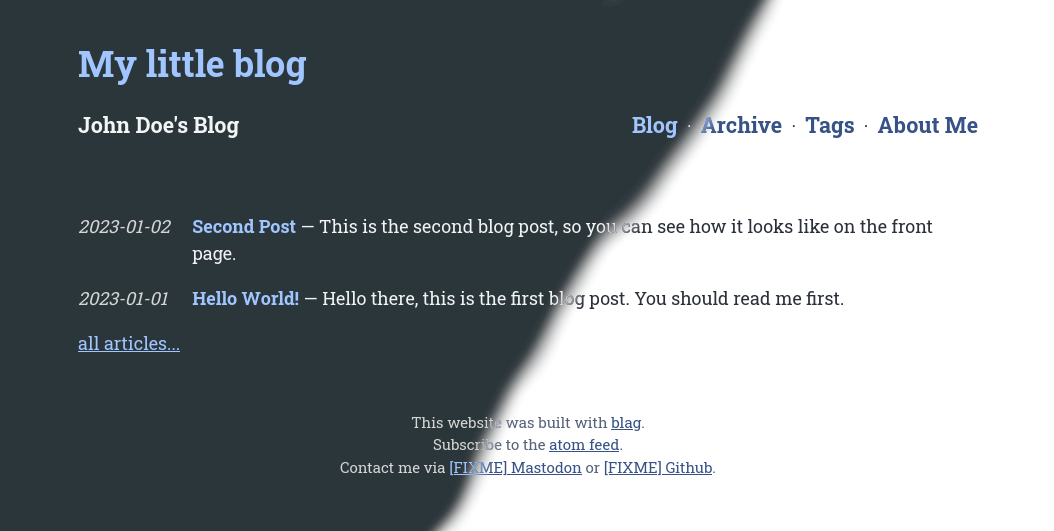 It comes with a light- and dark theme that switches automatically based on the
browser setting, as well as fitting light- and dark syntax highlighting themes
for code blocks.
Improved

 But I m drifting from the topic/movie.
