Search Results: "ag"

30 April 2013

Leo 'costela' Antunes: Deprecation of $(ARCH)-geomirror.debian.net

After the announcement of http.debian.net some months back I imagined the few people using my older $(ARCH)-geomirror.debian.net DNS redirector would relatively quickly jump ship to the newer solution, it being superior in basically every aspect. However it seems I had highly underrated the usage of my little hack. According to the server logs there still are a sensible number of genuine-looking queries being made (around 600 unique IPs in the last 3 days), and even if a sizable fraction of them are being generated by bots, this still leaves a pretty big number of potential users out there. So I guess it s only common courtesy to let these potential users know in a slightly more public place that I plan on pulling the plug till the end of the year. If you re one of the people making use of the service, please migrate to http.debian.net. Note however that this has nothing to do with cdn.debian.net, besides being based on a similar idea.

Steve Kemp: After you've started it seems like a bad idea?

To recap: given the absence of other credible alternatives I had two options: I think there is room for a new console client, because mutt is showing its age and does feel like it should have a real extension language - be it guile, lisp, javascript(!), Lua, or something else. So I distilled what I thought I wanted into three sections: So how did I do? I wrote a ncurses-based client which has Lua backed into it. You can fully explore the sidebar-mode - which lets you select multiple folders. From there you can view the messages in a list. What you can't do is anything "real": For a two-day hack it is remarkably robust, and allowing scripting shows awesomeness. Consider this:
--
-- show all folders in the Maildir-list.
--
function all()
   -- ensure that the sidebar displays all folders
   sidebar_mode = "all";
   -- we're going to be in "maildir browsing mode"
   cmail_mode = "sidebar";
   reset_sidebar();
   refresh_screen();
end
--
-- Test code, show that the pattern-searching works.
--
-- To use this press ":" to enter the prompt, then enter "livejournal".
--
-- OR press "l" when in the sidebar-mode.
--
function livejournal()
   sidebar_pattern = "/.livejournal.2";
   sidebar_mode = "pattern";
   reset_sidebar();
   refresh_screen();
end
--
-- There is a different table for each mode.
--
keymap =  
keymap['sidebar'] =  
keymap['index']   =  
keymap['message'] =  
--
-- In the sidebar-mode "b" toggles the sidebar <-> index.
--
-- ":" invokes the evaluator.
-- "q" quits the browser and goes to the index-mode.
-- "Q" quits the program entirely.
--
keymap['sidebar'][':'] = "prompt-eval"
keymap['sidebar']['b'] = "toggle"
keymap['sidebar']['q'] = "toggle"
keymap['sidebar']['Q'] = "exit"
-- show all/unread/livejournal folders
keymap['sidebar']['a'] = "all"
keymap['sidebar']['u'] = "unread"
keymap['sidebar']['l'] = "livejournal"
Neat, huh? See the cmail.lua file on github for more details. My decision hasn't really progressed any further, though I can see that if this client were complete I'd love to use it. Its just that the remaining parts are the fiddly ones. I guess I'll re-hack mutt, and keep this on the back-burner. The code is ropey in places, but should you wish to view: And damn C is kicking my ass.

29 April 2013

Lisandro Dami&aacute;n Nicanor P&eacute;rez Meyer: On the road to Qt5: declarative, graphicaleffects and svg in experimental.

Some more Qt 5 packages have entered Debian experimental:
Enjoy :-)

Guido G nther: Bits from the 6th Debian groupware meeting

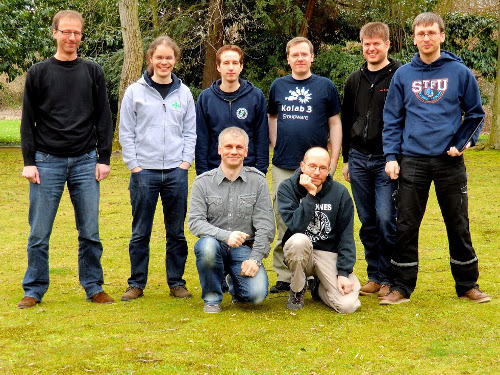
The sixth Debian Groupware Meeting was held in the LinuxHotel, Essen, Germany. We had one remote hacker from NYC which brings the number of attendants up to nine - an all time high! This is a short summary of what happened during the weekend: Groupphoto by Carsten Sch nert

Bdale Garbee: Removing LiPo Protection Boards

In my post about Batteries and Pyro Circuits, one of my suggestions was to remove the protection circuit board from LiPo cells used with Altus Metrum flight computers. To help out folks who want to do this themselves, I put together and posted a how-to with photos in the Documents section of our web site.

Thomas Goirand: Jenkins: building debian packages after a git push (my 2cents of a howto)

The below is written in the hope it will be helpful for my fellow DDs. Why using build after push ? Simple answer: to save time, to always use a clean build environment, to automate more tests. Real answer: because you are lazy, and tired of always having to type these build commands, and that watching the IRC channel is more fun than watching the build process. Other less important answers: building takes some CPU time, and makes your computer run slower for other tasks. It is really nice that building doesn t consume CPU cycles on your workstation/laptop, and that a server does the work, not disturbing you while you are working. It is also super nice that it can maintain a Debian repository for you after a successful build, available for everyone to use and test, which would be harder to achieve on your work machine (which may be behind a router doing NAT, or even sometimes turned off, etc.). It s also kind of fun to have an IRC robot telling everyone when a build is successful, so that you don t have to tell them, they can see it and start testing your work. Install a SID box that can build with cowbuilder
Install Jenkins WARNING: Probably, before really installing, you should read what s bellow (eg: Securing Jenkins). Simply apt-get install jenkins from experimental (the SID version has some security issues, and has been removed from Wheezy, on a request of the maintainer). Normally, after installing jenkins, you can access it through:
http://<ip-of-your-server>:8080/
There is no auth by default, so anyone will be able to access your jenkins web GUI and start any script under the jenkins user (sic!). Jenkins auth
Before doing anything else, you have to enable Jenkins auth, otherwise, you have everything accessible from the outside, meaning that more or less, anyone browsing your jenkins server could be allowed to run any command. It might sound simple, but in fact, Jenkins auth is tricky to activate, and it is very easy to get yourself locked out, with no working web access. So here s the steps: 1. Click on Manage Jenkins then on Configure system 2. Check the enable security checkbox 3. Under security realm select Jenkins s own user database and leave allow users to sign up . Important: leave Anyone can do anything for the moment (otherwise, you will lock yourself out). 5. At the bottom of the screen, click on the SAVE button. 6. On the top right, click to login / create an account. Create yourself an account, and stay logged in. 7. Once logged-in, go back again in the Manage Jenkins -> Configure system , under security. 8. Switch to Project based matrix authentication strategy . Under User/group to add , enter the new login you ve just created, and click on Add . 9. Select absolutely all checkboxes for that user, so that you make yourself an administrator. 10. For the Anonymous user, for Job, check Read, Build and Workspace. For Overall select Read. 11. At the bottom of the screen, hit save again. Now, anonymous (eg: not logged-in) users should be able to see all projects, and be able to click on the build now button. Note that if you lock yourself out, the way to fix is to turn off Jenkins, edit config.xml, remove the useSecurity thing, and all what is in authorizationStragegy and securityRealm , then restart Jenkins. I had to do that multiple times until I had it right (as it isn t really obvious you got to leave Jenkins completely insecure when creating a new user). Securing Jenkins: Proxy Jenkins through apache to use it over SSL
When doing a quick $search-engine search, you will see lots of tutorials to use apache as a proxy, which seems to be the standard way to run Jenkins. Add the following to /etc/apache2/sites-available/default-ssl:
ProxyPass / http://localhost:8080/
ProxyPassReverse / http://localhost:8080/
ProxyRequests Off
Then perform the following commands on the shell:
htpasswd -c /etc/apache2/jenkins_htpasswd <your-jenkins-username>
a2enmod proxy
a2enmod proxy_http
a2enmod ssl
a2ensite default-ssl
a2dissite default
apache2ctl restart
Then disable access to the port 8080 of jenkins from outside:
iptables -I INPUT -d <ip-of-your-server> -p tcp --dport 8080 -j REJECT
Of course, this doesn t mean you shouldn t take the steps to activate Jenkins own authentication, which is disabled by default (sic!). Build a script to build packages in a cowbuilder I thought it was hard. In fact it was not. All together, this was kind of fun to hack. Yes hack. What I did yet another kind of 10km ugly shell script. The way to use it is simply: build-openstack-pkg <package-name>. On my build server, I have put that script in /usr/bin, so that it is accessible from the default path.Ugly, but it does the job! Jenkins build script for openstack At the end of the script, scan_repo() generates the necessary files for a Debian repository to work under /home/ftp. I use pure-ftpd to serve it. /home/ftp must be owned by jenkins:jenkins so that the build script can copy packages in it. This build script is by no mean state of the art, and in fact, it s quite hack-ish (so I m not particularly proud of it, but it does its job ). If I am showing it in this blog post, it is just to show an example of what can be done. It is left as an exercise to the reader to create another build script adapted to its own needs, and write something cleaner and more modular. Dependency building Let s say that you are using the Built-Using: field, and that package B needs to be built if package A changes. Well, Jenkins can be configured to do that. Simply edit the configuration of project B (you will find it, it s easy ). My use case: In my case, for building Glance, Heat, Keystone, Nova, Quantum, Cinder and Ceilometer, which are all components of Openstack, I have written a small (about 500 lines) library of shell functions, and an also small (90 lines) Makefile, which are packaged in openstack-pkg-tools (so Nova, Glance, etc. all build-depends on openstack-pkg-tools). The shell functions are included in each maintainer scripts (debian/*.config and debian/*.postinst mainly) to avoid having some pre-depends that would break debconf flow. The Makefile of openstack-pkg-tools is included in debian/rules of each packages. In such a case, trying to manage the build process by hand is boring and time consuming (spending your time watching the build process of package A, so that you can manually start the build of package B, then wait again ). But it is also error prone: it is easy to do a mistakes in the build order, you can forget to dpkg -i the new version of package A, etc. But that s not it. Probably at some point, you will want Jenkins to rebuild everything. Well, that s easy to do. Simply create a dummy project, and have other project to build after that one. The build steps could simply be: echo Dummy project as a shell script (I m not even sure that s needed ). Configuring git to start a build on each push In Jenkins, pass your mouse over the Build now URL. Well, we just need to wget that URL in your Alioth repository. A small drawing is better than long explanation:
for i in  ls /git/openstack  ; do
    echo "wget -q --no-check-certificate \
    https://<ip-of-your-server>/job/$ PROJ_NAME /build?delay=0sec \
    -O /dev/null" >/git/openstack/$ i /hooks/post-receive \
        && chmod 0770 /git/openstack/$ i /hooks/post-receive;
done
The chmod 0770 is necessary if you don t want every Alioth users to have access to your Jenkins server web interface and see an eventual htpassword protection that you can add to your jenkins box (I m not covering that, but it is fairly easy to add such protection). Note that all of the members of your Alioth group will then have access to this post-receive hook, containing the password of your htaccess, so you must trust everyone in your Alioth group to not do nasty things with your Jenkins. Bonus point: IRC robot If you would like to see the result of your build published on IRC, Jenkins can do that. Click on Manage Jenkins , then on Manage Plugins . Then click on available and check the box in front of IRC plugin . Go at the bottom of the screen and click on Add . Then check the box to restart Jenkins automatically. Once it is restarted, go again under Manage jenkins then Configure system . Select the IRC Notification and configure it to join the network and the channel you want. Click on Advanced to select the IRC nick name of your bot, and make sure you change the port (by default jenkins has 194, when IRC normally uses 6667). Be patient when waiting for the IRC robot to connect / disconnect, this can take some time. Now, for each jenkins Job, you can tick the IRC Notification option. Doing piuparts after build One nice thing with automated builds, is that most of the time, you don t need to wait starring at them. So you can add as many tests as you want, the Jenkins IRC robot will anyway let you know sooner or later the result of your build. So adding piuparts tests in the build script seems the correct thing to do. Though that is still on my todo, so maybe that will be for my next blog post.

Wouter Verhelst: New in Wheezy: PMW

One of the things I do with computers is "do stuff with music". I'm not a professional musician by any means, but I do sometimes have a need for some software to do some music editing. In the past, that meant using GNU LilyPond; and while that's certainly an interesting piece of software, it has some idiosyncracies that have made me dislike it in the past. So when I learned about PMW, written by Philip Hazel (of PCRE and Exim fame) I was intrigued. PMW has several advantages over lilypond, in my opinion. To name but two: its syntax is less silly, and it takes far less time to convert something from source to graphic, to the extent that I've considered creating an editor which would update the result after every keystroke, something that just isn't possible with lilypond. The decision to upload pmw into Debian was just a no-brainer, and it's saved me some time since, already. Enjoy!

Richard Hartmann: #newinwheezy

There's a #newinwheezy game which basically presents a few of the 4451 new source packages in Debian/wheezy to a wider audience. My own entry is, obviously, vcsh. Quoth the manpage
vcsh - manage config files in $HOME via fake bare git repositories

You can also consult the (somewhat outdated) readme or just clone it. In related news, I have been asked to hold my "Gitify your life" talk at LinuxTag 2013. This talk can be found here. While the text on that page is in German, all slides will be in English and I will happily use either language based on what the audience prefers.

Michael Prokop: The #newinwheezy game: new forensic packages in Debian/wheezy

Debian/wheezy includes a bunch of packages for people interested in digital forensics. The packages maintained within the Debian Forensics team which are shipped with the upcoming Debian/wheezy stable release for the first time in a Debian release are: Join the #newinwheezy game and present packages which are new in Debian/wheezy.

Mart&iacute;n Ferrari: Setting up my server: netfilter

I was going to start this series with explaining how I did the remote set-up, but instead I will share something that happened today. One of the first things you want to do when putting a server directly connected to the Internet is some filtering. You don't want to have an application listening on the network by mistake, so a simple netfilter firewall is a good way to ensure you are only accepting connections on ports you explicitly allowed. I have been a long-time user of ferm, a simple tool that will read a configuration file written in a special structured syntax, and generates iptables commands from it. I have used it successfully to build very complex firewalls in previous jobs, and it had the huge benefit of keeping your firewall description readable and easy to modify by other people. This time I thought I may go with something simpler, as I only wanted a handful of very simple netfilter rules. I looked at Shorewall, and browsed a bit a few others. But in the end I decided against them: there was the need to learn the tools' concepts about different parts of the network, or there were more slanted towards command-line commands, so your actual configuration will be some files in /var/lib, totally managed by the tool. With ferm, I just need to write a very small configuration file, which reads almost like iptables commands, and that's it. In fact, the default configuration placed by the Debian package, already did 90% of what I wanted: accept incoming SSH connections, ICMP packets, and reject everything else. I took the example IPv6 configuration from /usr/share/doc/ferm/examples/ipv6.ferm and in 10 minutes it was ready:
table filter  
    chain INPUT  
        policy DROP;
        mod state state INVALID DROP;
        mod state state (ESTABLISHED RELATED) ACCEPT;
        interface lo ACCEPT;
        proto icmp ACCEPT; 
        # allow IPsec
        proto udp dport 500 ACCEPT;
        proto (esp ah) ACCEPT;
        proto tcp dport ssh ACCEPT;
        proto tcp dport (http https) ACCEPT;
     
    chain OUTPUT policy ACCEPT;
    chain FORWARD policy DROP;
 
domain ip6 table filter  
    chain INPUT  
        policy DROP;
        mod state state INVALID DROP;
        mod state state (ESTABLISHED RELATED) ACCEPT;
        interface lo ACCEPT;
        proto ipv6-icmp ACCEPT;
        proto tcp dport ssh ACCEPT;
        proto tcp dport (http https) ACCEPT;
     
    chain OUTPUT policy ACCEPT;
    chain FORWARD policy DROP;
 
It is important to note than when doing this kind of thing on a remote machine, you want to make sure you don't get locked out by accident. My method is that before activating any dangerous change, I drop an at job to disable the firewall in a few minutes:
# echo /etc/init.d/ferm stop   at now +10min
warning: commands will be executed using /bin/sh
job 4 at Mon Apr 29 02:47:00 2013
And if everything goes well, I just remove the job:
# atrm 4
Update: As paravoid pointed out in the comments, now (read: since many years ago, but I've never noticed) ferm has a --interactive mode which will revert the changes if you get locked out, much like the screen resolution changing dialog in Gnome.
Another thing that you definitely want to do, is to have some kind of protection against the almost constant influx of brute-force attacks against SSH. Apart from the obvious PermitRootLogin=no setting, there are a couple of popular methods to stop people probing random username/password combinations (I am assuming here that you actually have sensible passwords, or no passwords at all): running SSH in a non-standard port, and the great fail2ban daemon. Since I don't like non-standard stuff, I installed fail2ban, which by default it will inspect /var/log/auth.log for SSH login failures and insert netfilter rules to block the offenders. Problem is, I don't like much how fail2ban inserts rules and chains into my very tidy netfilter configuration which I had just created. So, I added an "action" to do things my way: only create a service-related chain and insert rules there, I will call that chain from my main ferm.conf. Ferm runs early in the boot sequence, so this won't be a problem during normal operation. The only caveat is that after changing a configuration in ferm, I need to restart fail2ban so it will recreate the netfilter chains and rules, which were wiped by ferm. This is my configuration, note that I am ignoring the port and protocol: the whole IP is blocked for a few minutes.
# cat /etc/fail2ban/jail.local 
[DEFAULT]
action = iptables-fixed[name=%(__name__)s]
# cat /etc/fail2ban/action.d/iptables-fixed.conf
[Definition]
actionstart = iptables -N fail2ban-<name>
              iptables -I fail2ban -j fail2ban-<name>
actionstop = iptables -D fail2ban -j fail2ban-<name>
             iptables -F fail2ban-<name>
             iptables -X fail2ban-<name>
actioncheck = iptables -n -L   grep -q fail2ban-<name>
actionban = iptables -I fail2ban-<name> 1 -s <ip> -j DROP
actionunban = iptables -D fail2ban-<name> -s <ip> -j DROP
[Init]
name = default

28 April 2013

Mart&iacute;n Ferrari: Moving my stuff away from home

TL;DR version: I want to get rid of the small server running at home, I tell you here about the service I've chosen, and why I like it. In following posts, I'll explain how did I set it up remotely. Disclaimer: I am in now way affiliated with the companies I mention here (except for Picasa, as I am a Google employee), and don't get any bonuses for this post. I am only sharing this because I think it might be useful information for other people.
Being a frequent migrant means possessions are a burden. In my previous place of residence (in France), I originally intended to only stay for 6 months, and so I arrived with just a couple of suitcases, and in the end that was enough for me to live for almost 2 years. The last time, on the other hand, I was removing my stuff completely from Argentina. I emptied my house, gave away some stuff, send some boxes to my parents' place, and carried the rest with me. That was a lot of stuff, but since the company was paying for the relocation, it was not much of a problem. Later I realised my mistake, and knowing that my time in Ireland is limited, I started to try and get rid of stuff I don't need. I know I will just sell or give away much of my stuff when I finally leave, but there are some things that are not so easy to part with. The main one being my home server, which hosts this website, my VCS repositories, pictures, and many other things I need to have on the net. This all used to be located in a home-made PC tucked in a data centre, co-located by a friendly company. But that computer died almost 2 years ago, and so canterville became abhean, and my stuff started being hosted with my aDSL connection. It worked well for some time, but now I realised I had to revert that change. With this in mind I set off to find a cheap place to host my stuff. I had a few requirements: I don't have that many photos, nor they are too big, but these requirements made it clear that most VPS offerings were not going to work for me. For some reason I fail to understand, local storage in VPS offerings is usually prohibitively expensive. This is OK for most use cases, but not for mine. A friend of mine, with a similar use case, is a happy VPS customer. He told me his trick: he only hosts in the server low-quality versions of the pictures, and keeps the originals (and back-ups) at home. This was a great idea, but with two fatal flaws: I want to only carry around a laptop and one or two external hard drives; and I want to have back-ups that are not physically with me. I was starting to think about hosting my files in Amazon s3 or something like that, since most dedicated servers are way too expensive. But then I heard about two French companies offering dirt-cheap servers: OVH and Online.net. Both of them offered small servers for about 12 a month, cheaper than most VPS offerings! Online seems to mainly cater to the French market, and for some silly reason, they charge a 50 set-up fee to customers outside of France. OVH, on the other hand, has many local branches, including an Irish one, so I went with them. The offering is a low-cost line called Kimsufi, and the smallest one is still very decent for a personal server: Once I had paid the fee for one month, it took a while for it to be activated (their payment system is pretty bad), but it finally was enabled about 24h later. Then the real fun started. On one hand, I was happy to see a wide selections of operating systems to choose from, including Debian stable and testing, and a web console with many functionalities, including some basic monitoring; but on the other hand, I realised that the installed image was not pristine, the online docs are not very good, and the web application is a bit buggy and really awkward to navigate. Having sub-par docs is not something I would usually care much about, but it made it a bit more difficult to me to understand some of the very cool functionalities their system offers (more on that in a bit), and more importantly, it made it clear to me that I won't trust their image: the procedures detailed there were not exactly best-practices, and they allow themselves to log-in as root into my server. I want to describe here what I think are their most interesting features, that made it possible to me to do risky operations, like encrypting the root partition, and setting up a firewall; and being able to fix problems that would usually require physical access. These are found in their web console: a hardware reset, and configurable netboot support with many offered images, including a rescue image based on Ubuntu and one that serves as a virtual KVM. (It is surprising that these servers don't have a serial console, but at least the kernel does not detect any). With these in hand, I didn't have to fear being locked out of my server for ever. Just set up a netboot image and hard-reboot the machine! Also, it made it very simple to install my system from scratch with debootstrap. The virtual KVM is a very interesting trick. It is a netboot image that runs some tests, and fires up a web browser. You get an email with the URL and a password to access it, and then you open a page that offers you what is basically a Qemu connected to a VNC server which will boot from your real hard drive. It is super slow, but that allows you to get console access to your server, which can be very handy to debug booting problems, unless it is some issue with the real hardware. It also offers the possibility of downloading an ISO image off the network and booting that, so it can be used to run a stock installer CD too. In another post I'll describe how I reinstalled my server remotely, and some of the pitfalls that I've encountered in the process.

Christian Perrier: [life] Running update: January-April...and more.

It seems that I didn't send any update to my international friends for quite a while, at least when it comes at my running activities. So, in short, I ran A LOT during the first months of April 2013. I mean it. As of now (April 28th), I cumulated 1424 kilometers, with a peak in March up to 375 kilometers. So, that's an average 12 kilometers per day. How did I achieve this? Among many other things, by doing part of my commute to work by running, which means 14 kilometers in one day, with a backpack containing everything needed to be dressed "normally" while working, plus my laptop, my rain jacket, etc....so up to 4 kilograms on my shoulders. And, yes, I can use a shower at work and I don't stink all day long! This alone already makes a fairly good training. Of course, all alone, it wouldn't be really funny, so I, of course, add some runs during the week-end, mostly trail running, enjoying the nature around our place. Official races have been mostly trail races during these months. The only road race has been an half-marathon in Bullion, back in February (4th year in a row I'm running this one, which is traditionnaly the "resume road races" competition in the area). I completed it in 1h39, quite close to my PB, even if....that was meant to be a training only. In February, still as a preparation race for Paris Ecotrail, I ran a 20km trail in Auffargis (a neat small village in the neighbourhood of our place), again completing it with great success, with a big negative split (for non hard-core runners, a negative split happens when one runs the second half of a race faster than the first one). All this was in preparation for Paris Ecotrail race, my second time on this 80km race that ends up at Eiffel Tower. Last year, being my first attempt on such distance,, I completed it in 11 hours 5 minutes. To make it short, this year, I finished 579th out of more than 2000 runners, in 9h36. That was indeed a really great result, in line with my 8h15 time back in November for the 70km "Le Puy-Firminy" night race. Moreover, I could indeed recover very quickly : the race was run on a Saturday and I resumed my "commute runs" on Wednesday. The next target were two trail races in April : I originally planned a 44km race on April 21st and finally ended up adding to it a 35km trail race on April 7th (the day of Paris Marathon), only 3 weeks after Ecotrail..:-) And I completed both these with a huge success. Indeed my best trail races ever, again with two negative splits and also a very good place. Indeed, I now usually complete races close to the very first women...:-). So, on April 7th, the trail du Josas (35km, 800m positive climb... which means about the equivalent of a marathon) was completed in 3h40....and last Sunday, the trail des Lavoirs (44km, 1100m positive climb) was completed in 4h40, with the last 2 kilometers being run above 13km/h. Describing how one can feel when "flying" in the very last kilometers of such a long run is just....impossible. Great, great, great memories. Then, during the week following the trail des Lavoirs, I ran 101km in 6 days, confirming that recovery is perfect. So, definitely, I am stunned by what I could achieve during these months, without injury, without big pain. Just good training and good results, without suffering and a giant pleasure. Yes, running is definitely a drug and I'm deeply addicted. Well, the result is, in short, that I feel good and well, so I think I won't stop soon...:-) Next challenge : Mont-Blanc marathon, in Chamonix : 42.195km....and 2500meters positive climb, with 1500 meters negative. Start in Chamonix at 1050m high and end at Planpraz (2050m), facing the Mont-Blanc, with a maximum altitude of 2267m during the race. Quite an interesting "marathon", isn't it? That will be my first race in real mountains...and, I guess not the last one. Target time: 6 hours. Secret wish: 5h30. During summer, I will mostly be preparing for the second part of the year....but I'll certainly enjoy the neighbourhood of Vaumarcus, Switzerland, where I'll attend DebConf. Challenge : combine running, hacking, cheese eating and fit all this in 24 hours every day. For the end of the year, challenges should peak between October and December: So, well, see you soon on this blog for another update after Mont-Blanc marathon. Let's hope I'll give you good news.

Vasudev Kamath: Tribute to Beloved Teacher

Today I'm writing this blog with saddened heart. My mentor and a best friend Dr.Ashokkumar is no more. He died yesterday after fighing with Lymph Node cancer. Ashokkumar or Ashok sir that is how we all students used to address him, was a Professor in Information Science Engineering in NMAM Institue of Technology and recently transferred to Computer Science Engineering Departement. My last meeting him with him was last year December during which he was looking every bit okay other than he had knee pain because of which he couldn't walk freely. But I never imagined that it will be my last meeting with him. Ashok sir was also behind the FLOSS event that took place in NMAM Institute of Technology including MiniDebconf 2011 which saw 2 of the foreign DD's Christian Perrier and Jonas Smedegaard. It was because of his first organized FLOSS event which I volunteered called Linux Habba I entered into the FLOSS world. This means its because of him that I started my FLOSS world journey and reached to my current level. Also it was because of his motivation I started writing this blog which I continue till this day.
I whole heartedly thank Ashok sir for teaching me guiding me and motivating me during my difficult times. You will always be remembered through out my life. May your soul Rest In Peace.
Here are the 2 pics of Ashok sir taken during Minidebconf (Credits: Christian Perrier and Kartik Mistry) Ashokkumar with Jonas and Me Ashokkumar during inaugaration of MiniDebconf with Christian and Kartik on stage Good bye Sir :-(

Vagrant Cascadian: intro

For many years, I've been meaning to write about various things in some sort of online journal. I'd like to tie together various parts of my life, such as my technical work in Debian, LTSP and other Free Software, Software Libre, and Open Source Software projects, but also my passion for Aikido, and other ideas that inspire me, such as pleaching. As with many new things, I struggled to name this journal. I even struggled with calling it a journal as opposed to a Blog, though blog always sounded a bit... brief and kind of blunt for my liking. So journal it is. But I still didn't even really have a name for it. Recently introduced to the concept of pleaching, essentially weaving living, growing branches togther, I was drawn to the concept, but admittedly, the sound of "pleach" or "pleaching" also carried some hint of harshness in it. Looking into synonyms, weaving, plait, braid... braid, yes, I typically wear my hair in a pair of braids... It has enough meaning to get by on... But that's too plain... so I borrowed from Spanish to come up with "trenza". So, thankfully to all involved, most of these posts will probably not be about picking names for things. I have a bit of backlog about some technical projects I've worked on that I'd like to write about, so I'll start with a few of those...

Paul Tagliamonte: Recent Hy developments

With some new patches from just oddles of interested hackers, there are some hot new changes, including a major mode for emacs and a hot new bot. I m currently blocking stuff while I m in the middle of the compiler, but new feature development will be wide open soon! Check out Hy, play with the source, install it with pip, and consider doing awesome stuff!

26 April 2013

Keith Packard: Shared Memory Fences

Shared Memory Fences In our last adventure, dri3k first steps, one of the future work items was to deal with synchronization between the direct rendering application and the X server. DRI2 handles this by performing a round trip each time the application starts using a buffer that was being used by the X server. As DRI3 manages buffer allocation within the application, there s really no reason to talk to the server, so this implicit serialization point just isn t available to us. As I mentioned last time, James Jones and Aaron Plattner added an explicit GPU serialization system to the Sync extension. These SyncFences serializing rendering between two X clients, but within the server there are hooks provided for the driver to use hardware-specific serialization primitives. The existing Linux DRM interfaces queue rendering to the GPU in the order requests are made to the kernel, so we don t need the ability to serialize within the GPU, we just need to serialize requests to the kernel. Simple CPU-based serialization gating access to the GPU will suffice here, at least for the current set of drivers. GPU access which is not mediated by the kernel will presumably require serialization that involves the GPU itself. We ll leave that for a future adventure though; the goal today is to build something that works with the current Linux DRM interfaces. SyncFence Semantics The semantics required by SyncFences is for multiple clients to block on a fence which a single client then triggers. All of the blocked clients start executing requests immediately after the trigger fires. There are four basic operations on SyncFences: SyncFences are the same as Events as provided by Python and other systems. Of course all of the names have been changed to keep things interesting. I ll call them Fences here, to be consistent with the current X usage. Using Pthread Primitives One fact about pthreads that I recently learned is that the synchronization primitives (mutexes, barriers and semaphores) are actually supposed to work across process boundaries, if those objects are in shared memory mapped by each process. That seemed like a great simplification for this project; allocate a page of shared memory, map into the X server and direct rendering application and use the existing pthreads APIs. Alas, the pthread objects are architecture specific. I m pretty sure that when that spec was written, no-one ever thought of running multiple architectures within the same memory space. I went and looked at the code to check, and found that each of these objects has a different size and structure on x86 and x86_64 architectures. That makes it pretty hard to use this API within X as we often have both 32- and 64- bit applications talking to the same (presumably 64-bit) X server. As a last resort, I read through a bunch of articles on using futexes directly within applications and decided that it was probably possible to implement what I needed in an architecture-independent fashion. Futexes Linux Futexes live in this strange limbo of being a not-quite-public kernel interface. Glibc uses them internally to implement locking primitives, but it doesn t export any direct interface to the system call. Certainly they re easy to use incorrectly, but it s unusual in the Linux space to have our fundamental tools locked away for our own safety . Fortunately, we can still get at futexes by creating our own syscall wrappers.
static inline long sys_futex(void *addr1, int op, int val1,
                 struct timespec *timeout, void *addr2, int val3)
 
    return syscall(SYS_futex, addr1, op, val1, timeout, addr2, val3);
 
For this little exercise, I created two simple wrappers, one to block on a futex:
static inline int futex_wait(int32_t *addr, int32_t value)  
    return sys_futex(addr, FUTEX_WAIT, value, NULL, NULL, 0);
 
and one to wake up all futex waiters:
static inline int futex_wake(int32_t *addr)  
    return sys_futex(addr, FUTEX_WAKE, MAXINT, NULL, NULL, 0);
 
Atomic Memory Operations I need atomic memory operations to keep separate cores from seeing different values of the fence value, GCC defines a few such primitives and I picked _syncboolcompareandswap and _syncvalcompareandswap. I also need fetch and store operations that the compiler won t shuffle around:
#define barrier() __asm__ __volatile__("": : :"memory")
static inline void atomic_store(int32_t *f, int32_t v)
 
    barrier();
    *f = v;
    barrier();
 
static inline int32_t atomic_fetch(int32_t *a)
 
    int32_t v;
    barrier();
    v = *a;
    barrier();
    return v;
 
If your machine doesn t make these two operations atomic, then you would redefine these as needed. Futex-based Fences These wake-all semantics of Fences greatly simplify reasoning about the operation as there s no need to ensure that only a single thread runs past Await, the only requirement is that no threads pass the Await operation until the fence is triggered. A Fence is defined by a single 32-bit integer which can take one of three values: With those, I built the fence operations as follows. Here s Await:
int fence_await(int32_t *f)
 
    while (__sync_val_compare_and_swap(f, 0, -1) != 1)  
        if (futex_wait(f, -1))  
            if (errno != EWOULDBLOCK)
                return -1;
         
     
    return 0;
 
The basic requirement that the thread not run until the fence is triggered is met by fetching the current value of the fence and comparing it with 1. Until it is signaled, that comparison will return false. The compareandswap operation makes sure the fence is -1 before the thread calls futex_wait, either it was already -1 in the case where there were other waiters, or it was 0 before and is now -1 in the case where there were no waiters before. This needs to be an atomic operation so that the fence value will be seen as -1 by the trigger operation if there are any threads in the syscall. The futex_wait call will return once the value is no longer -1, it also ensures that the thread won t block if the trigger occurs between the swap and the syscall. Here s the Trigger function:
int fence_trigger(int32_t *f)
 
    if (__sync_val_compare_and_swap(f, 0, 1) == -1)  
        atomic_store(f, 1);
        if (futex_wake(f) < 0)
            return -1;
     
    return 0;
 
The atomic compareandswap operation will make sure that no Await thread swaps the 0 for a -1 while the trigger is changing the value from 0 to 1; either the Await switches from 0 to -1 or the Trigger switches from 0 to 1. If the value before the compareandswap was -1, then there may be threads waiting on the Fence. An atomic store, constructed with two memory barriers and a regular store operation, to mark the Fence triggered is followed by the futex_wake call to unblock all Awaiting threads. The Query function is just an atomic fetch:
int fence_query(int32_t *f)
 
    return atomic_fetch(f) == 1;
 
Reset requires a compareandswap so that it doesn t disturb things if the fence has already been reset and there are threads waiting on it:
void fence_reset(int32_t *f)
 
    __sync_bool_compare_and_swap(f, 1, 0);
 
A Request for Review Ok, so we ve all tried to create synchronization primitives only to find that our obvious implementations were full of holes. I d love to hear from you if you ve identified any problems in the above code, or if you can figure out how to use the existing glibc primitives for this operation.

Russ Allbery: WebAuth 4.5.0

Time to finally release three months of work! This is a very large feature release for the multifactor support in WebAuth and for the integration with the user information service, which is the way that WebAuth interacts with local site policy. (Currently, you still have to write your own to a well-defined protocol, although we do hope to provide Perl modules to help with this in the future.) The major driving motivation for this release is to add the infrastructure required to set long-lived persistent cookies in a browser that contribute factors to authentications, which allows WebAuth to support "remember this device" functionality and to only require multifactor from devices from which a user has not previously authenticated. This includes a new token type, new attributes the user information service can send (including a way to invalidate such tokens), and new data that's sent back to the user information service. The user information service also now has the ability to add arbitrary additional factors to the current authentication, something that is intended to provide a hook for a local help desk to bypass multifactor for a user for some time if required. This release also contains substantial contributions by Benjamin Coddington at UVM to improve multifactor interactions, including sending the OTP type back to the user information service if WebLogin knows it, a mechanism for the user information service to communicate a message to the user that's displayed on the multifactor login page, opaque state that can be sent back and forth between WebLogin and the user information service, and the ability for the user information service to add specific authentication factors to the required set for a particular authentication. Other improvements in multifactor handling include the ability to set a lifetime on factors obtained via OTP login, a fix for a long-standing bug where an initial multifactor factor would satisfy a session requirement for random multifactor, and logging of even ignored errors when contacting the user information service. There are other changes too. This release touches almost every part of WebAuth. The change to WebAuthForceLogin in 4.4.0 was reverted since, on further consideration, the original semantics seemed more useful. Password change handling in WebLogin was fixed (it's been broken for some time). Apache 2.4 error logging for all modules is much improved, and mod_webauth and mod_webkdc now produce better error logs for all versions of Apache. And WebLogin now communicates password expiration times to its templates in seconds since epoch in addition to a pre-formatted English time for better localization support. William Orr contributed a new WebAuthLdapOperationalAttribute directive for mod_webauthldap that allows it to query operational attributes and include them in the environemnt. There are two backward-incompatible changes for WebLogin. First, WebAuth now supports a user checkbox indicating either to remember their login on that device or to not remember their login (local site templates can present it either way). However, proper implementation of this matching the normal expected wording of "remember me on this device" required changing the default, so a straight upgrade from an earlier version will result in no single sign-on. To preserve behavior, either a template change to add the checkbox (checked by default) or a configuration change are required. Second, support for getting password expiration times directly with remctl to a kadmin-remctl backend has been removed in favor of using data from the user information service by way of the WebKDC. Finally, I got to do a lot of cleanup of the API, fix diagosis of undef passed to Perl XS functions, and fixed a compilation error with Heimdal. You can get the latest release from the official WebAuth distribution site or from my WebAuth distribution pages.

Thorsten Glaser: mksh R45 released

The MirBSD Korn Shell R45 has been released today, and R44 has been named the new stable/bugfix-only series. (That s version 45.1, not 0.45, dear Homebrew/MacOSX packagers.) Packagers rejoice: the -DMKSH_GCC55009 dance is no longer needed, and even the run-time check for integer division is gone. Why? Because I realised one cannot use signed integers in C, at all, and rewrote the mksh(1) arithmetics code to use unsigned integers only. Special thanks to the people from musl libc and, to some lesser amount, Natureshadow for providing me with ideas what algorithms to replace some functionality with (signed shell arithmetic is, of course, still usable, it is just emulated using unsigned C integers now).

The following entertainment

	tg@blau:~ $ echo foo >/bar\ baz
	/bin/mksh: can't create /bar baz: Permission denied
	1 tg@blau:~ $ doch
	tg@blau:~ $ cat /bar\ baz
	foo
 

was provided by Tonnerre Lombard; like Swedish, German has got a number of words that cannot be expressed in English so I feel not up to the task of explaining this to people who don t know the German word doch , just rest assured it calls the last input line (be careful, this is literally a line, so don t use backslash-newline sequences) using sudo(8).

Richard Hartmann: Release Critical Bug report for Week 17

The UDD bugs interface currently knows about the following release critical bugs: How do we compare to the Squeeze release cycle?
Week Squeeze Wheezy Diff
43 284 (213+71) 468 (332+136) +184 (+119/+65)
44 261 (201+60) 408 (265+143) +147 (+64/+83)
45 261 (205+56) 425 (291+134) +164 (+86/+78)
46 271 (200+71) 401 (258+143) +130 (+58/+72)
47 283 (209+74) 366 (221+145) +83 (+12/+71)
48 256 (177+79) 378 (230+148) +122 (+53/+69)
49 256 (180+76) 360 (216+155) +104 (+36/+79)
50 204 (148+56) 339 (195+144) +135 (+47/+90)
51 178 (124+54) 323 (190+133) +145 (+66/+79)
52 115 (78+37) 289 (190+99) +174 (+112/+62)
1 93 (60+33) 287 (171+116) +194 (+111/+83)
2 82 (46+36) 271 (162+109) +189 (+116/+73)
3 25 (15+10) 249 (165+84) +224 (+150/+74)
4 14 (8+6) 244 (176+68) +230 (+168/+62)
5 2 (0+2) 224 (132+92) +222 (+132/+90)
6 release! 212 (129+83) +212 (+129/+83)
7 release+1 194 (128+66) +194 (+128/+66)
8 release+2 206 (144+62) +206 (+144/+62)
9 release+3 174 (105+69) +174 (+105/+69)
10 release+4 120 (72+48) +120 (+72/+48)
11 release+5 115 (74+41) +115 (+74/+41)
12 release+6 93 (47+46) +93 (+47/+46)
13 release+7 50 (24+26) +50 (+24/+26)
14 release+8 51 (32+19) +51 (+32/+19)
15 release+9 39 (32+7) +39 (+32/+7)
16 release+10 20 (12+8) +20 (+12/+8)
17 release+11 24 (19+5) +24 (+19/+5)
18 release+12
Graphical overview of bug stats thanks to azhag:

Vincent Sanders: When you make something, cleaning it out of structural debris is one of the most vital things you do.

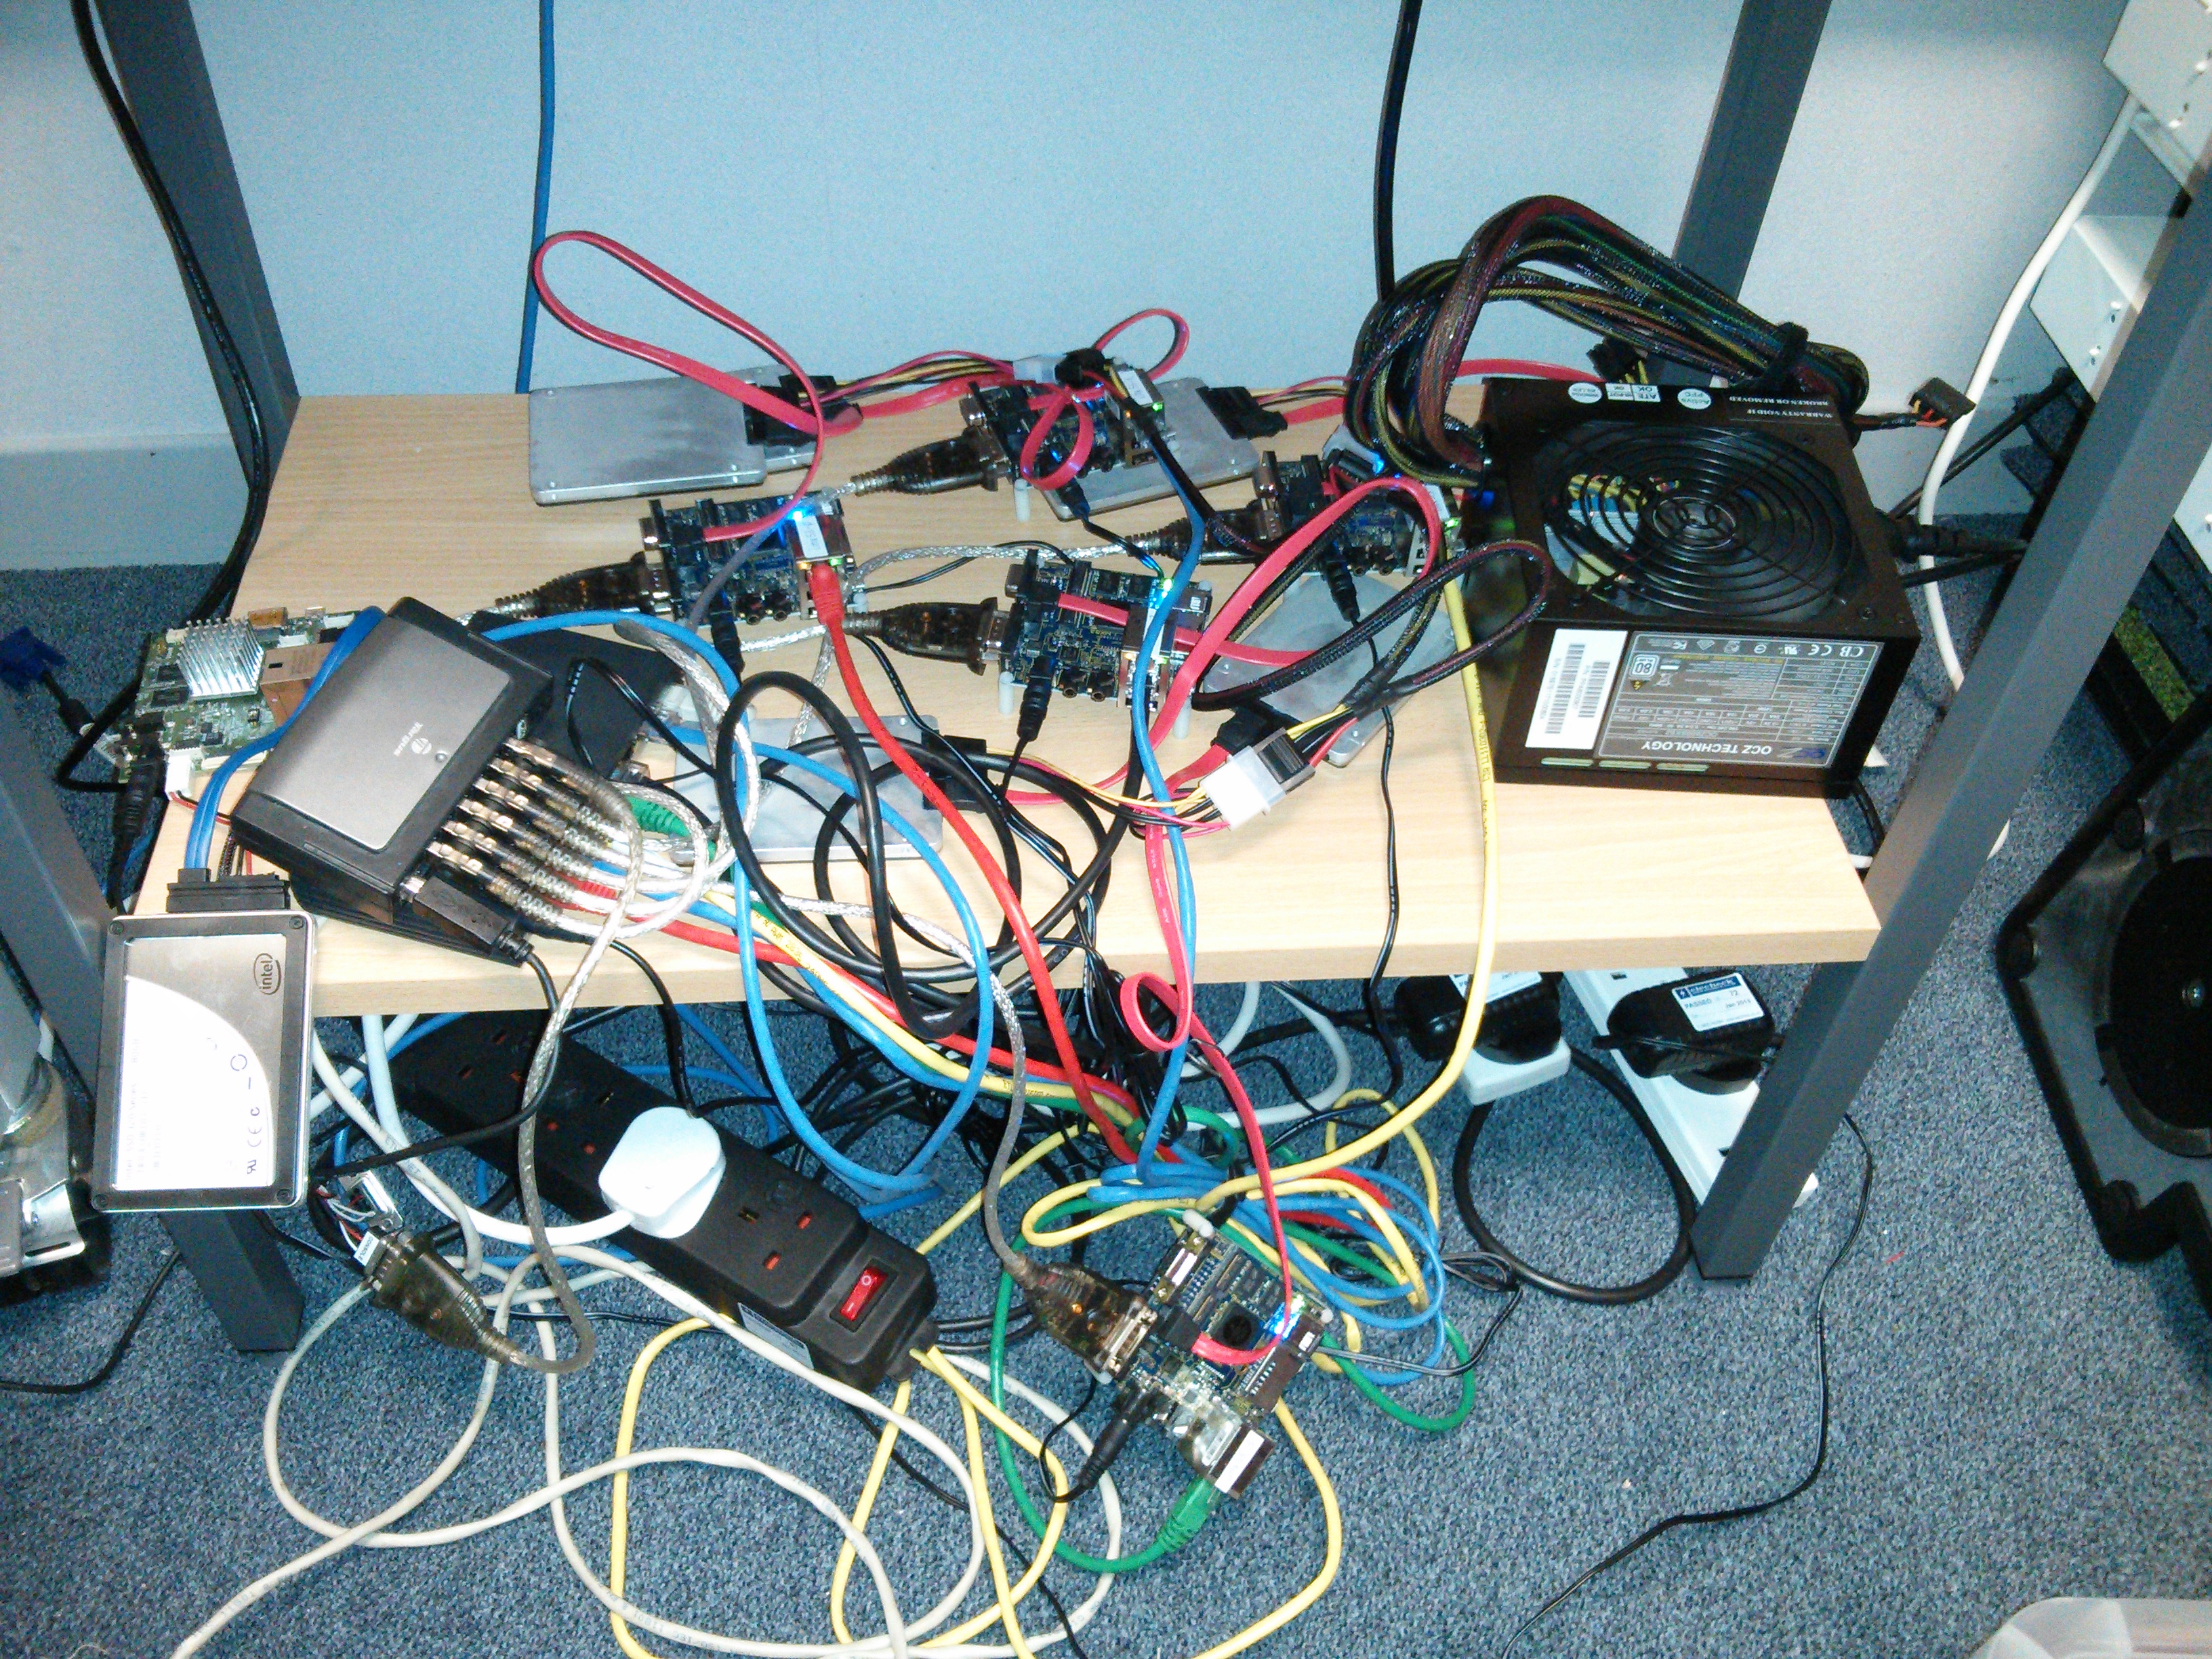
Collabora recently had a problem with a project's ARM build farm. In a nice change of pace it was not that the kernel was crashing, nor indeed any of the software or hardware.
The ProblemInstead our problem was our build farm could best be described as "a pile of stuff" and we wanted to add more systems to it and have switched power control for automated testing.

Which is kinda where the Christopher Alexander quote comes into this. I suggested that I might be able to come up with a better, or at least cleaner, solution.
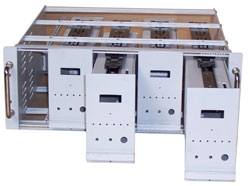
The IdeaA subrack with sub modulesPrevious experience had exposed me to the idea of using 19 inch subracks for mounting circuits inside submodules.

I originally envisaged the dev boards individually mounted inside these boxes. However preliminary investigation revealed that the enclosures were both expensive and used a lot of space which would greatly increase the rack space required to house these systems.

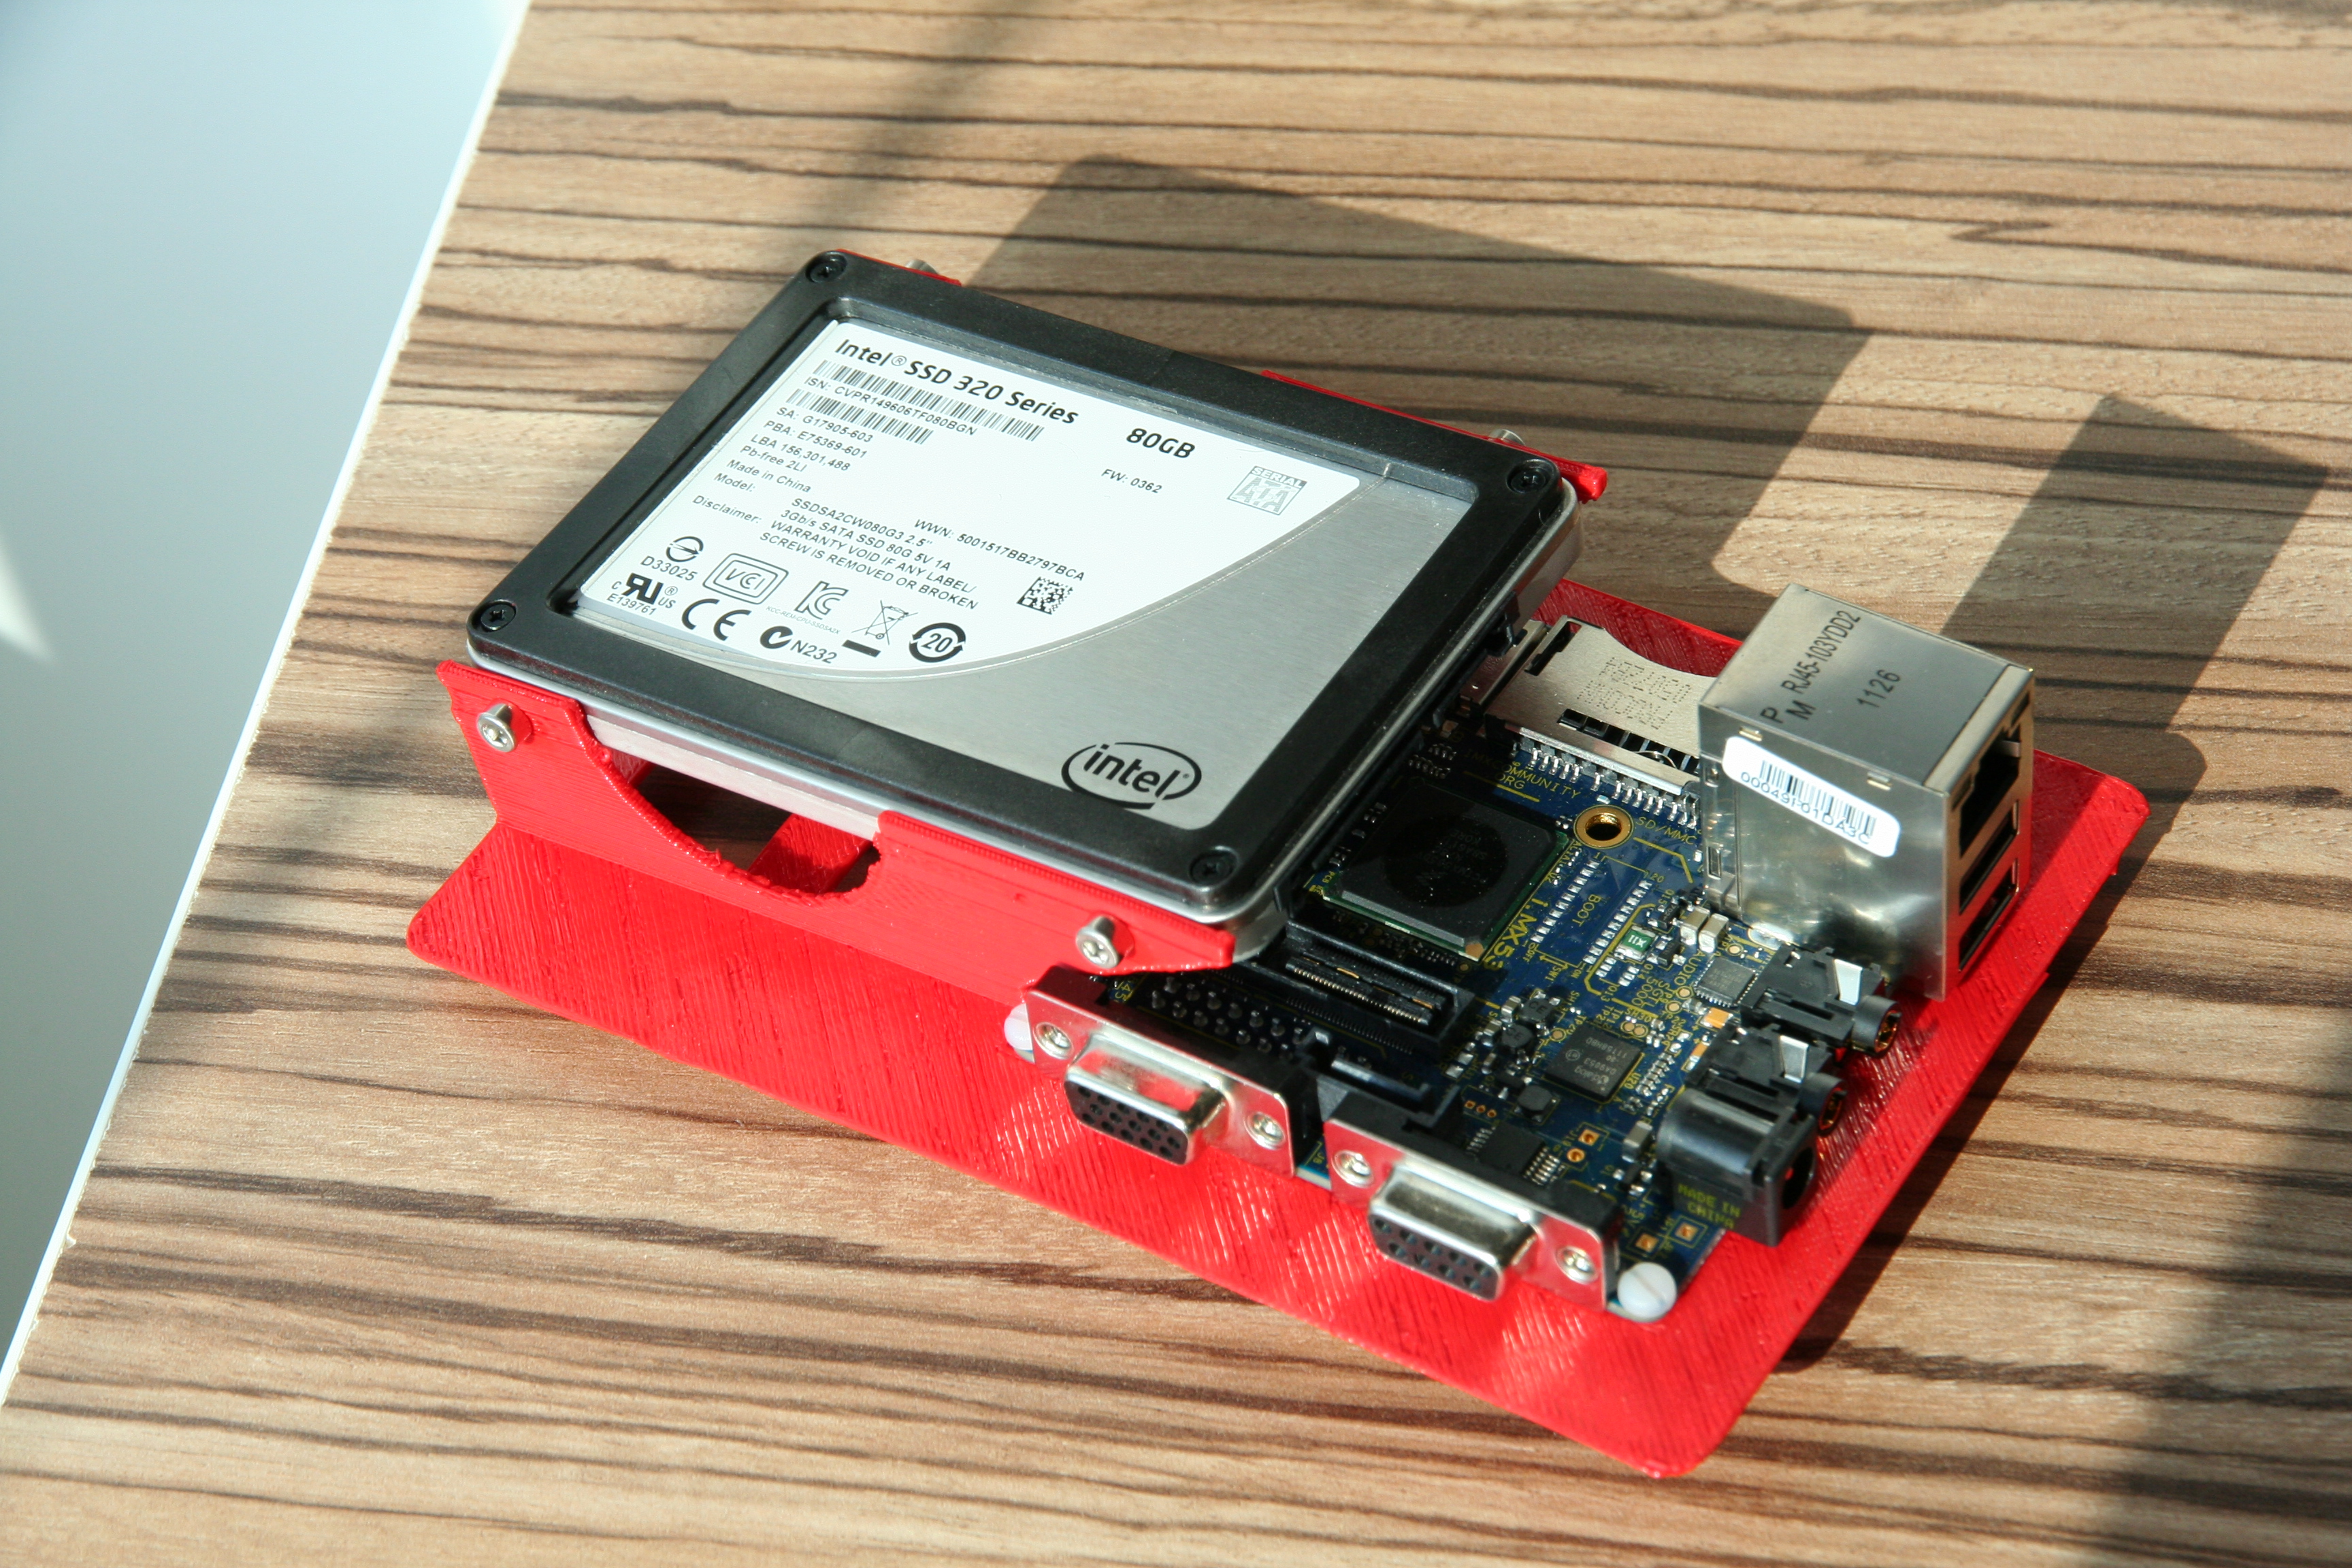
imx53 QSB eurocard carrier
I decided to instead look at eurocard type subracks with carriers for the systems. Using my 3D printer I came up with a carrier design for the imx53 QSB and printed it. I used the basic eurocard size of 100mm x 160mm which would allow the cards to be used within a 3U subrack.

Once assembled it became apparent that each carrier would be able to share resources like power supply, ethernet port and serial console via USB just as the existing setup did and that these would need to be housed within the subrack.
The Prototype
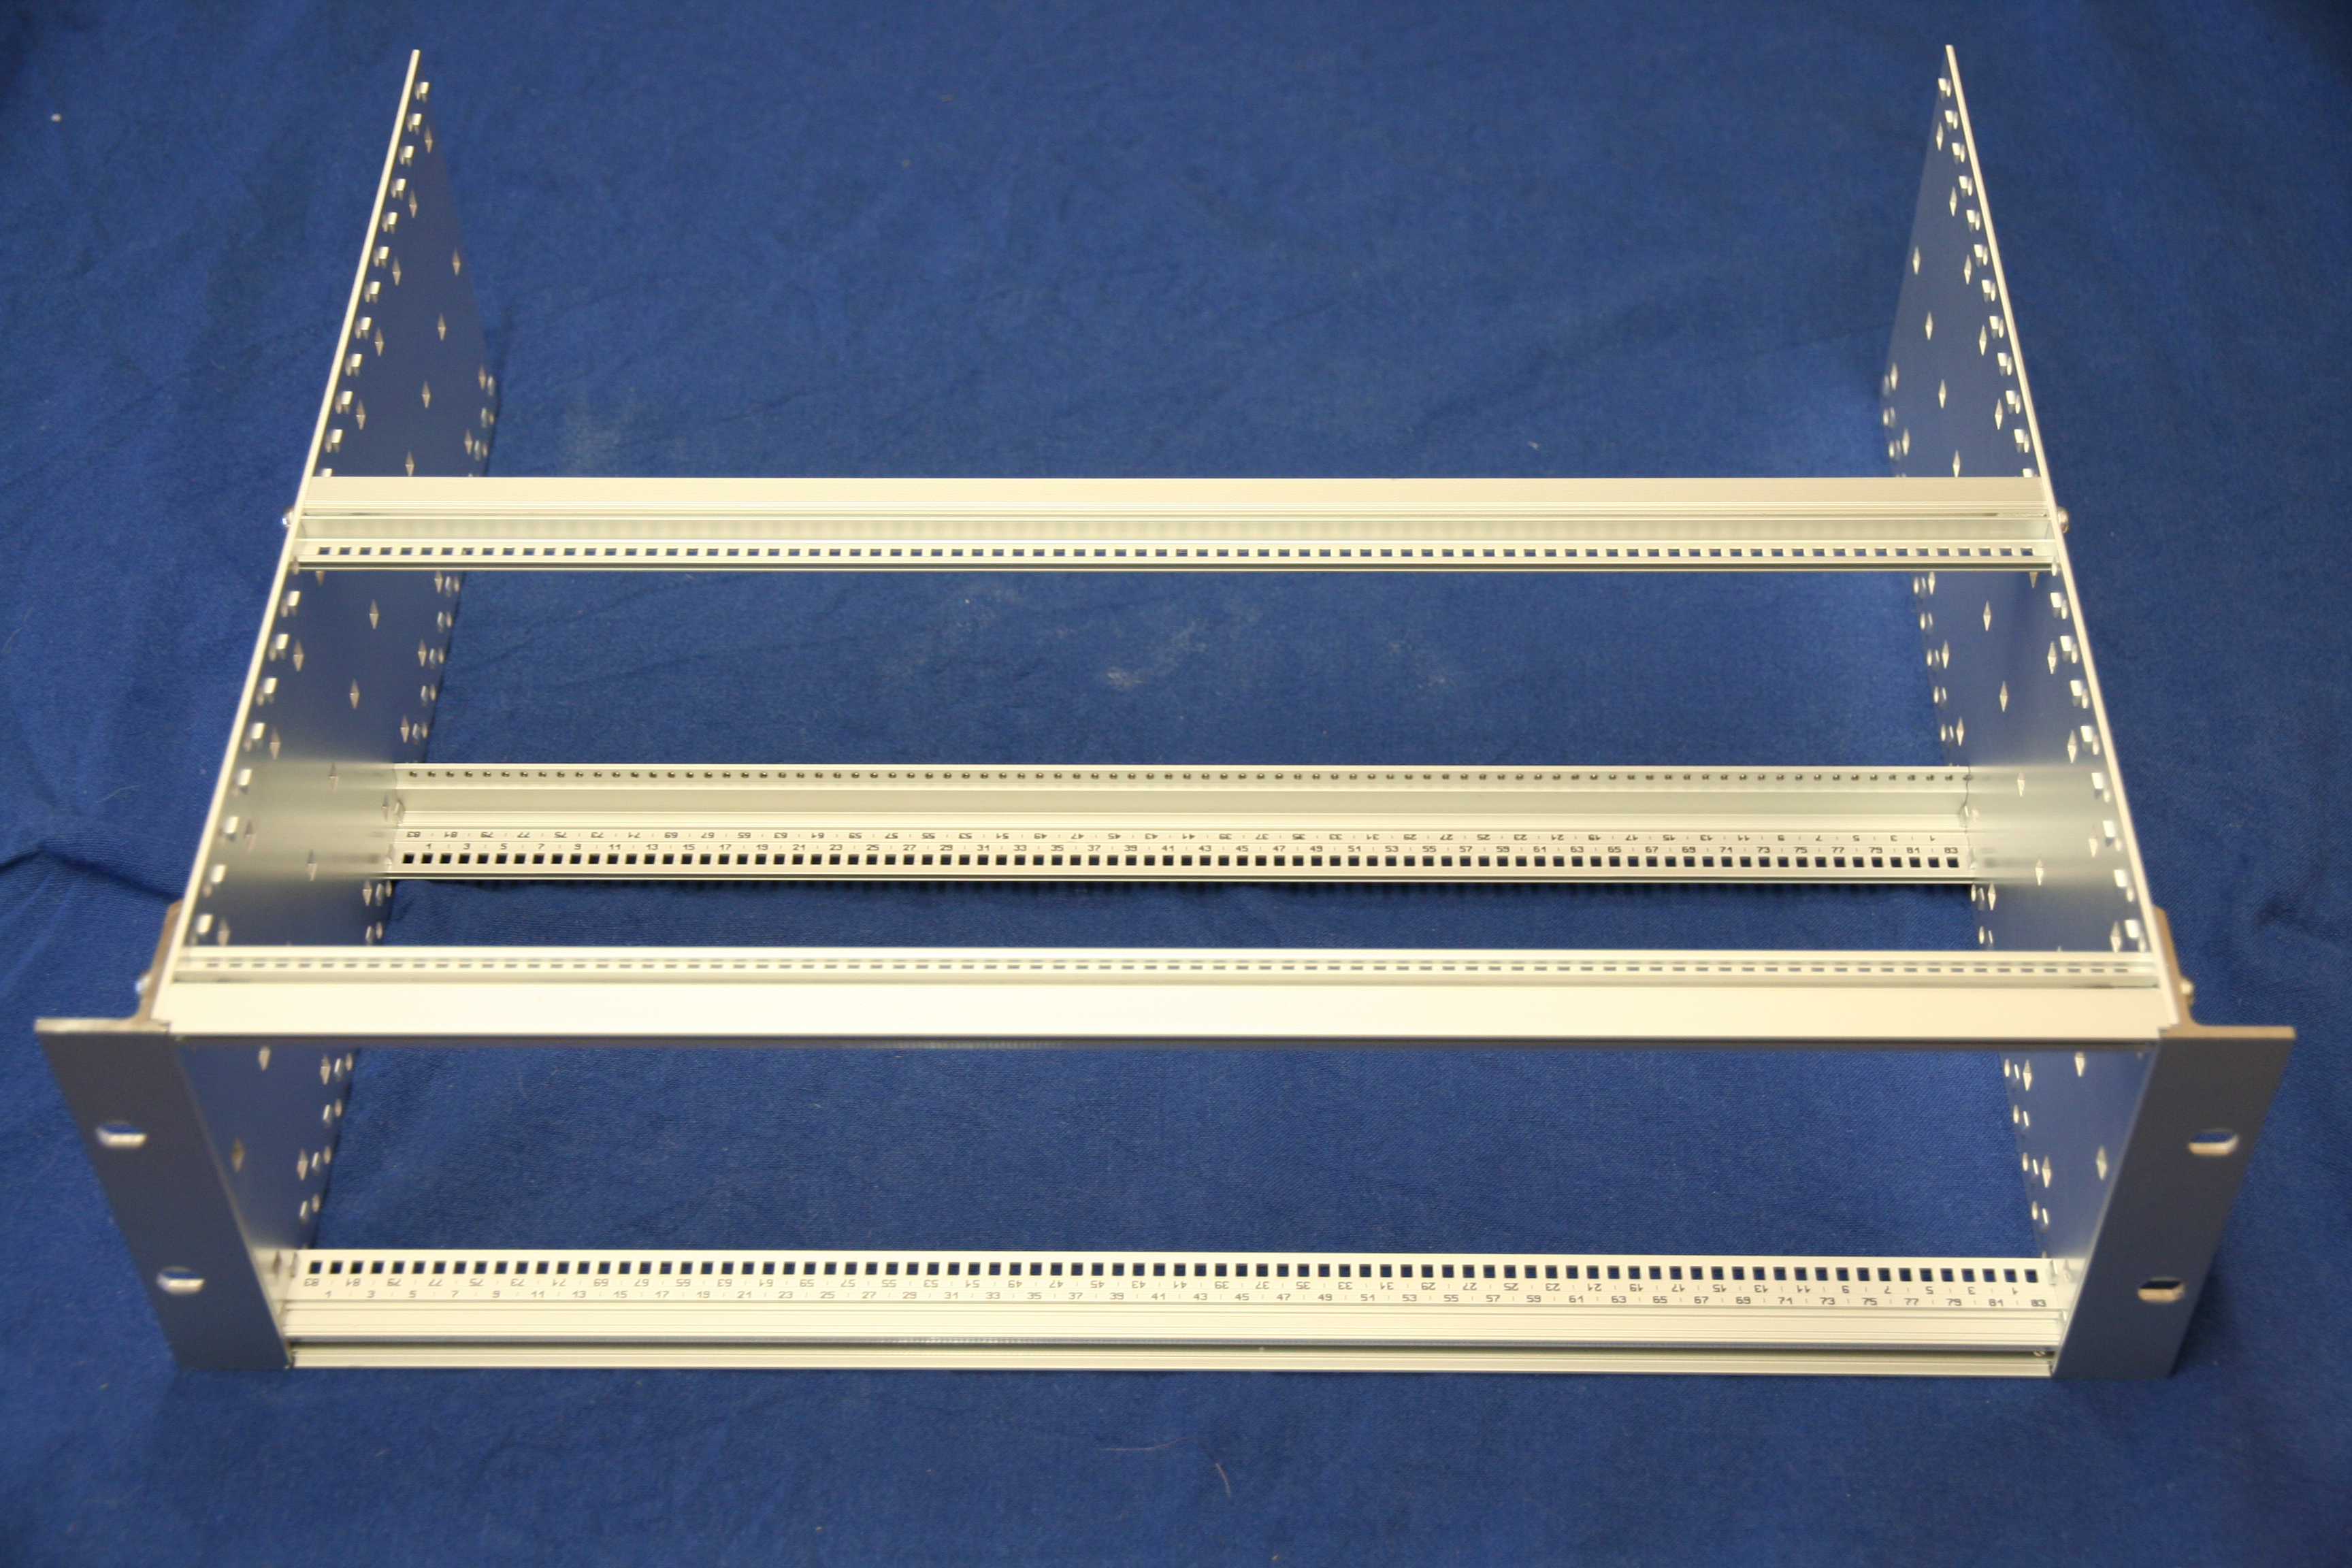
The carrier prototype was enough to get enough interest to allow me to move on to the next phase of the project. I purchased a Schroff 24563-194 subrack kit and three packs of guide rails from Farnell and assembled it.

Initially I had envisaged acquiring additional horizontal rails from Schroff which would enable constructing an area suitable for mounting the shared components behind the card area.

Rear profile for Schroff subrackUnfortunately Schroff have no suitable horizontal profiles in their catalog and are another of those companies who seem to not want to actually sell products to end users but rather deal with wholesalers who do not have their entire product range!

Printed rear profile for Schroff subrack
Undaunted by this I created my own horizontal rail profile and 3D printed some lengths. The profile is designed to allow a 3mm thick rear cover sheet attached with M2.5 mounting bolts and fit rack sides in the same way the other profiles do.

At this point I should introduce some information on how these subracks are dimensioned. A standard 19 inch rack (as defined in IEC 60297) has a width of 17.75 inches(450.85mm) between the vertical posts. The height is measured in U (1.75 inches)

A subrack must obviously fit in the horizontal gap while providing as much internal space as possible. A subrack is generally either 3 or 6 U high. The width within a subrack is defined in units called HP (Horizontal Pitch) which are 0.2 inches(5.08 mm) and subracks like the Schroff generally list 84 usable HP.

However we must be careful (or actually just learn from me stuffing this up ;-) as the usable HP is not the same thing as the actual length of the horizontal rails! The enclosures actually leave and additional 0.1 inch at either end giving a total internal width of 85HP (17 inches, 431.8 mm) which leaves 0.75 inches for the subrack sides and some clearance.

The Schroff subrack allows eurocards to be slotted into rails where the card centre line is on HP boundaries, hence we describe the width of a card in the slot in terms of HP
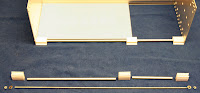
I cannot manufacture aluminium extrusions (I know it is a personal failing) nor produce more than 100 mm long length of the plastic profile on my printer.

Even if full lengths are purchased from a commercial service (120 euros for a pair including tax and shipping) the plastic does not have sufficient mechanical strength.

The solution I came up with was somewhat innovative, as an alternative a M5 bolt into a thread in the aluminium extrusion I used a 444mm long length of 4mm threaded rod with nuts at either end. This arrangement puts the extrusion under compression and gives it a great deal of additional mechanical strength as the steel threaded rod is very strong.

Additionally to avoid having to print enough extrusion for the entire length I used some 6mm aluminium tube as a spacer between 6HP(30.48mm) wide sections of the printed extrusion.

It was intended to use a standard modular PC power supply which is 150mm wide which is pretty close to 30HP (6 inches) so it was decided to have a 6HP section of rail at that point to allow a rear mounting plate for the PSU to be attached.

This gives 6HP of profile, 21HP(106.68mm) of tube spacer, 6HP of profile, 46HP(233.68 mm) of tube spacer and a final 6HP profile summing to our total of 85HP. Of course this would be unnecessary if a full continuous 85HP rail had been purchased, but 6 of 6 HP long profile is only 51 euro a saving of 70 euro.

To provide a flat area on which to mount the power switching, Ethernet switch and USB hubs I ordered a 170 x 431 mm sheet of 3mm thick aluminium from inspiredsteel who, while being an ebay company, were fast, cheap and the cutting was accurate.

Do be sure to mention you would prefer it if any error made the sheet smaller rather than larger or it might not fit, for me though they were accurate to the tenth of a mm! If you would prefer the rear section of the rack to be enclosed when you are finished, buy a second sheet for the top. For my prototype I only purchased a 170 x 280mm sheet as I was unsure if I wanted a surface under the PSU (you do, buy the longer sheet)
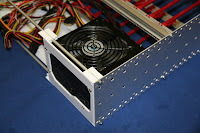
PC power supply mounted to back plateMounting the PSU was a simple case of constructing a 3 mm thick plate with the correct cutouts and mounting holes for an ATX supply. Although the images show the PSU mounted on the left hand side of the rack this was later reversed to improve cable management.

The subrack needed to provide Ethernet switch ports to all the systems. A TP-Link TL-SF1016DS 16-Port 10/100Mbps Switch was acquired and the switch board removed from its enclosure. The switch selected has an easily removed board and is powered by a single 3.3V input which is readily available from the ATX PSU.

Attention now returned to the eurocard carriers for the systems, the boards to be housed were iMX53 QSB and iMX6 SABRE Lite and a Raspberry Pi control system to act as USB serial console etc.

The carriers for both main boards needed to be 8HP wide, comprised of:
Although only 38 mm this is 7.5HP and fractions of an HP are not possible with the selected subrack.

With 8HP wide modules this would allow for ten slots, within the 84 usable HP, and an eleventh 4HP wide in which the Raspberry Pi system fits.

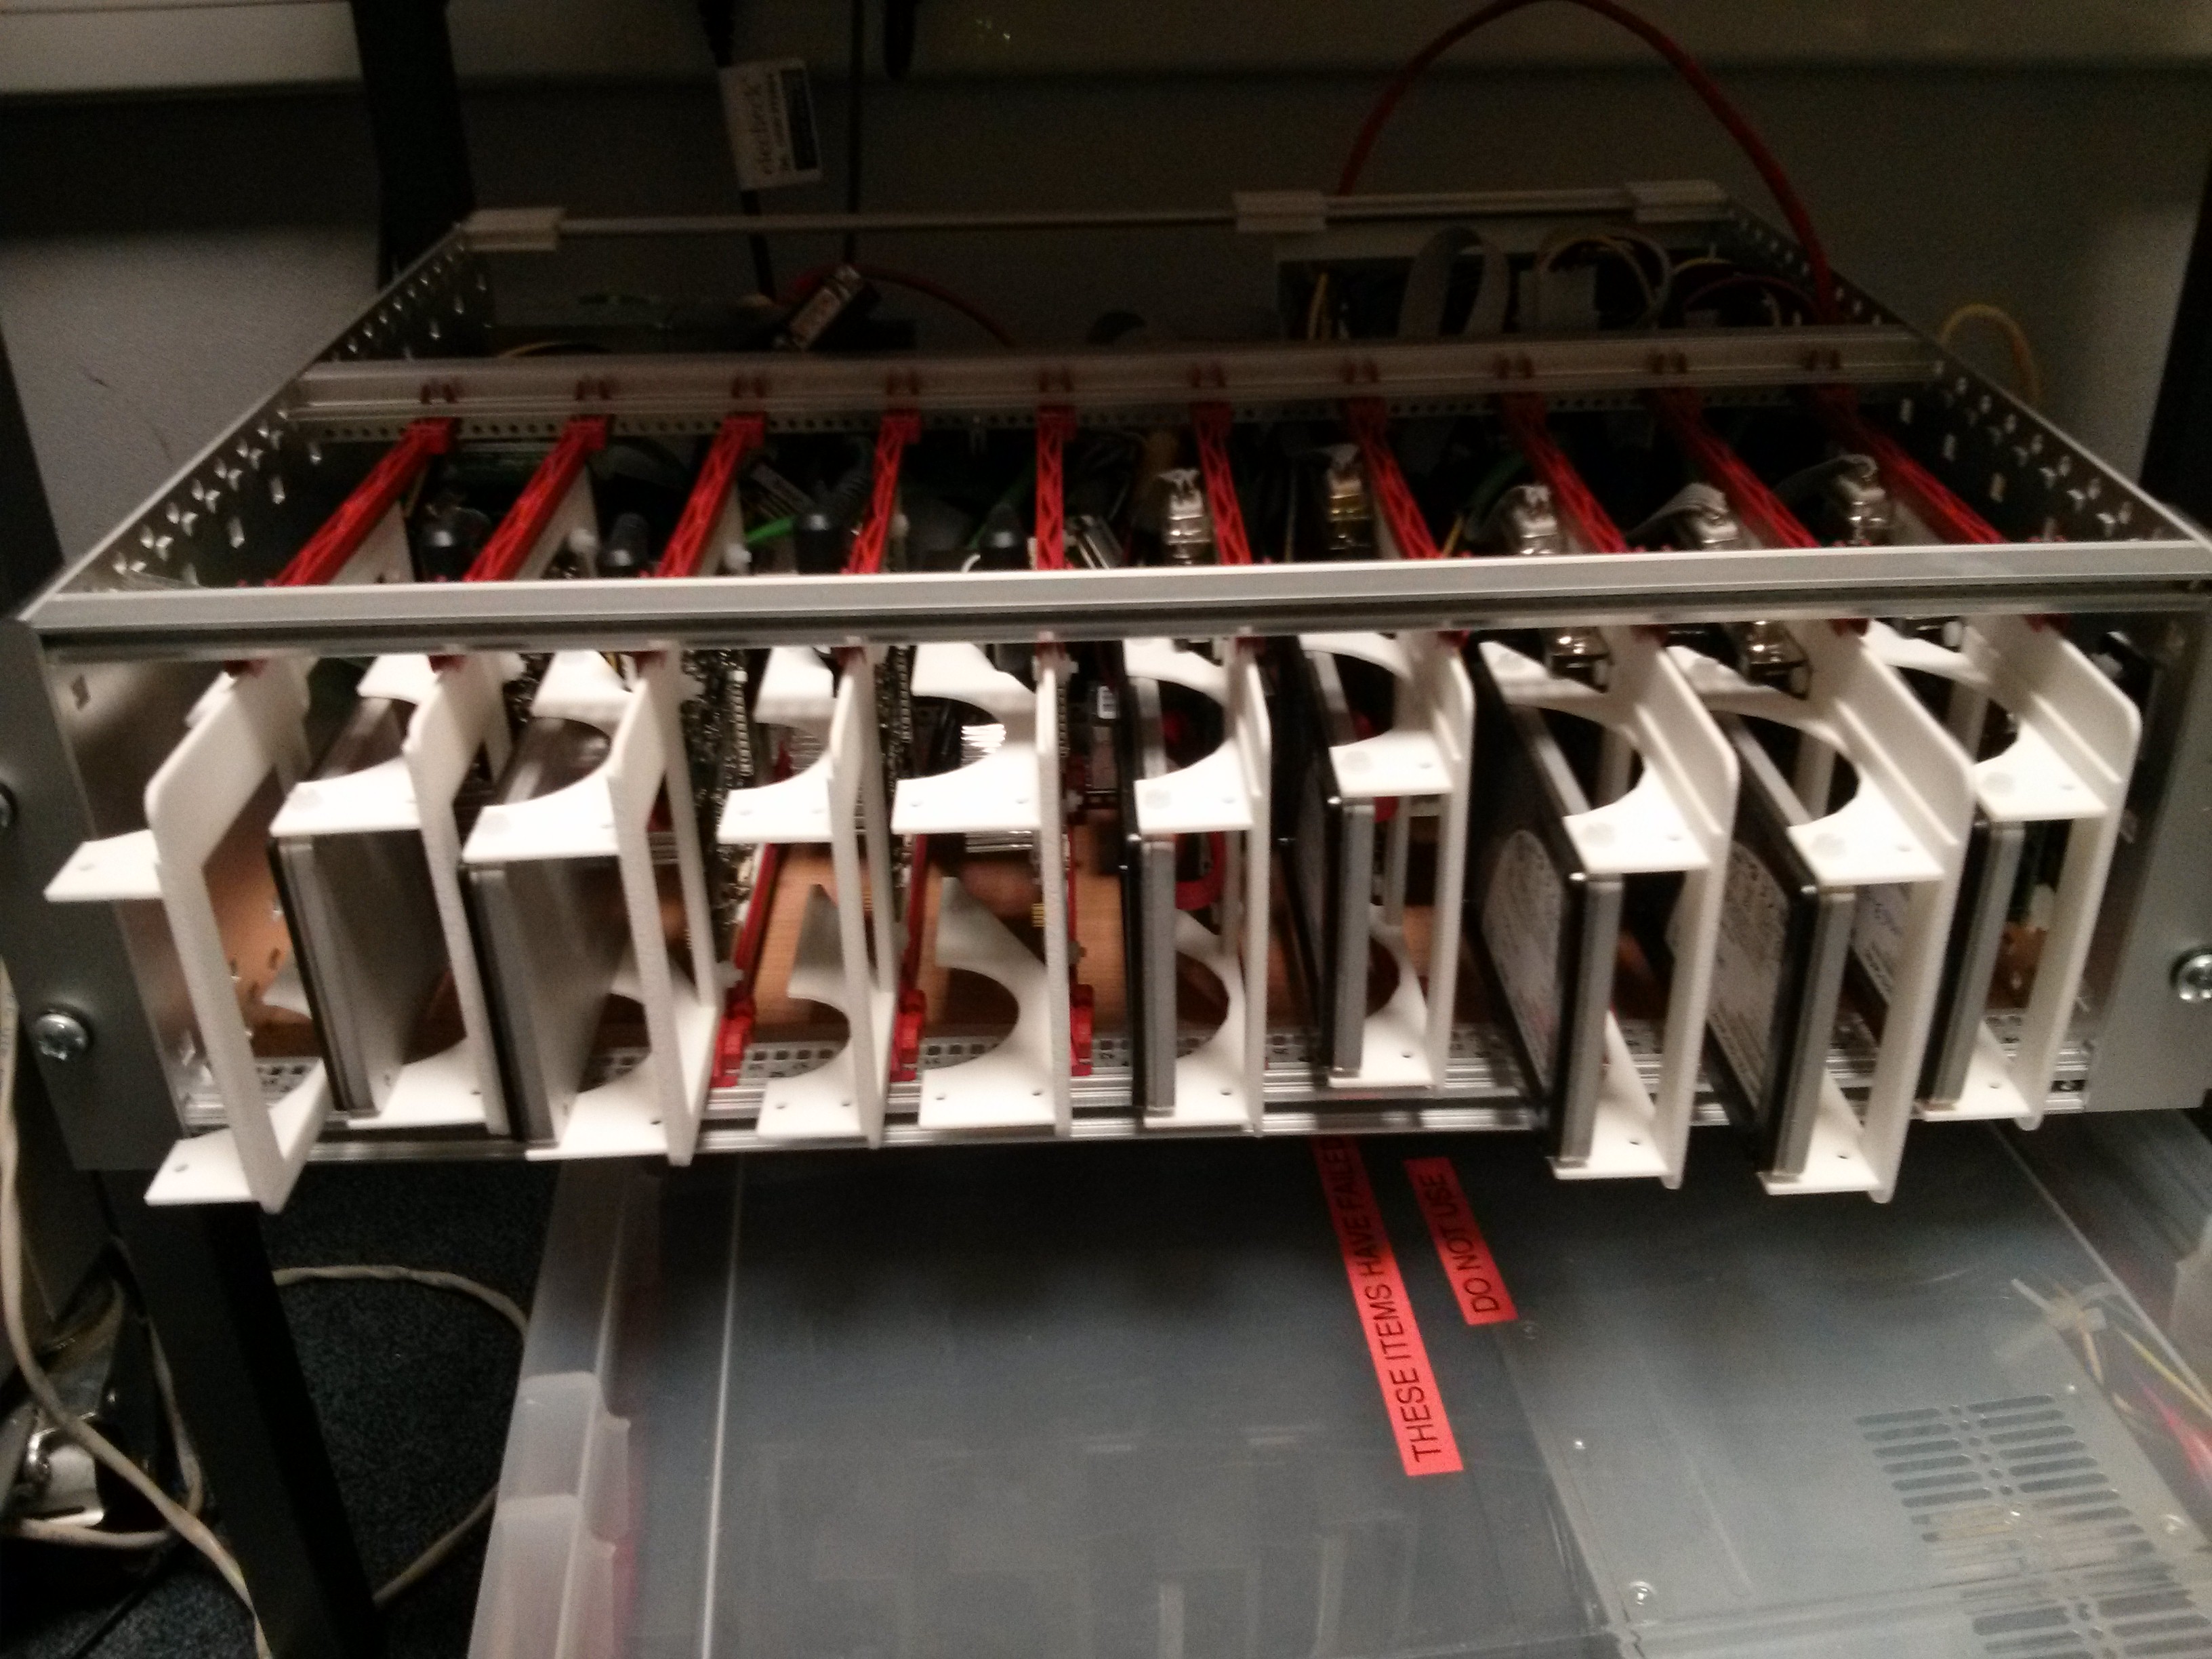
iMX6 SABRE Lite eurocard carrierCarrier designs for both the i.MX53 QSB and the i.MX6 SABRE Lite boards were created and fabricated at a professional 3D print shop which gave a high quality finish product and removed the perceived risk of relying on a personal 3D printer for a quantity of parts.

This resulted in changes in the design to remove as much material as possible as commercial 3D services charge by the cubic cm. This Design For Manufacture (DFM) step removed almost 50% from the price of the initial design.

i.MX53 QSB carriers with wiring loom
The i.MX6 design underwent a second iteration to allow for the heatsink to be mounted and not mechanically interfere with the hard drive (although the prototype carrier has been used successfully for a system that does not require a hard drive). The lesson learned here is to be aware that an design iteration or two is likely and that it is not without cost.

The initial installation was to have six i.MX53 and two i.MX6 this later changed to a five/four split, however the carrier solution allows for almost any combination, the only caveat (discovered later) is the imx53 carriers should be to the right hand side with the small 4HP gap at that end as they have a JTAG connector underneath the board which otherwise foul the hard drive of the next carrier.

Racked cards showing unwanted cable tails
A wiring loom was constructed for each board giving them a connector tail long enough to allow them to be removed. This was the wrong approach! if you implement this design (or when I do it again) the connector tails on the wiring loom should present all the connections to the rear at the same depth as the Ethernet connection.

The rack cables themselves should be long enough to allow the slides to be removed but importantly it is not desirable to have the trailing cable on the cards. I guess the original eurocard designers figured this out as they designed the cards around the standard fixed DIN connectors at the back of the card slots.

USB relay board with wiring loom attached
We will now briefly examine a misjudgement that caused the initially deployed solution to be reimplemented. As the design was going to use USB serial converters to access the serial console a USB connected relay board was selected to switch the power to each slot. I had previously used serial controlled relay boards with a USB serial convertor however these were no longer available.

Initial deployment with USB controlled relay board
All the available USB relay boards were HID controlled, this did not initially seem to be an issue and Linux software was written to provide a reasonable interface. However it soon became apparent that the firmware on the purchased board was very buggy and crashed the host computer's USB stack multiple times.

Deployed solutionOnce it became apparent that the USB controlled power board was not viable a new design was conceived. As the Ethernet switch had ports available Ethernet controlled relay boards were acquired.

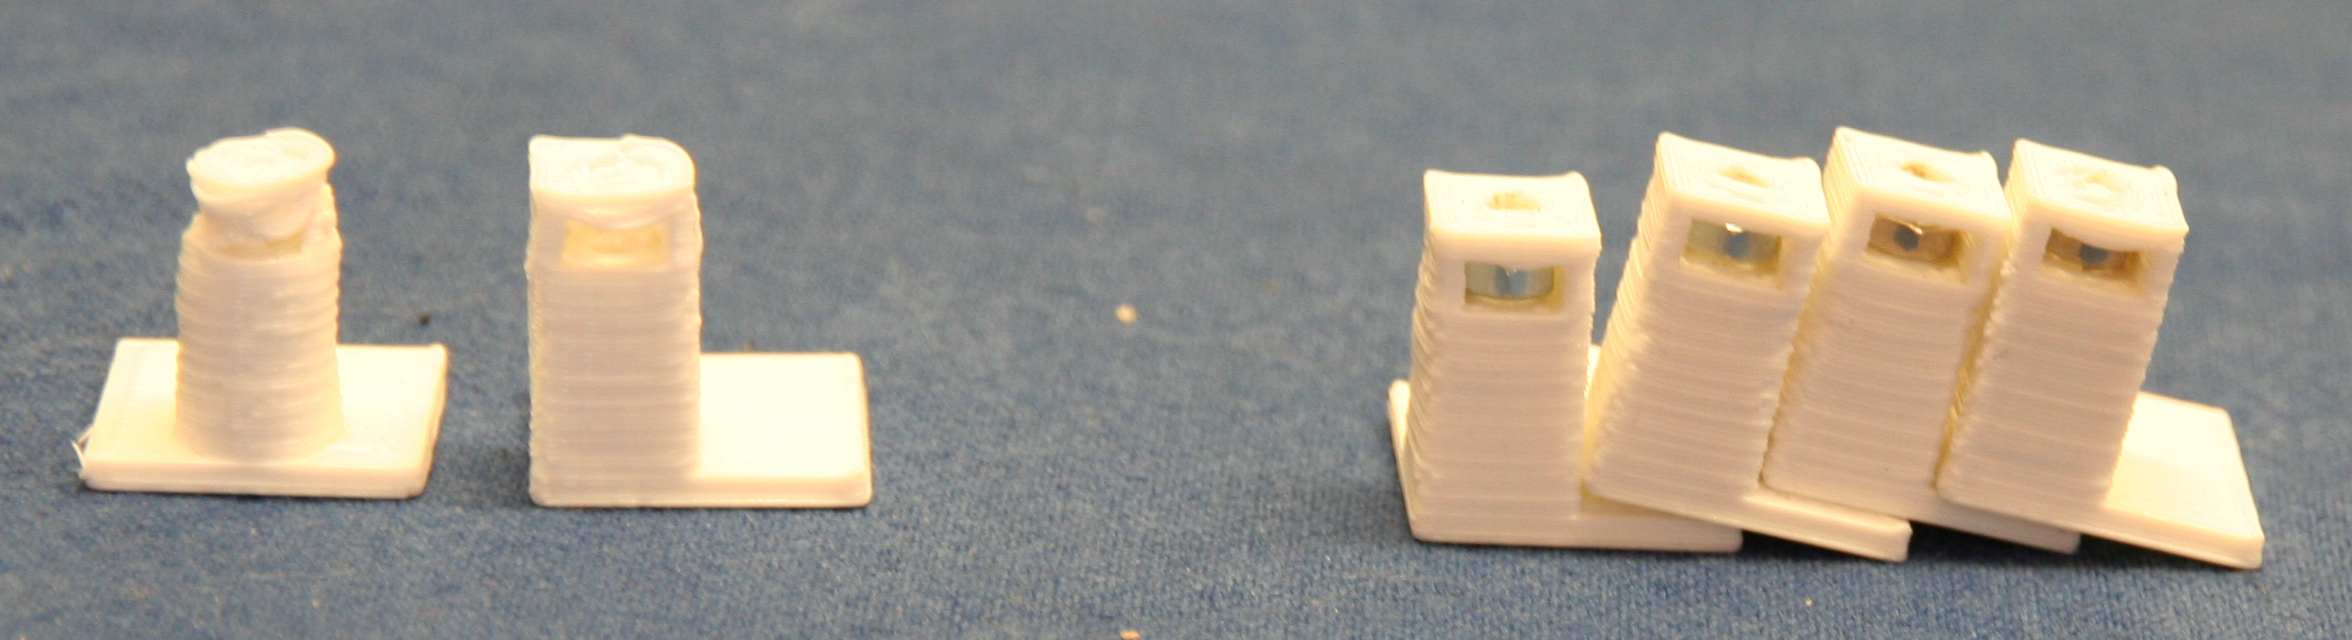
Evolution of 3mm PCB pillars
It did prove necessary to design and print some PCB support posts with M3 nut traps to allow the relay boards to be easily mounted using double sided adhesive pads.

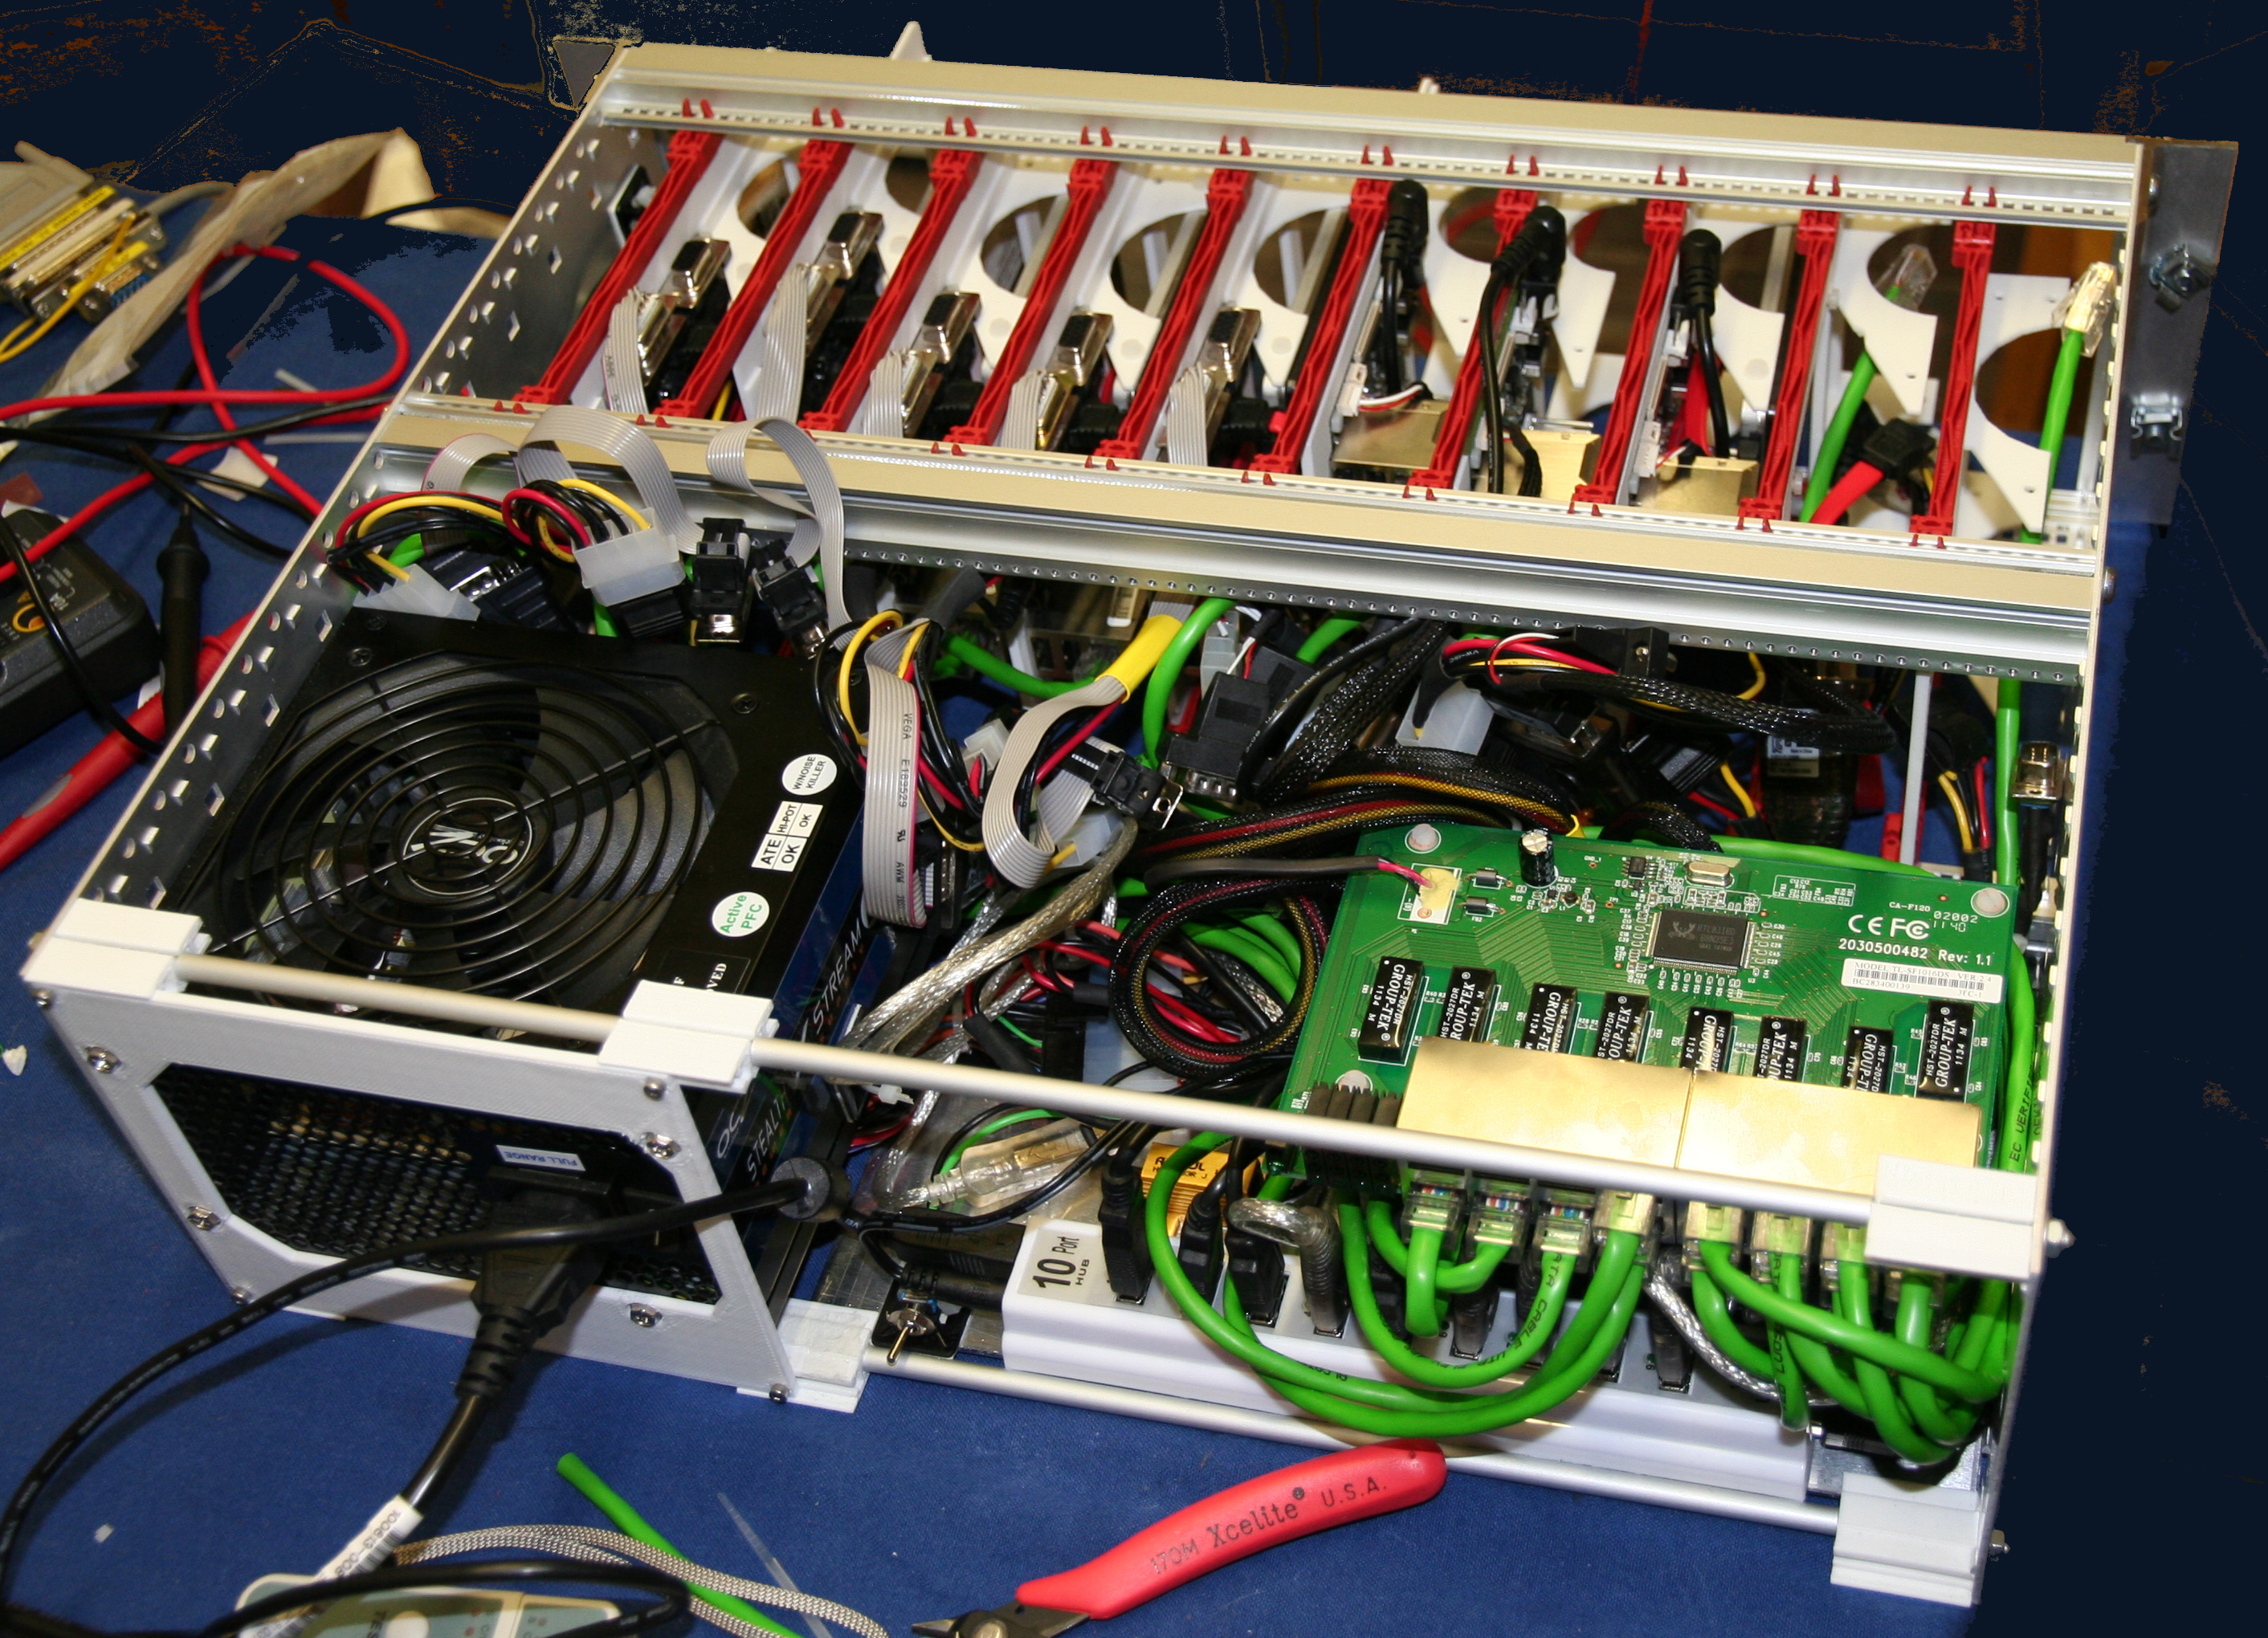
By stacking the relay boards face to face and the Ethernet switch on top separated using nylon spacers it was possible to reduce the cable clutter and provide adequate cable routing space.

A busbar for Ground (black) and unswitched 12V (yellow) was constructed from two lengths of 5A chock block.

An issue with power supply stability was noted so a load resistor was added to the 12V supply and an adhesive thermal pad used to attach it to the aluminium base plate.

Completed redesign
It was most fortunate that the ethernet switch mounting holes lined up very well with the relay board mounting holes allowing for a neat stack.

This second edition is the one currently in use, it has proved reliable in operation and has been successfully updated with additional carriers.

The outstanding issues are mainly centered around the Raspberry Pi control board:
  • Needs its carrier fitting. It is currently just stuck to the subrack end plate.
  • Needs its Ethernet cable replacing. The existing one has developed a fault post installation.
  • Needs the USB hub supply separating from the device cable. The current arrangement lets the hub power the Pi which means you cannot power cycle it.
  • Connect its switched supply separately to the USB hub/devices.
Shopping listThe final bill of materials (excluding labour and workshop costs) which might be useful to anyone hoping to build their own version.

Prices are in GBP currency converted where appropriate and include tax at 20% and delivery to Cambridge UK and were correct as of April 2013.

The purchasing was not optimised and for example around 20GBP could be saved just by ordering all the shapeways parts in one order.
Base subrack
ItemSupplierQuantityLine Price
Schroff 24563-194 subrack kitFarnell141.28
Schroff 24560-351 guide railsFarnell313.65
Schroff rack rear horizontal railShapeways2100.00
1000mm length of 4mm threaded rodB and Q11.48
170mm x 431mm x 3mm Aluminium sheetinspired steel240.00
PSU mounting plateShapeways135.42
PCB standoffShapeways422.30
160mm Deep Modular PC supplyCCL155.76
TP-Link TL-SF1016DS 16-Port 10/100Mbps-SwitchCCL123.77
8 Channel 16A Relay Board Controlled Via EthernetRapid2126.00
Raspberry PiFarnell126.48
USB Serial convertersCCL1037.40
10 port strip style USB HUBEbay17.00
Parts for custom Ethernet cablesRS1326.00
Parts for custom molex power cables (salvaged from scrap ATX PSU)Workshop1111.00
33R 10W wirewound resistor for dummy loadRS11.26
24pin ATX female connector pre-wiredMaplin12.99
Akasa double sided thermal padMaplin15.00
Small cable tie basesMaplin16.49
Miscellaneous cable, connectors, nylon standoffs, solder, heatshrink, zip ties, nuts, washers etc. Workshop120.00
Total for subrack603.28

The carriers are similarly not optimally priced as over five GBP each can be saved by combining shipping on orders alone. Also the SSD drive selection was made some time ago and a newer model may be more suitable.
i.MX53 QSB carrier
ItemSupplierQuantityLine Price
i.MX53 QSBFarnell1105.52
Intel 320 SSD 80GCCL1111.83
Carrier boardShapeways130.00
combined sata data and power (15 to 20cm version)EBay15.00
Low profile right angle 5.5mm x 2.1mm barrel jackEBay10.25
Parts for 9pin serial cable extensionRS15.00
Miscellaneous solder, heatshrink, nylon nuts, bolts and washersWorkshop15.00
Total for carrier262.60

i.MX6 SABRE Lite carrier
ItemSupplierQuantityLine Price
i.MX6 SABRE LiteFarnell1128.06
Intel 320 SSD 80GCCL1111.83
Carrier boardShapeways135.00
combined sata data and power (15 to 20cm version)EBay15.00
Low profile right angle 5.5mm x 2.1mm barrel jackEBay10.25
Parts for 9pin serial cable modificationRS12.00
Miscellaneous solder, heatshrink, nylon nuts, bolts and washersWorkshop15.00
Total for carrier287.14
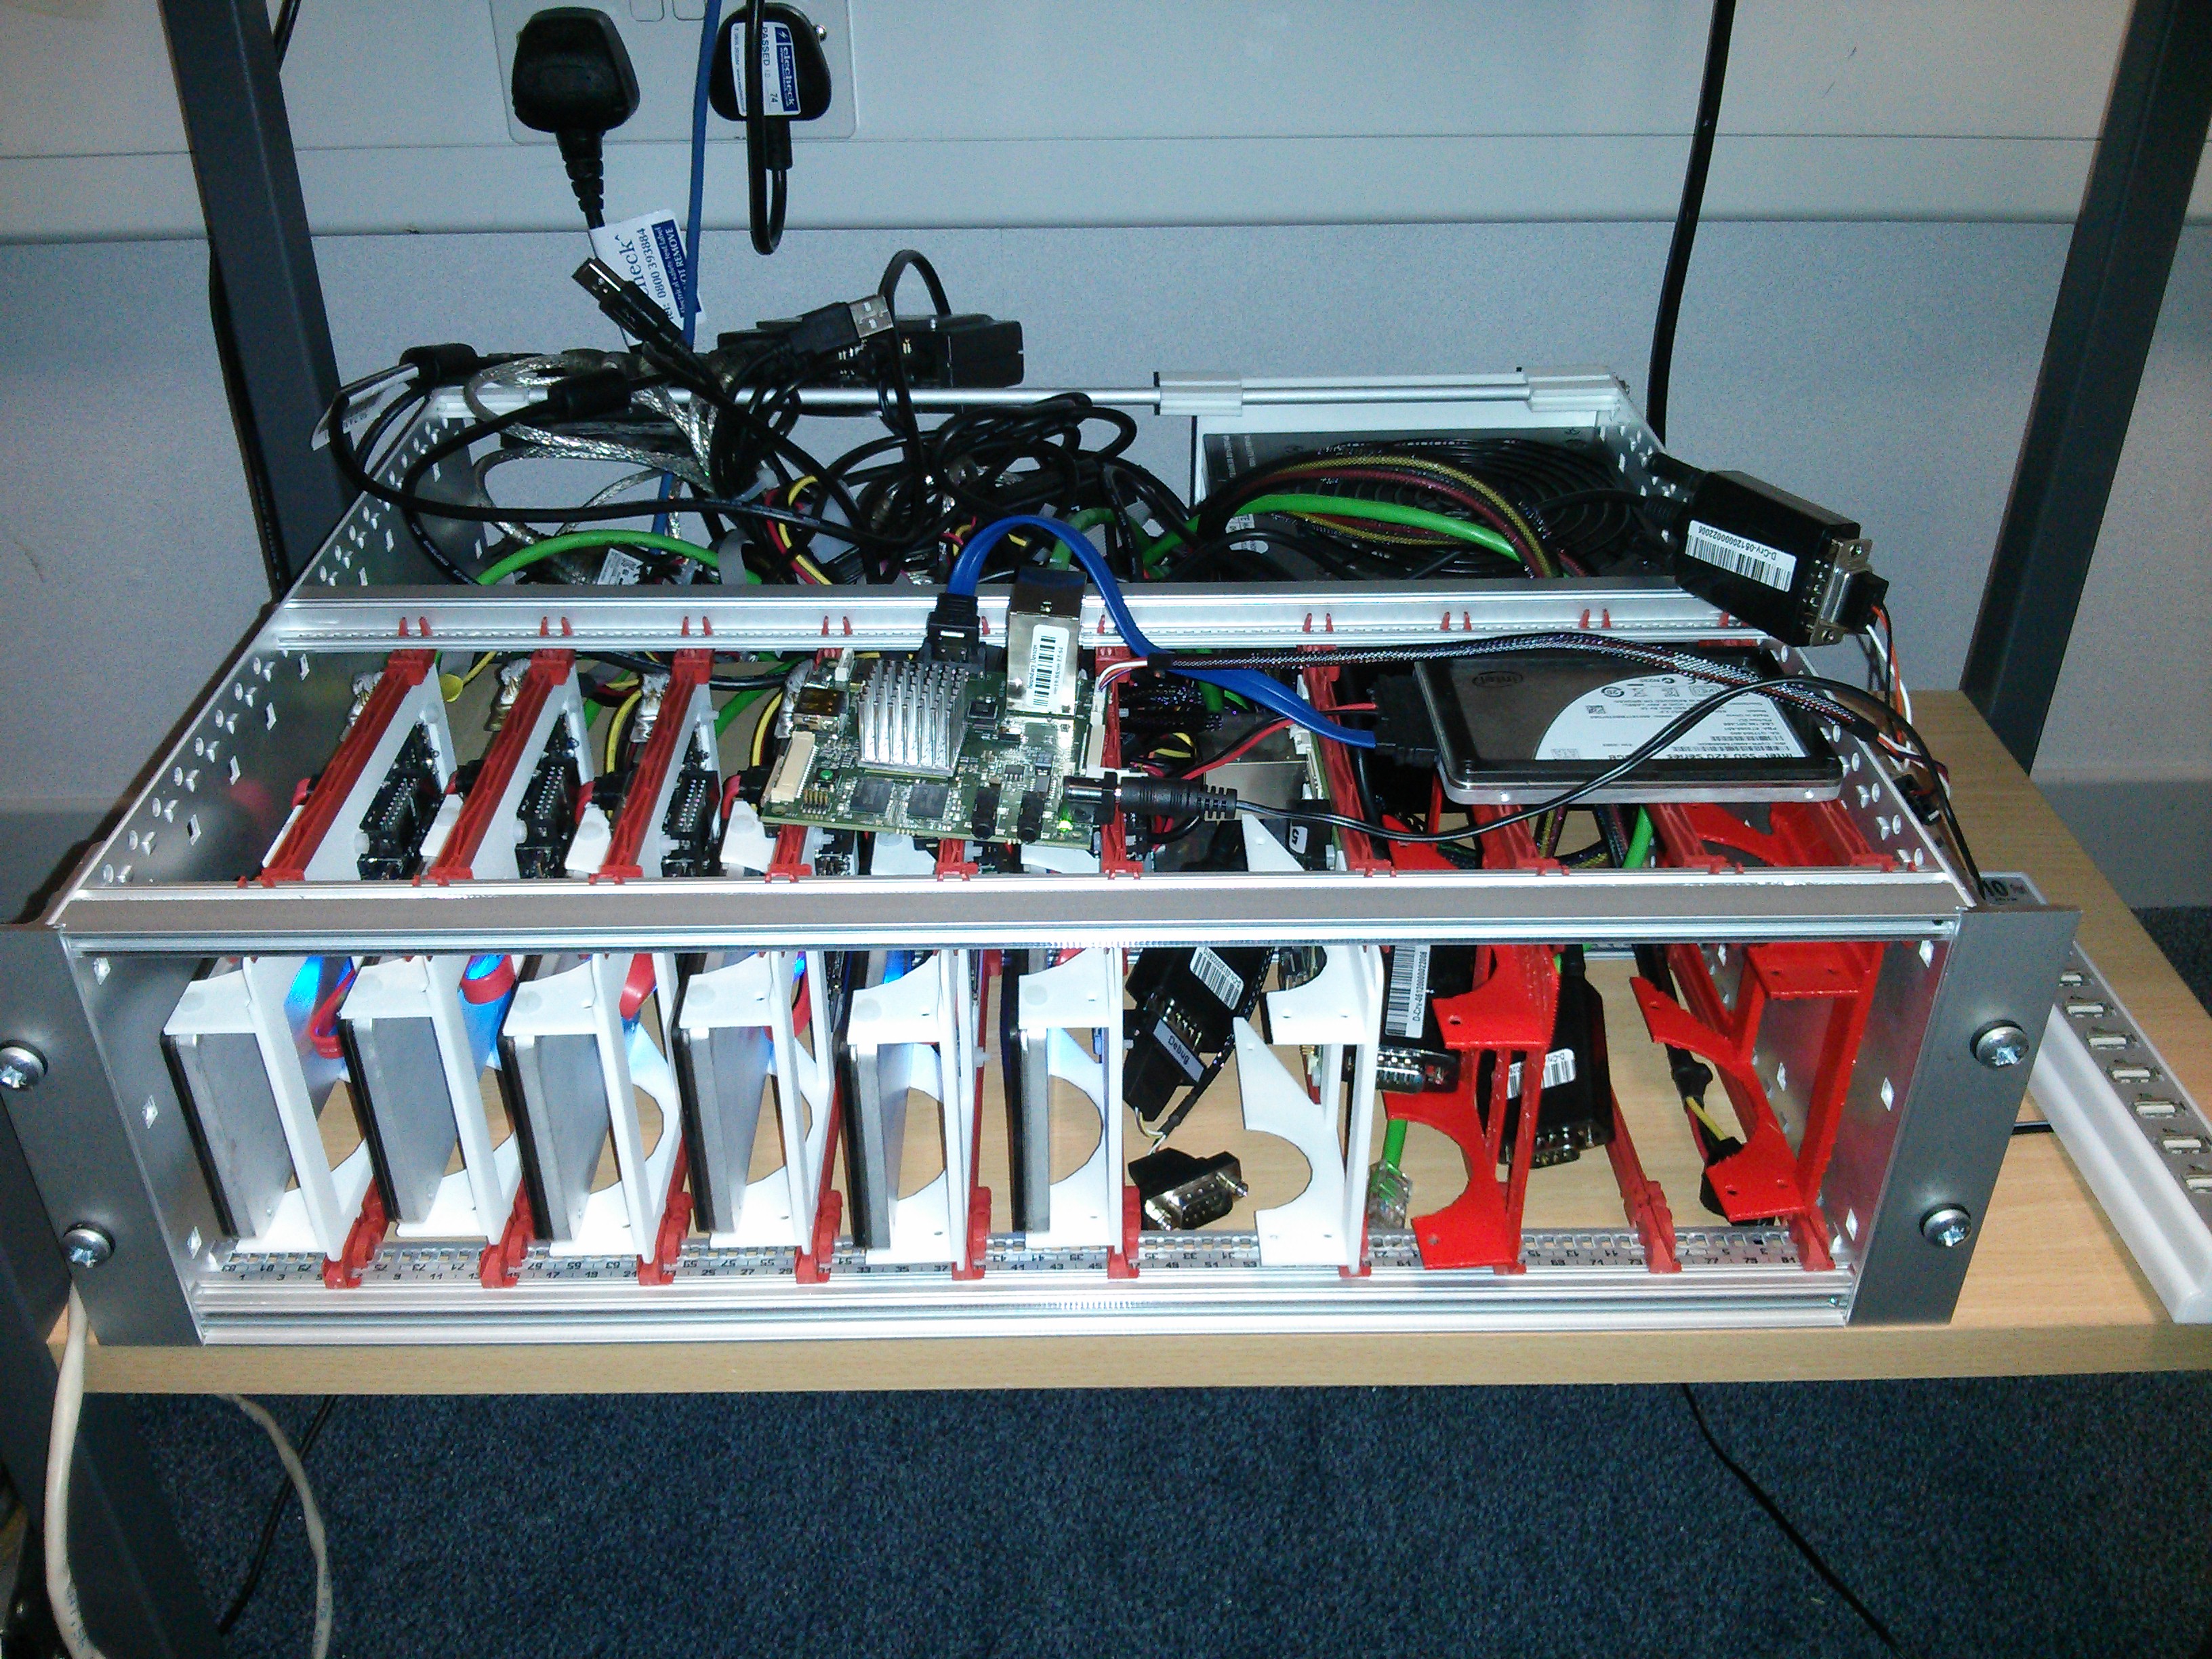
ConclusionThe solution works and in a 3U high 355mm deep subrack ten ARM development boards can be racked complete with local ethernet switching, power control and serial consoles.

Deployed system in situ configured as a build and test farm
The solution is neat and provides flexibility, density and reproducibility the "pile of stuff" solution failed to do.

For current prototype with nine filled slots the total cost was around 3000GBP or around 330GBP per slot which indicates a 100GBP per slot overhead over the "pile of stuff" solution. These figures omit the costs of the engineer and workshop time, which are estimated at an additional 1500GBP. Therefore a completed rack, fully filled with i.MX6 carriers costs around 5000GBP

Density could be increased if boards with lower height requirements were used however above twelve units there issues with Ethernet switch, power switch and USB port availability become a factor. For Example the 16 port Ethernet switch requires a port for uplink, one for each relay board and one for the console server which leaves only 12 ports for systems.

Addressing the outstanding issues would result in a much more user friendly solution. As the existing unit is in full time use and downtime is not easily scheduled for all ten systems, the issues are not likely to be fixed on the prototype and would have to be solved on a new build.

The solution is probably not suitable for turning into a product but that was not really the original aim. A commercial ARM blade server using this format would almost certainly use standard DIN connectors and a custom PCB design rather than adapting existing boards.

Next.

Previous.